Leaderboard
Popular Content
Showing content with the highest reputation on 06/27/19 in all areas
-
7 points
-
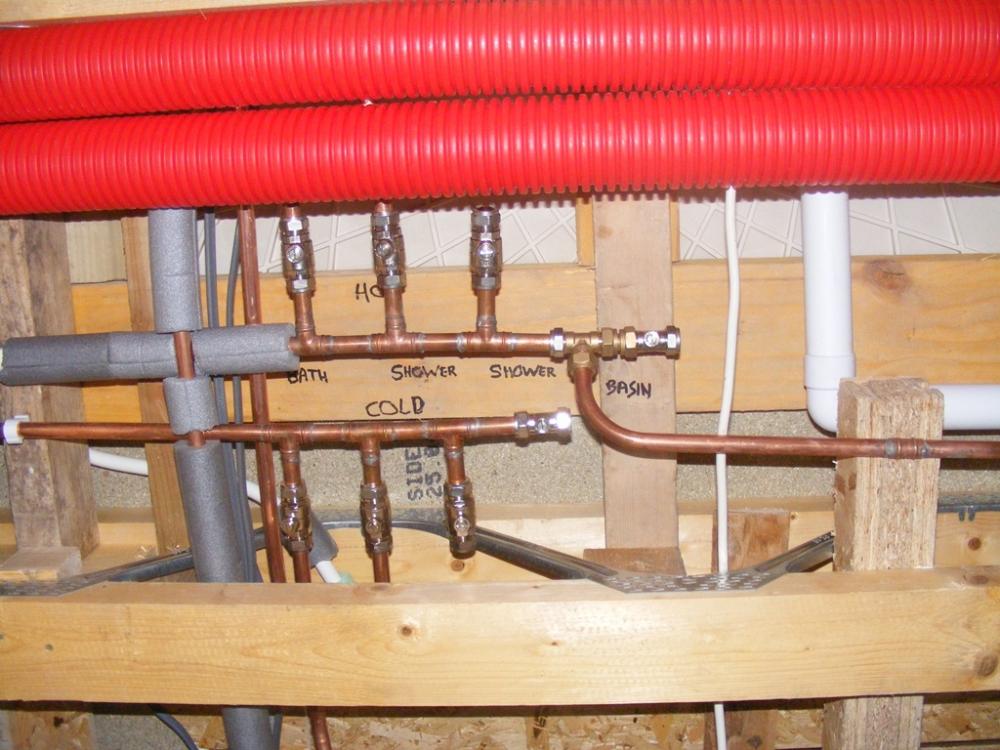
Re the siting of isolation valves. I wanted each appliance to have it's own isolator in an easy accessible place. But I wanted to achieve this without making the pipe runs, especially the hot pipe run any longer than they have to be. What I settled on was a central distribution point, which has ended up in the space above the ceiling in the utility room. This puts all the isolators together, and it will be finished with a mini loft hatch to lift out to get to them. As this is just the utility room I don't mind having this little loft hatch there.4 points
-
No, it's a c***! Worst job in my bathroom by far. Mind I'd never done it.2 points
-
Quick vid showing how I use a rubber faced block or blatt to level tiles. After spreading and notching the adhesive (not shown!) I place tiles in rows. Then one end of the block is placed on the "previous tile" and the other end is tapped/pressed on the "new tile". On a wall you normally work upwards in rows from a batten, on a floor you work towards yourself so you back out of the room. Normally I would also use tile spacers to get uniform grout lines.2 points
-
The tile levelling systems are ok for floors but not necessary for walls You need to set out from your window wall Try not to leave any nasty cuts I normally set out from the centre of the window Regardless off weather the window is central2 points
-
The boiler will short cycle, but life will go on. Do you want any more ideas on how to best mitigate, or are you at the "ignorance is bliss" stage yet?2 points
-
Ah, the Post Office will allow you to order just a phone line on a 12 month contract So that's £11.50 a month, plus £60 up front less £40 cash back, so £158. When I finished the order, it wasn't clear if there would actually be a 12 month contract. If not I will cancel after a month. I will report back on how it goes.1 point
-
1 point
-
+100000 Planning the layout is key. Sometimes it's better to have cut tiles at both start and end of a run to avoid a slither one end. Ditto with holes for things like shower mixers. Sometimes it's best to arrange the tiles so you are drilling in the middle, other times you want to arrange the hole to be on a grout line so you can notch the two tiles either side. Anything to avoid having to drill near an edge.1 point
-
Unless regs have changed, ask him to show you where a WC with a window needs an extract. A utility room will.1 point
-
No mention of network cables in wiring regs. Put them where you like. Same for A/V cables.1 point
-
1 point
-
Never tried that. Google found this... https://www.tilersforums.com/threads/vertical-brick-bond-advice.78243/ If the top of the tray is dead level I don't see why you can't work up from that. I would leave same gap as a regular grout line (eg use tile spaces to raise lower row of tiles off tray).1 point
-
I would suggest the brick pattern is much easier to have running horizontal. Work out where your cuts will go so that you don't have little slithers of tile. You may need tile trim for the exposed edge by the window.1 point
-
I think tiling the roof will be more of a challenge! If you are doing vertical cladding as shown you will need vertical battens fixed to the timber frame, then horizontal battens fixed to the vertical. I did some 25mm x 50mm horizontal battens on a radius of 3800mm. I soaked the battens and pre-bent them. They were for render board finish.1 point
-
Heavy wall tiles should not normally fall off but sometimes try to slide down a bit. That's why I use two spacers per tile to keep uniform gaps. Fix a batten to the wall for first row of tiles to rest on. Should be bit less than half a tile up to reduce waste. Tile in rows going up. When set remove batten and cut tiles to fit between bottom row and floor/bath.1 point
-
I've never used a tile leveling system nor seen a professional use one. I do however use spacers to keep joints uniform. The basic principle of tiling is that a notched trowel is used to form ridges and furrows in the adhesive. These allow the tile to be pressed into the adhesive a varying amount by providing somewhere for the excess adhesive to go. Within reason, the deeper the notches the more you can adjust the height. Don't hold the trowel at too shallow an angle as that reduces the depth. Aim for uniformity when applying adhesive. I was taught how to use a rubber faced wooden block to level tiles with those around them and find this works very well on both floor and wall tiles. The technique is to rest one end of the block on the/a previous tile and lift and tap the other end onto the new tile. Must make a video one day.1 point
-
No, I like the render finish and if the battens are correctly fixed to the underlying studs (which were marked) then there should have been no issue - an unfortunate oversight that will cost them a few £ but they're very professional and have never shirked from their responsibility.1 point
-
First pic is mine, the timber approach pic is from the net. Edge of windows will be 'covered' with insulation (100mm EPS) and this will be rendered. The alu cills fit onto a bottom 'rail' that you can just make out (see grey): Above pic is for my SIPs extension, but the windows have the same cill profile underneath.1 point
-
having done some in the past --larger areas of floor without them - I would always be using tile leveling spacers now the main thing is to really check your floor is level and no dips in it BEFORE you start If there are then self leveling compound ,or you will be using mega amounts of adhesive for tiles to fill in dips to get them right I speak from experience of making really new boy mistake on my biggest floor 6m X 5m--took twice the amount of adhesive ,cos it had dips caused by crappy builder not getting all joists same height but that did not stick out when it had underlay +carpet. you need a long piece of something straight to check it as well a as 4ft level ,then you can use minimum adhesive and it will be good +no worries about full contact remember if you start with 8mm under first tiles --you will be that at least for the rest -- so if its flat and level you could get away with 6mm --thats a third less adhesive !! my other suggestion is do not use light coloured grout ,unless you like to keep sealing it ,as it will show up any discolouration if its light usual one is PEE stains around the bog from us men not hitting the target . dark grout --do not show up the same1 point
-
I would do a stage 2 design for the whole house but only take the part you will build now to detailed design which will include parts of the future ext. - I would then incorporate all the lintels and openings just now, then brick them up so that come extension time you can just remove those bricks and you are through. On the founds I would pour founds some way into the extension and take into consideration any utility runs like pipes or electric etc. I would run the founds out so far with some rebar sticking out so you can continue them at a later date and connect into the existing easily - paint the ends and backfill with gravel so it is well drained and easy to excavate. I would run in the required cabling and things that may be needed to a convenient point and leave enough of a coil to get it well into the first socket or light switch etc. If you are going for a slab found then I would do the whole slab in one go and just deck over it or something for now.1 point
-
I would do this joist with insulation between up to top of joists ,then plywood then fit all UFH piping then fit battons between pip[ing ,then fill with biscuit mix ,then fix top floor to that this way no load on insulation at all1 point
-
Your proposed idea gives you one MAJOR problem. How will the UFH pipes cross over a joist, which they will to at one end, crossing over every joist. You cannot notch a posi joist. I did it this way on a very small section of floor under the bathroom, and I threaded the pipe between the top and bottom chord at one end, but it was VERY hard work with only a short run of pipe to keep threading through. If you are going to be doing anything like a normal sized room, you could be having many tens of metres of UFH pipe and threading it through again and again is going to be somewhere between extremely hard, and impossible. Battens along the top with a small gap at one end for the pipes to pass solve all this. Set the celotex level with the top of the joists.1 point
-
All I would say is it’s not normal to dig your ring beam trench before the piling contractor, he may struggle to get his rig in position with trenches everywhere, he will also collapse the sides of your trench with his rig. Normally put piles in then dig between the piles.1 point
-
1 point
-
It is OK to have inert rubble under the suspended floor. Make sure it is OK with the piling contractor as they sometimes need special support for larger rigs. If there is any topsoil I would remove it.1 point
-
1 point
-
And here it is ... https://www.ft.com/content/7d196c08-9826-11e9-9573-ee5cbb98ed361 point
-
One of my MVHR systems is going in a loft space and the design shows an inlet and outlet ducts routed through the slate roof. As I’ve never installed such a system before, could someone point me in the direction of the correct duct fittings I need to install in the slate roof? The roof is counter battened, not sure if that matters or not!?1 point
-
Yes. There is some concrete (dumped after the slab pour) to get out of the way. No way am I hand digging. Thanks for tips. Good idea to put the plans to the BC guy. Will get level checking pronto. thanks @PeterStarck for the pressure test info. Will look at that. I also recall @Russell griffiths Mentioning a chamfering took ages ago on another post so will look at that too. thanks all. Looks like we’ll be able to do it, with all your help ? photos will follow over the next few weeks....1 point
-
1 point
-
There is nothing in the regs that say there needs to be increased sound insulation in walls for bathrooms. The regs do say for internal walls and floors the minimum acoustic specification is Rw 40 dB, but.... this does not apply, where; An internal wall contains a door An internal wall separates an en-suite and the associated bedroom For a 100 x 50mm stud you can achieve Rw 40 dB with 1 x 15mm wallboard either side, with only 25mm 12 kg/m3 mineral wool in the cavity. Now this is a minimum, if you want to improve it and keep the single stud, you have three routes. Increase the mass of the plaster board, e.g. 2 layers of 12.5/15mm SoundBloc Increase the density and thickness of mineral wool in the cavity, e.g. 75mm of 24-48 kg/m3 Mount the layers of plasterboard on resilient bars for an up lift in acoustic performance. What is you floor construction? as it is likely that as it stands it achieves the min Rw 40 dB, and additional insulation will help bring up the performance, as well as those type of improvements listed above for walls.1 point
-
Block will be pretty good at keeping out airborne noise, but not so good at ground-transmitted low frequency "noise", so it really depends on how much of the railway noise is airborne and how much is vibration transmitted through the ground. Reducing sound from vibrations transmitted through the ground really needs flexible isolation, with the isolated structure having enough mass to ensure that it has a resonant frequency that's a lot lower than the lowest transmitted frequency, which may not be that easy to build. A surprising level of sound comes in through tiny air gaps, too, I've found. I can say that blown cellulose insulation between two, fairly well isolated, stud walls seems to be incredibly good at reducing external sound penetration, something that I wasn't expecting. Our new house is, if anything, too well sound insulated, as you can't hear anything going on outside, not even a Chinook flying overhead, when the doors and windows are closed and latched. Whenever I have heard a sound inside it's always been because a door has been closed, but not latched tight to its seals. It means that even a truck coming up the drive can't be heard inside, let alone a car. If you go for a stud wall, then I'd be inclined to fill it with dense insulation and try to isolate the skins on either side. If you go for block, then it will probably give better airborne noise reduction, but may be a bit worse at reducing structurally transmitted sound. An example of this is the way sound like a light switch click may well be clearly audible from the other side of a block wall - something that's noticeable in our old house, that has block inner walls, but isn't noticeable in the new house that has acoustically insulated standard stud walls.1 point
-
Stick them on the wall and then caulk then finish with your paint colour you will have on the wall. Anybody who notices that shouldn't be lying down on your floor.1 point


