
Leaderboard


Popular Content
Showing content with the highest reputation on 02/02/19 in all areas
-
What I find interesting about the FIR images in the Guardian article is that -- to me at least -- they underline the whole issue of where the air tightness is achieved if at all: you can have a airtight(ish) living space but if there is free convective circulation within the dot-and-dab (or service) voids interchanging with external air, then this can act as an active heat pump dumping heat out of the house. The airtightness should be achieved and verified before boarding out.4 points
-
Stumbled across this site today. They have a range of different coving sections for led lighting. Can light either the ceiling or the wall. Pretty good range it seems. https://www.14th.eu I've no connection with the company and not used them myself.2 points
-
FWIW, the movement of any vapour through any solid (including membranes) is solely dependent on the permeance of the solid and the relative vapour pressure either side of it. Vapour will always want to move from a higher vapour pressure region to a lower vapour pressure region, and vapour-permeable membranes try to allow this to happen, in both directions equally, by being fairly vapour permeable whilst retaining a high resistance to the movement of moisture through them.2 points
-
If you want a quick and simple solution then fit a carbon foam filter block inside the extract vent - they are usually used for fish ponds but what they do is trap the grease and just wash it out every so often. Should be no more than £10. One question I would ask though of the people worried about cleaning the ducts on MVHR.... when was the last time you cleaned your extractor hood pipework ..???? I know a lot of people who change the filters but nothing else, and even with a filter due to the direct extract route these get very mucky yet we all seem to ignore it ..??2 points
-
Highlights poor airtightness, dot and dab plastering and bodged tests - all issues we’ve been highlighting here for ever. https://www.theguardian.com/money/2019/feb/02/new-build-homes-why-some-owners-are-left-feeling-the-cold2 points
-
Nice to see Paul Buckingham getting some well-deserved attention at last. I've posted links to his papers on this before, but they are well-worth a read: https://www.aecb.net/still-taking-disgraceful-approach-build-quality-waving-goodbye-energy-savings/2 points
-
It sounds fairly straight forward do you have two types of roof, one standard with a cold loft area, the other with a vaulted section. You really need to show us a section drawing. In the standard cold loft area you will have 150mm of quilt between the joists and then 150mm laid at right angles across the top of the joists in the loft area. In your vaulted section you have 100mm of celotex in between the rafters ensureing you allow 25mm gap between the celotex and the membrane, then 40mm of celotex under the rafters. Does that make more sense or just as confusing. @wozza thinking about it, I bet you have a raised ceiling joist, that’s why you have the two different insulation types.2 points
-
When we first started on this path, we wanted a hands off, almost turnkey project. I'd heard of SIPS and seen lots of positive stories about energy efficiency so all was set. Then we spoke with a mortgage advisor and our world started to tumble down. I am now 56, Peter is 57. We will need a mortgage to build this house but because of our ages, we know that the mortgage providers will all keep the term of the mortgage down to 15 years max which will make the repayments large. Drastic action needed to be taken so we have now decided to build using a method where we can do this ourselve. We have no experience of actual building work but let's face it, how hard can it be ? - famous last words. Our previous house was built using traditional methods. We did have underfloor heating and a MVHR system but we struggled to get through the air-tightness test. We have learnt a lot since then. We nearly built that time round using ICF but I chickened out. This time, it looks like it is going to win. We have looked at the various types of ICF. The majority are of course the polystyrene type blocks and these do have real advantages for self builders. They are light and easy to manage. Our main issue with them is the fixing ability at the end of the build. Once the plaster is on, finding the fixing lines becomes harder and harder and so other ways of fixing heavy items to walls need to be used. Looking at various websites and you tube videos, it is also apparent that blow outs are more likely using the polystyrene and more bracing is required during the pour. The concrete is of a stiffer consistency that with the woodcrete ICF. The woodcrete type ICF blocks solve the fixing issues - you can attach anything to it. We have looked at three types of this type of ICF, Velox, Durisol and Isotex. Each has pros and cons and we have yet to decide which type to use. All three appear less likely to blow on pour day without significant bracing but of course it can still happen. We can't get a price without plans so at the moment the comparisons are being made purely on preference but without the benefit of a cost comparison. The concrete for this method is of a very runny soup like consistency. VELOX This method uses two flat panels that are clipped together as you build. The panels are large - 2000mm x 500mm so will go up quickly. One panel has the insulation attached to it. The system comes with a variety of options for the depth of the wall giving different u values. I have found getting information from the website quite difficult - the website is clunky and parts of it are not in English. The way the panels fit together, you end up with a completely solid concrete wall inside the formwork. I believe this gives a better chance of airtightness from the actual structure of the walls. The UK supplier seems to be a little difficult to get hold of sometimes - maybe this is the result of too many enquiries but it does ring alarm bells to me. The system has products for both internal walls and floors. The internal walls are two panels glued together, this takes the weight to 68kg - we struggled to lift a panel off the floor so raising it above shoulder height would be impossible for us. The size and weight of the panels pretty much rules this system out for us as it is simply too heavy for us to manage ourselves. It is however, my favourite product. DURISOL Durisol blocks are more like a squarish 8 with the top, middle and bottom bar at less than full height to allow a honeycomb concrete wall to form during the pour. The blocks are all 500mm x 250mm with the external walls coming is two depths - 300mm with a u value of .23 or 365 mm with a u value of .11. There are 3 different types of blocks. A standard block with the reduced internal height connectors. A facing block which has one end at full height - this is also used for lintels. A corner block for ...... turning corners! Because of the way the blocks work, the second row and above will all need a cut to ensure that your keep the "brick bond" in place. This is particularly pronounced if you choose the 365mm blocks as it is the width that causes the issues. QUESTION - couldn't you fix the problem by making the cut on the first row instead and increasing the size slightly so that every other run works properly? That didn't cross my mind at the training. The blocks have male and female ends so that they lock togehter prior to the concrete pour The blocks are rough and gloves are definitely needed. The blocks do shed while you are working as well so care needs to be taken to butt the blocks up properly as the debris can move things apart a little. The design of the blocks means that there are the 3 woodcrete bars, each end of the block buts together with only a small amount of concrete bonding the blocks together. The blocks are produced in this country so less likely to suffer with issues to do with Brexit. Lead time is in weeks. Free training is provided (we have done the one day training course) and they will come to site to help you get the first row laid, ensuring that you get a nice level row. Purchase of the blocks over £10k gives you one free site visit (need to check if that is the initial row or if you also get the first pour day). Other visits are by negotiation but they rely heavily on facetime calls to see your site without actually being there. The anecdotal evidence that I have is that Durisol will discount heavily but they do not talk about a standard price - you only appear able to get a price from the drawing that you provide. I believe this will be our third choice of block based on properties but is probably the cheapest of the three. It is also the one we are most likely to use due to the price. ISOTEX Isotex is a very similar produce to Durisol. The blocks are mainly 500mm x 250mm but there are "pass" blocks to match the block depth that you have chosen. This gets around the issue of "brick bond" issue. The blocks come in depths of 300mm with a u value of .23. 330mm with a u value of .19. 380mm with a u value of .15 and 440 with a u value of .11. There are more options for shape of block - not sure how much that will help on site - will it be more difficult to find the right type of block while doing tricky areas? The shape of the blocks is like an H but with 2 horizontal bars not one. This means that the blocks allow a freer flow of concrete between the blocks than you get with Durisol. It will still be a honeycomb but less so, there is roughly a third less woodcrete in the way of the concrete wall. Butting the blocks together mean that they just sit together without the benefit of the locking togethre - this means that there are two short unsupported parts of the block holding the concrete - does this make a blow-out more likely? Insulb the UK supplier provide similar training to Durisol - we are attending in February half term at Swindon NSBRC. The blocks are slightly smoother than the Durisol ones and seem less likely to shed. Jamie has made it quite clear that the price is non-negotiable. £55m2 for the 300mm block (I think I wrote down the correct block size but not 100% certain) against £62m2 for the 440mm block. I believe that this will be our second choice block based on properties and probably second choice one price comes into play - time will tell.1 point
-
Who me? Right now I've not designed anything and printed it. I've just printed other people's designs. I've used Sketchup in the past but intend to get Fusion360 as that's what a lot on Thingiverse seem to use and it's free. So far I've been printing out parts to upgrade my A8 to an metal framed AM8. I've printed about 15 parts taking 28 hours of print time and 140 meters of filament. Still some quite big parts to do. The sequence for me will be: 1) Design objects in Fusion360 and export in an .stl file 2) Import the .stl into Cura and generate a .gcode file. 3) Send .gcode to the printer. 4) Print it. Cura is the slicer recommended by ANet. It turns an .stl files into the gcode file the printer needs. The printer prints the object by building up layers of plastic. Each layer is drawn using a small nozzle to extrude plastic onto the bed or layer below. Cura works out the path the nozzle has to take in 3D to print the object. Cura starts by allowing you to drag and drop one or more objects/.stl files onto a grid representing the printer bed. Then you can rotate, move or scale them. Typically I've had to rotate some parts to get the grain/layers in the right plane as this is the weakest plane in the finished part. Most parts are printed "hollow" to save time and plastic. In Cura you can specify the thickness of the outer shell and fill the inside with a grid that improves strength and stops (for example) the top surface sagging. When it's configured I usually check I haven't accidentally lifted a part off the bed (Z displacement must be zero) and click "Prepare". In a few seconds it generates the gcode file and tells you how long it will take to print. If that's too long you can either remove parts from the bed or tweek the settings to try and improve it. After that it's just a matter of getting the gcode file into the printer and setting it going.1 point
-
Apparently you can import simple .stl files into Fusion360 or AutoCAd but I've not tried. I imagine it would be difficult to do anything more than simple changes on it. https://toglefritz.com/convert-a-simple-stl-into-a-body-in-fusion-360/ This lists some other programs it says can "easily" turn the surfaces back into solids... https://all3dp.com/1/7-free-stl-editors-edit-repair-stl-files/ No idea how good the results are. Better to persuade the author of the .stl to give you their source.1 point
-
I think the aqualisa one looks 100 times better tbh. And the Mira I was referring to was the one you linked to in the first bump eg the basic valve without the box of gubbings. That's a fall-back if you HAVE to run direct off gravity with no pump.1 point
-
15-18 turns on most rad valves should suffice, but you need to stop turning when the threads meet the rad as they'll keep going until it pops out the other side ( inside the rad ). I wouldn't threadlock them as they may not be un-doable afterwards. Only bother with that if they keep coming loose.1 point
-
If you chase channels out on inside of wall for your electrics then hard plaster ,that will do the same . and if cladding outside ,then maybe house wrap it under the batons for the cladding but if going rendered that will also serve to do the same plenty of good options should be less concrete cost using durisol or isotex as they are 120mm concrete - lot of poly types are much thicker1 point
-
Just parge coating Durisol should fix that easily enough I'd have thought. Pretty quick and easy to do, just need a bucket and broom.1 point
-
I think that I definitely heard that . Does this lead to pistols at dawn ? Please, at least let him finish the bathroom first ?1 point
-
sides cut longer then notched at blockwork on bottom. Creates a drip1 point
-
You need to add a vapour control layer between the 40mm celotex and the batten this can be achieved many ways a vapour control membrane taped on with all joints taped and taped to walls or tape all joins in 40mm celotex with the aluminium tape and seal to walls. That second roof makeup is probably a million times better than the first with just a little bit of juggling.1 point
-
Agree with @Russell griffiths on this point. Surely that will be a large number of "bloody great holes" ! (Personally I think that recessed spotlights are the spawn of the devil; I have about 70 installed by the previous owner, and the lecky will charge you One Point for wiring each one.) In my view Occam says use either multispot fittings or the more modern LED panels. Plus perhaps spend the recessed spotlght money on a feature light fitting for the hall, an artwork, or whisky. Ferdinand1 point
-
They work fine with compressible insulation.1 point
-
IMHO that looks like a really stupid design so yo install bloody expensive insulation and then cut a hole in it for a light DUR. might as well leave the window open pull the 100mm celotex down and touch the 40 mm against it, then find a shallow light or increase the batten depth, how is she proposing to provide your airtight layer if your going to cut a sodding great hole in it. Sorry that’s rubbish. You can have the best insulation in the world, but if it’s leaky and gappy you might as well leave it out.1 point
-
Not as I understand UPnP. I'm a bit vague about it but my understanding is the point of it is to allow applications on computers, phones, etc, to open ports for access from outside. I wouldn't be at all surprised if WhatsApp uses it if it's available. Yep, that's a bit more concerning. Usually there's a setting in the router configuration to enable/disable this. I have a vague memory of some routers not being very good in that they allowed remote logins even when they were supposedly disabled.1 point
-
I Tananarive cross the fee survey for 2017 in the Architects' Journal. It may be useful for some. YOu can register for free, or put the link into Google and surf in from there and it will give you the whole thing. https://www.architectsjournal.co.uk/news/aj-fees-survey-2017-how-much-are-you-charging/10020125.article If you find a later one, please add it here. Ferdinand1 point
-
If you have rigid insulation it is difficult to make it fit snug to the closer. I know they act as a vertical DPC but why not just bring the cavity insulation to the edge and have a strip of DPC up the sides? The cavity closers do hide a multitude of sins (mortar snots, missing insulation, uneven cavity width, missing wall ties) and make plastering simpler and Building Control seem to like them.1 point
-
I don't see how it would be possible because the .stl file contains only the triangulated surfaces of the final object not details of all the components that make it up.1 point
-
How deep are your rafters, as it said you must leave 25mm above celotex as for upgrading to 125 that’s something only you can decide, you need to weigh up cost versus benefit roof windows, triple glazed at the very least, fit the best you can afford as this will be a big heat loss area. As for fitting it’s no different then any other roof, rafters doubled up on each side, fit window fit celotex in between rafters fit celotex under rafters batten and plasterboard this will leave a slightly deeper looking reveal around the window due to the 40mm celotex and batten,1 point
-
Bar mixer is simplest and cheap to replace. I'll be knocking out tiles if my concealed one goes wrong.1 point
-
I managed to modify the carbon filter on our old cooker hood by just removing the grilles either side of it and re-filling the core with activated carbon granules, intended for use with fish pond filters (they are cheap and easy to buy from places like eBay). Worked a treat, and if you wanted to really save money then you can wash and bake the used granules to reactivate them.1 point
-
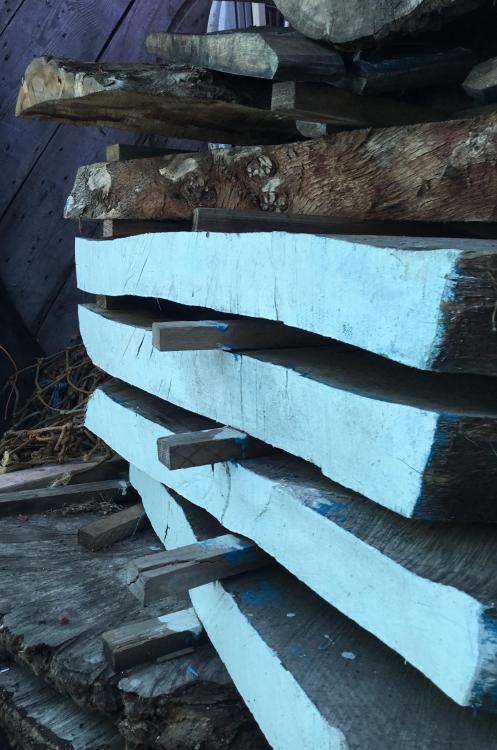
Yep - stops ends cracking open as they dry faster. The other issue is airflow - I’ve seen people build virtually airtight covers for wood stacks and wondered why they rot as the moisture can’t get out and the beasties find nice moist areas between the boards. The quickest and cheapest fingers are offcuts from the sides of boards as you trim them once you’ve cut them to thickness. Polytunnels make great drying sheds as you can open them up at the ends to get airflow but can also increase the heat by either the sun or even use heaters. Just don’t use gas heaters as they create more moisture than the remove unless you have them externally vented !!1 point
-
To extend the existing bungalow........... worst case, i will go back for permission to knock and build, and end up with exactly the house i have permission to extend to. I don't see how they could refuse that.1 point
-
That’s correct, it’s been done like this for a very long time, I think they used to use some sort of lanolin mixture..... I just use whatever I can find but floor paint is great !
 1 point
 -
My planning cost me £14600 all in, about £4500 to the planning consultants in the grand scheme of life it was money well spent we built a model of the original, then added extensions that we could get under permitted development then built another model of the new proposed house we then asked for a site meeting the planning guy didn’t really have a lot to say and just said you had better stick an application in and we got it.1 point
-
Paint the ends of the boards with cheap gloss paint. Couple of scaffold boards across the top, tarp over it but make sure the ends are covered from the top but still exposed.1 point
-
You are confusing water vapour permeability with liquid water permeability. The membranes won't let liquid water through (in either direction) but they do allow water vapour through (in both directions).1 point
-
So the moral of the story is wet plaster on block work. Can't hide anything like happens with dot and dab where you rely on the plasterer doing it right and if he hasn't then you don't know as it's hidden. Any one relying on a few tubes of caulk around their skirting to keep the draughts out really have been badly informed.1 point
-
I would refer to the "as specified on plans" part, a picture tells a thousand words and all that.1 point
-
How much moisture is actually within a structure that has an impermeable polythene vapour barrier on the inside, and a breather membrane and rainscreen on the outside?1 point
-
Lol, you're becoming way too sensible, and you know @Onoff never does anything swiftly1 point
-
………….moving SWIFTLY on...………….1 point
-
Surely silicon carbide would be... ...roughing it!1 point


