
Leaderboard


Popular Content
Showing content with the highest reputation on 06/07/18 in all areas
-
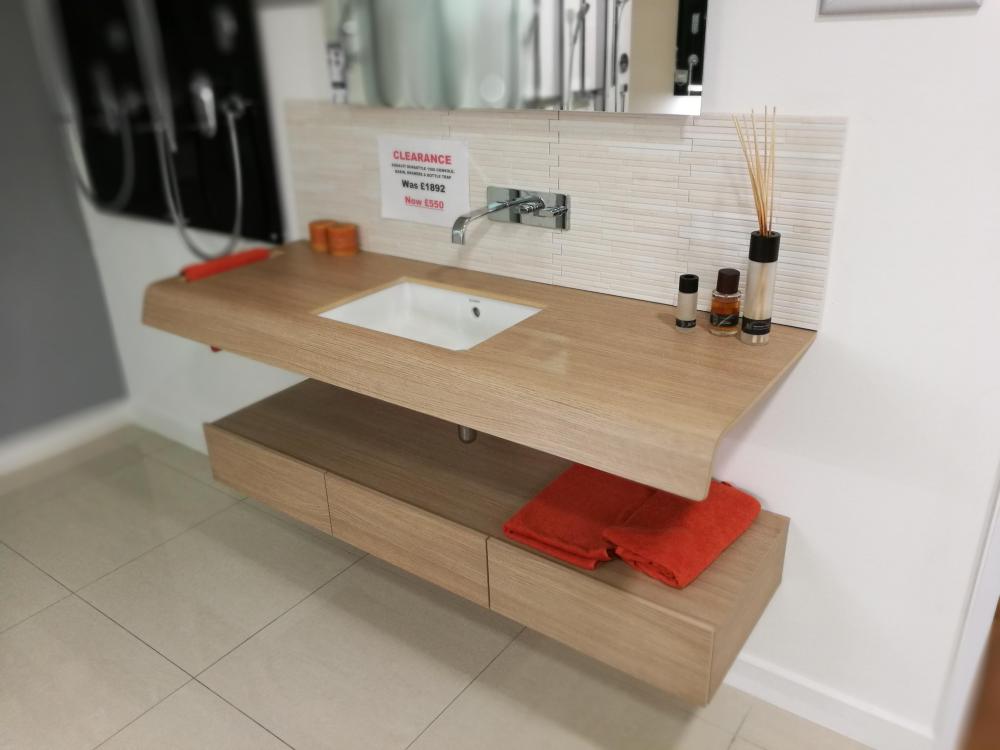
I think I have just got the bargain of the century. Victoria & Albert Ionian limestone bath list price £3215 V & A Tubo 14 freestanding bath tap & shower list price £1495 V & A waste Kit17 list price £350 Total £5060 I have bought the lot ex-display for £695 Would anyone really be mad enough to spend £5k on a bath & tap???? It appears not. The display has been in the showroom for nearly 2 yrs & they have not sold one, which is why they are changing the display to something they may stand a chance of selling. Got a couple of other good bargains. A Roper Rhodes Serrif Light Ash vanity unit with isocast basin & tap & waste £1200 for £495 A Duravit console with basin & waste £1895 for £550 & they threw in the £400 Crosswater tap as well after some persuasion. Never thought I would be able to have anything like this so chuffed to bits. Got a lovely DAR opaque glass chandelier type thing as well for £200 instead of £460.
 6 points
 -
It's been a long journey, but our little cottage is finally up and running as a holiday house. First guests just checked out and left us with some very kind words having thoroughly enjoyed their stay. Of course it's not exactly 'finished' but it's certainly usable. I'd have liked to have had a few extra days to tidy things up, but all the essentials are in place. There's decking still be be built out the front, I'm hoping to get this done in a gap between changeovers soon. I must say it feels pretty good to get to this point.With over three years of very hard work behind us, and a lot of faith that it would all be worth it, we are finally seeing money coming in. And having had to down tools I am going to have this curious thing called 'free time' again... although I'm sure I'll manage to fill it all2 points
-
I use Screwfix cheapest Mapei adhesive - £9.99 a bag2 points
-
Needs something cement based in the gaps so a bag of cheap adhesive would be good to fill the gaps.2 points
-
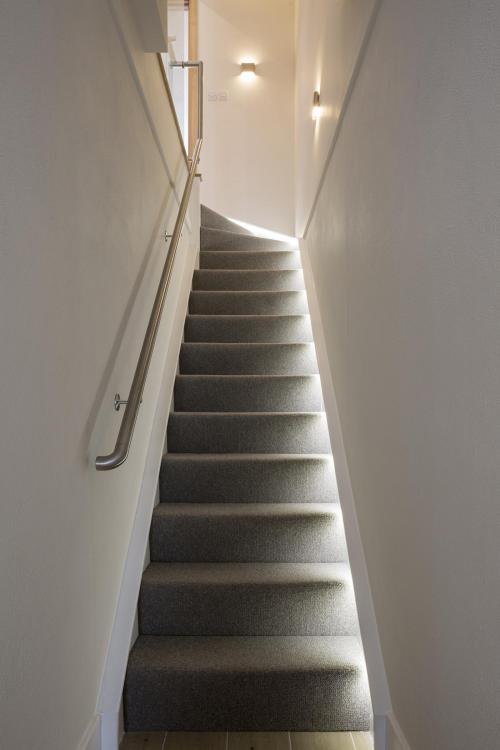
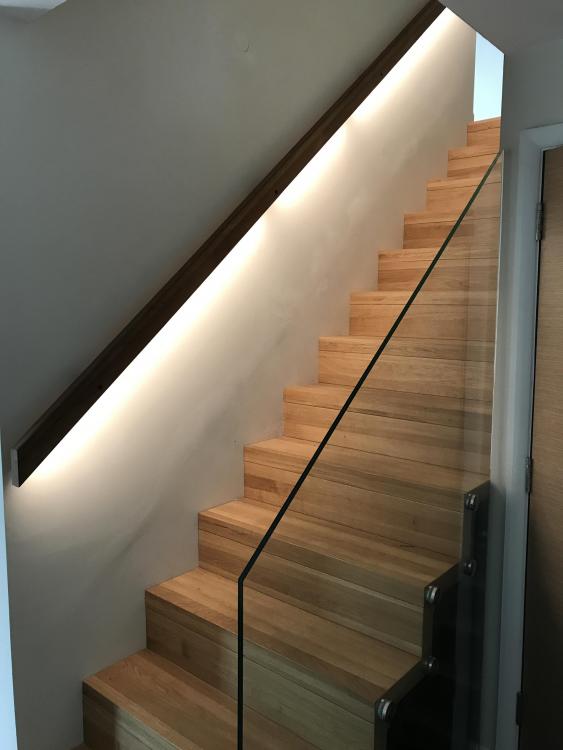
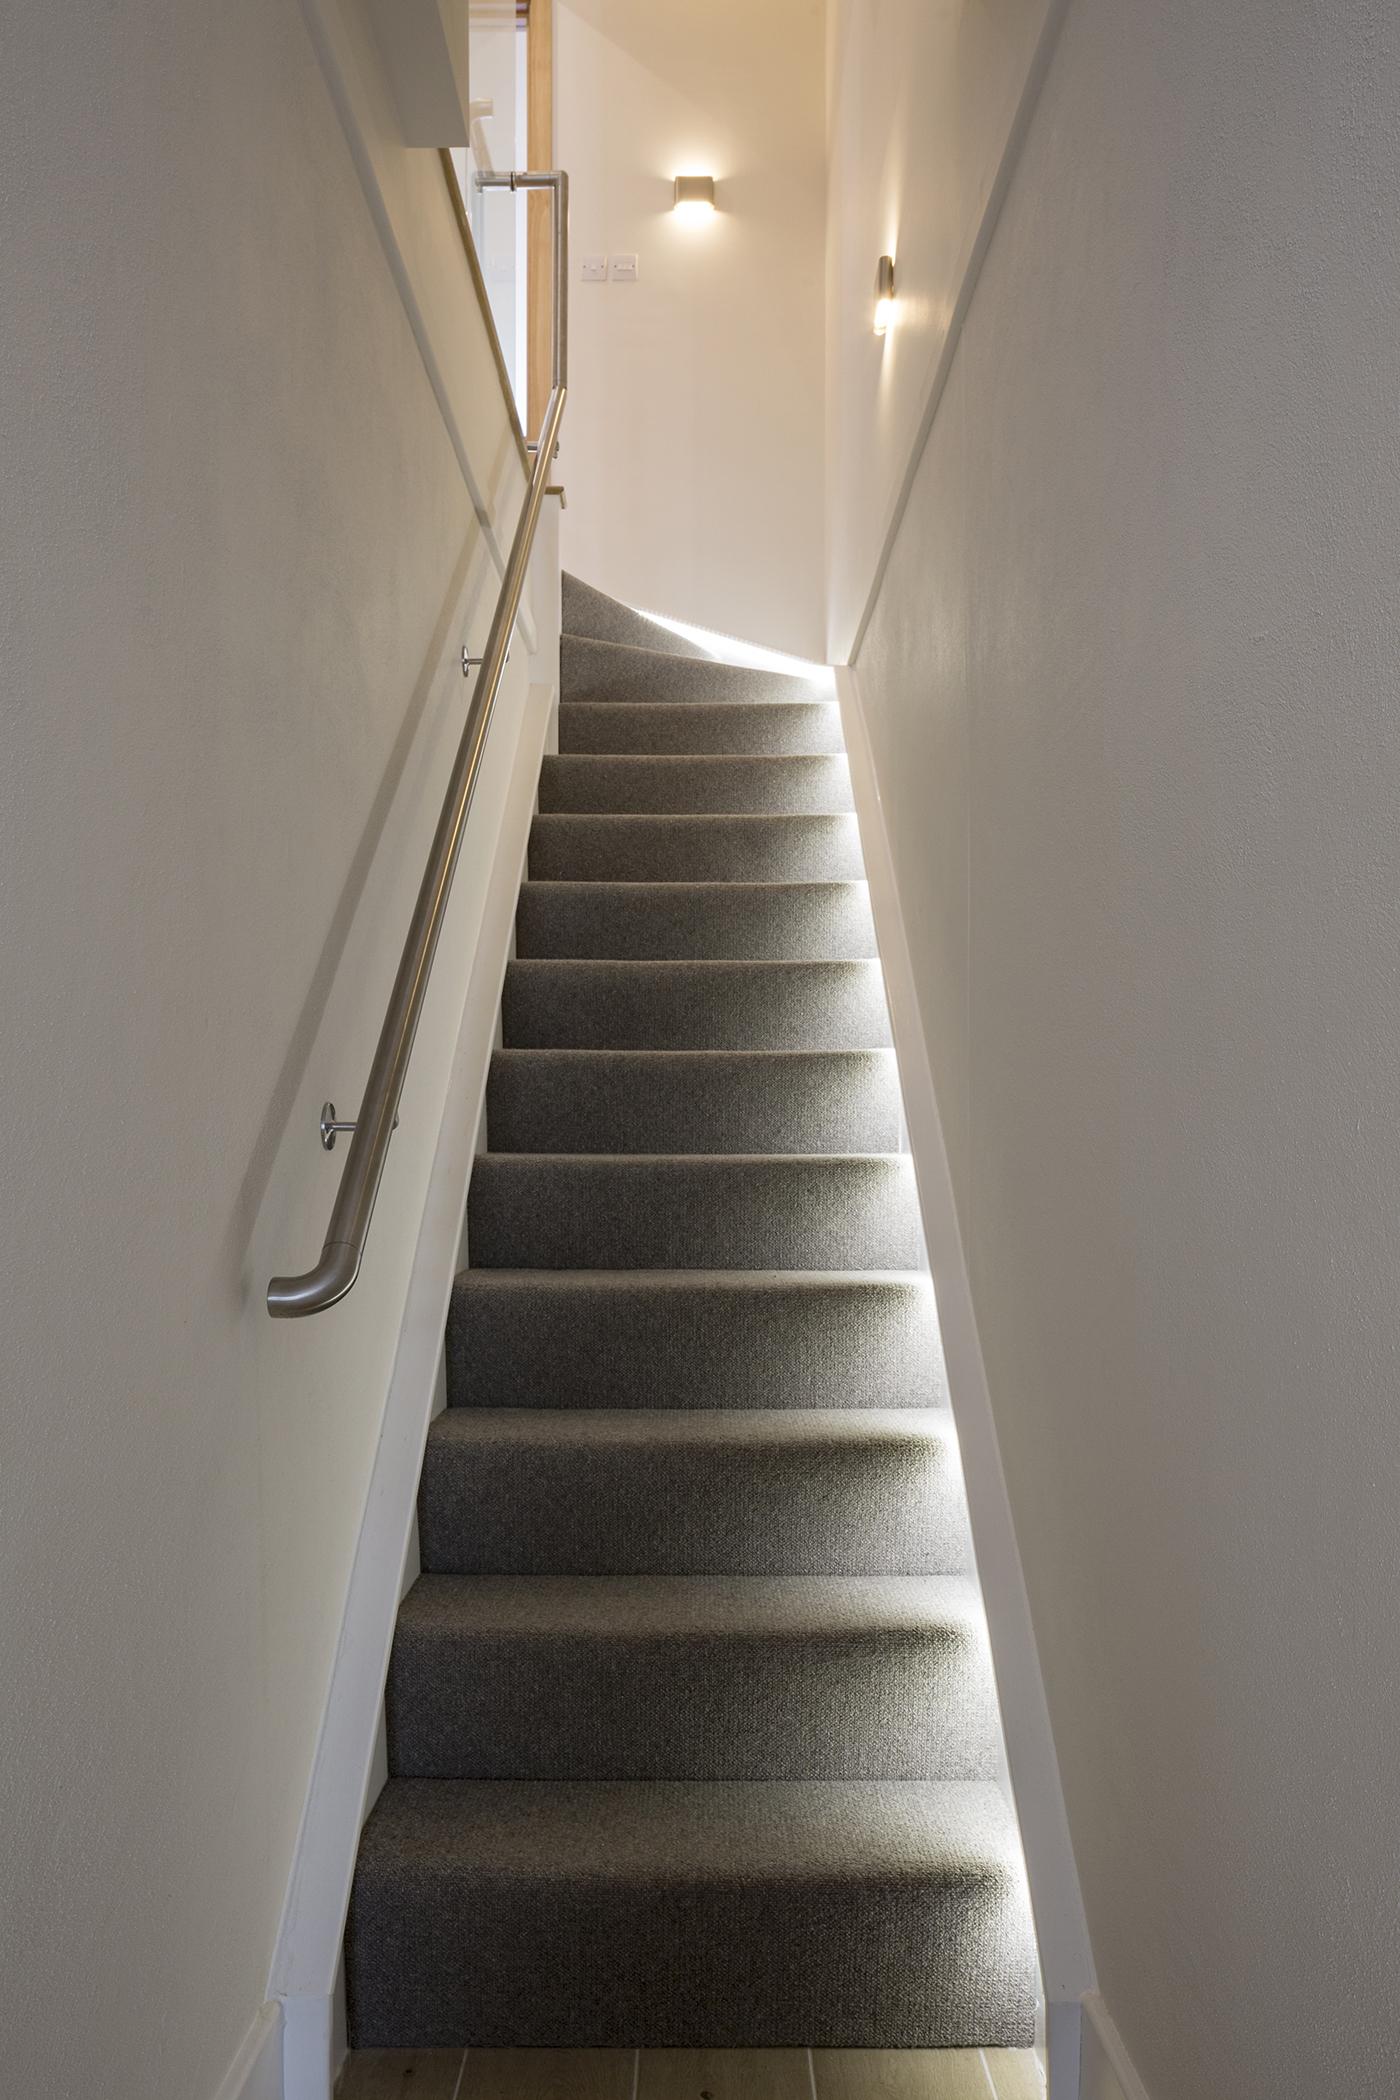
We just added a capping of MDF architrave to the top of the stair strings and installed LED strip underneath.
 2 points
 -
I have just mounted my ASHP (different make) and I used 4 of these anti vibration feet http://cpc.farnell.com/sip/02357a/anti-vibration-mounts-sold-as/dp/TL19203?st=anti vibration mount No problem bolting them down to the base. And cheaper from CPC than I could find on ebay2 points
-
I didn't realise quite how long a while since the last blog entry so time for an update as I'm on an admin day today, not least for the electricity supply which I'll come onto later. So, what's occurring? I'll start at the bottom and work my way up: Groundworks - the groundworkers arrived on site the day after the last May bank holiday, 29th May. They took the roof off back in April to sort out any potential bat issues and now they're back doing the main job. The old concrete garage block came down first. The roof panels have asbestos and have had to be properly disposed of, which has been done at a reasonable price of £650 rather than the c. £1300 I was looking at a couple of weeks ago. All done properly and I have my disposal certificate but without having to resort to sending stuff all the way to Swindon and get charged for 2 tons when it was just over one. A small result; still expensive but less than it could have been. My ground worker arranged this with one of his contacts; PM me for details if anyone local needs the details. The concrete sides of the block are all down but we've left the floor in place as it's a ready made hard-standing for everything that will be arriving on site over the coming months. It's mainly parking, portaloo and site cabin taking it up now. I will need to get some hardcore compacted down going further into the site as I'm not sure it will stand up to all the heavier construction traffic that is due. Demolition of the building will be finished this week, but there's still the old septic tank to be dug out and a bit more concrete from where there were sheds in the past. Next up is digging out for the insulated slab, drainage and services, not to mention the piles. I have my groundworker until the end of next week before he's due on another job, so we should get a fair bit done by then. I reckon the initial excavation will be a little rough until we've established the levels, which seems a bit chicken and egg to me at the moment. How can you mark out how deep you need to go when there's a whole lot of earth in the way? Fortunately, there are some useful markers on the site that I can use as references for the setting out of the perimeter but I will get everything checked out before the piling guy arrives and have any remedial excavation done for that. Speaking of piles....I've ditched the idea of the helical screw piles. Not because they weren't lovely enough, but because they were outrageously expensive compared with other, more traditional systems. The initial design drawn up by my SE would have cost more than £42k for the helical screw piling system which seemed like mad money to me, probably because it is. I had a chat with a contact and he said that very little of this kind of thing is done now, certainly on house projects. When it first came out it was embraced with open arms by the telecoms industry for ease and speed of use, but they have dropped it almost entirely now on cost grounds, and I can see why. My initial quote for CFA (continuous flight augur) piles came in at just over £15k which was far closer to what I was expecting. I reckon that in the end, with SE fees and everything it will come in at around £20k for the piles. As mentioned in a previous entry, the alternative was to dig to at least 2m depth over the entire footprint, which in itself is an expensive exercise due to the cost of muckaway (I estimate an additional 15 tipper loads), so swings and roundabouts, the piles aren't as extreme an option as it first seems. I've used Mini Piling Systems Ltd for the piling system - nice people, easy to deal with, based in Bath, will travel. I should add that because these are mini CFA piles, as long as the ground is dry and reasonably level when they come to put them in (July), there is no need for a piling mat as the rig isn't considered a large one. Moving upwards, the other thing that has slowed is getting drawings from holy trinity of architect, SE and MBC to the sign-off stage. The SE has been very efficient and have turned things around very well. The architect and MBC have been slower, but I'm going to hold back some criticism because were I in the shoes of the architect, I would probably be doing this amount of nit-picking on behalf of my client and I'm sure that I will be glad of it. As ever, just because an architect designs a house and it gets planning permission, that doesn't necessarily mean that it can actually be built. In my case, there have been delays in getting the small details that can be glossed over in the desperation to see physical progress and having something coming out of the ground, and this is what the architect has been pushing back on. They are determined to make sure that the proportions of rooms are consistent with the original design. For instance, the ground floor ceiling height has been raised so that the large open plan downstairs doesn't feel oppressively low due to its large area. As a result, most of the ground floor windows will also need to be increased in height as will the front door. This all has a knock-on effect, hence the delays. There has also been back and forth over the balconies and warm or cold roof construction and the parapet wall around them; we're not quite at the end of this but pending a response from a supplier, we are close. The issue is that the common solutions to ventilating the cold roof would look ugly. Everyone has gone to a lot of effort to make the house as good looking as it can be and it would be a shame to rush through this detail and then sit looking at ugly vents on the balconies for ever more. But, tick, tick, tick, more time passes. By far the biggest issue is that until these details and corresponding drawings are signed off and I pay a stage payment to MBC, my manufacturing countdown doesn't start. Standard time for MBC to get on site is minimum 6 weeks, this time of year more like 8 so I'm realistically looking at end of August or early September. Then there are the windows to go in and roof to go on. I really, really want the build to be weather-tight before the weather breaks in the autumn, as it will. Moving on to making the building work as a home, and for construction to actually take place, I'm sorting out the electricity supply at the moment. There is a live supply to the site as there was an existing dwelling there. Last year I contacted the DNO and had a service alteration done, which basically chopped the wire running into the bungalow and moved it all into a box on the pole with the overhead cable running down it. I rang the supplier at the time and advised them of the changes being made and arranged for one of their bods to come along and collect their meter. Sadly, they didn't turn up for the appointment, so now their meter is buried at the bottom of a pile of builder's rubble in the local landfill site. This put all sorts of twists into their collective knickers and it's taken the best part of a day to sort out how to re-establish the connection. It turns out that what's needed is a temporary building supply and this is always done through the commercial team. I've been quoted up to 12 weeks for the whole thing, but this is if you are applying for an entirely new connection, not just to get a meter installed. Even so, it could take around 4 weeks. We shall see. In the meantime, I've (for the time being) decided on getting my kitchen from DIY Kitchens. I've planned it all out and know what units I want and where, so I'm not going to think about that again for a while. I do, however, need to start thinking about lighting schemes and bathrooms/wetrooms as I've made very few decisions on these. Needless to say, there is a huge amount of other small detail going on but little of which can be done until the final drawings are in. Never a dull moment, though, my groundworker has just called to tell me that they have bent over a water pipe to stem the healthy flow of water that was coming out of it when they went to remove it, despite Wessex Water having sworn faithfully to me in February that the water was all turned off at the meter and that nothing should be coming out of anywhere. Off to make some more calls and demo photos to follow soon. Ta ta for now.1 point
-
I need to do a bit of research. I want to find out which cases my LPA has presented for consideration in a court. The Head Of Planning locally responded to a recent request of mine (to prevent someone using a caravan as a domicile rather than a worksite hut) saying simply, based on a similar local case, that it would be difficult to do and cost too much to enforce. I'd like to find out whether the analogy the Planning Officer draws is correct. To do that I'd like to find out which Planning issues have been presented for consideration at court by our Local Planning Authority.1 point
-
Weak-wristed drill/driver set, £50 https://www.screwfix.com/p/titan-ttp508kit-10-8v-1-3ah-li-ion-cordless-drill-driver-impact-driver-twin-pack/ I couldn’t help myself.1 point
-
Ah, my teenage years .........1 point
-
Well when they invent a real-world usable weed robot...1 point
-
3. EPDM TO EPDM. Splice tape good. Contact adhesive also good with a 3" overlap and nice tidy (no ripples) contact. In this weather it should be fine, the rubber is soft and malleable. Take your time and press it all tight together. Roller is good but ONLY on a flat surface, otherwise you'll stress the rubber at high points. Go poster!1 point
-
Well it's all piped up now. As I suspected, it was a struggle getting enough antifreeze in. I filled at 3 points, the 3 highest points and only just got the required antifreeze in before finally topping up with water and bleeding. It's been holding steady at 0.6 bar for 48 hours, I guess 1 bar is a good pressure for final filling? I still have all the UFH pipework to lay and fill, UFH manifolds valved off at the moment. Should start laying the UFH pipe downstairs in a week or 2. 30 soldered joints and 22 compression joints and the only weeps were a couple of compression joints not tight enough1 point
-
Our scaffolders erected the whole lot too close to the house. They had clearly been left unsupervised because when the boss came out at the end of the day he noticed the issue. They had to dismantle it and build it again! We were on holiday but we had security cameras on and could see it going up, then coming down, and then going up again. It was like a wtf moment watching that happening remotely!1 point
-
"3) How do you stick EDPM to EDPM?. I'm fairly sure the guys just stuck primer on both parts ; let it go tack then rollered them. But videos seem to suggest otherwise. Advice welcome here!" Right!, splice tape. There are 2 points at which they have joined on the flat bit. 99% they didn't use splice tape. They just stuck a piece over ( will get a photo tomorrow) . So I will cut a square and 'splice' a proper section on top for peace of mind! Then splice tape along base of wall and EDPM up!1 point
-
No, your lights will be fine.1 point
-
We had a tree chap that did just this, and we used the chap he suggested, who did a very good job, so it seems that some do. However, I've asked this morning during my fruitless ringing around session and none that I managed to talk to would suggest anyone else, though.1 point
-
Our test was done with a plug in the far end and the pipe filled with water. BCO was happy when he came around mid-morning and the level of water in the chamber at the top of the run hadn't dropped. Our ground works chap said that he always did tests this way, as air testing was too much hassle. I have a feeling that the O rings on the fittings probably seal a bit better when the pipe's filled with water.1 point
-
There are loads of Mitsubishi air con units around, which are pretty much identical internally to an ASHP (strictly speaking they are the same thing) so I suspect that maintenance and repair for the Ecodan, should it ever need it, may well be easier than finding someone with experience of working with NIBE kit. NIBE kit is well made, though, so should be as reliable I'd have thought. As above the heating requirement seems very high for a well-insulated and sealed house. Our place is 130m² and needs an absolute maximum in very cold weather of around 1.5 kW for space heating and it's very rare for it to need more than a few hundred Watts. I'd have thought that a place that's around 1.7 times the size shouldn't really need more than around 2.5 to 5 kW for space heating, most probably a lot less most of the time. Hot water is the challenge, and is where most of the heat energy will be needed in practice, I suspect.1 point
-
That's really great news, I bet it's a heck of a relief to have the build finished and earning money. Somehow I found that the motivation to do the little jobs that were outstanding started to get enjoyable once the pressure was off; my problem over the last couple of months has been a lack of time to do much.1 point
-
My plumber & his Dad put it in the garage for me & said no heavier than a good quality normal bath. Also the bottom of it is not solid, there is a void of about 5" before the bottom of the underside of the bath. QUARRYCAST® A naturally superior bath: It may sound obvious, but not all baths are created equally. At Victoria + Albert we are passionate about our unique QUARRYCAST® material. QUARRYCAST® is made from finely ground Volcanic Limestone™ mixed with resin. As the stone-rich alternative to both cast iron and acrylic it is 100% one piece, hand finished and packed with naturally desirable properties: Warm Due to the quality of the QUARRYCAST® material it has high insulation properties and is warm to the touch Beautiful TheVolcanic Limestone™ mineral delivers a naturally white, gloss finish, featuring excellent stain resistance Strong This raw material has special needle-like particles formed by the rock undergoing superheating. When mixed with resins these bond together to create an incredibly strong web. As well as being naturally white and naturally harder than acrylic, this makes QUARRYCAST® incredibly strong and ensures no creaking or flexing of the bath Renewable Easy clean solid surface – as the material is solid all the way through, internal scratches simply polish out Practical Drillable for unique brassware installation Unique Hand finished interior — exterior can be painted or personalised after purchase Lasting 25 year consumer guarantee Who knew?1 point
-
Looks amazing, well done! Love a bargain!1 point
-
'S wot wimmin are for innit? Nagglin' an' ferretin' stuff out innit? Come to think of it, 's 'ow she found me.1 point
-
I used them because it would be near impossible to bolt mine down directly. I think it was designed by a previous car designer with the mounting bolt holes as inaccessible as possible. Using the feet you could tip the ASHP over, fit the feet, then stand it back up, drill and bolt down the feet. SWMBO insisted I bolt it down otherwise the wind would blow it over. I know it gets windy here but......1 point
-
We put a LED strip in a routed recess (done by manufacturer) in the underside of the handrail, which is fixed to the wall. Sparky made provision for this at 1st fix with a low voltage cable placed behind the wall and the connection to the transformer made in ceiling behind a downlight. Only challenge has been how to control it - currently on a lux but that is not sensitive enough and is on all night. Going to switch to a PIR at some stage.
 1 point
 -
Its 80kg and going nowhere.... Vibration is minimal and tbh they don't really need the feet, I just wanted it clear of the ground.1 point
-
There's always a first time!1 point
-
Last couple of jobs with Staff blues,I tried painting them with Linseed Oil immediately before laying. Comes up a treat,gets all over your gloves & tools though!1 point
-
if only i had told you earlier1 point
-
Yep but don’t get joint filler and joint cement confused joint cement is very fine1 point
-
@pocster does mine:1 point
-
For absolute final filling, easifill normally will suffice if your painting ( then rubbing down the paint as a fine filler ) Toupret is the best I've used so far. You can accelerate the drying times with a hairdryer without compromising the filler and it feathers out to nothing ( unlike the joint filler which is coarser by comparison which 'maps' around the edges sometimes.1 point
-
Mind made up, FGHR it is, going for Atag iC Economiser 27, install either end of week or beginning of next1 point
-
I think I suggested this before, but submarines used to have a timed shower valve that would sort this problem out. You pressed a button and got just enough water to get wet before it shut off. You then lathered up with a flannel, then pressed the button again and rinsed as fast as you could to get all the soap off before the shower shut off again. Pressing the button again did nothing, you only got two shots of water for each shower.......................1 point
-
So the week that I was under pressure to order the scaff, my other half was doing jury duty. She obv. wasn't allowed to say anything at the time but the trial was guys from a local scaff firm who were up for burglary and receiving. Luckily I was talking to a different firm....0 points
-
During the winter my stove comes on in the morning and if any stat calls for heat it will take what it needs. Same goes for the evening. Stove fires up and heats my thermal store and if needed it will go to what ever room where it is needed. I will be in 4 years in September and have no cracks in my tiles or solid floors so heating up and cooling down regularly won't cause any damage. What are you going to be using to heat your house??? You can use the blending valve to set the water temp going in to suit your needs. Can be anywhere from 25 -55 degrees. Depending on what your heat losses are well determine what yours will be set at. Mine is set for 35 but each system is different and it's easy tweaked once it's in and running. So you can have it set at a lower temp like 25 so it comes on more often to keep the temp in the room at 20 degrees or run it higher so it takes 3-4 hrs to get to 18 and then you come home and enjoy it getting to 20. My and my dearest have the usual stat wars every winter where she puts them up to 22 and I turn them down to 20.0 points
-
My mistake was doing it all sober.0 points


.jpg.c21f3ac78c9b7efd90cbdcb312744dc5.thumb.jpg.7adcad4c0e384f5ecd7d56b0618df6e5.jpg)


