Leaderboard


Popular Content
Showing content with the highest reputation on 03/28/18 in all areas
-
You really are a worrier. Screed is usually about 3-1 so just stick with what you originally planned. Im concreting Saturday as well. Iv even booked the pump so there’s no turning back now. :-/ also got to be out for lunch by 2:30 so hopefully I can get an early start on it.3 points
-
We did the same and it's perfectly legal and adequate. In fact the garage didn't get used, as the house shell was up very quickly and so that was used. Before that, we just had a portaloo with hand washing facilities, plus a 25 litre container of drinking water and the ground works blokes had lunch etc in the cab of their diggers/truck. I found that around 80% of the people I had on site preferred to sit in their van to have a break anyway, even when the house was almost complete and I'd put folding chairs, a makeshift table and tea and coffee making facilities in there. I did have a first aid kit on hand, plus a plastic box full of spare PPE (no one used it) and a laminated sign with the phone numbers and addresses (with directions) for the local GP, dentist, shop, A&E etc.2 points
-
Another day, yet another little gem of learning. I've been getting a bit worried because although I got the bat licence last week, my glacial paced architect had done nothing about getting the pre-commencement planning conditions discharged for several weeks, even though everything was in place for some time. But that's another grumble for another day. Anyhow, I've got to get the roof off by the end of April, which is why I was getting my proverbial knickers in a twist over the pre-commencement stuff, so I decided to cut out the middle man and rang the planning officer to ask whether, pleeeease, nice Mr Planning Officer, would you mind awfully, as you're such a nice chap, if I sort of, kind of, well, take the roof off the bungalow to make sure no pesky bats come back? Pretty pleeeeeease? Nice Mr Planning Officer said 'no problem at all, no need to grovel, you are entitled to re-roof your house any time you like. Just because you don't get around to putting new tiles back on, that doesn't stop you taking off the existing ones to begin with. Now stop grovelling.' He didn't really tell me stop grovelling, but his tone implied it, along with the strong impression that he couldn't care less about the bats. Either way, result. Fate being the fickle creature that she is, but no more so than the aforesaid architect, I got an email from the architect's admin person late this afternoon to say that they had submitted for discharge of the initial planning conditions. I prodded them with a very sharp stick on Monday morning - the architect has possibly just taken this long to notice. I'm waiting to co-ordinate availability of ground worker and bat guy over the next 2 weeks, then off comes the roof. Followed by the rest of the house shortly afterwards, with luck.2 points
-
WhadaPlonka I'm really tired. I'll take the hint and stop for the day. The next mistake will be worse. Cheers @Dudda2 points
-
Are they not long side diagonals? For the 8" side not the 4" side?2 points
-
There was an extensive and involved thread on this last year: https://forum.buildhub.org.uk/topic/2376-principal-designer-role/ And a good summary of the thread by @recoveringacademic, here: https://forum.buildhub.org.uk/topic/2514-cdm-2015-and-the-domestic-client/2 points
-
This post is summary of the Principal Designer thread. The purpose of this summary is to assist members and guests decide for themselves how CDM2015 impacts their build project. The summary is offered as is and should not be interpreted as authoritative advice. As is normal in asynchronous online discussion, the thread sometimes changes its focus a little. Where those changes occur, the content has not been summarised. Discussion of this issue is particularly relevant to us because we are a self-build forum, whose members are assumed not to be professional builders, or -in relation to building- have any technical understanding or capability beyond simple DIY . To be clear, the following assumptions are made; · A client is a Domestic Client. The distinction is central to all that follows · The Domestic Client can choose to apply for VAT relief in due course, whereas a Client cannot · The Domestic Client is not engaged, or about to be engaged, in a business related to the build (because they will then be a Client, not a Domestic Client) The thread started with a question about the role of Principal Designer. The examination of that question inevitably lead to discussion about how the role related to other key aspects of the legislation. There was some reference to the history of Health and Safety legislation, but it was pointed out that over time, the general emphasis had not changed. If you qualify for Domestic Client status, then a contractor working for you carries the main responsibility for Health and Safety. It was in the detailed examination of the term ‘responsibility’ that a good deal of discussion arose. Several members agreed that the legislation was poorly drafted for our sector of the market. And in the context of a self-build forum, where many of us will be doing things for the build on our own (DIY) as well as employing contractors, it is easy to see a rich source of confusion. For example, self-builders might be tempted to become involved in the build in a way which implies technical competence and so enhanced H+S responsibility. A strong warning was given to self-builders to avoid becoming involved in technical aspects of the build to the extent that they might be considered ‘ a responsible person’. And that includes the self-builder being trained in a relevant build subject to the extent that he or she might be assumed by the courts to have more responsibility than a Domestic Client would be expected to have. Perhaps the simplest articulation of how CDM responsibilities can be operationalised was in this post (@jamiehamy) ‘… We have only used contractors for the steel frame, lifting in floor beams, ground works/drainage and electrics - and each time I've made it clear that the contractor is responsible for operating safely and I do not dictate how they complete the activities. I don't supervise on site and most certainly do not manage their work or how they work - they have a deliverable and it is their responsibility to complete that. Where required, I offer safety equipment, ask what they need me to provide to work safely and healthily, I find out if they are dependent on me for anything and let them get on with it. Maybe I should do more in writing but I choose reputable contractors and all work is fully invoiced…’ In terms of prosecution for H+S breaches, providing the Domestic Client has fulfilled their duties (not covered in detail in this summary) prosecution is highly unlikely. Domestic Clients should make sure the site is safe and secure, tidy and clear of obvious hazards. There was some discussion based on the meaning of a series of CDM-specific terms; Project Manager, PD, PC, Client, Domestic Client, Business or Business Activity, Contractor, design, designer as well as others. Please refer to the full discussion for a more detailed discussion. But it was convincingly argued (with supporting evidence, and some unevidenced dissention) that a Domestic Client cannot be either a Principal Contractor or Principal Designer. Additionally, there was some discussion of official legal documents related to CDM2015. In summary: be sure to understand the meaning of the term Domestic Client, and to maintain that status throughout the build. Any competent person with whom you have a contract to complete work on your site should be capable of working safely. Offer support to fulfill H+S requirements, but never offer advice or direct work or manage the process. If, after reading this summary you feel you need to, take care to seek advice from more than one reliable, authoritative source. Paying for advice does not guarantee its accuracy or authority. Source url forum.buildhub.org.uk/ipb/topic/2376-principal-designer-role/ Bibliography. HSE (2015), Managing health and safety in construction. Construction (Design and Management) Regulations 2015, HSE Books downloaded 04/05/2017 http://www.hse.gov.uk/pubns/priced/l153.pdf See especially Appendix 6. HSE (2015), How CDM 2015 applies to Domestic Clients Appendix 6, Figure 1, in Managing health and safety in construction. Construction (Design and Management) Regulations 2015. Download the flow chart (from our server) here HandSforDomesticClients.pdf HSE Construction Discussion Forum (accessed 04/05/2017)2 points
-
We have a passive-class house where the net heating requirement to keep the house warm in the coldest winter months is approximately 1kW. The only heating system for doing this an underfloor heating (UFH) system base on 3 ~100m UFH loops buried in our passive slab. That's it; no upper floor systems; no towel rails; nothing. The reason for this is that our timber framed house is super insulated and air tight so there is very little temperature variation throughout the house, but that's all been covered in earlier posts. What I want to do in this post is to provide a simple explanation of how I am going to heat my house and how this works so that John (@joe90) and other forum members understand my approach. This basic heating strategy was first evangelised by Jeremy Harris (@JSHarris), but variants have been adopted by other forum members and their consistent experience is that it works and works effectively for this class of passive house. However, what I am doing is a slight variation on Jeremy's approach: I am using the slab itself as my main heat store, so no buffer tank. I will be heating it by circulating warm water through the UFH loops and this water will be heated by a simple small inline 3kW electrical heater element. The heating charge will normally be done as a "chunk" once per day during the E7 cheap rate period to take advantage of low tariff rates. However, I am also including in the design provision for the later addition of an ASHP, should the heating data collected over the first year show that there is a 10-year payback in doing this. As I said, Jeremy's approach has been well documented by him in his blog and by others. He has recently described that his system settles down into a repeating pattern over the colder winter months winter where his heating comes on for a few hours once a day in the early morning, and the heat in the slab is topped up during this period. This is broadly what I call "chunk heating": unlike a traditional house central heating system which is turning on and off pretty continually, the heat losses in our type of house are so small and the house has such a high thermal inertia that you can heat the it practically with a single daily top-up to the slab; this heat then "trickle feeds" into the house over the day. Yes, there is a slight residual ripple on the temperature in the house, but this is less than a 1°C undulation over the entire day and so this isn't really perceptible to the occupants. I am adopting this same approach, but shifting my heating period earlier so that it ends at the same time as the E7 low rate tariff ends. The main difference in my implementation is that I am heating the slab directly without a buffer tank. I wanted to get my head around this before committing to this decision, so I modelled this in some detail and covered all of this physics and modelling stuff in my Boffin's corner thread. This modelling has persuaded me that the mechanisms and dynamics of heating are pretty simple, and so in this post I want to cut out all of the equations and stuff (with one exception) and focus on describing what happens in plain terms. First, I am using a small 3 kW electric element to heat the water circulating in the UFH loops (the same type is used as a hot tank immersion heating element). Just like an electric shower this heats the water stream a step in temperature. Sorry I am a boffin, so I will call this temperature change ∆T. (BTW, the triangle is just the Greek letter D and is short for difference; blame Isaac Newton for that one.) Just like an electric shower, double the power and ∆T doubles; double the flow rate and ∆T halves, and if I do the sums for a typical flow throw my UFH loops, and for a 3 kW heater then ∆T works out at about 1.6°C for my system -- a lot less than a typical gas-boiler fed UFH installation, but my heater is puny in comparison. So if I start pumping 3kW of heat into my slab, then the system settles down after about 10mins and the heat output is pretty much the same along the entire 3 × 100m runs of UFH pipe, pipe work, that is each 1m of pipe dumps about 10W of heat into the concrete. This lifts the temperature of the concrete, and at the same time cools the water in the pipe pretty steadily along its length so it comes out at 1.6°C cooler than it went in. But cooler or hotter than what? The heat flows radially away from the UFH pipe creating a thermal gradient. [Boffin bit warning, and the only one] this gradient is pretty close to what is known as the steady state radial solution to the 1-D heat equation, which has a formula Tr = Tp - A.log(r/rp). where T is the temperature and r is the distance from the pipe centre, with the p subscript relating to the pipe/concrete interface. The A term is a function of the amount of heat flow. The main thing to note here is the general shape of this gradient: the temperature of the water ends up roughly 4-5°C hotter than the slab average for this sort of 10W/m value, and the temperature in the concrete falls away rapidly as you moving away from the pipe towards the average slab temperature. Since the volume of concrete goes as r2, the actual proportion of the concrete more than 1°C hotter than slab average temperature is small. So the overall effect of the heating is to slowly lift the average slab temperature. There is also a general heat gradient along the water in the pipe but once you get more than a few cm from the pipe centre the concrete is all within 1°C or so of the slab average. There are also local hot regions around the UFH pipes up to 5°C or so hotter than the overall average slab temperature. However, this is factors less than you will get with a conventional UFH system. A key difference of Jeremy's approach is that the water continues to recirculate after the heating is turned off, and now the water flow acts to redistribute the heat rapidly along the pipe levelling the previous 1.6°C gradient; at the same time (without the heat being pumped from the UFH pipe) this central warmer region rapidly flattens out as the heat flows outward, and within an hour or so hardly any heat variation remains and the entire slab is within ½°C of the slab average temperature. A good analogy here is pouring water into a bucket: the surface level steadily rises as you pour it in and the surface itself is a bit churned up by the act of pouring, but as soon as you stop pouring, it rapidly levels out to flat surface. OK in a real slab this is also complicated by the deep elements (the unheated ring beams in my slab are over a third of the total volume) and the heat does flow into these largely thanks to the high thermal conductivity of the rebar. But overall, the slab is acting as a heat battery soaking up the power that you pump in. The trick is not to put a somewhat arbitrary limit of the maximum input water temperature (say 25°C) as this will limit the amount of power that you can apply. This heat gets quickly spread uniformly throughout the slab. By the end of the heating period, the slab is 2°C (or whatever) warmer than the room temperature, and is starting to transfer heat into the room fabric at ~15W/m² whilst itself slowly cooling. This is more than the external heat losses in the house, so this heat both warms the air and the rest of the wall fabric. This creates a very slow rise and fall in the room temperature over the course of the day -- of roughly 1°C. But so long as you put in enough heat each night, the overall house temperature remains stable. So how much is "enough" heat? In my case I use a very simple strategy. I am using the UFH circulation temperature at midnight as my test. If it is less than the previous night, then I add a bit more heat than last nigh and v.v. Simple really.1 point
-
Having spent a couple of hours reviewing the excellent CDM2015 mega thread and the synopsis by @recoveringacademicpinned at the top of this forum topic, I want to test my knowledge of CDM2015 as it pertains to my self build scenario. I will attempt to demonstrate my interpretation of the regulations through an imaginary conversation with an H&S inspector who has just arrived for a surprise site visit. Preamble: Let's assume the following build history. (1) Simple brick and block 2-story house 3 bed house on a level site. (2) The walls are now 9ft high and scaffolding is up. (3) I have done 85% of the work solo. (4) On the day of the site visit I am the only person on site. The H&S Official (HSO) arrives. HSO: Hello can I speak to the site manager? ME: There is no site manager appointed, can I help I am the owner of the plot. HSO: I really need to speak to your main builder or project manager. I am conducting an inspection of this site under H&S regulations. ME: There is no main contractor or project manager, I am doing everything well virtually everything. HSO: This does not sound plausible, anyhow we have been advised there has been a failure to notify this build to my office. ME: I consulted your regulations at the start of the build and concluded notification could not be submitted because I am a domestic client and there was no person functioning in a CDM role qualified to submit. ME: I had intended to make an enquiry with your department how to submit as my situation seems to fall through legislative gaps. HSO: I do not find your answers acceptable I need to speak to the appointed principal designer with regard to CDM 2015 compliance. ME: I read through the CDM 2015 regs before the build commenced and concluded the regulations prevented me from appointing a principal designer. HSO: Do you expect me to believe the house designed itself! ME: No. I designed the house using public domain references and guidance however I do not conduct business as an architect or structural engineer and so your regulations deem that I am not a suitable person to appoint either myself or another as the principal designer. I am just a computer programmer. HSO: How did you get building control plan approval? ME: I must be a clever computer programmer, I also paid a semi retired builder to review my final plans but his role was brief and tangential, it did not involve creative input. HSO: You are telling me this build has progressed without a main contractor, principal designer, architect or any appointed overseer of CDM 2015 compliance. ME: Yes. I am equally surprised that your regulations resulted in such an outcome, I was looking forward to undertaking the role of principal designer with its associated CDM compliance function on this site but your laws prevented that. To be continued... Would I be heading for jail?1 point
-
I am following progress on a single build new my home, no site office or portaloo, just a pair of brickies who have got the walls to 10ft now. There are diverse degrees of regulatory conformance out there in the real world with fencing, signage and a portaloo seeming to be the consensus minimums.1 point
-
If you had loads of space you would have a full size container and a small office/wc. The storage container is essential for first fix items like pipe, electric cable, windows and tools that might be on site before the building is secure. My builder told me he never uses an insulated or heated office because he said it encourages people to sit around drinking tea in winter.. I think the key thing is can you park a container and static van on the drive and still get a lorry with crane offload past it to the house? Heavy vehicles coming and going may churn up that side of the driveway, perhaps requiring hardcore to repair. So make sure you won't want that area to be a flower bed later. eg Put any temporary road where the final road is going so you don't have to rip up hardcore later. If the drains and other services are going down the driveway perhaps put those in early on then put the storage container/office on top?1 point
-
The key issue is that CDM (all variants) is intended to be an industry regulatory mechanism, and the creators of it just didn't consider self-builders as being within the industry, but they also failed rather dismally to make their intentions with regard to the relatively small number of self-builders clear. It's a pretty typical bit of poor government regulatory drafting work, where not all groups that could be impacted by the regulations were consulted properly. This is a common failing in government; they are required to produce a regulatory impact statement before getting draft regulation approved, but have a nasty habit of leaving out some who could be impacted adversely by the regulation, and only dealing with these "anomalies" afterwards, and then often rather inconsistently. Thankfully there is a clear, if somewhat tortuous, path through CDM 2015 that, after you've joined up a lot of dots, does result in a clear outcome, which is that, in essence, a self builder is a domestic client and therefore cannot have any appointed responsibilities under CDM2015, and might find themselves creating more problems if they tried to do so, as they might well be putting themself in a position where they could carry liabilities as a commercial client, for which they neither had the expertise or indemnity cover protect them, rather than the very much lower level of responsibility that a domestic client carries under the over-arching health and safety legislation, of which CDM 2015 is a part.1 point
-
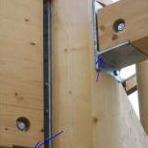
Yep, that'll work! Some surplus 40x40x1 angle cut, bent and sprayed. Should allow me to get the falls spot on as per CAD: This side needs a tweak:1 point
-
Work it all off...then put it all back on, nice! Ebb & flow, yin and yang.1 point
-
I'm sure I will have a few barrows spare if you wanted it, Its only gen 3 so might not be up to your standards, as for cheating, iv got 9.9 m3 to lay, by myself, in one hit before lunch, there will be a lot of swearing if the lorry isn't here before 81 point
-
As Caravans are highly recommended on the site too. Works for welfare. Combine with a 10ft container for storage and you're good. If you're like me an a caravan is off limits, you can get 20ft and 25ft containers that will serve both as welfare and as storage. A bare-bones a container is about £1.5k, which you can then line with some basic insulation and plywood to make it comfortable. Only issue is then installing anything as you'll have to cut into the skin, which you may or may not have the skills/tools to do (I dont!). Alternative is to buy 2nd hand units off ebay or get one built for you. Unfortunately none of that is cheap! https://www.shippingcontainersuk.com/brands/shipping_containers.php http://www.groundhog.co.uk/index.php As @lizzie mentioned, getting a garage or shed built out quick is a good way to get welfare and storage sorted. Two birds, one stone.1 point
-
The thing that really bugs me is the massive inconsistencies across planning, conservation and building regulations inspection. The systems are well and truly broken when, as discussed here frequently, some individuals are made to jump through a near-impossible series of hoops, whilst others seem to get what looks like a free pass through the system. There needs to be a root and branch reform of all three areas, with standards that are regulated and maintained so that they are common across the whole of each country within the UK. The fact that one town can approach approval of something in one way, and another a few miles down the road can approach approval in a totally different way, is just farcical, as well as being exceptionally frustrating. In my case I found both the planning officer and the first and last building inspector brilliant, the first conservation officer was an ignorant PITA who didn't even know what common building materials were when standing in front of them, the Environment Agency were a total PITA over run-off from our site to the adjacent stream, but were more than happy for me to run sewage treatment plant effluent into it, and generally caused me a lot of pain and grief over levels for flood protection that were, and are, barking mad, when you look at the true risk (rather than that which a bunch of undergrads did as a project, which is what they used...........).1 point
-
I usually reply to BCO points with inline answers in red, and I see their numbered list as an easy way to clear all outstanding questions in one go. In other words, if they send this kind of list, it means they're doing me a big favour and making it easy to respond without having to re-issue all my drawings. I'd be interested in your thoughts on it. Indicative answers : 1. Please provide details of the fire resistance to external walls within 1.0m of the boundary. This should be in terms of its minutes of fire resistance from inside and outside. 30 mins inside (1 layer plasterboard). No resistance outside - that ship lap is gonna go up like a bonfire. 2. Please provide design specification for the proposed MVHR ventilation system. We have a layout but need the design details. See attached PDF for the spec of the Zehnder ComfoAir 160 (A+ class). 3. Please confirm the provision of network access to the new dwellings. Wi-fi booster from study in original dwelling. 4. Please provide design details for the proposed staircase, and guarding to low level glazing. Standard Keyclamp handrail at 900mm high, brushed red oxide finish (see updated section attached). 5. As an extra item I picked up, please can you confirm that Bedroom 3 will have an escape window as it is an inner room. Room will only house teddybears, nevertheless see updated roof plan showing velux.1 point
-
SWMBO would bring her dinner up looking at that...as would I. She'll be happy with the magazine fed loo roll holder in stainless steel! As for tight and pert.....two kids put paid to that!1 point
-
Factor in for aluminium spreader plates as the difference is chalk and cheese.1 point
-
I think storage is self explatory. Welfare is the toilet and hand washing. I didnt have a site office. We build the garage first and that serves as office and storage, got a fridge and a kettle in there along with first aid kit. Other than that just a portaloo with hand wash facilities. I didnt need or want a caravan on site.1 point
-
Perchance?
 1 point
 -
Its what you have. Making the best of it is the trick. I have a reasonable site with lots of 'space' which I cannot use. But one side of the site I have about 8 meters for storage space. So I found some stillage cages and bought about 10 or so. Made some shelving out of scrap. Got some scrap corrugated sheets and made some roofing for it. That means I can stack light-weight stuff on the top shelf and heavy things on the bottom. Ladders can be stored on the tin roof. Doubles the storage volume, but much more importantly, I can easily see where stuff is.1 point
-
Can you squeeze that 8M to 9M? A small static caravan such as the one we have 28ft by 10ft (8.5 metres by 3 metres) might fit and would provide all your needs. You can get smaller static 'vans but they are not so common. An old (and hence cheap) large twin axle touring 'van might be a better bet.1 point
-
Or they could do like probably 90% of the trades we had onsite and refuse to use any form of PPE. I'd say well over half of the people we had onsite wore trainers. My worst memory was trying to hand a youngish guy a set of ear defenders and face mask while he used a petrol diamond saw to cut a load of blocks. He refused because they were "uncomfortable" and he didn't have that many to do. My ears were ringing just from the 10 seconds I was standing nearby waiting for him to finish a cut. He was cutting for 15 mins straight. I can't comprehend people not being interested in their own health.1 point
-
On a former job I visited a factory regularly. Visitors had to wear steel toes and if you did not have your own, they provided a pair of very uncomfortable steel toed wellies. So I got my company to buy me a pair of steel toed shoes for the next visit. When I told my host at the factory my shoes were steel toed, he stamped on my foot to "check" I was telling the truth. My boots on site have saved me many times from standing on a nail (steel insole) probably more times than the steel roe caps have done anything.1 point
-
There's an enormous variety of safety footwear including shoes and trainers, see the Screwfix site for a confusion of choices. You don't have to use boots if you don't want to. The most recent pair I've bought are these https://www.screwfix.com/p/site-slate-safety-chukka-boots-black-size-9/59707. They're quite light and comfortable, although the laces don't last long. Not wearing safety shoes on site is pretty foolish.1 point
-
There's a free PDF document of the HSE's guidance to clients, designers, contractors -- maybe you were thinking of this one?: http://bit.ly/CDM2015_guidance The one I tend to send to new contractors or clients is the easier to digest "A short guide for clients on the Construction (Design and Management) Regulations 2015": http://bit.ly/CDM_short_guide @laurenco I would be careful to check what roles you are expected to carry out, as you might find yourself responsible as Client, Principal Contractor, and Principal Designer all in one!1 point
-
That was a key decider. I'm doing so much ladder work and klettering aboot the place , and will be for a year or so, that decent footwear is key. The bridge under the foot arch is well made too. There is so much poorly made work clothing around : it's almost as if the construction sector doesn't care about it's workers. It's very poor.1 point
-
The UFH pipes needs to be filled when pouring the slab anyway (manufacturers instructions). I'm guessing that the problem in this instance was insufficient staples/fixings to hold down the pipe. I know it's not much help in this instance but you have to try and not mix diy work with contractors if you want to be able to have some comeback. Bodgit builder will have a ready made excuse that he didn't prep the floor if you ever try to sue him.1 point
-
as @Dreadnaught says I have even described all this in my blog posts, so all you need to do is to read this, and ponder what I say. Make a point of reading the referenced posts which go into a lot of detail including my mathematical simulation of the system to determine its operating characteristics so that was I confident that the system would work this way before I implemented it (and the first commission tests validate the model). We have this as our sole source of UFH heating and at the moment we are at a comfortable 22°C with a ½°C ripple over the day using 17½kWh of heating at E7 for a large 4 bedroom passive class house. Hence my recent post: But to your specific Qs: Does it need an additional expansion vessel adding to the system? It add an extra ~1ltr of water in the UFH circuit, so No. If I install the device just before the UFH manifold, would extra valving be essential to prevent the UFH pump running the return water through the boiler circuit all the time? Again read my posts and have a look at the photos. I have my Wilis effectively on a 15mm bypass across the UFH loop with a PHE on the other branch. No valves, but the flow runs roughly 50:50% through the two branches. That's on the warm loop side in a boiler mix-down implementation. I don't have a boiler, so my TMV is just cranked open. It is entirely redundant and I've only got one because this was the cheapest Wunda config that suited my needs. If you read the physics of this then you will see that this isn't an issue. I have a BS1820 temp sensor buried in the slab, the control circuit seems simple ... Have I missed something? What a bizarre type of sensor. A lot of people do this and for the life of me I don't understand why. I've already got this remote sensor which integrates the slab temperature by UFH zone: the UFH flow loops. I have ds18b20s on the out and return of each loop. Simpler, easier and a simple way to balance the flow through the loops as well. OK, so I have lots of ds18b20s measuring just about everything, but at £1.50 each this is hardly breaking the bank. On your supplementary points: If the UFH pump failed the Willis unit dual thermostats will cut in and switch it off. Eh?? This isn't a failure point; it's an essential backup safety feature. If the slab temp sensor fails the floor could get too hot so an extra temp sensor on the manifold could verify the return UFH water remains within acceptable limits. Yes, which is why you should always monitor your flow and return temperatures and include cut-offs in your control system. If you are too mean to spend the extra ~£6 on doing this per loop, then by all means do it on the manifold out and return. I am not sure that you are using for your automation system but your inclusion of Javascript-like pseudo-code suggests that you are reasonably IT literate. My HA is based on a single RPi3 with SSD running Node Red. All of the IOs are done by two (soon to be one) ESP8266 modules USB-serially attached to the RPi (so the core DHW + CH system is independent of our Enet Hub + Wifi). I do use other WiFI-connected Wemos modules for nice-to-have remote sensing. I run the NodeMCU Lua subsystem on my ESPs and talk native json to Node Red, though I also run and use a MQTT broker on my RPI. The support that I get on the Lua system is excellent (but that's because I on one of the core developers on the project ). By far the most expensive bits in my system are the 4×Crydom SSRs, but that's so my sparkie could sign off the 240V side and keep my BCO happy. The rest cost < £100. Not a virtue; just no point in spending any more. Yes, it has involved a lot of personal time, but it's my hobby project, and my son-in-law is into all of this shit as well so he's my SPoF backup.1 point
-
I’m in the best doing it your self camp, but my wife wants things done quicker. I’m currently fixing the reinforment steel for my basement, I’ve got two local guys helping me, they weren’t impressed when I insisted they get into their waterproofs and get stuck into some work during two hours of heavy rain this morning. Apparently I’m a slave driver!1 point
-
@recoveringacademic You should have a read of our old mate Ed Davies blog, he has similar issues. https://edavies.me.uk/2015/09/drill-test/ Re the welding. Remember that bit of uphill I did for a laugh.1 point
-
You shouldn't be running around at all....it's massively overrated Havent you already got 2-port zone valve(s) fitted for the space heating and the uvc ? If so, just fit the Willis heater into the UFH return, at the manifold ( eg before any other parts of the system tee in / out of the UFH primary pipework ) and then tee the return back into the UFH flow via another 2-port ZV. That way the hot water created by the Willis heater travels the shortest distance and doesn't risk any nuisance tripping of the internal overheat stat as it'll never see the high flow temps of the boiler flow. The power to the immersion opens the Willis 2-port ZV and as the heating and hot water should be off at the controls ( by design, amended at the time of the Willis heater being installed so they don't have any conflict ) the UFH manifold pump will simply recirculate through the Willis, through the ZV, and back into the manifold blending valve. The casualty will be the stat in the Willis which will work a bit of overtime but their cheaper than shoplifting so not a real worry. I think the heating would consume what's being generated pretty much as it's being generated, or near as damnit, so a few quid for a Willis would be where I'd start the research. Buffer tank ( perhaps with DHW uplift coil ) would be my get out of jail card if the Willis wasn't conveying enough of the generated PV to space heating. Having DHW uplift in that buffer would give you oodles more DHW when space heating wasn't needed / significant. At this late stage I'd want the retrofit to be as least disruptive as I could make it, hence my first suggestion. I'd even just look at the ground floor and not the whole of house space heating as the ground floor slab should do most of the work anyhoo. ?1 point
-
My extension has got 6ft of blie bricks below dpc owing to the sloping site. When we got near dpc the brick said "we'll need a foot of scaffold" meaning scaffolding so they could work from dpc level upwards1 point
-
@TerryE has commented extensively on such solutions. I suspect he will be along shortly.1 point
-
YES!!! You only need one bag FFS1 point
-
Strip foundations wouldn’t usually be poured right to the top of an excavation,meaning the very top of the dig can be scraped back to prevent lumps falling in. +1 to the typo theory. Sometimes us brickies get what’s known as a ‘blocking lift’ just below Dpc,normally if the distance from Dpc to ground level is unusually high or if there is a big difference in ground level around the site.1 point
-
I use safety trainers. https://www.screwfix.com/c/safety-workwear/safety-trainers/cat850528?cm_sp=managedredirect-_-safetyworkwear-_-safetytrainers1 point
-
PEX is pretty resistant to most things. FWIW I'd not cut the pipe and fit a joiner, I'd make up a small mould around the affected area and pour in some two pack PU potting compound. That#s good enough to seal up high voltage underground electrical connections, and will be a belt-and-braces job around that scuffed section. There are loads of places that sell the two pack PU resin, and it's all pretty much the same. It has a little bit of "give" in it too, so won't be bothered by any slight expansion as the pipe warms up. If your stuck for a supplier, then try Rapid: https://www.rapidonline.com/robnor-el116h-bk-500-thermal-conductive-polyurethane-resin-500g-87-0224 or TLC: https://www.tlc-direct.co.uk/Products/SWJKRESIN.html You'll probably need a couple of the TLC kits, maybe three, to get enough resin to fill the mould. Make the mould as tight to the pipe as you can - it it were me I'd try and make a mould from a bigger bit of pipe with a slice cut off, slid over the UFH pipe with the top open and the ends taped tight to the UFH pipe to stop the resin leaking out.1 point
-
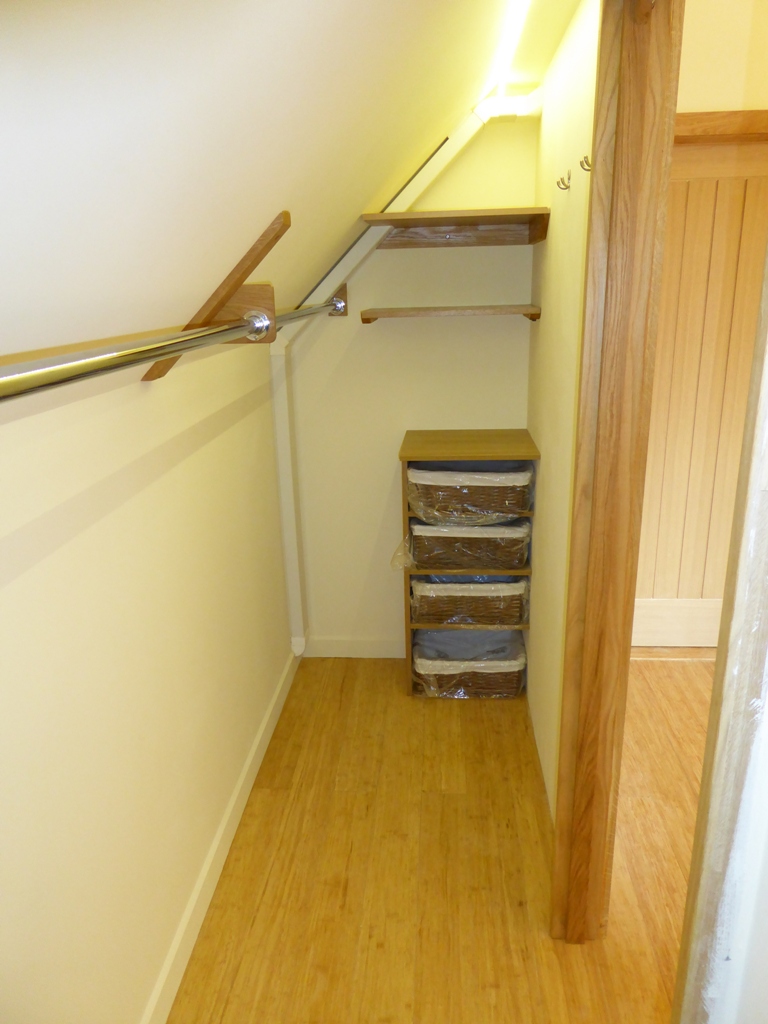
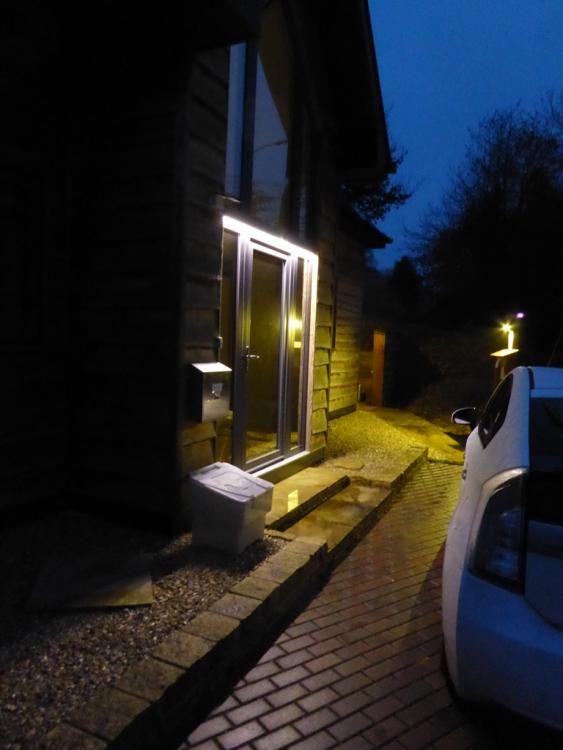
I've used lots of LED strip, ranging from these inset into the rain drip groove on the joining cill above our front door: to strips under our wall units in the kitchen, to locally light the work surfaces. I also used long lengths to light up our walk-in wardrobe, set right up in the apex of the ceiling: A couple of weeks ago I fitted long lengths in our eaves storage areas, just to make it easier to find stuff. I've also fitted strips under the shelf above my workbenches and in the cupboard under the stairs. Generally, the lower powered stuff doesn't really need a heat sink at all, and I have found no difference at all in terms of quality from LEDHut or a couple of Ebay sellers. I had one duff roll of 5630 warm white strip (the stuff that I used for the light over the front door), where the bonding between the main flexible PCB and the secondary flexible PCB underneath it (the one that's there to take the higher current of 5630 LEDs) was poor, but that was easily fixed by just gluing the separated parts back together again. Only the section outside, over the front door, is effectively mounted on a heat sink, as it was exactly the same width as the groove in the alloy cill (which was a bit of luck). What I have found is that the self-adhesive tape is fussy about what it sticks to, but the fix I've come up with for all the strips where you can't really see them directly is to stick a layer of aluminium tape down first, then burnish that with something very smooth so it bonds down well, and then stick the LED strip to that. Not only does that give a much better bond, but the aluminium tape adds a bit of back reflection (and a very tiny bit of heat sinking). The major difference between these strips is in the type of surface mount LED they use and the colour of the light. At the very low output end there are strips that use 3528 LEDs, which are not at all bright, but OK for places where you just want a very gentle light. I've used some low power 3528 strip as outside lighting, solar powered, like all out outside lights (including the strip over the front door) and they are good enough, but only really as light to mark the edge of the drive. Next up come the 5050 LEDs, and these are pretty good general purpose lighting - the wardrobe above has warm white 5050 strip. Top of the light output seems to be the 5630 LEDs, and these are what I used above the front door. They are very bright, but they also draw a lot of current, and for long lengths they either need to be fed with power at both ends or they need to be the type with the extra flexible PCB bonded under the main one. It's hard to tell without getting samples which is which. As a final not of caution, then choose the 12V power supply for these carefully. Some of the cheaper ones can emit a fair bit of RF interference, creating noise on radios and interfereing with wireless remote controls. Also, I made the mistake of using some dimmable electronic 12V DC halogen light power supplies, and these do not put out clean DC, but rather pulses of DC at a high frequency. There was no radio interference, but the high frequency flicker was noticeable when you made a sudden head movement, and sufficiently annoying that I ended up replacing them.
 1 point
 -
My view is that this thread has now run it's course, and that the summary that @recoveringacademic has carefully compiled here: should be considered to be the definitive source of information for self-builders. For those who are not self builders, but who are building as a part of a business, and so are bound by CDM 2015, as they are not domestic clients, then I would suggest that it is very unsafe to rely on information from an internet forum when it comes to getting legal advice. I'd also add that relying on any legal advice obtained from someone not practising law is also inadvisable. I've seen several accident cases where individuals made assumptions as to their liability based on advice obtained from the media, friends and even consultants, that proved to be wrong and ended up costing them dearly. Self builders are, by definition domestic clients as far as all building-related legislation is concerned, and the guiding principle to be remembered is that legislation aimed to improve the safety and welfare of workers on construction sites, in whatever statute, is not intended to apply to someone who is a domestic client. The sole exception to this is the law that covers each and every one of us every day, with regard to the reasonable duty of care we each have to each other. It is worth remembering that the word "reasonable" has no definition in the law of England and Wales (not sure about Scotland and NI, but I think it's the same). If you are an ordinary citizen, with no specialist training or knowledge, then what is considered "reasonable" in terms of your actions or inactions will be judged on that basis. As soon as you seek to acquire recognised skills and knowledge that means that a court may consider that you have an enhanced duty of care your liability increases. As an example, I used to teach electricians at technical college many years ago, and for years held a ticket myself. Even though I no longer hold a valid chit to work as an electrician today, I would still be considered by a court to have a higher duty of care to others in terms of electrical advice than someone with no such experience. It's the reason I spent a great deal of time clarifying certain points in my blog, after making a typo here that was picked up on and used to condemn me as giving dangerous advice. I felt strongly enough about making sure that my own liability was reduced as to not only quickly correct the typo but also to spend three days writing two articles to clarify things. Those articles were not written from the goodness of my heart, they were written to reduce my personal liability!1 point
-
Thanks Terry, that all makes perfect sense ( it's just the boffins maths that I didn't understand!). I am doing exactly the same really although I do have a heat pump (bargain of the week on Ebay) but my ethos was heat the slab overnight when the lecky was cheap knowing it will switch itself off when a set air temp was reached. Hopefully this will last all day, if not we will light the wood burner to sit round in the evening or manually kick the ASHP on to top up the UFH. I didn't apply any maths, perhaps just gut feeling and a hope it would work. In fairness everybody is telling me Devon is mild enough that very cold weather won't last very long at all hence the electric panel radiators upstairs instead of UFH as the outlay would not be worth it. Jeremys situation where microclimate meant more than weather modelling ( cooling being more important than heating) makes me think that I have to " suck it and see" . Whatever the outcome this new house will be sooooo much cheaper to run than the present uninsulated house than I can't wait to get out of.1 point
-
Been a bit quiet on BH as I've been busy elsewhere - rectifying Bodgit Builder's attempt at laying my concrete floor. I started a thread about that here: Having taken ages to lay my circa 300mm of EPS and mesh-tied UFH pipework, I was keen to get a professional in to get me back on schedule and pour a flat, level concrete floor. No top layer screed. A few local companies quoted, one stated that they could not guarantee the pipework so I didn't go for them and the others I had simply had no faith in. I ended up contacting a local architect's firm and they recommended I contacted some of their regular builders. A couple were either too busy or candidly said that the job was not for them. The other chap came and quoted me for the job with the assurances that he could get a level floor finish. As it was a retrofit internal slab, it took him 2 days to pump 150sqm @100mm depth. On day 3, I inspected the 'finished' floor, and it was nothing but flat. I could really feel the varying levels of the floor by just walking around - I didn't need a level to tell it was way out. I also noted that the datum at the big slider was approx 20mm below where it should have been. Having contacted Bodgit Builder he duly came round and he agreed he would come back to grind down and high spots and fill where necessary with self-levelling (even confirmed the latter in an email). Prior to the day of his grinding, I scraped away at some of the high spots to discover that there was only 1-2mm of concrete/latence covering the UFH pipework. He'd obviously had issues with the mesh/pipework raising to the top (yes, I had fully purged all the air out!) and rather than doing his utmost to push the mesh down, he'd just decided to 'cover' the raised pipework with a bit more concrete. He either didn't have any idea that this would impact the agreed floor height or didn't give a damn (and must have thought I wouldn't notice!). He did admit that he'd had an issue with this section of the floor and asked me how I wanted to have it rectified. I duly informed him that this loop of pipework would have to be dug up and re-inserted at the appropriate depth and re-covered. He spent 2 days grinding high spots with little impact. Moaned at the cost of the grinding blocks and started making excuses as to why he couldn't make it back until a few weeks time. In any case, after nearly 6months later, he has not returned (as I expected) and have had minimal contact (just a few lame excuses) as to why he hasn't been able to rectify his work. Spot the issues: Is that a bit of mesh sticking through the floor? Yes! Luckily in the corner where the kitchen cupboards will be (no UFH). Easy to cut out in the end. Bit of a hump (approx 30mm difference over 500mm) Door threshold? what door threshold? Maybe should have gone for a concrete floor finish! Nice high spot by the door. Inward opening door too. May either need to skim off 30-4mm concrete (risk revealing more pipework or may have to raise the whole door frame - luckily it's timber framed at this section) Bit of a 'dump and dash' job Not that clear here, but concrete is well abobe the red mark (AKA the "do not go above here" mark). Yes Bodgit was wearing specs, but obviously didn't go to Specsavers. Can't get worse than that? Luckily I've found a local flooring company who also have experience in grinding, so they've been busy sorting out the high spots (only to reveal a further 3 rooms that have pipework that needs to be dug up). They didn't want to attempt doing that, and rather than risking getting in another 'professional' I've resorted to doing this myself. Intricate work that few builders would get right - not without damaging my ufh! Various UFH pipes revealed when skimming off the first few mm of concrete: Slab above probably needs another 20mm taking of in order to hit the original datum, so hopefully no further pipes to be found! First set fully revealed and ready to be pushed back although one has been damaged when they skimmed the top. You can just make out the grey inner lining: So this bugger needs to be replaced as the grinder's kinda ground it out. So how do you replace a section if the coupler's aren't supposed to be buried??? "16mm Repair coupling for use with Wunda 16mm Pert/Alu/Pert floor heating pipe, when a repair is the only option. This fitting must be fitted in a clearly accessible location and under no circumstances be buried in screed or concrete." https://cdn.wundatrade.co.uk/wp-content/uploads/2017/08/T03-Wunda-Generic-16mm-nut-and-insert-repair-coupling.pdf Tape coupler with self amalgamating tape? Obviously will fully need to pressurize before I cover. I'll need to add the couplers on the straight sections as adding on the bend will just compromise it all. Should I leave a small void around this join in case I need to access it? Or box in around the coupler and fill with a weaker mix in case I need access in future years? It's in a corner in the kitchen with no units going on top, just the laminate flooring. At least I'm not the only one with this issue: Once the flooring company and I have completed the required work, I'll be looking to get a PI to locate Bodgit Builder as he's started moving house which isn't much use when you want to take the bar steward to the small claims court. Lessons learnt: Don't always trust recommendations! Do it yourself! Pay particular attention to the end and loops/mesh in the corner as these are the areas that seem to rise up when pouring It's not the end of the world, there are things much worse in life that will/can piss you off, so don't let the bar stewards get you down.0 points
-
Mine is a timber frame. It went up in a few days but from there to watertight took months. The frame bit is quick but the rest............ its almost 2 years since we started and circa 9 months since the timber frame went up. We chose timber frame because we thought it was quick?0 points


.jpg.c21f3ac78c9b7efd90cbdcb312744dc5.thumb.jpg.7adcad4c0e384f5ecd7d56b0618df6e5.jpg)