Leaderboard


Popular Content
Showing content with the highest reputation on 04/01/17 in all areas
-
NOTHING pi$$es my missus off more than when I repair a domestic appliance and she was hoping for a new one! Bosch dishwasher is coming up 20 years old.2 points
-
When I tried to renew ours about 9 months ago I bought the bearings off the internet, spent about 3 hours to get the drum out of the machine, and then about another hour to knock the bearing out. I then found they'd sent me the wrong bearing. At that point I lost the will to live, skipped the lot, and went to Curry's.2 points
-
No rush.... a while to go before we are painting!
 2 points
 -
1 point
-
Just had a good deal from Blanchards Builders Merchants for 20 sheets of chipboard for the bedroom floors. It was working out at £200 from TP and they did it for £152 and delivered it the next morning. They seemed very keen to provide a good service so I'll be going there from now on (and will check prices first). They have opened a new branch in Bicester (hoping for the Graven Hill work) so are keen to get their toes in.1 point
-
Keith vaz will sort u out1 point
-
I know it's easy for me to say sat here, but the proposal isn't exactly rocket science even with the PHE's and the buffer included. Lets see what he can do / offer.1 point
-
So another update. Plumber #1 has re-engaged and i sent him on some of the more current details on the thread. he agrees that simplifying is the way to go. Sounded a bit funny when i mentioned plate heat exchanger but that could just be me. Should be meeting up with him on Monday so we will see how that goes. Thanks D1 point
-
1 point
-
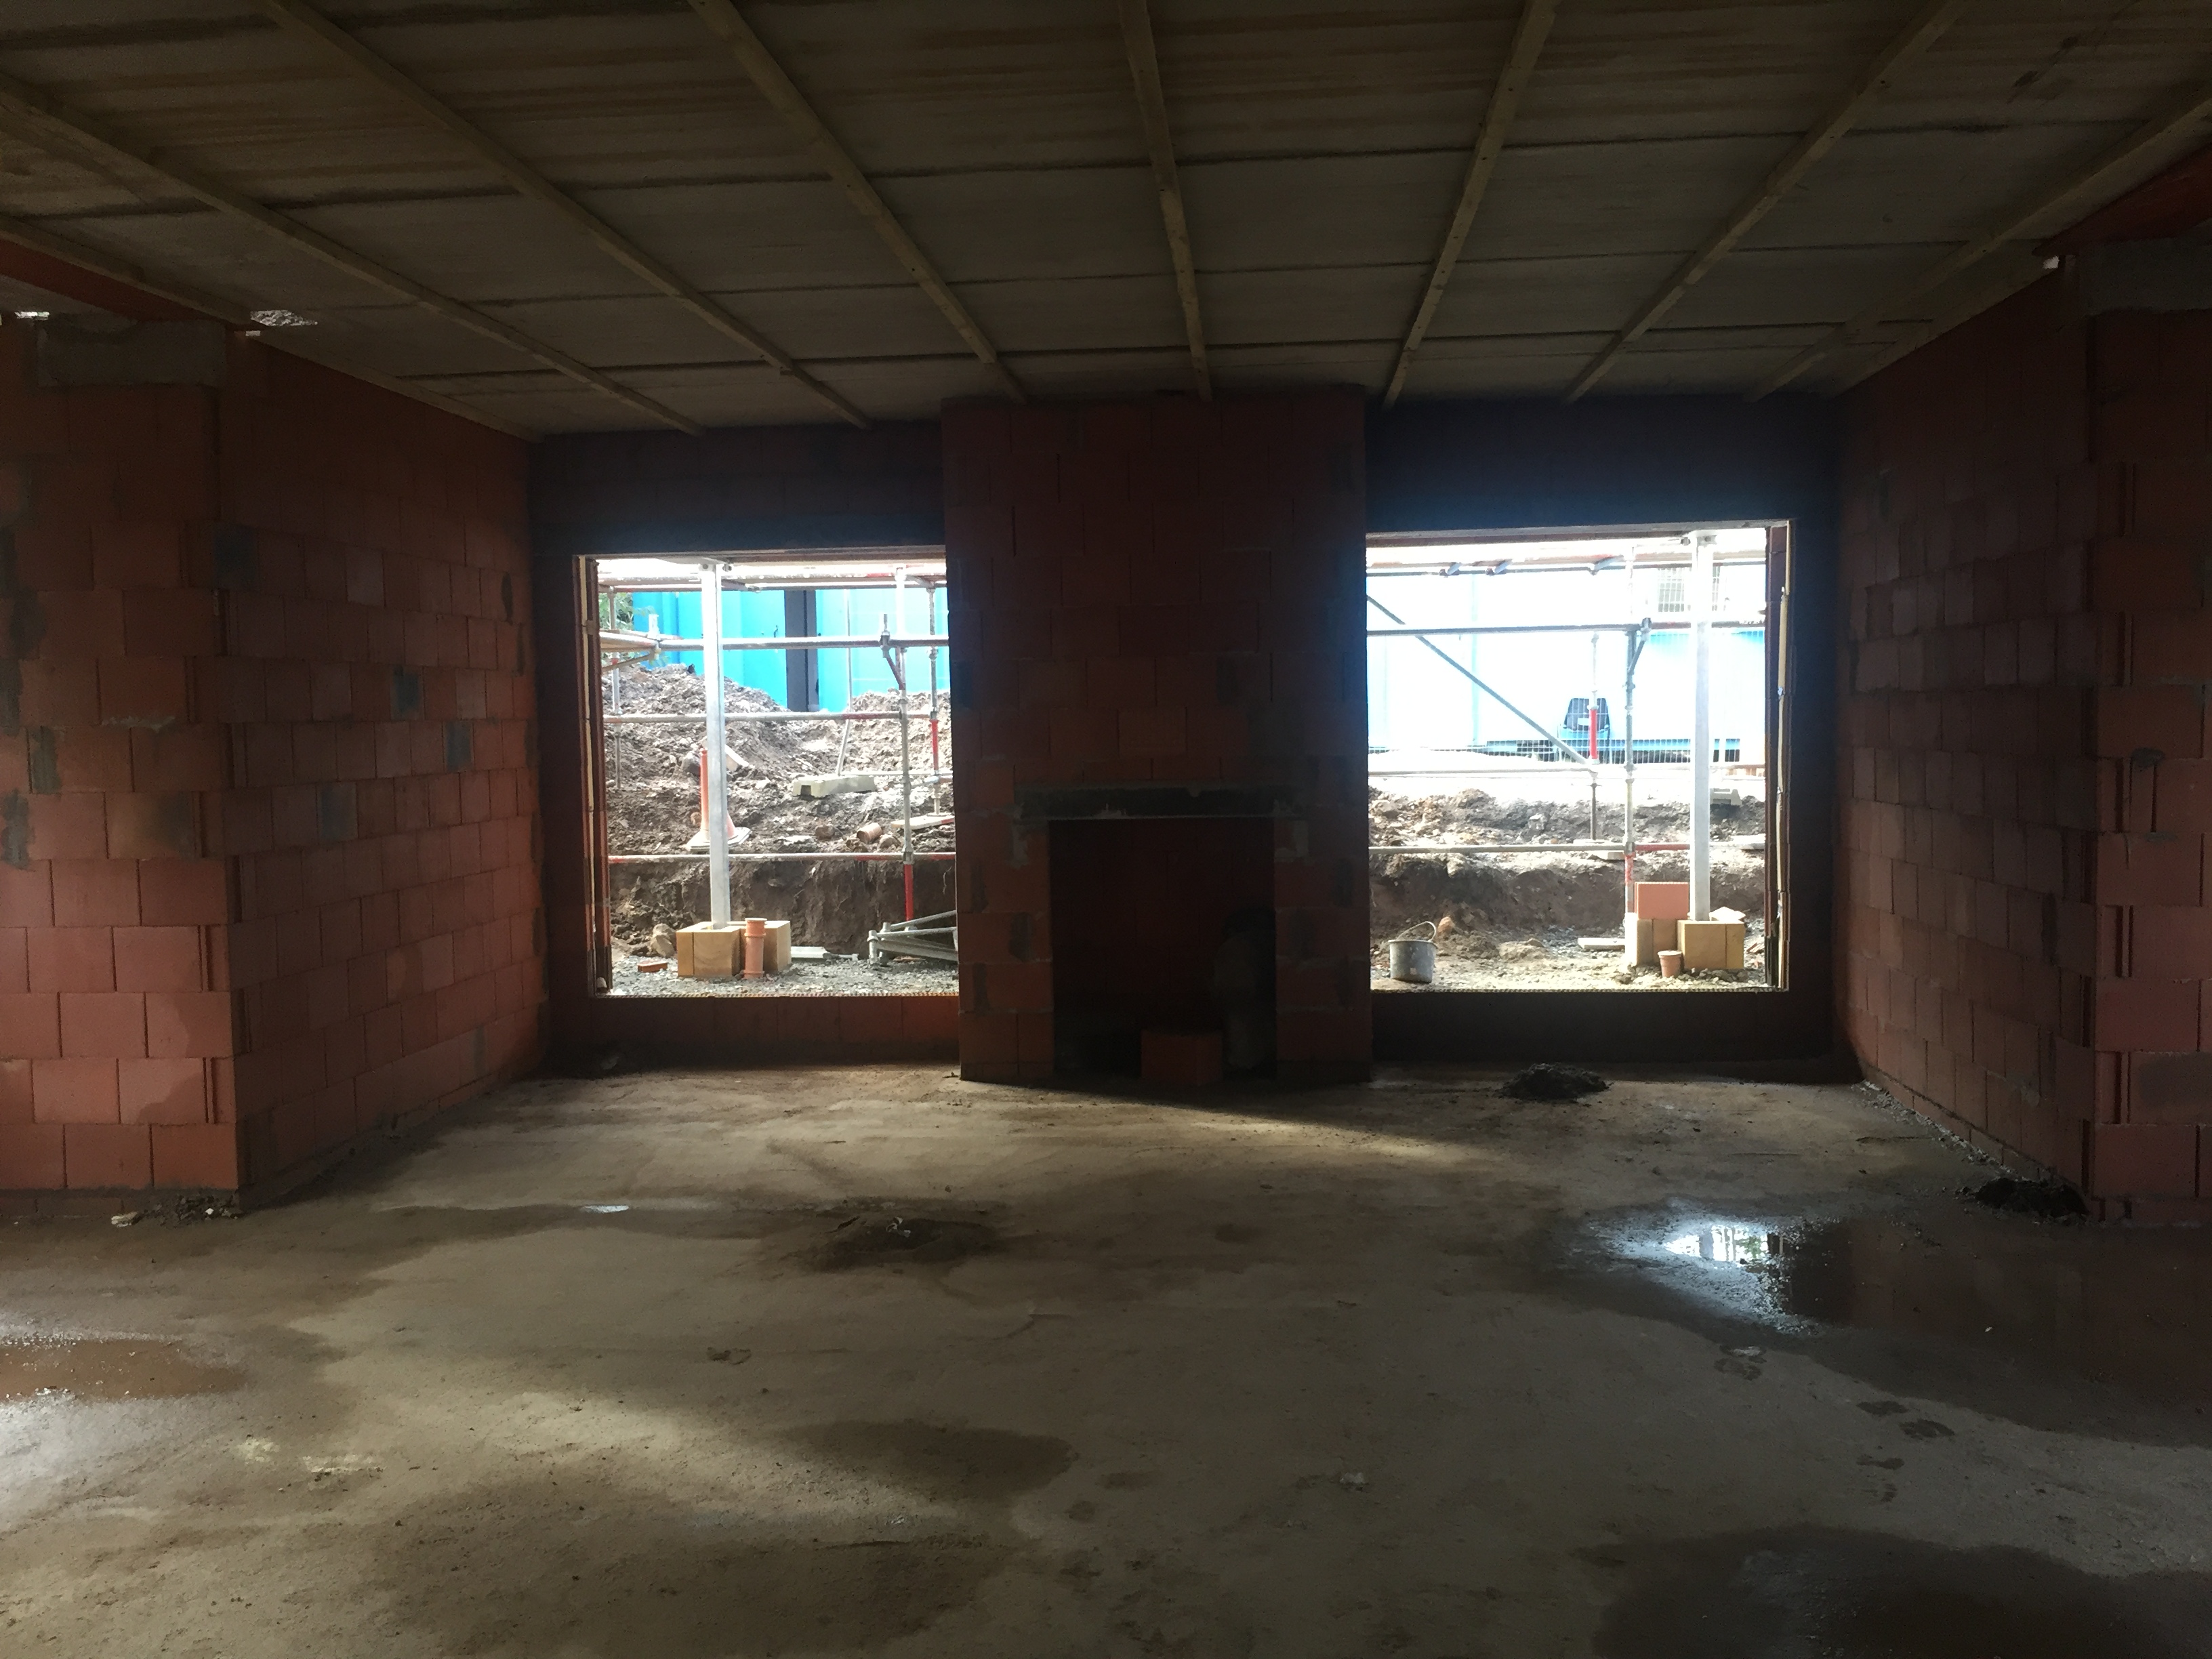
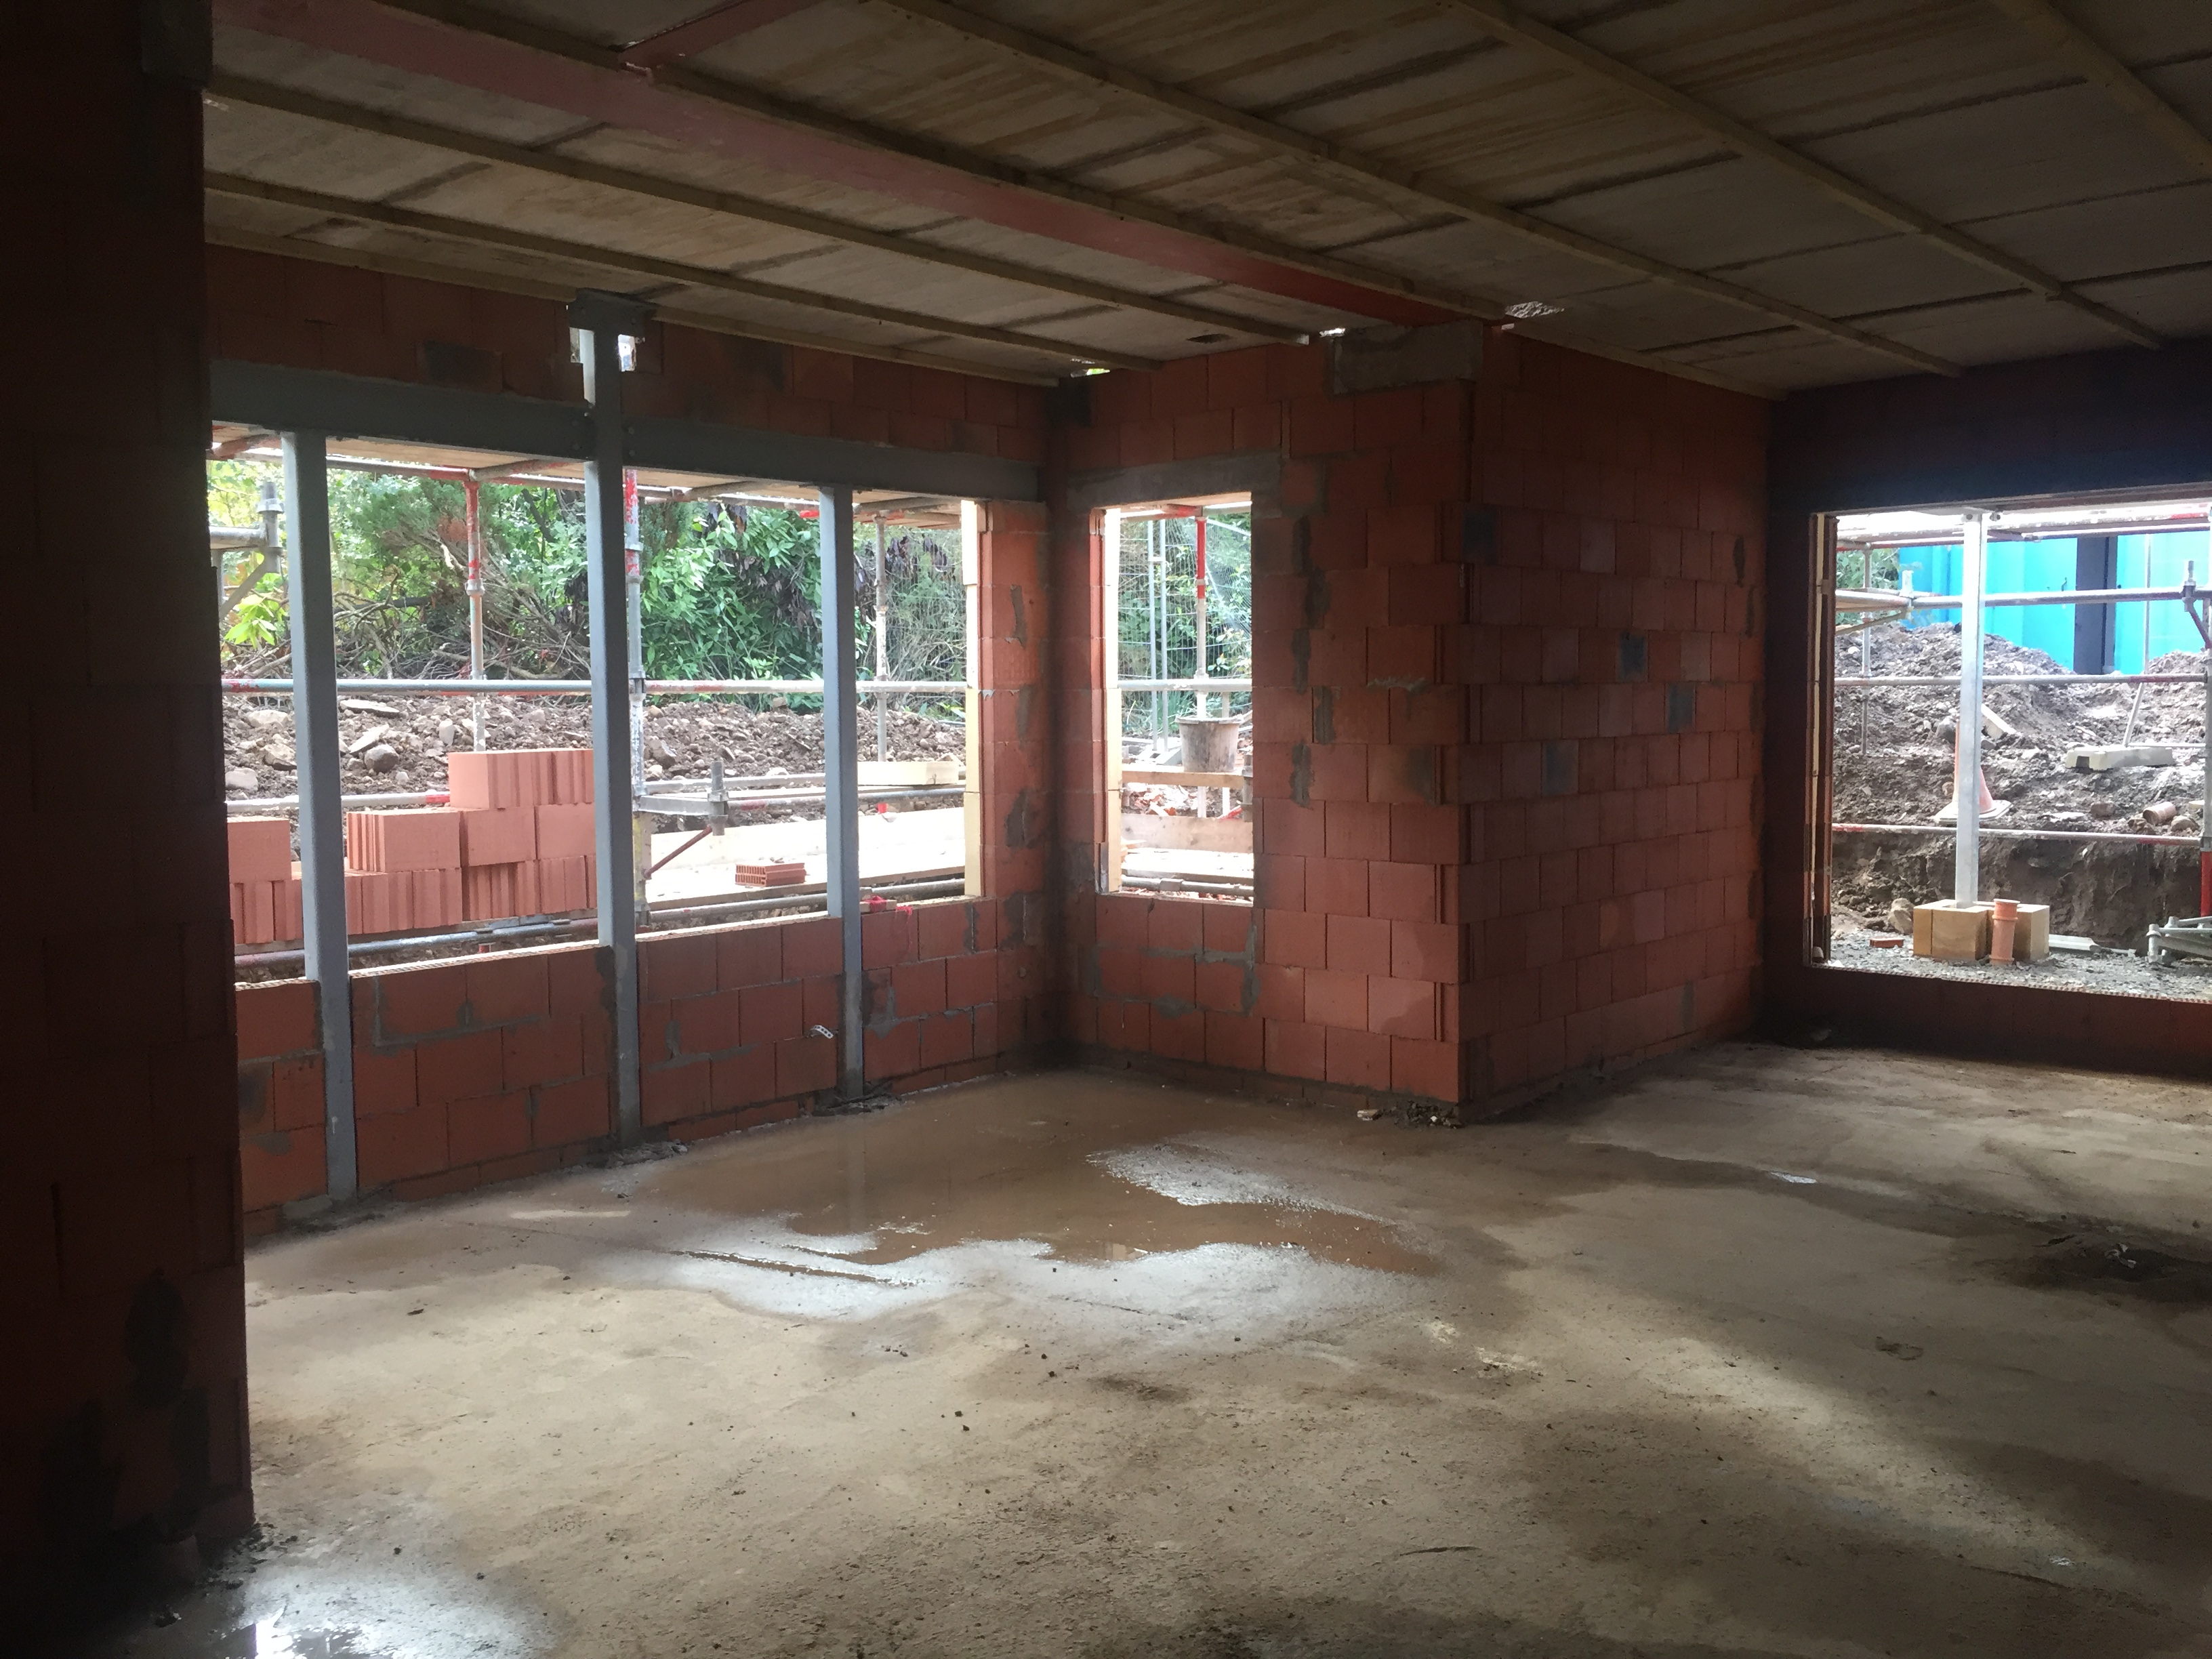
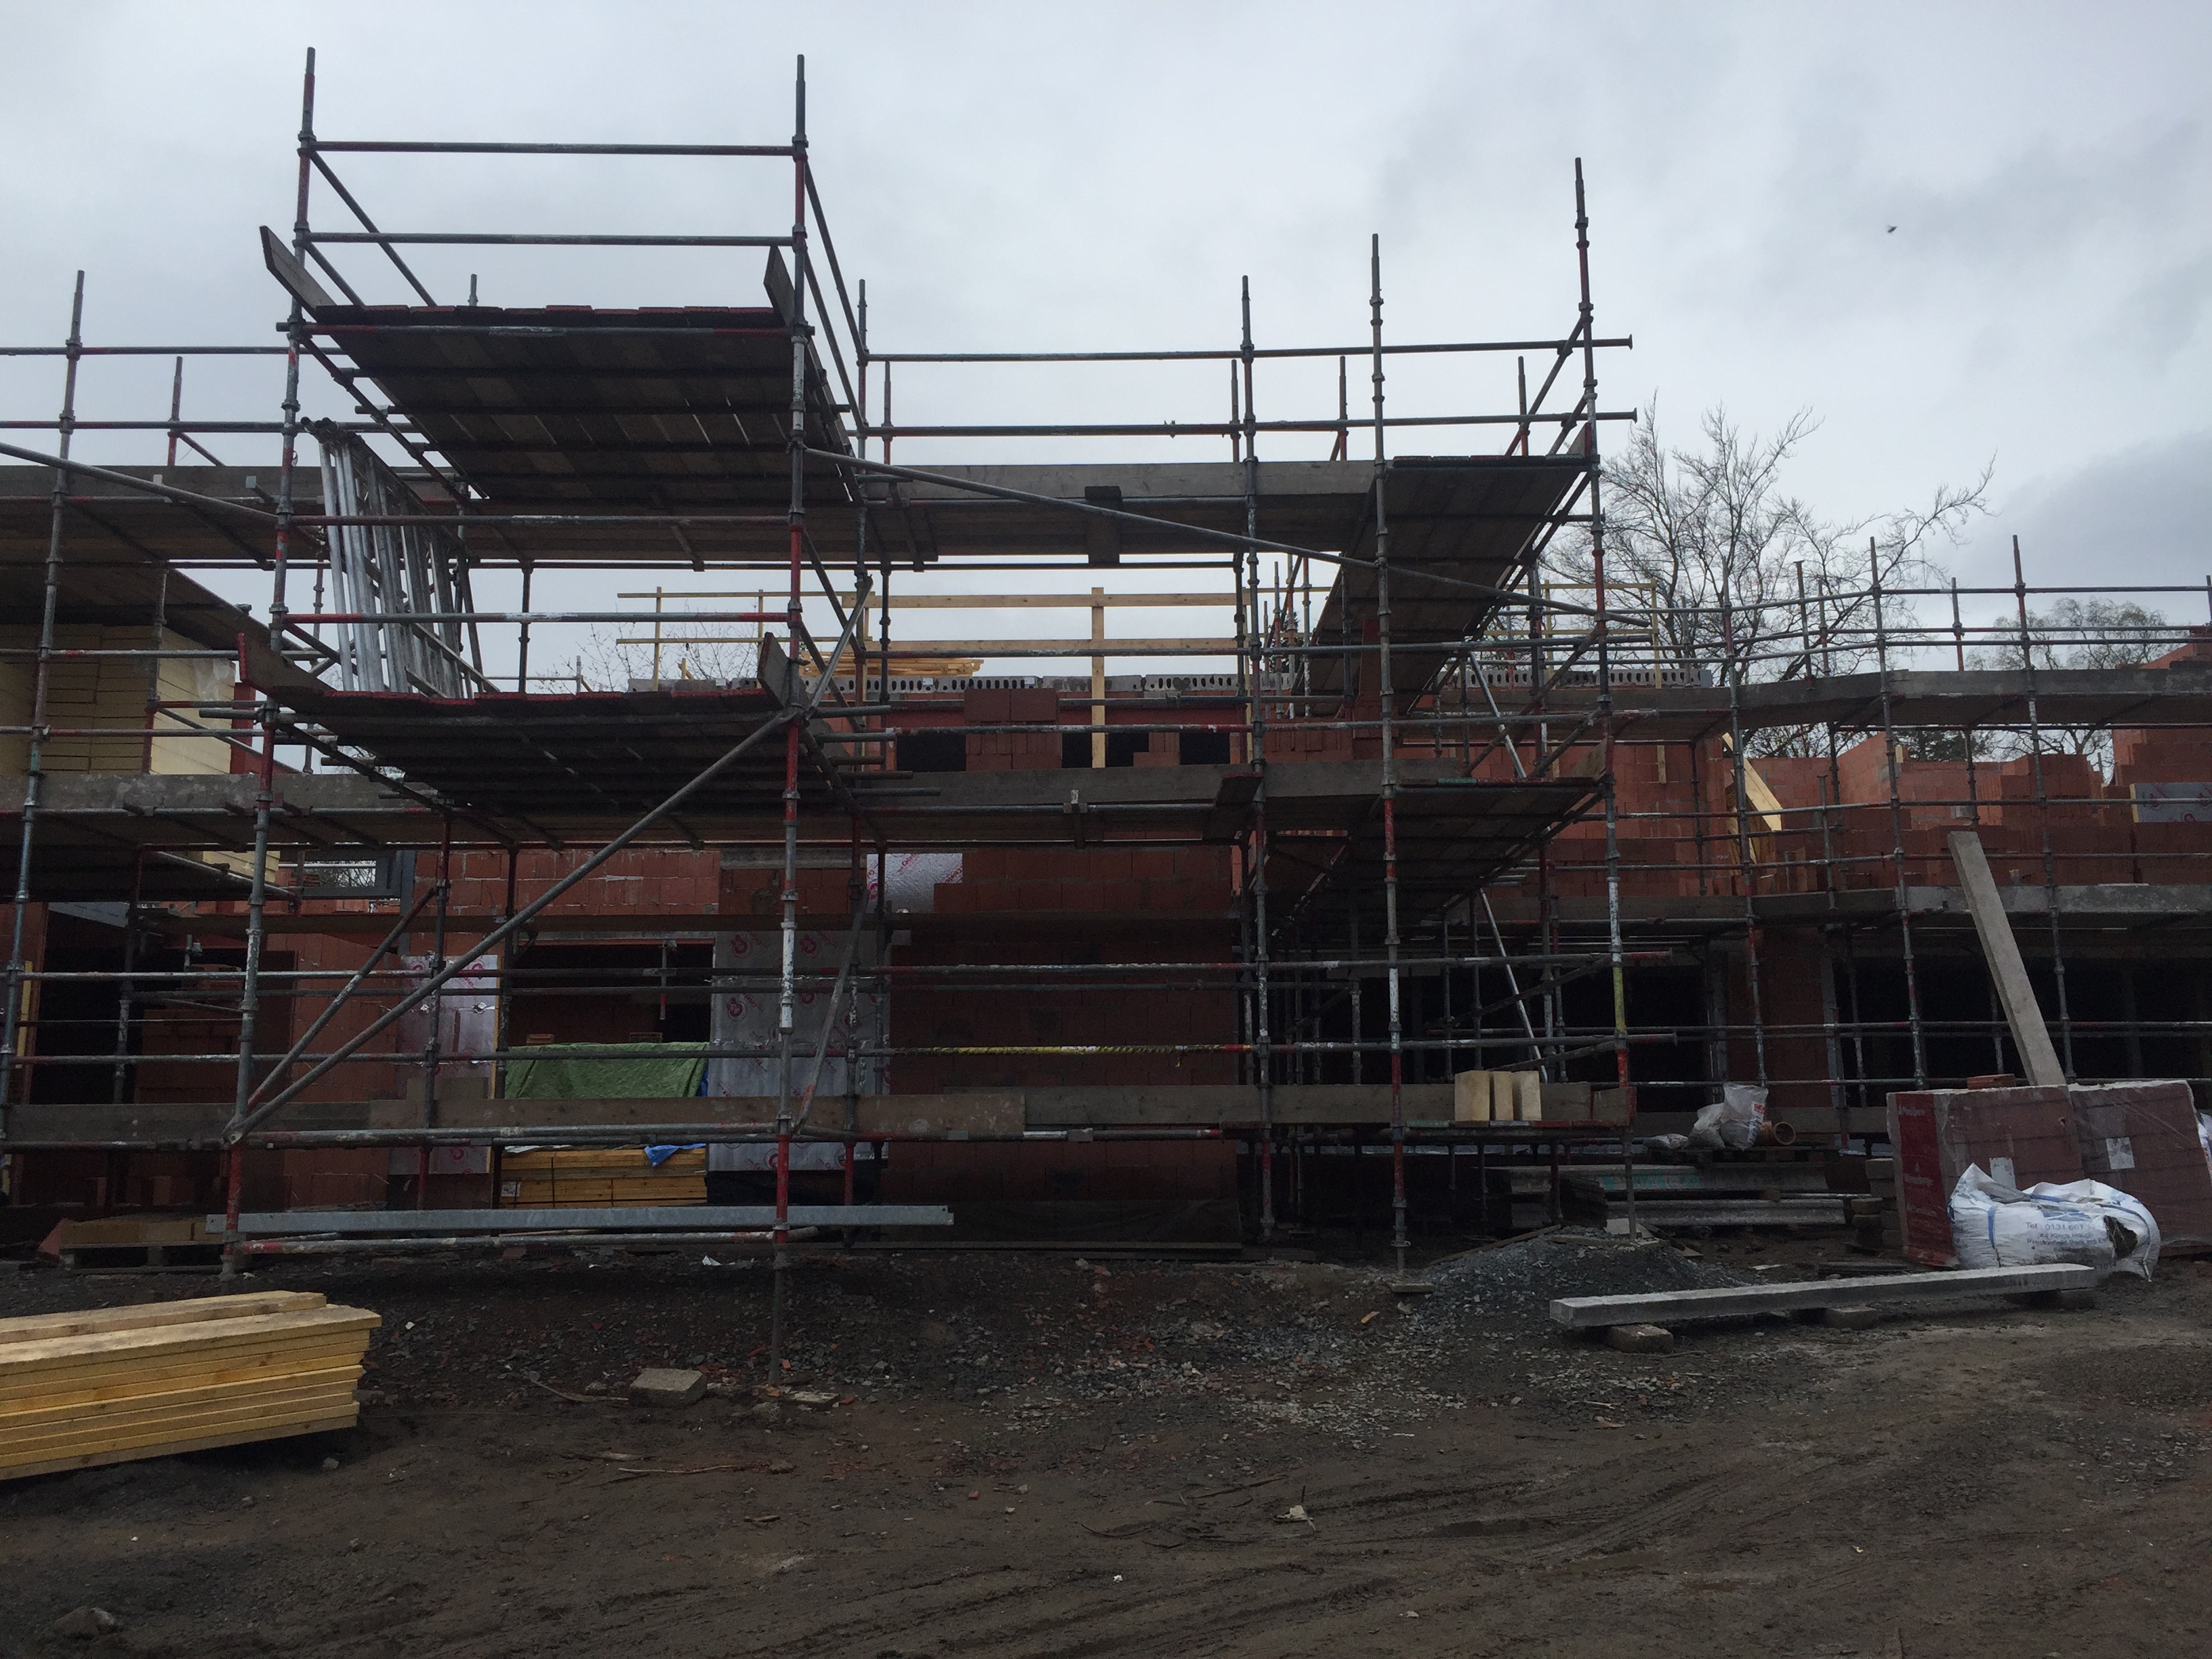
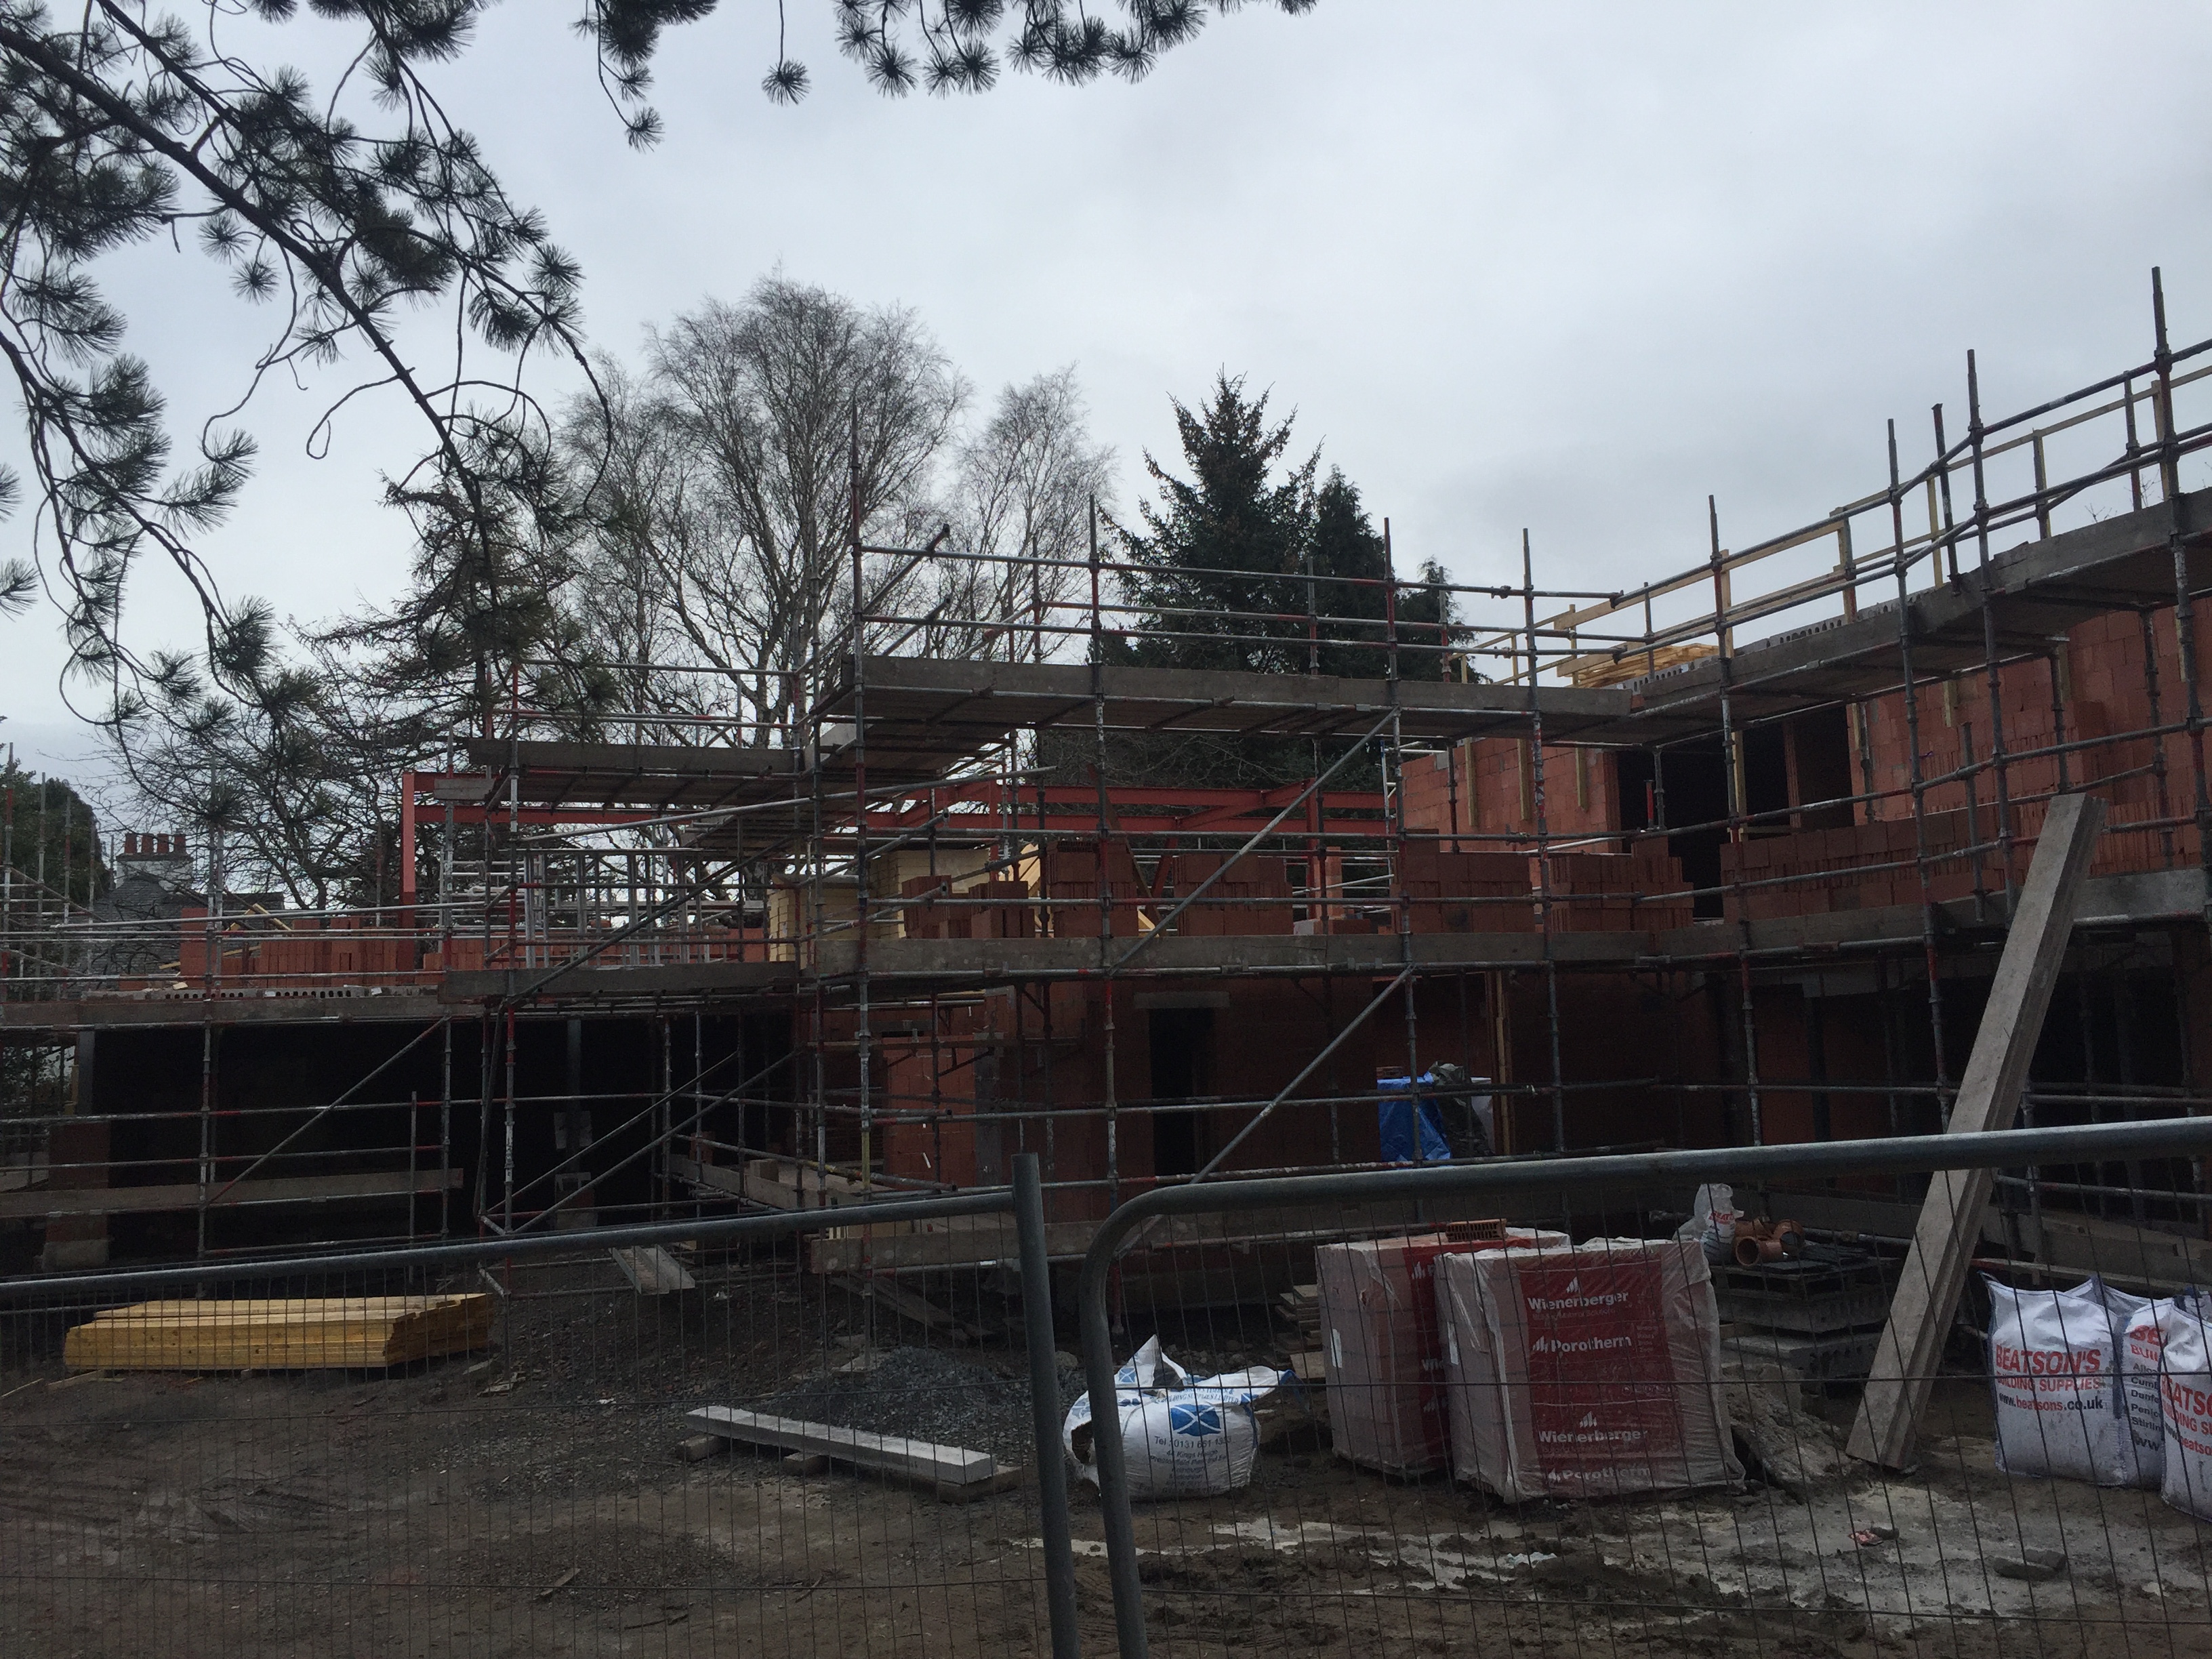
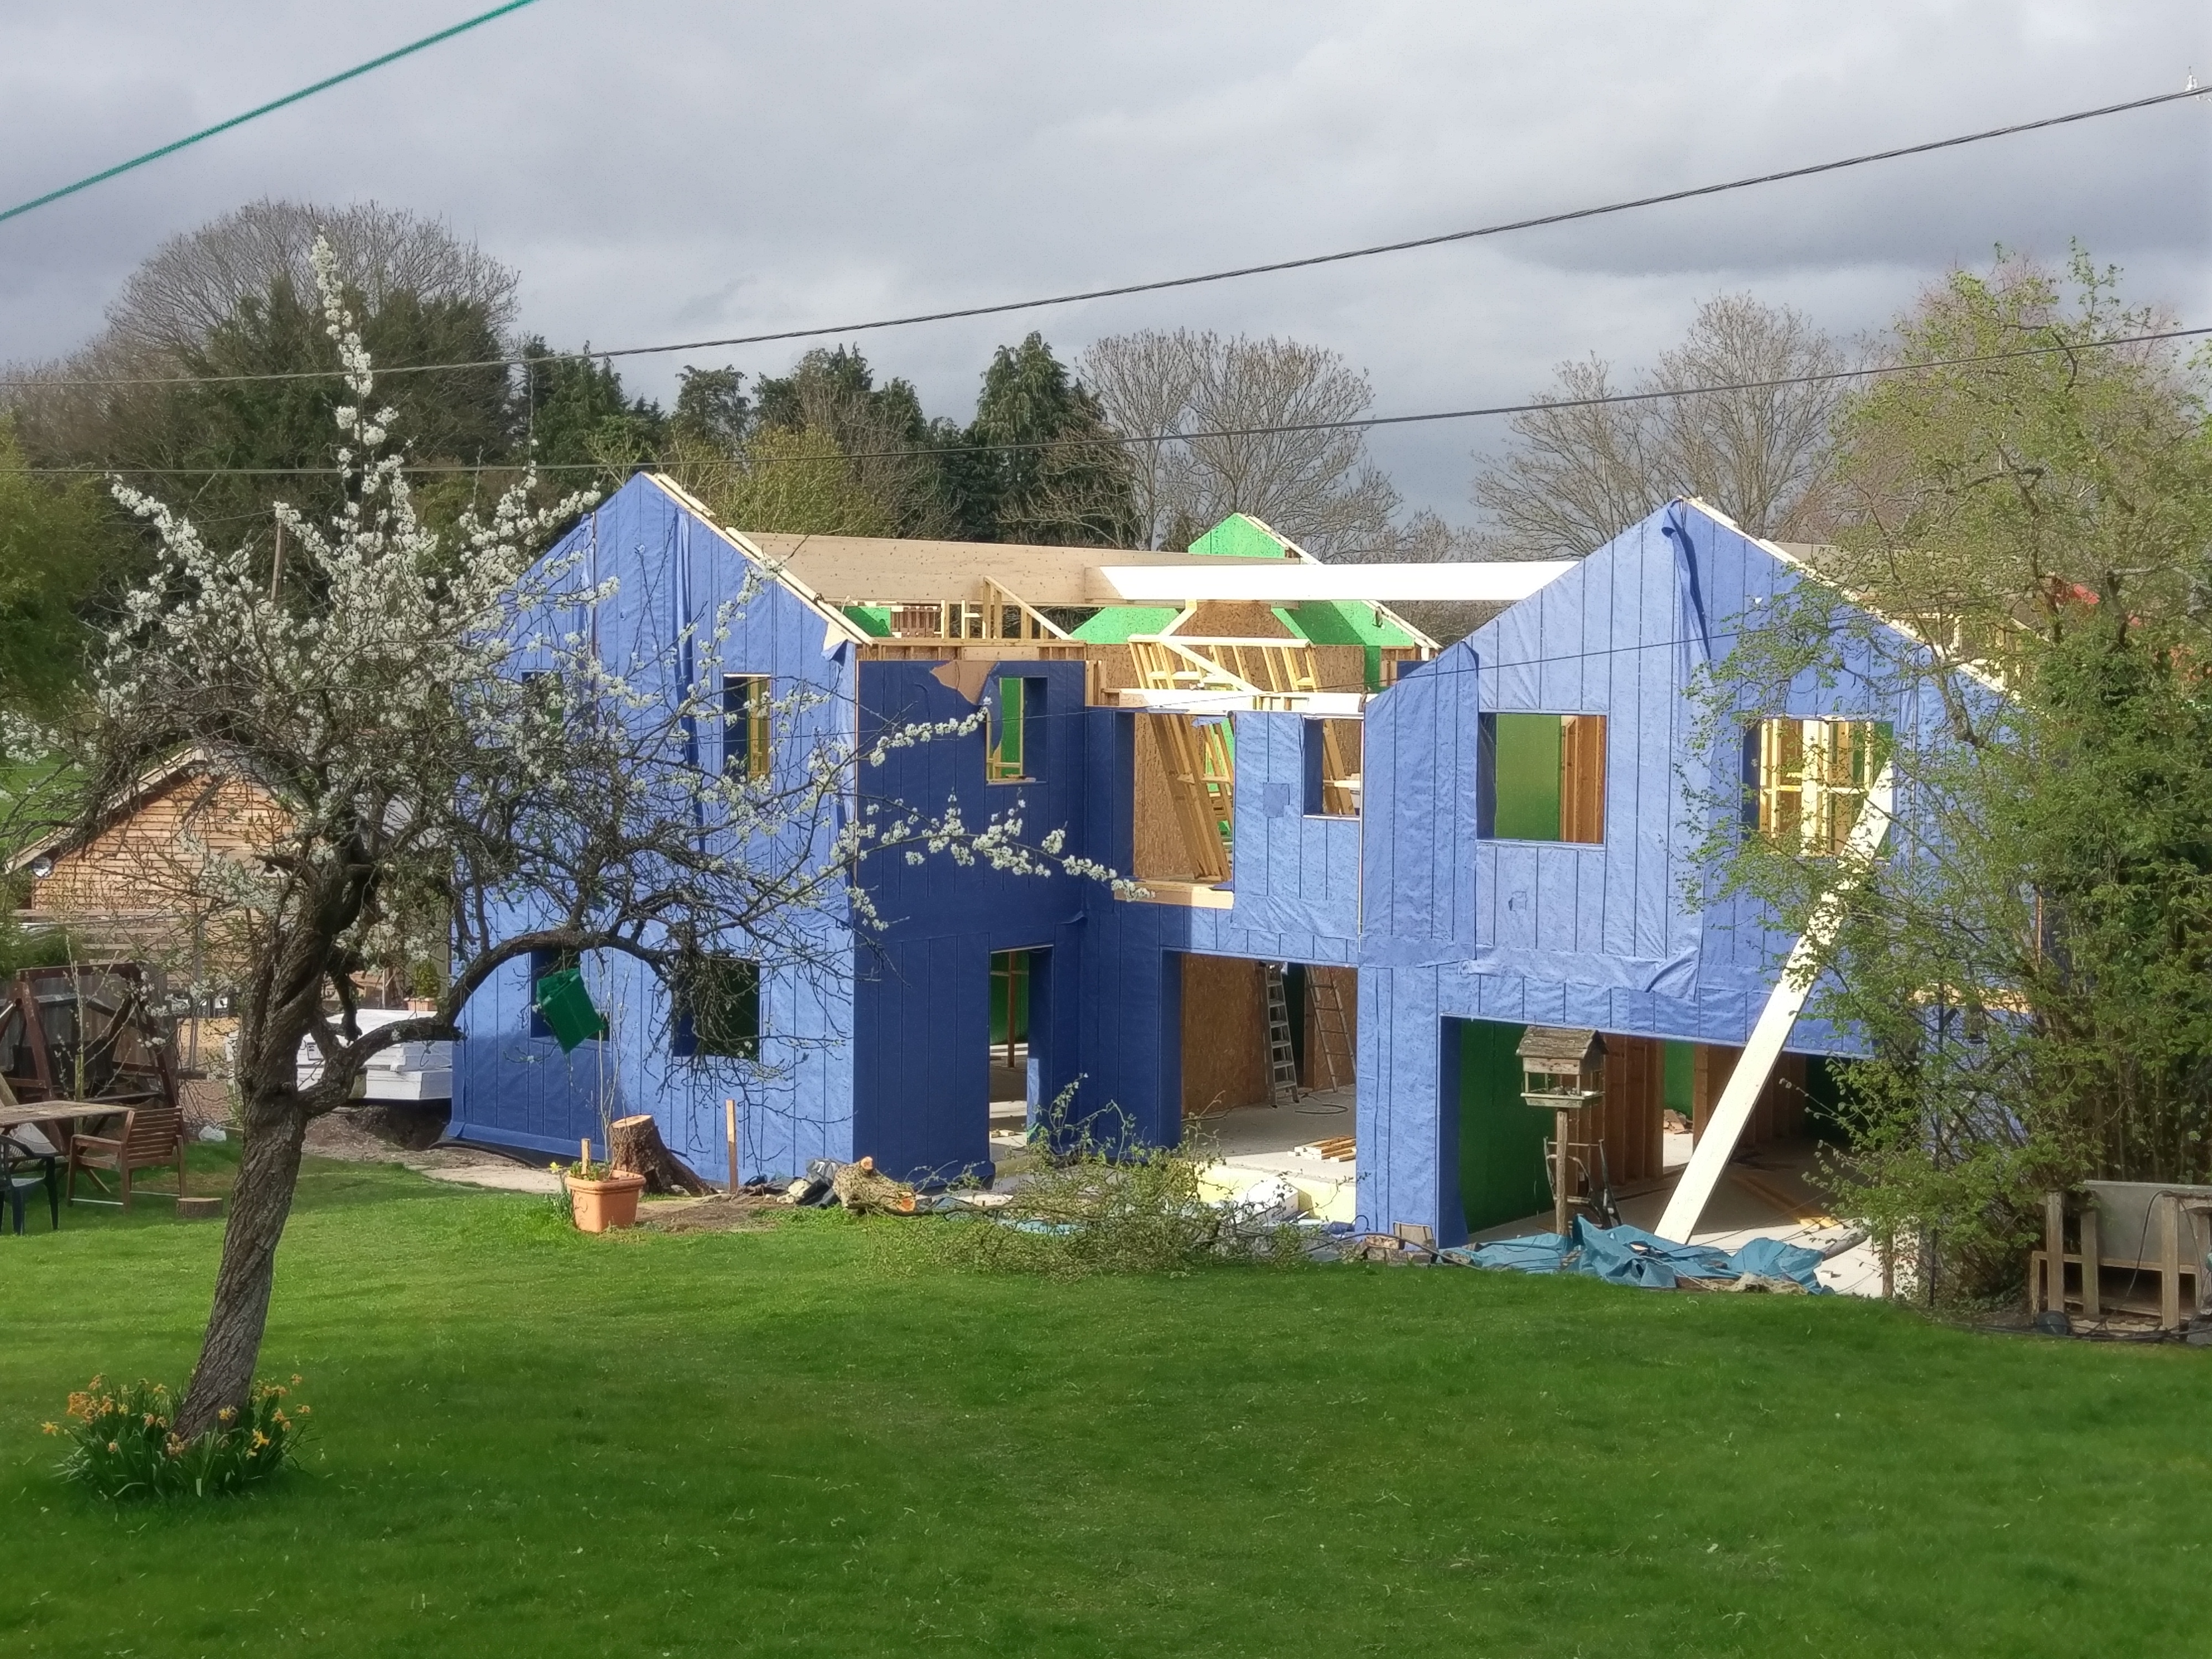
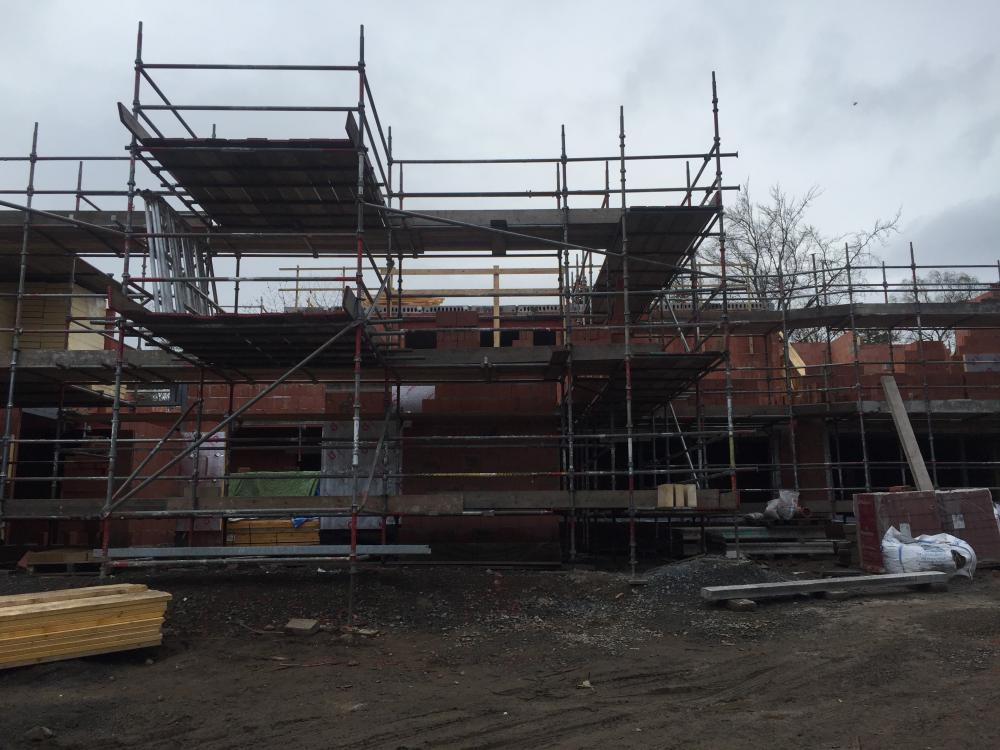
Progress finally seems to be a lot faster, although we are around 10 weeks behind the original schedule. The first floor slab is on and they have strapped out the underside for the ceilings. The first floor walls then went up on top of the slab and the slab for the second floor games room went in last Friday. Last week the steel started to arrive for the roof. I was shocked to see how heavy duty it is. The steel you can see at the left hand side of the house is for an area that is 1.5 storeys high. The architect says that the SE tried really hard to make normal attic trusses work but we had to have steel. It makes you wonder how all the old houses manage without loads of steel in the roof! The trusses are on site too and will start to go in after the steel. The roof structure should be finished in around three weeks then we can put the sarking on. The windows also start to arrive and go in next week. So between these and the roof we should be basically watertight in around 5 weeks. Kitchen sitting area looking west to the terrace. Kitchen table area looking south. Bedroom two and garage below. Front porch, hall and looking up to the second floor slab.


 1 point
 -
https://www.ukwhitegoods.co.uk/forumsphpbb3/spares-help.html1 point
-
The chances are it's a standard bearing, so with luck you may be able to get one from someone like Bearing Boys: https://www.bearingboys.co.uk/ (no affiliation, but they've always provided great service when I've used them). Usually the bearing will have the size code marked on it, together with the code for the type of shield/seal. For example, sat on my desk in front of me I have a box of 6000-2Z bearings, which are 26mm OD, 10mm ID, 8mm thick, with double shields. If you can read a number like this on the bearing face, then with luck you may be able to find a replacement fairly easily.1 point
-
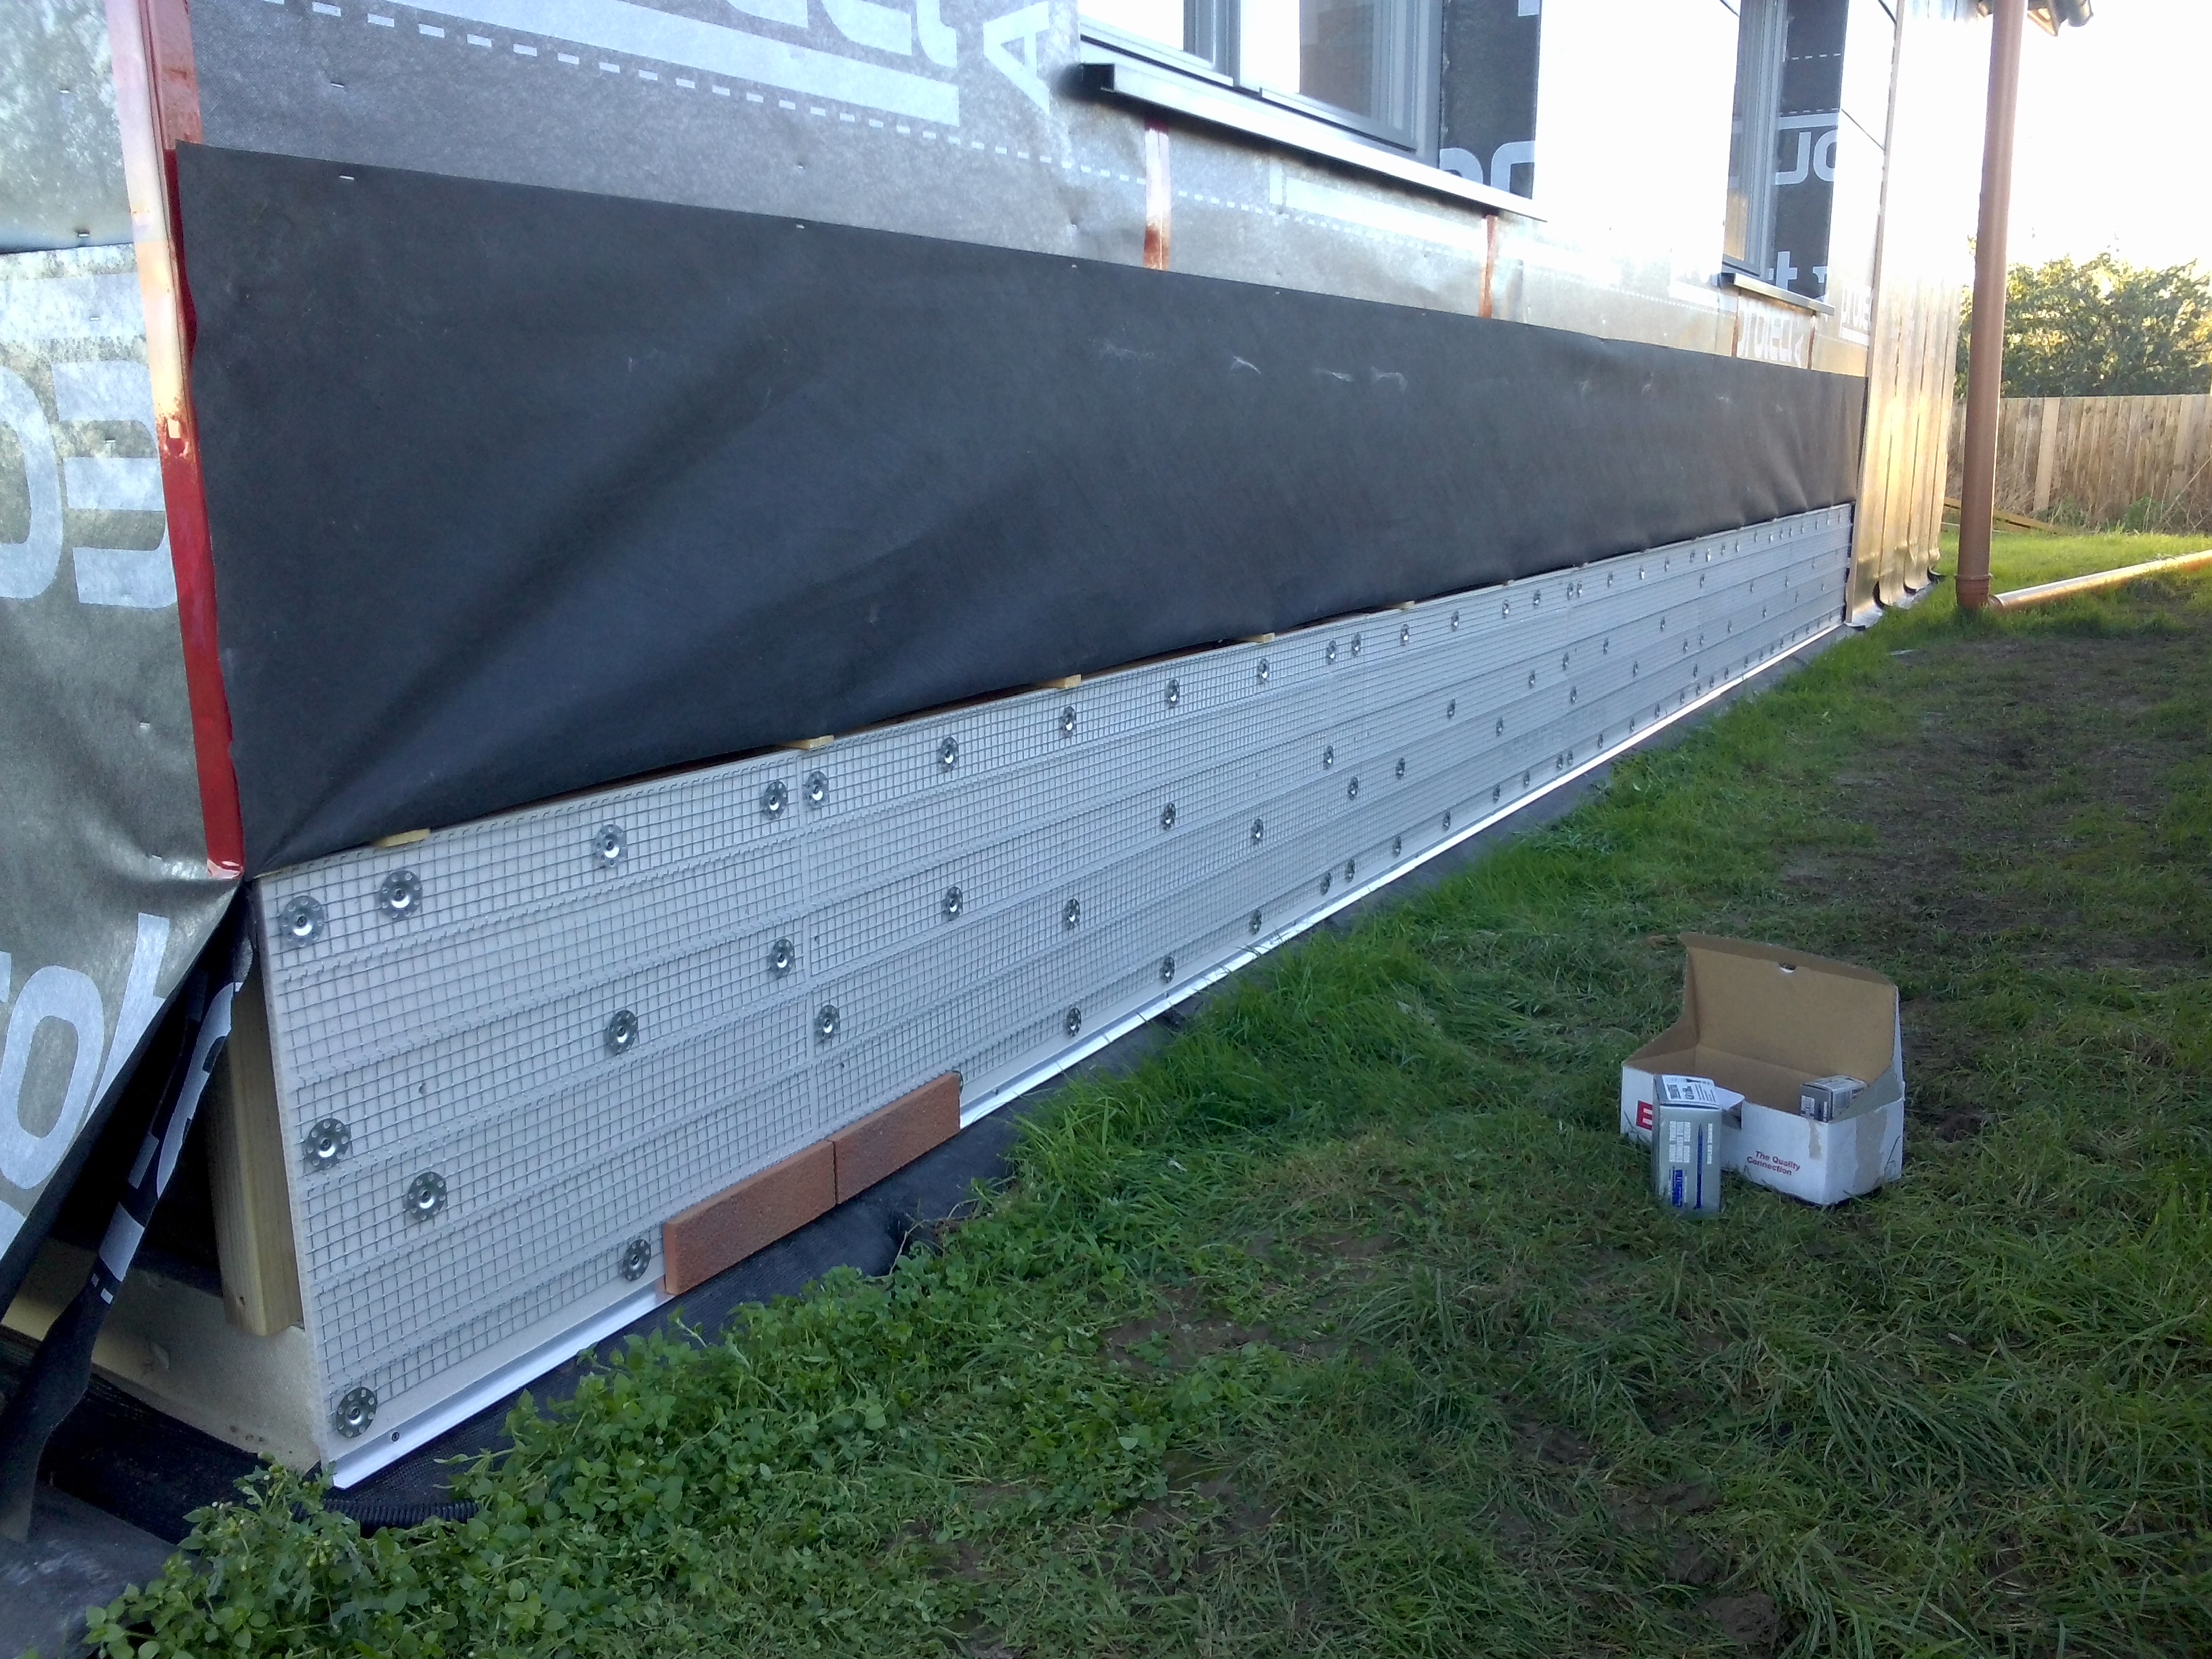
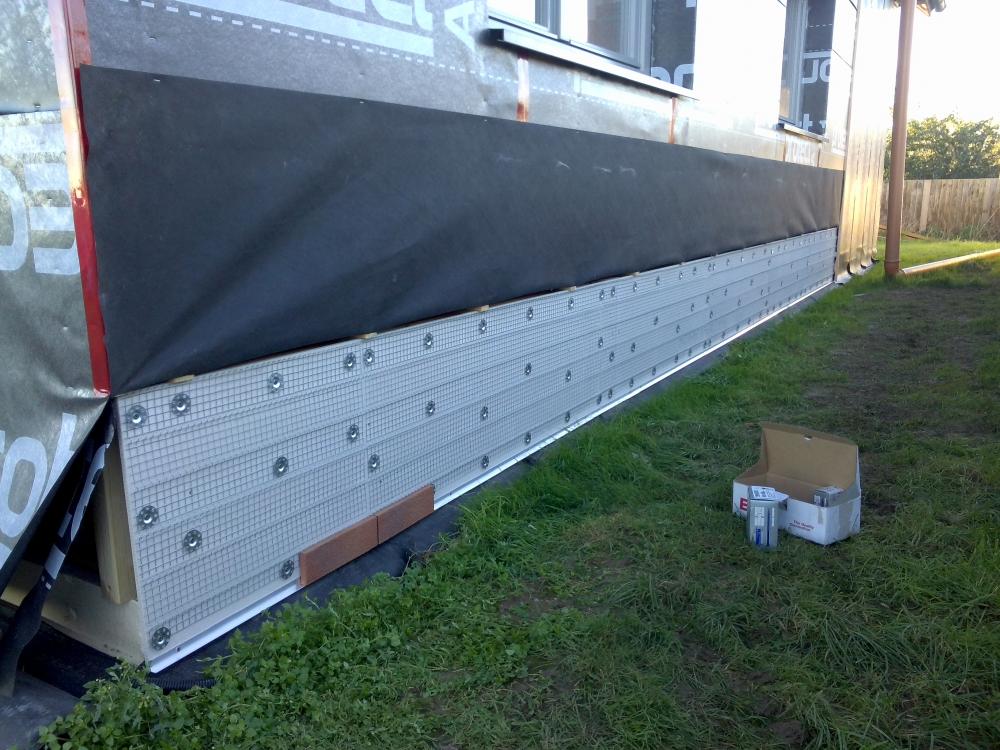
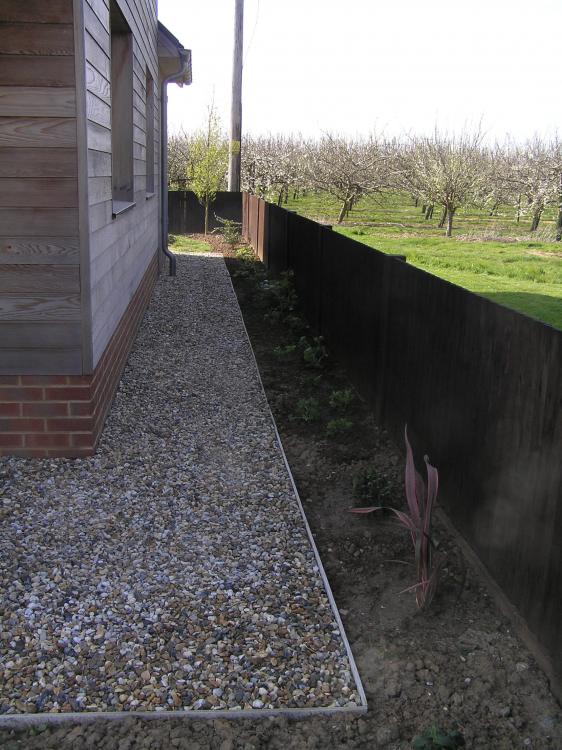
We have an insulated raft foundation with render board and brick slips which cover the 100mm EPS upstand as shown in first picture. Stainless steel wire wool is fitted between the EPS and render board. We used 18mm shingle to finish off next to the brick slips.
 1 point
 -
A strong magnet will also detect any screws as well.1 point
-
My approach to maintainability was a bit of a mix. For some things in the house, I have just bought a fairly large stock of spares, perhaps the best example being the UV water disinfection unit, as the lamps are hard to source for a reasonable price now, two years after I fitted the thing. I've got a ten year stock and have accepted that the whole unit will almost certainly need to be replaced by then, as I doubt the right size lamps will still be available. For the heating/cooling/DHW system I took the view that it needed to be able to be repaired or maintained by any reasonably competent heating engineer or plumber, in the future. To that end the thermostats could be pretty much any dry contact thermostat, and the relays are a very common standard DIN rail component that should be around for decades. I've documented things with detailed wiring and layout drawings, plus a bit of text describing how it works. My main worry with the microcontroller system I spent many, many hours developing, was that it was very unlikely that any heating engineer would ever be able to figure out how to diagnose a fault, let alone fix it.1 point
-
Sounds good to me, hard to tell from a photo what the finished construction is going to look like.1 point
-
i am no expert but have built small bridges in the past, that looks like a relatively long span with heavy loading and quite a small beam, have you had calculations done for the span x loading ?1 point
-
"Reconditioned".....probably means they've cleaned it and reseated the cards and leads! I always wonder when I go down the tip how many of the duff pcs down there would be perfectly serviceable with a bit of tlc. For £300 you could set up a nice 2 bay Synology disk station (NAS) with your data spread over two drives for redundancy. All your media would be accessible on any connected device.1 point
-
Zoom in on the first photo and you can see the top flange of the I beam. This is the I beam in the second photo supporting the line of full depth blocks. Think I'd squirt some foam down the gap (or from the underside) the stop the concrete falling through.1 point
-
I agree, the delta range is wide, but I thing you will find that once you've got the system up and running and with a bit of fine tuning it'll be a set and forget system. The only time I fiddle with our system is as the first cold days of winter sets in and the incoming cold water temperature drops.1 point
-
I was involved in the installation of a new heating system in an accommodation block at a Scout Camp Site. We found that customers were fiddling with the controls so much that we moved them into a locked cupboard and replaced them with a dummy room thermostat, this they could twiddle to their hearts content. I'm a fan of KISS, at the end of the day you have two points of human interface, "is it too hot/cold in here", or "is this water too hot/cold"? In both cases a bit of tweaking of the controls will bring these into control.1 point
-
I have not reached a view yet, but i do wonder about the impact of complex control systems on the next owners of a house. I have seen some on BH that would scare me off from buying as my perspective is that really I just want something I can leave alone except for twice a year, and has no moving parts if possible - while delivering perhaps 80-90% of the performance that would be achievable by adjusting very often. I think that a degree of complexity delivers, but that then needs a maintenance and repair strategy that is sufficiently simple that will last the lifetime of the system. Alternatively there could, I suppose, be an easy "strip drown and simplify" strategy for when it comes to be sold. For me, buying custom controllers from China, whether with custom code or not, may be a step too far. I appreciate that many on BH build with a "house for life" (*) expectation so that does not apply. Ferdinand * (Favourite anecdote.) Or, as Lord Morris of Castle Morris put it in the early 1990s after he bought Foolow Manor in Derbyshire in preparation for retirement: "I have bought a small manor house in Derbyshire to decline and die in" - and he did. Matthew Parris is now doing something similar.1 point
-
Chicken ;-?1 point
-
Just so you can read through it i will explain what i built, and in this case i think it will explain both sides of your coin (your builder friend seriously needs to think about his advice) I dug footings, the front side needed re-bar as it was so close to the pond but don't worry about that, the back side need underpinning because planners are a PITA but also don't worry about that, essentially i ended up with a flat concrete surface that i could build my building off. then i built both skins up to damp, then i filled the cavity with concrete so the top of said concrete sloped outwards (approx 40 DEG) with the inside edge of that concrete being 150mm below damp, my front wall was a standard (ish) timber frame with brick skin construction, so first course on the outside above DPC had periodic weep vents to allow any water out, inside course lapped the DPM with the DPC and then bedded my sole plate on top. inside skin had a timber frame on it (studs clad in OSB then breather membrane on the outside) built in panels, outside was just 4" brickwork with cavity trays, lintels and timber fillets above openings all tied together with "wall ties" (screwed through the OSB to the studs every 6 courses (2 courses on blockwork) and every 3 on reveals) (not every stud but there is no reason to skimp on things like this) simples back wall was a whole different kettle as i had to leave the original wall standing for planning reasons but it is worth noting it was a 9" wall (technically structurally free standing) in this case I built the panels on the floor, plied and covered them in membrane as separate sections then erected them (obviously leaving a cavity) against the existing wall, I will tie the two together as much as i can when i create the new openings. i would be mad not to. But If i wasn't creating new openings there would be no way to tie them together which is acceptable as it is 9" but IMHO is not a great idea. I have been drinking so I'm sure this won't sound as comprehensive in the morning as it does now but feel free to have a look through my videos, i might not explain much of it but it is all there if you look hard enough, I should note I am not insulating my cavity at all. all of my insulation is within my timber frame or inside it Ill probably edit this in the morning. HTH ED1 point
-
@Crofter is your man for inspiration. Sounds very much like his build. If you make it that warm and cosy everyone will move out of the house into the shed. Didn't you ought to finish the bathroom before starting a new project?1 point
-
The last house I built was in Australia, so materials may be different all bare plasterboard, plaster was sprayed using a board sealer, it's basically an acrylic base coat just like a thin watered down emulsion. Im sure any plasterboard sealer would do the same. The top 2 coats where standard semi flat ceiling paint that was rollered as it was being sprayed. The reason as I was told for the back rolling is to actually make the finish worse. The spray finish is so good that if you ever have to do a repair and a touch up you can never do it without having to re spray the whole ceiling. I do do have hundreds of photos, but they are all stored on an old laptop that has decided it doesn't want to turn on ?1 point
-
I sprayed our last house inside and out, we backrolled the last two coats. House was 360m and it took no time at all. We are positively stuck in the dark ages in this country. Sprayed all ceilings, walls and interior woodwork. Including doors. Even spayed all the facia as we couldn't get the colour we wanted. Advice for @JSHarris buy lots of masking tape and brown paper, I guarantee the bit you don't mask will get overspray on it. Who said if if you have 8 hours to cut a tree down spend 6 sharpening your axe. This is so true for this spraying lark you will spend 3/4 of the job time in prep and a 1/4 chucking the paint about.1 point
-
1 point
-
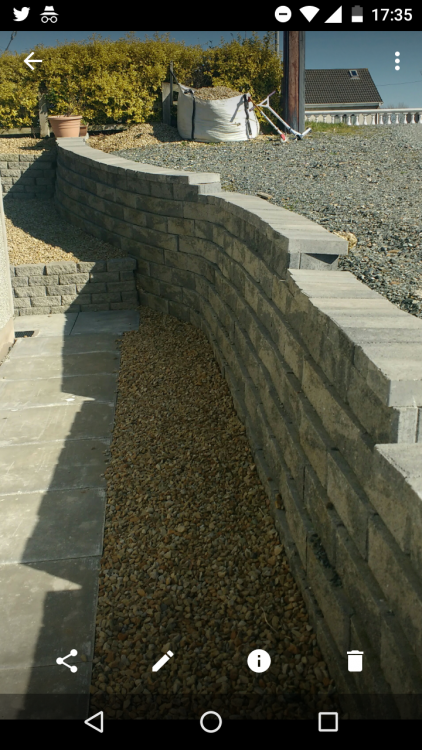
I used a dry build type block to construct my retaining wall. The blocks are 450*300*150. You don't need a concrete founds just a good sound base of compacted hardcore. The way they lock together they lean back at approx 80 degrees. That complete wall is over 20m long and at its highest 1.4m and I done it all in a day. Cost wise I think it was approx £600 just got the main retaining wall. The smaller wall facing you on the picture used a smaller block as they aren't suitable for the height you need to go. For a block wall 1m high I would start with a course 450mm wide then 2 courses at 330mm then a 215mm and then your coping. The most important aspect of any retaining wall is how you get rid of the water that will pool behind it. You need a French drain type system with a fine gravel behind the wall.
 1 point