


Jenki
-
Posts
836 -
Joined
-
Last visited
-
Days Won
7
Everything posted by Jenki
-
A busy couple of weeks and favourable weather has seen some progress at The Windy Roost. When in use the word I, or we, I mean Mandy my wife, and me. So far that's the only labour on the build. Mandy has worked office based for 40 years before we moved here, so this is an all new world for her, and although she regularly tells me she's older than me, and she's needs a day off, I can't be more proud... It seems that the engineers really worry about the wind here, which is fair enough, but you would think no house has ever stood the test of time. The 40M perimeter of the house required 288 H10 starter bars, after installing the radon barrier inside the shuttering, I used some 8x2 timber, (that will later be used to frame the gables), and drilled lots of holes and feed the L bars though. These were spaced as per spec and to suit the poly steel blocks. Checking the dimensions, diagonals and rechecking this was all secured in place. The 8x2 timber made pouring the shuttering difficult. I made some pour boxes, but this had limited success, so ended up using the 7 ton 360 & bucket method, a Caithness speciality, and the bonus was the concrete truck driver is also a very skilled 360 operator, which speeded up the pour. I think Stuart now counts as the 3rd bit of labour on the build. Rebar work in progress. 4 cube of concrete and all dimensions still bang on. Next day stripping the 8x2 was to be honest, a pain in the ass. But a few hours later all the shuttering was removed and we were ready to install the radon barrier over the sub slab joining it to the previously installed barrier now under the footing. Sand blinded, and then added 20 ton of 40mm be to dust in preparation for the slab after the foundation block pour. Installing the poly block we loosely set all four corner blocks, leveled them using plastic folding wedges, and measured the lengths, widths, and diagonals. We strung string lines around the blocks to ensure the corner blocks were in line. We sprayed the footing with marker paint, and then marked the blocks in position onto the footing. Then one by one we set the blocks in position and fixed in place with fire rated expanding foam. Checking the level with a laser level and double check with a dumpy level. Next day we filled in between the corners, gluing the blocks in place and ensuring the blocks are straight level, again using the string lines and levels. We cut holes for drains, ducts, and sealed the gaps with foam. The poly steel block are t&g and also come with clips that lock the blocks together. Before we closed the sides we needed to feed in horizontal H10 rebar🙈. We tied the horizontal and starter bars together, and also tried the rebar to the metal grids in the blocks. To close the runs the blocks needed cutting, luckily our cuts didn't cross the metal firings in the block, so it was simply cut with a hot knife. Then glued (foamed) in place. These cuts were braced with 4x1 screwed into the metal firings with bay pole screws. Foundation course in place. Mandy starting to tie the bars, you can also see the clip between two blocks. Concrete day. 3 cube. Concrete pumps don't exist up here, I was quoted 2k to bring one up from Inverness. I fabricated two 1200mm OSB form boxes, which sat between the top of the ICF block and formed a funnel, and used the 360 and Stuart to pour the concrete into the forms. We had two pokers on the go and filled one funnel, and while the bucket was being re filled, vibrated and leveled the concrete, filling the forms alternatively, and moving the empty form along. Mandy was a demon and just got in with it. The whole 3 cube took one hour to place. So paid £15, waiting time and a drink for the 360 operator. It went really well. We cleaned up the top of the forms, then checked the walls. We didn't prop the forms before, and used the rebar to be sure it wasn't going anywhere. Inspection showed there was some movement especially in the areas where a I removed one side of the ICF for door ways. This was easily rectified with some timber wedged and screwed in place. About 15 props in total were required. I was really impressed with the strength and quality of the poly steel blocks, only slight issue is they do have a slight wave along the block, but screwing timber to the metal firings lessons this and over all after the pour the walls are straight. Next slab prep, drainage, and lots of insulation.
-
- 4
-

-
- the windy roost
- highlands
- (and 2 more)
-
 This is what I'm working with. We want a wetland / pond area to the front of the house. This is the track leading to the house, house foundation top left. The red line is an old rubble drain, and my treatment plant uses this. It works well, and now I've put a pond further to the left of the red line ( other side of rubble drain for the plant) it slows down the run off from the field. I think I need to improve the holding capacity a bit maybe some crates at the right side of the red line. I'm thinking the rainwater from the house is directed into a wetland area and run this into a pond (green line), then an overflow from the pond into a swale created near the blue line, this eventually running into the existing rubble drain, if it hasn't already gone, all the land to the right drops towards the coast, 500M. So looking for design details so I can spec this up and satisfy my BCO, who is ok to work with. I'm more leaning to pond then overflow to soakaway for BCO, but implement the above.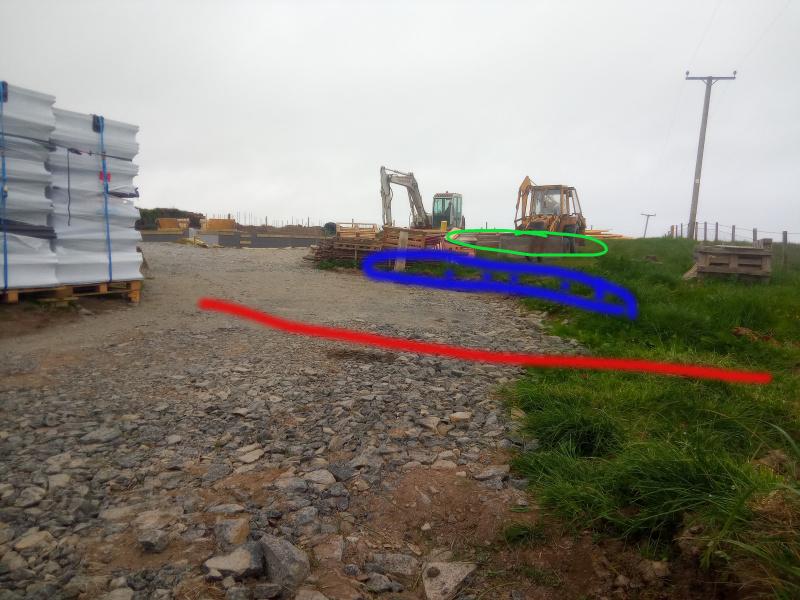
-
@ToughButterCup, how did you resolve this, did you end up DIY'ing a solution? Any source of info for design. I have a slope on my site and an existing rubble drain, so would love to create a pond/ wetland area, possibly a swale instead of just burying crates.
-
Slightly off topic, but try building in out of the way Highlands. Unless it's a block,sand, cement they have no clue/ inrerest. I mentioned to the BCO, you(building control regulations) don't really care about leaky houses, he was quite upset, and told me they were very keen on It, it must pass 5ACH!, I said, yep, like I said, you don't really care about it. But at least Scotland are tightening U values, and are ahead of England and Wales.
-
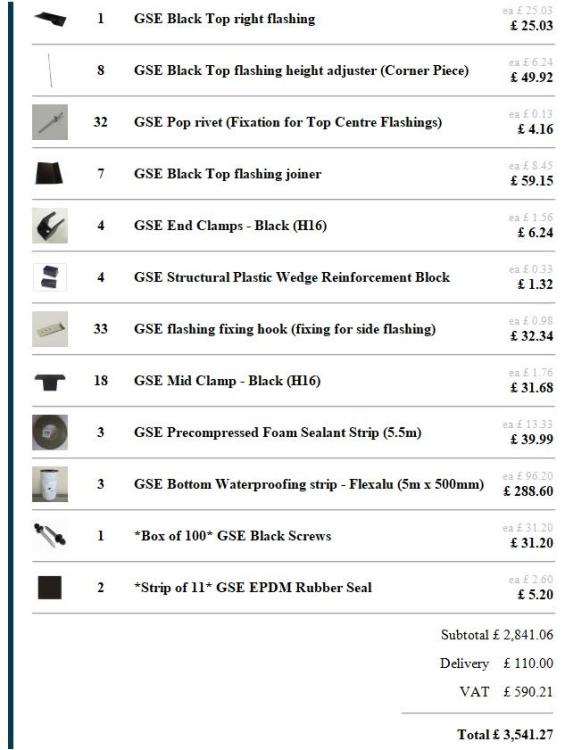
the quote did include the panels @ £1352 (£1622) / plus the GSE trays couldn't screen shot the whole lot(🙈), but yes, including vat the trays and trims are £1800 (not 2K as I said earlier, but, more expensive than the panels.)
-
Ahh, but you missed this bit in the same post
-
Not for the 405w panels I was looking at you need two halves
-
Not sure where £50 quid comes from for PV modules? I was looking at city plumbing for 405 we @ 159 less 10%
-
I'm looking at options and prices for PV, with my build budget tight, I still want to add a 4KW array to the roof, Getting costs the only options I can find are GSE trays and there are coming in more expensive than the panels. Are there other systems out there or am I looking on the wrong place. Eg if I went for 10 off 405w panels, I would need 20 of the half trays, plus clips trims etc. Midsummer quoted over 2k for the trays and ancillaries. Any ideas or alternatives? At these costs I may (have to), look at a ground mount after the build.
-
Nothing wrong with EPS 70 under a ground bearing slab.
-
What's the reason for edge bearing slab, have you had to make up the ground? Engineers love to over engineer, of the ground is fairly level, and make up is less than 500mm insist that you want a ground bearing slab. as with @JohnMo, this can't meet building regulations, I think the actis stuff is 0.33. The detail here has too many cold bridges, footing / slab / wall etc. My advice get the slab sorted, minimum 150mm PIR or 300mm EPS . then the radon barrier can be lapped up over the edge. this does depend on what radon protection you need. have you paid for the cheap desktop survey, that gives you an idea of the radon risk on your site?
-
I have read most if not all the ICF posts, and Primer is mentioned numerous times, but not a trade name or type. my journey is underway, and want to get ready for the build. there will be several areas that I will need to stick something to the ICF. 1, Under cill / sills with EPDM tapes 2, airtight membrane from ceiling to walls 3, internal reveals for windows What primer do I need, I was going to experiment with some SBR bond, but if someone has a recommendation for an all-round primer, I'll take that.
-
ASHP, how to decide - I just don't get it!
Jenki replied to Jimbo37's topic in Other Heating Systems
This is the problem, and government grants... I was chatting to a crofter who got a grant towards his ASHP from a wind farm company. So we enquired. Yes we can have 6k towards it. As long as it's MCS installed. So unfortunately this pushes up the price. MCS firms must be making a fortune. We can have a grant and it will cost me more than self installation how can they be correct? My thoughts is that any grant assistance should be separate from the purchase / installation somehow. -
Hope not 😕
-
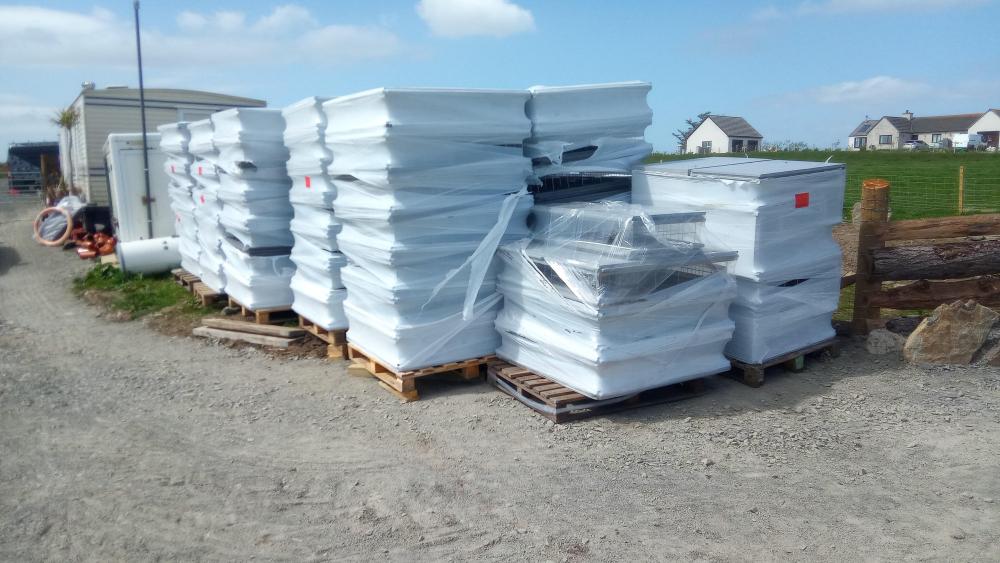
Worries me as well. It's got straps around all of the pallets to make them one lump, Sheltered from the Westerly's by the static, and currently has my van protecting it from the Southerly winds. 🤞. Everything not bolted down moves here.
-
ICF arrived today 😁
- 13 comments
-
- 2
-
-
- the windy roost
- caithness
- (and 2 more)
-
Recommendation/support for build system
Jenki replied to matt58k's topic in Insulated Concrete Formwork (ICF)
I've just taken delivery of my PolySteel ICF, they would not / do not take card due to costs. Had to pay by bank transfer 😕. Was a twitchy 8 days. Not a great sum, but would have sunk us if they went bump. -
Oh yes... I've got an old 550 backhoe, and its done me proud, but the back swivel motor is pouring oil, so I have a catch bucket, filter and re use. The steering pistons regularly come loose and fall out of the pinion, did today when I was unloading an artic🙈. Then not 3 hours ago a hose on the backhoe burst while I was trying to level 20t of crush and run. Would I buy again? Yes. But will be glad not to have to bleed the injectors when I forget to check the fuel level( long length of wood in the tank).
-
True, I was here pretty much from early May last year and reckon there was only 2 days for an hour or so when the midges were out. The horse flies were a different story until we got the fields cut late August.
-
Mine cuts, I think 52 deg left 60 deg right and bevels 47deg. (Compound mitre saw). 😁
-
My experience is currently 0, but will rapidly change from Wednesday when I take delivery of my PolySteel blocks. Why I changed to ICF. 1, My location is windy, exposed, costal. 2, The cost of insulation ( wool batts / wood fibre) has gone astranomical. Added to the cost of tapes/ membranes for airtightness. 3, I can use the PolySteel block underground so removes cold bridges and is cheaper than an insulated raft. This eliminates the DPC, as the core is continuous 4, Scotland as of February require a U of 0.15 for walls. The PolySteel blocks don't meet this on there own. So need EWI / IWI. A negative 5, PolySteel have a metal grid and firings at 150mm centres to allow you to screw EWI/ IWI , battens, plasterboard etc. They clip together, and have T&G on all edges, making them very robust, and blowouts, as far as I can tell are rare. Wall Air tightness is guaranteed. 6, My costings to build with ICF compared to Timber frame, with the same U values / airtightness are similar, I think ICF will cost me around 3k more, but I am saving on the foundation cost so this come down to 1.5k. And I doubt I would achieve the same airtightness with timber frame. 7 lastly, the process will be quicker. And I only have a short "long day" season so speed is good to try to get watertight for winter.
-
Digger ran over generator lead
Jenki replied to CalvinHobbes's topic in General Self Build & DIY Discussion
You should be able to re wire at the socket (reel) end, thus only loosing what looks like 600mm of cable, if you haven't told the hire company I'd be surprised if they notice, but I didn't say that 🙈 -
I bought a similar one, with an old lister engine, it just ran and ran. 20l will keep it running all day.😃
-
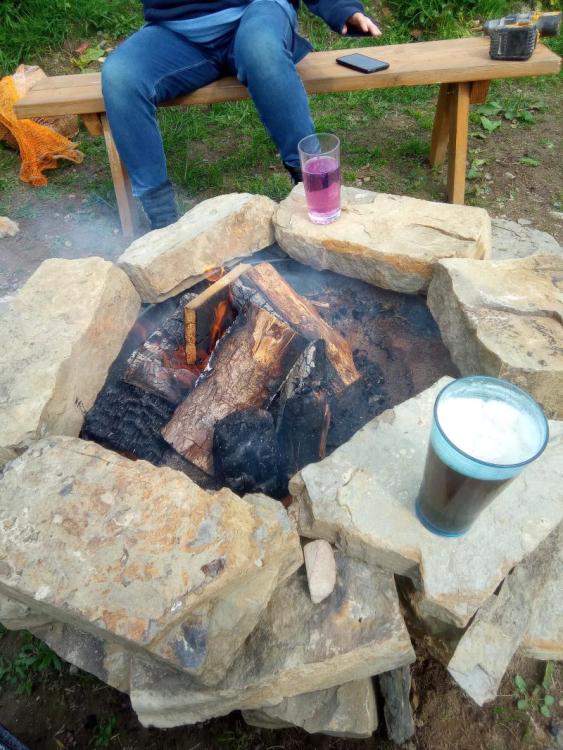
A bit of house keeping today, and as it's dry, and Scotland some down time, beer, g and t and the fire pit
-
Finally made a start in earnest. The original plan was to stick build on site, but the cabin builds opened my eyes to the winds up here, and established concern for getting the house airtight. I priced ICF, and although the costs are higher in the begining I think, I can self build for similar money, but get a far superior product. This is a budget build, most of the nice to haves have been dropped. The only redline is we want to ensure this is future proof, so all on the ground floor. Around 12 months ago the area where the house is going was stripped down to bedrock. The initial plan was a DIY insulated raft, but the move to ICF opened up a more traditional strip footing using the ICF. Back in February we hired a 360 with a pecker to break out some of the rock to lower the NE corner, as the bed rock slopes to the SW. Bed rock exposed looking East NE corner We broke out and removed around 400mm of rock along the W and N elevations, the break out got shallower towards the SW corner. The main aim here was to reduce the height of the house on the SW corner, we will be bringing the ground level up to minimise the impact. We also need to strip some rock of the slab area to allow for the 300mm insulation. This week, thanks to an understanding BC officer, ( still waiting for the revised certificate of design to change the building warrant, but he's happy for me to proceed with the old warrant for the time being👍❤️). We made a start preparing. The plan is to shutter the strip foundation. First step was to level the strip with layers of compacted 40mm to dust stone, and also level the bedrock for the slab. Ready for stone looking W Starting on the North trench we barrow in the stone and compact. Adding more stone in layers and compacting, the backhoe loader was doing some of the grunt, but the leveling was all by hand, 100mm layers at time. looking NE Took the decision to build the sub slab to what will be the same level as the strip footing, this allows for the Radon barrier to be put under the strip up the side and then on top of this sub slab, then all services will be above the radon barrier and below the insulation in another layer of compacted hardcore. The main reason for, what will be a fiddly taks of having the radon barrier under the strip, is that the strip footing has 288 starter rebars and sealing these penetrations would be worse. Once the strip is poured we will finish of the back filling and install the radon barrier. More stone looking East So 5 days in me and Mandy have moved levelled and compacted 70T on 40mm to dust. And around 5 ton of quarry dust, this is used up here as an alternative to grit sand for blinding and pipe bedding. The shuttering is 150*50 timber that will be leveled then the radon barrier folded to form a tray, later to be joined to the slab. I'm going to use 6mm threaded rods to link the two shutters together, preventing any spread when the concrete is poured. Hopefully next week the ICF arrives, in I've got a 10 hour round trip to collect rebar. For a tank of fuel and a days driving I can save around £500 collecting from Central rebar in Aloa. For info, £930+ / ton direct Inverness suppliers (100miles away) we're after between 1250 & 1500/ton plus delivery charges ranging from £200 / £350 plus vat.
- 13 comments
-
- 11
-
-
- the windy roost
- caithness
- (and 2 more)


