Jenki
-
Posts
832 -
Joined
-
Last visited
-
Days Won
7
Everything posted by Jenki
-
This is inside the ICF, so no shuttering to remove, I did use some timber battens to protect the ICF from a vibrating screed. These are obviously staying where they are.... off to water the edges of my slab 😁
- 14 comments
-
- 1
-

-
- the windy roost
- icf
- (and 3 more)
-
It goes on whilst the concrete is still wet ish. And you can't cover with plastic as it can cause the sealer to bloom, it does suggest in extreme temps to re coat after 3 hours, so I did that at around 21.00 last night.
-
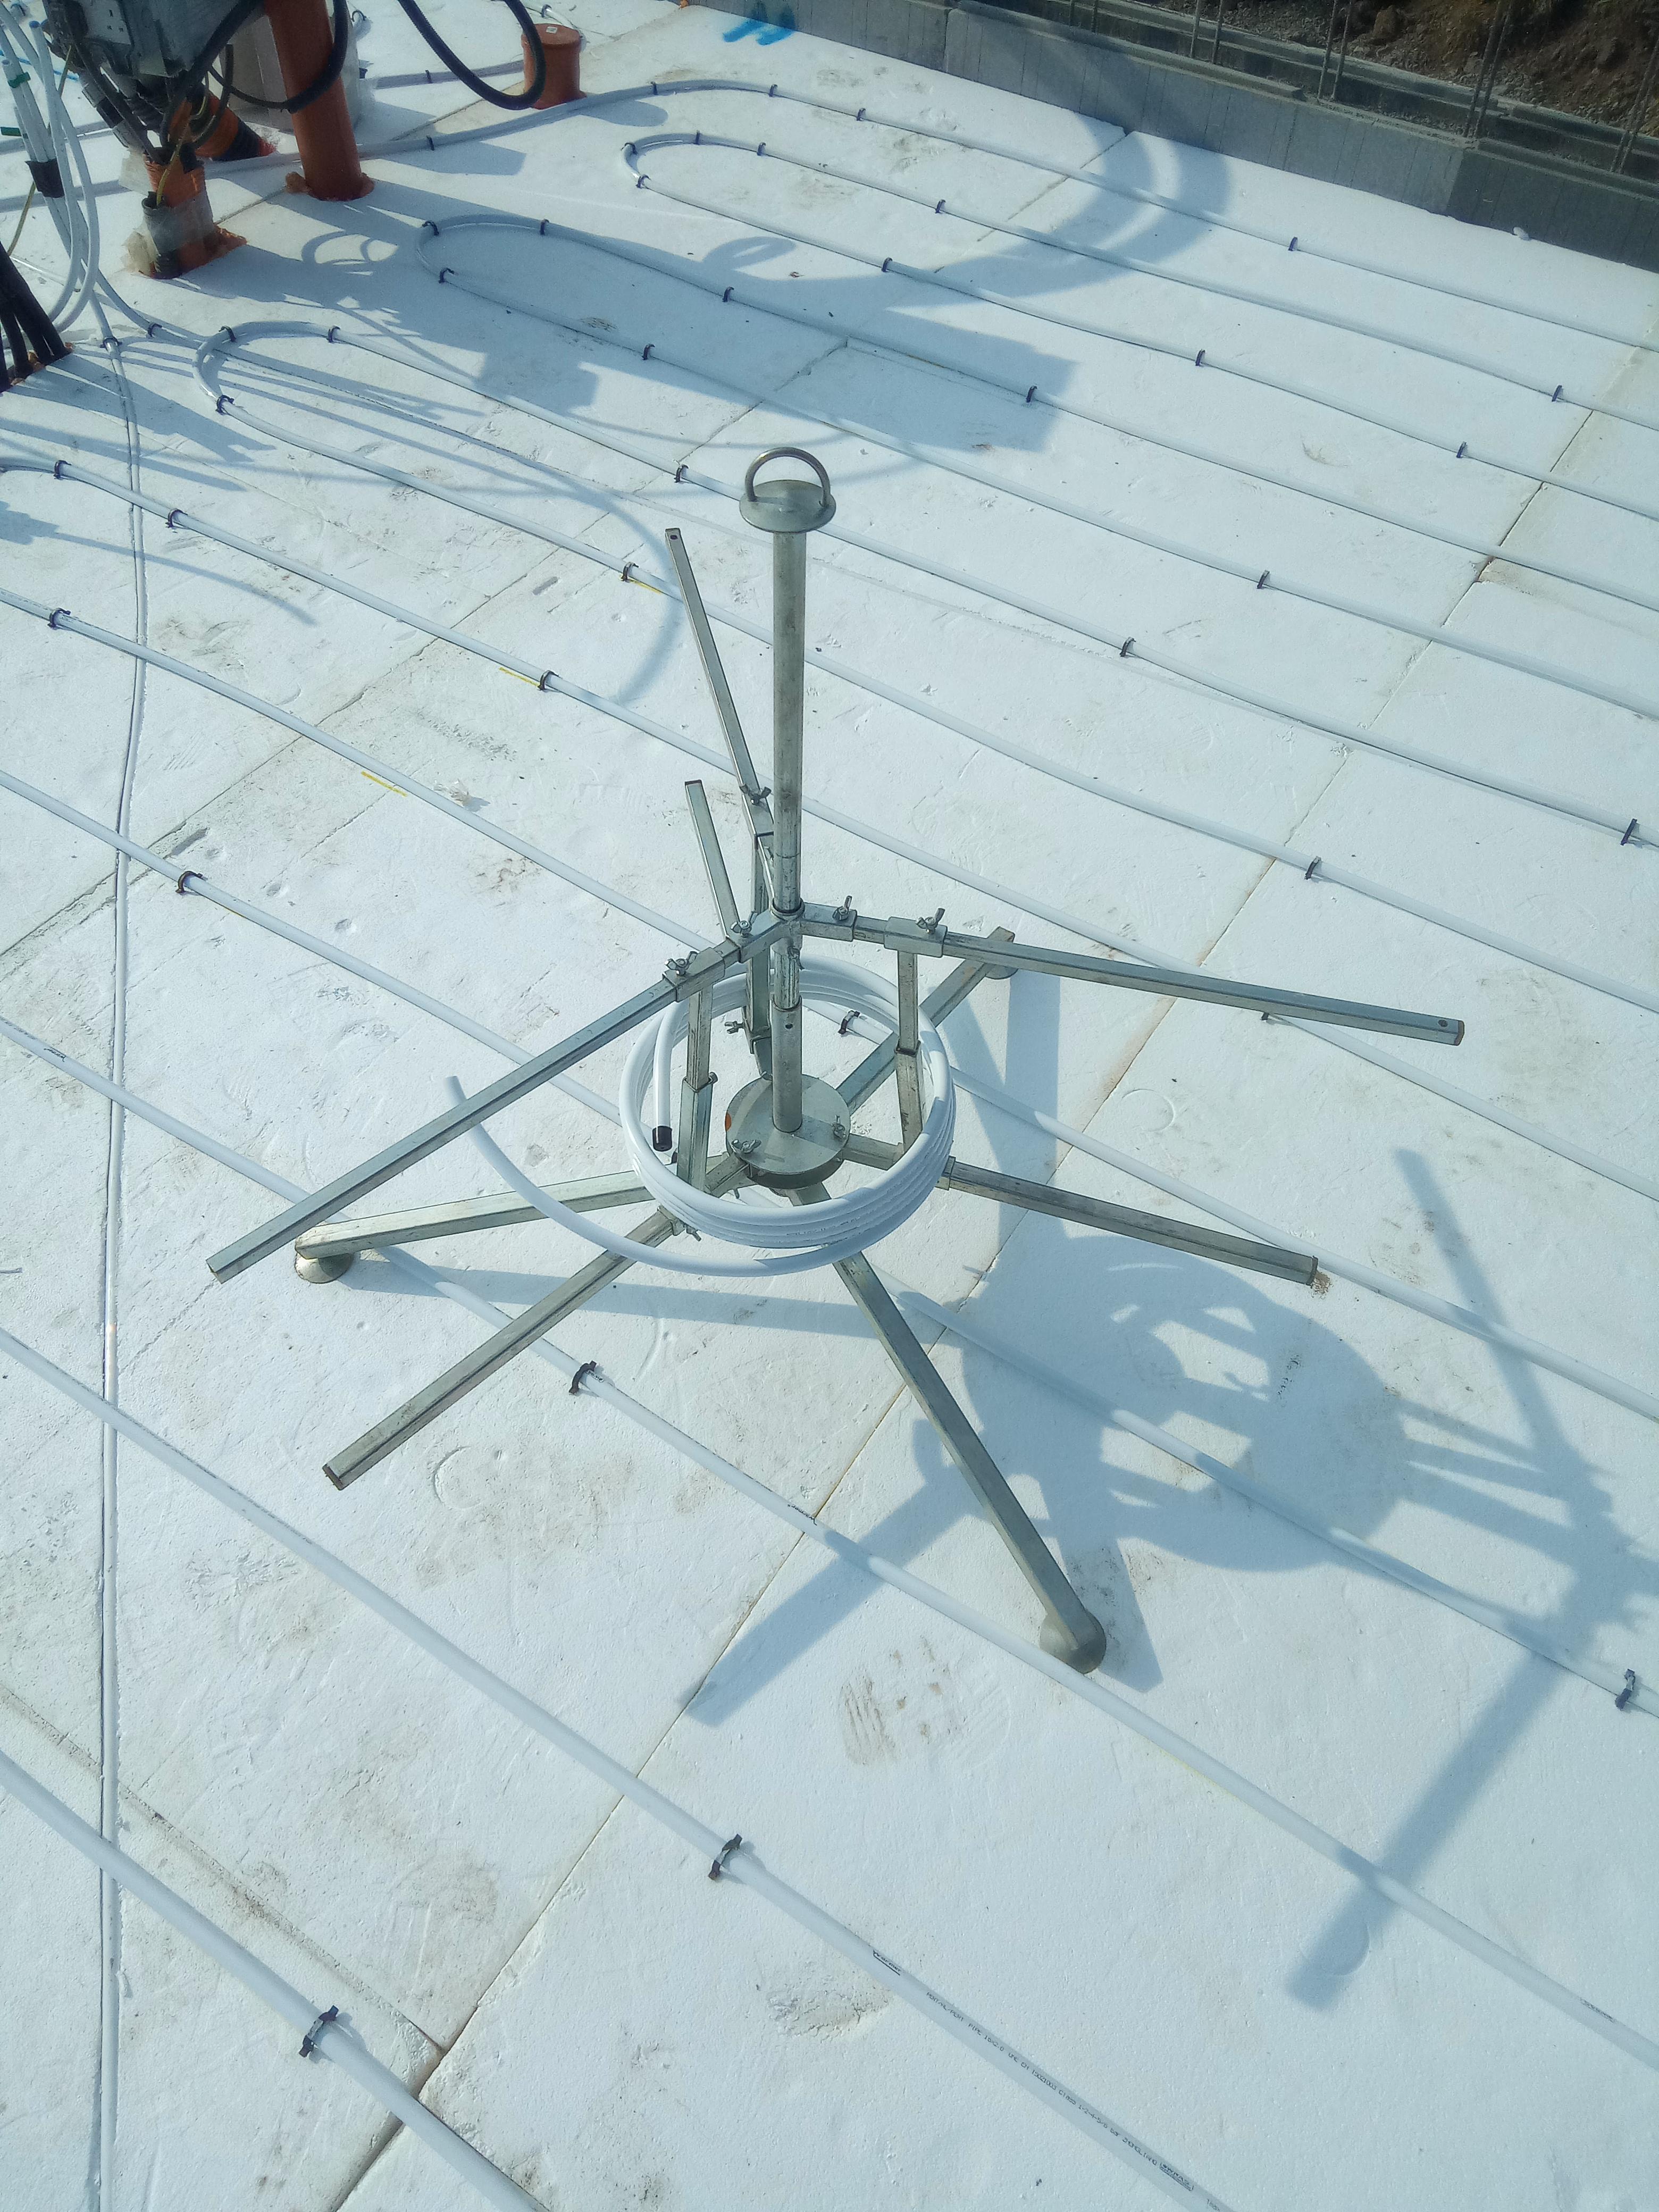
Day 31 of the build. (this is taken from the day we started shuttering the foundations) The weather up North has been spectacular for about 3 weeks, so we (Mandy and I) pushed to prepare and pour the slab before the weather changed, as I'm sure we will get a few weeks of low pressure, wet changeable weather after this spell. Following on from the foundation ICF walls, I'd already loaded around 20ton of 40mm to dust in a pile the slab area. Sat on the sand blinded radon barrier. Job one was to sort the drainage. I'd posted previously about my plan, and some constructive comments suggested changing my planned route, but with the extra length of run to the drain invert level I would have had to increase the floor height even more. So stuck with my original sketch. We ran string lines to mark the main areas, namely WC, SVP in the plant room, shower, WC and Bath, a need ran the drainage to the locations, as the utility backs onto the plant room I didn't add a drain in here as I'll run through the stud and use the SVP. Once the drainage was in place and is tested. We spread out the hardcore and compacted it. I used 10mm crush and run to bed the drainage and cover the pipes, I also ran ducting at this level, bringing in water, power, treatment plant feed plus some future ducts. To get the hardcore level / flat I used 3m lengths of galvanised conduit set on mortar pads all level to each other and used a 4M ally beam to screed the slab. I compacted the first layer then used another screed pass to fill in any deviations and used this as the level for insulation. I used a combination of 200 mm EPS 70 (50mm sheets and 100mm sheets all layed to stagger the joints, and used foam to seal to the ICF. The top layer was 100mm EPS150 this gives a firm hold for the UFH staples, and a firmer feel to the insulation layer. We plan to use a large shower tray and have this level with the floor, so I made this area sunken with two layers of EPS150 and a layer of 50mm PIR. As we were installing the insulation I installed 2 * 100mm ducts for the ASHP in the second layer of insulation these were only 800mm long, and a duct for cables. I also added flex ducts in the insulation for Hot & Cold services to the kitchen, utility, WC,Shower,bath, all these were cut using a hot knife. Lastly I cut some pipe for floor sensors in the kitchen, lounge, bedrooms and bathroom. The underfloor heating consists of three loops around 95M length, planned using Loop cad. The manifold was plumbed , filled and a pressure gauge to ensure no leaks. We have good water pressure so could pressurise to 6 Bar. ( With the heat ☀️ this rose to 9 bar one day). The above picture also shows K Steel screed rails. I used these to break the slab into smaller bays, and mainly will be under stud walls. The slab will for the foreseeable future be our finished floor, so I wanted to introduce expansion joints and force any cracking to these locations🤞. I also used Tibmix metallic dry shake topper on the concrete, the dry shake should help suppress the fibres and also increase the surface hardness. The pour happend on Friday 16th June, the first 5cube arriving at 8.30. we did the kitchen bay first which needed the 7t 360 to move / place the concrete, then, poured the WC / plant room and utility bay. This was an error, I wanted to pour the lounge next so both bays could be finished at the same time, but under the pressure of the pour took advice to do the awkward section next. This resulted in only a 3rd of the lounge bay having concrete, so this was spread out lower so the next load could fill the bay. By the time the second load arrived, the kitchen and utility bay was ready for power floating. The pan worked well and I had some time to start edging the slab, the rebar didn't allow the power float to get to the edge of the slab. By 13.00 all bays were in and leveled, but not floated, but the sun was very hot, and the kitchen bays was getting hard rapidly, I managed to float this but was struggling to to get a perfect finish. To dry shake makes the surface hard and this was apparent, the lounge and bedroom bays floated better, and to the main the dry shake suppressed a lot of the fibres but there are still some visible. The kitchen bay was rock hard by the time I managed to float again, and although it is fairly flat you can see, but not feel, the path of the power float. I used Setseal 6 as an acrylic sealer, which seals the surface and aids the curing process. By the time we finished the floor was rock hard, I mean hard, the idea being that the slab will slowly cure now but will not be affected by rain etc. Time will tell. Due to the temp, and the float not getting to the edge, I will have to carry out some remedial work on the edges of the slab, as by the time I go to troweling these it was too late. Today the slab looks great, it's flat and level, but the perimeter 2 inch will need some polishing, as will a section in the plant room. I'm confident I can get this fixed. Time will tell. The following picture doesn't do the slab surface any justice. It looks rough, but it's glass smooth. So 10.5 cube of fibre reinforced concrete. Power Floated, and this was non stop until 17.30. My chest and fore arms are wrecked from trying to tame the power float. I'm a little disappointed in the edge finish, but looking at it another way, it's way better than if it would have started raining, or the wind that we have today. I'm sure a few hours with a wet diamond polisher will rectify the edges. Maybe another hand would have been good. 🤔. Onwards to the ICF walls... .
- 14 comments
-
- 6
-
-
- the windy roost
- icf
- (and 3 more)
-
Hi. I got my vac pump from vevor, but you do need an adapter from the hose to the valve. The video I linked on you tube tells you the size you need 👍
-
For the cylinder. You need a 2 port if the max thermal cut out stat is tripped. A quirk, but if you have a 3 port you still need a two port to act as a dead stop. All unlikely with a heat pump, but thats the regulations.
-
Nice cylinder 😜, I've not un-packed mine yet as there's no house😁, Just for your info, you will need to install a two port valve as well to comply with unvented cylinder regs. You can't just have a 3 port valve.
-

Final (hopefully) bit of tape and membrane done today
Jenki replied to Thorfun's topic in Ventilation
Great result, the place is huge, so good effort 👍 -
Due to my location North Scotland highlands. this might not work for most. But I've installed my UFH, and the above are now surplus to my requirements. You could always book a stay in our cabins and collect 🤣 I've also got 90M of 16mm pert al pert pipe as well. Thinking £150 for both.

-
Thanks for the detailed reply. I like the idea of two rain gardens (North& South also) and emptying to a pond. This is going to be my base design, overflow from the pond to a wetland and swale👍
-
DCV compression on plastic? I'm not sure...
Jenki replied to Super_Paulie's topic in General Plumbing
Curious, @Nickfromwales, if you were to supply a shower valve from a plant room manifold with plastic pipe, would you use stubby copper to the compression on the valve, and then add an additional push fit joint? So two hidden joints instead of one? Honest question. -
DCV compression on plastic? I'm not sure...
Jenki replied to Super_Paulie's topic in General Plumbing
Sorry for the lateness. But I prefer the 1st photo🙈 Compression on plastic if you don't overtighten and use a metal insert is fine IMHO. Would prefer a visible compression to a hidden push fit joint. -
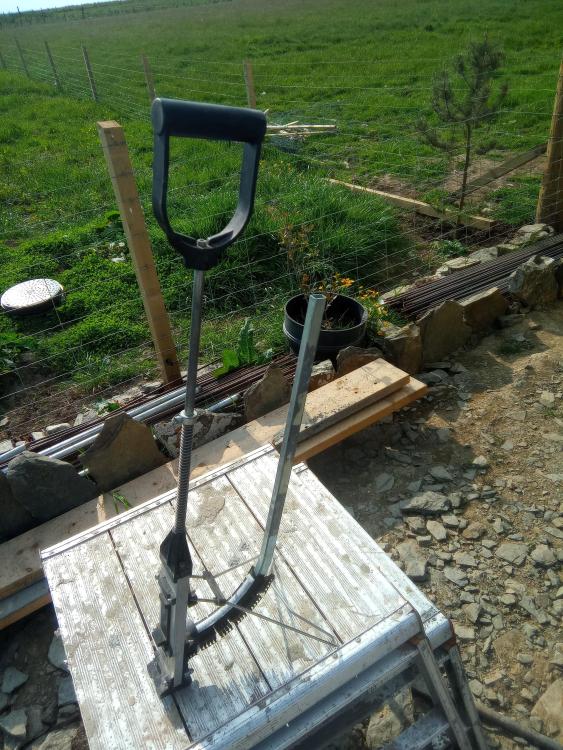
Well its seems necessity is the mother of invention, sat down for a few hours, previewed a few of the tutorials, the one regarding importing a pdf was the key for me, I was away then. I seem to have a workable layout now. 🙂 Off to find my floor tacker, and staples. anyone looking at this thread in the future RTFM. (or the video tutorials, they are good. )
- 5 replies
-
- 1
-
-
- the windy roost
- caithness
- (and 2 more)
-
I can feel a freehand layout, based on past experience coming on.🤔
-
Anybody got any quick tips to get my layout working. I downloaded a trial few weeks back and made a start but was struggling to make any progress. The weather has been ace, and if I can get a layout sorted, and ufh installed might be able to pour my spab by next weekend.
-
You can get folding half doors, that hinge on the screen.
-
Fiver it does.... Ever tried to wipe with wet toilet roll🤔
-
How would I move this scaffolding?
Jenki replied to CalvinHobbes's topic in General Self Build & DIY Discussion
Looks like it's on stillages, most farms will have a telle handler, or tractor with forks. Just pick each up and off you go. If your buying from a farmer I'm sure they will help load -
I installed a 12p Tricel Nova, the instructions were very specific, "the unit must be lifted of the lorry via 2 shackles connected to the eyebolts and sling of not less the x M long... So I bought shackles and slings ready for the big day. Unfortunately the unit arrived on a curtain sider on pallets so lifted it off with forks on the backhoe. All the preparation in the world only counts when you have full control of the process.
-
Personally would steer clear of plastic bags etc, as per @JohnMo photo above, coupler and a proper blank these could be set at finished height or a few mm below, then there is 100% zero chance of concrete entering the pipe. the power float will be over the top / skim the blanks and they will be easily visible. the coupler then allows you to connect whatever you need to, and if you do want wiggle room, follow the advice above, re timber boxing or PIR. +1 to this - - You do not want the chance of concrete entering the pipe by a bit of ply moving when tons of concrete are sloshing about.
-
Could you look at a liquid screed at 50mm and boost the insulation🤔
-
Is this under building control?. In Scotland none of those at that thickness would pass current building regulations, not sure what England's regs are now.
-
A busy couple of weeks and favourable weather has seen some progress at The Windy Roost. When in use the word I, or we, I mean Mandy my wife, and me. So far that's the only labour on the build. Mandy has worked office based for 40 years before we moved here, so this is an all new world for her, and although she regularly tells me she's older than me, and she's needs a day off, I can't be more proud... It seems that the engineers really worry about the wind here, which is fair enough, but you would think no house has ever stood the test of time. The 40M perimeter of the house required 288 H10 starter bars, after installing the radon barrier inside the shuttering, I used some 8x2 timber, (that will later be used to frame the gables), and drilled lots of holes and feed the L bars though. These were spaced as per spec and to suit the poly steel blocks. Checking the dimensions, diagonals and rechecking this was all secured in place. The 8x2 timber made pouring the shuttering difficult. I made some pour boxes, but this had limited success, so ended up using the 7 ton 360 & bucket method, a Caithness speciality, and the bonus was the concrete truck driver is also a very skilled 360 operator, which speeded up the pour. I think Stuart now counts as the 3rd bit of labour on the build. Rebar work in progress. 4 cube of concrete and all dimensions still bang on. Next day stripping the 8x2 was to be honest, a pain in the ass. But a few hours later all the shuttering was removed and we were ready to install the radon barrier over the sub slab joining it to the previously installed barrier now under the footing. Sand blinded, and then added 20 ton of 40mm be to dust in preparation for the slab after the foundation block pour. Installing the poly block we loosely set all four corner blocks, leveled them using plastic folding wedges, and measured the lengths, widths, and diagonals. We strung string lines around the blocks to ensure the corner blocks were in line. We sprayed the footing with marker paint, and then marked the blocks in position onto the footing. Then one by one we set the blocks in position and fixed in place with fire rated expanding foam. Checking the level with a laser level and double check with a dumpy level. Next day we filled in between the corners, gluing the blocks in place and ensuring the blocks are straight level, again using the string lines and levels. We cut holes for drains, ducts, and sealed the gaps with foam. The poly steel block are t&g and also come with clips that lock the blocks together. Before we closed the sides we needed to feed in horizontal H10 rebar🙈. We tied the horizontal and starter bars together, and also tried the rebar to the metal grids in the blocks. To close the runs the blocks needed cutting, luckily our cuts didn't cross the metal firings in the block, so it was simply cut with a hot knife. Then glued (foamed) in place. These cuts were braced with 4x1 screwed into the metal firings with bay pole screws. Foundation course in place. Mandy starting to tie the bars, you can also see the clip between two blocks. Concrete day. 3 cube. Concrete pumps don't exist up here, I was quoted 2k to bring one up from Inverness. I fabricated two 1200mm OSB form boxes, which sat between the top of the ICF block and formed a funnel, and used the 360 and Stuart to pour the concrete into the forms. We had two pokers on the go and filled one funnel, and while the bucket was being re filled, vibrated and leveled the concrete, filling the forms alternatively, and moving the empty form along. Mandy was a demon and just got in with it. The whole 3 cube took one hour to place. So paid £15, waiting time and a drink for the 360 operator. It went really well. We cleaned up the top of the forms, then checked the walls. We didn't prop the forms before, and used the rebar to be sure it wasn't going anywhere. Inspection showed there was some movement especially in the areas where a I removed one side of the ICF for door ways. This was easily rectified with some timber wedged and screwed in place. About 15 props in total were required. I was really impressed with the strength and quality of the poly steel blocks, only slight issue is they do have a slight wave along the block, but screwing timber to the metal firings lessons this and over all after the pour the walls are straight. Next slab prep, drainage, and lots of insulation.
-
- 4
-
-
- the windy roost
- highlands
- (and 2 more)
-
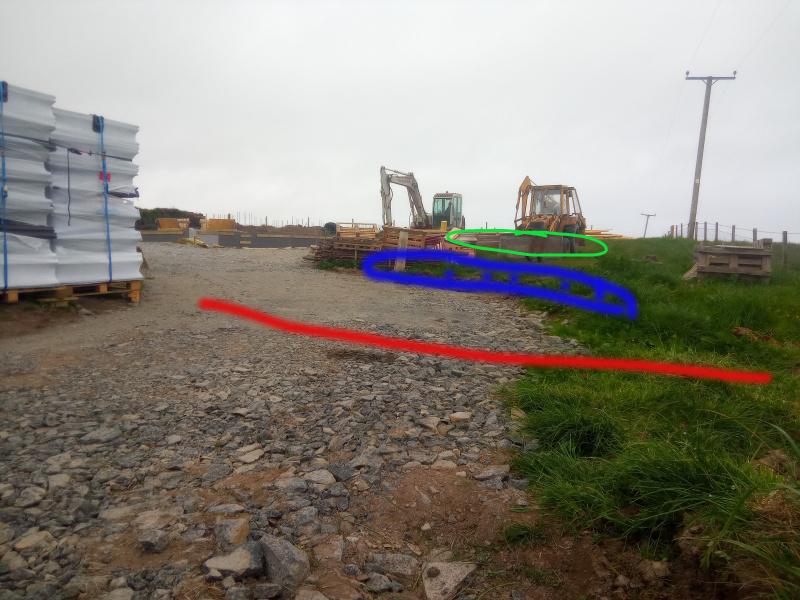
This is what I'm working with. We want a wetland / pond area to the front of the house. This is the track leading to the house, house foundation top left. The red line is an old rubble drain, and my treatment plant uses this. It works well, and now I've put a pond further to the left of the red line ( other side of rubble drain for the plant) it slows down the run off from the field. I think I need to improve the holding capacity a bit maybe some crates at the right side of the red line. I'm thinking the rainwater from the house is directed into a wetland area and run this into a pond (green line), then an overflow from the pond into a swale created near the blue line, this eventually running into the existing rubble drain, if it hasn't already gone, all the land to the right drops towards the coast, 500M. So looking for design details so I can spec this up and satisfy my BCO, who is ok to work with. I'm more leaning to pond then overflow to soakaway for BCO, but implement the above.
-
@ToughButterCup, how did you resolve this, did you end up DIY'ing a solution? Any source of info for design. I have a slope on my site and an existing rubble drain, so would love to create a pond/ wetland area, possibly a swale instead of just burying crates.
-
Slightly off topic, but try building in out of the way Highlands. Unless it's a block,sand, cement they have no clue/ inrerest. I mentioned to the BCO, you(building control regulations) don't really care about leaky houses, he was quite upset, and told me they were very keen on It, it must pass 5ACH!, I said, yep, like I said, you don't really care about it. But at least Scotland are tightening U values, and are ahead of England and Wales.