Leaderboard
Popular Content
Showing content with the highest reputation on 06/22/24 in all areas
-
Hi @BTC Builder Ignoring the irrelevant stuff.. Who's QS has said estimated build cost is £400k-£700k based on their own cost per sqm. Is it the lenders QS? If its the lenders QS, they look at it a different way. From the point of view of protecting the lender. It's all about risk. You say it will only cost £200k by you managing the build and going through the family business. They say what happens if, for any reason, you and/or your family business cannot do the work. What cost will it take someone else to complete the building? That's the lenders risk.2 points
-
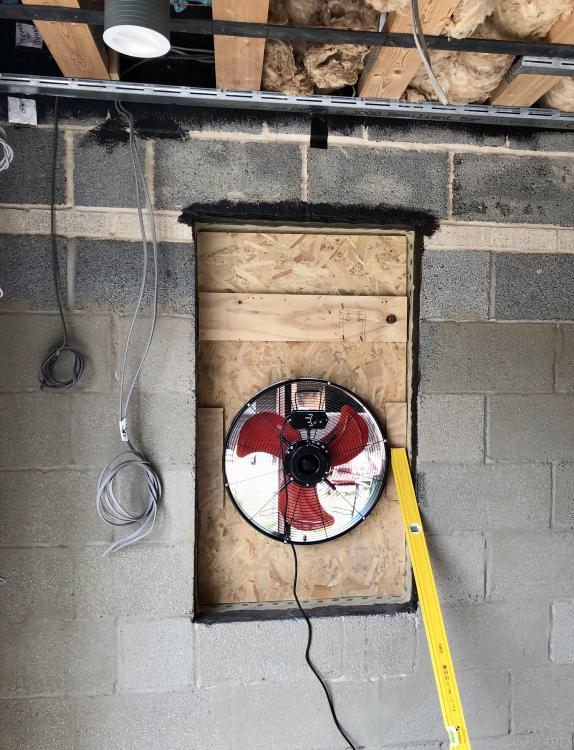
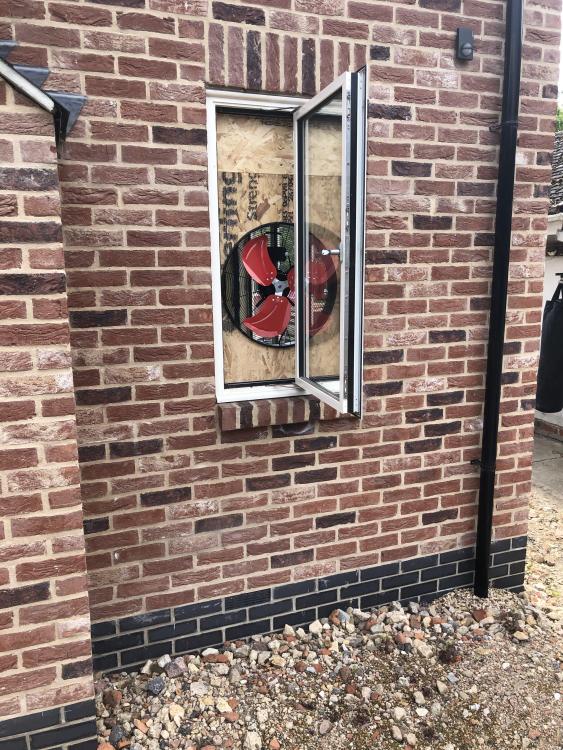
Just had a prelim air test completed, as I’m just finishing up, or so I thought first fix ready for plasterboard. Std brick and block build. And the result wasn’t great tbh so I wont publish it. Filled the house full of smoke, reversed the fan to try and ID the areas for attention… Windows, all taped up on perimeters, but the units themselves leak air in the corners, most if not all suffer from this, and my big gable window which comprises of 8 window units leaking along frame joints where attached to next frame - not happy at all with this. Restraint straps, air making its way down back of restraint strap between blocks and strap. Handful of small holes, and the odd crack in mortar that I’d missed. Big fist sized hole into the cavity I’d missed behind a steel into the cavity - Doh, poor attention to detail! And the mvhr unit, I taped off before the manifolds, maybe I needed to tape off at the building inlet and exhaust, as smoke billowed out the vents, are the units sealed up by design or are they quite leaky? To be fair the company I used (found them on the internet) were spot on, walked me around and helped identify the areas for attention. My local chap wasn’t interested in doing a test at this stage… £250 quid well spent, even if result was poor. Now I’ve seen it done, I need to build a rig to replicate. Now I’m going to have a cup of tea, and think about the challenges that lay ahead.1 point
-
https://www.plumbingforless.co.uk/files/ww/merlin/POLYPIPE Air Admittance Valves and Anti-Syphon Units - Technical Guide.pdf1 point
-
I don’t see how a house that will be worth £1million will only cost £170k in materials.1 point
-
Glue blocks and screws. https://www.pearstairs.co.uk/blog/3-methods-for-fixing-squeaky-stairs/1 point
-
1 point
-
You can block up an mvhr by wrapping up the filters with clingfilm - I found that a lot easier than blocking off the outdoor vents, as in our case that involves using a ladder on our garage roof!1 point
-
Might be able to get a brass fitting that would reinforce the hose under a clip1 point
-
1 point
-
1 point
-
@flanagaj Just PM'ed you. I should have added that they work closely with a planning consultant who does work in the south. Simon1 point
-
Martin at Whiterok was very good for us. Based in Basingstoke. Didn’t cost the earth, listened to feedback and wasn’t pushy with anything. We provided a mood board, a list of ‘must haves’ and they gave their two cents. One area they weren’t brilliant at was ‘fabric’ but I’d done my research and knew what I wanted.1 point
-
1 point
-
1 point
-
1 point
-
I'd pave under the area to meet the stone and just fix the pergola to the paving slabs with short concrete screws.1 point
-
Tent pegs is plenty.but so should be the nails, on angles. Plants will catch the wind bug also anchor it.1 point
-
Which is kind of understandable, it is only like a plumber always using the same make of boiler through familiarity, it makes for a working solution but with the combined knowledge on here I’m going for better than that. So I’m going for a modified version of your suggestion, I’m doing my research and then working with the architect for the best overall solution for us. I will be using The Spreadsheet too, but I want to work through each element individually first.1 point
-
@Tom - grow a pair mate . Great big pair . No fannying around in this forum 💪💪💪💪1 point
-
+1 Do this^^^^^^^.. Before living in the Highlands, I would have read this response and thought that's a bit overkill. I read this now and feel the earned experience of Highland living flowing through the advice.🤣1 point
-
Drop to 2.4m high and you'll need 14 sheets of OSB and 20 sheets of plasterboard. Roughly. Just setup a spreadsheet with room dimensions and it's easy to workout what you need. Just remember for sheet materials to include openings, and everything to at 10% wastage.1 point
-
1 point
-
1 point
-
1 point
-
This? "You will also need to provide one of the following: + An approved claim for a VAT refund for DIY house builders + A self-build warranty + An approved self-build mortgage" So, the VAT claim will do it?1 point
-
Wish I’d known about these before! But with nuts as big as @Pocster I man’d up and did mine free hand.1 point
-
1 point
-
1 point
-
1 point
-
I imagine 'Internorm's recommended installation methods' which was what was stated on my contract from the supplier, must be listed in a document somewhere available to installers. However it seems like this is a closely guarded secret. I don't have this document either I'm afraid. I have also been trying to get hold of this, having been in communication with the rep at Internorm. The first time I requested this, I was told 'this changes depending on the envelope of the building'. I replied with the details of the envelope of my house and received no further responses when I continued to request this. Of course I massively regret not insisting upon having the details of this before placing the order. I had just assumed that high spec windows would be fitted in a high performance way, rather than just the basic legal minimum of watertight and a basic amount of draught proofing. Maybe they would be more forthcoming with the details if they didn't already know I was in the middle of an install. Someone else on here has previously mentioned that these methods for standard (non-Passive) Internorm installs are just the legal minimum that could be fit in the UK. I.e. according to building regs and the GGF guidelines. This makes a lot of sense, especially with the disappointment clearly shown online (forums and reviews) with many who have had Internorm's fitted as replacement windows, and didn't know to ask for Passive fit. I think this problem stems from the vague term 'reasonably airtight' used in the building regs for replacement windows. I think it or GGF also mention 'draught proof'. Again vague. If there was a number, method, or materials attached to this (as is the case with Passive fit) it would be easy to prove and hold them to. As it stands it allows for all manner of sins in fitting replacement windows in the UK, so long as the 'making good' is done to a reasonable standard. I also think that as far as common practice seems to be with Internorm installers, they can claim 'will be fit with Internorm's recommended installation methods'. This is misleading to the average consumer, who would logically believe this to provide a higher standard of fit than for a cheaper window such as a low cost UPVC one. I am going to put in a formal complaint in to Internorm about this. With energy prices so high, it wouldn't surprise me if this becomes a more common issue in the UK, as an increasing amount of regular punters who are in the market for replacement double glazing as a once in a lifetime purchase, get sold Internorm on the 'triple for double' offer, and are not particularly well informed about how important the fit is. I assume this hasn't been such an issue in the past with Internorm's usual customer base (those doing a high spec self-build or extension) since they are often advised by a professional such as an architect, or have probably done more research and are aiming for specific targets. It is a flipping disgraceful carry on if you ask me, especially given the importance of improving airtightness in Britain's poorly insulated housing stock. There should be a moral imperative upon window companies starting from the top down to improve minimum standards of fit given the climate crisis. I would expect this to start with high spec companies like Internorm. If anyone does have a copy of these 'recommended installation methods' I would also be very interested.1 point
-
Sometimes hard to find in the database. Waste Carriers, Brokers and Dealers (data.gov.uk)1 point
-
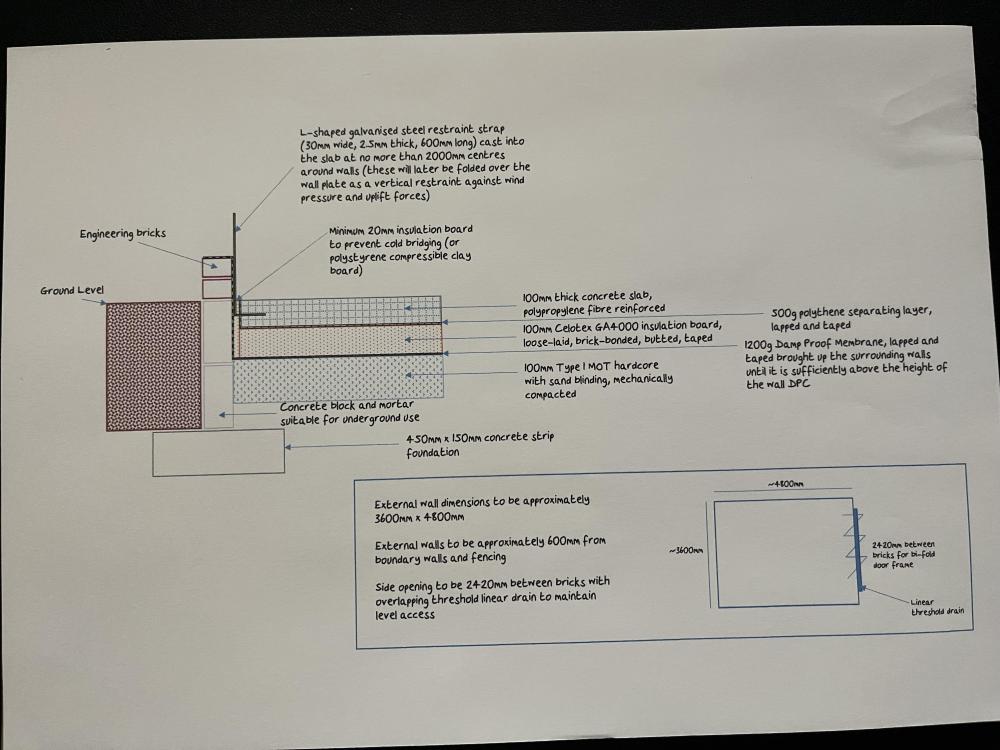
Never let me be accused of not bucking a trend... 😉 I put in an insulated slab without UFH, but there are no load-bearing structures on it. The superstructure sat on strip foundations / blocks / bricks and the bifolds sat on strip foundations / blocks. See the attached for info, but feel free to ask any further questions. This was 7 years ago, and I'm not saying I'd do it exactly the same again, but I've been very happy with it and even in the winter, the tiled floor remains a reasonable temperature. Zero issues.1 point
-
You need to get several quotes but you also need your full SE foundation design and drainage plans. None of the groundsworks companies I contacted would quote without it. As for the cost it does look horrendously high. Our site was similar to yours also requiring a 30m retaining wall and the total cost was £67k which included a treatment plant, drainage field and rainwater attenuation.1 point
-
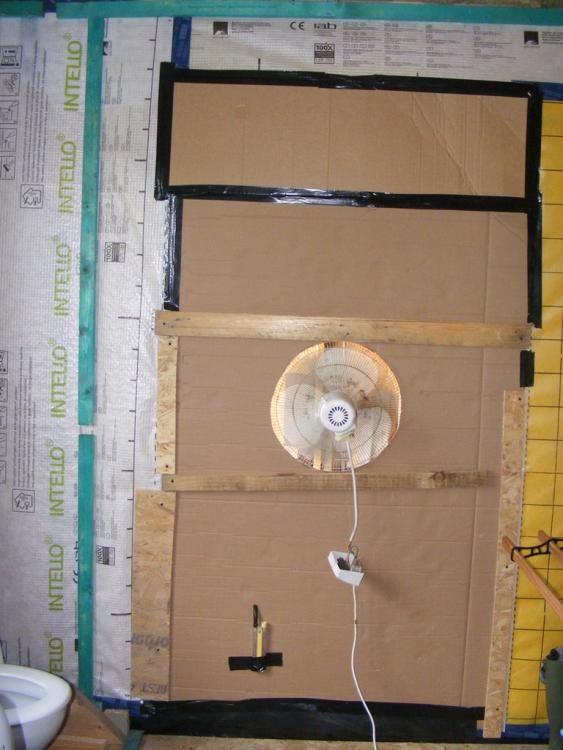
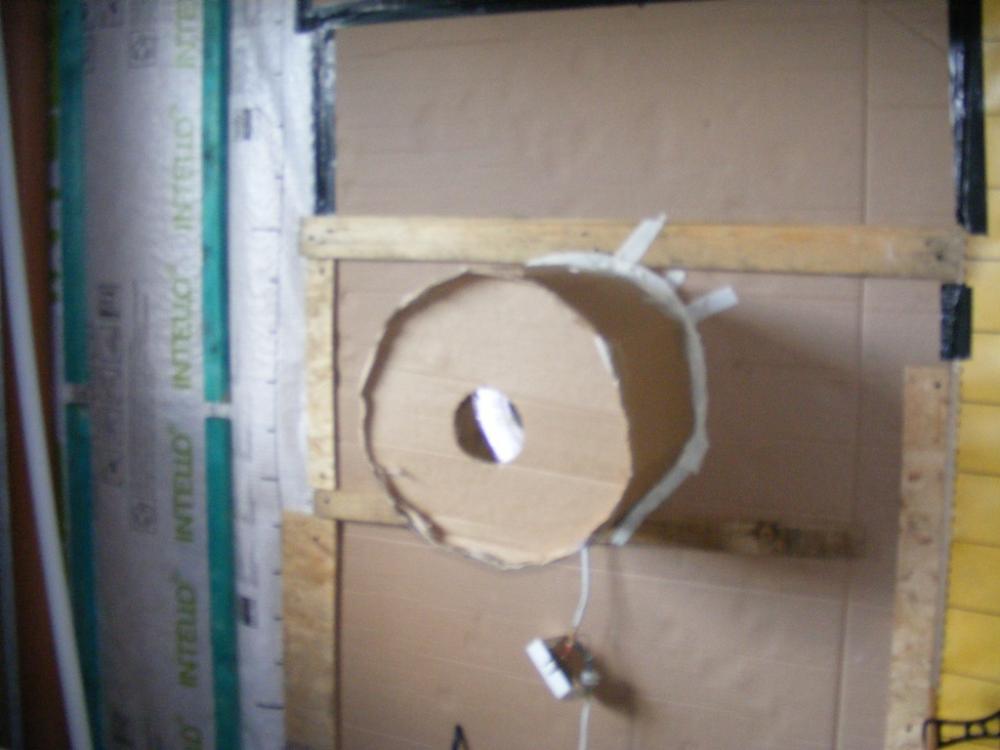
Something I have been wanting to do for a while is see how air tight I have managed to make the house, but without paying £hundreds for an official test. So take one old desk fan. Some bits of wood. A large piece of cardboard and a roll of duct tape. The first thing was just to run the fan on full speed and go around the house looking for leaks. I found a leak under the front door where it was not sealed to the floor properly. A leak in the loft at a tricky detail between the ridge beam and the OSB cladding, and a leak around where the mains comes in and cables go out under the floor. All fixed with a bit more tape and detailing. So now I have a house where there is no perceivable leaks coming in anywhere. The flow going out of the fan seems very small, and it's certainly holding a good pressure (if you open a door you can feel the rush of air enter, and hear the fan note change as it is no longer working hard) Time to try and measure something? Firstly the pressure. Normally an air tightness test is done at 50Pa. It was only when I looked up the conversion I realised that's a tiny pressure, about 2mm water gauge. So I set up my manometer, one side connected to "outside" the other side vented to the room. It's very hard to accurately measure 2mm on a U tube manometer, but I am sure it was somewhere between 2 and 3mm. So in the right order. How to measure the airflow? Simple. Just measure the air flow rate through the fan. Well my little anemometer would not register the wind speed entering the fan, it was too low to get it's impeller turning. So I had to do something to increase, the airflow. Decrease the area, AKA the "flower pot" principle. I didn't have a 15" flower pot, so I made one. The hole in the "top" is 110mm (because a bit of drain pipe was handy to draw around) Now the air flow was high enough to measure. 2.9 metres per second. A 110mm diameter hole has an area of 0.038 M2 So that gives a volumetric flow of 0.11M3 per second That's 6.6 M3 per minute or 396M3 per hour. Now my house has a volume of 480 M3 So that equates to 0.825 Air changes per hour. I'm actually a little disappointed with that. I had hoped for better. But let's not kid ourselves that this was in any way an accurate measurement. At least it enabled me to find and fix a couple of air leaks, and I am now reasonably certain there are no air leaks of significance. Feel free to tear the method or results to pieces.1 point
-
No but they make yummy Mexican style vegan bake thingys. And their booby buns are vegan too, but not marked as such, I think because it would adversely affect sales. Obviously this is on topic as keeping me warm will reduce my bun and savoury bake requirements and so save money long term and help me live longer to see the payback.0 points
-
That looks soooo far beyond me, but thank you. I was planning on my PhD being on The Statistical Variation of Tastiness of Greggs Vegan Sausage Rolls over time of day. Obviously significant field research needed. That’s more my level.0 points
-
If I do that then say polyfilla around the re inserted rectangle it will look shit . A large area can look perfect if re skimmed . Of course if your poly filla skills are amazing then perhaps it would work . I was just trying to do the job to a professional level for once .0 points
-
Thanks all. I like the look of the erbauer guide but think I'll try the ply offcut method - not that I've got massive balls though, more that I'm massively tight0 points


