Leaderboard


Popular Content
Showing content with the highest reputation on 09/10/23 in all areas
-
I am still waiting. My state pension will be the most consistent earning in my life.2 points
-
Lol. Just stirring the pot. As others have said just cut the brick at the bearing points only - you won’t need to do the whole row just the length of the required bearing for the lintel. Level up with cut bricks and mortar or cast in an insitu padstone for the lintel.2 points
-
I've seen work done on here for free by @etc , worth more than a grand. Frankly, the comments on here make you wonder why he bothers. If i had known about him before, and having seen what he has produced, on here, for people, for free, i would have gladly paid him a few bob, or given a donation to a charity of his choice. I have absolutely no doubt that he would have made my initial design that i got through planning, so much better. In the end, my structural engineer is also an architectural technician, and he did exactly that to the internal layout of both floors. Seriously, is it not 6 years to qualify as an architect ? There are always going to be shite professionals in all industries.2 points
-
How much higher?? Would be easier to pack up the lintels on the rest and then bed a deeper mortar bed as you build along to a string line so they all end up the same height. But will obviously depend on how much higher it is.2 points
-
Cut the bricks. The lintels will be bedded down on muck. You can use layers of coursing tiles or slivers of cut bricks with muck in-between to get levels spot on.2 points
-
I decided to redo it. in the end I only had to cut one piece a bit shorter and that gave me a better angle of descent. I'm now at 1:40 which I'm much happier with! I'm glad I did it as well as when I removed the horizontal piece there was a bit of water still in it. so it was definitely worth it in the end.2 points
-
I too went to great lengths to measure accurately where soil pipes should go, and found it was not quiet right, I bought numerous pan connectors (they can all be different by small amounts) so I would definitely drill oversize and give yourself wriggle room.2 points
-
Very very cheap. Please share where you can get a design for £1000 and construction drawings for an extra £250-£300.2 points
-
Lots of the ideas in this thread revolve around sight lines. For good reason. Lining up sight lines doesn't necessarily cost anything but can really change the feel of a place. It's one of the things that makes a bespoke design different to an off the shelf one. My own build was done to a tight budget (about £20k for 50m², plus groundworks/services). Here's some of the decisions I made to keep the budget in check whilst retaining what I think is a pretty nice finish: -My favourite tip is to avoid small windows. Consolidate all your glazing in to a few huge windows. Non opening if possible. You will get a much lower cost/m² with much better thermal properties. It's an absolute win-win. I was really surprised by how cheap a huge non opening 3G window was. -I'm also a big fan of bamboo flooring. I'm not up to date with prices but about five years ago it was half the price of decent oak, and much sturdier. -you don't need solid oak skirtings and door linings. I went with MDF which was a fraction of the cost and also much easier to fit. Need to screw the skirting to the wall, or messed up amitre? Just fill and paint afterwards. - larch and corrugated steel make very cost effective finishing materials, quick and easy to work with. - it's not necessary to spend big money on kitchens and bathrooms. I've seen people spend more on a kitchen tap than my whole bathroom cost. I went secondhand for all my kitchen appliances, but bought good brand names (Bosch and Siemens). They've outlasted the cheap brand new stuff I bought in my other house.2 points
-
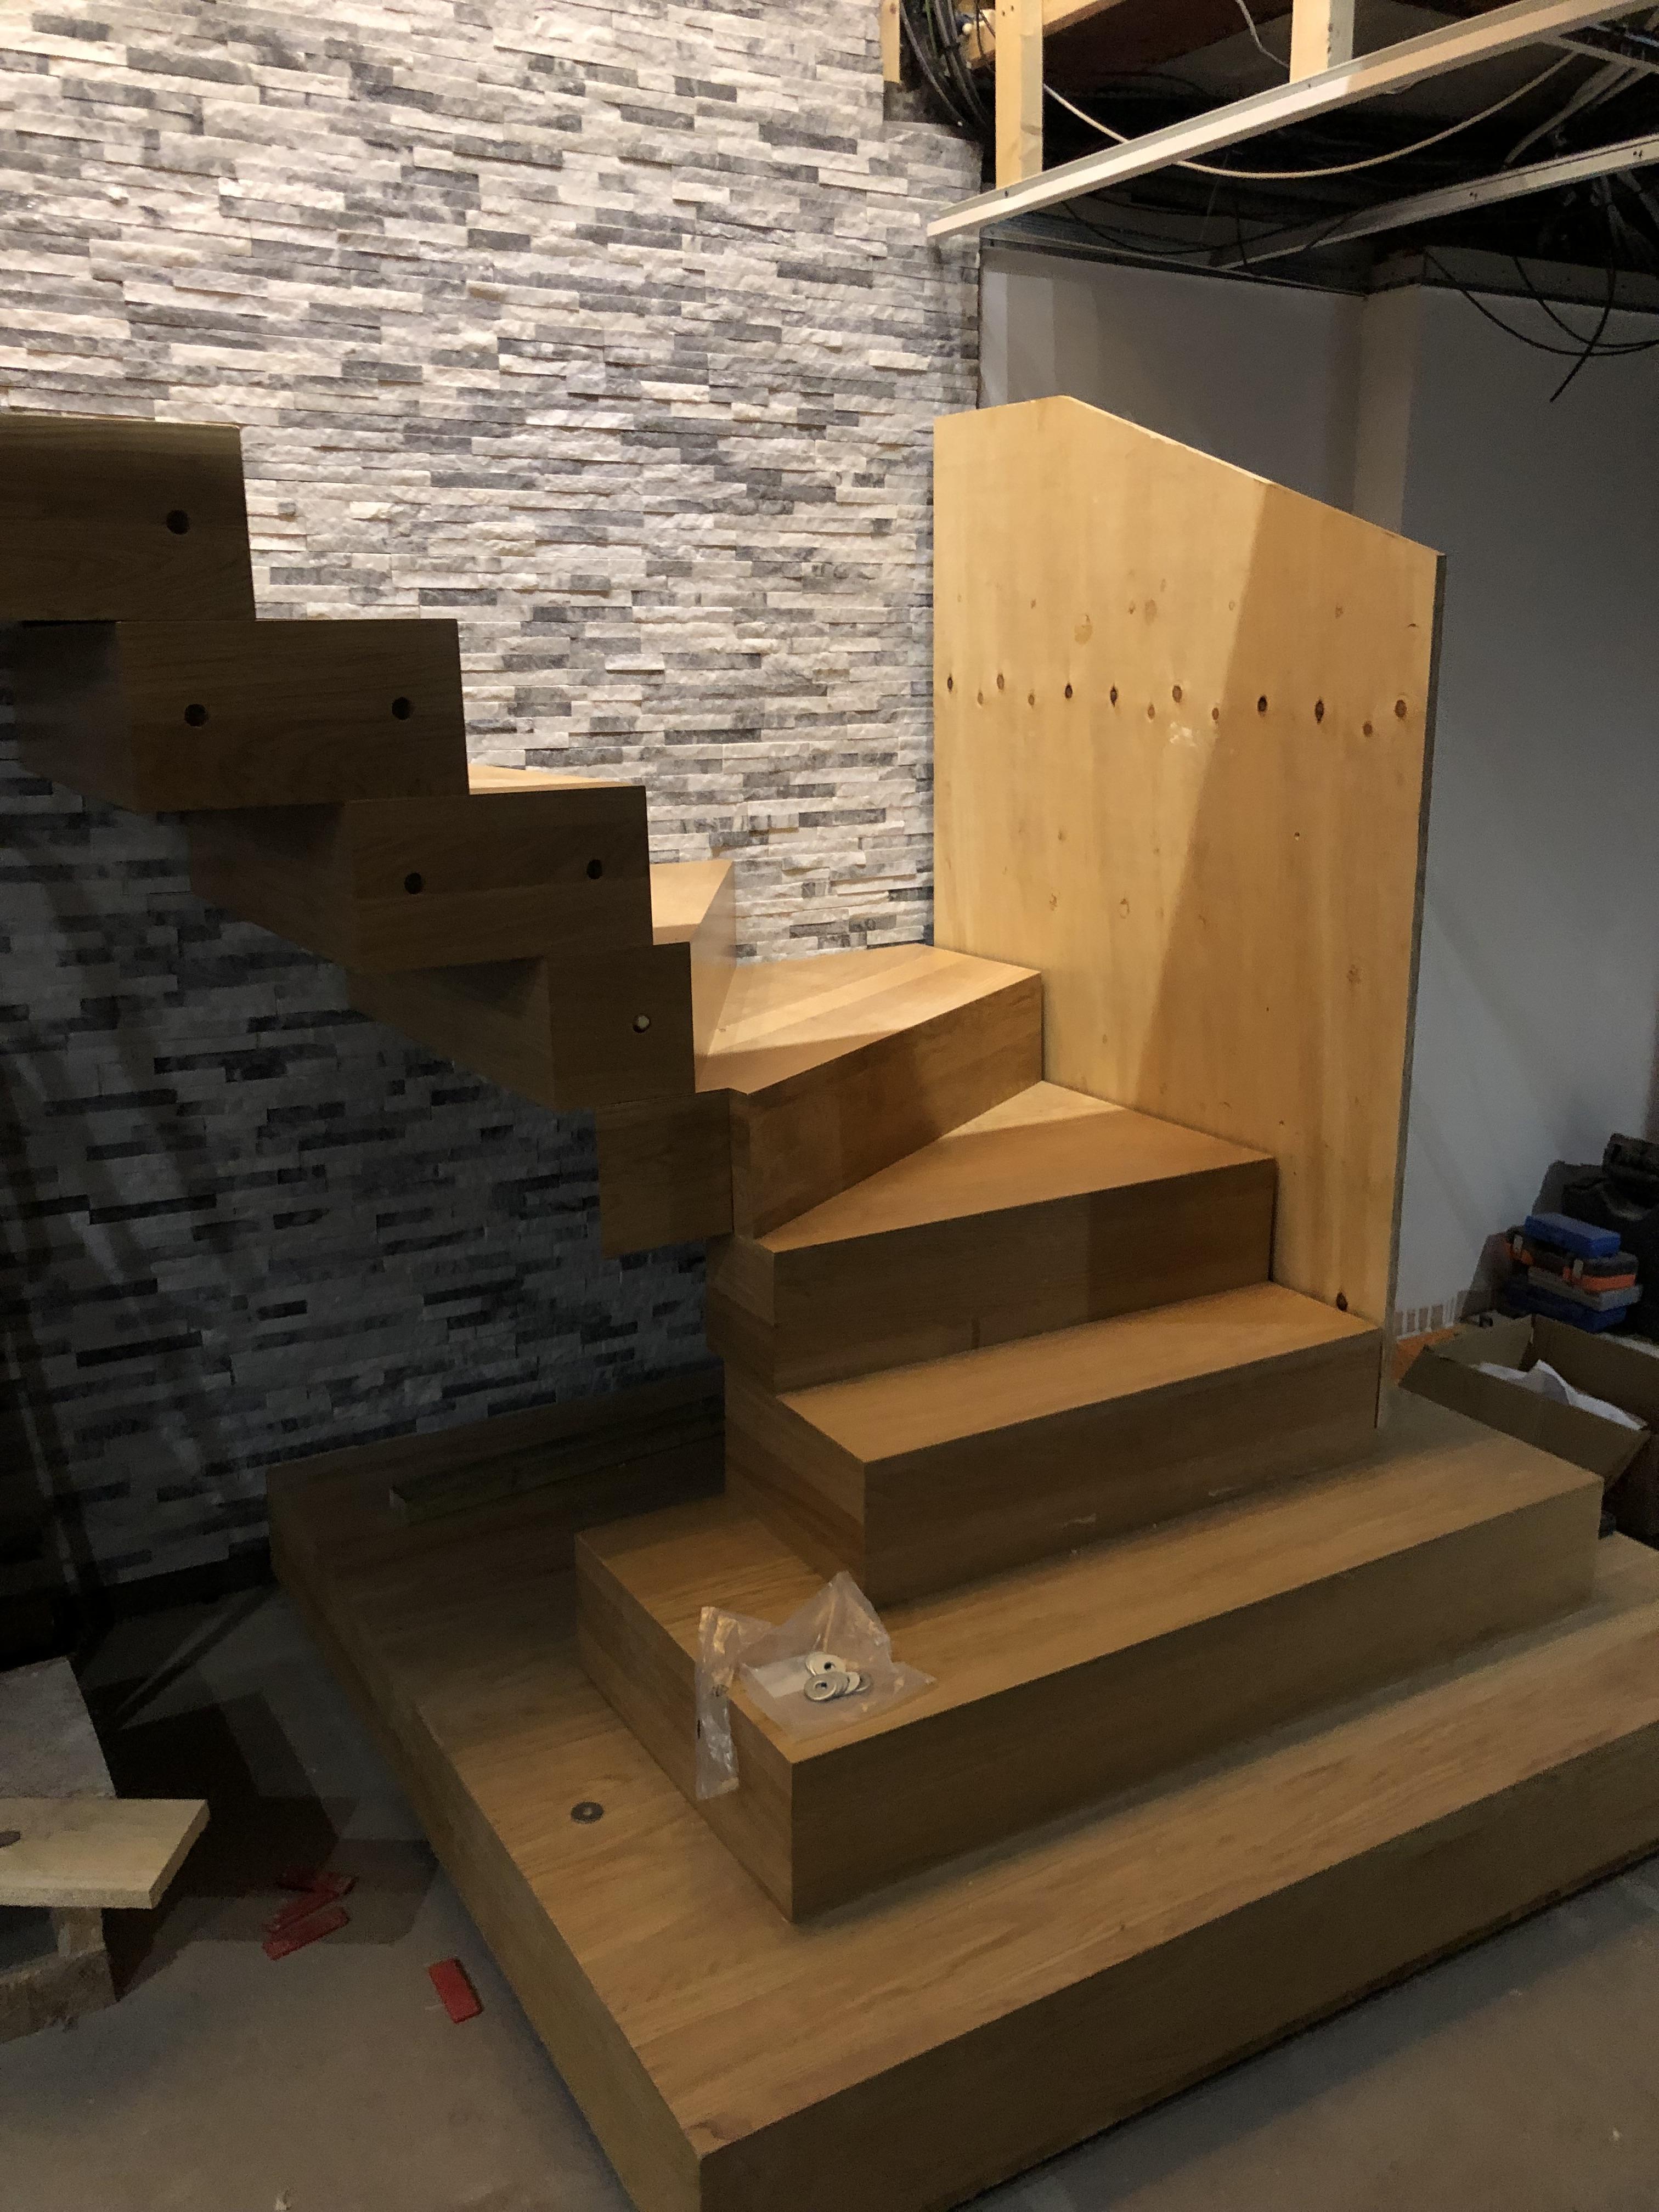
Not complete . Glazing on sides to go in later - very happy with it so far .
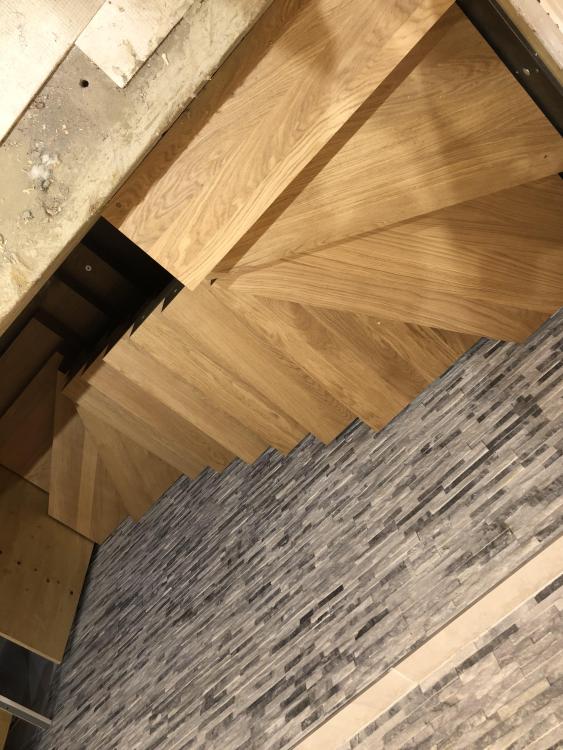
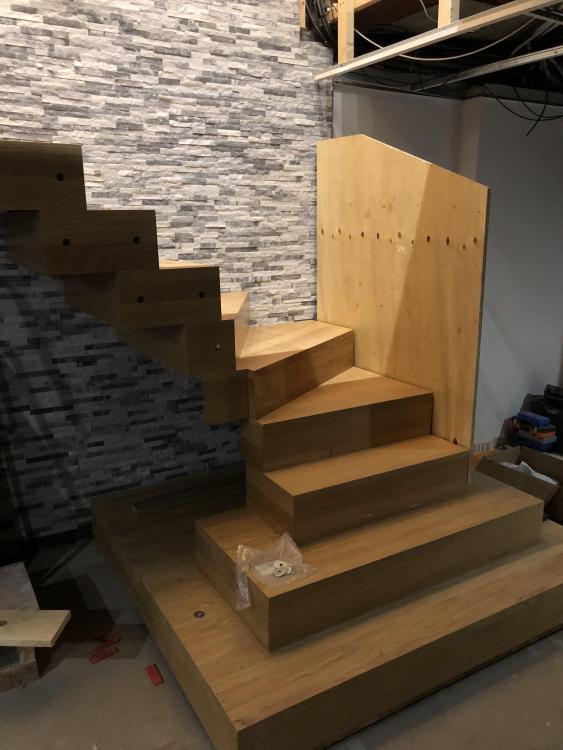 1 point
 -
Hi All. We are hoping to be first time self-builders in rural Perthshire/Stirlingshire next year....when we find a plot of land. We have a design/layout in mind though appreciate this will probably need to be amended to allow for the aspect and topography of the site. Whilst the search goes on we have time to absorb plenty of knowledge from the experience of forum members. Questions of help will no doubt follow Thanks1 point
-
I think that is the important bit. What often does piss people off is the IP side, that lack of transparency and general poor quality offerings. But it is the same with a lot of goods and services, price is not a marker of quality.1 point
-
7 years @Big Jimbo 7 long and hard years!!! And thanks for the kind words. I continue to work in the background helping where I can.1 point
-
His work of genius luck was getting a plot of land in London for £42K1 point
-
That’s all I’ll use on ours and I run a tiling business1 point
-
If you have a multimeter, you can check the amps pretty easily.1 point
-
If you are doing MVHR, the inlet on the smallest will be 125mm dia, but normally 150 to 160mm dia. You need to maintain those Mon cross sectional areas, other noise is going to be an issue. 1 possibly 2 air passing through MVHR will be in addition to air leaking in or out elsewhere. It will be likely heat recovery of additional ventilation over and above your normal ventilation. 3. Both your prices sound excessive. If it was my house this is what I would do. 1. Install moisture activated trickle vents, only open when needed, closed automatically all other times 2. Under cut the bedroom and living doors, so therecis approx 10mm gap always open. 3. Install a MEV system to the vet rooms - this extract only and they also can come with moisture activated flow control at the nozzle and fan speed. There is no heat recovery but only active when needed, only extract ducts needed , so way simpler to install.1 point
-
HiD needs to be given a break . I built an entire blockwork wall used a string , spirit level and laser - paranoid about drift . 1st time is learning , 2nd time is practice, 700000th time is skilled 😊 . It’s fixable ; that is what matters !! 👍🍷1 point
-
The bricklayer is my husband 🙂 He is not experienced at bricklaying, but it's this particular row of 2 bricks that is the issue. All the others are level. I guess the mistake was he built the 5 sections separately with string lines on each one, but this block must have been wrong from foundation level. We had a concrete man who has since been 'let go' who just tipped it all in one place on this pour and didn't move the chute at all making it very difficult to rake it level and I think this bit was slightly higher and we make the novice mistake of not checking it then. That said, it is what it is, and we need to recover and we can't take the whole wall down so need to get level where it is.1 point
-
yep if you use this mdf https://tricoya.com/1 point
-
It’s called piece of mind, well done 👍1 point
-
I’m doing mine in dot and dab I could easily wet plaster But you can get just as good airtightness with both1 point
-
They have closed that tariff to anyone new. Which is a shame, you can do a lot at 10p per kWh.1 point
-
I would certainly drill the hole oversized. Chances are you will need it. Too many times I have gone for precision which was precisely not quite right, but then to find that making an adjustment is really hard if not impossible.1 point
-
The Labc construction details are not to be used after 2021.It say that on the link @Dave Jones1 point
-
you can get already planed 2 x 1 from all the builders merchants but its nearly double the price of the bog standard stuff. a cheap belt sander will bring it up good just takes a while. other option is to use a sheet 8x4 sheet of mdf and cut slots nearly all the way through with a track saw.1 point
-
Could it be white mould? Given all the leaks you might expect some mould anyway.1 point
-
With my appeal it went down well with the inspector that rather than have dormers I designed a double hip roof (no gables) to reduce the mass of the build.1 point
-
Can I be the first to say ' I don't know'? Normally that's a useless comment, but I've seen a lot of attics but never this, and I would be cautious too. The sarking boards having gaps would be normal for air flow but pointless with a bitumen felt covering. I'm going to plump for the white being the residues from rot. The fibreglass looks quite new . We know that electric companies have been ticking boxes by subsidising insulation, so probably bg too.1 point
-
That is amazing that you managed to do that. One small stone and the game is a bogey. I do wonder what your house is sitting on? For all, if you are not as lucky as @JohnMo you can sometimes use a steel plate buried in the ground as this gives you a big surface contact area. If you plan ahead you can use your strip found (steel piles give a good earth) to give you an earth in poor conductivity soils. Here you pour your founds but make sure the layers of reinforcement mesh in the found are electrically bonded. This gives you a big contact area with the soil, much more than a earth rod. The steel mesh in the found is protected against corrosion by the concrete. If you get the spark in early they can test to see if you have continuity all round the found. Now if you tie your mesh in the founds together properly continuity should be no problem. This requires forward planning.. but that is another added joy to self building.1 point
-
The 3 core cable comes in just as it did originally with all 3 cores terminated one into each terminal. Then only the 2 cores of the new cable to the new hood are connected so nothing coming out of the earth terminal.1 point
-
There’s no need for a QS on a one house build1 point
-
I have used Marmox where we have a single storey element abutting 3 storey, so they are on the steel beam. I think they are better at stopping side-to-side cold bridges than up / down, as they have the concrete type vertical cylinders, but better than nothing.1 point
-
you want a planning consultant not an architect. You already have the first hurdle jumped, planning in principle so its down to plans. Find a good consultant to look over the plans, they will know the local planning inside and out (probably worked there as well). May be the case of put in what you want and appeal it. You are in the position of having 2 bites of the cake so refusal isnt a show stopper. If the appeal is unsuccessful you havent lost anything apart from some time.1 point
-
Other than for conversion of existing septic tanks, I would struggle to see the benefit to this over a packaged treatment plant? That produce water clean enough to discharge to a watercourse. Unless the irish regs are different..1 point
-
I installed a Puraflow system. Comprises conventional septic tank, pump chamber, then the clever bit which is the Puraflow unit itself. A big plastic tub filled with peat moss fibres and some piping. The effluent is pumped around that and trickles down through the peat moss, which allows for aerated breakdown, and what emerges from the holes in the bottom is fit to discharge to ground or watercourse. The system was designed in Ireland where high water tables are a very common problem.1 point
-
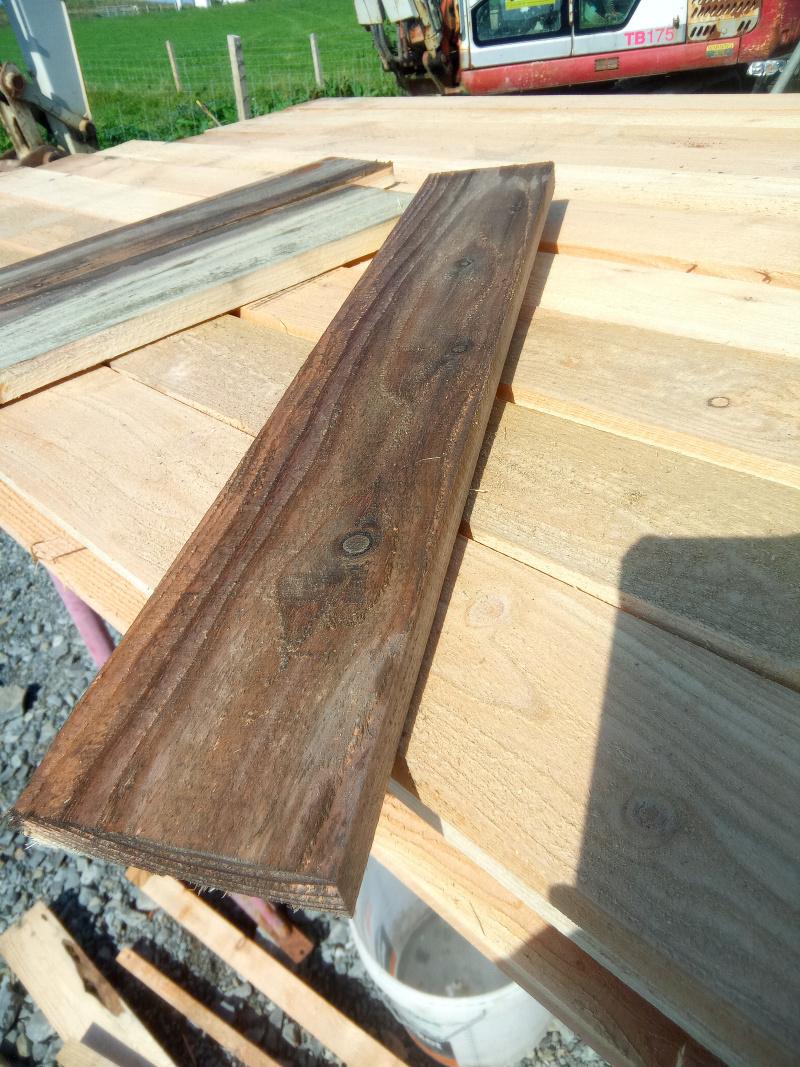
This made me think, it looks so much better than letting it age slowly. But our budget says no. Was looking around and found a product called Eco Wood Treatment. A one coat, one time,harmless to environment treatment. The coverage rates suggest a cost for our cladding to be £160. Compared to around £750. So I bit the bullet. It's a pack with crystals that you mix with clean water. So my trial brush on, no noticeable effect other than being wet. Then 10 minutes in the sun. Wow... The sample at the front 20mins after coating, the one to the left about. 10 minutes and the stack underneath are untreated.
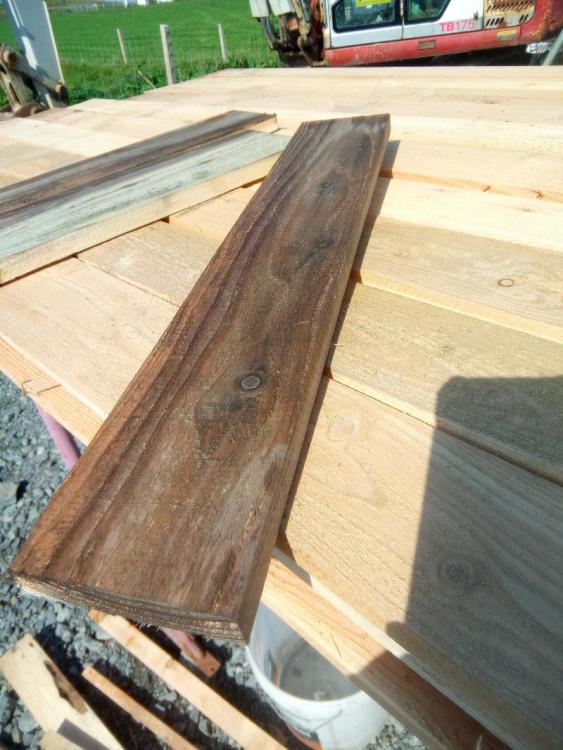 1 point
 -
Fit 4kW PV on roof. Least intrusive addition and it should get you "over the line" Not only that, it will reduce your electricity bills for the foreseeable future. DON'T go anywhere near an MCS supplier for the PV. You just need a roofer to fit the brackets and an electrician to fit the panels and connect it. I fitted my own for under £2K in parts cost. It is a great shame you did not ask the forum at design stage, we could have given lots of suggestions for how to build a good house. Sadly it looks as though you will have ended up with something akin to a mass produced developer house, the very minimum insulation and air tightness they can get away with and slap on just enough solar PV to scrape through. such a house will have higher ongoing heating costs but the developer does not care because 99% of buyers don't care or don't know. If you are self building you have a chance at the start to do it properly and get something better.1 point
-
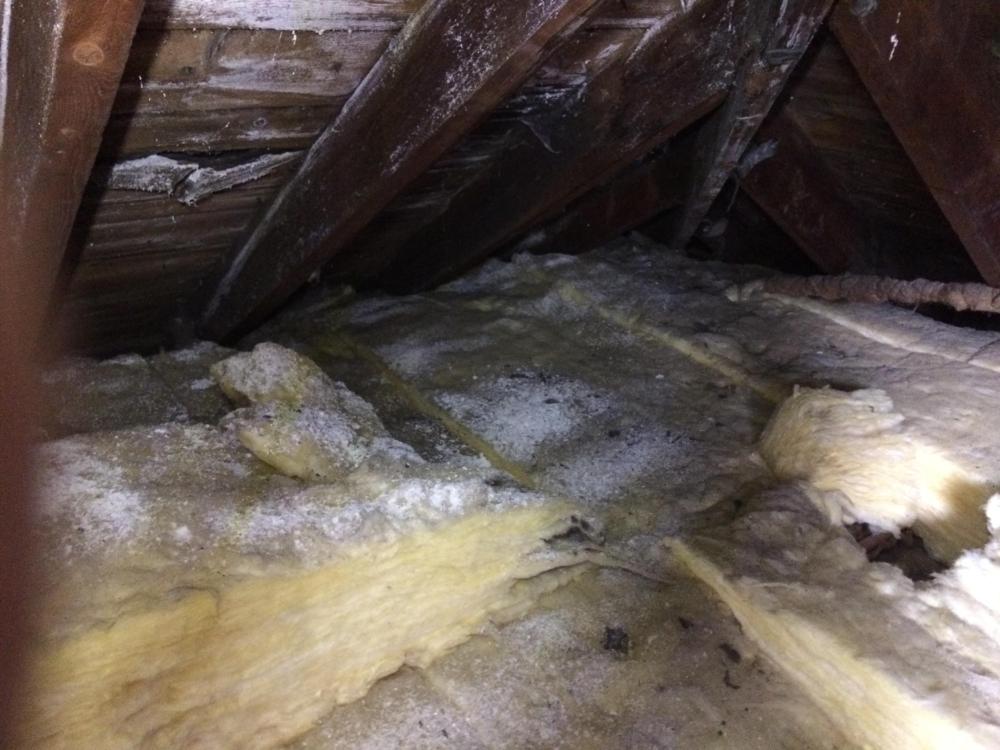
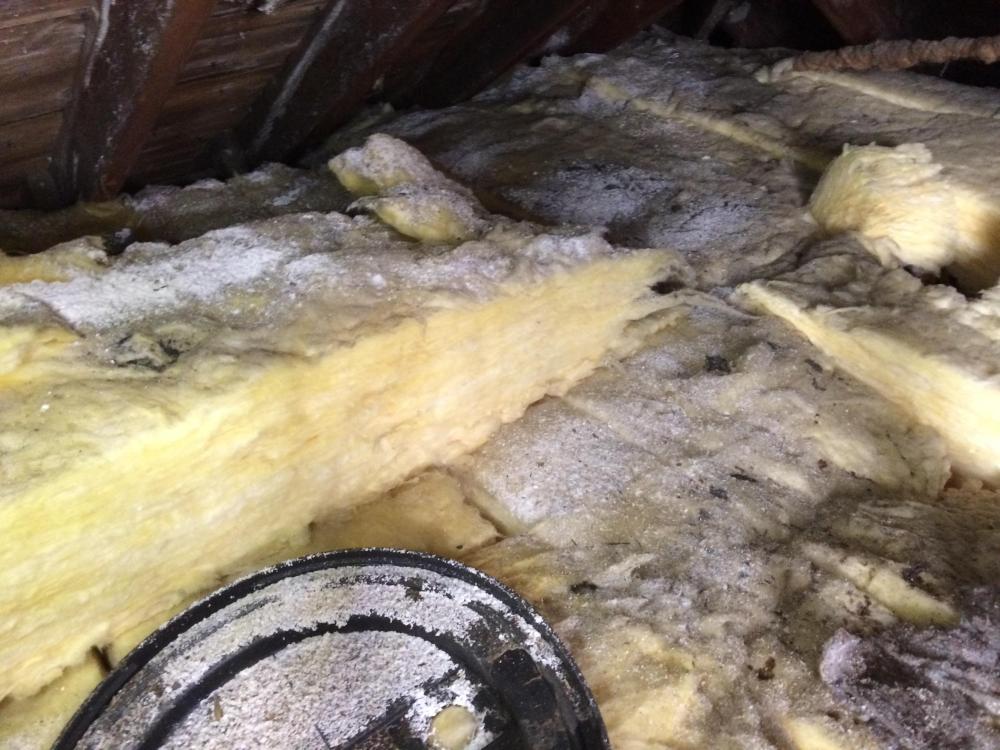
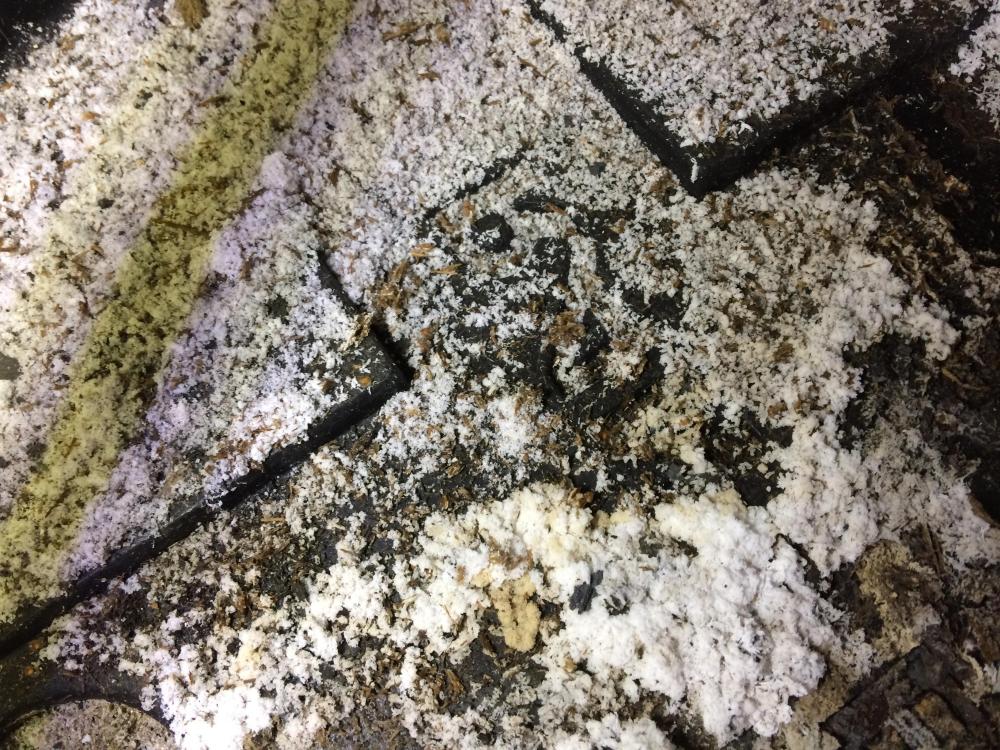
Has anyone got any ideas on this? I have a project; two story semi detached house built circa 1935 with a sandstone exterior skin , probably brick inner skin, no cavity thus it has solid walls externally, internally a set of brick load bearing spine walls. Roof is traditional cut timber with sarking boards. The non load bearing walls on the first floor are lath and plaster on timber studs. What I'm doing is demolishing a load bearing internal wall on the first floor which holds up the attic floor joists thus I need to put in a beam and some other structural support. To intall the beam requires disruption to the first floor ceiling which is attached to the attic joists. I know this about the building. 1 The Client has owned it for say two years. 2/ The roof may have been reslated/ repaired but this was a good time ago, maybe 30 years, possibly longer. 3/ The attic has been lined out but not a habitable space and accessed via drop down ladder. 4/ The roof was insulated with glass wool by British gas.. I can see their warning sign not to walk on the glass wool. I think British Gas stopped insulating lofts some 30 + years ago.. maybe wrong.. does anyone know? 5/ I know that old under slating roofing felts can contain asbestos and they were still used well into the 1980's. 6/ In the last couple of years the roof has suffered from significant leaks and the new owner, my Client has to get folk in to fix what they descibe as a couple of "floods" from roof leaks. 7/ There is no record in the title deeds of the roof having been sprayed for wood worm etc, but that does not mean to say it has not been in the past. 8/ The building has no cavities thus cavity wall insulation can be ruled out. As part of my survey and design I go into the attic and open a small door which lets me see into the roof void.. I observe the following. The above show a white residue on the underside of the sarking and on top of the glass wool. The above shows same residue build up on top of what looks like an old tank overflow pipe. The above shows more residue on the same glass wool but there was also a plastic lid lying on top of the glass wool that has residue in it. The above is closer view of the residue on the plastic lid. Usually I put big warning notes on my drawings if I suspect asbestos may be present, the age of the this house.. well it will probably be lurking somewhere. What I also noticed was that there was a small gap between the sarking boards, could not get good photo without disturbing the residue so stayed well clear. But I could see that through the gap there was some kind of sooty black fiberous material, don't know what it was but it didn't look like old bituminous felt... maybe it was just local.. I don't know. In cases like this I always recommend that an Asbestos specialist survey is carried out.. but I'm naturally curious and want to learn / expand my knowledge. The thing is the residue is quite a heavy build up, so maybe not asbestos... anyway Asbestos is not water soluble My thoughts so far on what it could be are: A/ Is it salts washing off the underside of the roof slates, yes sometimes you do get salts on the slates.. but never seen it this bad. But for this to happen the roofing felt would need to be seriously degraded? B/ The residue on top of the plastic lid means that the residue can't have come from the glass wool? C/ If the roof timbers have had a good soaking has the water washed out possible wood work spray. D/ Has loft space been sprayed and what I'm seeing is over residue from the overspray.. they must have gone to town with the chemicals? The thoughts of BH folk would be much appreciated.

 0 points
 -
This is almost quite timely as I have been pondering how to make a cheap shed that is sturdy. Wish I had seen this at 4:30 AM, then I would have had something else to think about during my 11 hours of driving.0 points
-
When we go to fully tile a bathroom that’s just been skimmed The first thing we do is knock the beads off0 points
-
(expletive deleted)er only took 4 years - what a lite weight - hope the walk on glazing leaks !0 points
-
Firstly fire the bricklayer. Secondly take the brick down and start again this time with a proper level string line.0 points