Leaderboard


Popular Content
Showing content with the highest reputation on 07/28/23 in all areas
-
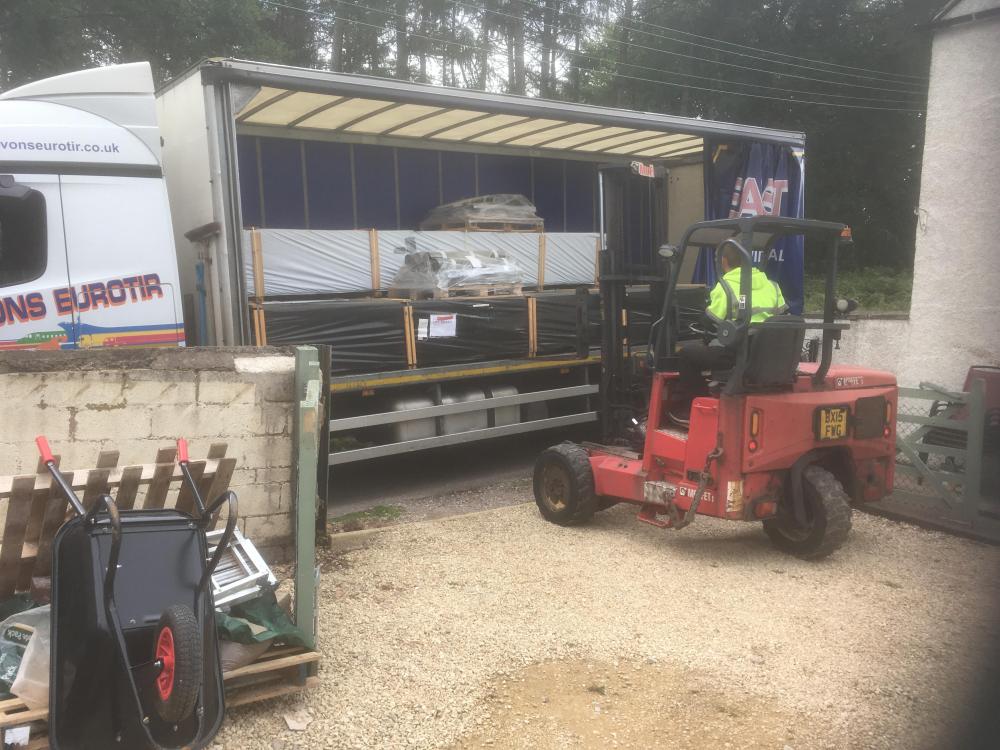
Right, my timber garage kit has arrived 🥳, first thing I notice the ground bearers are at the bottom of the pile so I have to move the lot (about a Ton) to get to them and make a start and although every piece is numbered the instructions don’t use the numbers 🤷♂️.
 3 points
 -
Heat pumps stop and start heating just like boilers do, but the circulation pump continues to run. Controlled stop starts of the heating cycle are fine so a run time of circa 10 mins or more is fine. Anything shorter is short cycling and wastes energy. The working volume of water is the prime reason for ok cycling or short cycling. Various formula are available to calculate the min working volume and cycle times. So if you are heating rate is fixed, the more water you have to heat the longer it takes. So can either install a buffer or keep system volume engaged by have a single or a couple of large zones.2 points
-
It’s good practice to not fit cast Cills until the outside skin is complete. They will 100% get chipped or stained with muck otherwise. good job by your Brickie’s shows they paying attention to detail. zero issue bedding them in level .2 points
-
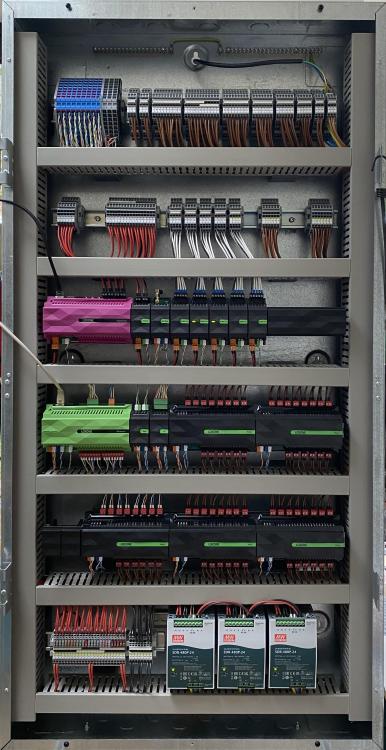
I use 1.5mm tri-rated for all cabinet wiring except signal wiring which would be cat6A. To me, mixing different sizes of tri-rated never made sense from a build perspective as I didn't want to have a scenario where internal circuit changes (and there usually are some no matter how well you plan) could be compromised by having the wrong size cable (sods law!) requiring significant rewiring. Use stranded tri-rated and bootlace ferrules on all terminations. Not sure of the need for gel crimps inside the cabinet, never needed them myself. Buy decent wire strippers and crimp tools. You'll be doing a hell of a lot of cable terminations and using the right tools is so much easier. Those blocks are only cat6A terminals. You will also need larger terminal blocks for all your other cabling both inside the cabinet and connections to external circuits. This is good advice and essential if you are to keep track of what you are doing. Planning the circuit wiring and cabinet layout/connections can be very time consuming but if done properly pays dividends when building your panel. This is a clients cabinet I built last year so you can get an idea of what is included.
 2 points
 -
Get all interconnected and take out the metal bridges inside them where you don't want them interconnected. This way you can buy fewer boxes and end up with fewer leftovers when you are done!1 point
-
Your pipe surface temp is say 25. This heat dissipates outwards (up, down and sideways). At 200mm centres, this heat transfers out sideways 100mm, it will never get to 23 as a 16mm pipe is the source of heat. The further from the heat source the lower the temp. The concrete in the floor is pulling heat and spreading it out over a much bigger area. The heat continues to be consumed to make up for the house heat loss. It's a bit like standing in front of a radiator its hot, take a step or back you don't feel the heat - it's still there just spread out.1 point
-
After a long struggle with planners, we were granted planning consent to build an off-grid ready earth sheltered eco-house in Norfolk, but our heads were turned by the opportunity to convert a barn in Suffolk so we're selling the Norfolk site, and busy with the Suffolk one. Our Suffolk barn is close to where we both grew up, and while the ec-home would have turned heads and probably featured on Grand Designs, we've decided that Suffolk is where we want to be. Our barn will have lots of solar panels, batteries, ASHP and EV charger and my motive for joining this group is to learn from the experience of others. We have a finite budget and don't want to spend money we don't have!1 point
-
A warning to others not to make the mistake I did. I had a 3-phase connection to a building that was demolished to make way for the new build. I paid UKPN for a disconnection (£451) and am now looking to pay UKPN for a new connection (£2,441). If I had been wiser, I could have moved the connection for £1,345. I am going with a meter kiosk near the pole, so I could have just done that once saving £1,547, but even doing it twice to have the meter somewhere else after the build would have saved £202. At least I saved a meter standing charge which would have added up to about £600, but I guess I could have had the meter disconnected and saved that. £2,441 feels like a lot for a new overhead connection to a pole right next to a kiosk. It will take their engineer(s) about an hour I expect and it's probably less than £100 worth of cable and ducting needed.1 point
-
That's all to do with energy flow through the floor. Nothing to do with solar gain. You are heating lots of tonnes of concrete, which in turn gives heat to the room. If you let the floor have to much heat, it takes for ever, for the heat to be given up and the room continues being heated. Same when the room is cooling, by the time you have lost 0.5 deg in room temp the floor is way to cold to react quickly, so the room continues to loose heat until the UFH has caught up. Solar gain - If your room temp is targeted at say 20 deg, the floor surface temp will be in range of 21-23 deg. If you get solar gain and the room starts to exceed 20 degs, the floor to room deltaT reduces, so the floor gives off less kW of heat. If the room goes above the floor temp, the floor stops giving of heat and could start to absorb it. A thermostat does nothing to help control solar gain.1 point
-
Room may not need UFH in it if lots of UFH pipes already pass through that area. For example our utility has the manifold in it so has no dedicated UFH loops, same with the hallway. If you have a DHW cylinder in the utility, again no need for UFH. Have seen plans with UFH in a plant room, plenty of heat there already without adding more. Hysterisis is the off set between the set point and reaction point. A 0.5 deg hysterisis with a set point of 20. Will switch off the heating at 20.5 and back on again at 19.5. Now concider your floor will take circa 12 hours to change room temp 1 deg. So a normal hysterisis thermostat is just too slow. Room temps will vary by 3 to 4 degs which is less than ideal. We started with a 0.4 hysterisis thermostat and that just didn't cope, so upgraded to 0.1. Have you thought about cooling, you may not think you need it, but can be a zero cost adder with the right ASHP. Ruining cool water through the floor loops certainly helps in summer, if you have PV running costs can be close to zero. We added 1kWh to a our daily electric bill having cooling on from 8am to 5pm.1 point
-
That's all good news then. I think my theory of rain flowing on top of the ground then into your reservoir still ahem....holds water. So land drains it is. Use cheap perforated pipe, gravel surround and membrane around that. I would send it all to the pond if the levels allow, with overflow to ditch. That way you are keeping the pond full and limiting what runs off to contribute to flooding elsewhere.1 point
-
So the SE has got costs back for both Ground Screws & Piles - 18K vs 35K so we're going the ground screw route. The exact number TBC (currently estimated around 90). They had been looking at a type 2 compacted layer 300mm above the screws but are now looking at a 200mm structural raft foundation directly on top of the screws. Then the insulated foundation is placed on top of this. Bakck of packet costs now as follows: 30K groundworks and install of Kore insulated foundation 7K for Kore EPS 20K groundscrews circa 10k ? for 200mm raft So about 70K for the foundation. Against this the Irish Government has waived development contributions and water / sewerage connection charges until next April 2024 if you finish building before Dec 2025 which is 12k + 9K savings so the foundation should work out around 50-60K when all is repriced and if we start say in January 2024. With everyone on holidays it will be September before the SE gets back to me with a delivery date for the final design meaning selling my house will delay things into 2024 I'd say. Was holding off hols myself, so this may trigger a break for me before this all kicks off!!1 point
-
I would try a sanding brush, the cylindrical type not cup shaped. Much less aggressive than flat sanding and easier to blend in1 point
-
Welcome to THE self build forum, friendly bunch with loads of knowledge on all aspects of building and renovations. We have all been there in various forms, bring it on.1 point
-
Pumped the water out and it hasn't risen again overnight. There is a ditch/watercourse which we are going to be discharging the surface water (attenuated) and foul water to. We are actually installing a pond, funnily enough. Are you suggesting to run the perforated pipes to act as the land drain to the pond instead of the ditch/watercourse? Our architect and structural engineer have come back also advising the perforated pipes and land drains1 point
-
Am I missing something here? If the outside ground is lower than the underside of the beams, how can they be submerged? That would mean the water inside is higher than the ground outside so cannot be ground water1 point
-
Google T shape tile trim Stuff like this comes up, so check with dimensions as to what is suitable. https://www.protilertools.co.uk/product/genesis-aluminium-formable-tile-in-stair-nosing-nfa-2-6m-length--multiple-choice-of-colour--?gclid=EAIaIQobChMI0a6czeSwgAMVuIBQBh3V9QJzEAQYASABEgKhAvD_BwE1 point
-
Need to get it out. pipe it to wherever your roof water is going.1 point
-
No It’s a crap way of doing Building in as you go is much more solid If they don’t want to do them now They won’t want them at the end of the job1 point
-
Cheers gents, I went ahead and did it. If nothing else it tidied it all up and will protect the foam from getting banged up 👍1 point
-
Thank you for the explanations/technical details RobLe and image from DJ, makes sense I'm happy to press on with simple replacements. The reason for the change Craig is the wife wants Anthracite but also I'm about to swap out the plastic conservatory in the images below for Oak with a tiled roof so now is the time to do the windows. M. Pike Conservatory Existing.pdf1 point
-
Hi @Fallowfields I just remember it was none of the big ones. They seemed to want only run of the mill situations. Who did the previous owners have insurance with??1 point
-
I'm kind of glad July hasn't been too warm, as its enabled me to get more done than i would have otherwise, but the rain has been the main issue, and surprisingly, hedgehogs which have been running all over the front garden, until they mysteriously all died, why i've no idea, felt very privileged having them here. First bit done whilst the hedgehogs were still around, the bit i've been wanting to do the most, around the boiler and gas box, where the worst damage to existing masonry was. June brought boiler service time of the year, so while the plumber was here, he fitted a new longer flue, and also a new gas pipe from the meter to the boiler, to accomodate the thicker walls. Around the flue, I have applied the required dual density rockwool wall board, heavy but really nice to work with, with the remainder done in the usual EPS. Fascia was also installed badly by a contractor many years ago, so i took the bad bits off to replace later on. Fascia repaired, brick slips applied and gas box has been resprayed and refitted. I still need to silicone around here and fit the boiler flue rubber, along with cutting the waste pipe down slightly to fit nice and snug. Rear of extension has been boarded, and mostly rendered, the top part is also fixed now, and just needs a render basecoat on, and brick slips. Front is also complete, and i have since popped a trim above the window to cover the foam, this also needs a bit of silicone when i get a tube. Below the DPC on all sections of EWI, i've got a tub of black render to finish this off, which i'm going to do all at once at the end. Really pleased i've managed to get this far, i've still got to take off 3 rows of tiles front and back of the original bungalow to put some mesh in to stop mice getting in the loft, ensure the insulation is bang on, and vented, replace the latts and felt and tiles back on, a nice autumn job i think when its a bit cooler still, minus the rain!!1 point
-
Glad you're sorted, those prices don't look too awful, considering. It does seem mad it's so hard when the subsidence was rectified and so long ago, unfortunately probably another casualty of the tickbox "computer says no" approach to focusing on the easy customers and avoiding anything requiring a bit of thought...1 point
-
Doesn't that just add more expense for little or no benefit. Staple UFH pipes to the PIR, then fibre reinforced concrete, tile to concrete So hardcore compacted, sand binding, DPM 200mm PIR, Polythene separating layer UFH stapled to PIR, 100mm fibre reinforced concrete slab.1 point
-
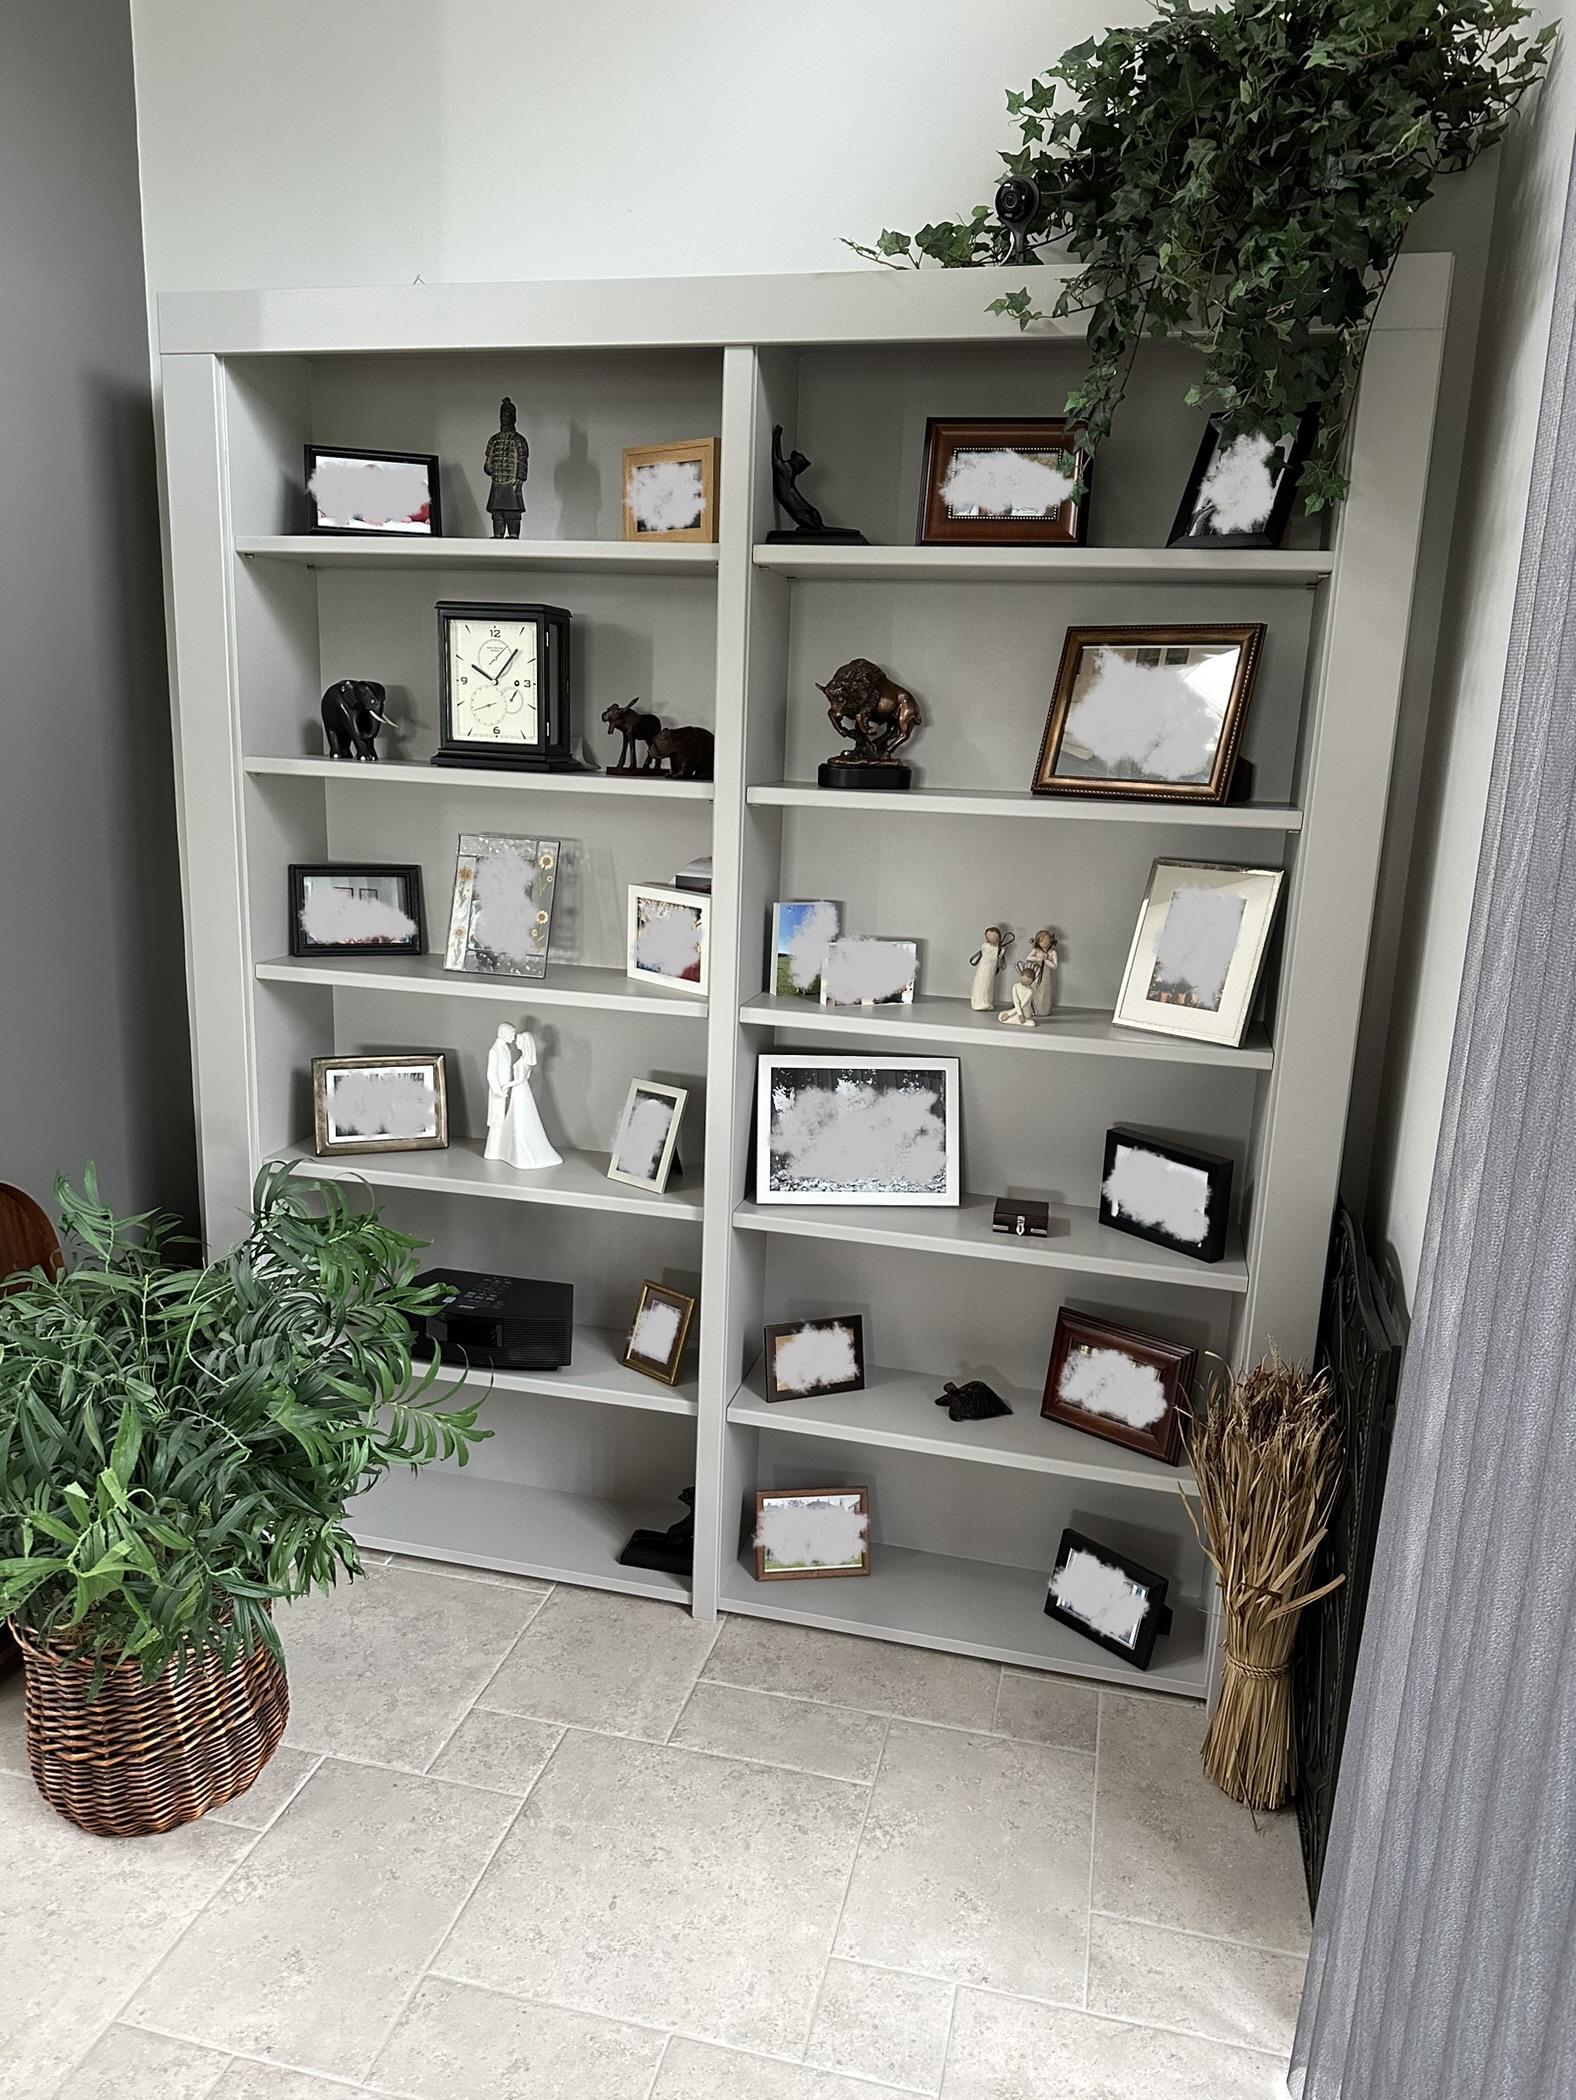
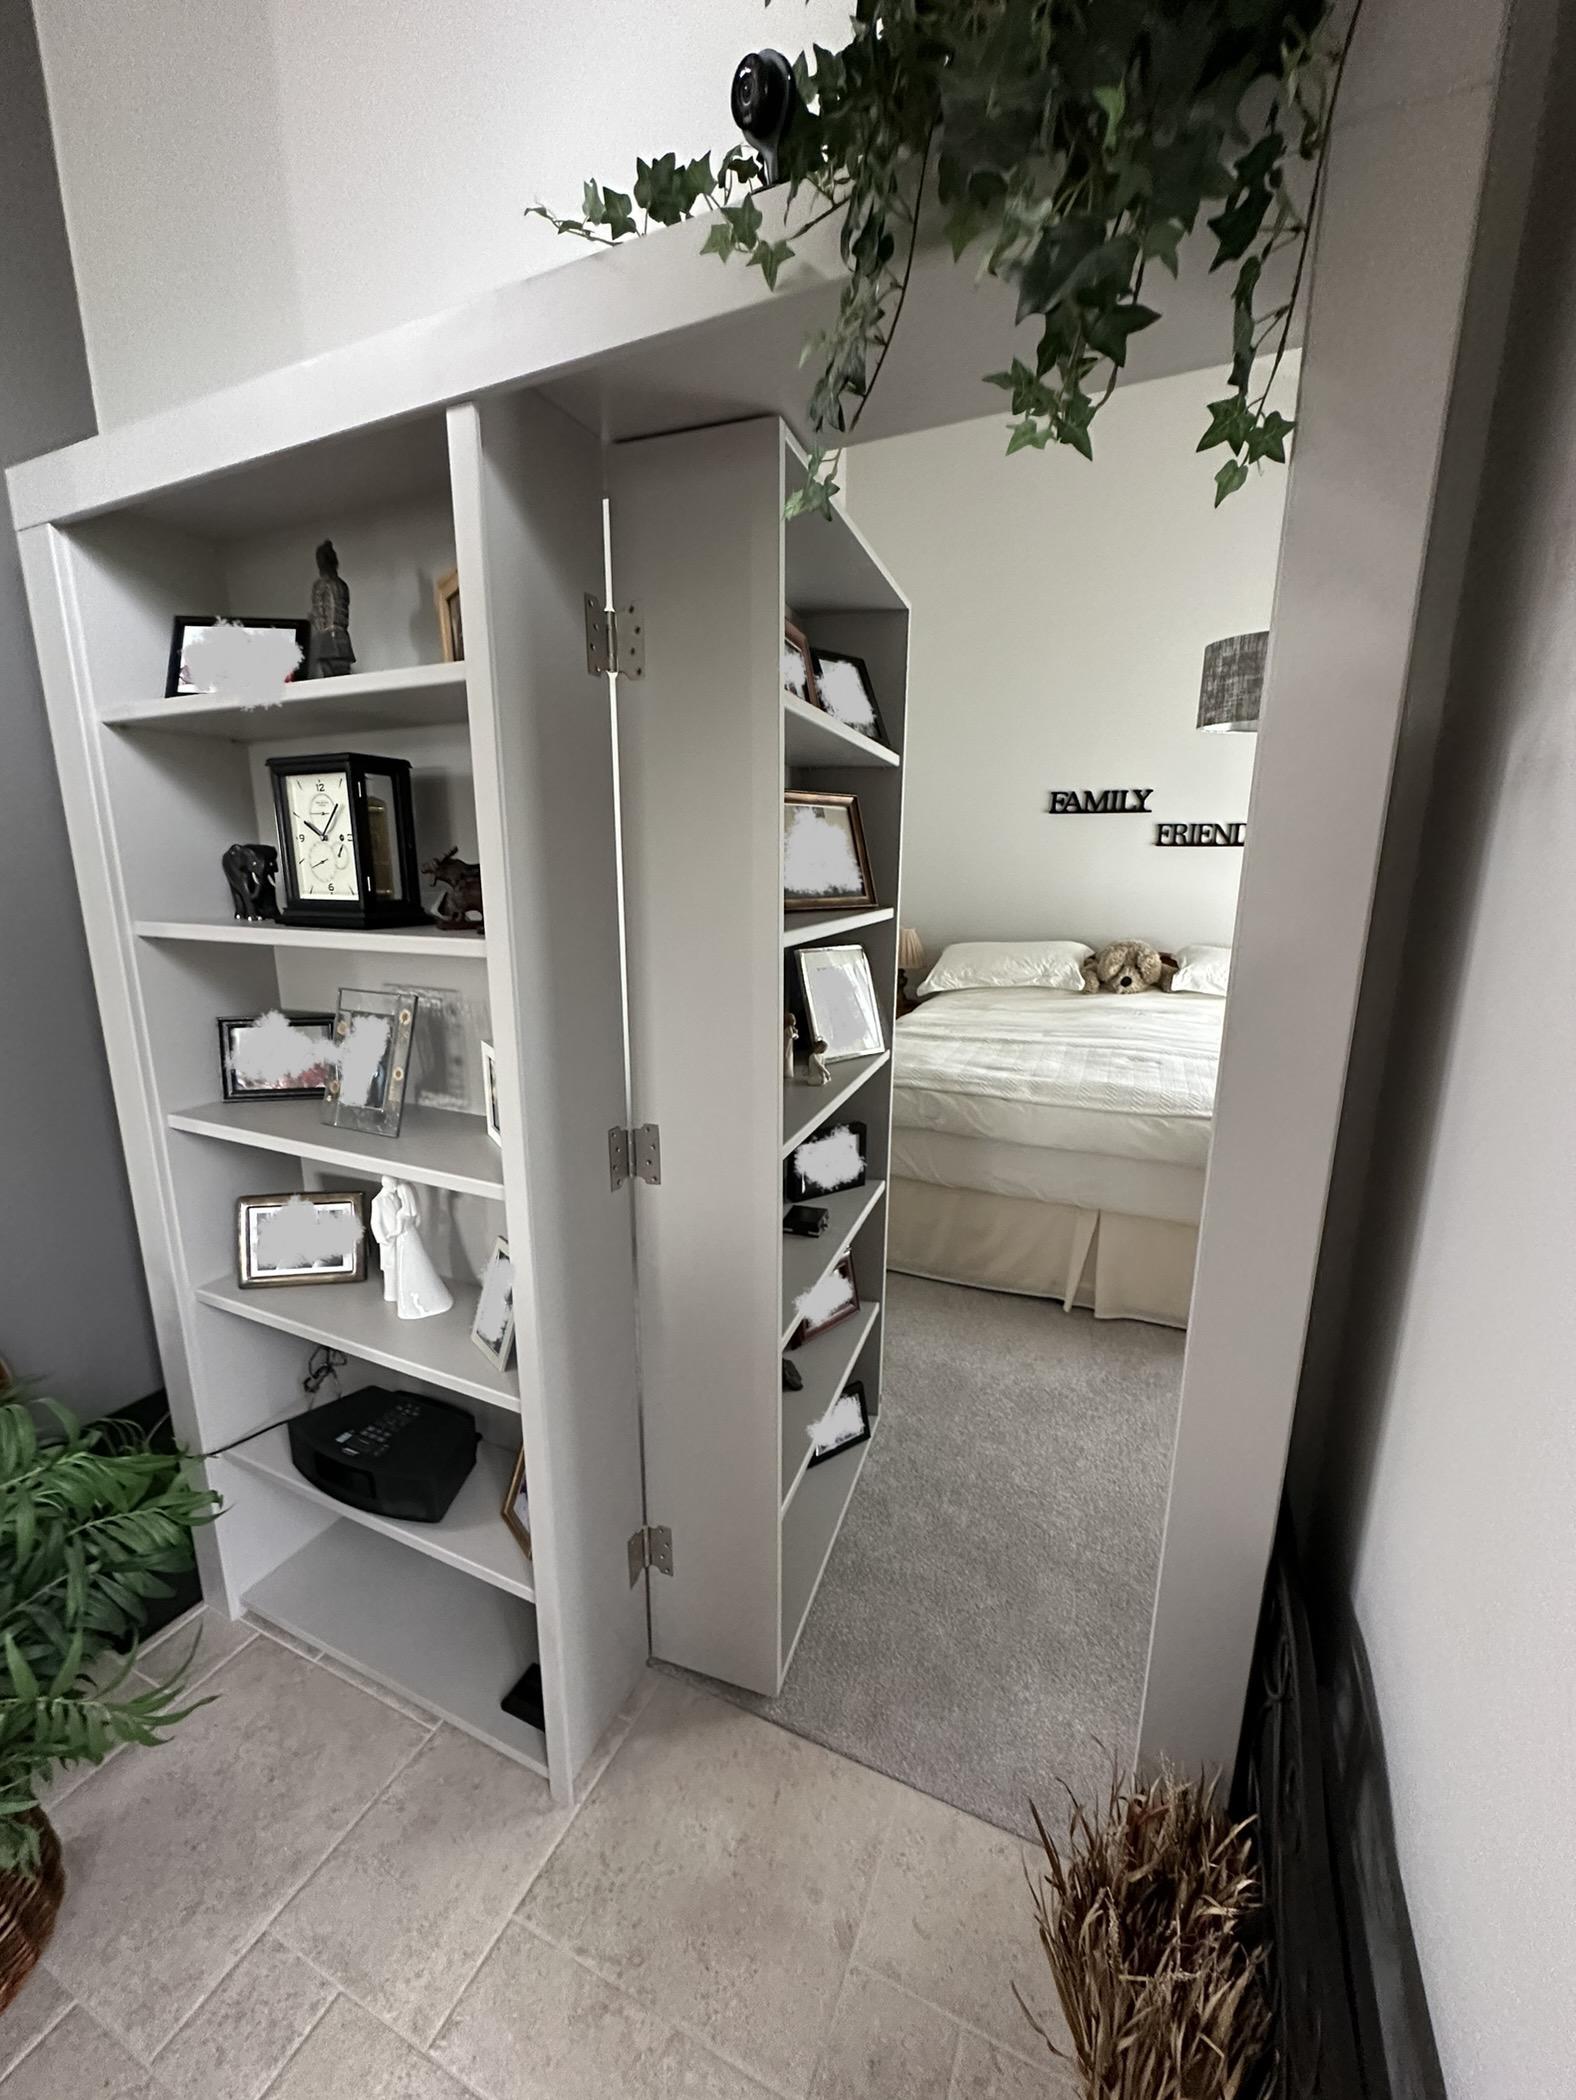
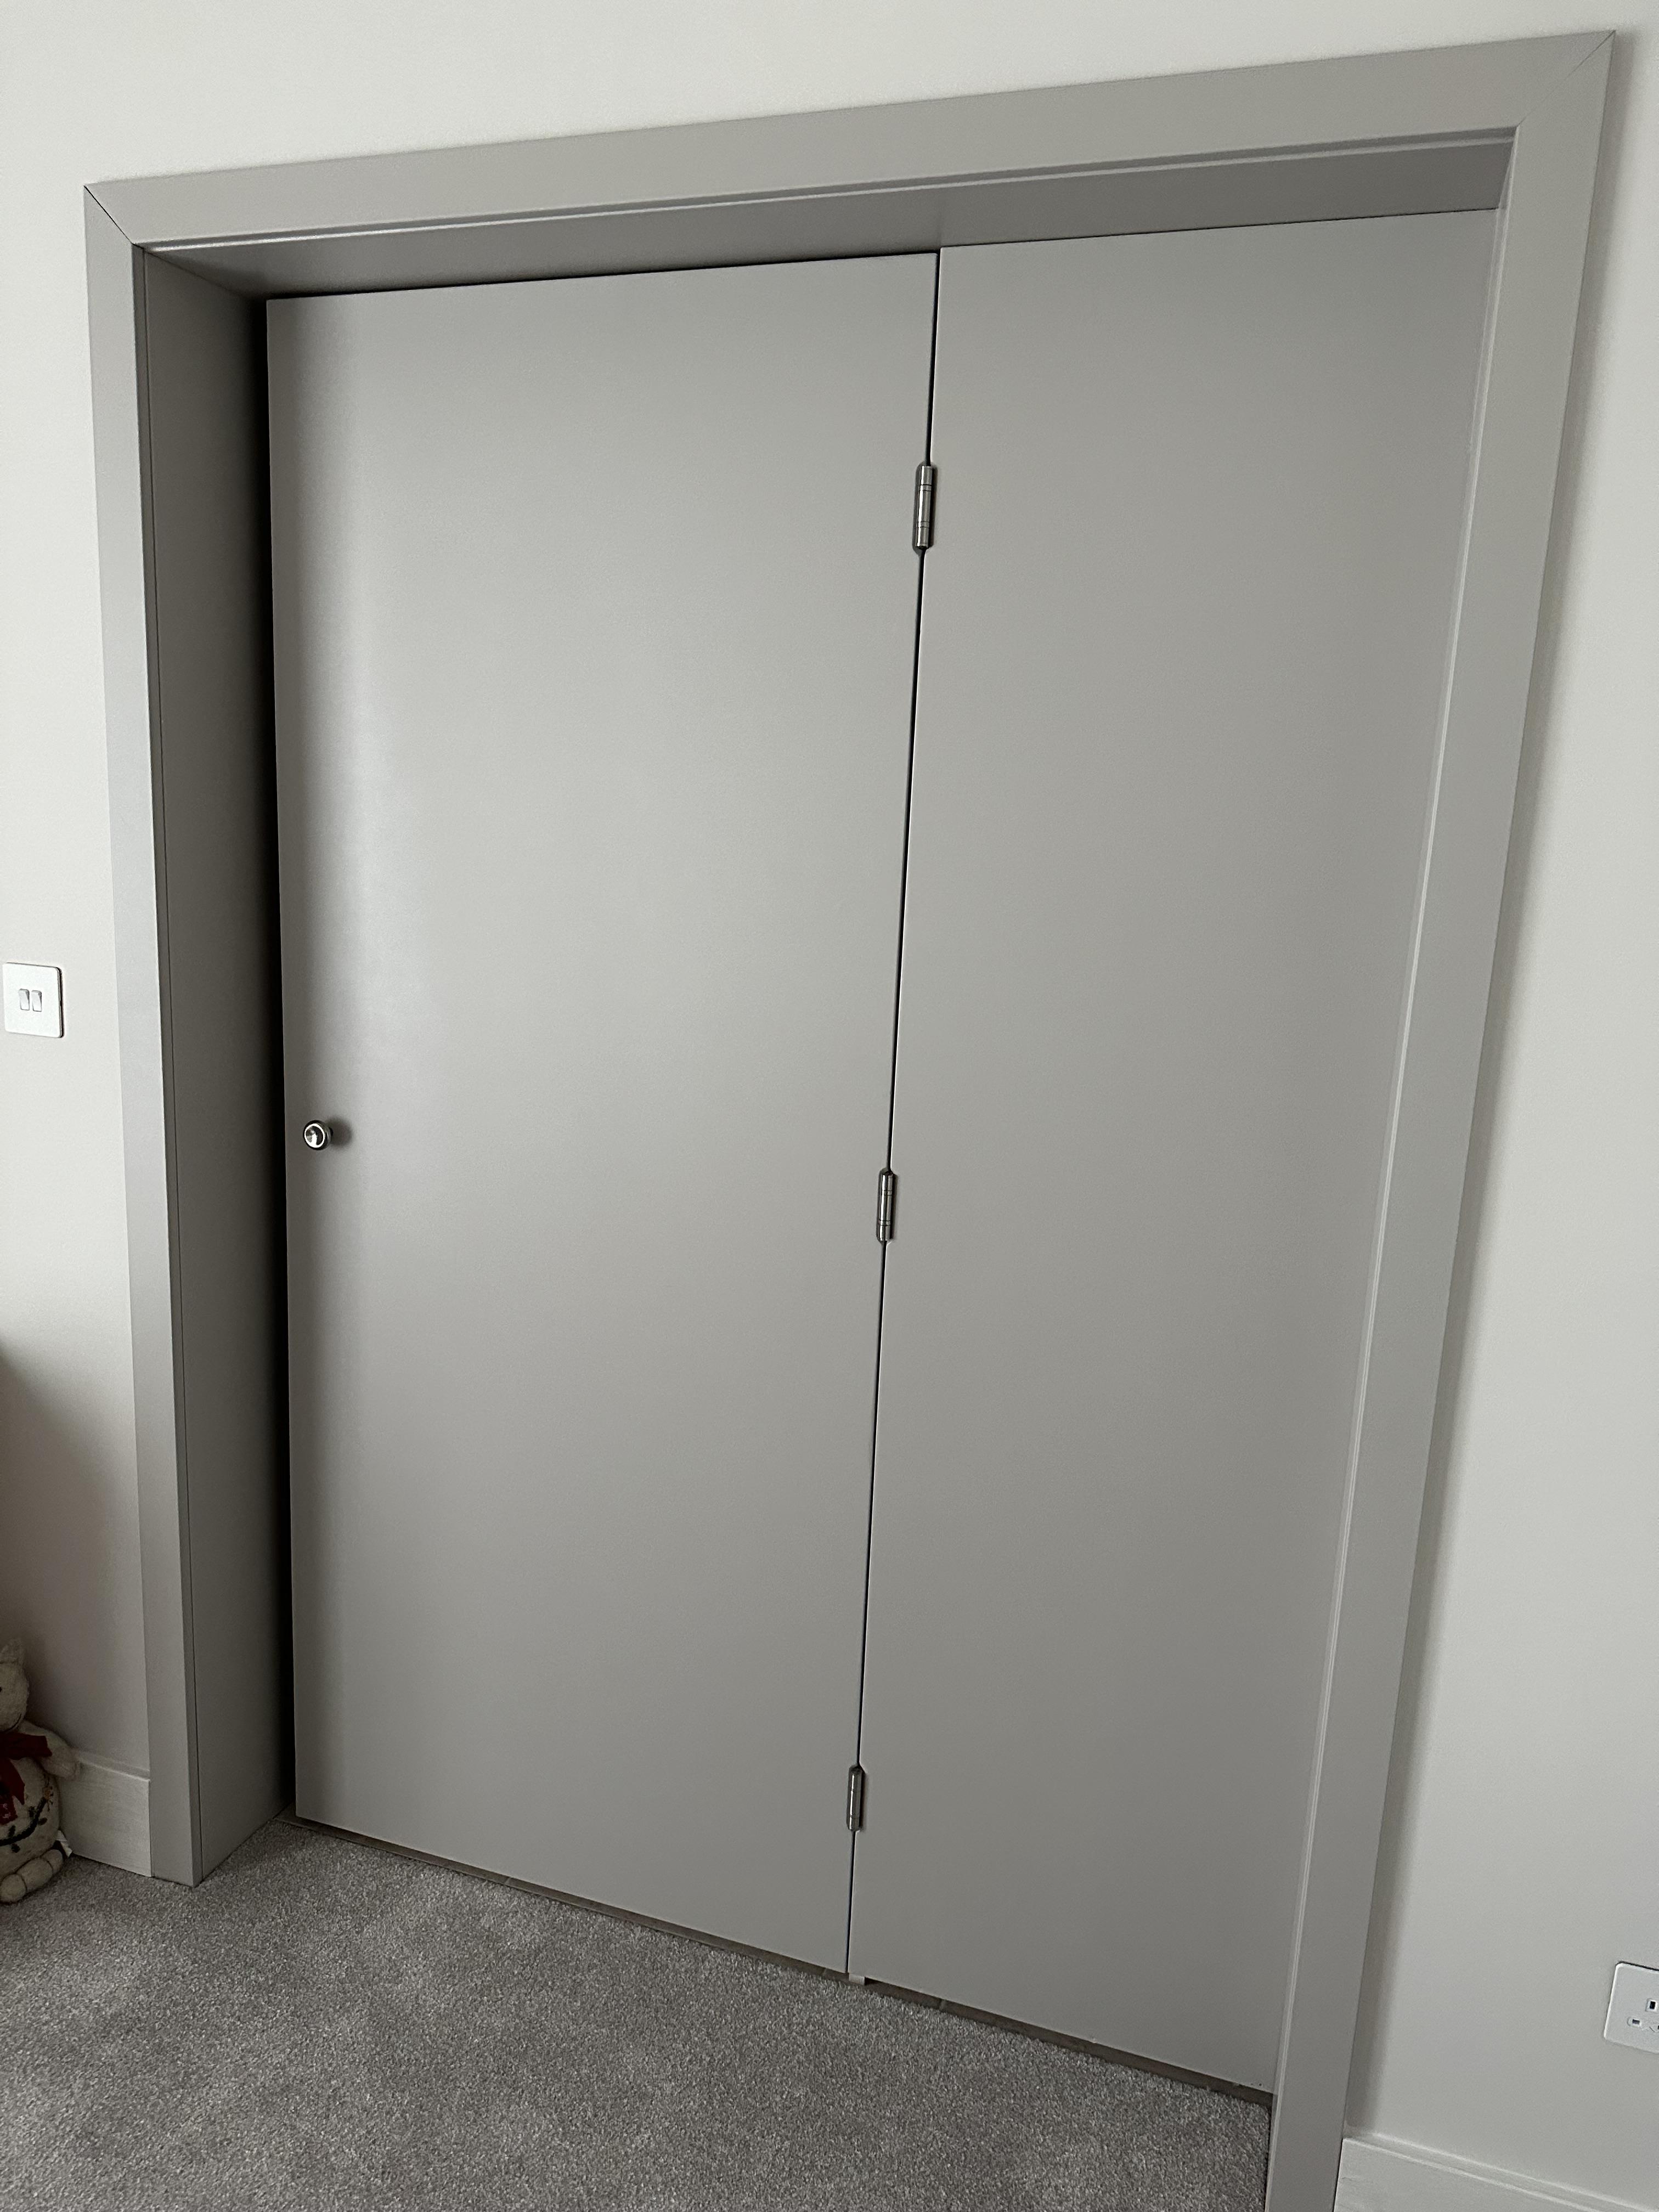
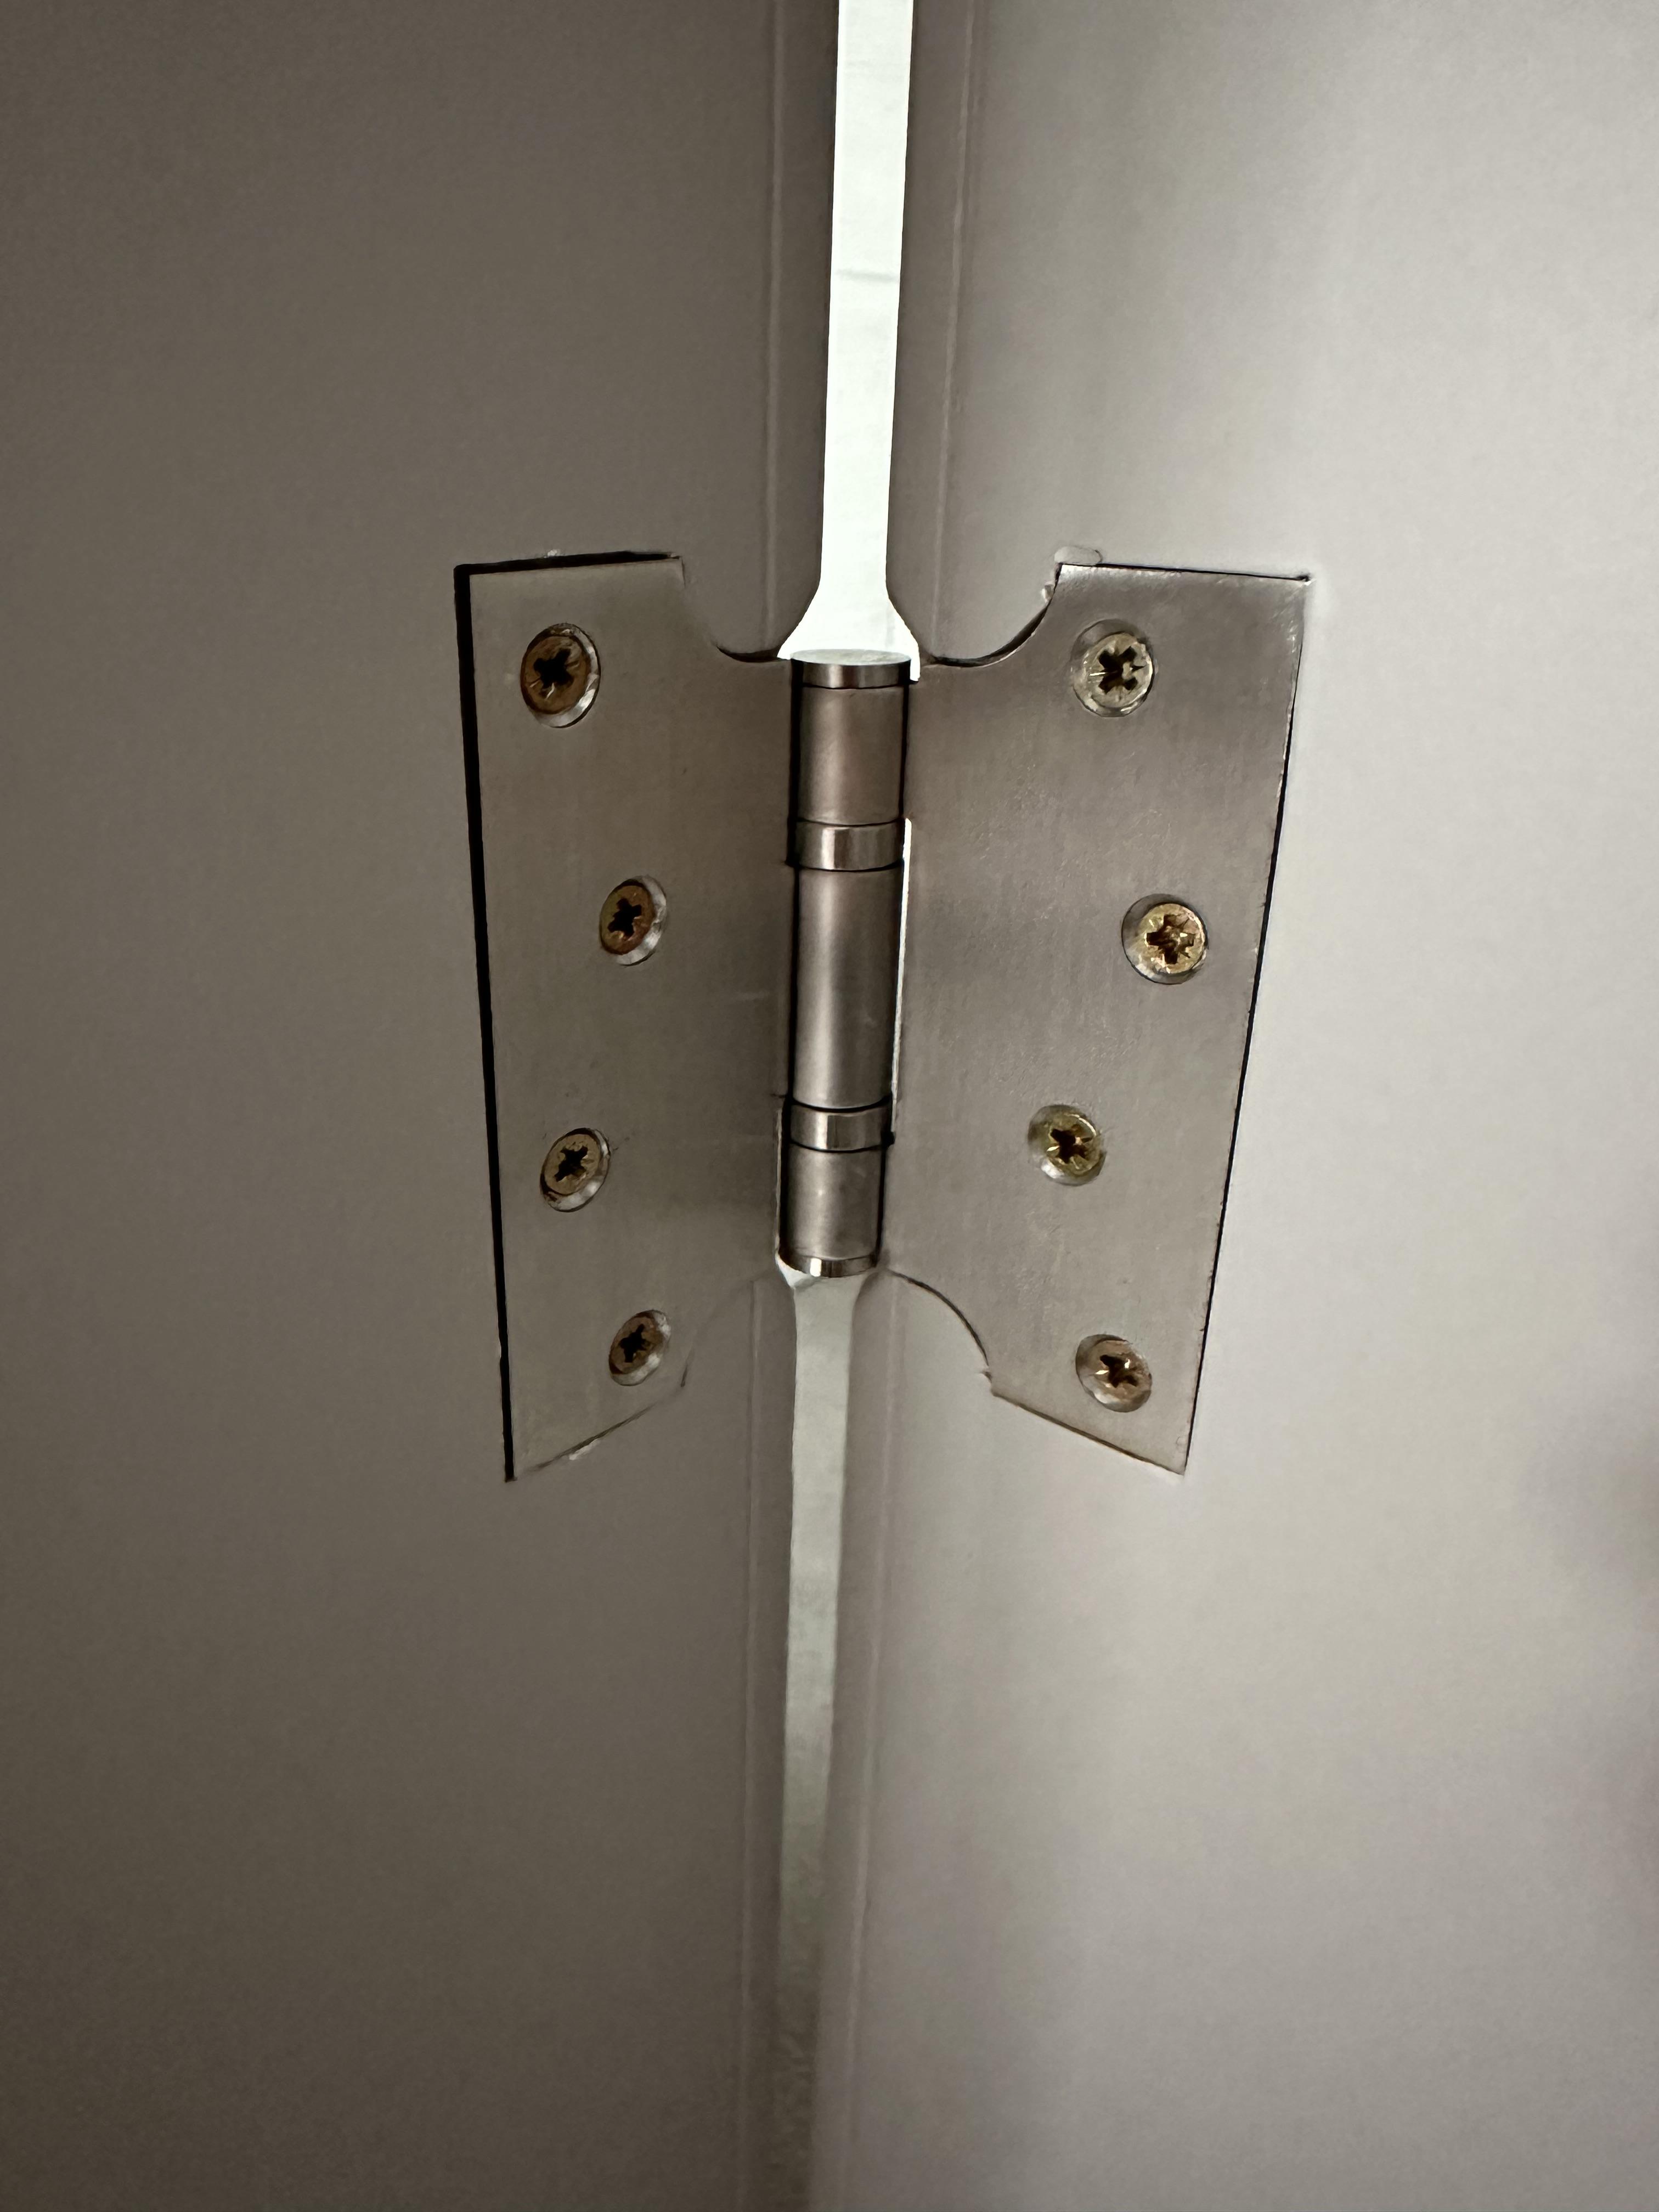
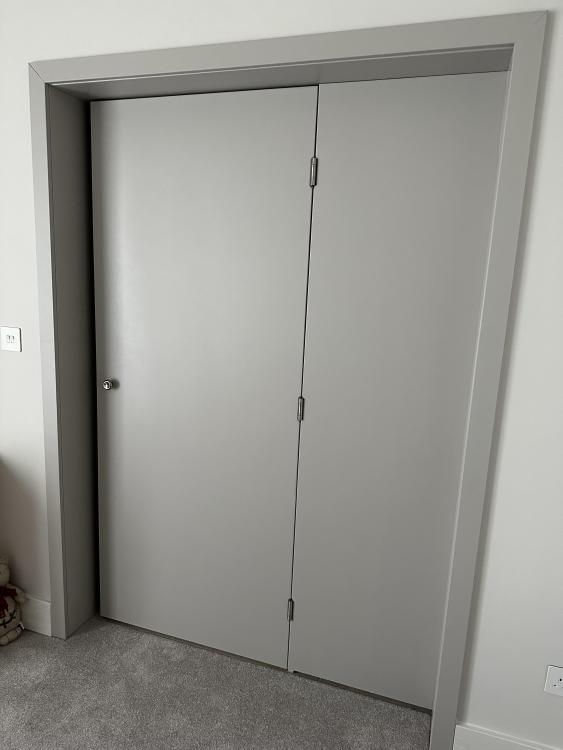
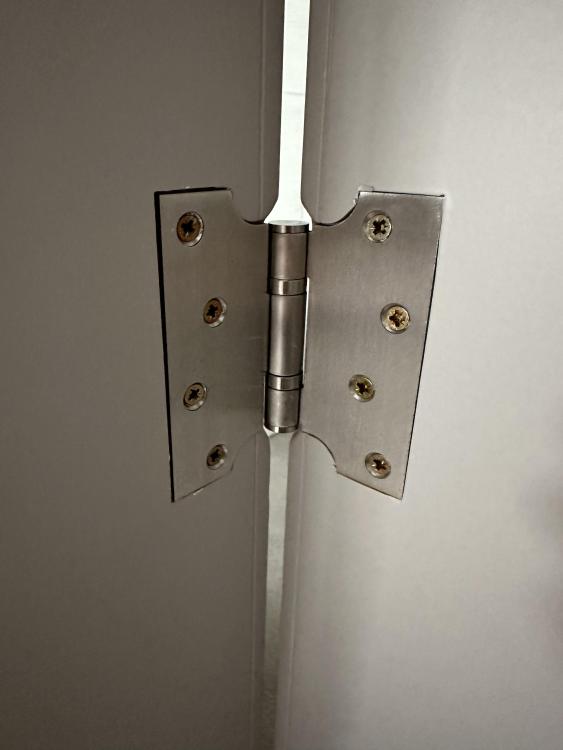
Hi Yes, we found a contractor to make the Murphy door for us. He built it from scratch. Photos below.


 1 point
 -
1 point
-
Looking forward to the full story. You'll get to know every part while sorting it.0 points