Leaderboard
Popular Content
Showing content with the highest reputation on 03/03/23 in all areas
-
5 points
-
I did wonder if this should be in the MVHR section but actually it's more about the technology side of things so figured Boffin's Corner might be best place... The reason for posting is that I'm always really interested in reading about what other people have done with all things home automation, electronics, DIY etc and figured that the very people behind all that might well be interested in what I've been up to too. I've also got a bunch of graphs which for some reason have always appealed to me and I'm sure I can't be alone in that! So here goes! The follow graphic illustrates what it's all about, and that is essentially the 'command and control' of our Titon MVHR unit. Titon do sell an LCD touchscreen controller for it (although I'm not entirely sure if it is compatible with our particular unit) but it is pretty expensive and I figured I could do more for less, and have more fun in the process! It is based around the following components: Raspberry Pi Zero W - This is the 'heart' of the control system and monitors temperatures (using DS18B20 1-wire temperature sensors) in all the ducts (supply, extract, intake and exhaust) as well as humidity in the extract (using an AM2302 humidity sensor) and (soon) air quality in the supply (using a Plantower PMS5003 particulate sensor). As I will elaborate further below, with all this information it can automatically boost on humidity rises, cut back or turn off the ventilation entirely if outside air quality suffers, report heat exchanger efficiency etc and likely more things in the future too (I've been thinking about putting summer bypass under its control and perhaps complete fan control too). It also creates the graphs and serves them up for viewing in a web browser. Shelly Uni Smart Relay - Used as the interface between physical boost switches in the house and the MVHR unit so as to increases their utility in terms of allowing different actions for short vs long presses, but more importantly it also provides an easy way for boost and setback to be triggered from other triggers whether that be from the Pi, widget buttons on our smartphones and voice control via Alexa. Shelly 1PM Smart Relay - Used to monitor the power consumption of the MVHR as it was something I was interested in understanding even before fitting the system, and it used to also serve as a means by which to disable the ventilation in response to a fire but I have since decided I don't actually like that and would rather the ventilation kept working. It is still connected to the smoke alarm circuit though and will alert me via app/SMS if the alarms do trigger. Raspbery Pi Pico W - Acting as a 'mobile' means to interface with a PMS5003 air quality sensor whilst I am still playing around with it, but when the sensor goes in the ducting I'll read it directly from the Pi Zero from then on. So breaking down some of the functions further... Heat Exchanger Efficiency With knowledge of the supply, extract, intake and exhaust temperatures you can calculate heat exchanger efficiency in real time. The Paul Heat Recovery page on the subject describes two methods in more detail and the following graph illustrates what are fairly typical efficiencies figures (high-80/low-90%) I see from the unit: Automatic Humidity-Related Boost The Titon does have its own humidity sensor with an adjustable (but unmarked) threshold and whilst I've never actually tried it I've always assumed it would be susceptible to false positives (triggering when it shouldn't) or negatives (not triggering when it should) and perhaps more to the point was always going to be a bit of a pain to fine tune (and adjust seasonally) given that the unit is in the loft. So, given I am monitoring humidity (in the extract manifold) anyway if we look at a typical graph it is easy to see when boost needs to be triggered: Those peaks correspond to showering and cooking (e.g. mostly the hob) and as I said are really easy to spot with a rate-of-rise calculation. The Pi takes measurements every 5 minutes and as a starter-for-ten I set it to trigger the boost (via an API call to the Shelly Uni) if the humidity rose by more than 5% within the 5-minute window. This turns out to have been a perfect threshold as it has never knowingly missed a shower (or pan of boiling water) or triggered when it shouldn't have in the several years it's been running now so I've not cause to make any changes. Automatic Ventilation Setback This is the most recent addition to the control system, and is still work in progress but as it's been so interesting to me I thought I'd share the not-quite-finished product... Our neighbour (who thankfully we get in really well with, but even friends can be annoying!) bought a wood burner for their recently-built extension. We've been mindful of what we might be breathing in from it as it seems barely a day goes by when there isn't some article or other written on the subject. Indeed, on occasion over the winter we've seen smoke coming from it but more to the point we've been able to smell it through the MVHR too. Granted, this is mostly when I've seen the smoke and have jumped up on a chair to sniff the incoming air from one of the vents and it seems the planets have to be in alignment for this to occur e.g. a cold still day with no wind, the neighbours using damper-than-ideal logs etc but it's happened a two or three times now and whilst I've been convincing my wife how sensitive the human nose is and that we shouldn't assume we're being poisoned I did begin to really want to quantify how 'bad' the situation really was. Aside from anything else it was a good excuse to buy another sensor, produce more graphs and give another aspect of control. Like others whilst we normally run the MVHR 24/7 and enjoy the fresh air it provides but this of course is only effective if the outside air is indeed fresh so my goal is to detect when it isn't fresh and either turn the ventilation down (whether that be both supply and extract, or perhaps just supply I don't know yet) or perhaps even turn it off temporarily when such a situation arises. The PMS5003 particulate sensor is a delightful little thing - the size of a small box of matches and costs around £15. You wouldn't expect much for so little but I've read several accounts now of people having compared them with air quality sensors costing thousands and them being a reasonable enough match, certainly good enough for taking measurements that are meaningful, consistent and reliable enough to feed into a home ventilation control system. The sensor is based around a laser whose light is reflected by the presence of particulates in its path from which the sensor can determine particle quantities in the 0.3-10μm diameter range which is exactly the region of interest when determining common particulate matter based analysis and determination of air quality. The following graphics illustrate the what the sensor can detect: The sensor does everything for you in terms of detecting the particulates and then presenting summaries of particle count and mass of different particle sizes over a serial line that I am reading with a bit of Python code running on a Raspberry Pi Pico W (currently powered by a USB powerbank for mobility): The Pico is configured to continuously read from the sensor and gets an update roughly once per second and, via HTTP through its wifi interface, I can request and parse these readings from a script running on the Pi Zero: I capture the readings once per minute which are then stored and can be graphed to show particle count of any specific detectable size but I am finding the 'all detectable sizes' (>0.3μm) summary useful enough: The particle mass figures are even more useful as they can be compared against Air Quality Index charts such as the UK's Daily Air Quality Index (DAQI) 10-level bandings shown below: Now technically the DAQI levels, like most AQIs, apply to 24hr mean readings thus non-continuous spikes as seen above don't really up the level - it's the 24hr average (as shown in the table) that really counts if wanting to compare against the index. The neighbours haven't been using their woodburner over the past week or so as far as I can tell and so it would've been rather boring to put the sensor in the supply manifold as ultimately intended so instead it's been sitting in our open-plan lounge/kitchen/diner and it's been quite an eye opener! As the following graph illustrates, cooking really does produce a lot of particulate matter: I think the first spike was preparing some halloumi burgers on the hob, the second the bread machine in action and the third some sausage rolls in the oven. What was really quite alarming was when my wife burnt some sesame oil in a frying pan... I was out at the time so have only got her word but she insists it wasn't that smokey (and to be fair when I got in later I could smell cooking but didn't assume anything more than that) and yet the particle count graph looked more like a nuclear bomb had gone off: The spike doesn't look all that significant until you look at the y-axis scale - a peak of over 3000 particles/0.1L which is over ten times the peak we'd normally see when cooking! It was interesting to see the PM1, PM2.5 and PM10 counts against the DAQI for that episode too: Whilst as mentioned it doesn't mean all that much shown like that given the DAQI is meant to be used with a 24hr mean (thus 13μg/m3 of PM2.5 in this case, which is still only Level 2 'LOW' on the scale and not the 195μg/m3, or Level 10 'VERY HIGH' as it might otherwise appear presented like this!) but it does make for an interesting perspective nevertheless. Some might say it also serves as a quantifiable measure of my wife's cooking skills but obviously I wouldn't... So that's where I've got to really! Next steps are to buy another air quality sensor as it seems a shame to lock this one away in the MVHR ducting as there are too many experiments begging to be done - lighting matches, candles, perhaps the barbecue and maybe driving around with it too (the sensor, not the barbecue) to see what the air is like on a commute or in a city etc. Also with two sensors I can have one inside the house to automatically boost when required, and one in the supply duct to do the opposite and turn the ventilation down/off temporarily if the outside air quality is lower than desired. I've written more than I planned to so well done - and thanks - if you've got this far. Hope it was of some interest, and if there are any questions or any way I can help you do something similar I'd be happy to oblige.4 points
-
Not as exciting as when we completed on our plot but it still feels good! He was one of the more expensive options we shortlisted but we got on very well, met current clients who were very happy with him, and we reviewed some of his previous Design & Access statements etc. which we thought were good quality. Will probably create a thread to share floorplans etc. in due course to benefit from the experience of other BH'ers. Haven't yet figured out how but I'm half tempted to start tracking the process through blog posts, even if it's just for us to look back on (hopefully fondly) in a years to come! Also a massive thanks to @ETC who has offered some great support and advice to help us get to this point.3 points
-
2 points
-
The correct procedure is to use the existing manufacture fittings to convert to copper tails, and then push Hep2o onto the copper. The copper divorces the different manufacturers.2 points
-
2 points
-
Thanks Jilly We would have to spend on full technical detail 4K We would prefer just to keep the planning open1 point
-
1 point
-
1 point
-
1 point
-
Nice job. Did that package in the foreground come from @pocster?1 point
-
Also keep a diary. An A4 page a day one. 1. Very interesting to look back on. 2. Keeps all notes and contacts to hand. 3. Conclusive evidence when your suppliers deny dates, agreements etc. 4 weather and conditions and who was on site until when. 5. In the unfortunate event of any problems you will have this as confirmation. 6. You will forget some problems that have been overcome. This will remind you how well you did. Start it now, summarising the verbal agreements with the architect.1 point
-
1 point
-
Agreed. I stopped contributing to the thread when it was suggested that developer margins of 25% net are "pretty standard".1 point
-
I have been looking for land to do a development project but can't see any with a profit margin higher than 10%. The only plots that go with margins over 10% are for multiple units so not really suited to home builders. Even multi unit sites under £1m have much less than 20% margin and those £2-£3m are around 18%.1 point
-
Thanks - just had a read - and yes, it has made me think about more about the whole air quality issue. I am also starting to think that so many articles seem to focus on what everyone else is doing that's causing you harm, and not perhaps what you might be doing yourself that might be just as bad if not worse. To be fair, that's exactly what I did - concerned almost entirely with what the neighbour's wood burner was doing to us, but now I am as much interested in what we're doing to ourselves! Just hope it doesn't become an obsession*! 😂 *Edit: Non-paywall version in case the link doesn't work for you1 point
-
1 point
-
Reminds me of our over-hot-oven roast beef fiasco (mmmm beef fiasco) I have a nasty suspicion that breathing in the smoke that evening did all kinds of mischief to my body. The following day I had lots of pain in my lower back and it's been moving around my joints ever since. Left knee today, shoulder yesterday kind of thing. When you see the WHO reports on the dangers of air polution and the effects of PM2.5 it's quite believable that this might have been responsible.1 point
-
Thanks Jilly, is this the thin gel like strip product that you can stick? Sure I have seen this before. So this sits as a break between your post and what? I guess the Aluminium window frame would be fine if we did this and screwed the frame to the post with the Aerogel between. Just need to sort aesthetic cladding then.1 point
-
PS: The absence of a mixer probably explains why your actuators feel pretty hot when it is working. UFH temperatures are normally 30-50C eg lower than boiler/rad temperatures 60-80C. If you have any solid wood flooring this can be damaged by too high a floor temperature. Ditto some lino like products have a max floor temperature. Sometimes as low as 38C.1 point
-
Yes they can be added. There would normally be a pump and mixer on each manifold. The manifold pump sends the same water round and round the floor loops. The mixer injects new hot water into the floor loops to maintain them it at a set temperature. Typically looks something like this (see photo). The pump is obvious. The mixer is at bottom left near the flow and return valves. You might also need a bypass added to the system to deal with a situation where the mixer on both manifolds is closed. We have seen all sorts of problems on here. Manifold pumps and mixers are normally fitted on the left of the manifold. We've seen problems where they have tried to fit them on the right due to a lack of space and they have ended up being fitted upside down or with the pump pointing in wrong direction. If your plumber doesnt know about UFH I would find another that does. I note a distinct lack of insulation on all your main flow and return pipes as well.1 point
-
This is what i did and didn't have a screed above the insulation, just UFH and laminate, its not too springy. I did it this way as in future the outbuilding may be used as a garage. in relation to the roof to save floor to ceiling height, have a look at a hybrid roof. This would be a big no no if it was a permanently occupied and in a cold area, due to the risks of interstitial condensation, but as its an outbuilding then it may be possible. We have done it, and will see how it performs. Have a look what Oakwood Garden rooms say on the matter, though there is some debate. https://www.youtube.com/watch?v=EZFcHcxbFbE https://www.youtube.com/watch?v=P_dBayq3_FA1 point
-
That isn't really how you make MDF shelfs, those brackets are more used for solid timber, like oak or oak mantles. These thick floating shelves are usually made up with a timber frame inside. I made the stereotypical floating shelves in an alcove unit, first I built a frame in 30x30 pine, fixed that to the wall, then fixed a piece of spray painted 12mm MDF to the bottom, then I created the top of the shelf with 18mm MDF with a return on the front with 12mm MDF, that was all filled/sanded and sprayed to create a seamless finish, that was then simply offered up to the frame and it is held in place just with the caulk - I also incorporated LED lighting into the front edge. If I just wanted a plain floating shelf, I would build a timber (or metal) frame, fix to the walls. Then make a "sleeve" piece -i.e. 2 pieces of MDF joint with a front piece - fill and prep the whole lot and paint (spray paint for me).1 point
-
Yes they are. I think the DHT11, the blue ones, got the range a bad name. That is useful to know. I wonder that the ESP8266, which I have a few of, works down to reliably.1 point
-
1 point
-
1 point
-
Basics are, there seems to be no real target values. Improve airtightness to what? Just a bit better or 1m3 per m2 at 50 Pa or better? Target U values, better than you find it is too vague. You need a clear statement of what you want to achieve, otherwise it's rubbish in rubbish out. As I mentioned in another thread linking an ASHP to PV and battery is daft. Let the PV and battery feed the house, if power is available the heat pump will use it.1 point
-
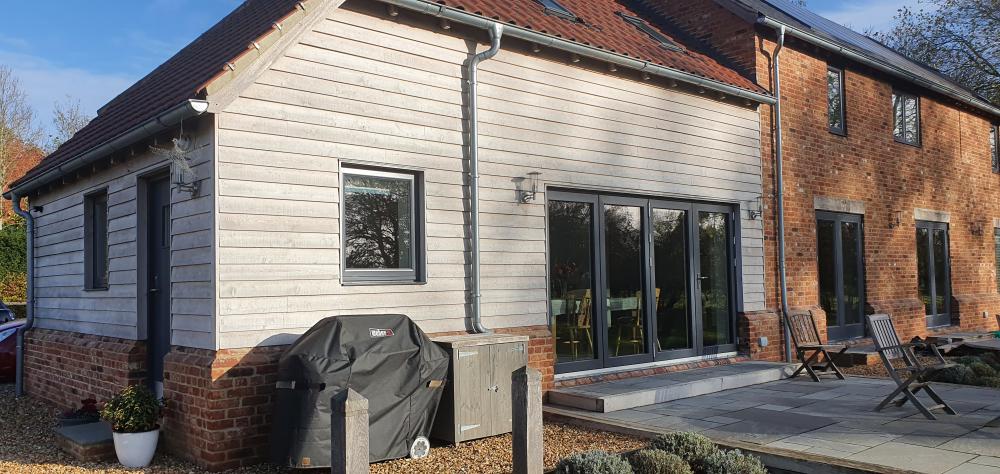
Completion certificate came through this afternoon. Had an inspection a month ago, the only things picked up were. 1. Boiler not positioned as per plan, variation required, easy enough to update, took a couple of weeks to be approved. 2. Hadn't finished the balustrade due to weather. Had to get that completed. 3. Wanted a commissioning cert for log stove. Next jobs Install ASHP, mostly complete. Build summer house, being delivered next week. So from digger arriving on site, 3 years almost to the day. Could of been finished 6 months earlier, but I went back to work. All in took me a year longer than expected, but big site everything bigger and takes longer than expected. Overall costs including doing lots myself, and including all groundworks £2400 per m21 point
-
It’s a shame I am moving as I could knock these up for you in my workshop (that’s now stripped out ready to move) 🤷♂️1 point
-
MDF is often used purely for the smooth finish. A couple or 3 coats of a decent undercoat often gets you to the same place on cheap ply. I think it is about time you started buying some power tools. A small cordless circular saw, a long straight edge, some G-Clamps and maybe a cheap multi-tool. Assuming you have a drill already. With them, you can make a lot of things, except accurate curves. Then you can put that shed to good use, drink tea, grow a grey beard and smoke a pipe.1 point
-
A heat battery supplier I am familiar with is suffering multiples of failures of their, now eye-wateringly expensive, units. I've received pictures from two clients since xmas who have had failures with their units and damage done to their property. One is "not on his first replacement unit"... A Telford / other unvented cylinder is cheap, simple and very reliable, and all of these will "work with Octopus" Contact Trevor at cylinders2go and mention my username and the forum and he will look after you on a price for a cylinder. If you wish to charge this with cheap energy in a short window, you can ask Trevor to fit multiple immersion heaters into this so you can heat it very quickly ( to match half-hour pockets of cheap rate electricity etc ) so can all be done with one unit, very simply, and very reliably. Reliability is the key here, as the heat batteries are, unfortunately, dropping like flies ( from the feedback that I'm receiving.anyways! ).1 point
-
Bracket fix, why would you want to screw through the frame? Only screw through the frame if no other alternative in all honesty. Removing the beads, you'll need to be careful removing the excess silicon, if you catch the edge of glass and it shatters, it's a new pane required. Toughened glass's weakest point is the edges. You'll also need to be careful when putting the bead back on and pinning it, the pin should arc back away from the glass and usually would be done in factory with different type of nail gun. You'll need to do this with a hammer and pins and straight and will need to be careful not to nip the glass. You'll then need to silicon again as it looks like a wet sealed system. Why would you need to remove the glass to install multipoint lock keeps? Does the door not already have multipoint locking?1 point
-
The main benefit is in cases where there's partial shading of a subset of the panels over the course of the day. Without getting bogged down in details, microinverters allow each panel's power output to be optimised individually, whereas an ordinary inverter can only optimise for a long string of panels (usually one or two strings per inverter for a simple domestic installation). The problem with the latter is that the power of the string is constrained by the lowest output panel. For example, having one panel partly shaded can massively cut peak production of the string as a whole, even though the other panels are in full sun. This is why it's important not to have chimneys or aerials (etc) shading a panel where ordinary inverters are used.1 point
-
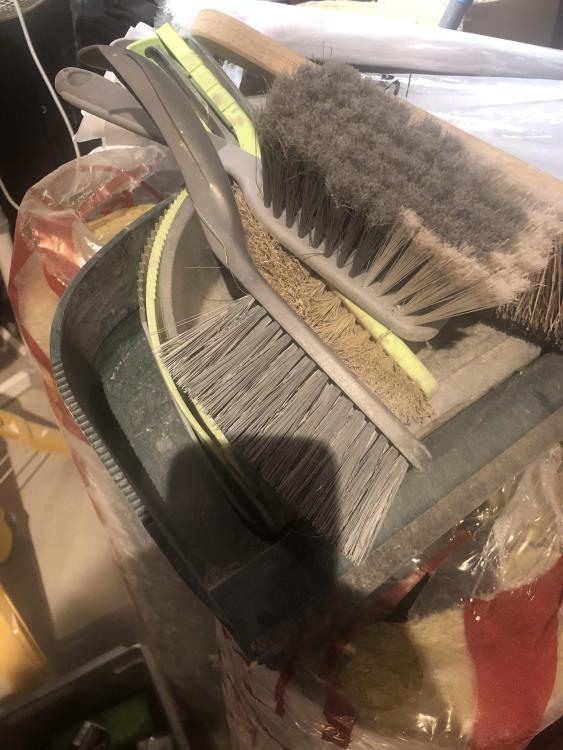
I didn’t look for multiple brushes and pans . They found me . I will look after them until they are old enough to fend for themselves0 points
-
0 points
-
0 points
-
0 points
-
0 points







.jpg.c21f3ac78c9b7efd90cbdcb312744dc5.thumb.jpg.7adcad4c0e384f5ecd7d56b0618df6e5.jpg)
