Leaderboard


Popular Content
Showing content with the highest reputation on 03/05/22 in all areas
-
WARNING I will be starting a thread soon on DIY installation of PV!! 🤞3 points
-
I know you want to educate and that's very noble. I'm currently so depressed by world events, I can't bear to lay any more misery on anyone else. Let's be as gentle to each other as we can 😔2 points
-
My £6k of PV will soon be generating almost £1k a year in electricity. That was paying someone to install it! Total no brainier at the moment.2 points
-
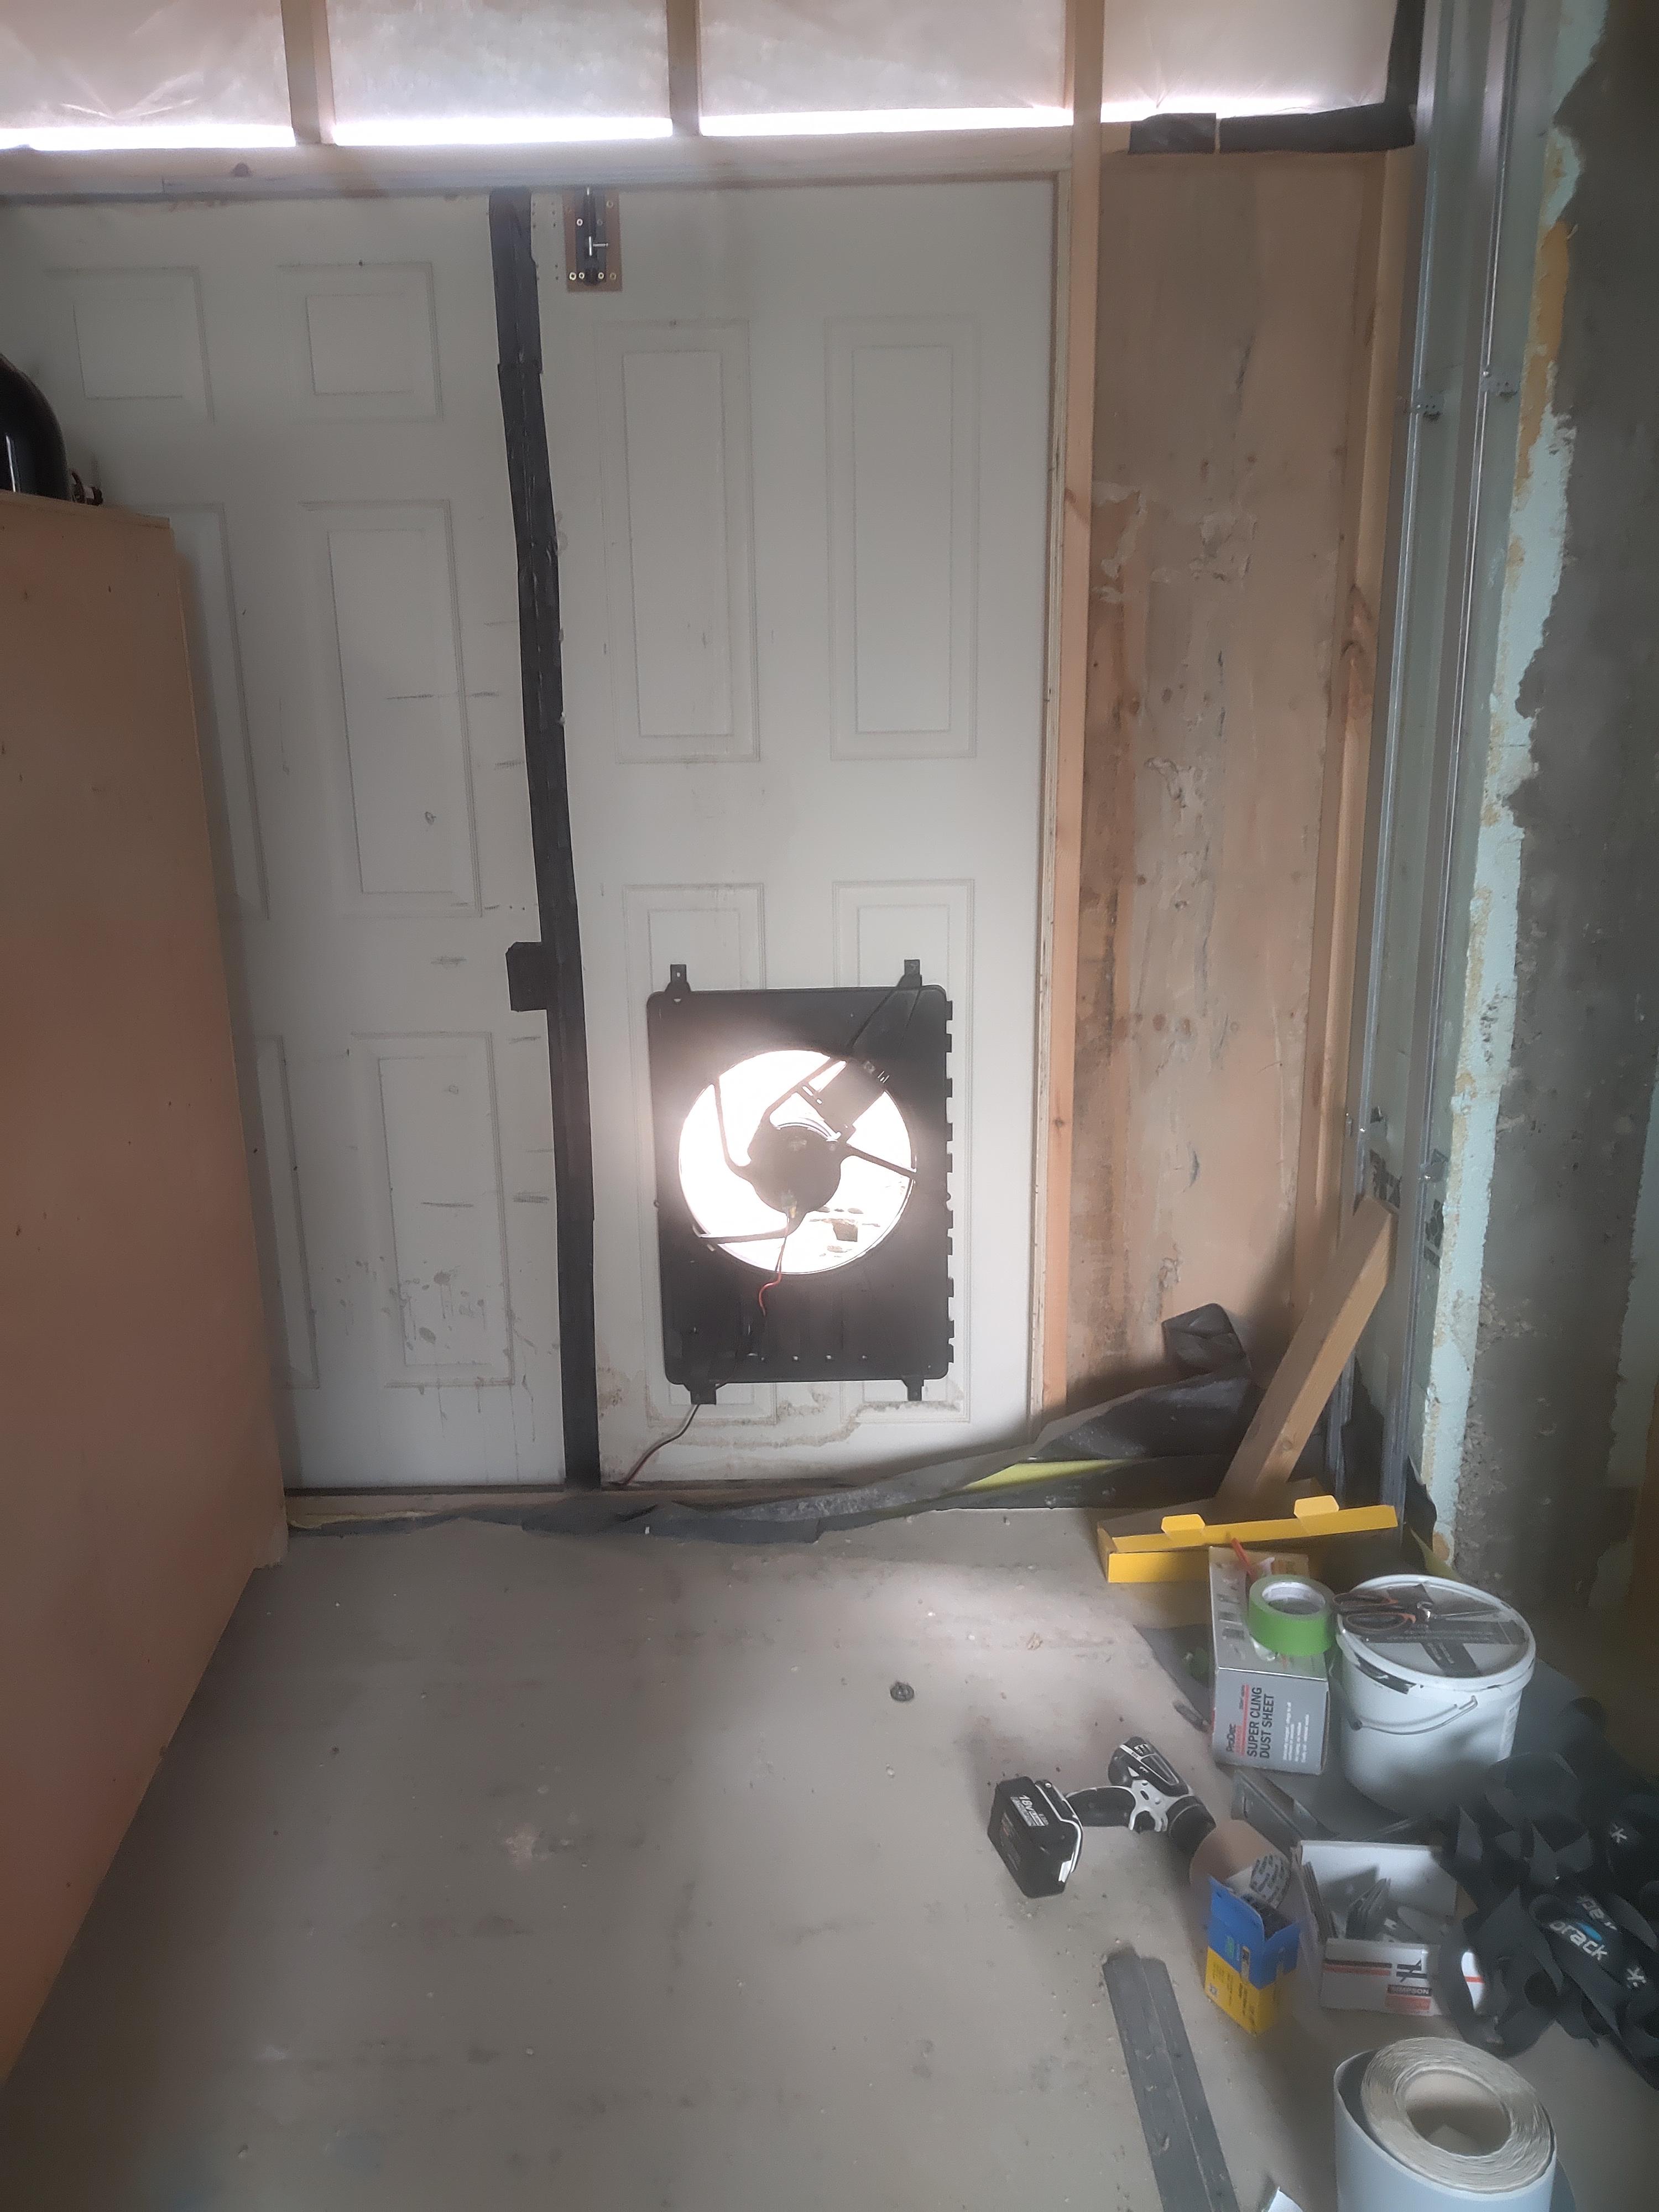
Tadaaa worked very well. Just used jump leads and an old but of cable with a couple of spades on the end. Found some small leaks and very helpfully found one of our huge sliding doors was ok at the bottom but not the top along the closing edge so the door may not be fitted straight. So worthwhile.
 2 points
 -
This has opened a number of opportunities I hadn't really thought about. I have an 8m wide, 3m deep, South facing deck that gets too hot to use in the summer. Unfortunately its around 30m from the house. I don't fancy trenching in a SWA but it sure would make a fine spot for an PV array.1 point
-
Damn that's a good idea. I've chickened out of fixing them to our roof but we once had a pergola against our SE wall and I could always rebuild it as an array support. The grapevine would thank me for reinstating it too 🍇1 point
-
Thank you @Radian...your point about max OC ratings for the module noted. In terms of what you mentioned for the min inverter start voltage, I was aware of this, but thanks for that too @SteamyTea yes of course, appreciated, I was not paying attention to what I was typing as usual, but great you pointed it out... thanks I'm going to put five of these panels on a south facing pergola Thinking of getting a hybrid inverter so I can add batteries later. thanks1 point
-
It is 4 kW. kW is power, kWh is energy. kwh is nonsense.1 point
-
The inverter MPP tracker will adjust to the maximum input current the inverter can handle. Note that this may cause the input voltage to the inverter to rise towards the sum of the maximum OC voltage ratings for the modules - this is where the actual danger arises. Exceeding the maximum input voltage will definitely do damage. You should be aiming at no more than 75% of this figure IMO. As well as ensuring the maximum OC voltage is within limits you will also have to consider the minimum voltage that will be presented by your series string. If the aim of using these high power modules is to reduce their number, you may be providing insufficient Voltage to start the inverter.1 point
-
I ask again, do we have any coal fired stations capable of being re started, or have they all been decommissioned beyond that point?1 point
-
But almost half of the fuel to provide electricity is gas!.1 point
-
Sadly not idiot builder proof! Was the UPS commissioned as I would expect the battery to last at least a week. Basement waterproofing with a high water table is no mean feat. Internal drained membrane and pumps is the lowest risk system so hopefully you won't have any further issues other that the maintenance costs.1 point
-
You are confusing curing times with how long a cured screed would dry out if it got wet after curing A cured screed won’t absorb the moisture as much as you think it will / has, so the issue will be the trapped water between the layers / membranes / Insulaton etc where water will sit and have to be extracted through forced ( mechanical ) ventilation / dehumidification. As stated, metering and monitoring will be your only means of measuring success. Sounds like a pita of a basement to look after. What height did the water get to above the top of the screed?1 point
-
That sounds like a fatally flawed basement design. Is it the case that if you ever have a power outage it will flood? For drying I also like open windows, but if you cannot get much natural ventilation a combination of dehumidifiers and heaters works well. We had a flooded new build due to a leak at first floor which pissed in overnight so it was like a rainforest on the ground floor. 2 big heaters, 2 big dehumidifiers on 24 x 7 and 2 weeks later it was dry. We didn't even need to replace the ceilings, just a re-dec.1 point
-
We loose ~5% of the natural gas due to distribution. And then there is the processing losses, which are less for large users than domestic users. Electricity is also more useful than gas. If we still had gas lighting in our homes, airtightness would have to be above 10 ACH, not below it. I also doubt that many gas boiler actually get close to 90% efficiency in reality.1 point
-
Open the windows!1 point
-
Get some air blowers in blowing air, circulating air from the basement outside, crack open windows, etc buy a humidity meter so you can monitor results1 point
-
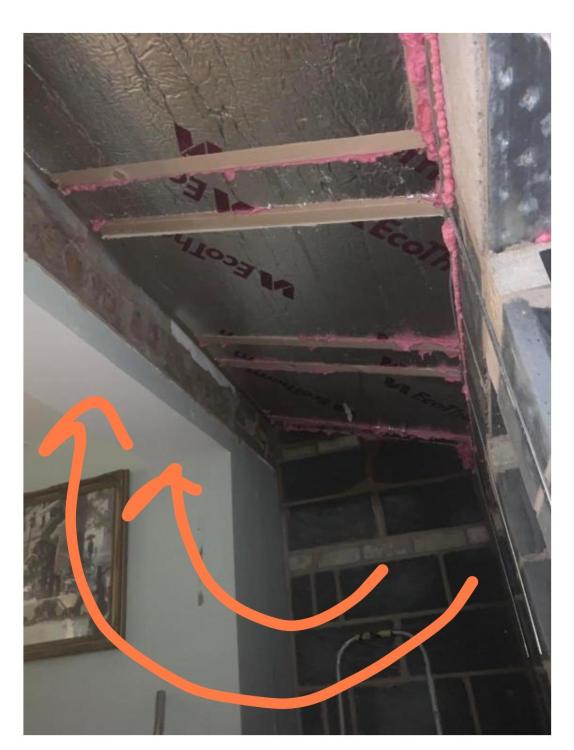
Correct. I don't think slabs or rolls make much difference. Yes but should help further isolating the plasterboard and stopping it from acting like a "speaker". Also it will help with rain noise. You need to do everything you can to prevent the inner surface of the house from vibrating. The air gap created by the resilient bars makes sure that any vibrations aren't been taken through the insulation either. Unfortunately looking at the pics I think it's really neither here nor there. You could triple the insulation in this part of the roof but it would pale into insignificance beside the thermal bridge of the lintel as indicated below. PIR and phenolic insulation typically only perform to their stated U-Value under laboratory conditions. In reality their thermal performance will be much closer to mineral wool than producers would have you believe. Most of the noise is probably coming directly through the roof of the porch. It looks like at the moment all you have is 125mm of PIR and a sheet of plastic. Tiles will help but the big difference will be when the plasterboard is applied. I have no reason to suspect the Velux windows won't reach their stated performance in isolation. As ever the key is detailed installation. Any air paths must be sealed and you must have a continuous layer of plasterboard. It should be mounted with a medium that allows isolation of vibrations eg acoustic mastic, rubber strips or resilient bars. A cavity inthe structure can be good to prevent vibrations but should contain a dampening medium like Rockwool to reduce the drum effect. Hope this helps.
 1 point
 -
First I misread the Siemens datasheet. The input will accept 240V at a current draw of around 15mA so yes, this could be switched by the Pro SM4. The advantage of a Wifi based switch is that it removes the RPi from the scope of the inspectors review, though you should have the CE DoC to hand. The disadvantage of Wifi is that it doesn't work too well in a steel equipment enclosure. 🙃 Though you could try putting the RPi inside the enclosure as well In the UK, the rule are different. Your electrics have to be signed off by a Part P certified electrician who certifies the house registration and does this in an online registry so the Binsp (and insurance companies) can look this up. Once my electrician read the datasheet for the Crydoms he was happy to ignore the 5V control signals as these are outside the scope of the certification.1 point
-
He’s correct in stating 50 in Timber Timber and soundproofing don’t go hand in hand What you to realize is that there isn’t a comparison with timber and MF Even without the difference in density of the two When you insulate an mf stud There is 2 mil every 400 mil of surface area without insulation Hardly anything where as with timber you have no insulation on 50 mil of every 400 You just relying on 89 mil of timber Which allows sounds to travel through like butter1 point
-
The other thing to be careful of is anhydrite screed laitance. This can make if hard to glue tiles or wood floor to. https://www.bal-adhesives.com/tiling-onto-calcium-sulfate-anhydrite-screeds/1 point
-
Think ours is around 65mm with stone on top. Not enough insulation at only 80mm. Works OK but would go for lot more insulation if building again. I would also put expansion gaps where the screed in two rooms meet at a doorway. Eg Don't screed through a doorway. We found out the hardway that it will crack and the crack can be curved in one room more than the other. An expansion gap acts like a deliberate crack but at least its straight and you know where it will be and can tile accordingly. You need one even if only one room is going to be tiled.1 point
-
Dense concrete blocks, ideally 140mm , wet plaster one side other side two layers of plasterboard of different thicknesses ceiling full fill with dense rockwool batts, better to use poured concrete but more expensive , definitely double tack ceilings and carry blockwork to 20mm below floor and fill gap with rockwool ALL AIR PATHS MUST BE SEALED, even gaps round lighting wires will net noise in and out. 22mm chipboard floor for me, no holes1 point
-
Hi Parma, Welcome to the forum. I'm not an expert but i'll have a punt anyway. Q1. Yes but don't trap moisture in the timbers. I would probably opt for an airtight membrane joined to your wall airtight layer at the edges, Follow this with a layer of 50mm rockwool between battens, resilent bars and 2 layers of soundblock. The the trouble is all your openings will need to be detailed correctly. Tape the airtight layer to the frame and seal the plasterboard up tight to the frames with acoustic sealent. No gaps. With tiles on the roof it will improve a fair bit I imagine too. Again the windows and skylights are really the weak points. Q2. Don't know. Q3. Not for sound insulation. You need something heavy ( plasterboard) and something to absorb the sound ( rockwool) and something to decouple to reduce structurally transferred noise ( resileint bars)1 point
-
for fine temperature control. This is in steam sterilisers, we're switching heating loads of up to 50kW and a failed-short would be seriously bad. But control has to be good enough to not overshoot too... So we have one contactor as a safety device on an independent control, and then actual heater switching is carried out by SSRs or another contactor, depending on brand/model1 point
-
They're somewhat variable from board to board. Maybe subtle differences in layout between issues? Anyway, been there, fixed that. I think that the instabilities are arising from dynamic changes in clock speed. This can be fixed by forcing on turbo mode by adding the following line to the /boot/config.txt file: force_turbo=1 Another tweak some people swear by is raising the default core voltage with: over_voltage=2 I think it's safe but unnecessary. YMMV1 point
-
I’ve been doing footings (& nothing else) for around 18 months now since relocating & the norm is to leave all doorways out,so the insulation layer is continuous & runs right out to the external leaf at doorways.1 point
-
I'm going through this process atm, timber frame with brick outer skin. Internal walls - no blocks in door openings as liquid screed wants to flow throughout the GF. External walls - brickie ran the blockwork across the door openings but we did have a debate about it - we both thought it would be better not to have doors stting on blockwork as presumably that would make a cold bridge. Better to have doors sitting on 150mm insulation plus screed in principle but I'm waiting to see what my chosen screed/UFH contractor advises. If neccessary we'll knock out the offending blocks. On the flip side, having external blocks all round the perimeter did make it easier for the timber frame joiners to install the timber sole plate.1 point
-
Personal experience says foundation blocks to max 2 course "below" DPM. Externally you don't want to see them. and DPM level should be 150mm above ground level. Its common (old practice) to build the external internal skin to DPM using concrete commons / thermalite coursing bricks, and then knock out these out at thresholds. but that has issues. Internally sounds crazy / wrong Depends a lot on construction type - Timber floor / beam and block / slab on grade etc etc - need some more info but doesn't sound correct...1 point
-
He's talking out of his arse. I've fitted new heating systems ( and fixed older ones too ) for north of 25 years, and what he says is a crock of crap. I've converted 50 year old systems from gravity hot + pumped heating, with pipework that looks like a rat-run with T's here there and everywhere, to new sealed and pressurised S & Y-plan and I've never had this issue. If the 3 way valve has been installed correctly, and more importantly WIRED correctly, then zero heat should get to any of the radiators. That would only be applicable if it were a gravity DHW scenario where the heating would get reverse convection flow to rads higher than the heat source. @graham1 The quickest way to solve this would be at ask your installer to put a gate valve in the flow to the rads, between the zone valve and the first rad, and then to close it. If the issue remains, further investigation into the plumbing layout is needed. Is this a 100% new install or a retro-fit new boiler onto existing pipework and rads?1 point
-
It is. There is a cross-wall of the same construction, but it is not bonded (new term for me 'risband joint'), so the Engineer we have had to engage has said it must be tied. The solution is a 1m long x 75 plate bonded to the inner wall, then a short return onto the outer wall that has a bolt through it and glued to the outer skin. Then there is a similar butt joint at a main corner, where the same is proposed. In my mind this will simply transfer any loads further along the wall, but it isn't the biggest deal. Then there is a facade with arches that have joggled to a new shape. the proposal is to us similar ties linking the existing first floor joists to the facade, either within the arch stones or just above them. My understanding is to leave arches well alone as they adjust to movement....but hey ho.0 points
-
Diesel car and gas it is then!0 points