Leaderboard


Popular Content
Showing content with the highest reputation on 02/24/17 in all areas
-
If you do have to fit a vent pipe up through the heated envelope of the house, then worth looking at insulating it as well as you possibly can, as it will be a pretty effective "cold air chimney" that will act as a fairly significant thermal bridge. It's the primary reason I didn't want to have to fit one. In our old house the vent pipe runs in a boxed section in the bathroom and where it runs is always where condensation forms, as the damned thing is always cold.2 points
-
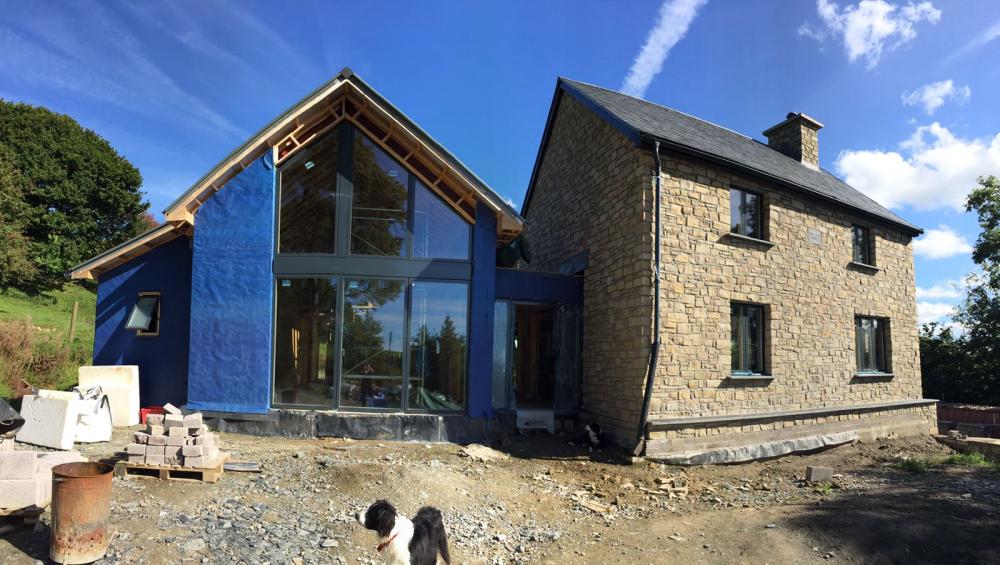
So the roof is now totally finished- was a beast of a job and having finished the ridge I felt as though I had been riding a particularly fat horse all week. Physically tough doing it without help and using just a ladder, but I'm impressed with the corrugated steel and would happily use it in future. I would seriously consider it for wall cladding as well, as it was much quicker and not any more expensive compared to my larch. I had made a start on the larch wall cladding a few months back, fixing the first layer of boards on the gables. I'm now comfortably past the half way point with the cladding, with only the seaward walk not yet started. It's been a process of trial and error to find ways of getting each board in place ensuring that it more or less plumb and with equal gaps either side. Part of this learning process has been judging what kind of tolerance to work to. The boards are highly variable, from less than 95mm width to over 100mm, sometimes tapering at one or both ends, and often with a bit of a curve to them. So my first idea of using a long spirit level and a wooden block as a spacer wasn't going to work. The first layer was done quite carefully with markings on the battens; temporary nails on these marks located each board whilst I used the coil nailer to fix it in place. For the top layer, I didn't want to use that method as it would leave nail holes in visible parts of the cladding. So the best method for fixing the long boards of the gables seems to be to put small marker nails on the reverse side of each board, spaced to match the gap that is being covered. It's obviously a lot of prep time, but I can do that inside the house during bad weather (it is February in Skye after all), and then when the weather allows I can literally just shove the boards up against the wall and they will be in the right place. Unfortunately my progress is now going to be rapidly curtailed as I become the stay at home Dad- SWMBO has gone back to work, so my day now revolves around the couple of hours nap time that let me sprint down to the house site, baby monitor in my pocket, and feverishly nail some boards on. Next project: self build baby pen...1 point
-
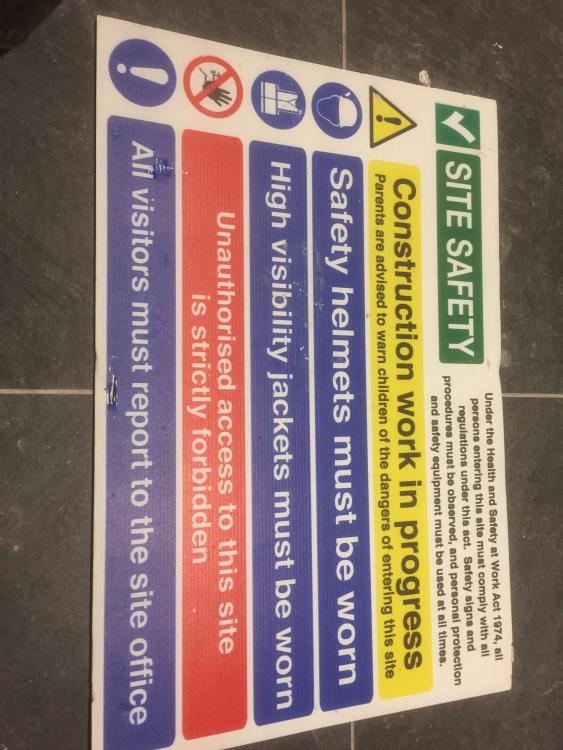
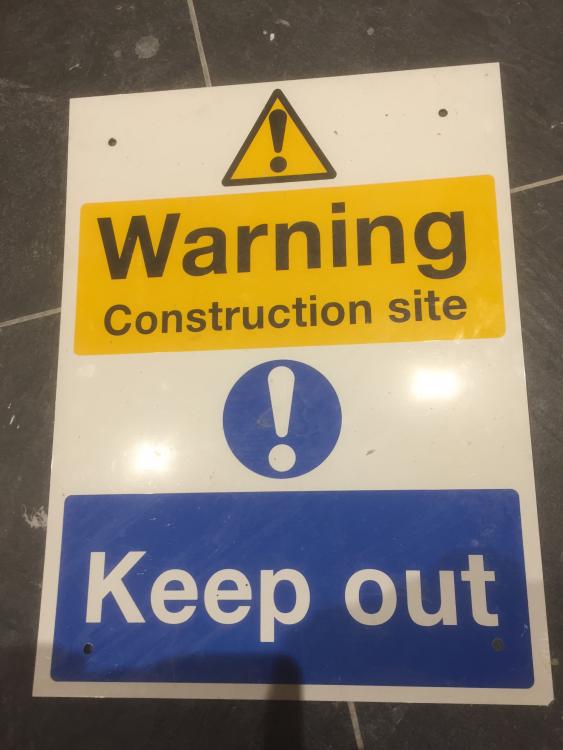
Anyone want construction site sign? finished my self build enough to remove it. Just need to pay the postage. Rigid 400mm x 300mm warning sign. Need to check postage but just checking Post office i assume it would be around £3 unless you can advise an alternative option? Or collect Aberystwyth PM if you want it. Also have a larger site safety sign but unsure what postage would be on this, quite light but double the size of the first one.
 1 point
 -
It is with Zs, Quite a few at the cheaper end of the market, mostly for private rental, Most owner occupiers are willing to pay the little bit extra and have a properly designed and installed radial system, Radials can often be much quicker and less cable consuming to install, it's the extra fitted equipment that ramps up the cost slightly, and obviously dependant ok no the number of radials the client wants, then sometimes the cable saving goes the other way, I've done some with 2 radials to a room as they never wanted power to trip out a whole room, or more usually, 2 rooms split across 2 radials, slightly less expensive. I've done some quite modest 4 bedroom houses with close to 30 circuits in them. And some fairly flash 6 bed+ with fewer than 15, horses for courses. I have a very modest 2&1/2 bed semi with 14 circuits, not including shed. But, tbh, that's ridiculous, and only because I could, ( "for free" )1 point
-
So the timber floor board don't rot! Hang on a sec. What timber floor boards?1 point
-
1 point
-
That was my thought - most people do not know about MVHR and if they hear they need replacing every 10 years, it will put them off - especially as it 'required constant maintenance.' I shall be sending an email to the magazine to query the article and comments.1 point
-
Yes, it's not applicable to this specific case, I was referring specifically to cases where there wasn't a suspended floor, hence the reference to refurbs. There's a more general question here, though, why do we still consider having a suspended ground floor with a cold void underneath? It needs a great deal more insulation than a ground floor that doesn't have a void underneath, to achieve the same thermal performance, and, given that insulation can be load bearing and rest on the ground I wonder just how cost-effective a suspended floor is in the long term, say through the life of the building.1 point
-
It's a grey area. On a new supply one man will install the supply, then a second person will install the meter (often not even on the same day) Last supply move I did (temporary building supply moved into the finished house) we were told one man would move the supply in the morning and a second man would be along to move the meter in the afternoon. But the first man moved the meter as well and I had it all connected up tested and working before the second man eventually arrived. He cut the first man's seals, checked the connections and re sealed it again then went off for an early finish.1 point
-
Mine was only 75mm thick. And it was 3 years ago as well!! I take it that the new cemfloor type screed is basically a liquid screed but without the problems associated with the older types. I think if I had to choose again I would still go for sand cement screed as it's the tried and tested method with little issues if laid correctly. From cold my screed takes about 90mins before you start to feel any heat on your feet but it will stay warm after the stats turn the heating of for close on 3hrs. A deeper screed will take longer to heat up but longer to cool down so a 50 mm liquid screed will heat up quicker but also cool down quicker. It's a tough choice to make. Glad all I have to worry about is what flowers to plant in the garden.1 point
-
Steptoe, my comments about oversizing come from the experience I have in my existing home - the voltage drops 6V (using an accurate appliance monitor, 8V in the kitchen and 2V at the meter) in the kitchen when the 2.4kW oven (which I assume is a largely resistive load) is on, which suggests about 60W (2.5KW * 6V/ 240V) is being lost between the meter which is in the garage, and the kitchen about 6m away. Unfortunately the cable goes underground so there is little I can do about it. However if you assume your 2.5kW oven is perhaps on for 1 hour a day, then its annual consumption is about 900 kWh/year (probably an over-estimate), which costs £140/year (at 15p/kWh), over a 25 year investment period for the cable that's £3,500 of electricity used by the oven, my 6V drop on 240V is a 2.5% drop, so £90 over 25 years being lost in the cable, which probably represents a worthwhile investment in additional copper if it were not for the difficulty of replacing the underground cable. I suspect there may be some other issues going on in my 40 year old home to cause this sort of drop.... Anyway, if you were starting from scratch and comparing 3 different cable types 1.5mm2, 2.5mm2, 4mm2 of 10m in length for the same oven, with resistances of 12, 7 and 5 mohm/metre, then the voltage drops would be 1.2V/0.75V/0.5V respectively or 0.5%, 0.3%, 0.2% - and the 25 year cost of the losses in these cables would be £14, £8 and £5 respectively, and the cost of the 10m cable would be £3.60, £5 and £8.00 respectively. So the energy loss saving of going from 2.5mm2 cable to 4mm2 cable would be £3, and the additional cost of the cable would be £3, so the breakeven seems to be around the 2.5mm2 to 4.00mm2 range on a 25 year investment horizon. Anyway, I suspect my views are tainted by my experience in my existing home - which was all as far as I know installed professionally. The previous owner had the house built and was not at all practical - so wouldn't have done the electrical work himself, and my impression of him was that he would have hired a recommended 'professional' electrician. Perhaps there is something else going on in my home, but a 6V drop, and 60W cable loss, to me is unacceptable, given a professional installation? There may also be something wrong with my schoolboy maths above - comments please? But if the numbers are correct, and I was installing new cabling I would generally round up the required cable size to the next available size if it were a long term investment?1 point
-
When I priced mine up I sent that ces quarry the volume I needed and they gave me a price for both the liquid type and sand cement. As Dee says if they where a 1m3 short you paid a high price to get another small amount. In the end I got a local guy who laid my sand cement mix but put an additive in to speed up the drying process. Of hand I think I paid £1300 for the complete job of 14m3 with £200 of that the additive.1 point
-
Yeah 50mm was the depth the recommended. I got a quote from RTU also and they gave a price slightly over £14 p m/2 but they also had included in the quote that any additional screed used would be charged at around £260 per m/3 and the rep said that it was likely there may be some over run. The Cemfloor guy said they do a fixed price quote so they come out and survey and the price they give is the final price. I personally wouldn't go with the other liquid screed given the drying time and adhesion issues so its the Cemfloor or sand & cement for me. Still not 100% decided so i will ask a few tilers and a guy i know does Terazzo to see what they think.1 point
-
Agreed. Plus you can allow for diversity ( unless that's already been factored in by the regs which I'm unsure of ). Again, ageeed. NOTE : Each install is unique. Let's remember to dispense advice accordingly, in a positive manner, and get the op to as good a resolve as possible. Cable sizing should only be summised under qualified supervision, IF you do not deem yourself competent to do so. We should also advise that for a 3rd party sign-off ( certificate ) said qualified person will need to witness the cable installation, from start to finish, in order to ascertain its compliance, and satisfy themselves that the type and size of cable used is completely fit for such purpose. @lakelandfolk, who will be signing-off the work?1 point
-
The RTU guy who gave a talk at the Self Build show said the Ultraflo screed (similar to the Cemfloor) would cost "around £14/m2".1 point
-
The pond mats I've seen have been either coils of pipe tied to a stainless frame, weighted down with concrete blocks, or ladder-like affairs made of polyprop pipe, rather like giant towel rails. Whether it makes financial sense to use a water-source heat pump is a bit debatable, though, as they are expensive to install and need periodic replacement of a lot of pretty expensive special, non-toxic, antifreeze. The antifreeze also reduces the collector efficiency by around 20%, as no antifreeze is as good as water in terms of either thermal conductivity of heat capacity. You may well find that an ASHP will be a fraction of the cost to install and have lower overall running costs.1 point
-
For my wife its the self levelling appeal. She hates the though of anything being out of level. They quoted me roughly £15 per m/2 for the Cemfloor1 point
-
I'd stand it back up and see if it survives.1 point
-
No offence but anyone who blatantly posts these up is at risk of breaching copyright and the wrath of the IET. My latest OSG was £27 from memory.1 point
-
Now that is a good idea!1 point
-
Hi Joseph, Digging out was a bastard (30mm screed), 100mm slab, the rest was a mix of post war rubble and clay. 3 grab lorries (had a local guy who needed quite a bit of the rubble/soil so that helped me 150mm hardcore back in (circa 12t), compacted and levelled with a 10mm tolerance. Up to this point, probably spent £3200 in man hours plus materials, tools of £500. UFH cost will be approx £1200 (will do that myself), insulation (£?) and some type of self laying/levelling concrete (£?) Some will say the payback time will be quite some time, but I work from home so I expect the heating to be on low during the day when needed.1 point
-
On a related note, had my private BC come round for a pre- final inspection. He said 'I'll need the MVHR commissioning cert' I responded that it was a DIY install (which is common) so what did he need to see exactly? We agreed that I'll send him the spec of the unit to ensure it's adequately sized for the house1 point
-
Cool, at the moment I drive round with a pen permanently stuck in the over-ride slot, has worked for 8 months Will give them a call, just need a friendly mechanic to extract it for me..1 point
-
@Tennentslager, bear with this old boy: Clever old sod! Can't see tbh whether your pipe in the corner stops short under the floor or not. Drill a hole through floor etc. Slitting disc on a bit of studding. EDIT: I think I've just found my father!1 point
-
I thought you'd never ask1 point
-
I like Jeremy's idea of discharging into the lake, if you can get permission for that. It would solve a whole host of problems and be a simple reliable solution. If doing that, I would install an air blower type treatment plant. When I was researching for mine a couple of years ago now (so others may have come to the market since) I found the three best ones were the Vortex, the Biopure and the one I fitted, the Conder. These all had very similar levels of cleanliness of the effluent and were way ahead of any others that I found at the time.1 point
-
Your 600mm challenge isn't too much of an issue. Provided you follow the General Binding Rules (I assume you live in the UK, apologies if I have that wrong). @ProDave's advice (above) is the most important thing to sort out first. Given that you follow those, then my research lead me to follow @JSHarris , @Stones and other's advice: choose a digester that has the fewest moving parts. And if there are any moving parts, don't immerse them in the raw discharge. Inevitably, they need maintenance. So we choose a digester that does nothing more than blow bubbles through the liquor. And the air compressor (the only thing with moving parts) will be held in our Winter Garden, so it can be maintained in the warm and dry. Push comes to shove, I can always get Debbie to stand there and blow down the pipe1 point
-
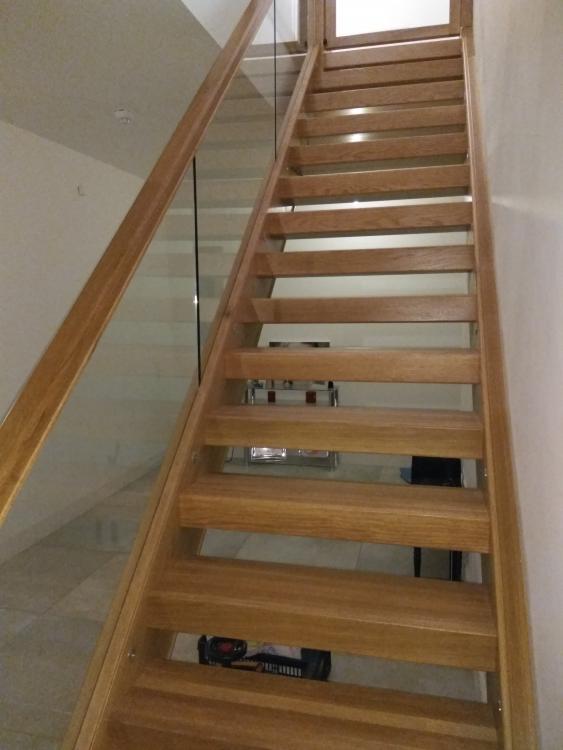
This is ours here. The tread is solid oak right through. Let me know if you want details.
 1 point
 -
I've experience of this Siga tape and I can say it's incredibly good stuff. Compromise on the membrane all you can, but DO NOT compromise on the tape . Cheaper tapes which give up and start to leak will negate all the hard work you've done, and also the situation would become exaggerated by the fact you've got MVHR, so, give this the same respect you gave your founds and raft and keep the standard high. ?1 point
-
What U Value are you targeting? While foamglass is better insulating than other block work, it's not quite as good as EPS, so to achieve a Passive-slab type level of 0.1 U value for the floor and perimeter you'd need roughly 350mm foamglass. But that's not the whole "issue" with SIPs. If you wish to eliminate cold bridging and condensation risk on the sole plate then you need an additional external layer of insulation that drops down passed the sole plate. Where as on a thicker twin-stud wall or I-Joist wall there is an opportunity to place an EPS upstand under the middle of the sole plate so that the inner face of the wall is over the warm floor and the outer face is over a cold ring beam (or on the EPS upstand itself in the case of the twin-stud) and therefore braking the cold bridge, you can't do this with a SIP panel. Hence the need for EWI to isolate the sole plate from the cold side. My experience is that SIP suppliers are much happier about additional insulation going on the inside than the outside, but I believe quite recently Kingspan have started to support EWI on their panels. It's worth looking into the Potton PassivHaus that used Kingspan SIPs, their foundation was very complicated to resolve the cold bridging issues and IIRC they specified EWI to cover down passed the sole plate. Seems to me there are easier solutions with twin-stud and I-Joist walls. Plus you get to use an insulation with better decrement delay and acoustic properties.1 point
-
Hi we built a SIP house 4 years ago, and as stated its the site work that dictates how well sealed the structure is. The weak points are the first floor as the joists sit on the sip panels and any roof valleys. We spent a good week going over the roof junction as the foreman was off when the roof went on and there were a few gaps that were quickly sealed and taped. It is no different to any other house in that attention to detail is the key.1 point