
Foundation and first course of poly steel.

Entry posted by Jenki in The windy roost foundations
2515 views
A busy couple of weeks and favourable weather has seen some progress at The Windy Roost.
When in use the word I, or we, I mean Mandy my wife, and me. So far that's the only labour on the build. Mandy has worked office based for 40 years before we moved here, so this is an all new world for her, and although she regularly tells me she's older than me, and she's needs a day off, I can't be more proud...
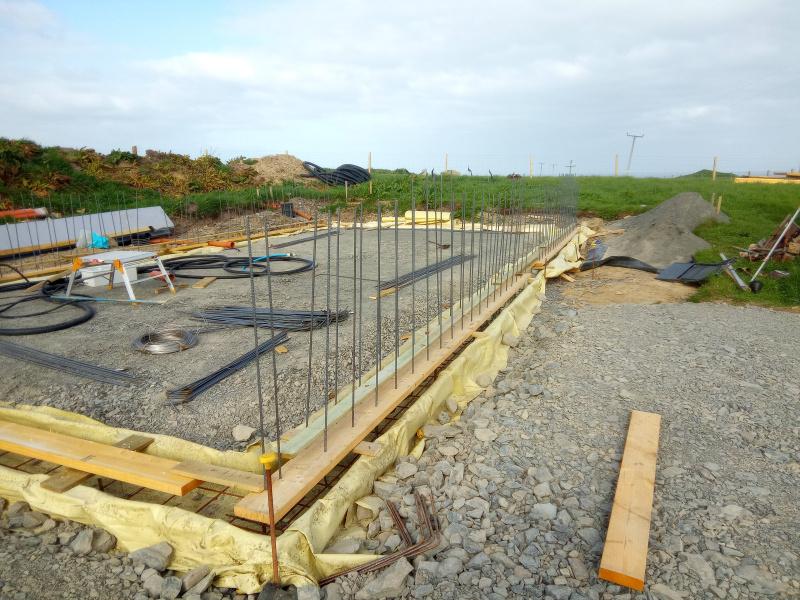
It seems that the engineers really worry about the wind here, which is fair enough, but you would think no house has ever stood the test of time. The 40M perimeter of the house required 288 H10 starter bars, after installing the radon barrier inside the shuttering, I used some 8x2 timber, (that will later be used to frame the gables), and drilled lots of holes and feed the L bars though.
These were spaced as per spec and to suit the poly steel blocks.
Checking the dimensions, diagonals and rechecking this was all secured in place. The 8x2 timber made pouring the shuttering difficult.
I made some pour boxes, but this had limited success, so ended up using the 7 ton 360 & bucket method, a Caithness speciality, and the bonus was the concrete truck driver is also a very skilled 360 operator, which speeded up the pour. I think Stuart now counts as the 3rd bit of labour on the build.
Rebar work in progress.
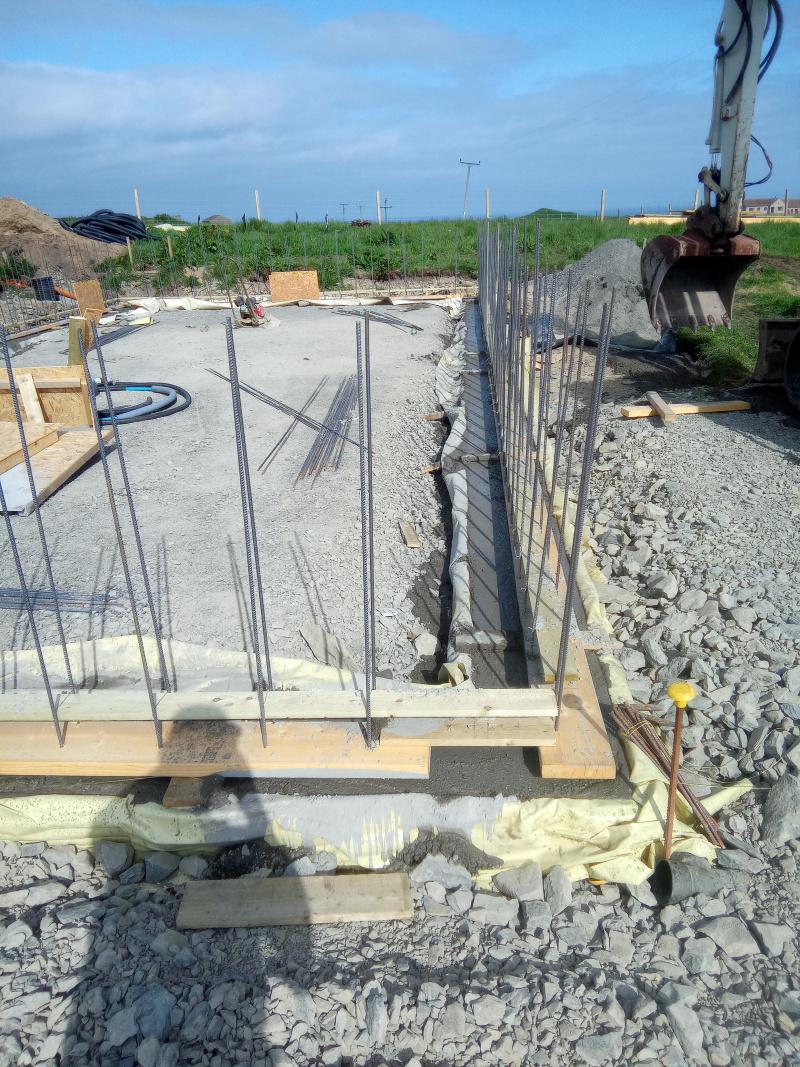
4 cube of concrete and all dimensions still bang on.
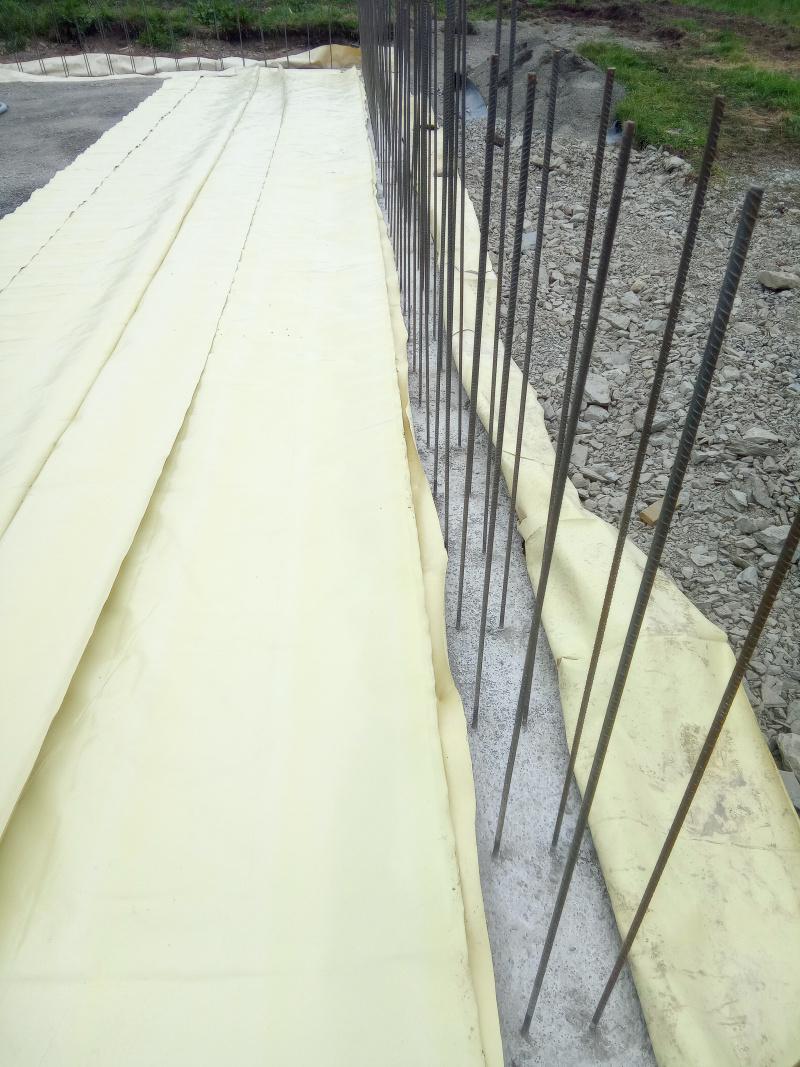
Next day stripping the 8x2 was to be honest, a pain in the ass. But a few hours later all the shuttering was removed and we were ready to install the radon barrier over the sub slab joining it to the previously installed barrier now under the footing.
Sand blinded, and then added 20 ton of 40mm be to dust in preparation for the slab after the foundation block pour.
Installing the poly block we loosely set all four corner blocks, leveled them using plastic folding wedges, and measured the lengths, widths, and diagonals. We strung string lines around the blocks to ensure the corner blocks were in line.
We sprayed the footing with marker paint, and then marked the blocks in position onto the footing.
Then one by one we set the blocks in position and fixed in place with fire rated expanding foam.
Checking the level with a laser level and double check with a dumpy level.
Next day we filled in between the corners, gluing the blocks in place and ensuring the blocks are straight level, again using the string lines and levels. We cut holes for drains, ducts, and sealed the gaps with foam.
The poly steel block are t&g and also come with clips that lock the blocks together.
Before we closed the sides we needed to feed in horizontal H10 rebar🙈.
We tied the horizontal and starter bars together, and also tried the rebar to the metal grids in the blocks.
To close the runs the blocks needed cutting, luckily our cuts didn't cross the metal firings in the block, so it was simply cut with a hot knife.
Then glued (foamed) in place.
These cuts were braced with 4x1 screwed into the metal firings with bay pole screws.
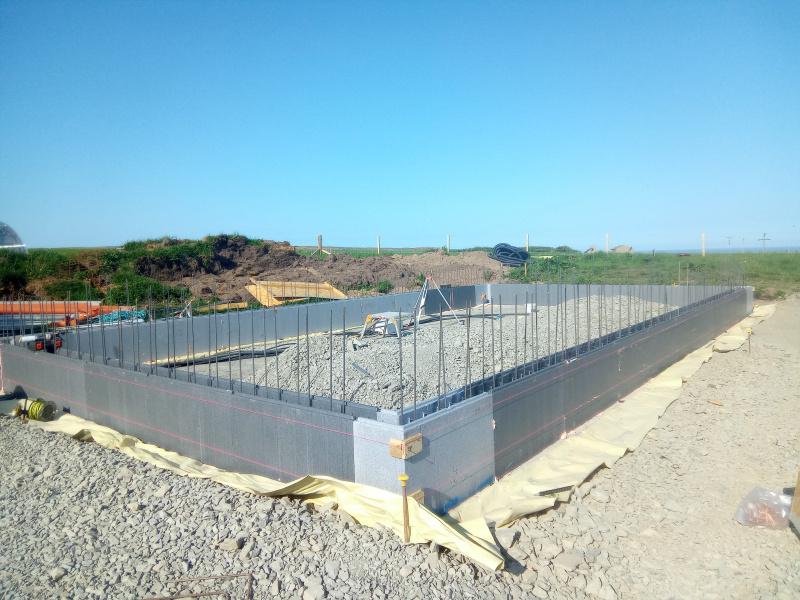
Foundation course in place.
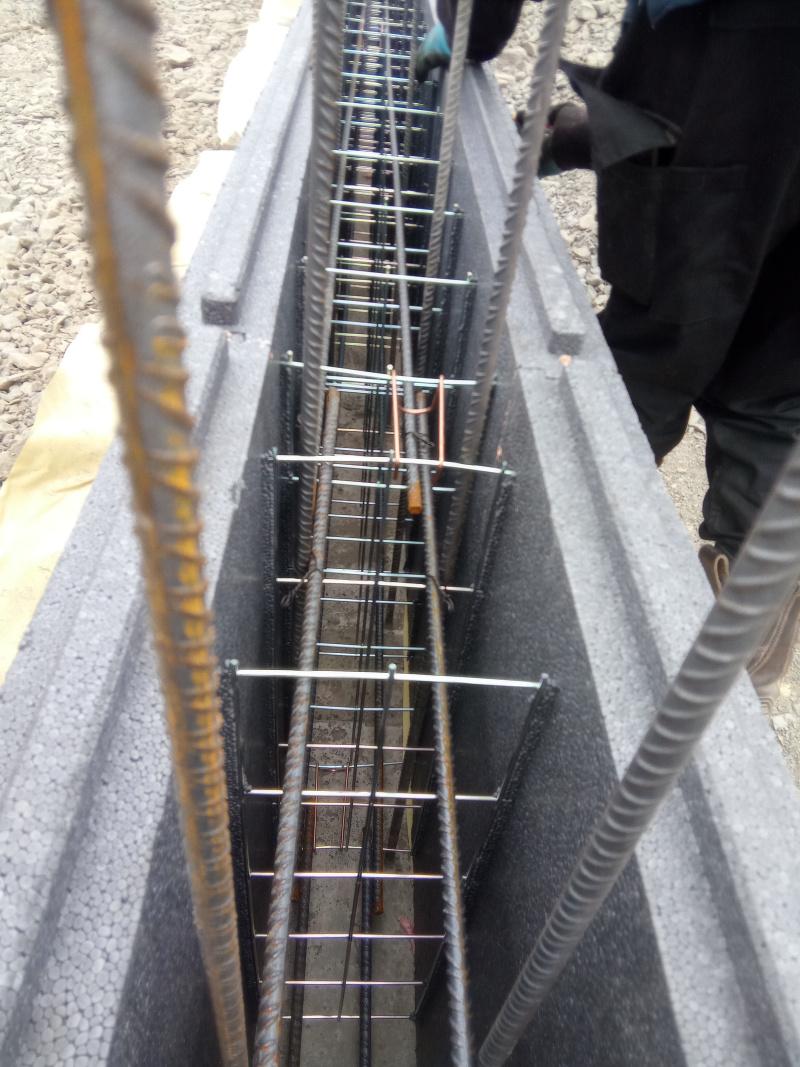
Mandy starting to tie the bars, you can also see the clip between two blocks.
Concrete day. 3 cube. Concrete pumps don't exist up here, I was quoted 2k to bring one up from Inverness. I fabricated two 1200mm
OSB form boxes, which sat between the top of the ICF block and formed a funnel, and used the 360 and Stuart to pour the concrete into the forms. We had two pokers on the go and filled one funnel, and while the bucket was being re filled, vibrated and leveled the concrete, filling the forms alternatively, and moving the empty form along. Mandy was a demon and just got in with it.
The whole 3 cube took one hour to place. So paid £15, waiting time and a drink for the 360 operator.
It went really well.
We cleaned up the top of the forms, then checked the walls.
We didn't prop the forms before, and used the rebar to be sure it wasn't going anywhere.
Inspection showed there was some movement especially in the areas where a I removed one side of the ICF for door ways.
This was easily rectified with some timber wedged and screwed in place. About 15 props in total were required.
I was really impressed with the strength and quality of the poly steel blocks, only slight issue is they do have a slight wave along the block, but screwing timber to the metal firings lessons this and over all after the pour the walls are straight.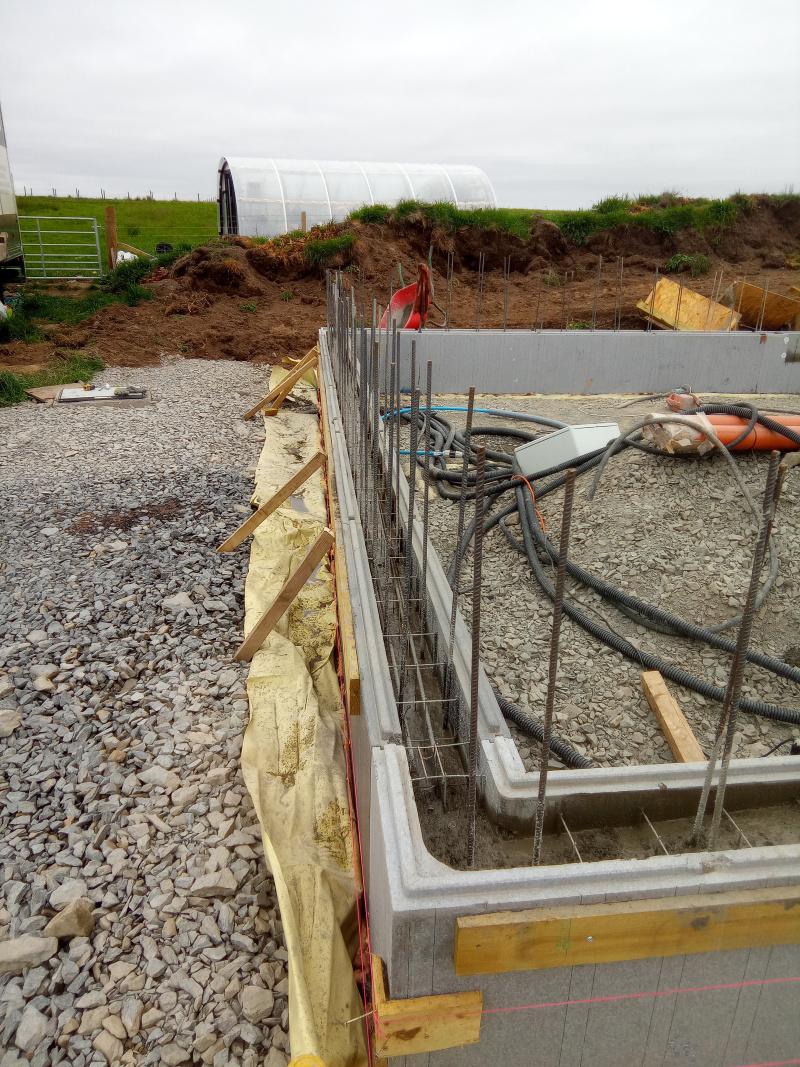
Next slab prep, drainage, and lots of insulation.
-
 4
4
0 Comments
Recommended Comments
There are no comments to display.
Create an account or sign in to comment
You need to be a member in order to leave a comment
Create an account
Sign up for a new account in our community. It's easy!
Register a new accountSign in
Already have an account? Sign in here.
Sign In Now