Nickfromwales
-
Posts
30306 -
Joined
-
Last visited
-
Days Won
294
Everything posted by Nickfromwales
-

Spontaneously exploding shower glass
Nickfromwales replied to DavidFrancis's topic in Bathrooms, Ensuites & Wetrooms
Hitting, or more specifically STRIKING the glass during installation creates a ticking time bomb. It may also have been caused by the house naturally settling after buildings work. Was it a fixed, framed piece of glass? -
It worked though !!!
-
Na, he's definitely pinched that from vogue, or top gun ( with my money on the latter ). Anyhoo, setting the silver blonde Adonis aside, WELCOME BACK The Mitchell's.
-
I assume it'll be100watt per m2 so it'll be fine to tank over. I'd probably recommend laying the mat and then flooding the area flush to the wire ( literally just covering it ) with a flexible self leveller. That would give you a flat clean surface which would get primed ( 2 coats, 1 watered down 75% water, and one neat ) with the Impey primer, and then the membrane. The idea being that no water could get to the Uth mat. Flooding the area will then make up the defect either side of the shower so the membrane has an even flush surface to continue onto. You'll use the same volume of tile adhesive to make up this deficit so it's 6 and two 3's cost wise but a much better job imo.
-
Can you hang the ceiling downstairs on acoustic rail / fixings and use dense acoustic wool in between? That would leave you free reign upstairs. Just spreader plates then. Another option could be acoustic wool and then spreader plates, 22mm weyroc, 6mm dense rubber acoustic mat then your choice of floor covering. With the spreader plates the heat will still get through imho.
-
Ok, so no areas will end up being Ufh heated as well as rads in the same space? That was my question . Rads upstairs is a good fail safe as others here with full MBC passive builds have reported back on a need for a little trace heating. Have you considered Ufh up and down as it would be mono temp then as opposed to two differing disciplines / controls / components etc?
-
Am I reading this correctly, as in you'll have UFH AND rads ?
-
Also, I've just got off the phone to an Impey uk tech guy. The membrane ( as I thought ) is a must. It provides a bond to the GRP, acts as a decoupling barrier AND provides a critical key for the tile adhesive. The guy said to primer around 1000mm in each direction on the floor and lay more of the membrane down as belt n braces. ( And as a typical manufacturers arse cover ) they even went on to say to apply membrane to the entire floor area. He agreed that a over shoot of 1m should suffice but only as you're fitting glass.
-
I usually do tbh, and weight the tray down whilst it cures. That takes care of any final undulations ( 1,2 or 3mm max ) but if you're confident that the tray doesn't move one jot then I'd say you'd be ok. Is this one fitted now?
-
Getting power for lights with least disruption
Nickfromwales replied to Shell820810's topic in Lighting
Gyproc easy fill is designed for seamless and invisible blending in of repairs to plasterwork. I use it when I do knock throughs etc and you can get it perfect if you make the right call and get a good decorator to apply it and layer it accordingly. Just prior to it being good enough, you coat it with a high opacity paint, and leave to dry. The paint acts as a super fine filler and allows you to sand back at 320 grit level to a perfect finish. Cut the plaster as sympathetically as you can, bite the bullet, and get your lights spot on -
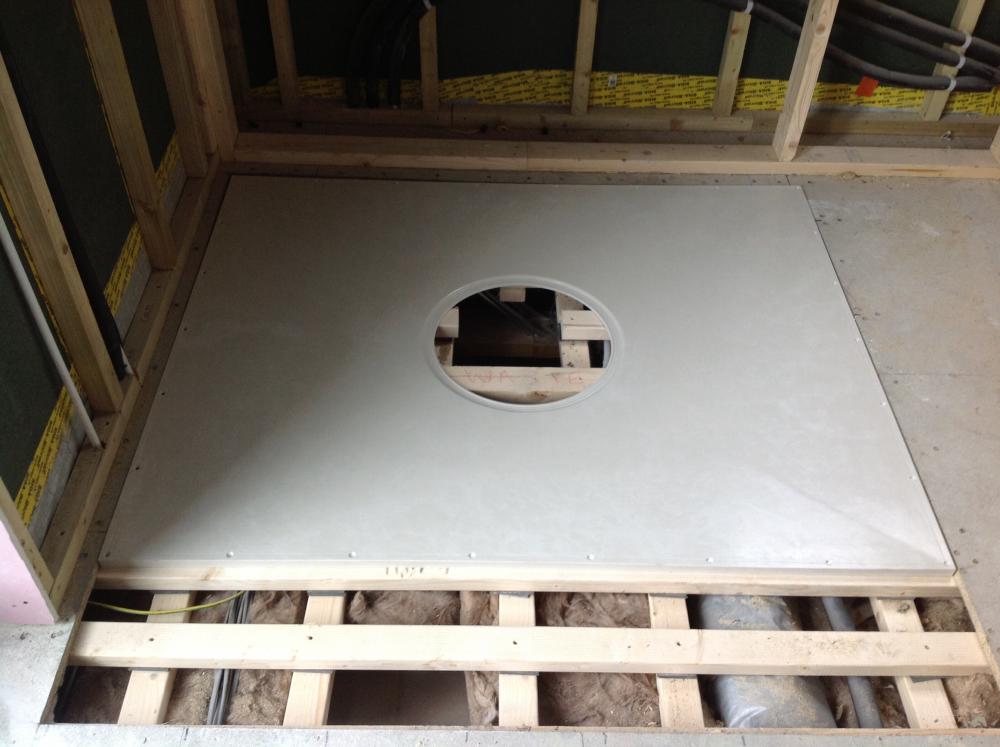
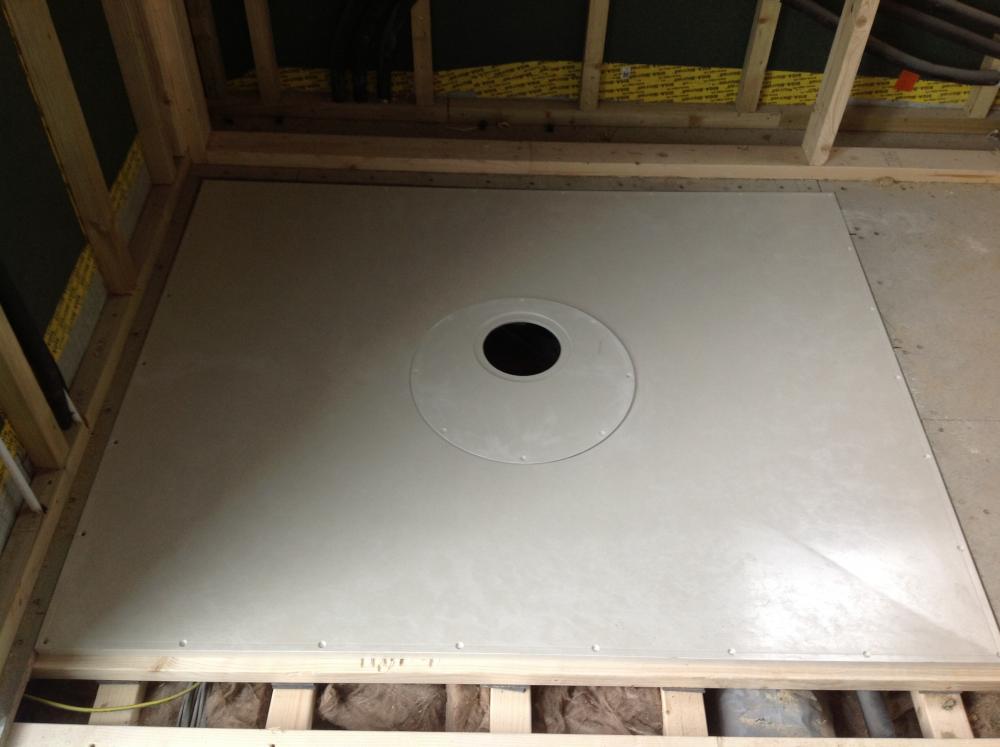
Happy days. Can I assume that the ply was bonded / glued and screwed down before fixing the tray down? If you're not using the Impey tanking membrane then you'll have no warranty based recourse The one I pictured did use the specified Impey kit ( including the membrane ) so you're stepping into the unknown if you don't stick to their 'approved' method of fitting. The membrane covers you from the mouth of the waste opening, all the way to the tanked corner / wall junctions so is quite significant. The only reason I see that they pursue this particular discipline is that there is an obvious break after the waste where the off-settable disk sits in the former. The membrane ensures no water can get past that 'weak' point, but tbh you can cheat your way out of it with a good sealant. The disc ( for the benefit of those reading this long after I'm immortalised ) has countersunk holes all the way round and you fix it down with self tappers, and iirc the Impey kit also comes with this absolutely horrible ( but good ) rubber solution in a mastic tube ( which you're supposed use to seal everything up from an Impey POV ). It's totally and utterly horrendous stuff to use and NEVER cures fully, and I MEAN never, which meant I had no choice other than to throw my mastic gun away after using it.......and my scraper.........and anything I touched whilst throwing my gun and scraper away. Dangerous territory I think as I can't say you will be watertight without the membrane, AND I can't say that anything will adhere to the former without the membrane. Have a think on how to progress and come back with your thoughts
-
They seem fine. They just need 3/8" to 15mm copper to irons which is pretty common practice when fitting imported taps tbh. The other option is to ditch the flexis that come with it and buy some 15mm x 10mm replacement ones such as these
-
Sorry your pic is as bad as the ones I draw If the stack carries on up then deffo OK to strap it back in .
-
Impey and Diamond are only an inch thick . Both GRP iirc.
-
The kick back loop will be fine, but you'll need to take it up to attic height and fit a 50mm AAV which is accessible. For the runs which you show T'eed in multiple times just use one of these with a 45 out of the middle to rectify you back to 90 degrees. That way you'll get the water naturally flowing to the stack plus you'll be able to get a narrow flexis rod through the tee and down the leg ( should you ever need to do so ). Generally best practice to use swept branches rather than flat T's as the latter create a wall which the water has to hit against before deciding which way to fall. That is quite problematic for shower and bath wastes as it massively reduces the natural flow velocity, but not so problematic for a basin.
-
Sourcing our plumbing equipment for first fix
Nickfromwales replied to JanetE's topic in General Plumbing
Some answers are in my previous two posts. Check through and come back with anything I've missed. The junction between the tiles and floor covering is done in CT1, NOT silicone. CT1 doesn't have a short life like silicone and doesn't go black / mouldy. -
Sourcing our plumbing equipment for first fix
Nickfromwales replied to JanetE's topic in General Plumbing
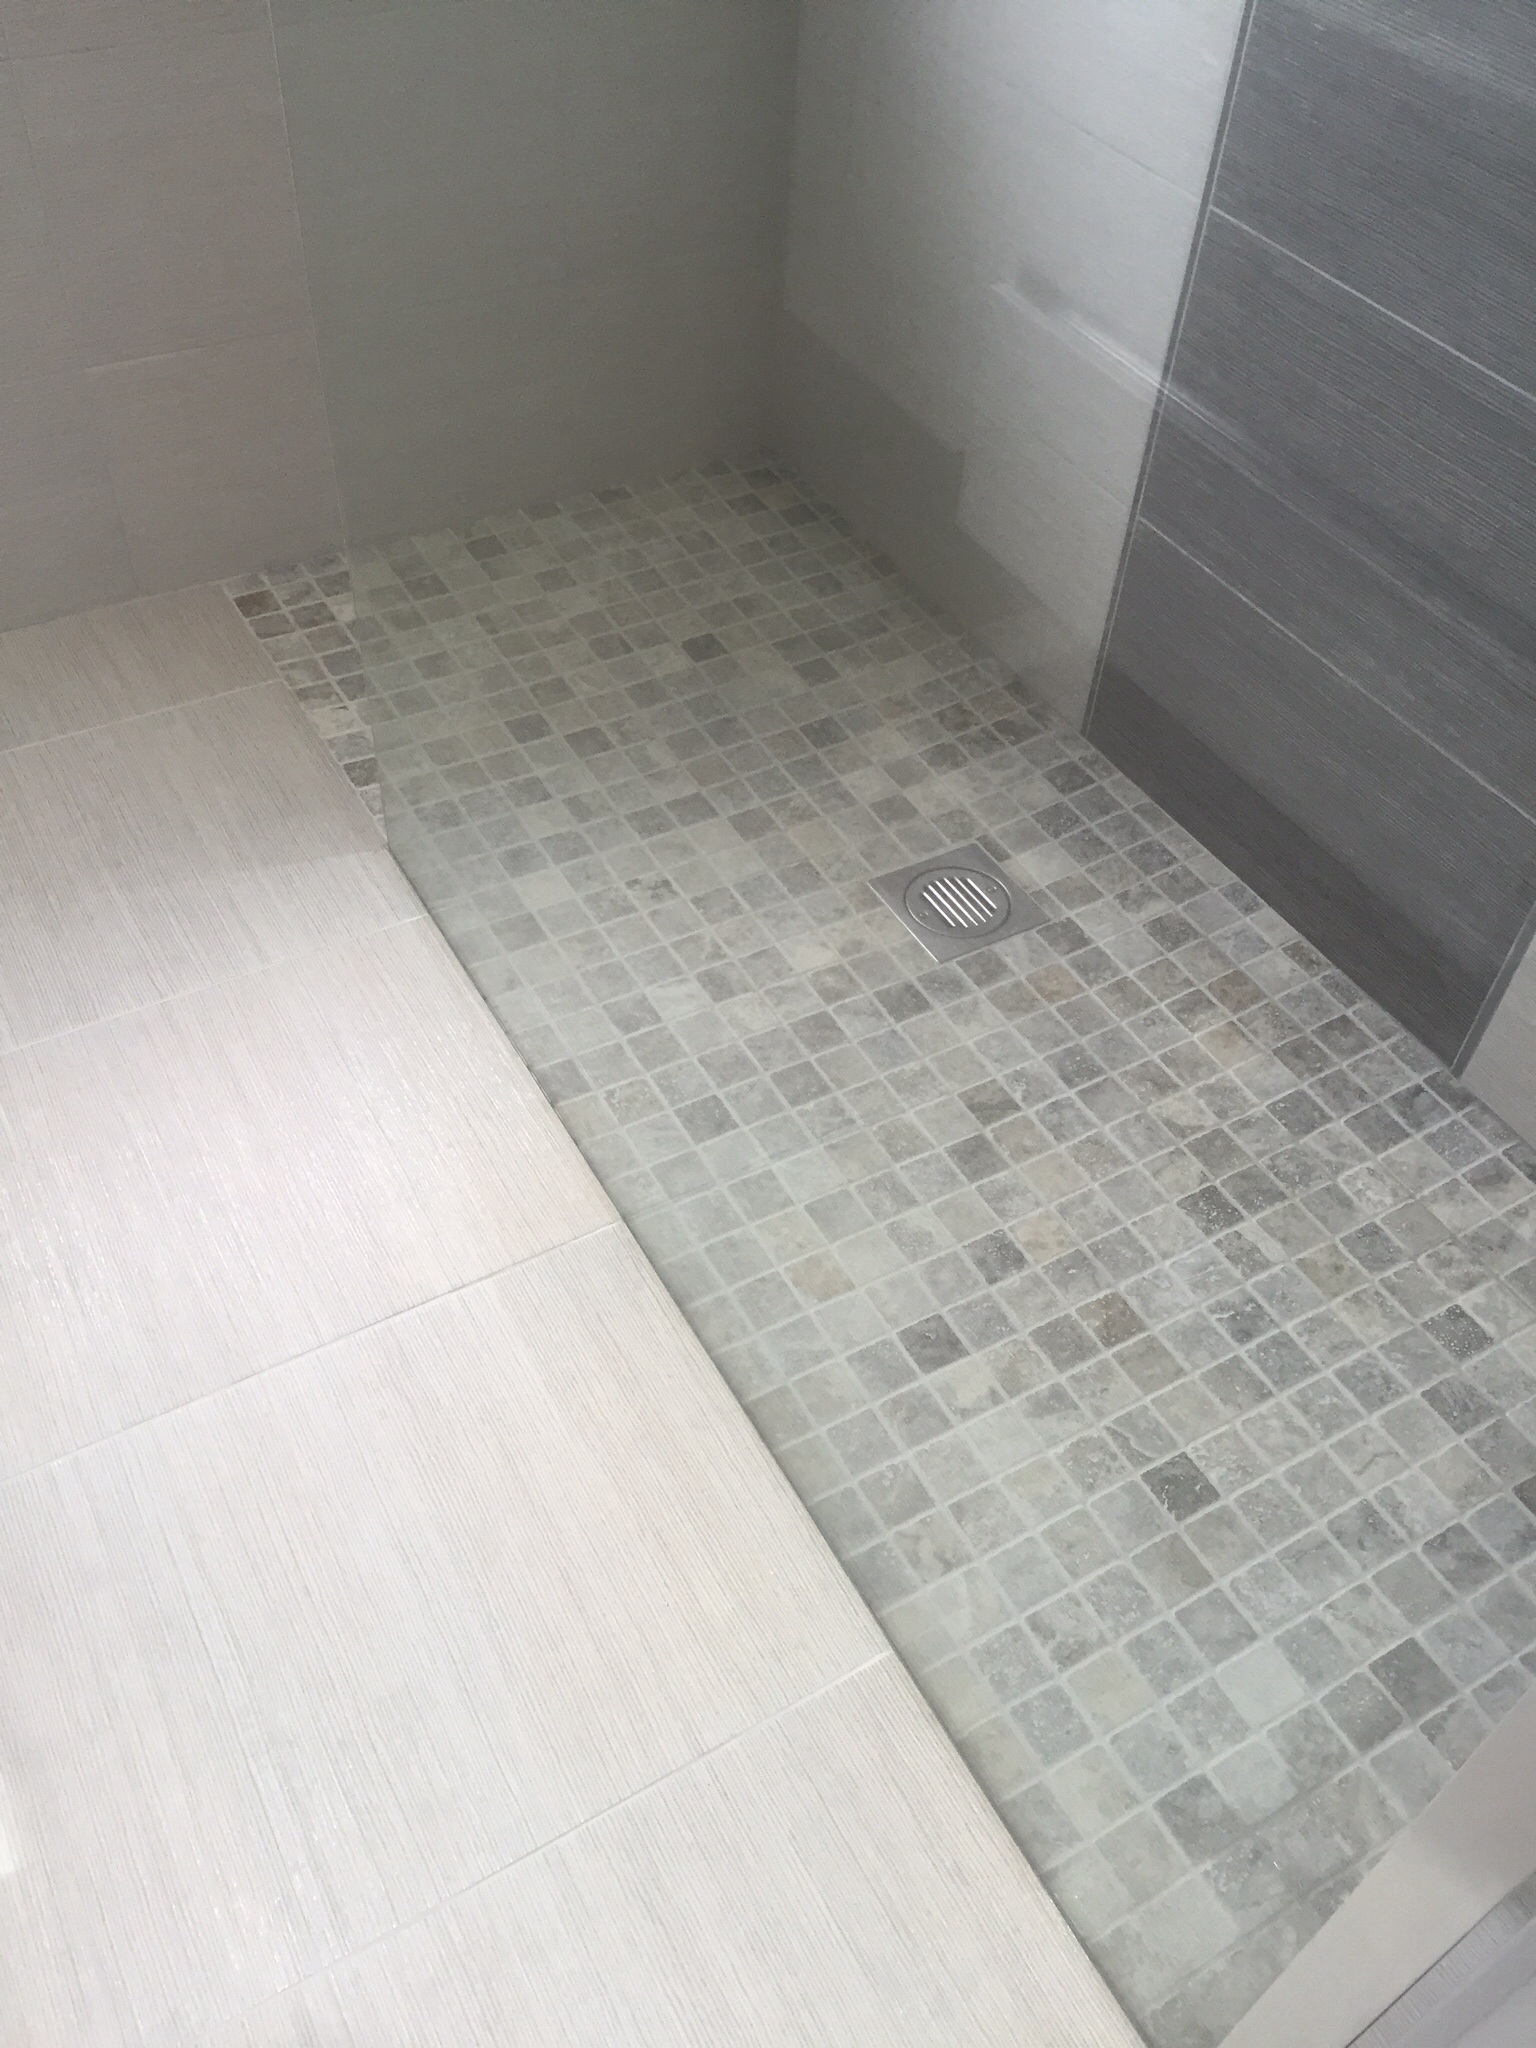
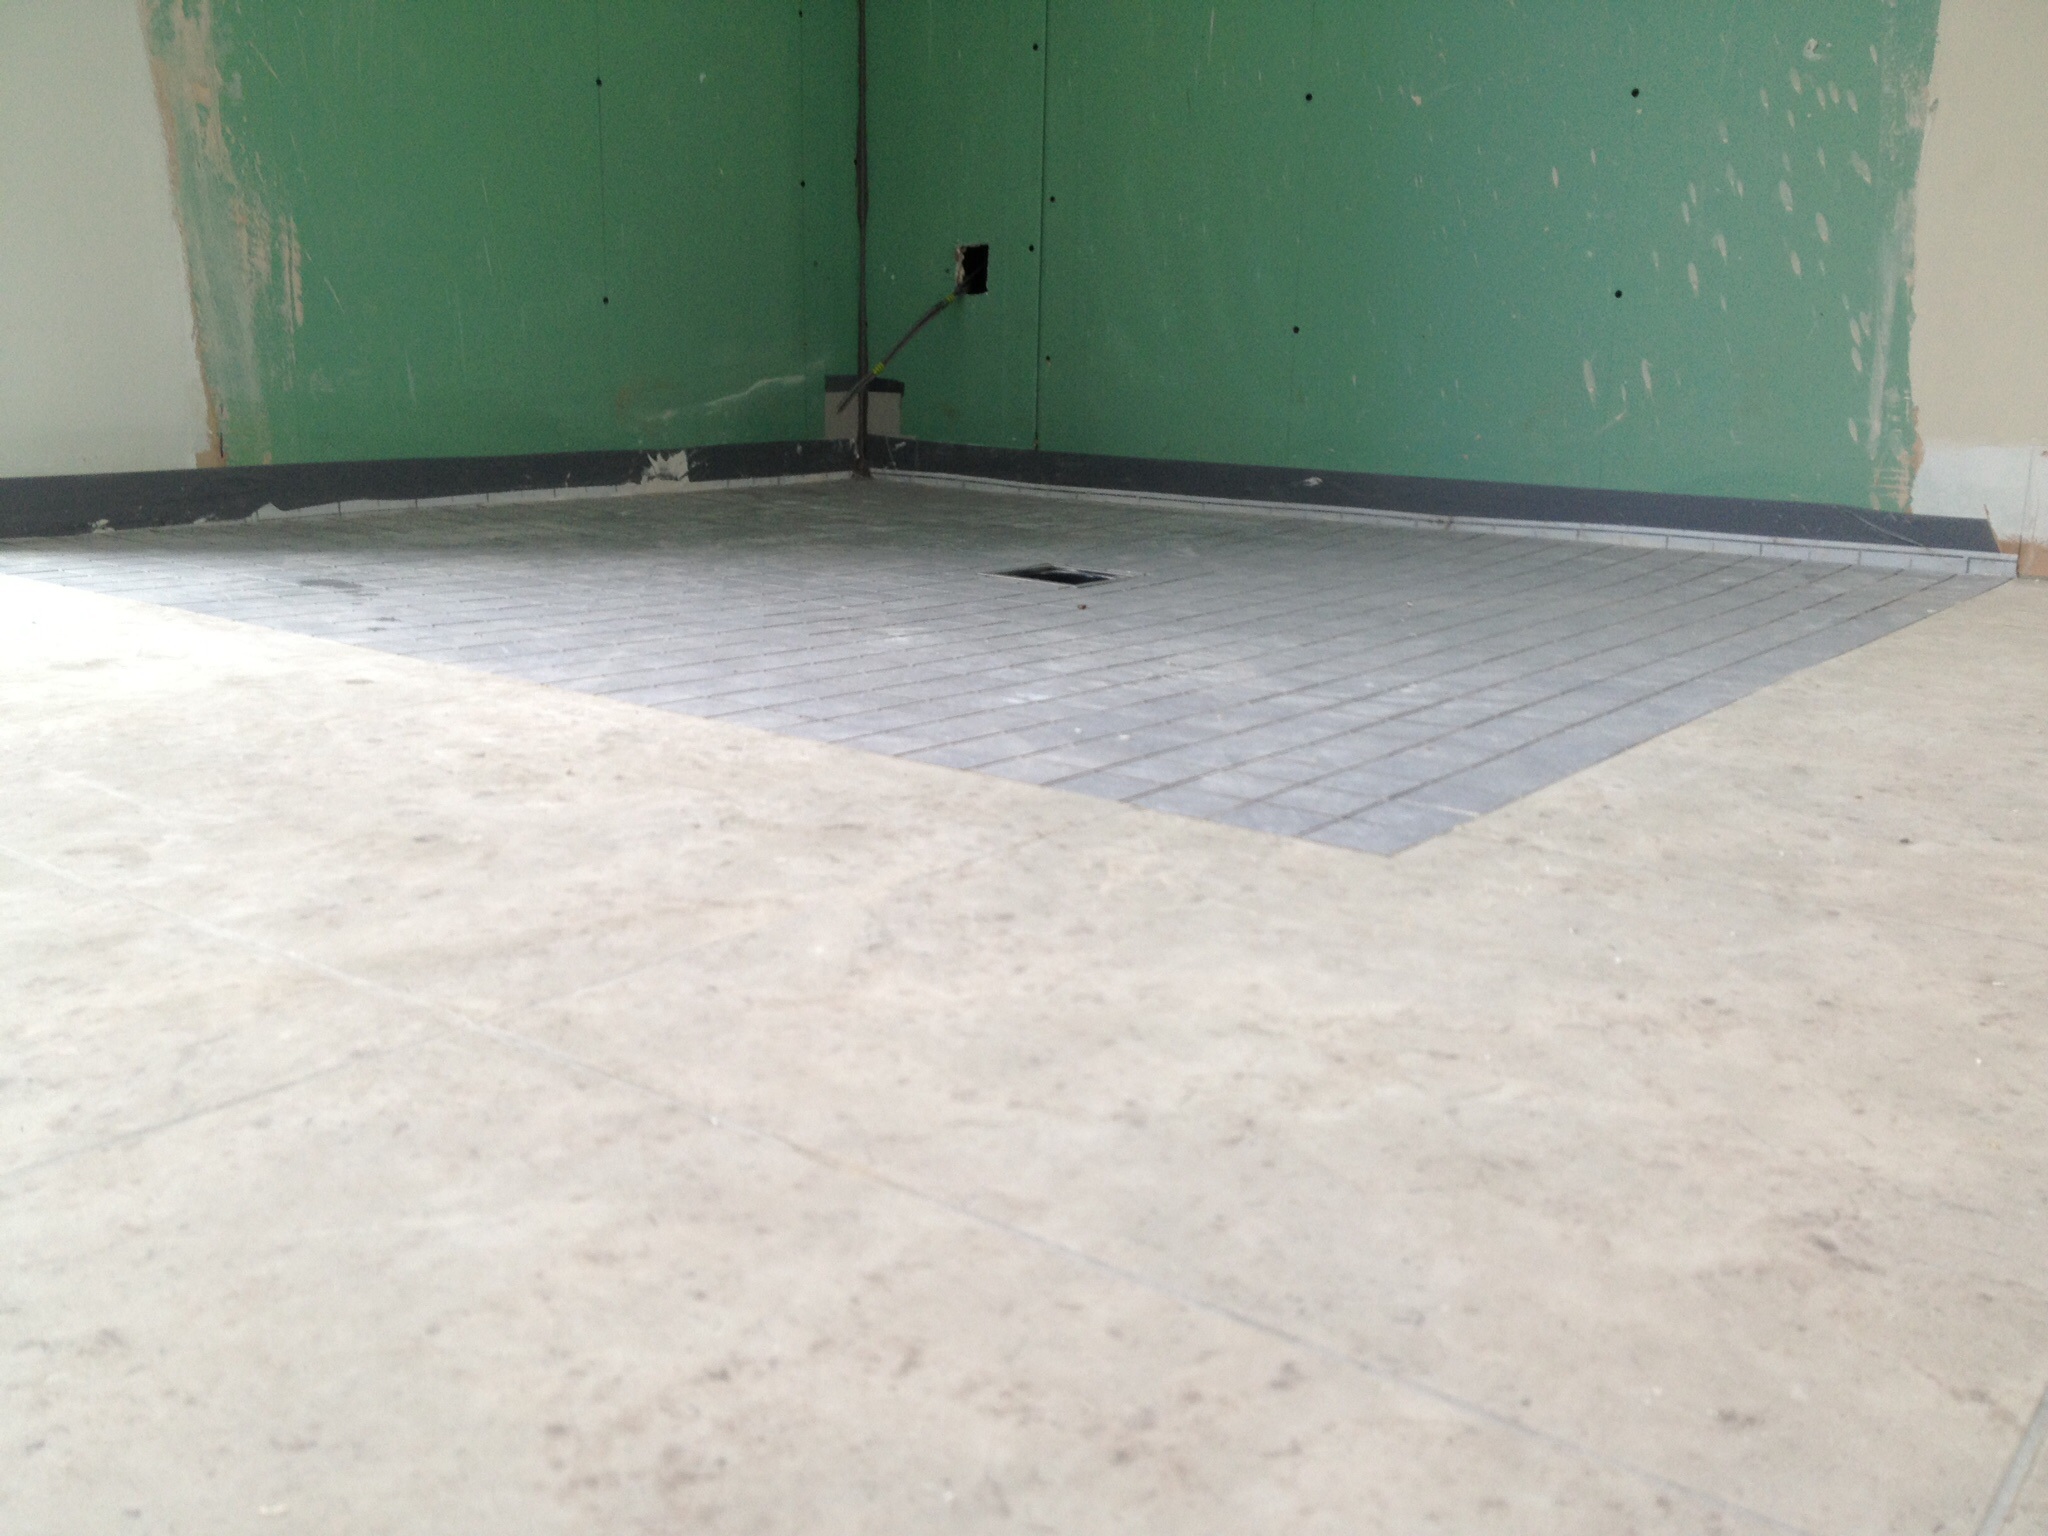
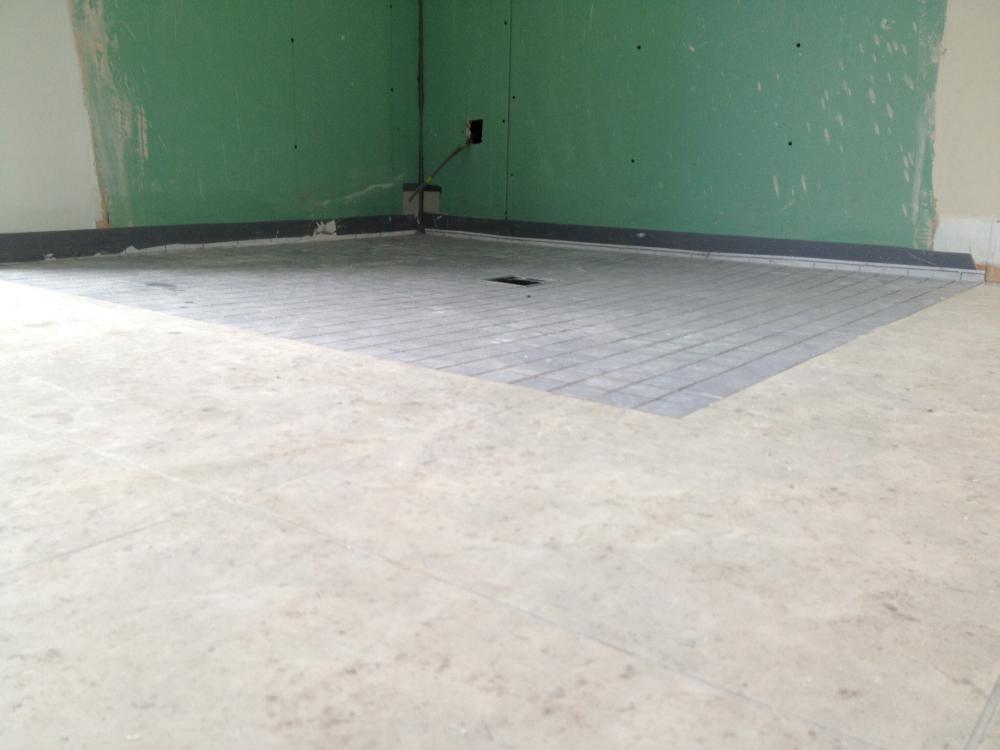
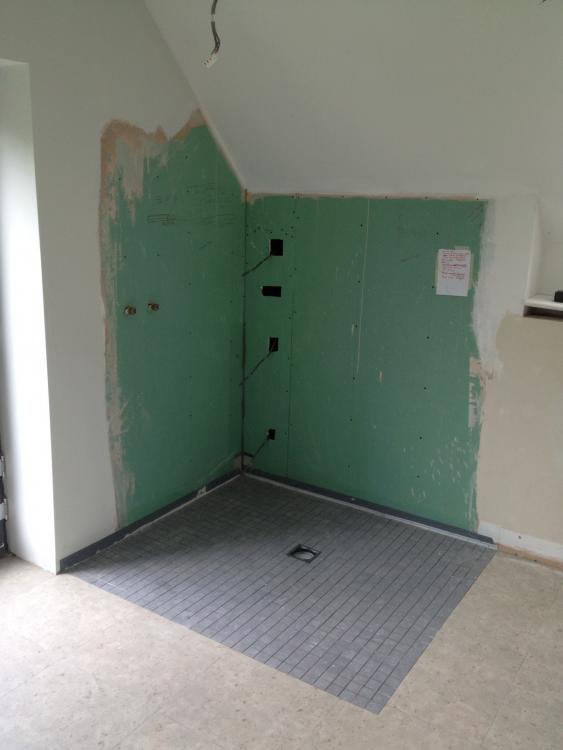
The dark strip you see returned up the walls is the Impey tanking strip, not a row of mosaics . The tray to floor junctions were all tank stripped too prior to the Amtico going down. That job had mermaid panels fitted so no need to tank any further up the wall than the remainder of the width of the tanking strip, eg 120mm ( or so ) wide strip = 60mm flat and 60mm vertical. -
Sourcing our plumbing equipment for first fix
Nickfromwales replied to JanetE's topic in General Plumbing
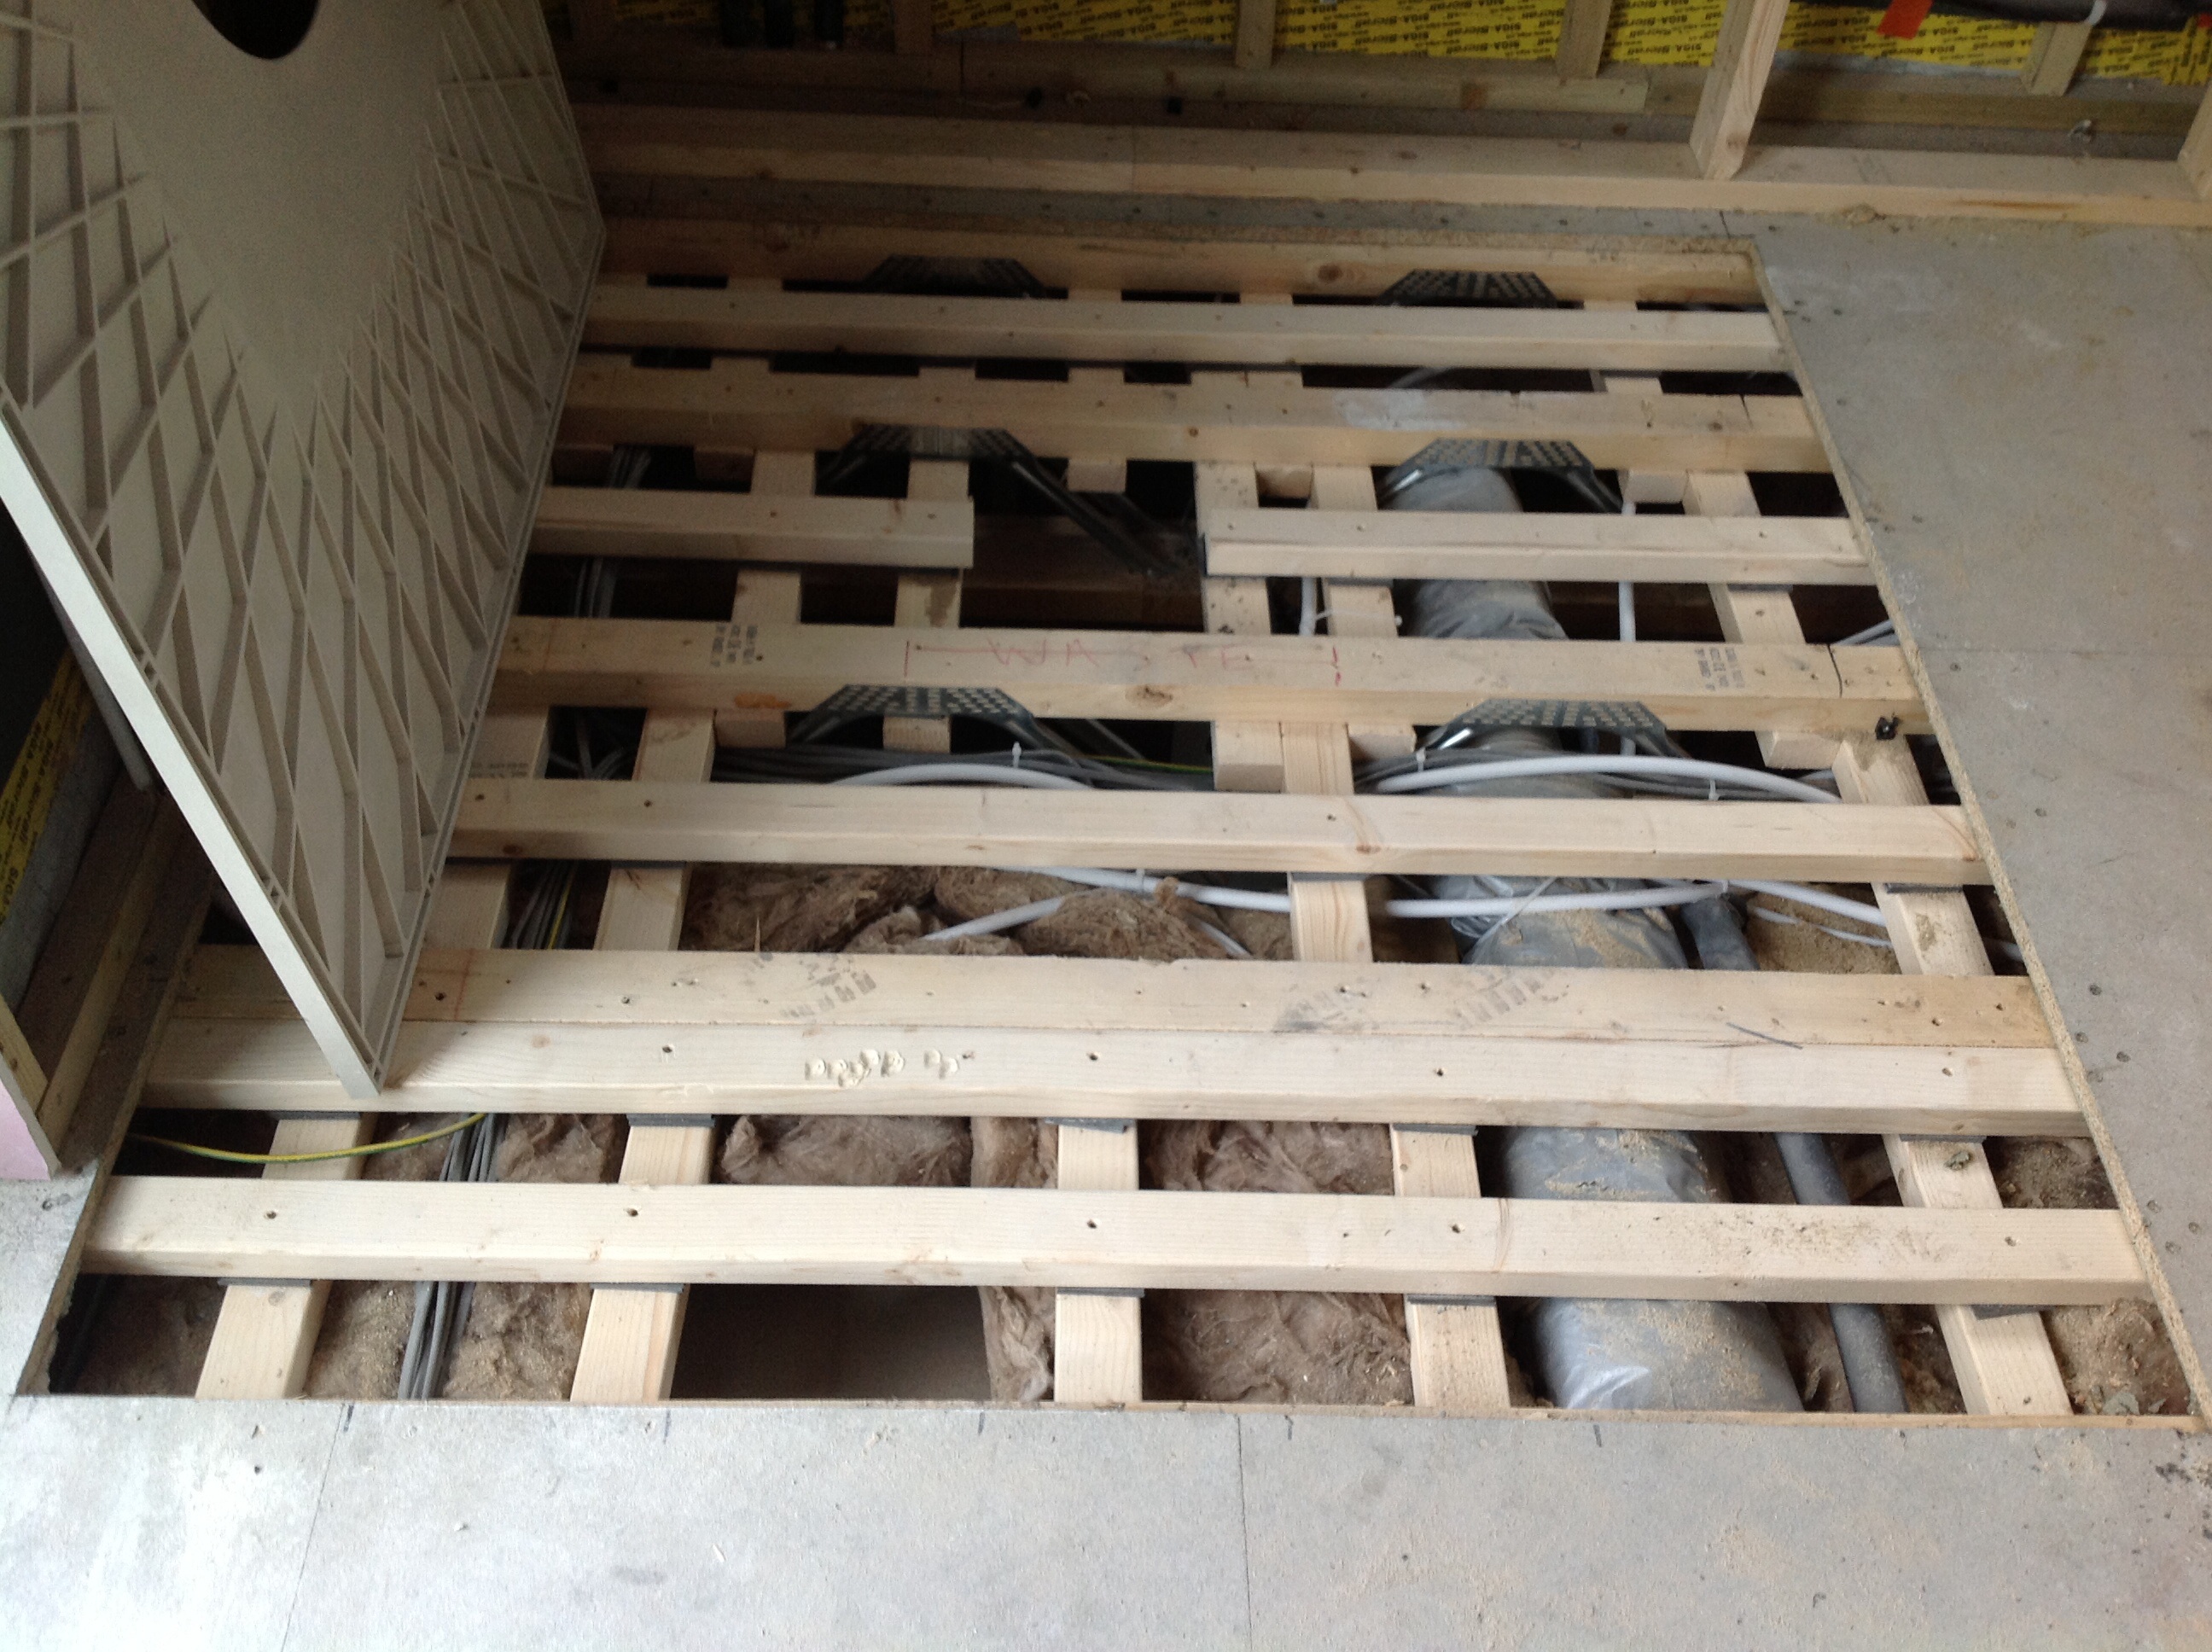
Look again at the pics All that 3x2 was retrospectively fitted to the existing MBC pozi joists but all under slung, perpendicular first to create a cradle, then overlaid with more 3x2 run parallel ( spacered accordingly to allow for the thicker timber of the pozi joist ) so all the timber I added never added a single mm to the existing entire floor level. The Weyroc you see in those pics is the original monolevel deck laid by MBC. I cut out that section of 22mm Weyroc and dropped the Impey tray in flush +3mm. The company that fitted the Amtico first overply'd the entire first floor with ply this raising the floor to my anticipated final height, and then I just used tile adhesive to give me the mil or two of fine tuning to get the mosaics completely flush to the amtico. I don't 'do' steps so my OCD is on a par with yours! . And yes, it wasn't easy. -
Sourcing our plumbing equipment for first fix
Nickfromwales replied to JanetE's topic in General Plumbing
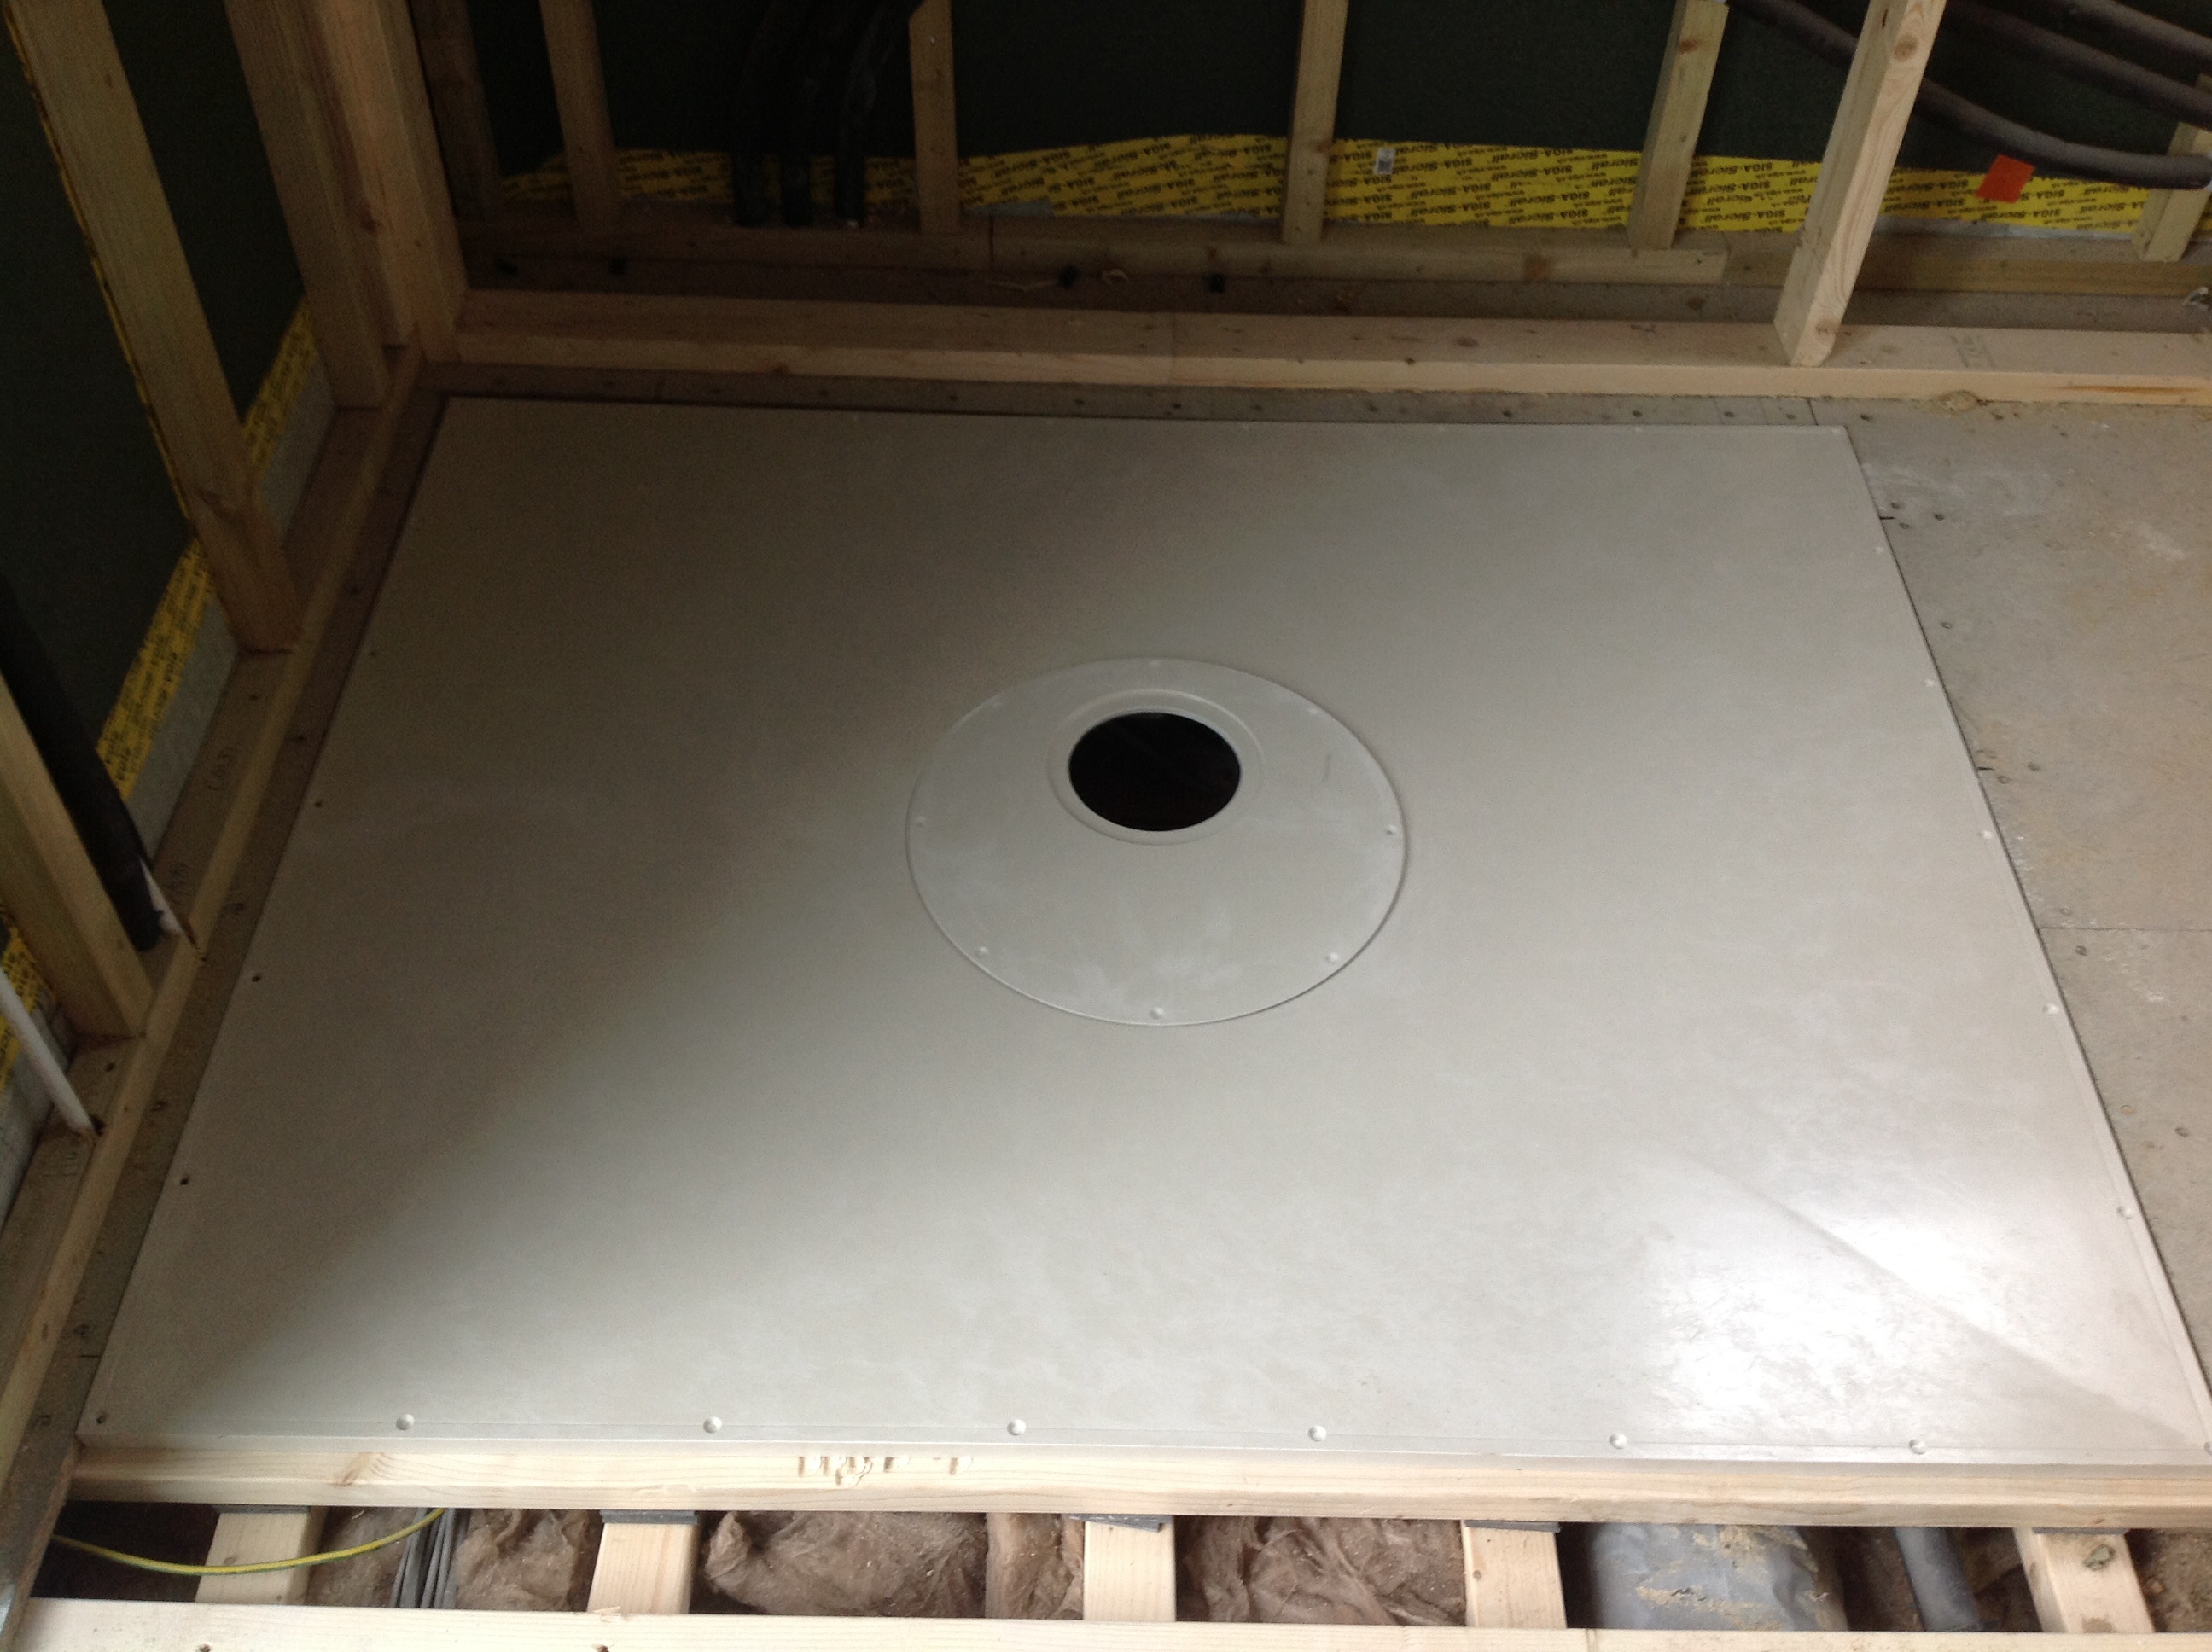
JG would be my last choice. Sorry. Hepworth push fit is the best I've come across to date, and even with its higher price tag I'd still think twice about going for JG SpeedFit. The inserts for JG are very thick walled, especially their 'super seal' ones, whereas Hep ones are slim stainless sleeves which don't infringe on the internal bore diameter anywhere near as much. Quite important when you're designing for 10mm runs to basins / other outlets and you don't want a trade off between delivery losses and flow rates. The diamond tray I fitted was a one piece jobbie that had the waste outlet offset with a simple / clever design that meant to miss a joist you just rotated the tray by 180 degrees. It's currently and happily nestling away under those mosaics as we speak. . Been in for 6 - 8 months or more now and zero complaints. I'm in regular contact with my customers so I get real life feedback which is helpful. That pic shows the 300/500mm offset, and the joists ran parallel with the length of the tray, so an 800mm wide tray with a centre outlet would have landed 3/4 onto the second joist. Impey are the innovators though as they do a rotatable 'double off-settable' outlet which is second to none. This pic shows ( look carefully ) the MBC pozi joists ( with the metal webs ) and then the ~15 lengths of graded CLS timber ( 3x2 ) that I retrospectively added to provide support for the Impey former shown. Impey say that they're happy with less, my OCD says otherwise ( and CLS is pennies in the grand scheme so I choose belt and Bracey-McBrace ). The mosaics got grouted with an anthracite grout and looked great alongside the Amtico. Word of warning, the bars in the Amtico ( where the joins are ) want to suck the grout wash-up residue in with capillary action. Mask the edges well as it's a right pita to be cleaning that until 3am, ask me how I know . Solvent weld waste of any decent make will be fine. Most important discipline is cleaning the swarf / burr from inside the pipe after each cut. Failure to observe that will leave a rough 'crown' inside each joint where hair will snag and cause issues later down the line. From an ongoing self-maintenance POV I always run 50mm waste to any shower / tray / former etc and always make sure the pipework can be got to for rodding later down the line. Always try to avoid 90o bends, and use 2 x 45o bends instead, slightly separated, which will make rodding / clearing much easier and make the run 'further penetrable' during such action.

-
Yup. No problems whatsoever on the last lot of MB stuff I fitted. Normal 32mm traps straight on . If you have any long runs of waste pipe from basins, particularly if they drop vertically, then use one of these. Stops the gurgling and absolutely necessary if there is a bath sharing the same waste pipe before it gets to the 110mm soil pipe.
-
Looks nice for the money. Says "does not include fixings" so there opens a compatibility can o worms. Can you email them with the model of frame you have and ask if the fixings are available to suit ( and how much )?
-
4-port or 2 x 3-port mixer?
Nickfromwales replied to le-cerveau's topic in Boilers & Hot Water Tanks
Does the dotted line denote the 'deemed' midway point or is it a tank in tank design you've looked at for this example ? Going to look at your tank thread again to try and join the dots, but this is a very curved ball here as the first needs to be ascertained in order to arrive at this thread, does it not? -
Agree with all that Not saying it won't produce hot water / heat energy, just I see it as a one-trick pony. You do have a lot of it so maybe it'll be worthwhile. What's your means for dumping excess energy when the cylinders are satisfied?
-
The text editor on here saves your draft just click on it ( as if typing a fresh reply ) and see if it's there.
-
Agree it will contribute, but only to hot water. I'm considering a huge TS too, but for a DIY ( non MCS ) Pv array and my chimnea to heat it. For ST I just don't see the benefit as you have the additional capital cost to integrate it, so even if the ST kit is cheap it's still down to economics / maintenance / efficiency for me so Pv just seems a no brainer in comparison. I don't think you can get RHI with a TS so another negative ( and I think that's a bad deal btw as it would be better suited to a TS over an UVC in most instances ). I'll shut up now