Leaderboard
Popular Content
Showing content with the highest reputation on 10/10/24 in all areas
-
Try Grohe - not the same as Hansgrohe. Their thermostatic mixers (at least the ones I've come across) require the hot water to be 2°C warmer than the mixed temperature. In other words, if you want a shower at 40°C, you need the hot water supply at the shower to be 42°C. I'm sure Ghrohe aren't unique in that. BTW, Grohe's thermostatic showers have 'therm' in the name, to distinguish them from non-thermostatic. As in Grohetherm.3 points
-
I used to offer a maths class when working on schools. How much concrete to order for the floor slab X x Y x Z. That took an hour and it was quite a struggle for most. I had planned for this then 2 more questions but dropped them. Even those who could grasp the numbers had trouble with decimal points. A site foreman wanted to learn management. Lesson one......he could not work out the volume of a pit. He could do darts countdowns and horse odds though. It was a matter of needing to know for him. Don't assume it is easy for everyone.2 points
-
As @JohnMo says. The technical side is really very easy, just working out areas, volumes and multiplying by some constants. You will learn so much about your house and why things are done in a certain way. That knowledge will really pay dividends for decades.2 points
-
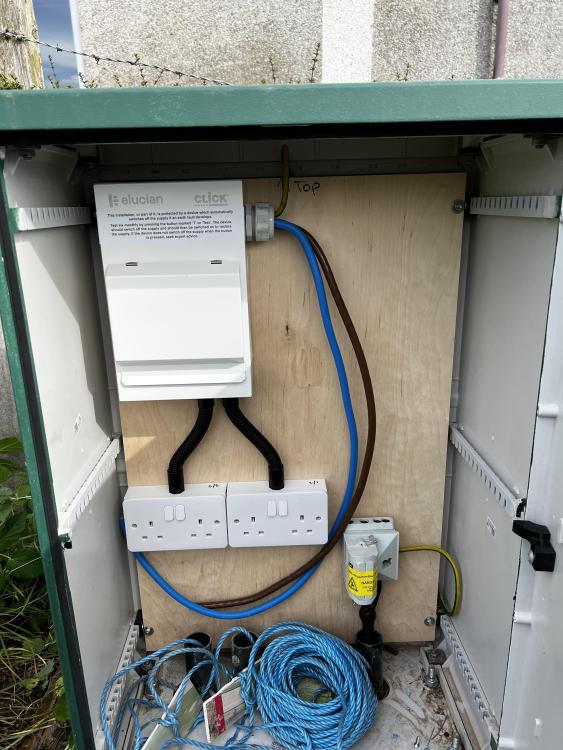
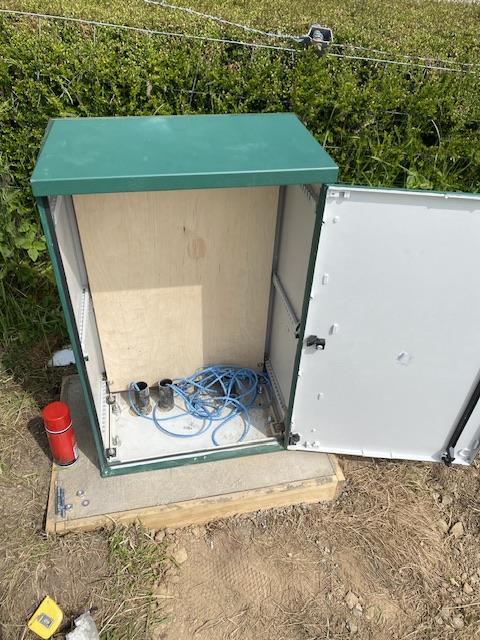
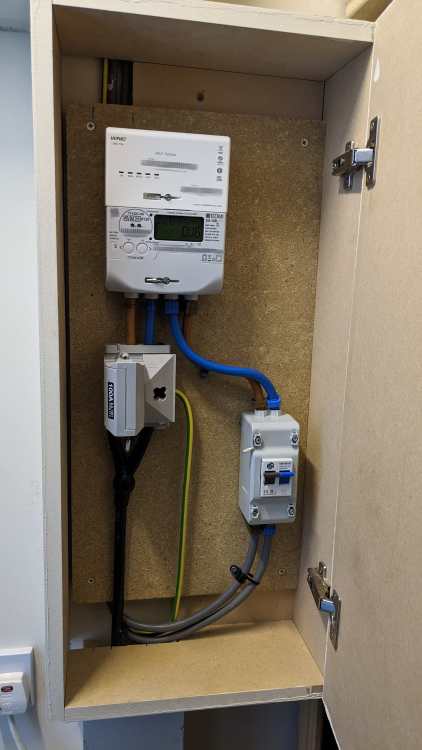
If you have the cable on-site that will be easier. Just keep in mind the cable is very unwieldy. The issue we had was I put the kiosk in when the plot was still a field so just had the service cable from the pole and nothing else. I made up a template out of a sheet of plastic board marking the holes where the ducts came through the bottom of the kiosk. The spec I got from SSEN had a duct to put in the trench I couldn’t buy anywhere. When the guys came to fit the service cable they basically said as long as it’s black 😂 I had a temp CU and some sockets fitted to get us power on-site.2 points
-
We've lived in a 3 storey new build with a comparable spec for 7 years now. Our ACH is around 0.5. We have an MBC WarmSlab that's 100 mm reinforced concrete on ring-beams encased in (mostly) 300 mm structural EPS and UFH embedded in the concrete raft, so ground floor only. The UFH is run as a single zone and heated by a single 3kW inline resistive heater. We keep the whole ground floor 24 × 7 within a ~ 1°C tramline of 22½°C, the 1st floor is typical 1-2°C cooler in peak midwinder, though I do use an 1kW oil-filled rad (controlled by my CH system) on the 1st floor for the peak midwinter period. My son's bedsit in the warm loft is mostly heated by his Games PC and huge TV screens. 🤣 The house was built as ASHP ready, but we put the inline heater as a stopgap until we had confirmed the heating characteristics and loses of the house. However in practice, the heating costs are relatively small, and we have never made a payback case to install, maintain and depreciate an ASHP. We have never missed upper floor CH. I also use the Green Octopus Agile Tariff so my CH system schedules the CH and HW on-times to buy and use the cheapest half-hourly price slots. I am not necessarily suggesting you do the same, but what I am saying is that for this class of house running the whole GFL as a single zone is entirely workable, and we use less than 30 kWh heat daily even in cold Dec-Feb, so a ~ 5kW ASHP should be fine for this class of house. With a ~ 10m³ slab acting as a thermal store, it is even questionable whether you need a separate buffer tank for the UFH. I suspect that most ASHP installers have no idea how to design and right-size an ASHP for a (near) passive-class house.2 points
-
At the beginning of Week 5 the scaffold arrives. The ICF walls get past window header height so they can be boxed in first with the ICF to close the side jamb, header and cill then the wood brace for the concrete pour. The internal structural walls are started and tied into the ICF. These are to support the steel roof beams. Its good to stand in the open plan kitchen and lounge area now and get the scale of the room, the three windows look down our field to the East and the slider door opening looks out South towards Dartmoor, visible on clear days. The kitchen may look a bit dark but it will have 4 velux windows that as well as providing light help to zone off the open plan area. The photo from the scaffold shows our workshop in the big barn and beyond that just visible is our current home. The weather has not been too bad during working hours, a mixture of sun shine, rain and strong wind with gusts of over 43mph so I will be happy to see the pour next week. This week the car is our own Jensen Interceptor my husband took it out in the sunshine when he went to our local ‘Men’s Shed’ in Holsworthy. Total man days of labour week 5 is 23 man days.1 point
-
Hi, just joined because I was reading all the posts about MHRV. I have the basic design of my proposed 110 sq M house: 3br, 2 disability bathrooms, superinsulated, Off centre roof pitch with the long side facing N (S hemisphere!). wrt the MVHR, it seems the most economical solution for me is a Mitsubishi Lossnay ceiling mounted. After doing some research, I have found a Chinese Co that supplies 90mm round Semiflex duct & accessories. Yet to create a manifest, but providing the freight is reasonable, should be economical. The Co is: https://www.erviguicoo.com/fresh-air-abs-distributor-with-high-quality-abs-materials-product/. So far I have a catalogue, but will need drawings, etc. The Lossnay will be locally sourced for warranty. btw, the Steib-Eltron tool is great for designing the MVHR system. Some details of the build: light construction because there are no snow loads! The Wall frames will be Pine, with the top & bottom plates screwed as well as nailed (due to Cyclone uplift). Studs 90x45, on 600 centres. The roof trusses will be at 900 centres. The roofing is Trimdek corrugated iron, but I will use 0.48mm as I will use S5 mounts for the solar PV that are rail-less (just screw to the ridges, hence the thicker steel). Hempcrete: 270mm thick walls with 10mm lime based render each side. One thing I will do differently is to raise the truss bearing point so I can have 300mm of insulation across the ceiling with no step down, The Hempcrete walls will go to the top of the outside edge of the trusses, & will return into the ceiling, sitting on a ledger. Then I can seal & attach my OSB airtight layer directly under the trusses. The OSB also gives wind bracing. (all joints sealed & taped). 300mm Fibreglass insulation above OSB. This will be built on a slab foundation, using Cupolex domes. The edge rebate will have stainless ant barrier/dampcourse. Air sealing: all transitions taped after walls are rendered. Slab is to be polished, so the concrete will be edge primed before taping . Blower Door test: I will DIY a blower door using a s/h Automotive 12v radiator fan. I already own a digital manometer, & after reading the MVHR threads will buy a Testo 425 Digital Hot Wire Anemometer (the computer connected one), & control the fan with a DC speed control to vary output. The Air volume can be easily measured with a cone over the fan, & something like a piece of 150mm plastic stormwater pipe, with a hole to insert the Anemometer probe. This anemometer is apparently sensitive enough to check for leaks around windows, etc. The Automotive fan will easily blow/suck 50 pascals. My build is also in a bushfire zone. No gaps bigger than 2mm in the outer sheath & roofing: I do not use Soffits or barges: I use a product called G&G gutter brackets that screw to the metal roofing overlap. I use 150mm half round gutter that I can easily clean (with a moon section on a pole). The gutter ends are sloped so I can sweep the leaves out. In Australia, the roof space must be ventilated, which is accomplished with about 75mm wide folded perforated aluminium sheet that runs on top of the hempcrete, to the underside of the roofing. I have designed a system that stops the embers. The vent at the ridge is a product called Vent-a-Ridge. This allows air to pass under the (raised) ridgecap, exiting through the corrugations. There will be the usual smart membrane & counter battens for air flow. Hopefully I can build this for less than a ´normal´ builders build (aiming for $au2500 per M sq) regards, Doug1 point
-
1 point
-
You've got it - that's what you're looking for: Hot water temperature at supply connection min. 2 °C higher than mixed water temperature :)1 point
-
Ah, I misread, soz. So the principal elevation is most likely still facing ‘Highway B’. I found the Gov guidance useful but don’t recall enough detail to advise. Have you read this?1 point
-
1 point
-
1 point
-
Before you go too much further it looks like you need to firmly establish what your principal elevation is. The elevation facing ‘Highway B’ clearly used to be the principal elevation but moving the drive to ‘Highway A’ and the porch addition facing ‘Highway A’ may well have made that the principal elevation.1 point
-
1 point
-
I'll try that one on her @Adrian Walker, but I don't think it'll wash. She's got a way with her that's sometimes called 'quiet determination'. Brilliant when it works in your favour but .....1 point
-
Easy for some. But well worth it if it is in the skillset. It also demonstrates that some elements are very much more important than others, and some pragmatism...if that is within the skillset. Some who charge for it don't understand it properly either. They maybe think they do., maybe don't care.1 point
-
It will be site specific. UKPN will meet you on site to discuss. In our case it had to be within a radius of the power pole. It might equally be from a cable in the road. Then they don't want it vulnerable to vehicle impact . A real person will advise on site. I can't remember the distance (30m?) but beyond that it became a major project and cost and timescale jumped dramatically. Within it , it could go to kiosk or direct into the building.1 point
-
Those two oval-shaped bits of metal on the top are to allow access for cleaning. If you want to be able to access them, the unit stacked on top needs to be movable.1 point
-
Great blog, thanks for all the info and photos.1 point
-
I meant so he could gauge how bad it is. Don't know how thick, if there was admix, fibres, mesh etc.1 point
-
Do it yourself. The only way you will get a sensible outcome. Start with heat loss calculation, use the Jeremy Harris one in boffins corner. That will let you size the heat pump. Either download a trial version of LoopCad, design your floor loops, 150 to 200mm centres should be ok. I used Outsourced Energy for all my UFH parts, they do a design and install service, they should be near you. They supply all good kit. Ventilation treat as separate entity, it will just run in the background. If solar is available it will use it automatically from the consumer unit - nothing complicated needed. Same for the heat pump.1 point
-
I think that's a non starter tbh as I'd be extending into my driveway which I don't want to do.1 point
-
Thanks so much. It was a lot of pressure for sure. Who knows what the future holds, maybe.1 point
-
Ditto. Come up with a (any) design using all your permitted development rights and get them agreed with an application for a certificate of lawful development then negotiate what you actually want. Although of course you may find you can achieve close to what you want using PD anyway.1 point
-
Thats the point I think @joe90 .... Amble's not exactly the richest area in the UK ....1 point
-
1 point
-
1 point
-
No, it was some video about the factory in NI. Usual stuff about bringing employment and being in control of the process. But one shot had a guy putting the sticker on. https://youtu.be/u-kAyg6LOaw You're right about that video, awful placement - I'm a fan of Heatpumps (ha) but I'm not going to argue they are beautiful things. The best we can hope for is unobtrusive - and that isn't.1 point
-
You can indeed use only 2 zones and meet Plat L. If you have a well insulated home that's likely to be recommended by everyone here, as above. However official 'best practice' is still for one thermostat per room so, in the absence of any instructions from you to the contrary, your designers have a valid reason for having designed it as they have. As they seem to be supplying and installing it, I imagine they have a financial incentive too. Your options now include: persuading them to simplify the design according to your new request installing their existing design anyway (after getting their confirmation that it can achieve the temperatures you want - probably not an issue) cutting your losses and going elsewhere / designing it yourself - for example using LoopCad1 point
-
Max it out via PD and use that to your advantage with a formal application after (and Appeal if need to). Or just build out the PD works providing you’re happy with the design solution.1 point
-
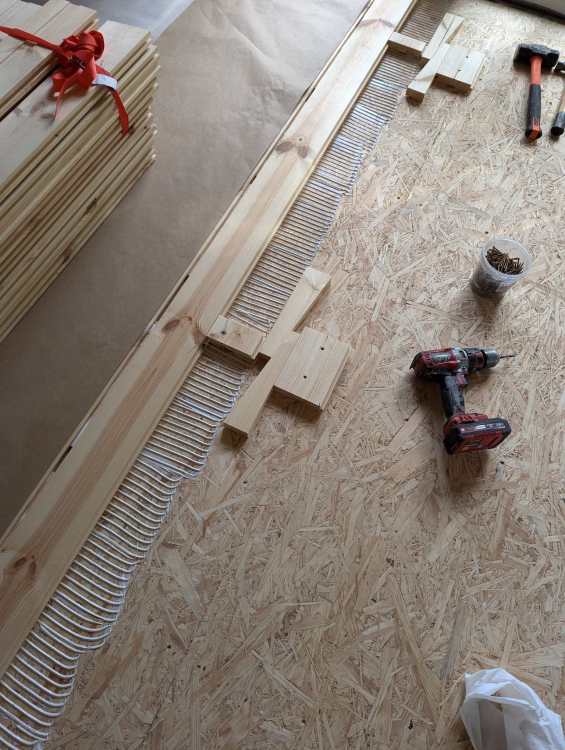
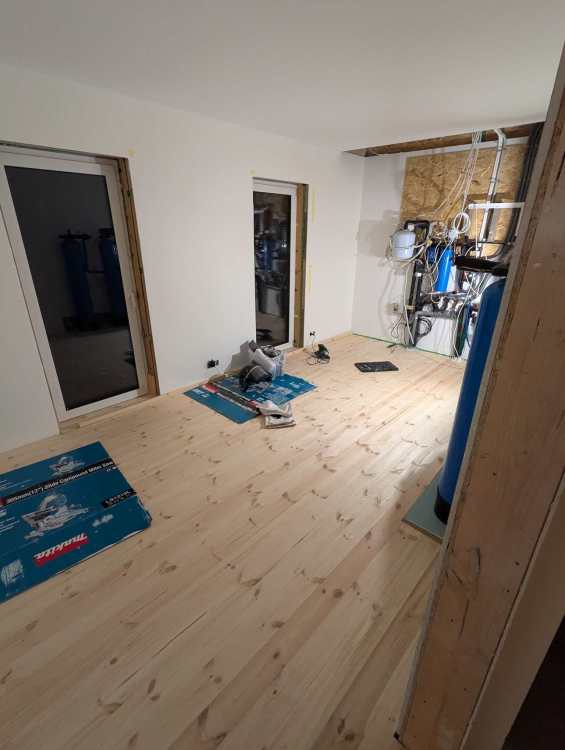
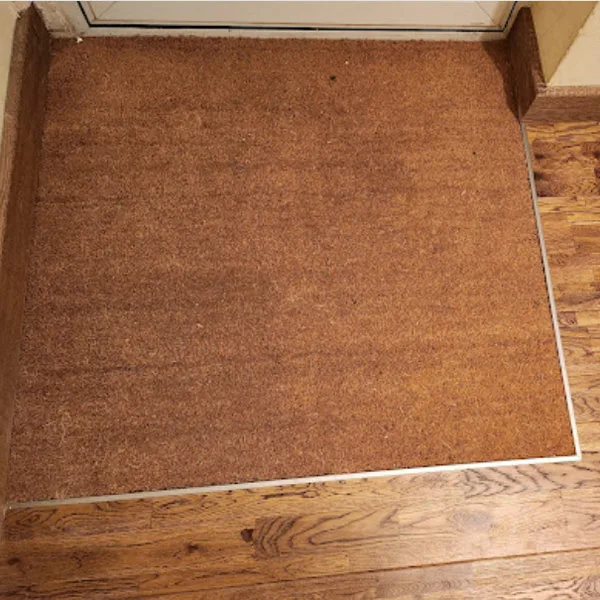
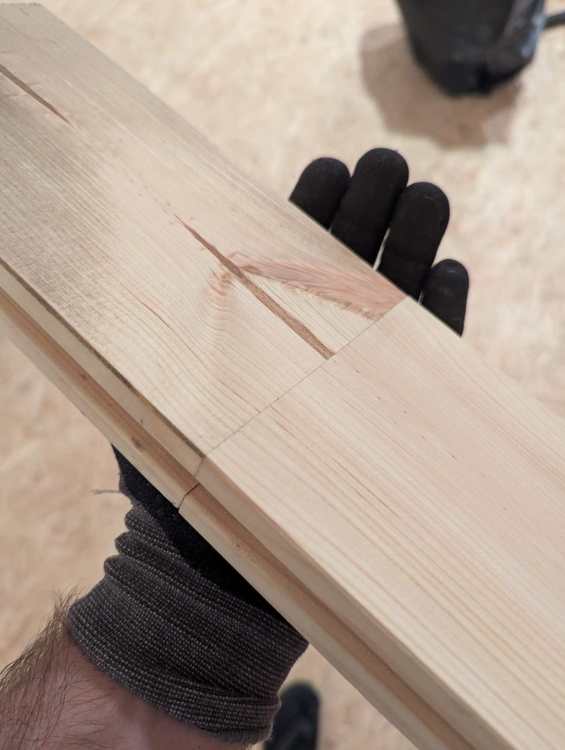
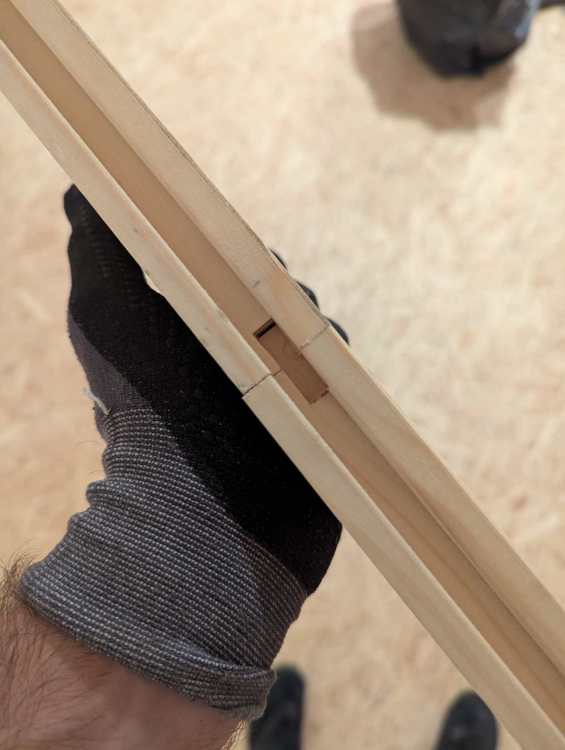
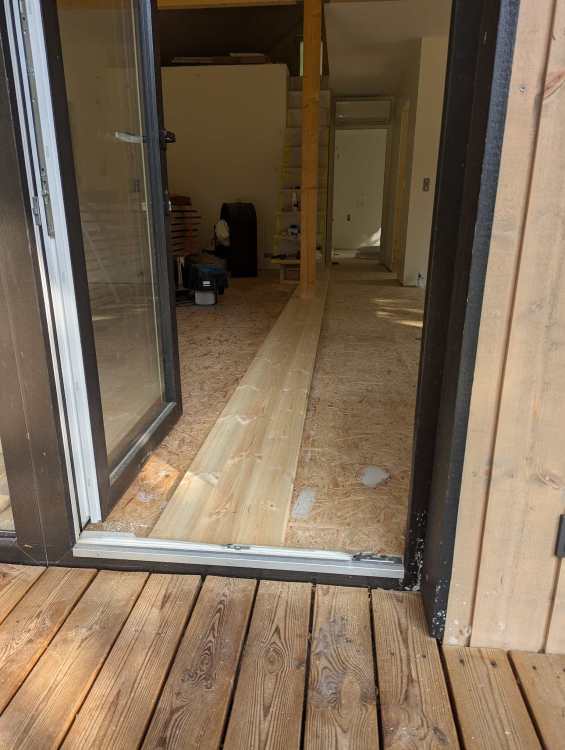
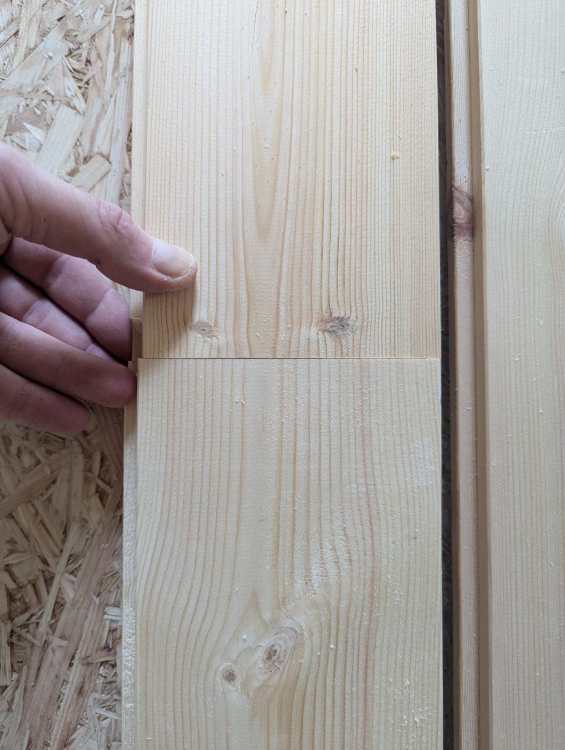
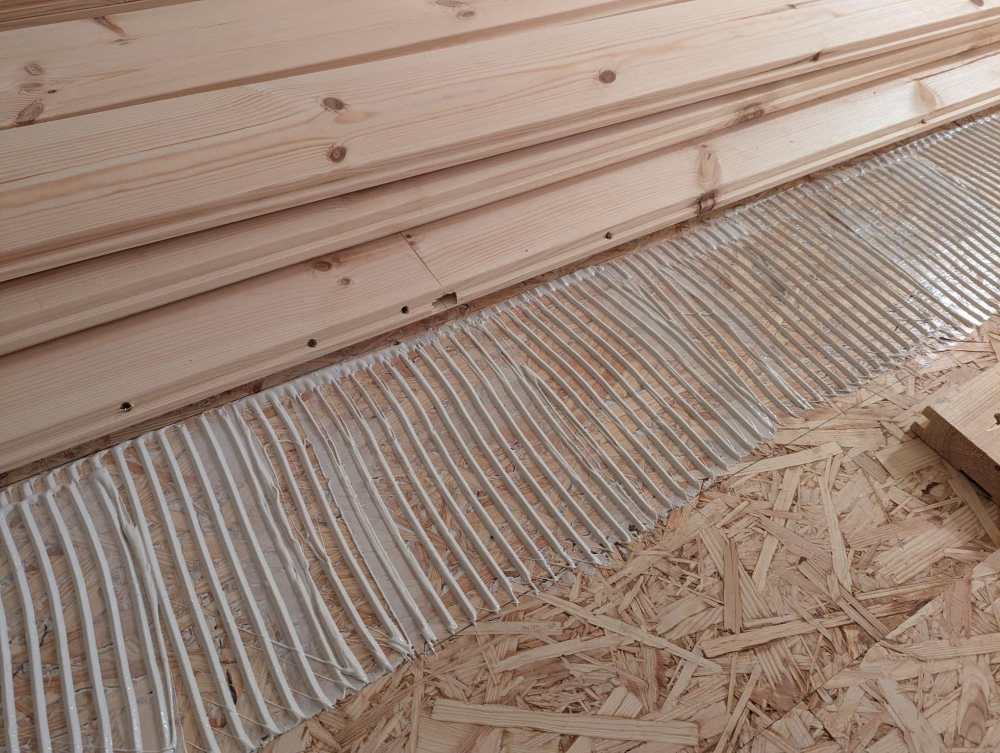
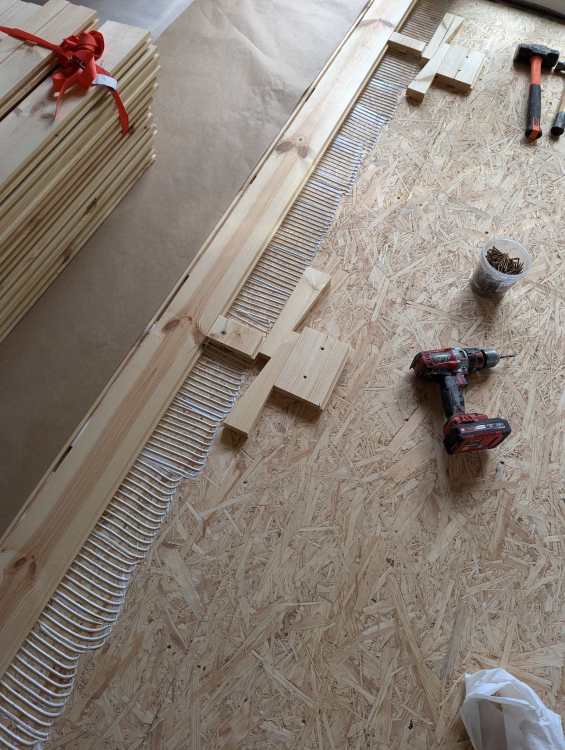
For what it's worth this is what we have done did: MS Polymer floor adhesive, notch trowelled over SANDED OSB (told by man in shop who seems to know his stuff that it is important to sand to remove wax coating on the boards that's there for temporary site waterproofing), which at a 1300g/m2 application rate effectively gives you a thin layer of glue over the ENTIRE surface (aka an air moisture barrier - be sure to work it into the holes created by your wedge blocks as you go too) PLUS your raised ridges of glue to lay the wood onto. Secret screwed through the tongues too to keep it in place/persuade it to be straight/allow me to walk on it instantly. https://renove.lt/lt/klijai-ms-elastic-400-12kg Boards then graded by width (of course they're all bloody different once acclimatised, and indeed different end to end because they're trees) and wedged into submission (September being a "neutral" month for expansion/contractor) with the ends (where there has to be joints) routered/false tongue added/glued to avoid any moisture getting into the "ends" of the grain should anything get wet wet. Set the router depth off the face of the board to set these "flush" and make the glue take up any variation in board thickness (which is also all bloody different because wood). Prime/stain/2K PU laquer to go over the top in the coming weekends. For the entry mats I have left a gap (mat well) that is going to be edged in solid brass (say 10x5 mm, as a visual edge and to protect the wood; with the wood/brass sanded to be inlaid flush) then tanked before dropping in an underfloor heating mat and a coir mat to sit flush with the floor. That's hopefully enough to (a) leave wet shoes on safely and (b) dry reasonably quickly in winter. 🙂 Other tips - don't scratch your balls if you have slow cure floor adhesive on your hand and buy kneepads that you'll use and love. I rate these FWIW: https://lt.misupplies.co.uk/clothing-c12/mens-workwear-c635/trousers-and-shorts-c512/knee-pads-c519/helly-hansen-workwear-79571-kneepad-xtra-protective-p53480?utm_campaign=pr_r&utm_source=www.misupplies.co.uk&utm_medium=wi_proxy&utm_content=lt_LT&utm_term=c Start with a stringline, attached aline of blocks against it, wedge the heck out of your first boards to have them be bang straight. False tongue in the groove end and then lay boards from both directions having first checked where to start to avoid horrible part board cuts. (image pinched off internet)1 point
-
1 point
-
Mid range kitchens and bathrooms from retail are good on the wallet, The kitchen in my current house is a b&q. I fitted it and like yourself it was bought on a sale offer. It’s a decent kitchen too, even after 6 years. Oak beams will cost but you need to have that one item that screams wow. Mine are the big sliders looking out over the fields. That alone may cost as much as the other 8 windows. like you I originally thought about having sliding doors in bedrooms but cost would just be getting out of control. I have visited Voltacon several times and they are great. Off grid, no DNO permission, no feedback to grid, off grid so if there’s a power cut the house will stay on. Very easy installation. Highly recommend kit.1 point
-
Just caught up watching the episode. Awesome job and what a result! Can only imagine the fears and worries building something of that scale! Hats off to both of you, what a team! Hope you get to give a talk at a self build exhibition someday. You would be inspiring to listen to.1 point
-
im just winding, its a great effort. Unfortunately my missus saw these sort of things on Instagram and TikTok and almost all the trades were not shown so thought it would be a few months job. You do get quite the false impression from social media unfortunately. I might have missed it but did you go for any sort of home automation. Id hate to have left a light on at the far end of the building... 😆1 point
-
I trust you inserted the words “Buildhub” into every recorded interview. If not, expect abuse from members.0 points


