Leaderboard
Popular Content
Showing content with the highest reputation on 06/22/20 in all areas
-
It's been a while since anyone was on site but family. We've done a few jobs in the last couple of months but obviously made nothing like the progress we originally planned. (Management speak would be "rebaselining the programme"!) All the beam and block is installed and grouted. All the plinth blocks are installed and pointed, placed to an accuracy of 3mm in height and 5mm in the other directions. Hopefully... Waiting now for the SIPS people to mark my homework! All the building control paperwork for the foundation stage is completed We've finally settled on a landscaping plan for the site and implemented a little of it, mainly to get rid of a few tonnes of spare soil Then we spent a few hours tidying up the site. I estimate we've got 1/10th of the woodland "tamed". The tidy site awaiting scaffolding next week. The front of the house, looking at the louge. We weren't sure about landscaping levels until quite recently, so elected not to do too much with the exterior bricks and blocks until that question was answered. It makes the telescope vents more difficult but in theory it should be the lesser of the problems. Also note the mistake - some slips got missed in the section under the front door (and at the back too). Oh well, I suppose that's what you get when you foolishly try to race a global pandemic. At least it's not a difficult fix. Finally, I found a bit of spare time to put a new engine in the wife's Lotus. The old one (with 130k miles) became significantly past its best last year when it lost oil pressure with the inevitable result. Here's the remains of the old one. Pictures of the finished Lotus when it's been washed - sitting in the corner of a building site for ages has done it no good at all. With any luck, the scaffolding will be up by the end of the month and we will have a SIPS kit on site.5 points
-
The Innova branded product is what I ordered. It was fitted this week. Unless they print fake labels I can confirm it’s a Spanish product and I have to say I’m impressed with the finished article. The two guys that fitted the worktops were efficient and courteous.2 points
-
Mermaid, Aquapanel or a few others - all can be fitted to blockwork using foam or adhesive.1 point
-
Is this in the ensuite? Why is the shower not running along the other side of the corner? If it is butted (sorry) up against the loo, you need to think carefully about how you will clean all the different bits. Mine is butted up against a bath, and I deliberately went for a narrow bath to give me a comfortable hand width to clean between. If you mean the one in the cloaks, that should be Ok if you get your wall coverings right. F1 point
-
1 point
-
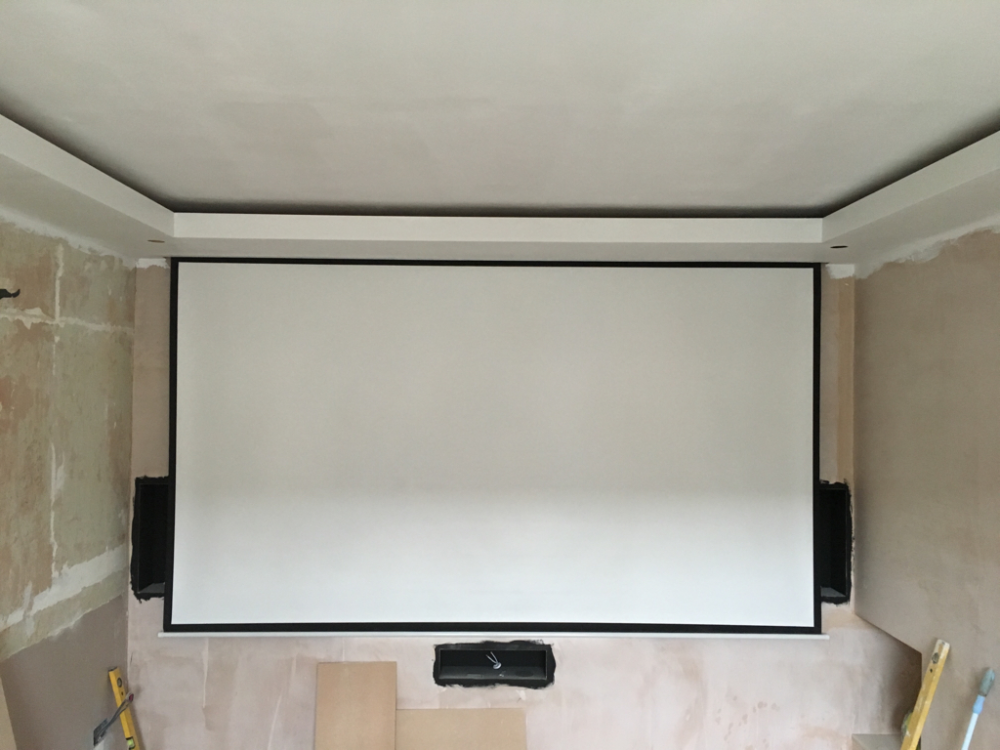
https://www.google.com/search?q=home+cinema+pelmet&tbm=isch&ved=2ahUKEwjW6LONjJbqAhWP0YUKHUWgD8cQ2-cCegQIABAA&oq=home+cinema+pelmet&gs_lcp=CgNpbWcQDFAAWABg8IgBaABwAHgAgAEAiAEAkgEAmAEAqgELZ3dzLXdpei1pbWc&sclient=img&ei=IP7wXtbYJI-jlwTFwL64DA&bih=1056&biw=1890&client=safari1 point
-
1 point
-
I would have thought any “decent” timber merchant could supply that, my local one can. Only needs a thicknesser/planer ( I have one but am a long way from you ???)1 point
-
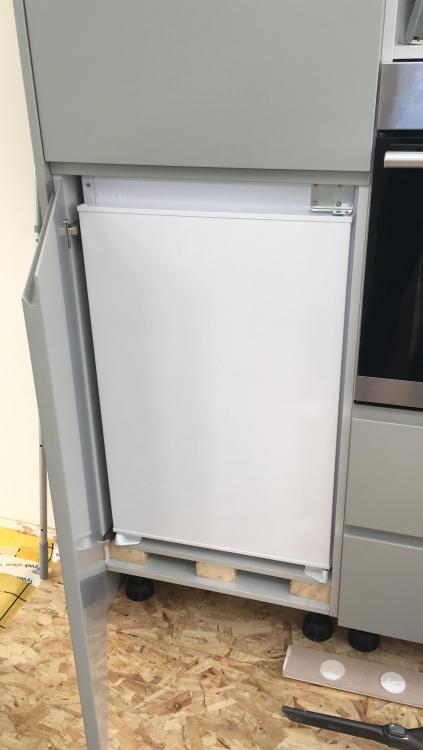
Yeah, that dawned on me when i'd hauled it in, its behind the fridge. Going to make full documentation for all the house so whoever will know where it all is located. Socket has been there for the last 11 years to be fair, never thought about it back then! Yep, theres a 40mm gap all way along the back, and same at the top of the unit, and will put a vent plate in the kickboard once I cut them. Also cut some circular holes in the 'false floor' i had to make for further ventilation. ? Just finished doing all the door kit, bloody hell that took some effort!1 point
-
@MikeGrahamT21 have you put ventilation slots in the back of the floor...???1 point
-
TIP (from an electricians point of view) Where does the FF plug in? Make the plug accessible, e.g under the unit behind the kick board, or in an adjacent cupboard. If this ever becomes a rental property and the electrician comes along to PAT test the build in FF he will curse you if the plug is behind the FF. He will thank you for your foresight if the plug is under the unit behind the kick board. He will thank you even more if there is a note somewhere saying where it is so he does not have to go searching.1 point
-
1 point
-
1 point
-
Thankfully not. We would have killed each other by now! that’s a pity , you haven’t truly experienced a self build until you’ve roughed it in a caravan for a while! And lived through the winter with the "beast from the east" and spent half an hour one night, in a blizard, lying on your back under the caravan thawing a frozen pipe with a hairdryer. Perhaps I am not selling the experience very well?1 point
-
I'd cut boards 7 & 8 in half lengthways and then move 19 & 20 up the room and put the 1st two offcuts back where 19 & 20 were = lights now in the middle of a board. Now their up, I'm not sure I could be bothered. Don't bother with the cardboard, a good skimmer will give them a rough clean out for you, wait for it to dry 24hrs and then use your PB knife / file to finish the job off properly. poke some wire into threats that are blocked. The bigger pain is polyfilling the boxes where the plasterer hasn't done close enough to the box...1 point
-
I got an extension for mine to plumb into kitchen waste, so that I only have a single penetration through the structure, runs under the units and then up the back of sink unit, seems to work quite well.1 point
-
Thanks for the clarification - I did suspect it wasn't that easy. However for other items under the £30k limit (kitchens etc) then cards are definitely a useful part of the mix.1 point
-
When you get the dishwasher in the instructions it normally has a pic of pipe orientation, some manufacturers like a certain route for the pipe, like on a washing machine.1 point
-
You might be able to do it under the units as a straight run, avoiding a tight bend round the corner.1 point
-
Where does the waste pipe originate from? Usually it comes up out of the floor, so you have plenty of room to run the waste under the kitchen units.1 point
-
Thats good to hear, maybe the place I used gave me the scare story! Always hard to tell.1 point
-
1 point
-
You can buy hose extensions but make sure you can access the joint just in case. Can you not run a 32mm waste to where you want and add a running trap that is accessible..? You can always use a hose connector on the trap to connect the dishwasher waste1 point
-
we've had a quote from idealcombi and it's very competitive. I like the idea of all the profiles being the same regardless of being inward, outward or fixed windows. they're definitely going on the shortlist and we'll probably end up having a showroom visit to see them in the flesh. oh, and for us Rationel couldn't do the large size panes of glass for our entrance hall, nor the large sliders so they quoted for Solarlux for the slider which were astronomical! as such, Rationel are no longer being considered for us.1 point
-
Agree with ProDave - keep your ducting taught and make the highest point of the system the fan unit - this will ensure any condensation runs away from the fan unit. I’d use flexible round insulated aluminium ducting for this installation. The ducting can run to the fan unit from any angle, right angles add resistance to the air flow equal to a theoretical Additional metre to your ducting length. The straighter the run can be to the unit the better - take the most direct route you can!1 point
-
We put down UFH using retrofit 25mm XPS boards. heats up nice and quick and is actually calling for heat a lot less than our lounge with rads. Hard to know about heat loss to the floor but we love it, much better with no ugly rads and warm feet.1 point
-
Our triple glazing ( http://www.earth.org.uk/triple-glazing-3G.html ) is a bit darker than double, but I don't think for us that it's a major issue. The make up of the triple glazed units is as follows: External pane of 4mm Clear Float/12mm Argon gas-filled cavity/4mm Planitherm Total+ Clear Toughened Safety Glass/12mm Argon gas-filled cavity/4mm Planitherm Total+ clear inner pane. Rgds Damon1 point
-
Welcome to the forum. You might also be interested in The Paving Expert website as it has tons of stuff relating to hard landscaping, such as drainage, retaining walls, paving, paths, patios etc.. https://www.pavingexpert.com/ There is such a lot on there I find it best to search the index. https://www.pavingexpert.com/pavindex1 point
-
Interestingly, for anyone looking at using an electrically heated Sunamp, charged either by off-peak electricity on a time switch, or excess PV generation, then there is a very good case for not over-sizing at all. If I had opted for a UniQ 6 as a replacement for our Sunamp PV we would definitely have not had any problems with the controller 50% threshold, as every day we would have used at least 65% of the full capacity. It was my decision (and it was my decision, Sunamp suggested I buy the UniQ 6 as a replacement for the 5 kWh Sunamp PV) to choose to over-specify, by opting for the 9 kWh model, when I knew that our requirement was usually around 4 to 4.5 kWh per day.1 point


