Leaderboard


Popular Content
Showing content with the highest reputation on 01/09/20 in all areas
-
After a summer spent cruising the canals we arrived back on site with a little trepidation and a lot of enthusiasm. When we left the build we had just got the scaffold down and had a lockable water tight shell,. Well almost water tight, we still have two leaks. One where our roof lights join and another on a roof seam that abuts the wall on the house gable. Fortunately neither were bad enough to have caused any damage over what has been a pretty dry summer. The internals of our ICF build required no supporting walls making it a nice big unencumbered space to start installing the MVHR, electrics and plumbing. We had decided to get the MVHR installed first as the pipes are the largest and least flexible. The system design for our MVHR had been provided by Blaugberg making it a fairly straight forward install. Of course the design hadn’t taken into account joist spacing or any other details of the construction. Taking the joists into account etc we ended up mounting the two manifolds next to the MVHR unit raised for the floor to allow access. Getting the MVHR into position involved getting a bulky 80KG box to the roof area of the house, a task made pretty simple with the aid of an electric winch. With the manifolds raised off the floor and two of us feeding the pipes through the aero joist webbing we managed to get all the pipes in with minimal loss of skin. The manifolds have large removable panels that allow access to install flow constrictors. Our intent is to get the MVHR setup as soon as we can to help keep heat in the house and to get the humidity down from the 65-70 percent it’s currently at. One other job we wanted to get done early was an initial air tightness test. Although we are not building for passive certification we want to make sure we are as close to the 0.6 passive house level. We needed to get the roof VCL installed, in our case this is just a plastic membrane. Getting the membrane in place where we have vaulted ceilings was time consuming as it involved step ladder, a ladder and staging to get to the top of 5M high. With the membrane in place we called in a local firm to do the air test. With the fan drawing air into the house detecting leaks was straight forward as the air was much cooler outside than in. We had a few leaks virtually all at the junctions of the VCL with the roof purlins. The guy doing the test recommended trowelling mastic over the spray foam which had been used to seal the junction of the purlins and the ICF. Having identified the areas we needed to fix we got on with the air test proper. As the test proceeded restrictor rings were fitted to the fan until the required air pressure was stable. The initial figures are excellent down at 1.08 ARCH which given we have a bare structure and know leaks around the purlins mean we should be able to meet the 0.6 ARCH. Interesting form me was the degree to which the fan got restricted, you can see from the photo that just a 15mm ring was left exposed. For a normal build this would be the case for a small single bedroom flat. With the MVHR tubes in place we set to installing the water pipes. It’s surprising just how much having to make decisions about tap positions can exercise your patience. We had opted to use a water softener and after a bit of searching around decided to use a Monarch Solo, a non electric water softener that gives ample flow rates for our house size. Compared to re-plumbing a house starting out from scratch made it a simple and quick. Again having two people to feed the pipes makes the job a lot simpler and saves shaving the pipes through the ceiling webbing. We will pressure test all the water circuits prior to do any plasterboarding. Along side the water pipe installation we also installed the electrical ring mains. With ICF it’s important that the wires don’t come into contact with the polystyrene as it leaches the plasticiser from the cable insulation making it brittle over time. Lighting rings will follow. We have a fairly good idea of where we want lights but it’s difficult to be sure so we plan to put in a lot of redundancy so we can change lighting as required once living in the space. We have also installed stud walls for the two bedrooms and bathrooms. The seemingly huge space soon shrinks! Having said that the rooms are generous. In the entrance hall one wall has a curved corner, a little more fiddly to construct but well worth the effort making the hall/stair area look really good.2 points
-
Ages ago I wrote a spreadsheet for doing what-if comparisons to see whether it was better to invest in more insulation in the walls, roof, floor, fit better windows and doors, or fit a better MVHR system. Others have found it useful and I've been reminded that I've not re-posted it over here, so here's the latest version. It should be self-explanatory, you fill in the cells with your wall, roof/ceiling and floor areas, add the areas of each door and window, put in the U values for each and, if you can, get hold of the met data from the met office for your area (the data in there is for West Wiltshire, right on the border with Dorset). This isn't a thorough modelling tool, it just looks at heat loss fairly accurately but doesn't take into account heat gains, although there is a crude way of doing that by drawing a line across the seasonal plot at the point where you don't use heating and you can very roughly assume that anything above that line will be heating. Please feel free to ask any questions, but bear in mind I wrote it back when I was designing our house and haven't used it for a couple of years. so I may be a bit rusty. Heat loss calculator - Master.xls [edited to add latest version of the spreadsheet]1 point
-
Evening All, It’s been a while since my last post… The good news is that our planning application has been granted against all odds, however it did require us to conjure up enough interest in the village to get it ‘called in’ and decided at committee level (6 in favour, 5 against!). They have placed a number of conditions in our path which are likely to drain more out of the budget and slow us down somewhat, but we’re still smiling! We’re now in the process of drawing up the necessary details to satisfy building control, and we really ought to be finalising our heat energy supply. I haven’t yet attempted to calculate the energy demand of the house (from JHarris’s spreadsheet), however I was under the impression that from a CH POV, ASHP should present us with a good improvement from our current oil fired boiler setup. We intend on integrating UFH in both the old and new part of the house. That said, the new part of the house is an upside house…i.e. upper level will be for living and lower for sleeping…I’ve seen UFH installed over floor joists (for the 1st floor living), but am keen to get people’s opinion on it? With regards to DHW, my wife and 2 children (& counting) enjoy their long showers/baths, and I’m aware that above ~45 degC, CoP plummets w.r.t. the majority of ASHPs? I have also read about people using the ASHP to supply the DHW tank with water @ 45degC, and then using an alternative source top up the remainder to get to say 65degC? Solar seems to be a popular option, but given our proximity to mature trees, seems an unlikely candidate? Wind however is something we do have a great deal of (the good kind!); being situated on the top of a valley, we really do get fairly good gusts on most days, but I haven’t yet grasped whether this is a viable / realistic route for the domestic market, and particularly given that we are in quite a sensitive area in terms of focal points (& our pockets aren’t deep!). Would using the grid to top up the remainder of the DHW needs be a viable option, or would we be better off scraping the whole idea and sticking with a more modern (& hopefully more efficient) oil fired system? Any advice would be greatly appreciated!1 point
-
Ooooh, at last ... a chace to get to the January sales and get myself a ManBag. Must get one to match my workboots? Thanks Gary!1 point
-
I think that's a fair assessment of my problems to date, though my lack of knowledge has to share equal billing I recon. I've found some contradictions with that, all my joints are glued with the jointstick, (when you get the hang of the applicator it works very well) and horizontal joints don't need support but it looked to me as though vertical joints did and I've endeavoured to hit a stud for each vertical joint which has been, er, challenging. Thanks to @PeterW's advice I'm going to give my studs a stiff ignoring from here on in, plus I'll be using resilient bars for a fair bit of it which should make life easier. I hope.1 point
-
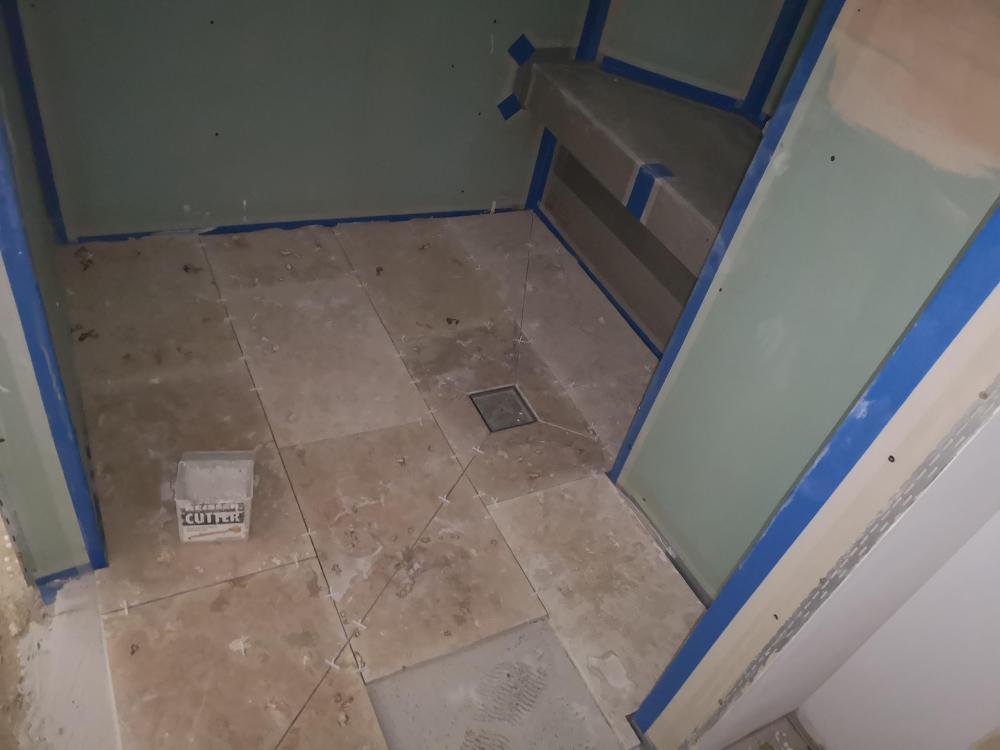
Decent wet tile cutter such as a Rubi bench that will take your biggest tile at 45 degrees. Set it up in the garden under a gazebo, hose nearby so you can clean it down daily, and change the water in the tank regularly.1 point
-
I seem to remember @Jeremy Harris bought his MVHR from Euroland and claimed the VAT back ok!, @iSelfBuild perhaps it’s because you are a VAT Reg business? Us buildhubbers don’t tend to be.1 point
-
Honestly not sure exactly what you are doing but the correct way is to calculate the heatloss of each component (in W/K) and add these to give total heat loss. Then multiply by the temperature difference you want to design to. This gives the heat demand in Watts.1 point
-
I was required to fire protect my WRC cladding. Had the same problem trying to find a suitable product. I was doing the whole house - didn't need to do it all but there was so much of it close to boundaries that I thought I'd do the lot. I used this, applied in their mill by the timber supplier: http://fireretardantuk.com/shop/hr-prof-holz-prof-wood-fire-protector/ The cladding has been up now for a couple of months and here's what it looks like at the moment:
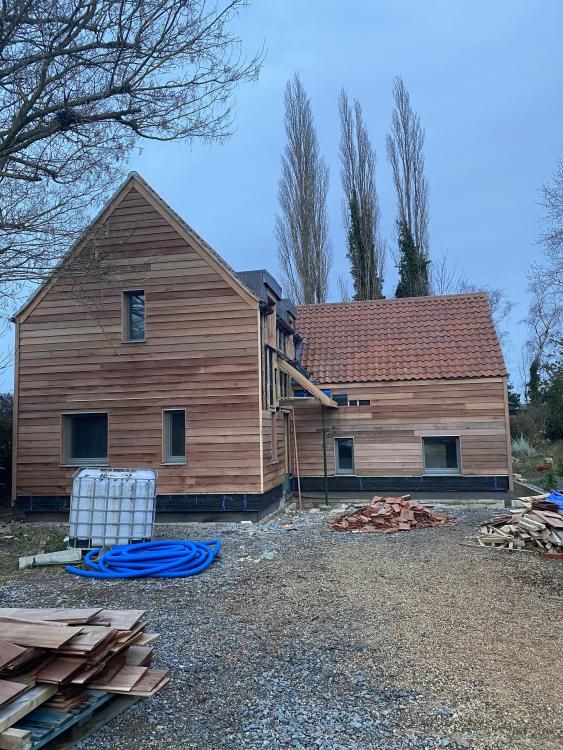 1 point
 -
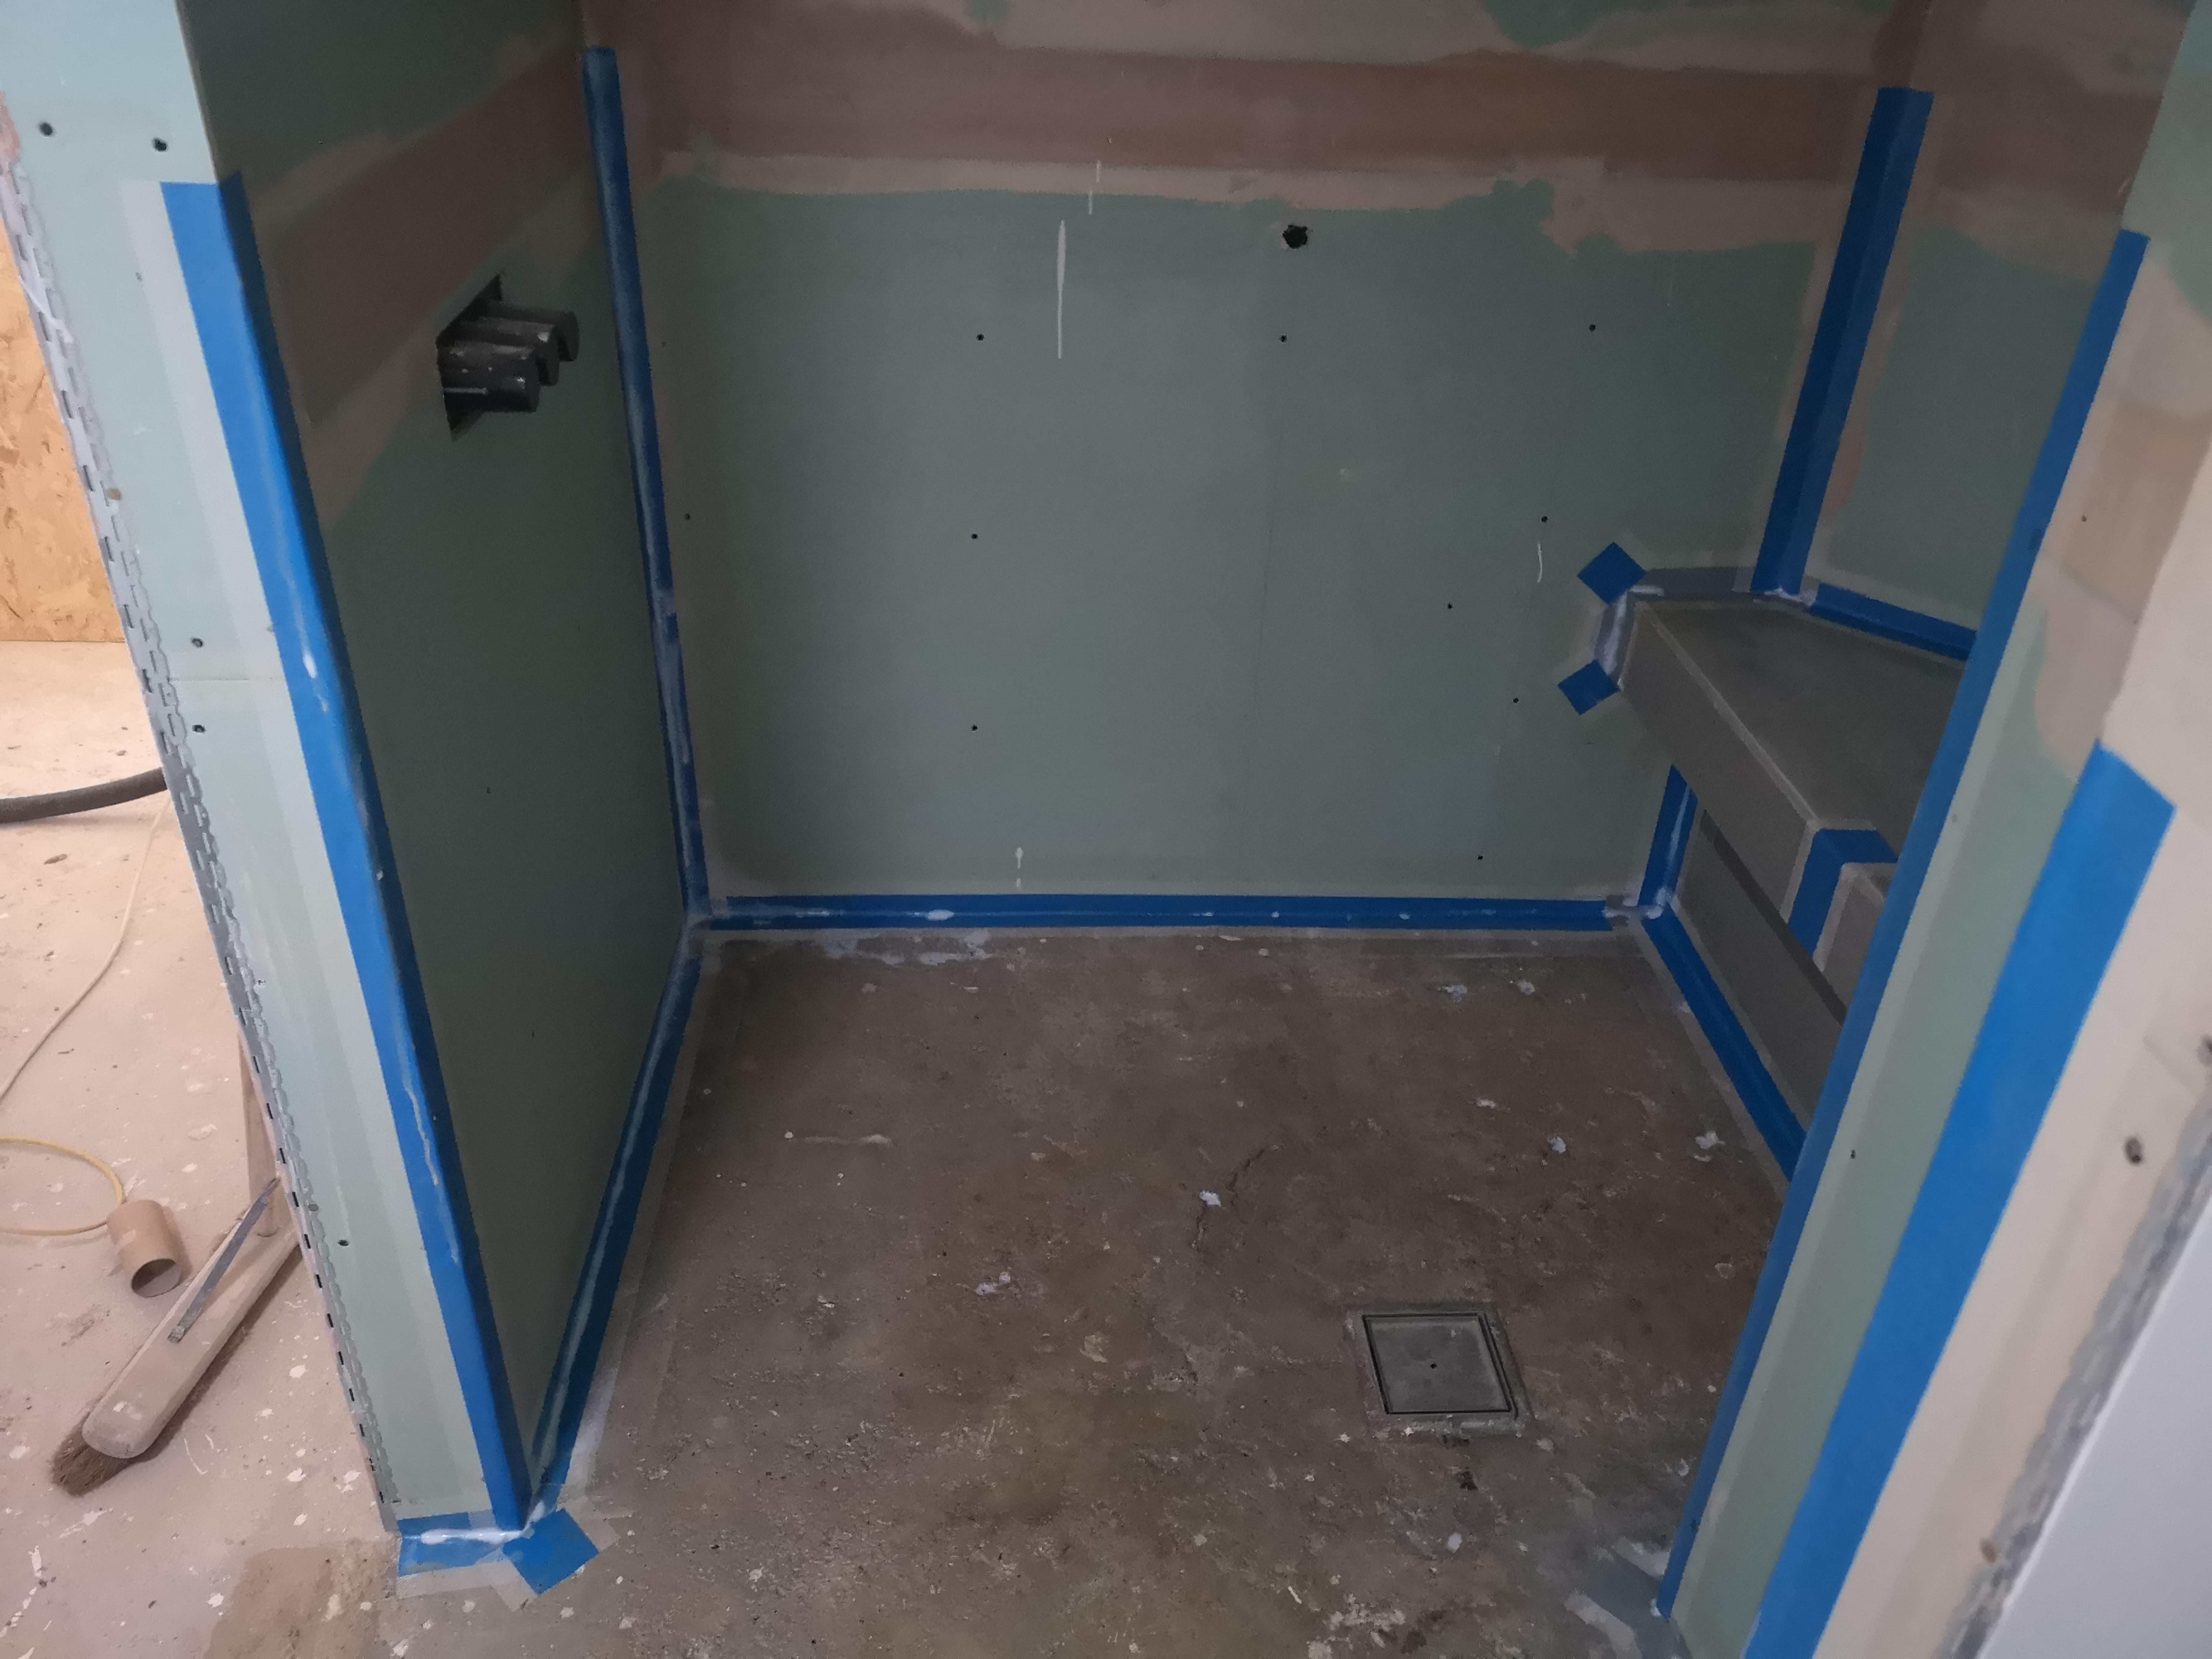
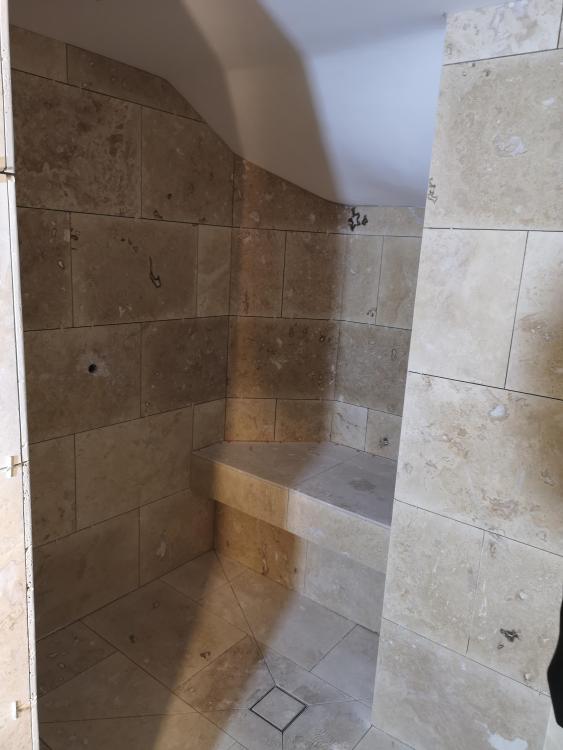
I am loosing faith in the whole wet-room concept. A friend had a nasty accident this Christmas while showering and this has prompted me to reconsider whether I want a fancy open wet room type shower in my new build. The casualty slipped on hair conditioner that made the shower cubical floor very slippery and has now had surgery to pin a broken bone. A further point of concern is my recent experience of a holiday cottage with a wet room. Having used a shower in a wet room for a week I now comprehend how difficult it is to stop water soaking the whole bathroom floor. Then there was the fancy boutique hotel in Cardiff with a large semi enclosed shower cubicle that necessitated throwing a sacrificial towel on the floor across the open entrance to prevent a large puddle forming. We visited a relative for Christmas and used their wetroom bathroom & shower. I noted the combination of wetroom plus the British climate = nice breeding ground for mold. On the flip side: Swmbo and I have concluded the snug 80cm square shower in the static caravan is ideal. It is so small there is little risk of a dramatic falling incident. Couple this with a 21kW combi gas boiler fed with exceptional local mains water pressure plus a cheap £30 no brand thermostatic bar mixer sourced from Amazon and we have a perfect shower. The only downside is the step down from the shower tray floor to the main bathroom floor. Are wetrooms a passing British fad best featured in holiday villas in a much warmer climate?1 point
-
What I do not like about that flashing is that the flashing sits on the peak of the tiles and looking at the tile exposed below it looks like the tile has been cut to fit, thus any water sitting high on the peak can get blown over the peak and may then pass over the tile and start its journey into your house. Looking at that, assuming roof is otherwise good and will be in service for some time yet, I would remove the lead and form a new wider piece which can be beaten down into the trough of the tile so that any water needs to be blown up onto the peak first before it can leak down. I also like the hidden valley types but that would take a lot more work and messing to install and if you are fed up of projects you may not want to do that! I know I am late to this party but just my thoughts without having read other posters replies.1 point
-
Sex is what posh people get the coal delivered in.1 point
-
What's the difference between a Bison and a buffalo? answer: you can't wash your hands in a buffalo...1 point
-
Very pleased you are asking such questions a good year before I need to know the answers. Next question is 'C' or 'D'. Should the ceiling reveal panel be fixed before the side panels? Your option 'A' diagram shows the reverse. I assume ceiling panel first is better because the side pieces then offer natural support.1 point
-
James Latham at Greys stock it down here in 10x5 sheets. Buffalo board they call it.1 point
-
Hi @Stewpot we too are in the Scottish Borders and have been since 2018. If you wish to pop along to discuss any aspects of your build etc,. drop me a PM as I would be more than happy to assist. We used Scottish Water and found them to be OK to work with but that said, they were the more difficult to do so out of the utility companies. Like you, we wanted a likely cost of connections before committing to the plot. Our connection to the mains was across a single track country lane. Having identified it made the application a touch easier and I eventually got a cost out of them. They don't do road trenches etc - that said I found a local company which are Highways approved. They were more than reasonable and I believe the cost of digging up the road etc and making the connection in readiness for SW was about £900 - SW charged me just under £1k for there parts. If you haven't already done so, take a look at my blog - it might be helpful.1 point
-
Ok so using rates I pay and going straight through, you’re at about 185sqm of brick / block. At £1/brick and £2/block laid, that is about £15k of labour at best ... 6 weeks work for a 2+1 gang at good money. Flooring at £15k is mental - that’s £200/Sqm..!!! Are you sure these are not full supply and fit prices ..?? Strip founds in a day would be easy for a JCB although I wonder how that retaining wall would affect the structure ..? Are they 1200 deep founds ..? Is it a brickwork finish to the outer skin or render ..?1 point
-
if covered with breather paper it shouldn't matter whether waterproof or not, covering mine with mdf ?1 point
-
yes it it’s - balanced flue. Most - if not all - New gas boilers in the UK are sold and fitted with a C1x type balanced flue that takes the air from outside. Old B-type flues haven’t been used for years on boilers, and are really confined to gas fires rather than boilers. That Veissmann link is very badly worded and close to being factually incorrect in a couple of places.1 point
-
Yes ; I think octopus energy have a 1am to 4am window at 5p per kWh . It can’t just be on the figures I think . Add in an EV ( and you charge off pv for that some of the time ) then the benefits improve . It did seem like a good price . Also - what will the cost be of ‘grid’ electric going forward per kw ? . I kind of see it like buying a car . I could spend 5k I could spend 20k - common sense would be the 5k car .... To do it now ( and exclude vat as part of a new build ) has its advantages. Figures wise it doesn’t add up ( nor does the 20k car ) - but at least I’m trying to be off coal etc ...1 point
-
I left a hole in the floor when the screed was getting laid. Then set a large shower tray so that the tiles and the tray where the same height. You obviously have a tiny step, 35mm , around the edge of the tray. Much easier than a wet room to install.1 point
-
Ok so definitely 50mm1 point
-
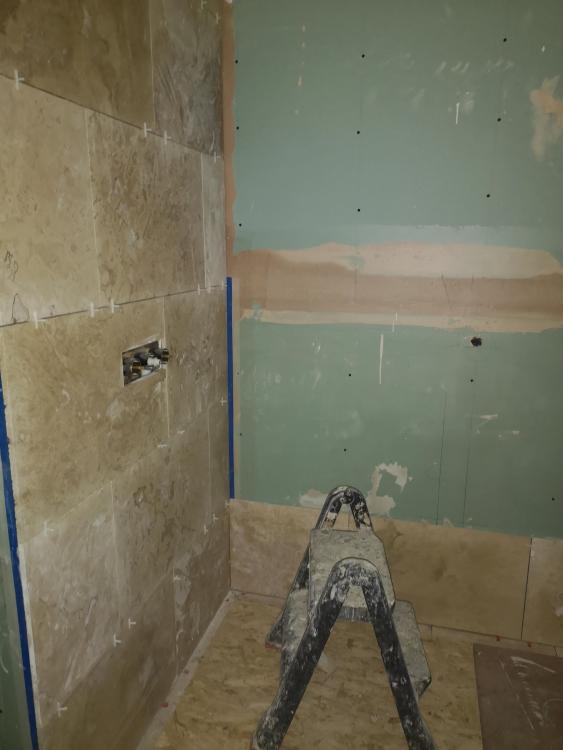
Fwiw the Tiler I used. (and have known and trusted for a long time) did the floor first. Also +1 to plenty of tanking. luckily we had a bunch of the liquid left over from work but I had to buy the tape from here. Lots cheaper than finding a leak Sealing tape D11, 10-50 Lfm,... https://www.amazon.co.uk/dp/B079NGGLBW?ref=ppx_pop_mob_ap_share

 1 point
 -
All I can say is that in our last house I fitted Multipanel to the whole bathroom, including around the shower. That was around 2006/7. Ten years later I was so impressed with the way it had performed, that I did both bathrooms in the new house with the stuff. The only thing to avoid with it is to seal the base as described, with a ~3mm thick bead of sealant under the lower edge, and to never use the plastic seal moulding that Multipanel recommend. That stuff is a design disaster, and should be avoided. There was a cheap and nasty laminate board around for a while, that used an MDF core. I can't recall what it was called, but it was far from being a good design. At least the birch ply in the Multipanel stuff is a heck of a lot more robust, and with a layer of decent laminate either side it's a pretty damned good product.1 point
-
I dont back-butter my toast either.....0 points
-
I've just ordered an item of furniture from Germany. They won't deliver it, but it's still significantly cheaper for me to hire a van, drive to Dover, get a ferry over to Calais, drive to Germany to collect it and then drive back than it would be to purchase exactly the same piece of furniture from a UK retailer.0 points
-
If only it was soundproof, then we would not hear the country and western coming out.0 points
-
I've got to ask the question. Has anyone seen a commercial kitchen with a downdraft extractor?0 points
-
The other is in the Albert Hall is it?0 points


.thumb.jpg.bac90f3bbf6868cf2118d010d936c99d.jpg)