
Leaderboard


Popular Content
Showing content with the highest reputation on 01/20/19 in all areas
-
Well, folks, that's it. The last nail in the last joist. Its been hammered in HARD. Here's why. For reasons only known to the inexperienced self-builder, I put the floor joists up working from both ends of the room to the middle. 400 centers. That makes a gap between joists of about 328ml. The middle three joist are longer than the others - they had to be inserted closer than the others: 310ish. Tight. Well tight if you are my size. Arms and head above the top chord of the joist - beer gut wedged firmly between the POSIs, but swinging the hammer now like a demon (900 nails down and just a few more to go - all because of you @Pete). Easy Peasy Lemon Squeezy. Well yeah, until it came to turning round to reach that sodding wedge to help nudge the top chord a mil or two higher. Christ this is tight. Turned a few degrees. Couldn't reach the wedge. Bugger - - Hand in my pocket - - maybe there's a spare wedge in there? Nope. By this time there is a semi painful wedgie though.? Dropped the hammer. "Foxtrot Uniform Charlie Kilo" Stumped, and firmly wedged, I realise I am going to have to wriggle out of this. Up? No way Jose. Not strong enough to overcome the effects of the beer years. Starting to sweat a bit now. More from annoyance than anything. Down? No choice. Only way . Now, those of us whose work trousers 'need' braces because our trousers have half a ton of tools hanging off them (all lies girls, just lies) will realise that descending through a really tight space has an inevitable effect on your braces. That partially painful wedgie now got worse. A lot worse. You see the back clip of my braces caught fast on the bottom chord of the joist. The front of my work trousers started to pull hard. My eyes started to water I think. By this time, my hands were in the air, and my head altogether too close to the gap between the joists. And suddenly with one bound (as it were) I was free. PING - THUMP The clip of the braces parted company with the waist band - shot up inside my clothing and hit the bottom of my shoulder. No wedgie pain now, just shoulder pain instead. All of this was happening dear reader at the same time as my T shirt, gillet and windproof were slowly making their way past my beer gut on the way to my my head. Couldn't see a thing. But sure as Hell, I could feel my shoulder. A few seconds later, there I was topless on the scaffold boards. Cold? No. Furiously hot. Just a matter now of jumping down to the floor. Yep, I suspect you are ahead of me......... The jump was elegant. Feet and knees together (just like I wuz taught) Thump. I stopped. My trousers didn't. Normally that wouldn't matter. No need to fuss over a small thing like that. Standing in the doorway way my best friends wife with a grin from ear to ear. I wouldn't have minded but her dog went mad.4 points
-
Hi. Just an update. I have managed to sort this out with the owner behind me. He is giving me 4x25m behind the house and I'm giving him 3x25m down the side. I will also be losing about 20-30m2 at the entrance as I'll have to set it back to give him access. All in all, it's worked out good. Thank you to all of you for the help and advice.2 points
-
After reading every post on this forum on the subject of sound insulation and in particular Rockwool I wanted to document our experience. Until the delivery arrived and we opened the packets we really didn't know what we were going to be working with. Here is the best description I can give. We ordered the following from Insulation4Less. They told us the lead time was about 4-6 weeks (nationwide shortage) but actually it all came within a week leaving us with a literal mountain of rockwool to store around site. It was wrapped but needed to be lugged into the house out of the rain. Big job. The 50mm deep packs were orginally intended to go in the ceilings where there were lots of pipes to fit around. We chose RWA45 rather than the more expensive Flexi. Having not seen the Flexi I can't give a really accurate comparison. But the RWA45 is flexible and can be pushed into spaces and compressed a little anyway. And it is cheaper. It is not rigid / solid like Celotex (which I had first thought it might be). Here are some open packs. It is pretty easy to cut using an insulation saw like this. https://www.screwfix.com/p/bahco-insulation-saw-22-560mm/7498k But it does shred easily too. Mask and gloves absolutely essential. The 100mm deep stuff looks like this. So although it comes in these "batts" which have a form to them, you can trim to to the size you need. We are trimming almost everything because the 600mm wide batts don't fit into the 560mm gaps between the 600mm centred studs. But there are plenty of places to stuff the offcuts and the puzzle of how to use every offcut as efficiently as possible is keeping us both amused somewhat. We are fitting this into all the stud walls (internal) and the ground floor ceiling. No need for any insulation on the external walls or top floor ceilings as that has been pumped in by MBC (more of that in another blog). Hubby used our MVHR builders straps to fit up a load in the ceiling. He is now using cheap pallet strapping and a staple gun! It is fair to say that we have been doing this sound insulation on and off now for well over a month. It is a big job. Ceilings harder than the walls. Time consuming. A bit (alot) messy. Requires us to ply the walls first (where ply is needed) and then insulate. For the stud walls that don't need ply we will work as quick as we can in the evenings once the the plasterboarders are on site (due next week) filling in behind them as they plasterboard one side. Going to be a busy week. But progress is satisfying and physically working on our build again is fun.1 point
-
Do not know if this is useful but thought I would post for anyone thinking about doing a self build. Here is a break down of my fee's I have to pay before I start building. My help someone trying to estimate their costs. This is for a 4 bedroom house 280 m2 detached house The legal work was complex Fee Payable To Payable When Amount Local Authority Planning Fee East Ayshire Council Planning Submission £500.00 Architectual Plans ATW Planning Submission £2,375.00 Building Control Drawings ATW Building Warrant submitted £2,375.00 Egineering drawings ???? Building Warrant submitted £1,100.00 Building warrant East Ayshire Council Building Warrant submitted £2,228.40 Additional Security Fee BuildLoan At the start of the loan - non-refundable £1,120.00 Build Store Arrangement Fee BuildLoan Applied for mortgage - non-refundable £695.00 Completion Fee Newcastle Building Society Fee has been paid - non-refundable £995.00 Product Reservation Fee Newcastle Building Society Fee has been paid - non-refundable £199.00 Valuation Fee Newcastle Building Society Fee has been paid - non-refundable £340.00 Mortgage Discharge Fee Newcastle Building Society At the end of the Loan - non-refundable £125.00 Solicitors Fee Wallace Quinn At end of conveyancing £2,116.00 Structual Warranty Build Zone Through Out the build £3,940.00 Site Insurance Before Completion £342.12 Thanks1 point
-
The lecturer taking us for the 18th was a dour Yorkshireman. He kept on about the prices of things (beer etc) "down South". He was pretty good and could spout the regulations off the top off of his head so we were hanging on his every word and dutifully making notes. He then recounted how a lad on a previous course was talking to him about kitchens and how this guy said his had cost £140K. Incredulous at the cost even for "down South", he said: "By Christ, how big is your house?" "Just a 3 bed semi" the chap said. Still reeling the lecturer pressed on and asked how in the Hell a kitchen in a 3 bed semi could cost that much. "Well, the missus ran off with the kitchen fitter!"1 point
-
£4k ??? Send me a PM if you like.1 point
-
https://www.planningportal.co.uk/info/200130/common_projects/43/outbuildings/2 If the floor area of the building is between 15 square metres and 30 square metres, you will not normally be required to apply for building regulations approval providing that the building contains NO sleeping accommodation and is either at least one metre from any boundary or it is constructed substantially of non-combustible materials. Our garage is Timber Frame with insulation and is right on the boundary with neighbour, but as it is slate roof and cement board rendered, this was considered sufficient to exempt it from Building regs.1 point
-
@newhome please tell me it was Naked Jungle!1 point
-
OK, to clarify I did have a clear idea of what outcomes I wanted (mostly based on ideas from this forum) and brokered discussions between these two trades (plus MVHR if you're not DIYing that element - something of a rite of passage on this forum) to ensure they were on same page, especially where they interacted (such as heating system, fighting for first fix space, etc). I more or less left it to them and their professional judgement to design their respective systems and decide where each pipe and cable went - can't help thinking that if I had commissioned a super detailed wiring / plumbing diagram then I would have been spending twice and/or it would be ignored anyway. We also did a few site walk throughs ahead of 1st fix to make sure large services, such as foul runs, went where they could/should and didn't clash with other systems. One place where a M&E plan would be useful is during the structural design to ensure sufficient voids, steel penetrations etc are made to enable the bulky services (MVHR, Fouls etc) to be laid efficiently. We got caught out a few times on that but managed to work around issues - just.1 point
-
Very common DIY accident. Which is why ladders are for access only on proper building sites. If you want to work at height the you can't use a ladder as a work platform. Luckily we aremostly DIYers on here1 point
-
There are high and low pressure ball (float) valves too, so maybe your original were low pressure and the don't like the new system. You can change the nozzle for a high pressure one or just buy a whole new unit. Nozzles are very cheap1 point
-
The float valves would need their restrictors changed surely?1 point
-
If you pressurise the heating system to the max recommended by the Boiler manufacture, that should (?) give you an indication of what the mains pressure is as a minimum. eg 1.5 atm plus whatever the drops across the boiler repressureisation gubbins are, As to whether that is a useful number... Ferdinand1 point
-
A pressure reducing valve on the cold mains at source sound like a good solution. Even if you turn the stopcock down to a dribble, the static pressure will be the same once it equalises. You were right to bring things into the year 2000, so stick to your guns. Just a shame the plumbers didn't give you a bit more advice on the pro's and con's before getting paid and moving on. Still doesn't make them terrible, just a bit complacent.1 point
-
Been doing some thinking over the weekend. The quinn therm sandwich is now gone. New make up 22mm Chipboard, 6mm Natura Sonic Gold underlay, 18mm Engineered oak.1 point
-
Just for info the cheapest printer I've seehn is a clone of the Anet A8 made by CTC on eBay for £90. However it needs assembling and some FETs boards adding (£12 from Amazon) to prevent a known fire risk. You also need an SD card and reader for your PC. A reel of ASA filament is about £25-30 on Amazon. So if you have time you might DIY for say £150? However that printer is pretty basic. Most people who buy one end up printing upgrades to improve it or even replacing the wooden frame with aluminium extrusions. Edit: Not sure if that printer will print ASA.1 point
-
Perhaps get a pressure gauge from screwfix/tool station and measure it? Pressure at our house isn't huge but we needed to fit pressure reducing valves on wash basins to stop splashing. If you do the same make sure they are accessible as you may have to adjust them up a bit after a year or so.1 point
-
Googling 3d printing services finds loads but to get a quote most want to upload your design. However I found this place that will estimate cost based on dimensions before you have the design files... https://www.3dprint-uk.co.uk/pricing/ I tried entering 20mm x 10mm x 5mm, 2 bodies (whatever that is), qty 10, white nylon and it said £40.1 point
-
ASA looks like the right material to use. Rigid.ink says it has good UV resistance. As I understand it the design software (the slicer?) will tell you how long the print will take and how much material it needs. I expect they charge by the hour. I doubt the material will cost much. Whole 1kg reel is about £25.1 point
-
You sure your not related to Frank Spencer.1 point
-
My system is: 27 panels facing East. 8 panels facing West. These 8 are split across 2 separate gables. They are split across 2 inverters, each of which has 2 inputs (thought dual inputs were normal) with the strings defined so that I can move some of the East Panels (iirc up to 14 or 16) onto a putative South facing veranda roof. Inverters are Solaredge, and I have a Solaredge thingamajig optimisation device on each panel. So I think that it should be possible to do what you need, probably with a single inverter if chosen to be a dual input, and if you talk carefully to your supplier about your requirements, or gird your loins for a brain teaser if self-installing. As people say above, there may be a few small compromises to live with. F1 point
-
Yes why would you not claim it? it is shown on our planning and building warrant so I damn well expect to get the VAT back.1 point
-
Yes you will need an Sds drill and any will probably last the entire job, personally I use Makita but thats just because it was on sale and I like the brand. But if you intend to do anything over a 50mm core I would highly recommend hiring a dedicated core drill for the job. Coring is a very quick way to ruin even the very best Sds drills1 point
-
I have had numerous cheap SDS drills in the past, some lasting longer than others but with my new build I treated myself to a de Walt and cannot fault it. Also I bought a DeWalt cordless for this build and I am very glad I did. You get what you pay for.1 point
-
Pallet stairs... Depends whether the figures stack up...
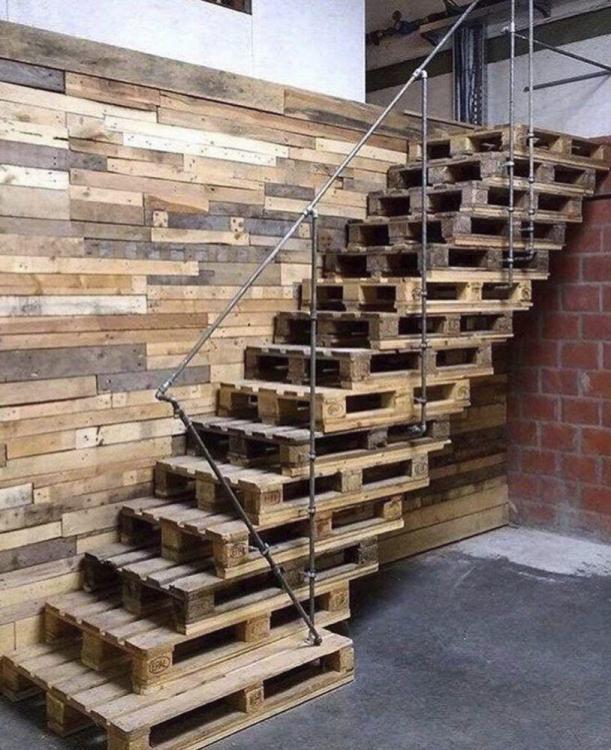 1 point
 -
We have this and ours is 300mm FJI joist studs on top of two parallel sole plates of 75mm x 50 and 150 x 50 with 50mm x 75mm thick PU infill in the gap. Every so often the stud is fixed, via the web, to the concrete with a strong tie angle bracket in the PU trough which is fettled around the bracket. All on top of a DPC. PS this is as our SE detailed.1 point


