Leaderboard
Popular Content
Showing content with the highest reputation on 08/10/18 in all areas
-
The mods are discussing it, but for the moment there's something of value to our members in allowing the discussion to go on. If nothing else, any potential purchasers will hopefully have some questions to ask before buying (or can judge for themselves the quality and usefulness of the company's replies).3 points
-
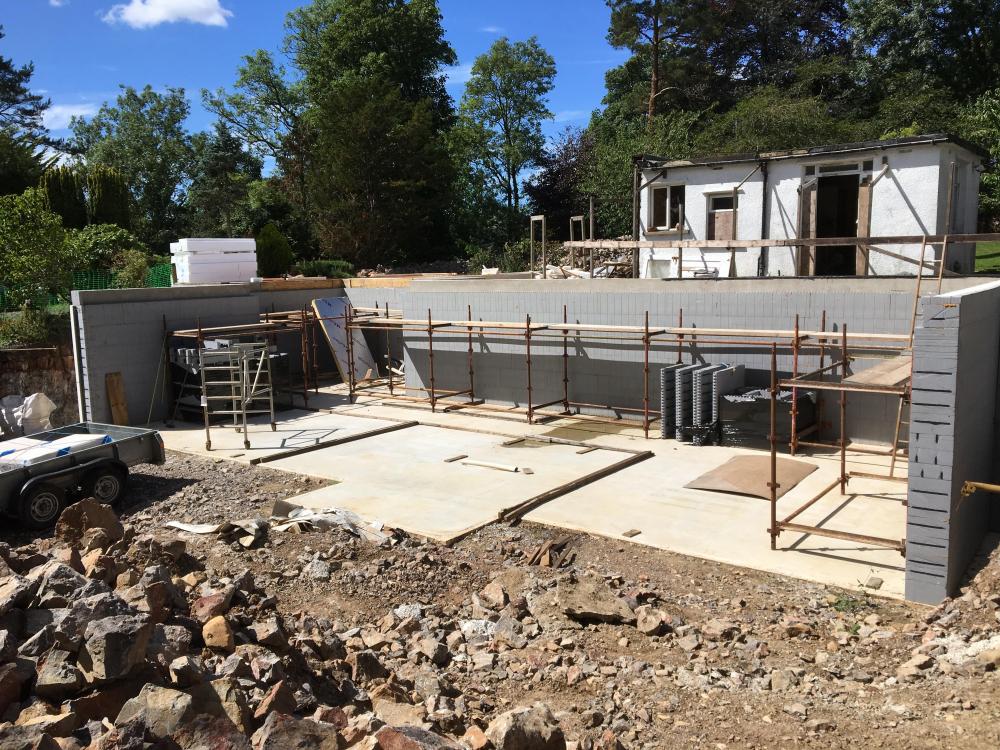
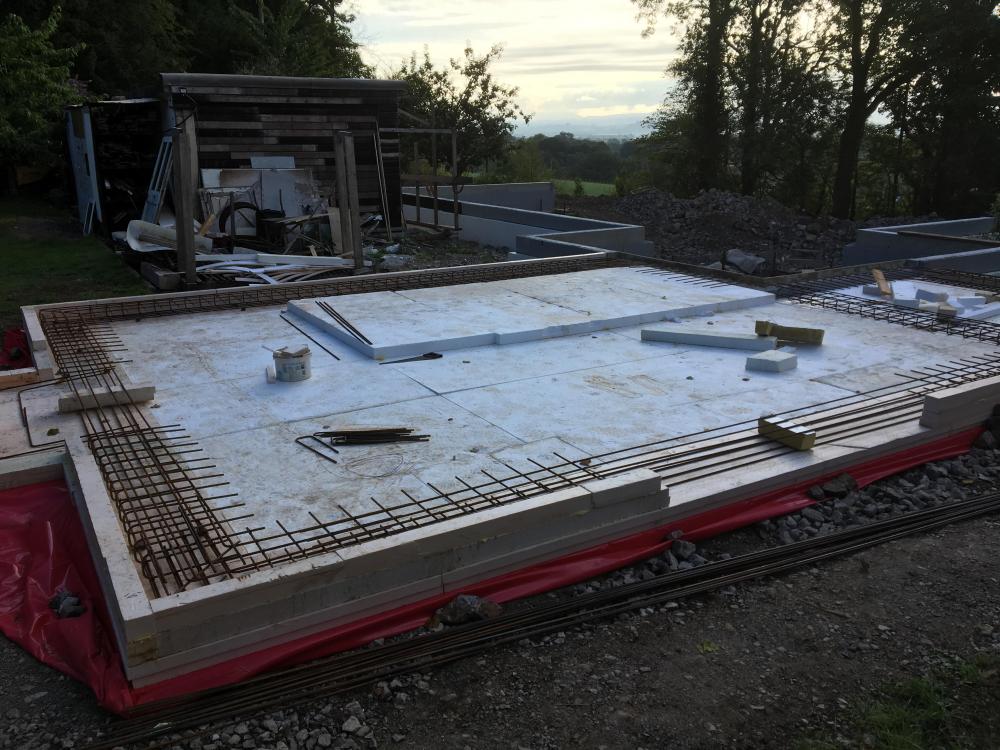
Someone @Alexphd1 asked for more photos of my DIY insulated foundations, so here you are. This is the basement complete with ICF steel reinforced retaining walls. Here is a photo of the lounge. This sits at the elevated ground level at the far corner of the basement, just to the right of the pile of white insulation in the above phot.3 points
-
I wasn't going to visit the site today, but we've had heavy rain showers today in Dorset and I thought that would be an ideal opportunity to see how level the slab looks after its late night power floating. My reasoning was that whilst I can't identify any high spots by eye, it would be easy to look for the low ones by where the puddles were lying. Here's a photo taken from a slightly elevated viewpoint (the top of a pile of wood chippings!), looking from the south east corner where the snug will be, over towards the north west corner, where the main living area will be. Most of the puddles that you can see are barely a couple of millimetres. I'm not sure how long it had been since the shower that caused these, but it was a breezy day and not hot. The next is taken from the other end of the right hand side of the property, as seen above. Between the brown foul waste pipe and the white UFH pipes, you can just about see that there is a hole in the slab. This is meant to be there right now, but is due to a mishap yesterday. As the concrete was being transferred in the digger and poured from the bucket, the digger rocked slightly and the bucket bounced on the exposed UFH pipes. Harry from MBC reckoned that one of the pipes has been damaged as a result, and so the area around the punctured pipe has been left uncovered. My trusty plumber/UFH person will be coming early next week to fix the damaged section of pipe and make good on the concrete floor, and MBC will be covering the cost of this. Once I have the bill for the repair, I will pay it and MBC will deduct the amount from my next stage payment. This was all agreed this morning without any arguments or quibbles. So far, all the puddles in the photos have only been a couple of mm deep. The deepest is on the far north west corner of the living area, shown below. It's not easy to guage the depth of this area, but I think it's about 4mm at the deepest. The thingies are a couple of end caps that get put on the pile rebar, but the wind was blowing them towards me. You can see how they are tilting. Here's another view of the same: I don't recall the exact tolerance that the slab needs to be within off the top of my head, and I'm not going hunting for it right now as I'm one g&t into Friday evening with a couple more to follow, so no point now. However, the figure of 5mm is scratching away in the deepest recesses of my grey cells, so I think this should be acceptable. If anyone knows otherwise, please speak up! The finish on the surface overall is very nice. I had a walk over the whole thing and couldn't see anything obvious, but then apart from squishy concrete under my boots, I wouldn't know quite what to look for anyone. To my unpracticed eye, it looks pretty good. One very good think that came about from all that excess concrete being dumped all over the place yesterday is that the team spread it all out between the hard standing and the slab, so I now have an even more level and sturdy surface for the crane when it arrives with the timber frame:2 points
-
You two will be banned if you don't pack it in. @Onoff could use the time to finish his tiles and @pocster can give him a weary-joints massage to relieve the 'tension'. .2 points
-
2 points
-
2 points
-
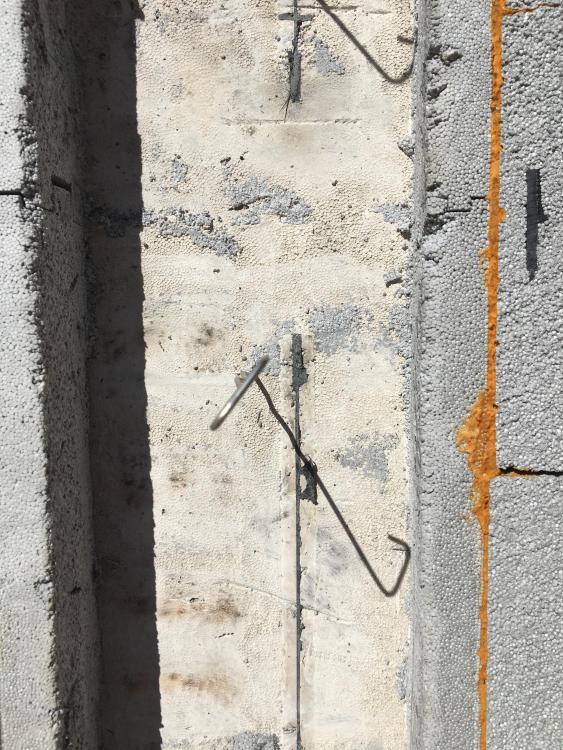
Having never used ICF before I was unsure about the practicalities of filling them with concrete and how to compact then. My local concrete pump guy has some experience and it was he who suggested they needed limited compaction. Hence this was our approach. So so about a month after the pour I've stripped off some of the ipolystyrene insulation to allow an internal wall to the keyed onto the concrete wall. Here is a photo of the concrete fill that was exposed having removed the polystyrene. Looks good to me!2 points
-
2 points
-
2 points
-
The phrase "patented" when used by a UK-based company does not mean "there were patents, but they were in other countries, were in the names of another entity, and lapsed over 10 years ago". Patents are by definition public documents, and anyone saying they have a patent while refusing to give details is either lying or woefully ignorant about what having a patent actually means.2 points
-
I am a big fan of contractors who come up with a solution rather than just the standard shrug of shoulders. Pouring and curing a concrete slab is a hell of a task and lots can go wrong - deliveries, mix, weather, poor prep, poor site operative, broken equipment. On most housebuilder sites nobody cares, unless it is civil engineering, in which case it is all inspected, cube tested etc. A few years ago near Brighton I watched a reinforced concrete bridge being built, then a couple of weeks later the main supports were torn down by a huge demolition excavator. Apparently the concrete supplier got the mix wrong. Mucho £££2 points
-
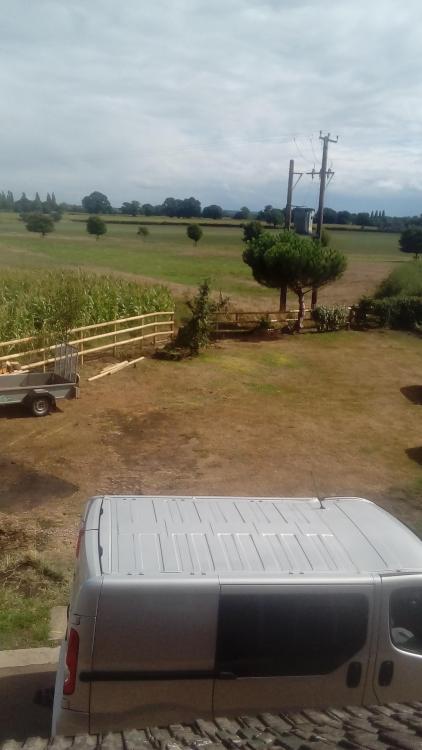
Hi everyone. Should be starting our new build next week. Its in our garden in Cheshire. Bungalow with room in roof. Quite experienced at building but going with 1 or 2 new ideas (new to me) I've seen on here in last couple of weeks, ufh, good insulation, air tight and mvhr. Heres the plot, picture doesn't do it justice.1 point
-
No bath in my new place but in the existing one I have a hand shower over the bath as well as both a hand and rainfall in the walk in1 point
-
I wanted hand sprays for the baths too but according to hubby they weren’t necessary so not fitted (since when did he clean the damn baths anyway ...). Then we went to a hotel that had one and he said what a good idea they were. I could have coshed him over the head with it!1 point
-
Overheard her discussing the floor grout with No.1 son just now: "I wanted white but I like the grey!" Progress but it ain't over!1 point
-
You missed the point above. @pocster wanted a threesome. Maybe they have plans to include you in their ménage à trois ? ???1 point
-
1 point
-
That's looking great, well done! And well done @Onoff too!!1 point
-
Which is why you need a handset as well as the rainfall affair. I would never have a shower that only had the rainfall out of choice not least because the handset is useful for rinsing the shower after cleaning as well as showering.1 point
-
Not a peep from her since I got in. Bliss! It'll a be a 'kin long time until the grout goes down at this rate.1 point
-
Looks good, well done. 5mm not a problem pretty much perfect I would say.....I had 40mm in one area, 25mm in others and lots of dips that were between 40 and 25 deep.....140 bags of levelling compound, mine could never be level just flat according to floor layer who did it. Enjoy the well deserved G&T's1 point
-
5mm is neither here nor there, even if tiling the slab direct you'd work off a 6mm adhesive bed as a max, so there'd be no problem making up a 5mm dip.1 point
-
It's G&T #2 for me now, but I will dig out my figures from Norrsken for you tomorrow, @Vijay. I've got pretty big lift and slide going into my living area, so it should give you some idea of comparison. If I don't get back you by the end of tomorrow, PM me to give me a nudge.1 point
-
1 point
-
I have a 5mm low point in my raft foundation, the TF company we’re not phased about it.1 point
-
Looking good. Don't be afraid to put a tape across the diagonals and check for square. Same goes with checking for level across the floor. A few buckets of water threw over it in a day or two will do it no harm but can show up bad bits very quickly. If it turns out it's all gd then happy days on to the next bit with confidence it's 100% right at the bottom.1 point
-
Seriously. Whip everything off in the adjacent room and you can have a 3-way and get your pipe in easier.1 point
-
1 point
-
My final comment on the subject..... @richi I don't know Polly she was not involved in my purchase (bought a year ago). I can tell you having lived with it for 4 months now that my lovely (and large) shiny chrome bathroom fitting do not have scale they have a sort of water marking which is very easy to clean off. It is definitely different to 'normal' water and my and OH skin has improved here, we both developed skin problems at the rented house due to the awful water and the water supply is the same awful water here at new house so I am very aware of the improvement and the only difference in supply is the Halcyon device. I should be on commission!!! LOL1 point
-
Grey for sure ! now piss on the white to show her how easily it dis colours ?1 point
-
Off cuts, pizza box, duct tape! Hands down I prefer the grey. I think the space will look bigger with the grey. I've left it stategically placed so she can see it through the open door (well, doorway as there isn't yet a door) when she flys by.1 point
-
1 point
-
1 point
-
1 point
-
If gone through the full grind process to fully polished I don't believe they need any sealer. Powerfloats are hard to use a sealer on without defeating the object of the powerfloat and roughing the surface. Mine is also waterproof concrete so I have to use a topical (not penetrating) sealer. Watco do a powerfloat sealer that doesn't require any surface roughening. Absolutely......i'm experimenting for the hell of it but am actually happy already with the house showing the scars of its difficult birth....thats a personal aesthetic though and @MikeSharp01 might not have it in his minds eye, hence I was detailing my experiments more in the hope they might help him....i'm speculating his powerfloat has 'suffered' some of the same characteristics. Yes, probably a lot of parameters to add up to a great result..and a spot of luck also in the mix!1 point
-
Correct me if I'm wrong but in England building control have no interest in anything under 30m2 internal. Build it off what you like in this case, even topsoil! This is where a good builder might help you. If you hit good ground 500mm down, and your house is only on similar footings in a similar location why go down to 1m.1 point
-
That sounds like the same texture quality issue as trying to touch up over a spray painted surface. It may be necessary to rough up an entire section / room, or create a feature (eg area for a sitting area or a dining table). Or I suppose one could rough it up in patches across a region so that the larger texture becomes the feature. F1 point
-
Grouting again...maybe tonight but SWMBO and I aren't exactly talking to have the "silver grey vs white" discussion! Is it feasible to mix up a small amount of silver grey grout, put it down then see how it looks? Maybe do an area of white to to see the contrast. If it doesn't get the thumbs up from madam is it easy enough to remove with a sponge and go for the white? And around the edges where the floor tiles meet the wall. They're pretty full of adhesive. I didn't pay too much attention to cleaning them out (maybe I should have), other than making sure the edge wasn't caked. Figured the wall tile adhesive and grout under the bottom wall tile will cover it all up anyway?1 point
-
For mbc purposes I see no reason why the highest point of scaffolding would be higher than what they're building. The roof membrane installers should have a high hand rail...but given its single storey and not exactly urban they'd probably 'overlook' it, especially if you had air bags/crash mats.1 point
-
No need for CT1, just washing the grout off willl do the job. You grout as normal packing every little nook and cranny, and then when sponging off you just rub it into the gap between the trim and the tile. Youll see as you grout that it's all you need. Just make sure the 3 degree benched tile is slightly proud of the top of the trim and set back away by about 1mm so you can get grout into the void of the trim / tile and you'll be fine.1 point
-
Do you really think I would be that dense No dicks here I only have one shower with separate controls at home. I wanted them all like that but hubby decided that they would be easier to replace if they went wrong if they were the thermostatic bar mixer types so I only managed to persuade him to fit one. I only use that shower (downstairs) to shower the dogs so generally get soaked in the process anyway so getting a wet arm is neither here or there in the great scheme of things!1 point
-
1 point
-
Bet I'm not the only one that zoomed in on that valve looking for the reflection...1 point
-
Not really. As most folk are used to an electric shower or a standard bar mixer / concentric valve where the business goes on in one place, then no. If people have been fortunate enough to be able to afford higher speed installs from day one then yes, it may well seem standard, but most have not. When I demonstrated this to my current clients ( who I steered away from B&Q and the 2 x new electric showers they were going to just replace as it was the easy route ) they were blown away, having been used to two utterly shit electric showers for a very long time they were simply unaware that there "was a better way". I very rarely remove concealed stuff tbh, and its mostly bar mixers or electric units, but then the good stuff goes in and the smiles emerge.1 point
-
Stuck with the window and the soil pipe but it actually works really well. Loo roll stays dry lol1 point
-
1 point
-
You can try. The risk lies with the Kitchen supplier, not you. Any supplier with sense would take a pragmatic view and offer you a deal. But ask yourself this question - if the supplier is winging their way by ducking and diving around the system would the HMRC one day catch up with them and would you supplier still be in business if you needed to go back to them in time? Amol1 point
-
I'd second @PeterWs comment about not going up to 1000mm. We were concerned that the shower wouldn't be big enough (well, SWMBO was concerned, hence me building the house scale model to 1:50 scale so I could use model railway 1:50 characters to give a sense of scale, mainly for the shower...). Once I'd finished the shower and she came over to see it her first comment was "It's bloody enormous! I didn't think it was going to be that big!".1 point

.jpg.c21f3ac78c9b7efd90cbdcb312744dc5.thumb.jpg.7adcad4c0e384f5ecd7d56b0618df6e5.jpg)


