


Jenki
-
Posts
836 -
Joined
-
Last visited
-
Days Won
7
Everything posted by Jenki
-

Virtual machine to overcome Loopcad trial period.
Jenki replied to Post and beam's topic in Boffin's Corner
I just used another email address 🤔 -
Being a new expat living in the Highlands, it's not rare hearing a Scottish accent, but I reckon I hear more English southerners than Scottish, of my 3 closest neighbours 2 are locals, and one came from around 10miles from where I grew up in Manchester. Agriculture: two crazy examples. A local farmer sold his head of sheep, as the government are willing to pay him more for the next 5 years in subsidies to sell them, than he would earn rearing lambs and selling.( with a hope of meeting next zero) absolutely crazy shortsighted planning. Reminds of engineering in the 90's outsourcing everything to China, only for costs to increase, but no way back when the foundries closed etc. Secondly wool. I had my second hands on experience of rural life today assisting my neighbour with the annual sheep shearing. ( Started paying back my long I owe him list) He gets about 30 to 50 pence for a fleece. And it costs him £1.50. So why is wool insulation so expensive, my gut is big business not wanting this cheap raw material when they can sell profitable glass fibre / PIR products lobbying government for favourable incentives to use their products. Sitting here at 74M AMSL, I'm quite happy that the planet will do what it needs, the UK hitting net zero with the introduction of EV's and decimating farming will not work, and have a more detrimental effect on the planet as we will need to secure food security by way of more transport.
-
Interesting thread. I've put some sensors in the core of my ICF wall N,E,S and W elevations. And as they are fixed forever, I piggybacked two sensors in each location for redundancy. So that's 8, and then I've got sensors in the slab in 5 locations, these are in pipe so on theory could be replaced, I've wired these in cat 6 all back the the plant room. So if 8 is a good max number I could configure on two sets of pins ( I think I'll use ESP32) I want to create a logging system, but also measure CO² and display the info ( a future project after the build) Is there a calculation to work out resister size needed If I measure the Resistance of each cable?
-
Distance, 100 miles of single carriage way in the Highlands., and a bit of we don't want to do it I think.
-
MVHR self install - tips and experience
Jenki replied to flinn's topic in Mechanical Ventilation with Heat Recovery (MVHR)
😞Not really the answer needed on a self build (DIY)forum. If it was the admin could put that in a banner on the landing page and be done with it. -
Small water heater discharge point termination (post tundish)
Jenki replied to Stones's topic in Boilers & Hot Water Tanks
Unfortunately, it's not in the course paperwork. I asked this exact question as I want to discharge into an internal SVP. They showed examples using a waterless trap. The only stipulation they gave was they you need to be able to see the tun dish if you do not discharge outside. I.e you must be able to see the tundish or the external discharge point. -
I didn't. Just the plan and dimensions of the ramp. I did put details of the ramp height etc, as once you get over 600mm you then need handrails not just curbs
-
Small water heater discharge point termination (post tundish)
Jenki replied to Stones's topic in Boilers & Hot Water Tanks
I did an unvented course a few week back in Inferness, the waterless trap is acceptable, after the tundish. The D1 and D2 discharge pipes still need to be correct diameters and lengths etc, but they can discharge into the SVP, but can't use solvent weld, push or mechanical joints. -
That's a good question. The digger and my loader were the backups. I had buckets and bought some more incase filling the voids under the windows was a struggle, but it worked ok. Reading other posts on bursts etc I had timber, screws and OSB etc around. The rest is hard earned instinct I think, you see and experience problems and it adds to the knowledge. I spend time thinking about what went wrong, how I resolved and what could be better. I was calm outwardly, but to Mandy and another lad it was apparent I was stressed😂.
- 39 replies
-
- 1
-

-
- the windy roost
- icf
- (and 2 more)
-
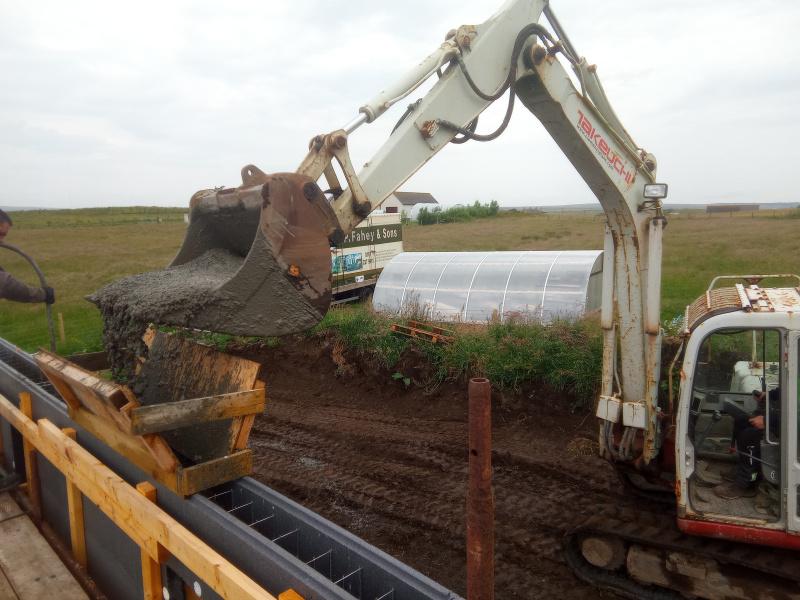
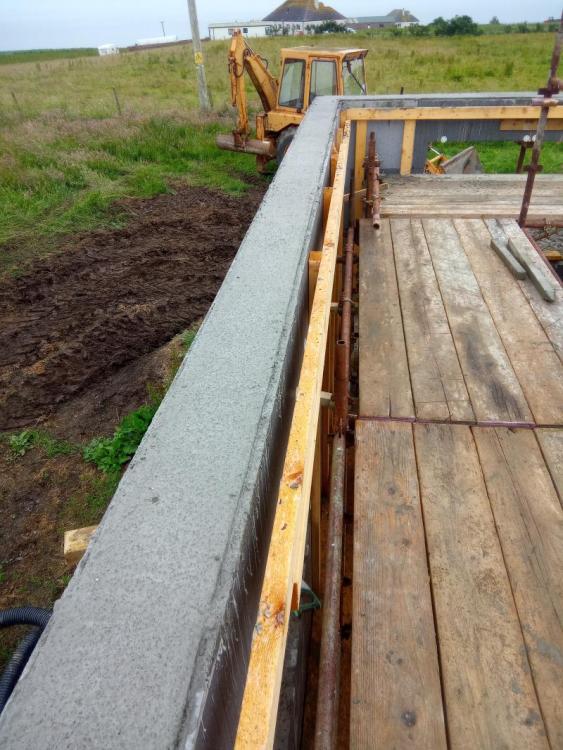
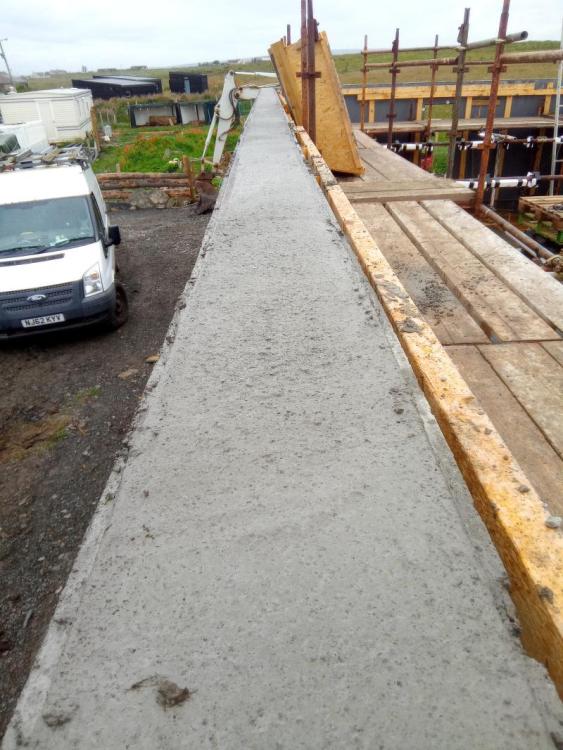
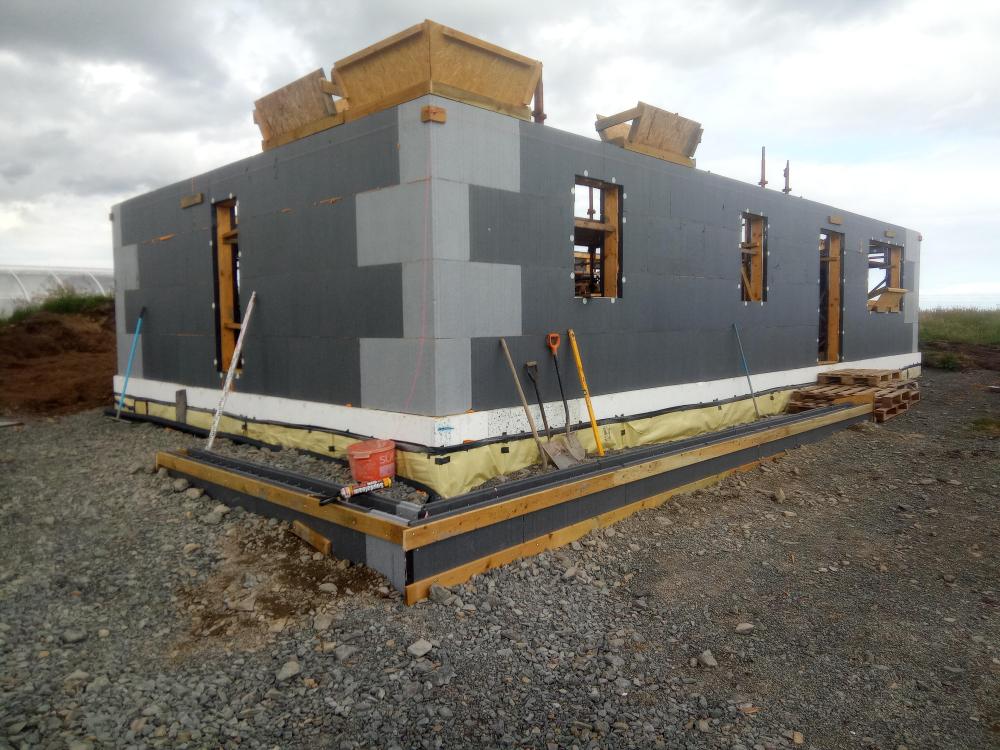
Day 48 of the build was a big one, we poured the ICF ( PolySteel) walls. Following the slab pour 2 weeks earlier, we start on building the PolySteel ICF walls. I've no experience with ICF, and thus can only comment on the usability and quality of PolySteel. The process is straightforward, all the blocks are t&g on all edges, so you simply use a bead of fire rated foam and push the blocks together. Each block clips to the last with two **clips joining the metal mesh inside the block together. Our rebar spec, was I think over the top, but basically we had a pair of 10mm starter rebars vertically every 300mm centres so the first two rows we had to position the blocks over the starter bars. In addition to this each corner block( 2 left-hand and 2 right-hand in our case per course) have 4 off 10mm L bars and pairs of 10mm horizontally on 300mm centres. Our perimeter is just shy of 40M, so all in that's just short of 2KM of rebar. Point 1, the spec calls for 400 mm L corner bars, (which I had cut and bent) you can't fit these. You can get 1 in but the other 3 need to be shorter on one side to get in, this was more so on the first two courses with the precast starter bars in the way. I ended up cutting 1 to 400mm X 300mm and 2 to 400mm X 200mm per set. These were tied in place to the metal grids in the PolySteel. With so many starter bars I made the ones located at windows longer so that they were around 80mm below cill height l, (this was when I poured the foundation.) This saved me adding extra verticals bars after, and in the main worked out. To cut out the windows I had to figure out a good way to cut the blocks. The Steel mesh in the block has a 30mm plate that sits under the surface of the IFC to allow you to screw into with self drilling screws ( one of the reasons I liked this block) For window openings This needs to be cut, I had an old rage metal circular saw and this worked amazingly, if I did this again I would buy one for the job. But I'm never doing this again😂 The most difficult part was cutting the mesh, this is 3mm bars, I used a small cheap set of bolt cutters which worked but was difficult getting into the cavity of the block and then squeezing the cutters. The angle grinder was too cumbersome in the tight space, and ripsaw with metal blade just too bouncy it felt like a bodge, so patiently cut hundreds of 3mm bars to make the openings. I think a small cut off air grinder would work well, as I did try a Dremel type cutter but this was painfully slow. At two courses high it was time to start bracing. This was done by fixing 4x2 to the blocks on 1M centres and at every opening ( the 4x2 will be re-used for studding later) I secured the timber to the blocks with 100mm baypole screws 3 per block in pre drilled holes. Below shows a bit later on but a 4x2 ring beam tied to all the verticals. We also tied the long walls (N&S) to each other with long ratchet straps and more 4x2. A little security if the winds picked up. Once 3 course we're built, I made the boxes for the windows and doors, basically 6x2 screwed through the ICF into the timber. These we're then sealed with some silicon and or foam. On the back of the 6x2 I screwed in some coach bolts to act as a key to fix them to the concrete. Each course we added the corner and horizontal rebars. We then erected some Kwikstage scaffold around the inside perimeter. This is old rusty scaffold but wasn't ready for the scrap man just yet. The bays fit really well, snug if you like. When I purchased the scaffold I also got thrown in a load of 5ft tubes, swivel, couplers and clamps. So I went around and braced the scaffold and tied each section to each other with short sections of pole. This made the stage rigid, lastly used some standards to brace the North and South walls together, creating a mesh in the middle. The final course of ICF seemed easier to cut out the openings, not sure why. All blocks were screwed to the vertical 4x2 and then the vertical 4x2 we're plumbed and tied to the scaffold. This made the whole lot rock solid. I used string lines to make sure the walls were straight and plumb before fixing to the scaffold. Now we put in the vertical rebar, pairs of 10mm rebar on 300 centres. Pic below shows the corner L bars before the verticals were fitted. To pour the concrete, around 12M³, a pump was put of budget as they would have to come from Inverness, we were quoted 2K, so reverted to the 360 bucket method. I created 2 pour boxes and 1 corner box put of OSB, to act as a funnel for the concrete. We poured in 600mm levels and vibrated the concrete. Moving the pour boxes along as we went. The first wagon had 7 cube so this would be over all the cills, once the cills were full, we capped them off and screwed some 4x1 in place. All working like a dream... When vibrating I noticed some of the ** clips holding the blocks together pinged off.. I went down to check levels etc, and noticed that one corner block on the SE corner, between a long window and large lounge window had moved😱. The t&g was holding but the was a 15mm gap. Ok panic starting now. We stopped pouring here and moved moved on but needed a solution. I'm not proud of this, but we used a haulage strap, through the window around and out through the door and back and ratcheted the section of wall together with some timber on the corners to prevent the strap digging into the ICF. Followed this up with some OSB and timber straps. Then the cheap electric vibrator we were using in to window voids gave up. Couldn't handle the stress of the day, my heart rate was in triple figure now. The hired in vibrator we were using from the top was still going strong, and I also had some cheap plate vibrators to hold against the walls which were doing enough. I went around all the corners and added more bracing, berating myself for not adding large strips of OSB on all the corners.why didn't I do that. If your reading this because your planning to use PolySteel then screw large sheets of OSB to the corners.. Ok, heart rate still in the hundreds, but the first truck was done, we were level, with the exception of the problem SE corner to about 1.4m. everything was holding and plumb. The moved corner will be ok, as long as it stays put. While waiting for the truck to go back and refill, around 90mins, I went manically around screwing more battens to the corners. The concrete was setting up on the SE so I was feeling a little better, but worried about filling up the corner With the excitement of the corner issue and my manic battening, I forgot to add the additional supports for the two large windows, these were left out so we could fill the lower part of the wall from the 360 bucket. We start the second lorry on the West wall, working out way to the SE problem, all working well, vibrating and filling as we go, shuffling the pour boxes around. Then the hired vibrator started smoking and gave up. Back to sticks and the flat plate vibrators for the last section. We skipped the SE corner and worked our way along the S and then W walls. With about 3m of wall to complete the digger shut down. Spanners out, more fuel, clean the filters, bleed the injectors, no go, dead. Ok. Fire up my old loader and get it as close as possible and shovel it in... No this wasn't happening, the steering piston decided to come off, an old fault that came back just at the right time. FFS anything else. Yes, those supports for the lintels I forgot.. Pete!! Those lintels are sagging argghhhhh. Acro props and some more tense moments we jack them back into place level and plumb. Ok back to the other fire. We were contemplating buckets when my neighbour brought his Manatu with a big bucket and managed with shovels for the last bit around 1/2 a cube. While the tops of the walls were being floated, and in anticipation for excess concrete we managed to fill some shuttering for a front path, and the start of the ramp to the rear door. This is the offcuts of ICF from the windows that will form the path and increase the levels at this corner hopefully softening the height in this corner. So it's done, it's up, my heart rate is now normal, and I think I dodged a bullet or two. But with DIY and house building you have to adapt to react to the events as they unfold. My list of favours I owe my neighbour has expanded. But we can sit here today and be proud of the product. the SE corner will need a little fettling to get square,but nothing to worry about. On wards and upwards. Day of rest today, just off the strim around the pods, guests due later.
-
My plan B was my old digger leading towards plan C ( buckets), if you read my blog, luckily plan D was a little better😂
-
They give us 45 Mins to unload and then £1 a minute. The guy driving the digger was the truck driver, who was rewarded with some cash, I had agreed this with the company The excitement with the second truck ended up with about 90 mins waiting time, the first truck about 40mins so all in not too bad.
- 39 replies
-
- 1
-
-
- the windy roost
- icf
- (and 2 more)
-
If you read my posts, In my location they wanted £2k for a pump. That's £2000 pound. Sorry I've baffled you, we can't all be superman @Dave Jones😍
- 39 replies
-
- 6
-
-
- the windy roost
- icf
- (and 2 more)
-
Digger was not a fuel issue, first thing we did, clean the filters, purge the air etc. It tried to fire but you could hear a solenoid clicking out immediately. Definitely a wire issue/ electrical. Plus the machine just stopped, no coughing etc, just like it was switched off. Not my problem for now. Day off, then clean up and strip the scaffold tomorrow.
- 39 replies
-
- 1
-

-
- the windy roost
- icf
- (and 2 more)
-
It's a 7T takeuchi? There's wires everywhere, it would fire sometimes but you could hear a solenoid kicking out almost immediately. They tracked a blown fuse, but there's still an issue.🤔
-
There's 28 cube of concrete in there now with footings, slab and walls so circa 60T I'm sure it'll be there tomorrow
- 39 replies
-
- 1
-

-
- the windy roost
- icf
- (and 2 more)
-
It's the neighbours, just stopped, thought it was fuel although the gauge was over half, but no, couple of lads came to look, seems like a wiring problem, but they couldn't fix it yet. Got it running but stopped again. Luckily the neighbour had the manatu as well, my owe him list is now massive. Just waiting to find out what the cost is🙈
-
@FM2015 I'm just about calming down. Breathe.. It's up, the walls are straight/ plumb, but the day had some issues. Used hoppers and a 360 until it broke🙈. I'll write up a blog, but we got 12.3cube in the walls, the 360 gave up with about a cube to go. Managed to finish with a manatu, buckets and shovels. Also managed to pour a foundation wall for the path with offcuts of the ICF. So beer time.
- 39 replies
-
- 7
-
-
- the windy roost
- icf
- (and 2 more)
-
Trench digging, found hollows? holes
Jenki replied to garden4ork's topic in Landscaping, Decking & Patios
It's close to the ground so I'd suspect backfill, but take care and dig some more, pull out the rock and see what your left with, if it's backfill and you get ground water it may well have washed away leaving the voids in the poorly compacted backfill. -
The only safe way to proceed is test and or replace, I couldn't sleep knowing that might come back in the future and cause problems. Feel your pain
-
With the great weather in the last two weeks, following on from the slab pour, we will endeavour to pour the walls of the house tomorrow. I'm thinking I won't sleep tonight. Mentally listing all the things I wanted to do, and re ticking them off. First 7 cube is arriving at 8.30. 🤞 I'll leave this picture with you....
- 39 replies
-
- 8
-
-
- the windy roost
- icf
- (and 2 more)
-
You could try a cold forming bend and then pressure test.
-
4K for 125SqM UFH 😯. 🛣️👨.
-
STUNNING VIEWS
-
Looks great, cant wait until I can afford a workshop. Is it vertical board on board cladding? are the roof tiles going to transition to the lean too as well?


