crispy_wafer
-
Posts
1194 -
Joined
-
Last visited
Everything posted by crispy_wafer
-
Installation cost
crispy_wafer replied to Mr Blobby's topic in Mechanical Ventilation with Heat Recovery (MVHR)
Did it myself, just saw it as one of the simple jobs that I could do without needing to pay someone. I also saw it that £1500 buys a lot of plasterboard, or half the tiles for my ground floor, or even the 9 days I spent in the Canaries over Christmas. -
Octopus Energy tariffs
crispy_wafer replied to Adsibob's topic in General Self Build & DIY Discussion
Electric only here, in the old bungalow. I switched over to Octopus Tracker 3 weeks ago, initially hesitant because of risk, but looking at the last years worth of tracker prices I decided to switch. Not running the heat pumps in the build yet, but if unit prices stay at approx 30% less then I'll take that. -
Discount Offers of the Week
crispy_wafer replied to Ferdinand's topic in General Self Build & DIY Discussion
Another bargain IT deal, if you see it as that... If you work in IT, or come across a trade supplier that will deal with you then, TP Link are running a promo, not for resale on selected lines of their Omada switches/AP's/Router/On prem Controller. A lot of the gear is 40% off and you can have 2 of each line. Probably isnt evolved as much as the ubiquiti gear, but then the product lines probably wont change as much either. I used my own trade reseller, but discovered by browsing on broadbandbuyer -
No experience of the windows, but make sure you grip the handles and check their operation and feel in the hand. I never really did, mine are crap and the majority of them have loads of play left to right and in and out. The windows weren’t necessarily cheap either!
-
Hi there, no I didn’t, I put it to the back of my mind and moved onto another job. When it comes to my pre plaster inspection I’ll find out then. I do think that a 10mm notch won’t cause too much sleep loss. This scenario must crop up regularly in bungalows I’d have thought, maybe the modern way is to have fat dabs and pack out the plasterboard from the wall.
-
Internal doorstep wooden flooring
crispy_wafer replied to Anonymous1's topic in Wood & Laminate Flooring
Get rid of door and frame, cut the concrete out, make surface good then clad the step down in same material as the flooring. Only worry would be, opening the door and falling down the step. You'd be ok as you'll know about it, but visitors might get caught out... -
opposing connections below need 200mm I believe, connections at 90 are not entirely in the no connection zone so I believe are permissible. I knew I'd seen it somewhere on my hunt for rules - here it is. Technical_Bulletin_7_2014_Cross_Flow.pdf I'd wait for others to comment though...
-
Maybe this'll work.

-
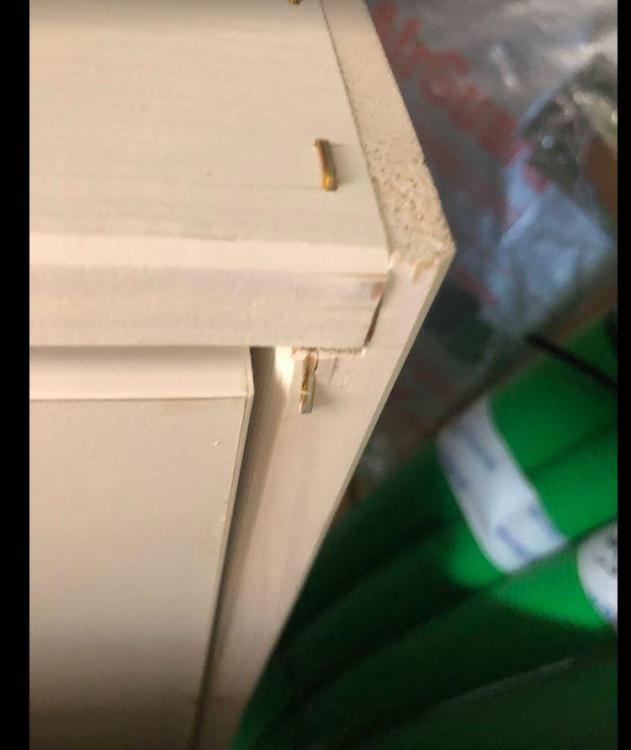
Morning all, I'm not really the complaining type, I generally just let things wash over me and take the approach that I'll sort it out. However, I'm starting to think I need to be a little forthright in some situations. Take this loft hatch casing as an example, picture attached below. Should I complain or not? Part of me thinks, nah, leave it be, not worth the effort. But the other part suggests I paid decent money for it and as this is going into my shiny new home that I'm putting blood sweat, swear words and tear into, and anything visual like this might just bug me till I'm pushing up dandelions. During assembly they have fired a staple through the casing, it either gone in skewed or hit a knot and deflected out the bottom, I don't think the trim will cover it? What say you
-
Bricks or dense block at this point?
crispy_wafer replied to Post and beam's topic in Bricklaying, Blockwork & Mortar
we had a combo, blocks where the ground level was going to be built up, and blues where visible below dpc. -
A question for the tile aficionado's
crispy_wafer replied to crispy_wafer's topic in Floor Tiles & Tiling
is it worth say narrowing the choice down to rectified tiles only, or would this be counterproductive? Pricewise I'm happy up to 30-35 per m2, Obviously I'd love a bargain too. I'm not too arsed about posh branding or glitzy showrooms either. -
A question for the tile aficionado's
crispy_wafer replied to crispy_wafer's topic in Floor Tiles & Tiling
That's where she saw them! -
A question for the tile aficionado's
crispy_wafer replied to crispy_wafer's topic in Floor Tiles & Tiling
very good point. I'll keep that in mind -
A question for the tile aficionado's
crispy_wafer replied to crispy_wafer's topic in Floor Tiles & Tiling
Very nice. -
Sent the Missus down to a local Independents tile warehouse on Saturday morning with one aim... Find a tile that we can cover the whole groundfloor with. 'Must be Italian or Spanish cos that's what @nod from the internet says' I said. Have a few colours in it to makes complimenting, or contrasting a little easier. Anyhow, she's found these wood effect tiles from Keratile (alen forest), I wasn't really thinking of wood effect, but I can live with them. The independent offered them at 28inc VAT per m2 straight away, so there must be deal to be had. First offer isn't always the best is it? Is Keratile a decent'ish manufacturer of tiles, or will these bend like banana's and cause the pro a nightmare. Should I look to a different brand, now I can see what she likes, if so any recommendations? I have that Roccia place bookmarked. Ta Marek

-
Personally, I'd dry fit, flush and see, only because I've heard that rimless loo's have a tendency to splash/spray a bit, but individual mileage may vary. I don't think it hurts to do a test fit and trial.
-
Needing a 75mm coupler
crispy_wafer replied to phatboy's topic in Mechanical Ventilation with Heat Recovery (MVHR)
i'm done with them now, so just cover the shipping. DM your details over and i'll pinch a small box on Monday and get them over to you. let me know if you have a preferred courier. -
Needing a 75mm coupler
crispy_wafer replied to phatboy's topic in Mechanical Ventilation with Heat Recovery (MVHR)
I've think I've got some of these left, will you need rubber sealing rings? Will have a rummage through the box later and come back. Connector for 75mm Blaufast MVHR Semi Rigid Radial Ducting System for Heat Recovery Ventilation (blauberg.co.uk) -
recessed skirting? I'm looking at profiles/trims right now as I'm doing research for my place
-
would a bifold door work?
-
have you checked it with a square? I know I would do after spending that kind of loot. It does look good though!
-
bloody hell, you are good 🤣. I do see what you mean though, now you have mentioned it. ... and that's another reason why I'd need someone competent by my side!
-
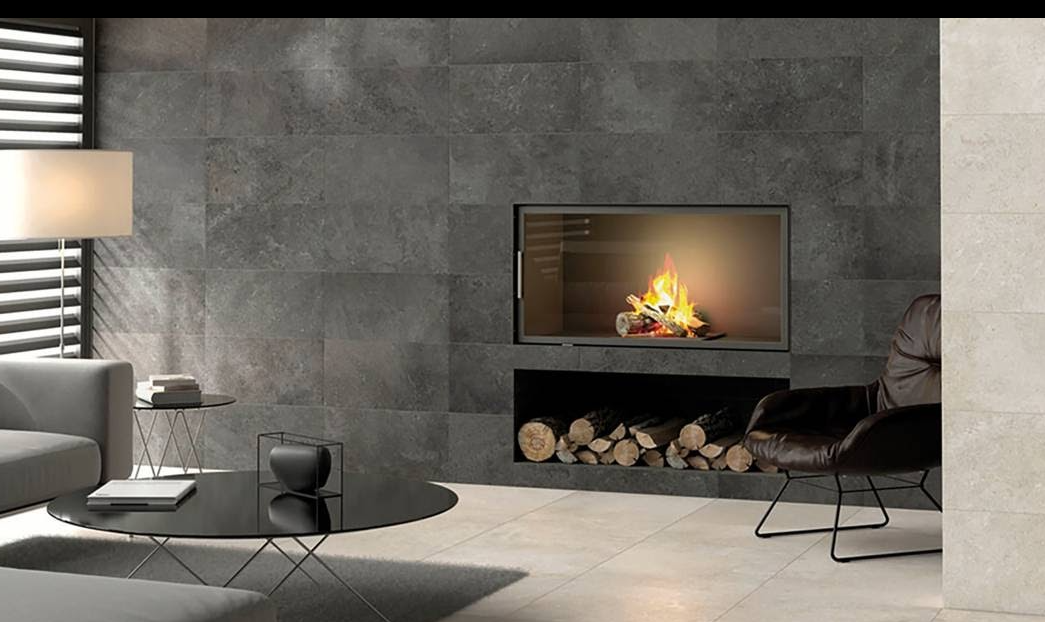
Saw this picture whist browsing tiles yesterday and loved the idea, so much so, that I'm going to attempt to get a look similar. We already have the inset ready to be installed, but I was undecided on the wall finish till now. I haven't done any homework yet, on how to achieve this, the subject wall at the moment is just plain blockwork. I may just pay someone to do this as me and tile adhesive are a real messy combination, but I'd like to be forearmed with info first so I can understand what's taking place. Will I need to prep the wall first, and should I expect the tiler to use a special type of adhesive to deal with the potential heat from the inset? What sort of costs should I be expecting on a 5*2.4m wall?

-
looking good, well done sir!
-
Shower tray - subfloor prep
crispy_wafer replied to crispy_wafer's topic in Bathrooms, Ensuites & Wetrooms
Spot on, Thankyou.