crispy_wafer
-
Posts
1194 -
Joined
-
Last visited
Everything posted by crispy_wafer
-
2.50 will get some half decent branded faceplates and you'll get price breaks too.
-
Our spark recommends Schneider, as above suspect the tradies stick to brands that cause them less grief and returns.
-
Electric towel warmers, how to control?
crispy_wafer replied to crispy_wafer's topic in Electrics - Other
I picked up some heatmiser/grant stuff for the ASHP. Be nice if there was something similar but for electrics... So start with a time clock for multiple zones, into a control centre that fires an on or off signal to switch the electric to the device on or off... How all that works in practical terms, and even if possible - no idea. Surely, this has been done before, or is this a strict one radiator one control type of scenario - which means multiple faceplates. -
Please could someone point me in the right direction. Upstairs bathroom and En suite will both have electric towel rails, and possibly yet to be decided UFH heating mats. I'm thinking about time scheduling on/off's and manual override for set time periods (15/30/60 etc minutes) with a single interface control. Apologies, this is all new to me, our old bungalow has none of this stuff in it, so what kind of products/manufacturers should I be looking at. Not bothered about app control or cloud, but if Google or Alexa is part of the feature set then it's not a problem! Many Thanks Marek
-
Think I'd try one of those rubber clay to plastic adapters and tighten up to see if it will deform to the oval shape. Might work, might not!
-
So, if not plasterboard then wires might be routed in capping which could give a narrow path for airflow.
-
Presuming those walls are dabbed plasterboard?
-
Thanks for simplifying it for me, that'll work a treat, honestly doing that didn't even cross my mind.
-
I was trying to get out of paying twice, but that advice (spelt correctly this time!) is sensible and logical. Floor to floor is 2750, so Howdens are out. quarter turn at the bottom is required to comply with regs and not to foul a doorway. Maybe just maybe a loft staircase might do the trick, or even a non compliant set will help. I'll hit TK and stairbox and see what the damage will be! Thanks Marek
-
I'm getting cheesed off clambering up and down ladders. The progress of the build is slow and we are no where near finished, Boarding and skimming is a little way off yet. I've got a staircase layout made up, so happy on that side of things, what I'm not sure about is materials and how to plan... We had this vision (like many) of a nice hardwood staircase, glass, or wrought iron look balustrading, but I don't think putting a HW staircase in now would be the best decision I ever made... It would get dinged and bashed up regardless of how careful we tried to be. Is it feasible to get the staircase in MDF then clad it later? A lot of places sell the staircase cladding kits, the risers and treads seem relatively easy to do, we might even end up carpeting, no plans been made that far ahead. What about the stringers, they'll be on show, can these be clad effectively, or is it worthwhile to get these in hardwood and just tape copious amounts of cardboard and bubble wrap to cover it. Can I just get the staircase in without the balustrading and add this as 2nd fix item later, would be useful if I could as I can lug awkward items upstairs. Ta Marek
-
The opposite and downside to purchasing, I hire and have to save up my jobs and try to tackle them in one hit. over the last year and a bit, I get a machine in probably once a quarter for a week, take time off work and then blast through (Drainage, Trenching, clearing out the drains...). Often at the mercy of weather and having to have materials on site. If I had one full time, I'd be able to tackle the odd job over a summers evening or a Sunday saving me time. Saving grace, a dropped track or a burst hose is their responsibility and I get a day back as a sorry for next hire time. And I can choose the right excavator for the task, I've had micro's up to 5t sized machines now. I'd love one tbh, but just cannot justify having the cash tied up. I do have an old kubota mini tractor and a 2t dumper though.
-
Where did you buy sinks, toilets etc?
crispy_wafer replied to CalvinHobbes's topic in General Plumbing
Currently doing the same, manomano keep coming up, but generally the products are shipped from abroad so depends on your appetite for risk(damage, and dealing with) - I've puchased things like mounting frames from them, James hargreaves clearance..., heatandplumb . com, ebay, welove . co.uk, even wickes have vitra or villeroy boch in stock. -
Best model acoustic insulation for studs and joists?
crispy_wafer replied to ashthekid's topic in Sound Insulation
Just going through this right now... Without ringing the builders merchant the best price I've found online so far on 60mm rwa45 is 30.73 per pack delivered. But this is what we SB'ers do... trying to do the best we can without prior experiences to call upon. and are afraid of the sucking through teeth trades when they come on site, and the 'you dont want to do it like that, you should have done it like this'... Was the 70mm stuff, acoustic roll stuff? As that's quite a bit cheaper for coverage than slabs -
Managed to collar a plumber who popped into work today, he say 1200mm, so I'll run with that. If the BI thinks differently then I'll adjust down as necessary I've got a of bit extra on the HEP.
-
Perfect!
-
Morning All, Is there a standard -ish height or rule of thumb for heights... for things like Shower controls over a shower tray height for pipes where they exits the wall under a basin, and likewise a bathtub Thanks Marek
-
@Thorfun Morning pal, I've had a sleepless night trying to figure a solution to this conundrum! I came up with the conclusion that there is a solution but they all require more joints 😕! This is from a discussion on one of @MortarThePoint posts where the question was asked what the best way to bring hep out of the wall. May help. It may be easier to use a shower fitting even for a basin etc: https://www.ebay.co.uk/itm/322273391778 And a couple of hep2o adapters: https://www.screwfix.com/p/hep2o-plastic-push-fit-adapting-male-coupler-15mm-x-1-2-/5970f As that gives you more meat to screw to the wall. At the expense of more joints.
-
Ceiling Speakers Recommendations
crispy_wafer replied to richo106's topic in Networks, AV, Security & Automation
I've got a couple of these as they seemed to fit what I wanted to do. Still in the box as I've got bigger battles to fight at the moment. Pro Series Ceiling Speakers - Lithe Audio LTD -
I'll post up my own plea for help in the lighting section, but I am getting to the point where I need someone to just design out the interior for me and say there go 'make it like that' at the moment all I can see is blockwork and timber and cant get see the finished version.
-
me too! You've got me going off on a tangent thinking about plumbing 🤣, when I need to be trying to design a lighting plan for my kitchen and dining open plan room.
-
@Thorfun have you bulk purchased any plumbing fittings (is it worth it for a one off domestic with 2/3 bathrooms, kitchen and utility?) vs just utilising Screwfix/Toolstation Wickes B&Q etc as and when.
-
Pretty sure they used to do a brass version, as I was looking the other week. I'm not sure I have too much confidence in anything that has plastic threads. As much as we don't want too many hidden connections I think I'll do the same and convert to copper.

-
What connectors did you use to connect the hep to the ibox?
-
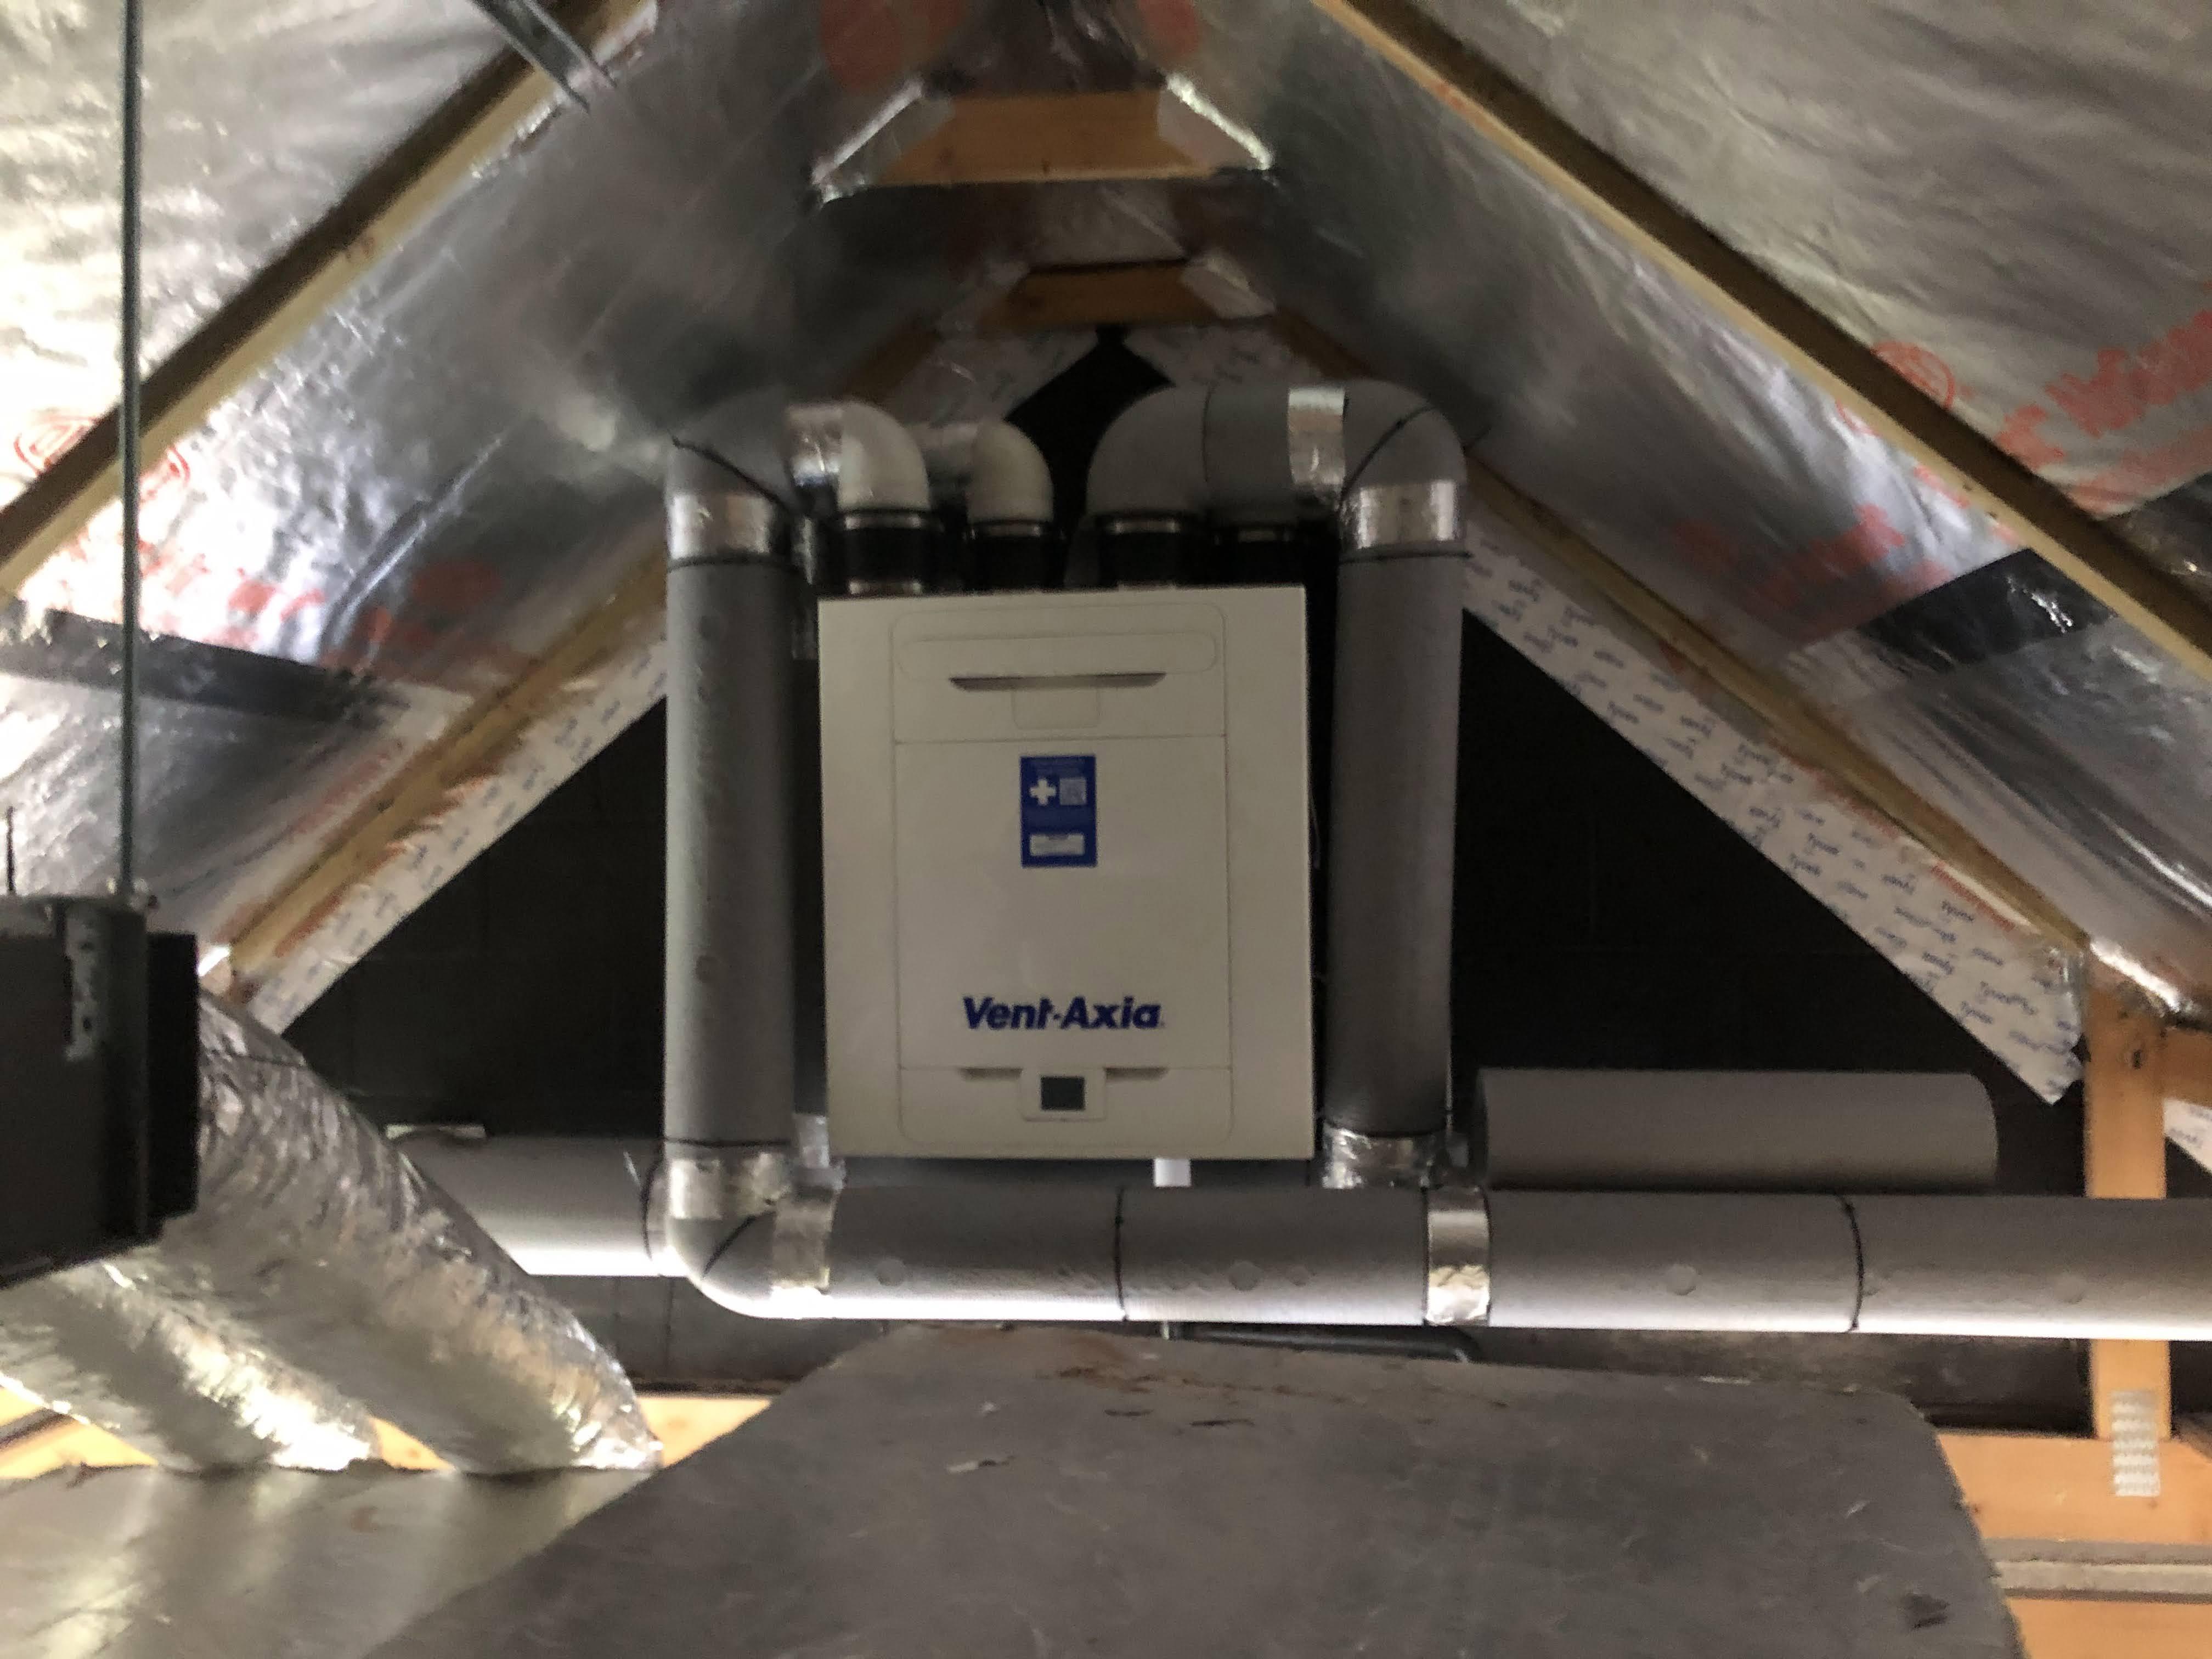
MVHR -> Distribution Box Install
crispy_wafer replied to jayc89's topic in Mechanical Ventilation with Heat Recovery (MVHR)
Those attenuators are 600's, used 90's as that's what I could get at the time of install, if I could get a nice sweeping bends then I'd probably spend a morning and reconfigure it tbh, it's not commissioned yet so cant really answer if those have caused too much pressure drop at the normal running setting. -
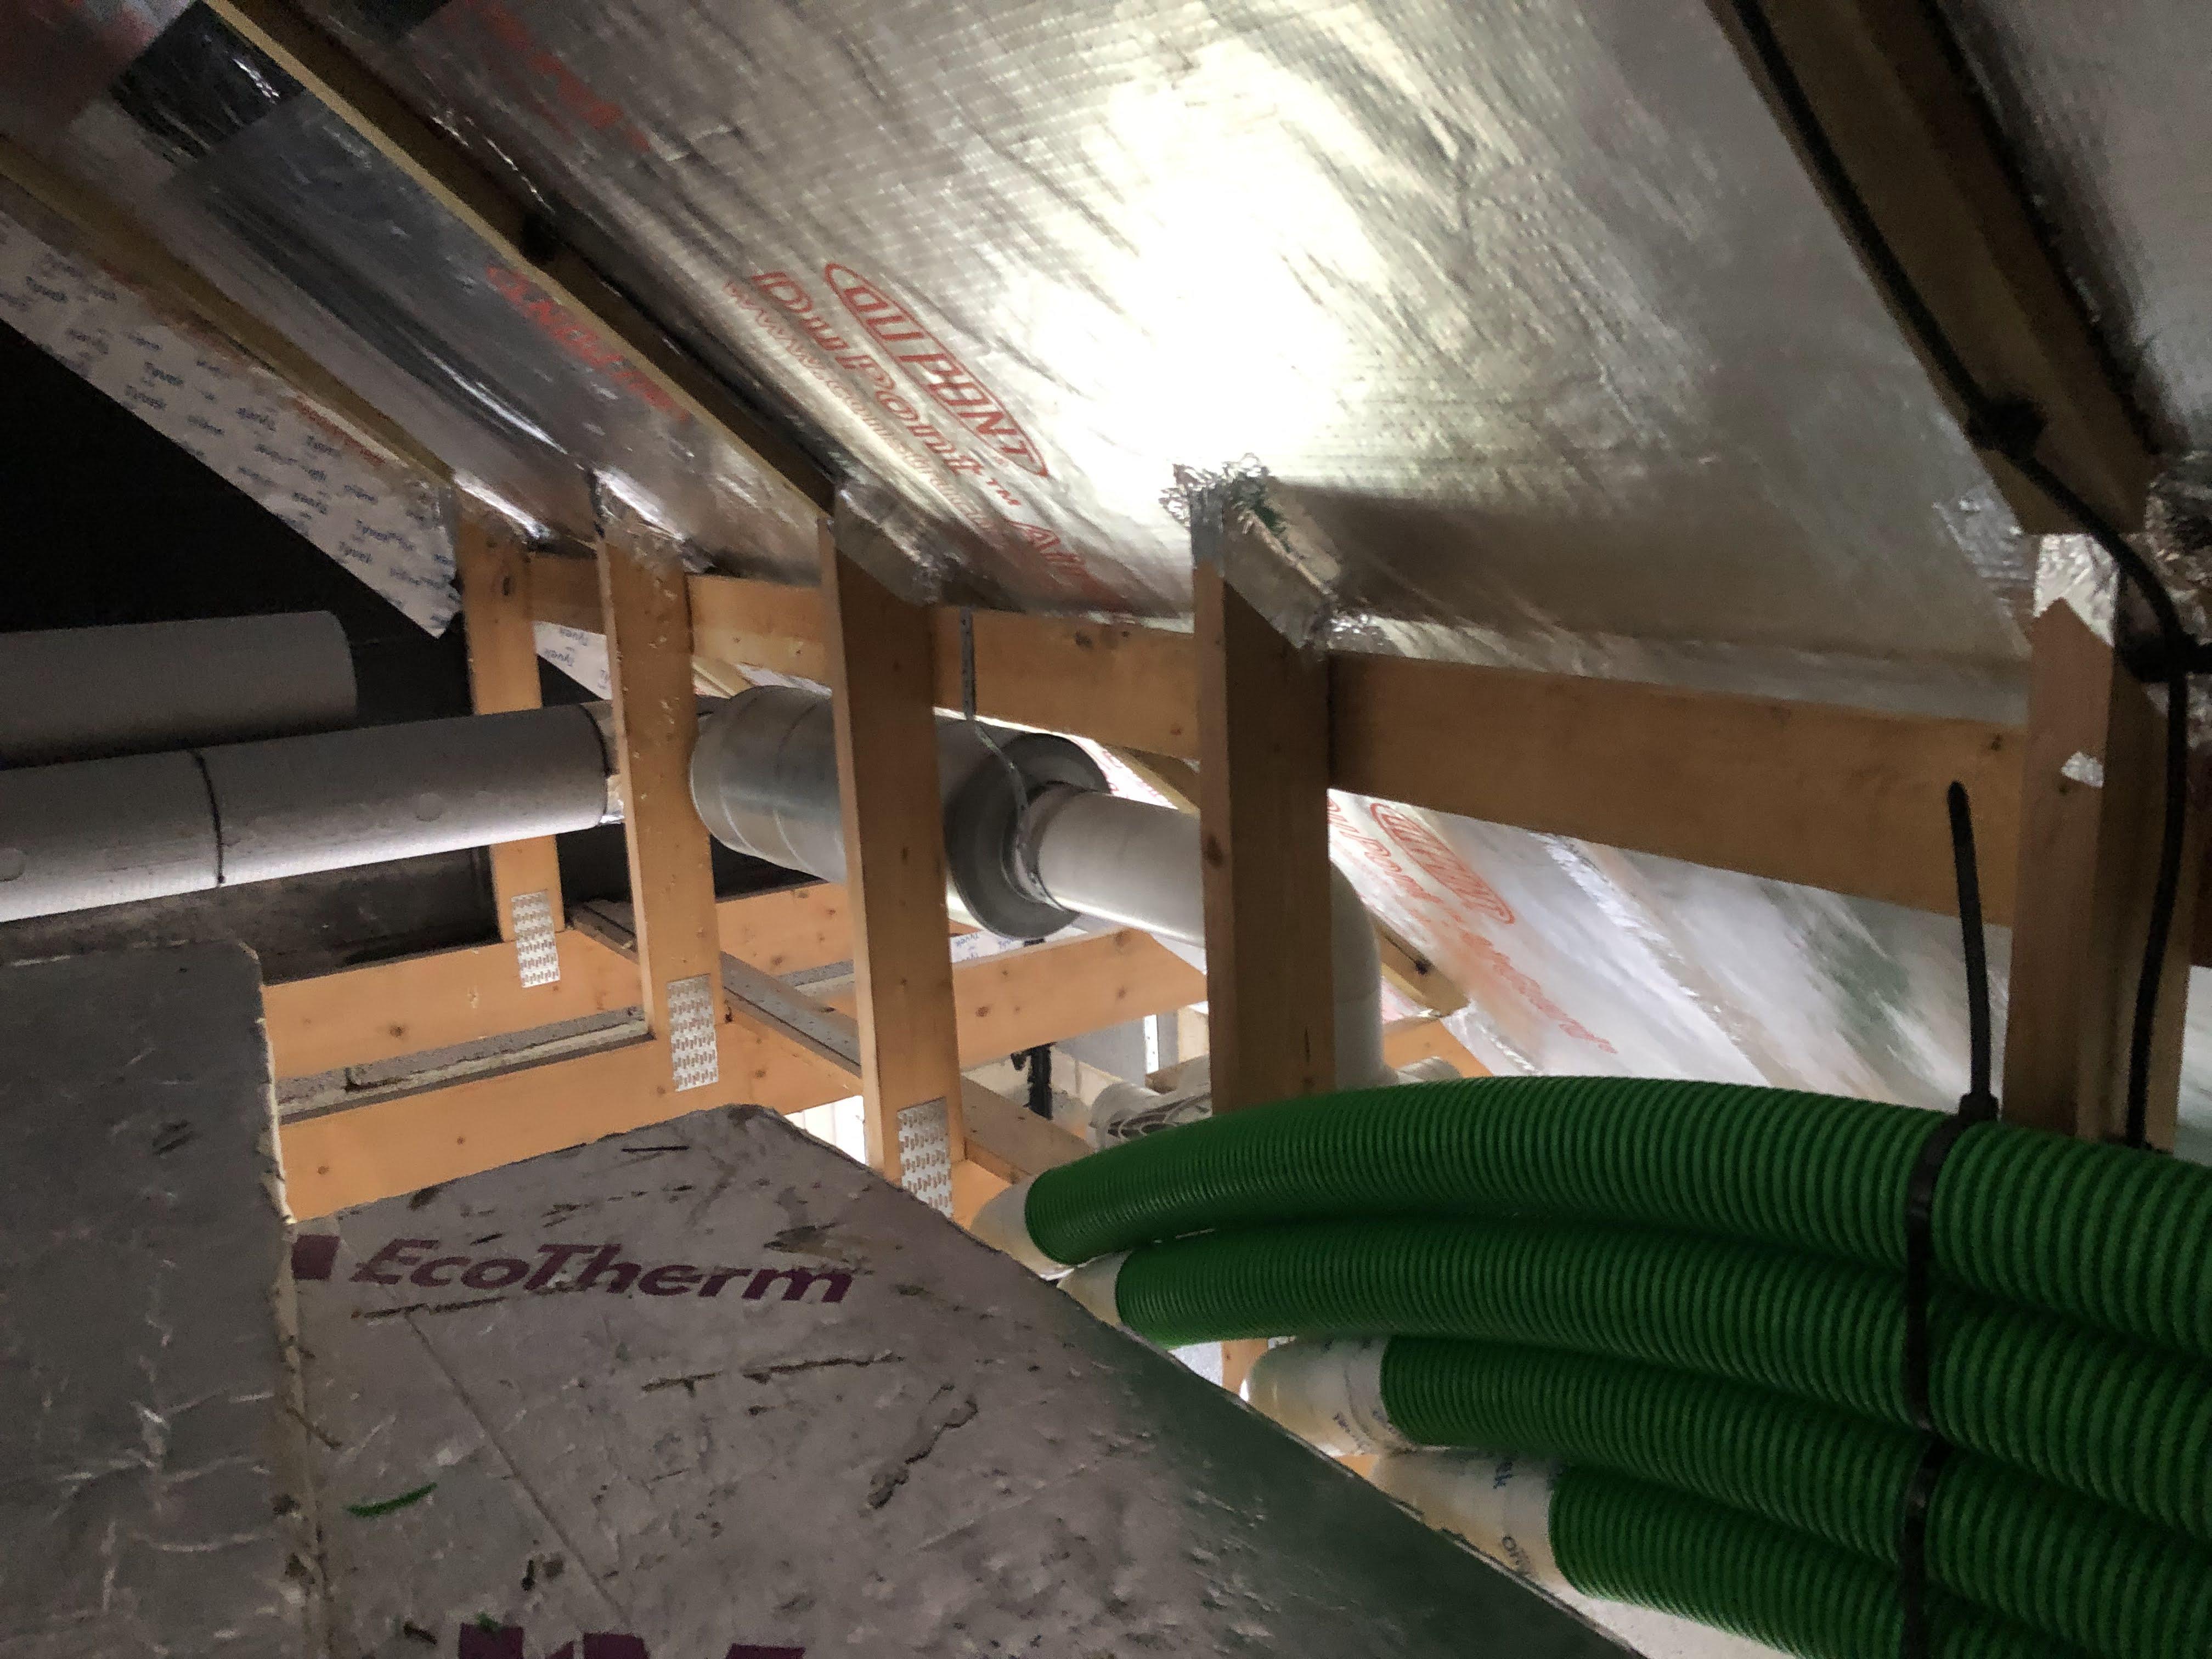
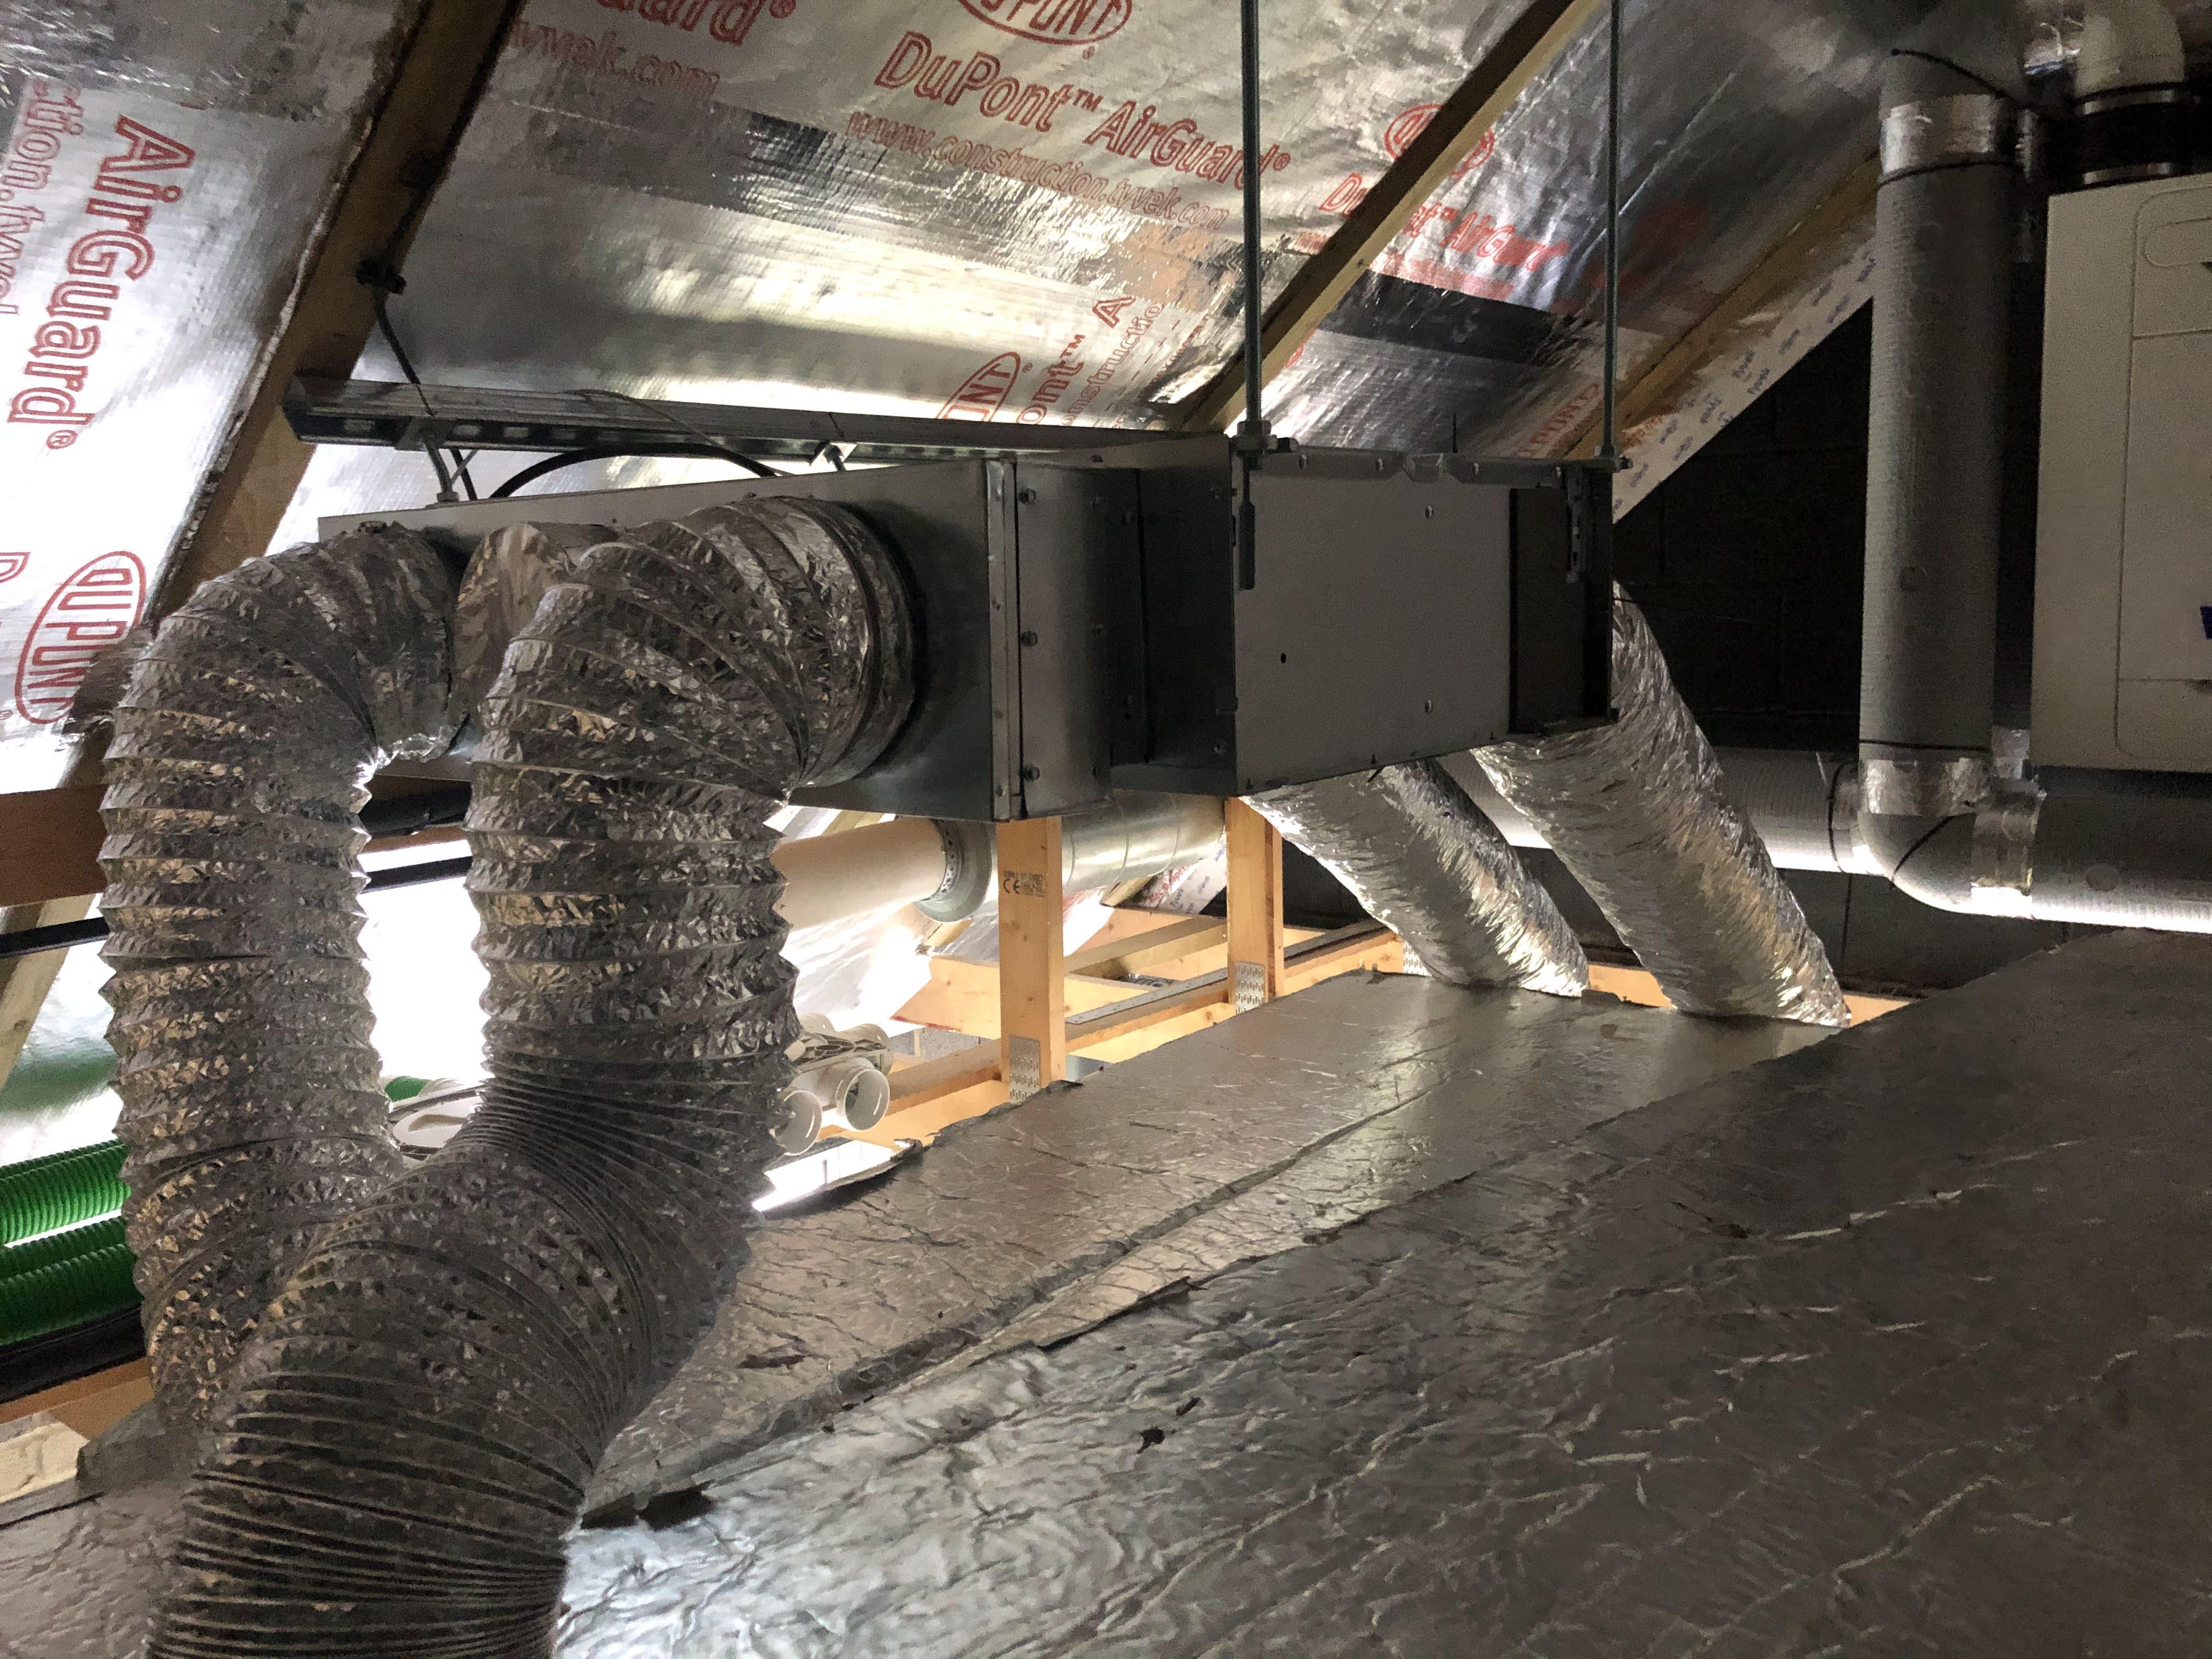
MVHR -> Distribution Box Install
crispy_wafer replied to jayc89's topic in Mechanical Ventilation with Heat Recovery (MVHR)
This might be of use. I used plastic pipe for what it's worth. Plenums mounted to either side of the attic out the way! Strap banding used to hold/support the attenuators, last photo you'll have to look past the AC unit!