crispy_wafer
-
Posts
1194 -
Joined
-
Last visited
Everything posted by crispy_wafer
-
MF ceiling edge support and wiring
crispy_wafer replied to crispy_wafer's topic in Plastering & Rendering
@nod pretty please! Looking at a single layer of 15mm acoustic boards followed by skim, is 1200*1200 hangers/mf7 ok, or should i decrease the spacing. I’ll be fixing the boards @ 400’s as per.
-
Comes down to time, will, inclination and money. Paid to have foundations and built to watertight Paid to have windows and external doors installed. Paid to have Ducted Aircon installed, solar panels aswell. First fix insulating, joinery, metal framing, plumbing, electrics, Mvhr done myself, but it has taken a long time whilst I procrastinate over the best way to proceed and save up enough to pay for materials out of salary. Will install/commission the ASHP myself. Going to order the first batch of plasterboards tomorrow, then shift them inside ready to start fixing to the mf ceilings. D&D plaster boarding and Skimming, someone else can do that, scares me that I wont get the plasterboarding right plumb and flat Tiling the ground floor, again someone else can do that. Reckon I'll do everything else apart from the kitchen worktops tbh It's just a big 3d jigsaw really, just the parts and skills are a bit of an unknown!
-
Simple question I hope, What's the preferred onsite methods for cable drops when using mf ceiling? Cut the mf6 short and leave a gap?, Cut the top/bottom and just fold out the way? I can't really chase behind as the timber wall plate is just above the mf6. Then protect the cable in conduit as it passes over/between the metal, protect from the sharp edges?
-
ASHP/UFH install issues and questions
crispy_wafer replied to markharro's topic in Air Source Heat Pumps (ASHP)
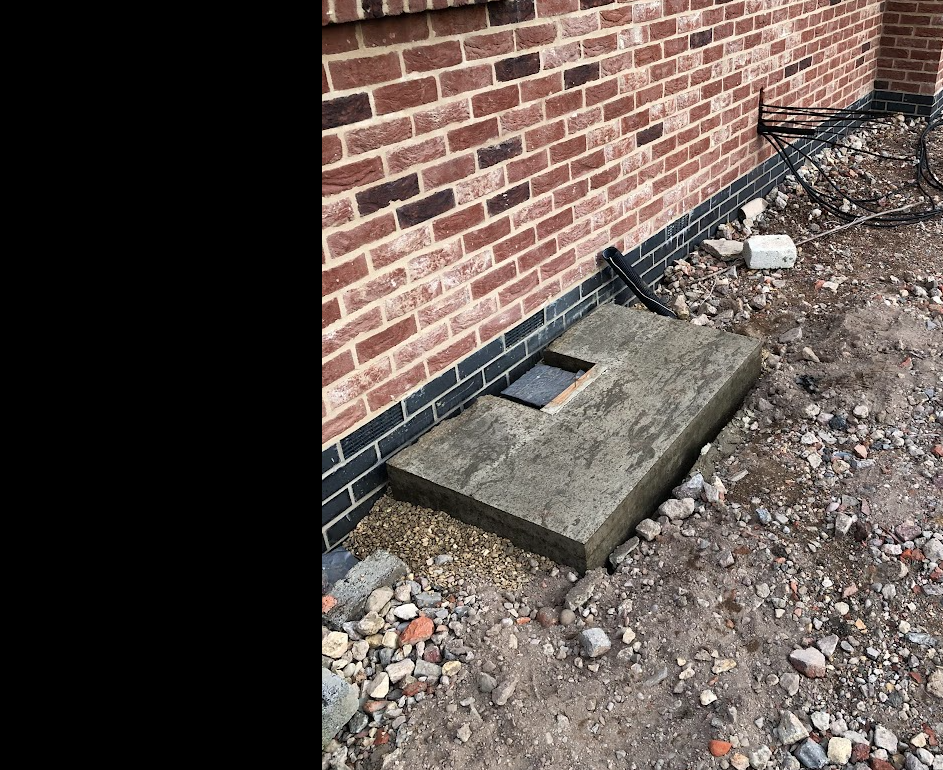
When I put the drains in I ran a bit of 110 to the back of the concrete slab.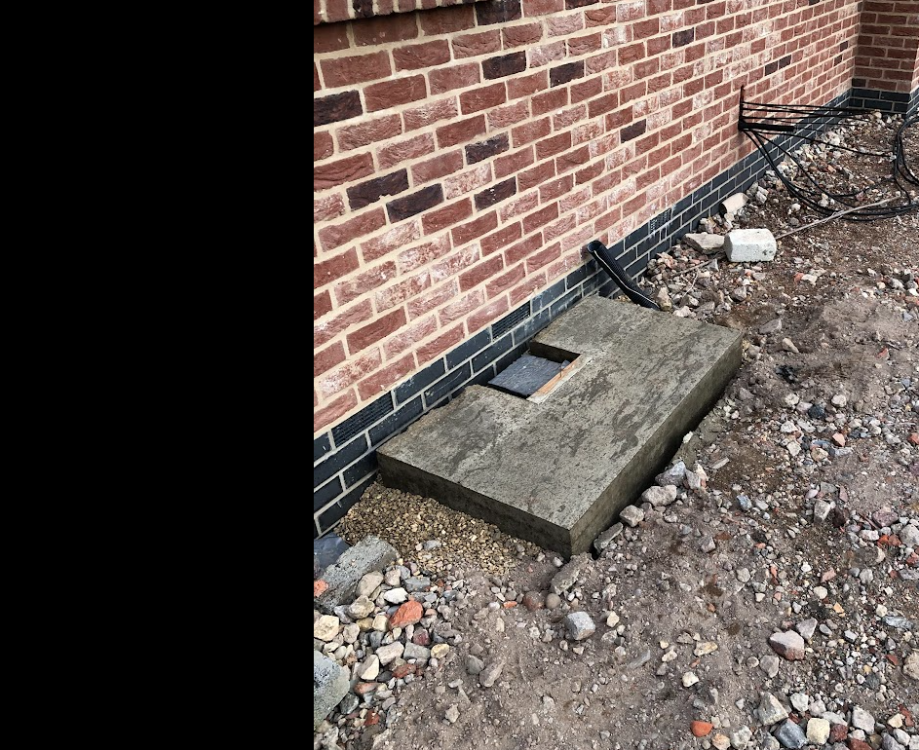
-
Question to those with oak. Is it noisy, I mean when walking up/down it? A local manufacturer to me warned me off as it could be a bit boomy. Suggested oak for everything else but the treads? - Just curious as I've not committed either way yet.
-
ASHP/UFH install issues and questions
crispy_wafer replied to markharro's topic in Air Source Heat Pumps (ASHP)
For what it’s worth my pipework follows a similar path to yours in that it runs behind then along the wall. I used this stuff on what I’ve done so far (Still WIP) https://www.bes.co.uk/pre-slit-pipe-insulation-22mm-dia-x-2m-long-25283/ the sticky in the slit is a bit crap, so I painted contact adhesive along it. It’s not coming apart any time soon. my corners are a bit on the ropey side but I had a roll of uv pipe wrap tape, to cover my sins.
-
Erm, well, I'd planned on using Jackoboard on the walls and it will be their stuff to seal joins, so the walls wont be tanked as such. It's a kudos stone resin tray. Quite honestly though, hadn't thought of tanking under the tray considering there's a whopping great hole for the waste to drop through.
-
Discount Offers of the Week
crispy_wafer replied to Ferdinand's topic in General Self Build & DIY Discussion
CTD are running 20% off jackoboard at the moment with code SALE20 edit: 20% off loads of different stuff, if prices stack up fill yer boots.... Jackon Tile Backer & Insulation Board 2400x600x12mm | CTD Trade hope this helps someone. Marek -
Morning all, Quick question about when would be the best point to install a shower tray. The walls have not been lined yet so are bare studs. Should I install the tray tight to the studs and then drop the lining (backer board) to the top of the tray, or would I be better backer boarding the walls first then fitting the tray. Ta Marek
-
👏👏 awesome stuff, well done.
-
Shower tray - subfloor prep
crispy_wafer replied to crispy_wafer's topic in Bathrooms, Ensuites & Wetrooms
Quick question bathroom has no wall coverings and studs are bare, should I install the shower tray at this point or install the tile backer boards to floor then drop/slide in the shower tray? -
Sure, Andrew’s and Arnold or A&A, their tariffs aren’t necessarily for everyone but as we don’t use the landline much apart from old family members who would ring us once in a blue moon the cheap no frills tariff works for us. Other providers offer more features, just depends on what requirements you have. For a phone I picked up a yealink device from eBay.
-
Same experience here with Starlink, son spends his spare time playing Fortnite and Fifa, no problems with 'lagging' as he so eloquently puts it. Latency is often between 25-40ms here in Lincs. TBH I like it, I've already moved my legacy landline No. to a voip provider. Openreach can come and get their crappy copper wire and FRO.
-
I'm going to be using either vitcas cs construction boards, or skamotec 225 boards bonded and mechanically fixed to the wall before applying the necessary adhesive before tiling round my inset. Cant really say much more because I'm not at that point, but that was the plan I had in my head.
-
If you are unsure go to vitcas and see any products that might suit.
-
Cant answer your question, but thanks for the picture, I was looking at doing something similar with trunking, this helps massively with visualisation. 👍
-
I laid out a length onto the concrete floor, then went up and down the length with a blowtorch, just so the sheen on the tape changed, then picked it up using the backing tape and then wacked it onto whatever I was sticking (dpm to dpm, or wall to dpm) then pressed it into place and used an old wallpaper roller to flatten it out, leave the backing tape on until you want to stick to it.
-
Cardboard shims/furring strips for studwork
crispy_wafer replied to markharro's topic in General Joinery
I used plastic shims from screwfix to straighten a slightly out stud very recently, horseshoe shaped come in various thicknesses (1/3/5/10mm). Painted contact adhesive onto the stud and just stuck the shims in place. Previously I've cut studs on the bowed in side halfway down, give it a shove to straighten and open the cut then place a timber wedge into the cut. A few bags of packers are useful to have around, especially for getting ceiling battening level. -
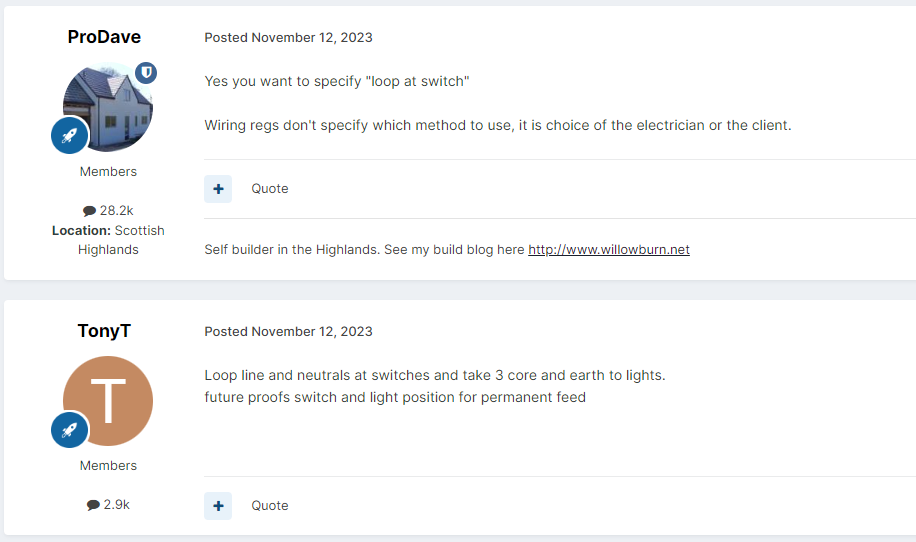
This is possible with our plan, especially in some rooms where we have a mix of brighter lighting and softwer lighting, so what you are saying is, it would be either a double switch with 2 * t+e cables or a double switch with a single 3 core+e cable out to the fittings?
-
top advice, currently ours is in an out building but that has to be demolished on first occupation so, yes, this is something we are going to have to get aligned to.
-
Slight hijack, I've bought Various Aico mains wired kit for the kitchen (heat), upper hallway, down hallway (smoke) and lounge(multi). Think I would like something in my utility room with plant room attached, tumble drier/washing machine, solar gadgetry... Any recommendations please?
-
As my nice spark is busy on other commitments he's given me permission to run up cables for switches and lights. I've done most of the easy 'loop at' switches now and now my attention is turning to running cable up to the pendant or downlight. I asked him what cable I should use he say t+e is fine. but I read this where @TonyT mentions running 3 core + e to lights? What's a good reason for this? What would I be loosing by just using t+e? ta.
-
success, looks like it can. Just need a switch or two.
-
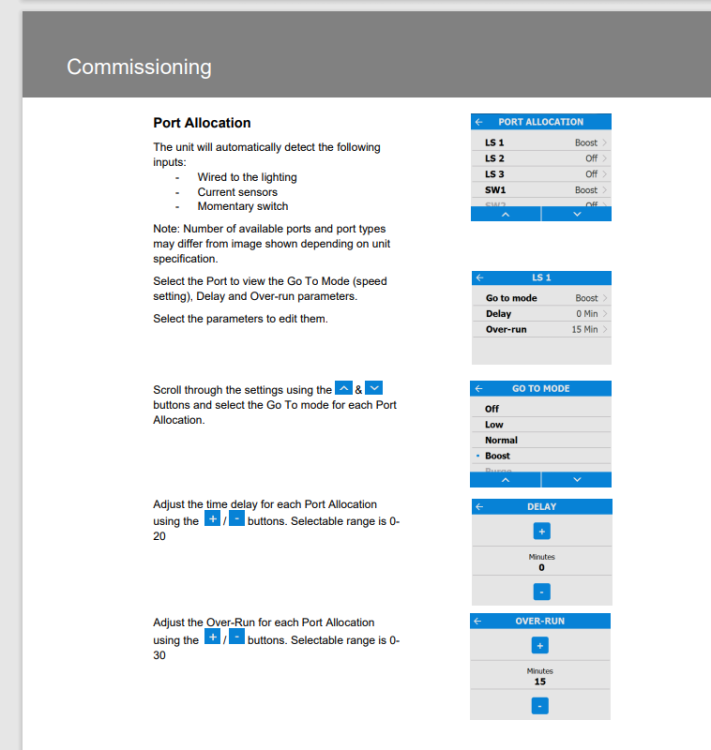
I think I could quite easily live with having a setup like that, let the unit decide what it wants to do most the time, but have a couple of switches that boost for a period of time. Just picking through the commissioning guide now to see if I can set a timer on the volt free.
-
Yes, that's a downside that Mrs and I discussed, especially when its a night time visit!