


Gone West
-
Posts
4668 -
Joined
-
Last visited
-
Days Won
20
Everything posted by Gone West
-

MVHR visible ducting
Gone West replied to graeme m's topic in Mechanical Ventilation with Heat Recovery (MVHR)
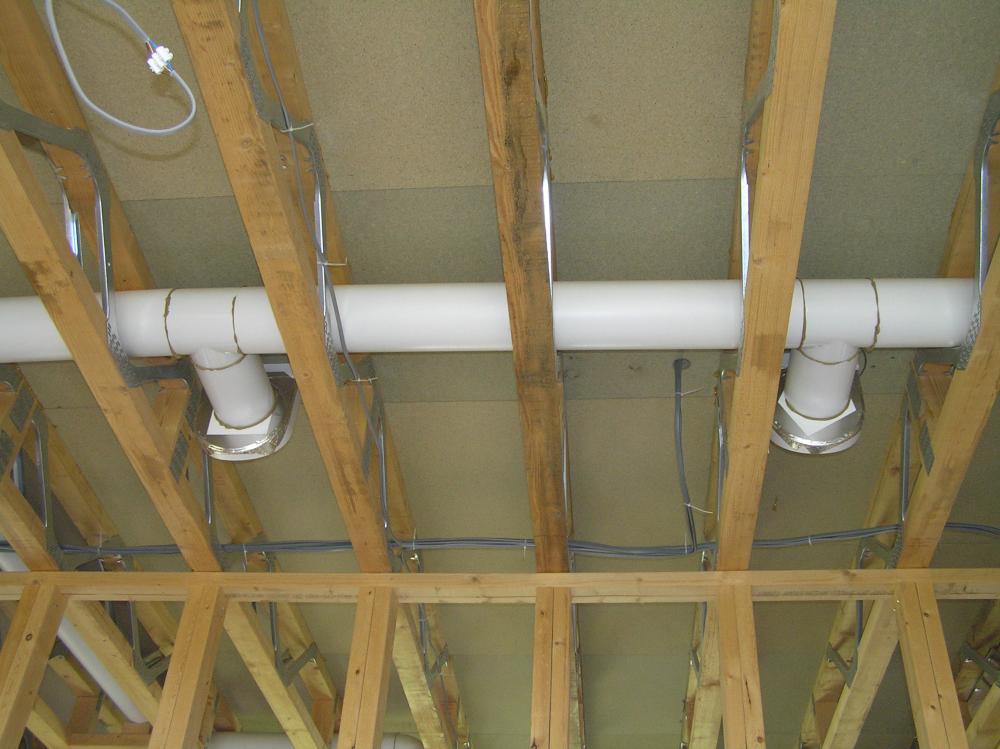
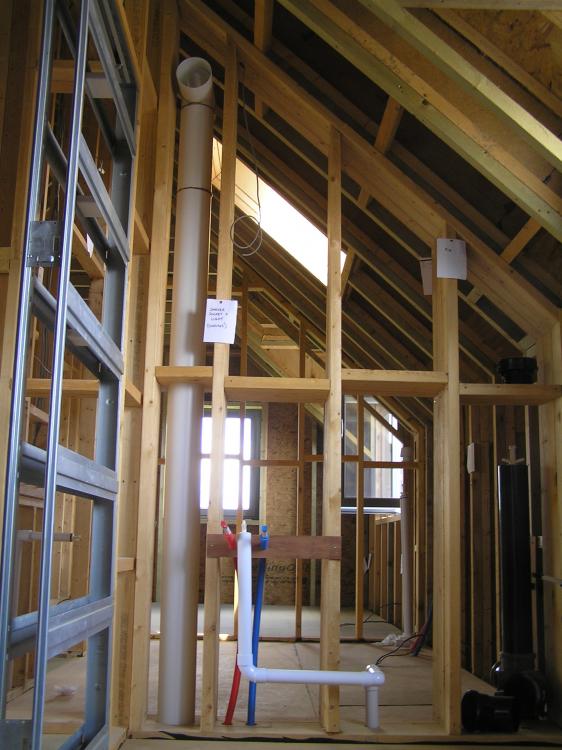
We also have vaulted ceilings upstairs and had room inlets at around 500mm above the floor. We used 204mm x 60mm ducting for that short length. The extracts in the bathrooms were through an extra wide internal wall between the ensuite and bathroom where we used 125mm round ducting.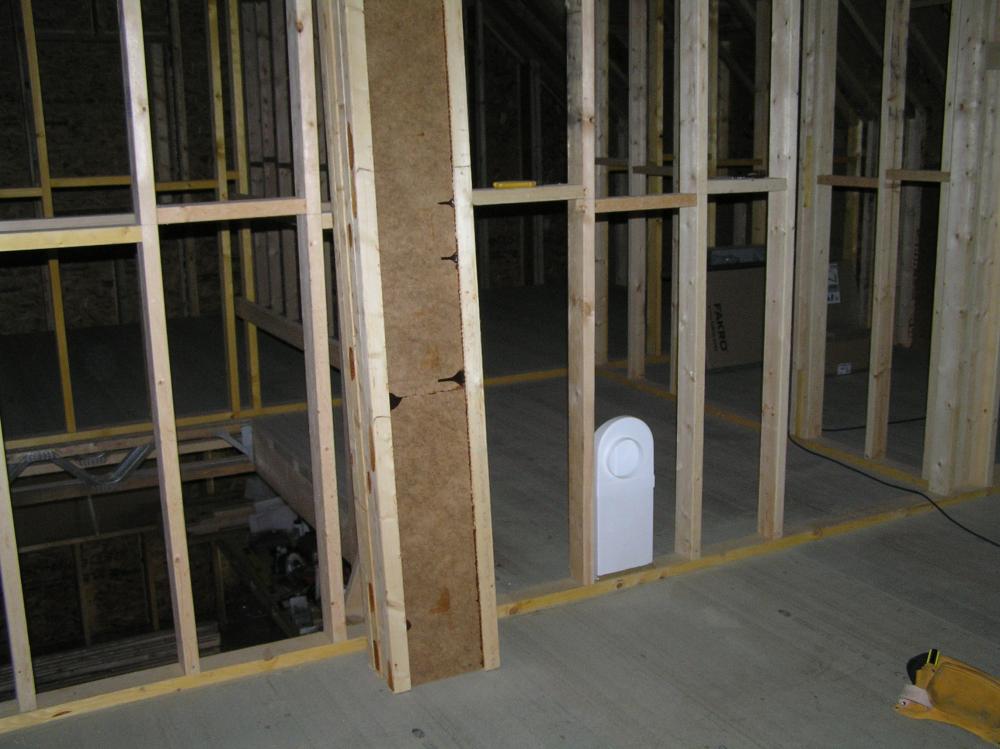
-
remote location with need for internet access
Gone West replied to joe90's topic in Electrics - Other
We have 1.5Mbps on our landline and 17Mbps on our WiMax connection. -
I have metal web joists in a timber frame and they are untreated. BCO wanted timber outside of the external racking treated but anything else could be untreated.
-
Help! Floor being poured tomorrow. Lots of air in UFH loops
Gone West replied to oranjeboom's topic in Underfloor Heating
That's looks odd to me. I've never had concrete I can gouge with a tape measure after a week of hardening. Get him back asap and see what he thinks. -
This is not an easy post to write.....
Gone West replied to ToughButterCup's topic in General Self Build & DIY Discussion
Don't give up Ian. You are certainly capable of doing the work yourself. It will take a bit longer, but just pace yourself. What's the rush, there's always tomorrow.- 62 replies
-
- 1
-

-
- planning
- project management
- (and 1 more)
-
@RichS I can't find the spec. at the moment but 5mm max. sounds about right.
-
Under my PH slab I have 250mm type 1 compacted and on top of that 50mm granite fines then the insulation. What you need must surely depend on the ground conditions.
-
Help! Floor being poured tomorrow. Lots of air in UFH loops
Gone West replied to oranjeboom's topic in Underfloor Heating
Definitely sooner if you're confident he can do a good job with the latex. Unless you're lucky they have a habit of forgetting they said it or not answering their phone. You can always put down floor protectors until you lay the bamboo. -
Bit of an aside, but that's very interesting. We're plagued with moles at times and if I knew what the frequency of the vibrations was perhaps I could build a better trap.
-
pro's & cons of different ICF systems
Gone West replied to mvincentd's topic in Insulated Concrete Formwork (ICF)
That's interesting because I used a small amount of Recticel in my build and that had a reasonably thick aluminium layer. I even went to the bother of sealing all the cut edges with aluminium tape because I thought there was potential for the Pentane or whatever gas it was to leak out. This was several years ago and things may now have changed. -
We were very lucky because of the Planning Committee, who here, are a mix of ages and genders. The Planning Inspectorate refused our second application so we submitted our third application taking onto account all the comments the Planning Inspector had made and it was refused again by the Planning Officer. I then took it to the Planning Committee who passed it unanimously. No one had voiced any objections at any stage except the Planning Dept. and it had support from the Parish Council.
-
Okay, cross posted with Jeremy. So forget about replaceable membranes and nitrogen fill and any air in the vessel will dissolve back into the water. Thanks for your help.
-
I can understand that it's a waste of money in ordinary car tyres but I'm not sure about expansion vessels.
-
Hi and welcome. We've built to PH standards without certification and you won't be sorry you did when the heating bills come in. I hope you've seen Ian's build story @recoveringacademic with regard to Durisol.
-
@JSHarris Thanks for that info. The advertising blurb states that with a nitrogen filled expansion vessel there is less corrosion and the nitrogen permeates through the membrane more slowly than oxygen resulting in the charge pressure staying up. Don't know how true that is. As your vessels are vertical and bottom fed did you find it necessary to bleed air from the water side of the vessel or does it just get absorbed into the water over time?
-
Never having had an unvented DHW system before I've a couple of questions for the wise and knowledgeable. 1. In practice is there an advantage in having a replaceable membrane or 2. having a nitrogen filled vessel? In the WRAS guidance on EV installation it states the EV should be installed bottom fed and upright so does that mean air going into the vessel with the water isn't a problem or is there a way of bleeding it out?
-
Welcome to the forum. Interesting plans so looking forward to the blog and good luck with the whole project.
-
This is an area I looked at when running PHPP. I tried different weather data sets but the effects on the overall results were small. In practice the local semi? microclimate has more of an effect on comfort in the house. Living a few miles from the sea in East Kent produces a very different climate from further inland. In the summer, on sunny days, we have Easterly onshore winds every afternoon which seems to reduce the effect of decrement delay. We also have much lower maximum temperatures. The maximum temperature here this year was 26C when further inland it was reported to be 32C. The humidity is also much higher all year round which should affect MHRV. In winter we have higher night time temperatures. These effects are presumably magnified in Cornwall.
-
I've dug out the paperwork from March 2010 and my memory of the cost was wrong. The fee was £1874.80 + VAT. This was for Pre Construction Assessment and Final Assessment and did not include drawings, Psi calculations or certificates for airtightness etc.
-
That was me and was based on the price of £1700 I was quoted by Peter Warm seven years ago for certification. The quote was based on the fact all components were PHI certificated.
-
Type of Flashing for Polycarbonate to Brick
Gone West replied to Ferdinand's topic in Garages & Workshops
On my last house I used lead for the flashing between the brick wall and conservatory polycarbonate roof. No problems with leaks. -
Well done, hope the rest of the project goes smoothly.
-
Sometimes nightmares are real: the insurance story
Gone West replied to ToughButterCup's topic in Self Build Insurance
@recoveringacademic Well done for persevering and getting a good result. Hopefully that's the end of the trials and tribulations for your build. -
I have 110mm stub stack in my downstairs wetroom which has a 50mm pipe and 50mm AAV connected. It seems to flush with no problems. I wouldn't have more than one toilet with a 50mm AAV though.
-
That's a question only you can answer . If you're confident with your calculations and don't need the certificate for selling then no. The only way to know for sure is to pay for certification, if you think it's worth a couple of grand.


