


Russell griffiths
-
Posts
7884 -
Joined
-
Last visited
-
Days Won
61
Everything posted by Russell griffiths
-
You need to stick the ply down with D4 glue. All perimeter and joins. When it’s all in trim off excess glue and seal up all edges and joins with a polyurethane sealant. If it was mine I would sprayfoam the underneath of the ply with a closed cell foam. You will need the insulation layer on top of the ply to extend over the concrete core to the timbers that form the blocking behind the facia board.
-

Green building stores new range of glazing. Reviews?
Russell griffiths replied to Post and beam's topic in Windows & Glazing
Green building store stuff is far superior to rational IMHO go to the self build centre in Swindon they have a stand there, along with lots of others. -
Black alu ogee guttering and fittings
Russell griffiths replied to Redbeard's topic in Rainwater, Guttering & SuDS
I had guttercrest lovely stuff. -
Are these costs realistic for a 500m2 house
Russell griffiths replied to miike's topic in General Self Build & DIY Discussion
Start thinking about a million and aim to bring it in for 1.2 if you do some good shopping. -
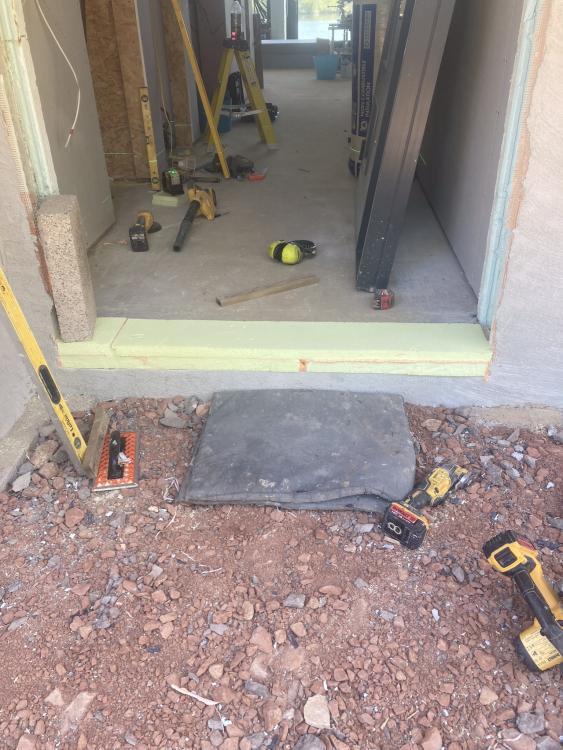
Foundation and damp-proofing advice for timber garden office
Russell griffiths replied to DanHW's topic in Timber Frame
Your wall needs to extend over the concrete slab, what you are creating there is an area for the water to sit and run under the walls/ floor. -
Anywhere you want to put it, don’t have a cut smaller than a quarter block, don’t put slithers in, cut two blocks to make up a run rather than one small piece. Keep half bond by adding a quarter at the corners, then continue with half bond, don’t let this slip to less it looks amateurish and looses strength. Mark window position on floor and do a dry run of blocks to test it out.
-
Shower Tray in Finished Concrete Floor
Russell griffiths replied to Visti's topic in General Construction Issues
I bet my left nut it will crack, how much is anybody’s guess, will it annoy you , well that’s up to you. Go for a walk around b and q or wickes and look at the floor slabs, polished concrete with a clear sealer normally. Look for the cracks, there will be plenty. The only way to do what you want is with a pre formed tray that is designed to take concrete or screed, this will be metal or fibreglass. It gets laid on top of the insulation and the concrete poured in it, then concrete is floated and a sealer put on. Waste is incorporated into the former. -
Plasterboard bending
Russell griffiths replied to Pocster's topic in General Self Build & DIY Discussion
Absolute bloody legend. Always put a straight edge at floor level for skirting, and ceiling level, these are the two areas it will show. -
Drop a block down at doors and infill with a high density xps insulation. Sit doors directly onto the insulation.
-
Plasterboard bending
Russell griffiths replied to Pocster's topic in General Self Build & DIY Discussion
You should have put the level across the studs before you put the board up. Good god man, I thought you were improving 🤦🏻♂️ Take the board down and pack the dodgy studs, or plane face of proud one. You probably won’t see it much if you squint a bit, but think of when you put skirting on. -
Nudura ICF and external cladding
Russell griffiths replied to Martin S's topic in New House & Self Build Design
@Martin S watch out for trying to attach stuff to polar wall, the nylon straps stand proud of the eps so you don’t have a flat surface. -
Brick cladding when the glazing is already installed ?
Russell griffiths replied to Post and beam's topic in Brick & Block
I find trades have no respect for anything already fitted unless told to be careful. Point out the new windows, discuss methods to protect them , go and buy the stuff to protect them and install it. Point out very clearly that any damage must be paid for by them and then leave them to it. Hold back enough money at each stage until you are happy. Regarding the window position, this is down to design, and making sure it works brick sizes. You should not have any cut bricks in the face of a wall unless it is actually part of the bond. Design the problem out, before it occurs. -
You cannot paint over silicon, you can with caulk. Does it need to be painted ? can you get it cut out and decorated, then silicon over the top as a neat finish. Or use a hybrid pu adhesive which is flexible and can be painted.
-
If you are going with a tiled floor on a wet room former, some of the wastes are multi directional, and also have a large lift out circle in the area the waste goes. They are all different according to make, but you basically rough in a waste pipe and then fit the former, lift out the large round bit and connect on the trap, then drop the big circle back into the former, tanking needs doing to top spec. Have a look at all the formers and trays they will have some fairly detailed instructions.
-
A friend of mine paid 60,000 Australian dollars, they flew the cable in by helicopter.
-
Ours neither, it’s warm mixed water, outside, you haven’t actually got a washroom for the dog inside surely 🤪🤪
-
Er, it’s outside stoopid
-
If you have any particularly large windows get some different brackets, the standard ones are a bit poo. You can buy a multi use fixing plate, it is about 100x150 with 40-50 holes in it gives far more choice of screw location.
-
Turfcutter or similar tool - handy for laying slab?
Russell griffiths replied to Pabbles's topic in Garages & Workshops
Find a man who does mini excavation, will probably have his own mini dumper that you drive. Expect £400 a day probably plus fuel now. Will shift twice as much as you will if you hire one. -
Why don’t you chuck a new pole up right smack on the boundary, uncap their cable and clip it to the new pole. Then rip the old one out.
-
Go and talk to them. I personally have pussyfooted around a boundary issue with a neighbour because I didn’t want to rock the boat, a month ago I was in a raging mood and got on the digger and ripped all the old fence out back to the correct boundary, I waited a few days for the row to happen. Never did, neighbours came out and said “ we wondered when you were going to do that “ two years I’ve been hesitating. If you believe you are 100% in the right then go and have a chat and tell them you intend removing it.
-
Erect ladder, unclip cable, cut down pole. Wait for the shit to hit the fan. Cost zero.
-
Treatment Plant. Running Air Pump Intermittently
Russell griffiths replied to Jenki's topic in Waste & Sewerage
My Graf plant runs 6 mins on and 4 mins off, or it could be the other way around. I was told this optimised electricity usage and stops the air holes blocking with crud if the blower is off for longer. -
Garage construction. Stick build or blockwork?
Russell griffiths replied to Russdl's topic in Garages & Workshops
Reading all this it looks like a project for icf blocks. Can be self built, no additional help needed. One concrete pour so reasonable pump costs. Render outside, no problem. Clad the inside in 18mm osb and paint. -
Face brick water absorption below DPC advice required
Russell griffiths replied to ruggers's topic in Brick & Block
As above, Staffordshire blues, order them and move on to the next problem, anymore than two minutes thought on this is overthinking. Only one product suitable for down there. Obviously different manufactures might have colour variation.


