ruggers
-
Posts
333 -
Joined
-
Last visited
ruggers's Achievements
Regular Member (4/5)
22
Reputation
-
@JohnMoJohnMo what thickness of slab do you have, I'm going to have 55-60mm cemfloor. Is your dhw set to constant or only heats in the cheap slots? I was focusing a bit too much on cylinder standing losses becauae many of them at 1.9 to 2.3kw/24hrs, and SAP only recognises this, but its based on stored water at around 70 degrees, not 48-50C which lowers the dt when placed in a 21 degree room. I need to select battery or no battery to complete the pv 1st fix install, along with inverter size but ideally I'd live in the house for a year first to see its real behaviour and then decide. The solar company prefer hanchu systems but they only do 5.14 and 9.4kw battery, with i think its 3.6, 5 and 7kw inverters. They did offer another 2 types of inverter but one was seriously expensive.There's the option of gateway for off grid back up for another £1k which if added on later i was told is a bit trickier and wouldnt be as cheap retrofitted. I take it you have a large array but are limited on annual export? I'd have thought it was still cheaper to use the ashp to heat dhw than an immersion. I understand that the cooking appliances modulate but it just feels like in winter, dark nights with a family to cook for in peak slot that with lights on, tv, oven and hob, i could easily be pushing above 5kw peaks which would daily push me into peak prices, even in spring and autumn or cloudy summer days. I've been meaning to drop you a message and come back to our old conversation around my mvhr and heat loss as I've got a bit lost with it all and lost faith in the heat loss software which has updated its software and changed all sorts of figures that i had a good understanding of. I rhink i found the spreadsheet you mentioned but didnt find it very user friendly
-
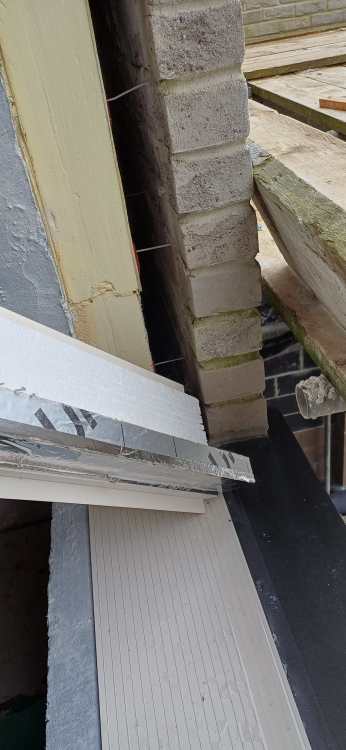
@Mr Punter thanks for the image. Your yellow duct looks different to mine, I've used a 63mm ones as Northern gas specified, its corrugated on the outside. The don't seem as strict as other companies and not mentioned any hockey sticks but i have asked the question so there's no surprises on the day if i do choose to install it. What does your gas power in the home and do you have a low energy/low temperature heating system? Never seen 3 wall boxes before. Bricks look the same as mine smoked branco and staffy blues.
-
@Bornagain Sounds like a well built house. Do you know what your total heat loss was? What size hot water cylinder did you choose? Mines going to be exactly 200m2 too, floors, cold loft, 2.4m ceilings. UFH and radiators, MVHR. 4.8kw of almost south facing solar and anti sun glazing in the South windows. I'm applying a lot of detail to air tightness but I just wouldn't expect it to retain heat all day like yours. I'm designing the the heating system to have a max flow temperature of 35C at dt5. How big is your PV system? I've nothing against heat pumps and home battery, its just that the more electric I convert to, the bigger the battery needs to be plus the inverter to handle it all. To get a decent ROI, youneed to be on a time of use tariff and if the battery is undersized, you end up paying for peak or day rate, and with everything electric, I'd need a bigger inverter. I had a company highly rated add some in roof PV to my build as a late decision, and just for once I wanted to not have to research it all and put the trust in a company, they were saying 90% of customers have a 3.6kw inverter, then I realised I'd need bigger with an ASHP and possible induction hob and electric oven, so they said 5kw hybrid inverter and they'll do the G99 to DNO. But looking at it again, 2 or 3 hobs in use with the oven on puts me above the 5Kw, so in 4-7pm peak rate which is 45p, I'd be in it every day even with the heat pump in set back.
-
Why does it not go below 2kW? Viessmann and Vaillant and many other well know state 2.1Kw minimum compressor output which I find strange. Forgetting costs of running, does the heat pump provide any difference in comfort or less short cycling than when you had the boiler, and if it does, is it purely because it can modulate lower than the boiler you had? How does a cop of 2.5 break even on a gas boiler. gas 5.4p at 100% efficient, 6.1p at 90%, electric 25p, scop 4.1 required and even in summer you wont get a cop of over 4 on dhw which ruins the scop. An 11Kw boiler will provide 18Kw for DHW vs 6Kw heat pump, but it isn't going to change between summer and winter temperatures. My figures indicate gas cheaper and quicker on dhw and ashp slightly cheaper on space heating. Why do you choose immersion which is only 100% efficient vs the heat pump which is much quicker to heat and 250-360% ? Are you just running on off controls for a fixed flow temperature like you mentioned?
-
2021 wasn't last century 😂. For what it costs i just want to run gas in. I wish there were more gas ashp hybrid units. Ashp wont save me any more theyre almost identical in running costs I've been going over it for years and nothings changed. Its a total nightmare i hate heat pumps and battery and solar before I've even lived in the house. Tempted to sell it at the end and stay in an old house with gas combi and not have to monitor how much water i use and pausing heating because its 4pm to 7pm peak rate. I'm just going round in circles with it and over the 4 years I've been told heat pumps are the future and the prices will come down, they've just increased by 15% I'll likely have to fit an ashp to handle the low peoperty heat loss and minimise short cycling better than gas but i really dont want one. It just means the battery situation becomes twice as expensive so not woerh it for me. I've put 4.8kw of South facing solar on, thats the most i can put on the roof. Battery adds 2 grand, or 3 grand if i add the gateway for off grid back up. Due to my low usage I'd save £220 a yr using octopus cosy, thats not a big enough saving for a decent roi. Cant get on anything cheaper than cosy without an EV which i wont be buying. EV is the only way to make a battery roi by unlocking super off peak rates. The idea of having weather compensated heating is to let it run 24/7 and have a nice steady comfortable house, but energy prices on tou tariffs just goes against it all and makes us run sumilar to on off if we're having to use set backs in the peak slots. If electric cost 4p per kwh, we'd just run it as we please. My price was for a 9.4kwh battery which is enough for my house, but add an ashp, then i need twice as much battery, so twice as much outlay, which still doesnt help the roi. Cycling a smaller 9.4kwh multiple times ler day just halfs its life span If you have an EV and can stick 10kw+ of panels on the roof and install a battery yourself then its all good. Solar doesnt help a heat pump when you need it in winter. In summer you only need to heat dhw. Solar diverts a waste of money if you can export for 12 to 16p per kwh, its better to heat dhw quicker and more efficiently with the ashp in summer. I'd need a scop of 4.15 to equal my 90% efficient gas price vs 25p standard electric cost. Cosy off peak 14.5p Ashp is average scop 4, so its 400% efficient, but Gas heats is 4x cheaper and heats dhw 3x faster at any outdoor temperature and due to the cost, you can just set water constant 24 hrs a day and not worry about tou cheap slots. We like 10 minute showers, 3 of them and the tanks nearly empty. Engineers charge £100 more for a heat pump service vs gas which wipes out the annual savings. Will an outdoor heat pump exposed to the elements last as long as an indoor gas boiler? Same brand boilers 12 yr warranty vs heat pumps 7yrs. The manufactures cant have faith in the product. The only reason I'll end up installing an ashp, is if it will run a low heat loss property better than a viessmann 200 11kw boiler at its lowest modulation of circa 2kw. But most heat pumps ive seen are 2.1kw min output too.
-
@saveasteading I'm on the old 2022 regs so i can choose gas or electric heating, solar is a choice and overheating hasnt came in by then. The yellow duct has been in place for over a year, it just comes up from 600mm below to up against the wall. Its £290 to get connected.
-
I've laid my 63mm underground yellow gas duct for a new build and i have it coming from horizontal underground with a sweeping bend up vertically to the hole under the built in external meter box. The electric one has a red and white hockey stick to complete the transition between duct and meter box, but I cant see anything online for the same with gas. Looking at completed wall boxes on neighbour’s houses they just have a white plastic conduit coming out the bottom of the gas meter box into the ground. Does the gas company provide this? Is there a coupling for the 63mm to stick? Hoping to not have to dig down through compacted type 1 to add a plast sweeping bend when the yellow duct already does this with the draw cord in.
-
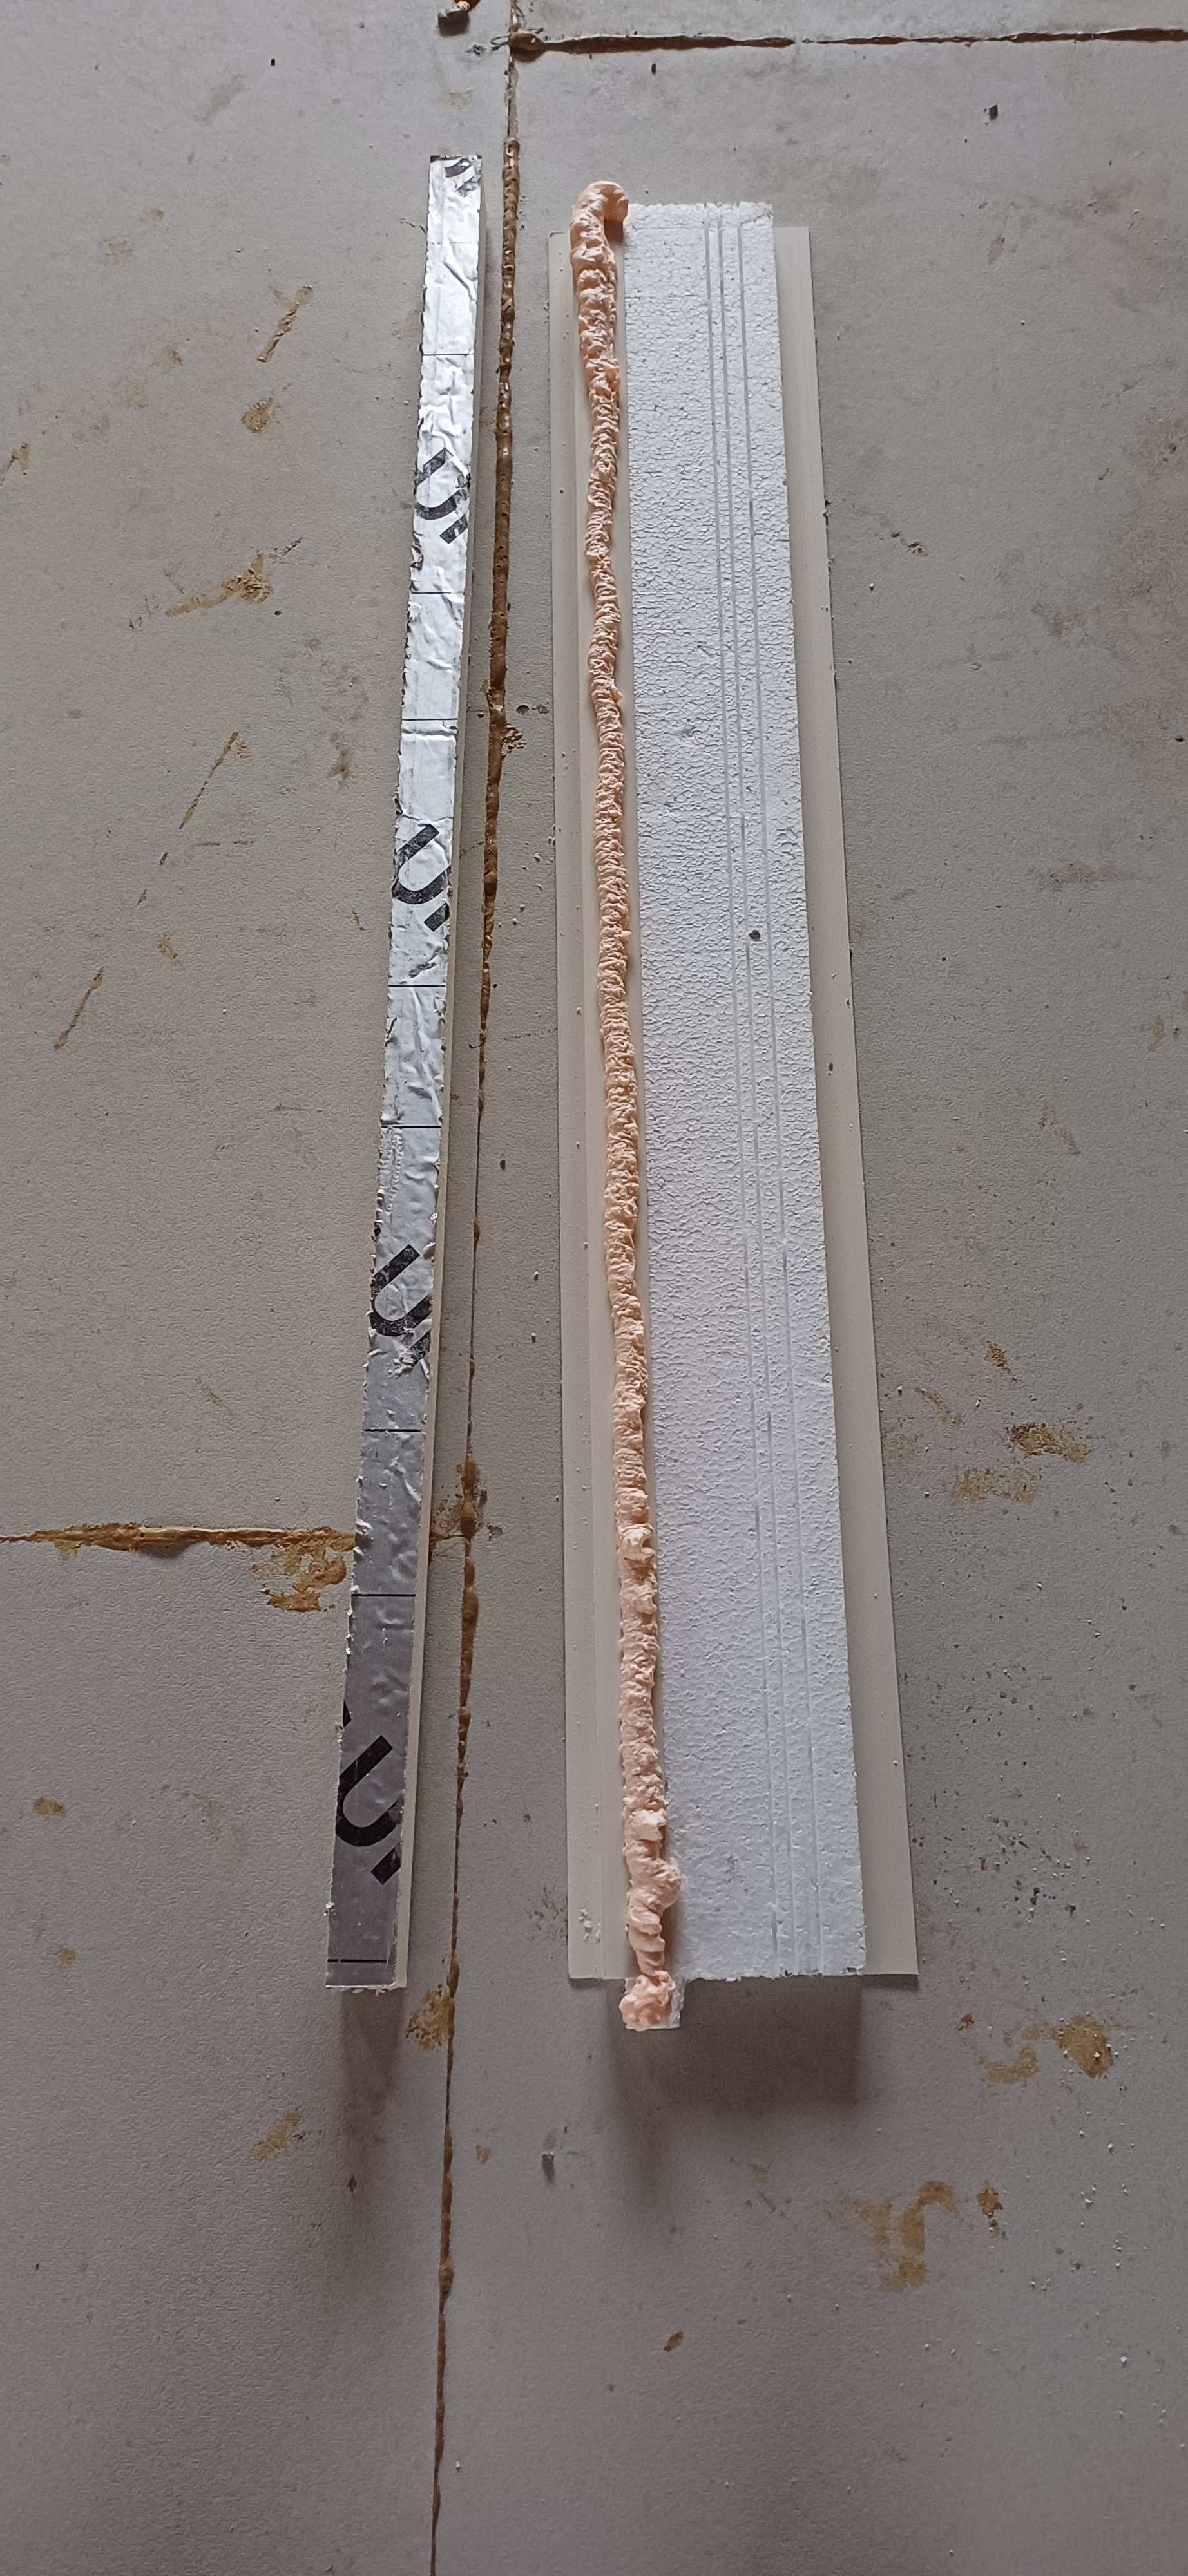
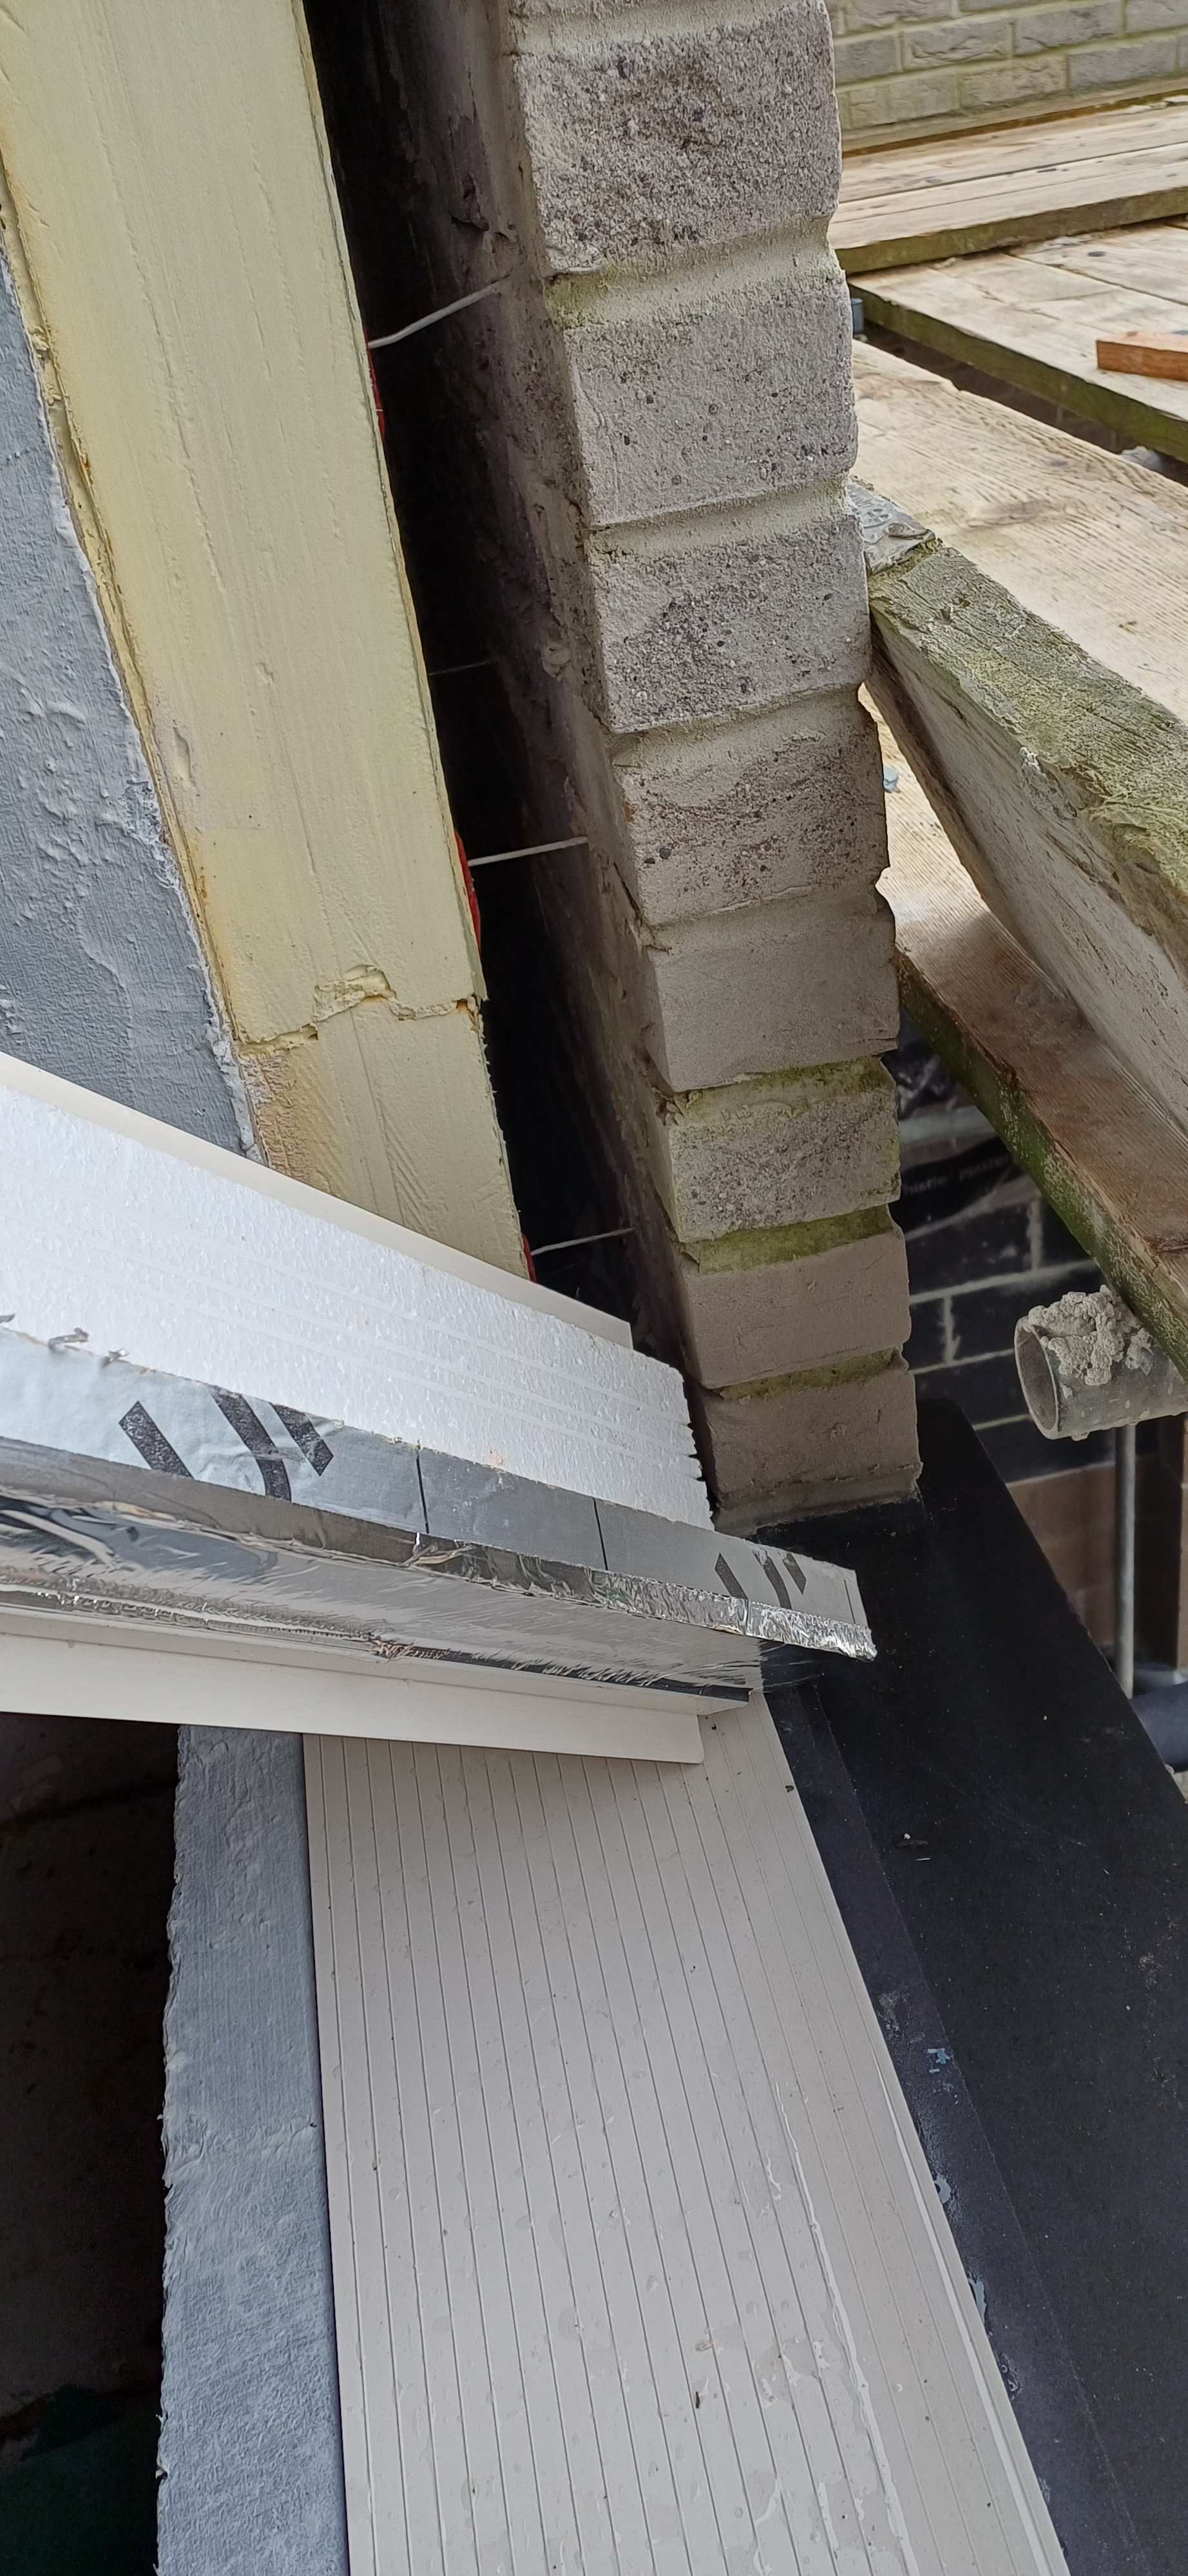
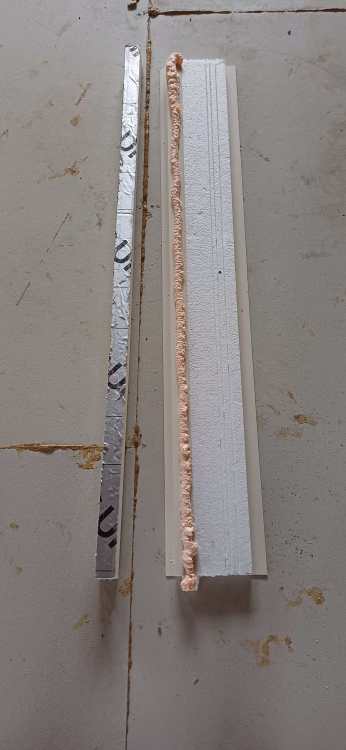
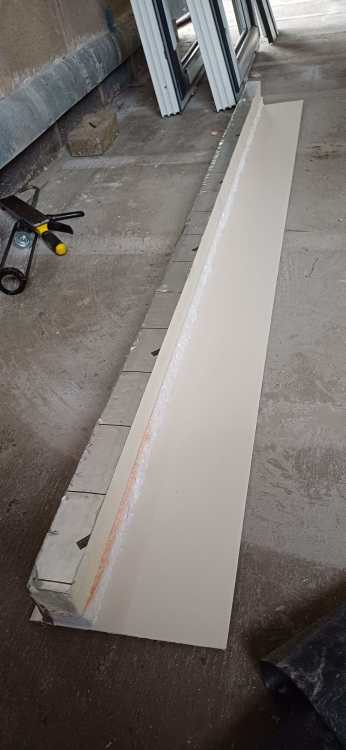
If i was to do it again, I'd still modify the closer, but I'd keep the pir flush with the inner block reveal. I set my pir back by the thickness of the closer, 25mm so that the full 150mm closer wdth would fit in purely because i thought all of the eps was bonded to it, and it may be with other brands, but these aren't and the eps was a friction fit into the c shaped plasic at the end which goes against the outside wall. I'd keep the pir flush with the inner reveal but have a checked reveal set back 25mm then i could add a 37.5mm insulated plasterboard to the reveal without taking up window frame width. Maybe using plasterboard pu foam is better to adhere the board to the reveal but I've had no issues with dab before and agree your screeded finish will be better. Ill try a floor tile comb.
-
Hi Mike, wet skimming the block walls and not dot and dabbing boards on would give a good air tight seal, but the reveals have been closed off with plastic cavity closers. They're pretty flimsy 2mm plastic which overlaps the inner and outer masonry and a 25mm thick piece of eps is attached to it which can be cut to suit the cavity width. Ive chose to modify the closers to be thicker by bonding pir and foil taping it, then setting my windows back 25mm to minimise cold bridging. The closers on their own offer very little insulation to the reveals being thin eps. I could have still improved these further, but you often learn things after its too late. If wet skimming walls you'd sill need something over the smooth plastic closers to skim onto. Some of the tapes claim to be skimmable. You need tape between the window to wall to maintain air tightness. Ceiling barrier to walls taped too.

-
Hi, lost track of time since the last reply, had to do 11 long days straight on the build. Not using aero barrier but did get a quote for just under 3k. Although good, if applied afterthe house is all boarded, i feel like its only going to seal against the available surfaces and not behind them so if anything settles in it may not be as affective in the future. I've bought a wagner pro sprayer and so i plan to spray all of the walls with liquid avcl. But since your advice to skim the reveals prior to applying the brush on avcl which has fibres in too, im going to apply some more self builder nutterism and parge the blocks with bonding agent and then spray the walls. Tapes will still be used at reveals and ive used air tight foam too.
-
Hi Nick, when you say multiple runs of 60mm tape, do you mean all 4 sides of the window in one continuous swoop, then another over lapping the tape each time until you reach the desired width?. Or do you go 360 on the inside window edge and then 360 on the closer outer edge nearest to the room side? First option wod use a lot of tape. I got the flexi adhesive parge coat on yesterday, just scraped it hard to the block and it went on nicely. Was the thank me later to this aimed at longevity or ease of spread compared to sand and cement? I'm considering doing the inner walls the same now with multifinish before i spray them with airtight membrane (dont think my shoulder will thank me later), Could be over kill but self builders often aim high. Do you have a preference for tape brands you use or they all much alike?
-
@Nickfromwales I'll give the flexi adhesive a go this weekend, only needs to be a few mm thick then so should dry quick. Get all the closers cut ready, and fit them with a bit of hybrid polymer and if needed some twist nails. I was looking at some soudal tape 200mm, they do two types. One has a self adhesive window strip side, then a peel off butyl side on the masonry edge. The extra tape is the same, but then the full area between the two strips is also a peel off adhesive strip. Not ure if this will make it easier or harder to apply for a full 4 sided opening in one go. I need a decent upstairs ceiling membrane too. I was asvused to use ampatex db90 with siga fentrim 50/85 (£85 quid is steep) because its prefolded and saves tons of tkme. Do the full upstairs before the stud walls go up so its only the perimeter edge to tape up.
-
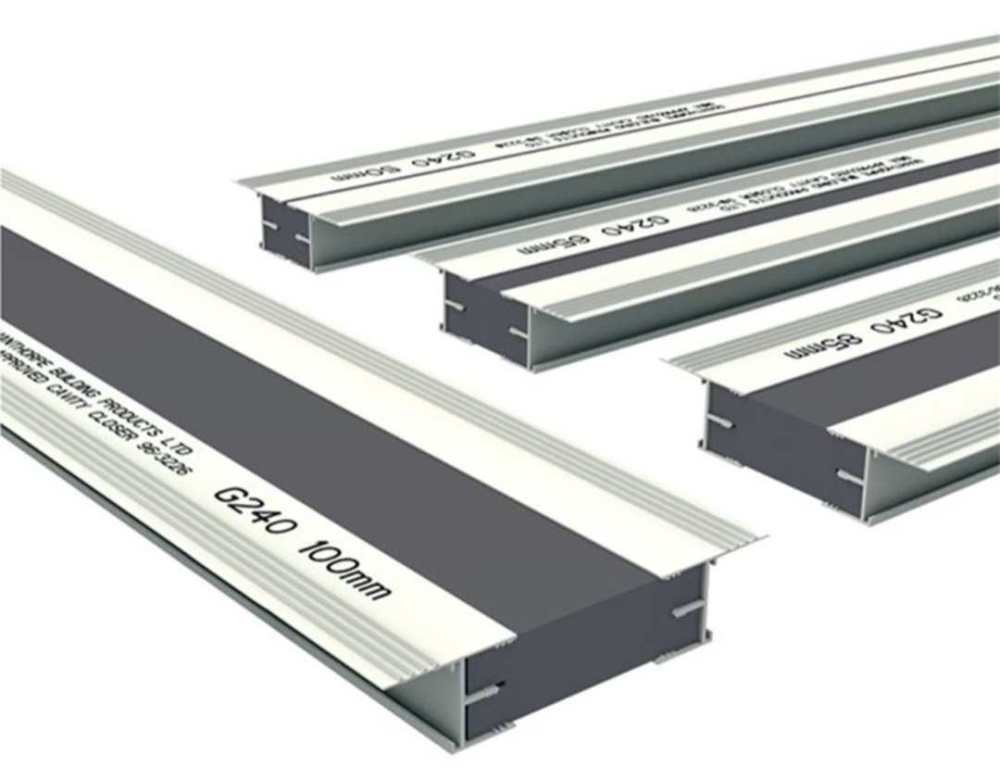
I'll have a look whats delivered tomorrow, theyre all dkfferent. If theres an outer wing too, i can cut it off or it will be hidden between the frame and brick anyways.
-
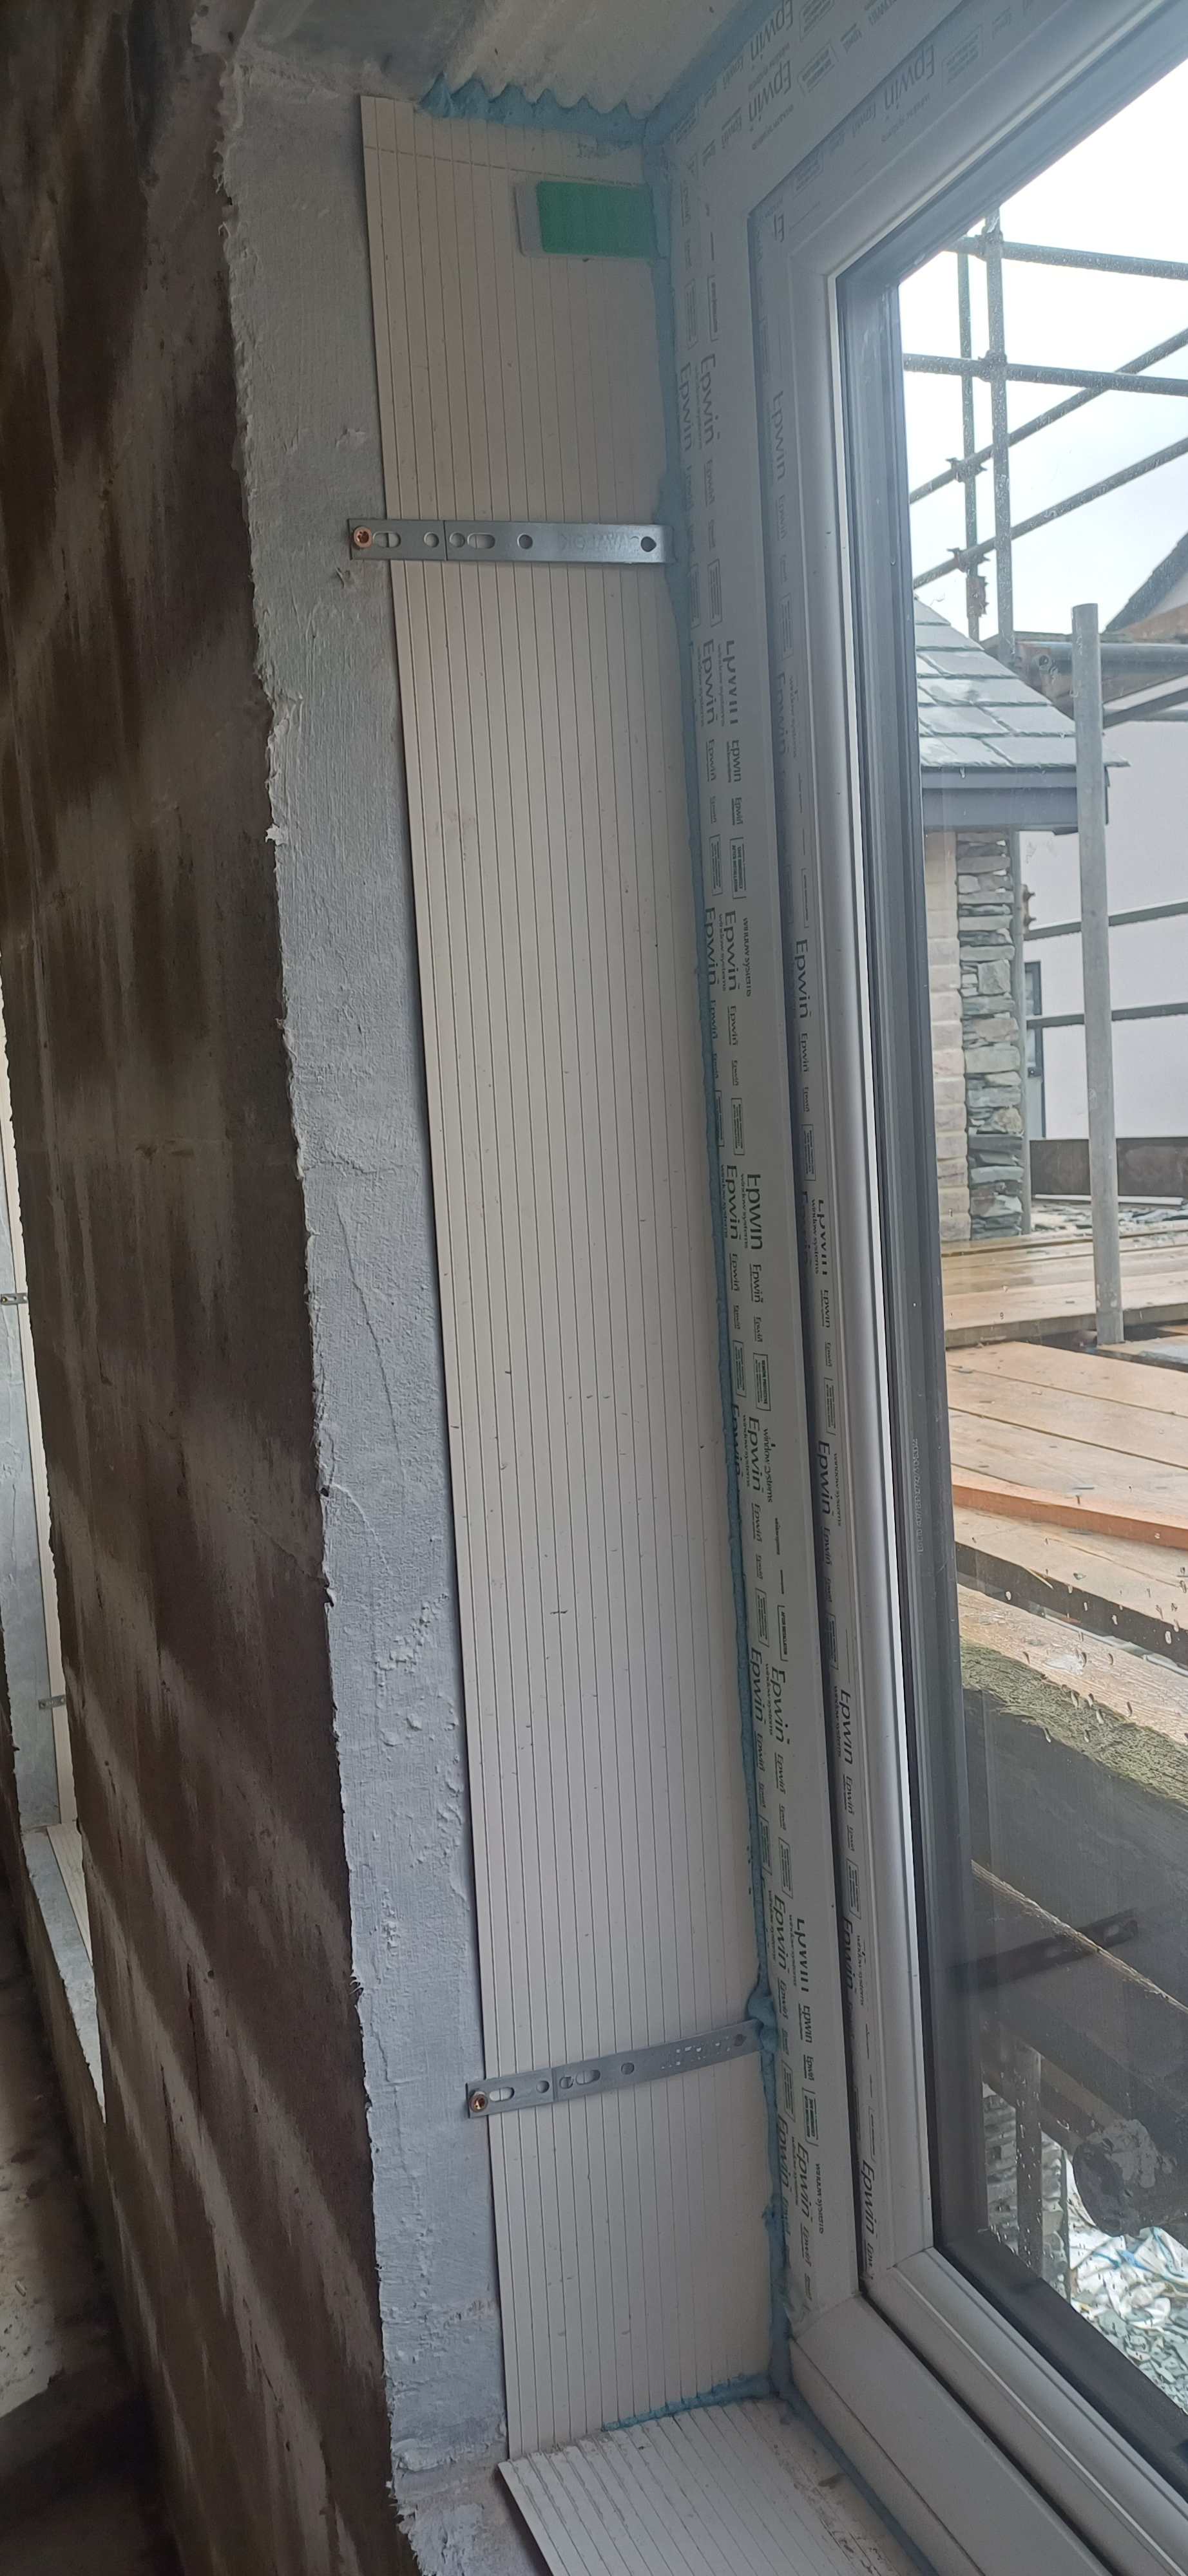
What does the 150 - 200 mean? Most of my vertical block reveaals are 1050 to 1275mm high. I've used the brush on around the full house perimeter before i built the masonry hangers into the block work diring construction and its quite an easy product to apply and it does fill a lot of the grainy holes, a parge would give this a better finish but i thought the liquid avcl would have a better lifetime bond to the blocks rather than adhesive then painting over that? The cavity is 150mm, frames set back 25mm. Ill assume the closers wings are 25mm, so there will be 150mm of plastic to cover. I didnt think theres a need to paint over the whole closer. I proposed to tape the inside closer edge to the parged or liquid sealed inner leaf block, then use a folded tape to tape the window frame to the closer 15/50mm or similar. Then adhere my plasterboard to the reveals over everything. If i don't vertically tape the closers edge to the inner block before the windows are fitted, ill be taping over metal window straps too so the tape wont be continuous betwen plastic and masonry, it will be taping over metal too.
-
I want to ensure the laps/wings of the plastic closer have a good seal to the inner block work and need the closers fit before Tuesday windows. The brush on soudal lq has reinforcement fibres in and is a paste and much thicker than what will be sprayed onto the inside block work later on using their sp version. Its already bought. Passive purple is great but the price was far too expensive.