Crofter
-
Posts
3484 -
Joined
-
Last visited
-
Days Won
11
Everything posted by Crofter
-
Good timing with this thread! Newbie question: why choose plasterboard instead of ply for the reveals? Every house I've lived in has used ply, I could go either way and am just curious.
-
In structural terms, two thin layers will always deflect more than a single layer of equivalent thickness- unless you succesfully achieve a full bond between the two layers, which is not as easy as it sounds. What is the spacing between the joists?
-

Discount Offers of the Week
Crofter replied to Ferdinand's topic in General Self Build & DIY Discussion
Oh b*gger, I just bought a box of screws a minute ago and never knew about that! Is there a discount code or anything? -
Friendly local plumber had one in the back of the van. Now fitted and I will see if my shower tonight is hot or cold! Oh and he's going to come and give me a quote for fitting a UVC. So all good really. Thanks for the pointers everyone.
-
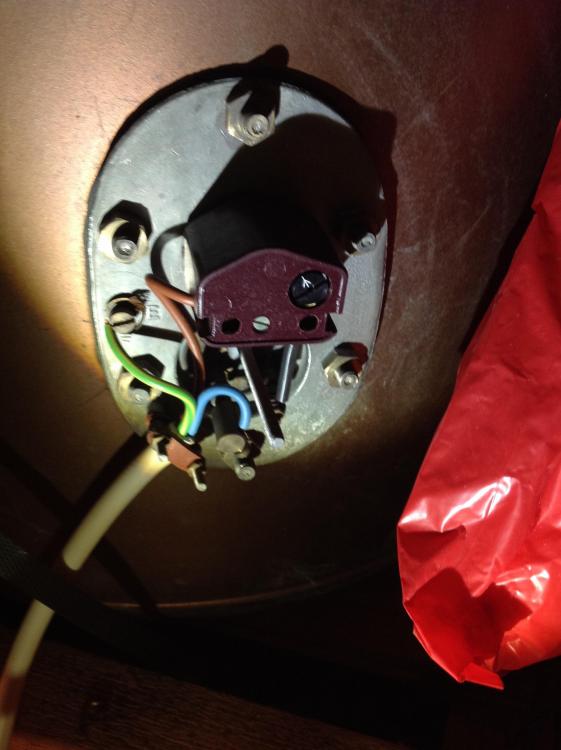
Ok so I've now had a look and I think I can exonerate the element- getting about 20ohms on it. But the stat is giving me open circuit regardless of what I do to it. I hadn't realised just what a simple little mechanism it was- I had assumed it would be electronic to some degree. Is it possible that it's something as simple as corrosion on a contact? Also, I've had to gently explain to SWMBO why bypassing the stat may be a bad idea (does she want a shower badly enough that it's worth boiling the tank??) and then had to explain exactly what I was doing with the frozen waffles:

-
Thanks gents, will see if I can do a spot of troubleshooting.
-
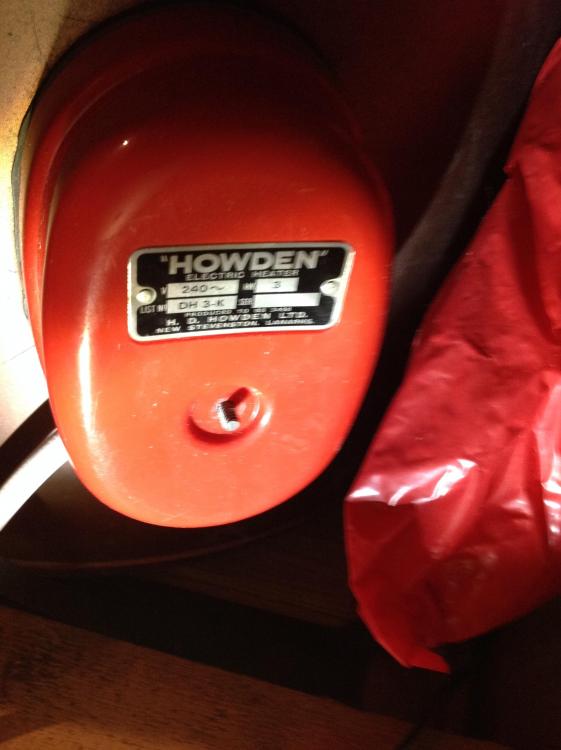
Swift reply on this one would be appreciated- I have an angry SWMBO and an unwashed baby. System is very simple, ancient copper vented tank with a loop to the defunct back boilers and a 3kw immersion. Photo of presumed offending article attached. There is power as far as the isolator switch. Is it worth trying to check the element with a MM? And are there different types of fitting etc, before I go buying a replacement element? Thanks in advance... and I should mention at this point that I have always thought of the Welsh as our brothers and kindred spirits... splendid chaps one and all... cough cough @Nickfromwales
-
A lot of the best ways of improving bang for buck come from the basic design and layout. Mark Brinkley explains this well in the Housebuilders Bible. Looking specifically at energy performance, you want to tend towards a square footprint and avoid complicating the basic box shape. Don't overdo the glazed area (even good windows are far worse insulated than poor walls, and obviously cost much more to boot); consolidate many smaller windows into individual larger units. Don't have a chimney. All of these factors improve thermal performance yet actually lower build cost.
- 30 replies
-
- 1
-

-
- u values
- insulation
- (and 1 more)
-
It's not an electrician you need, it's a fire engine!
-
Burley Springdale is smaller, at 3kw. Great little stove but you need to chop very very small logs for it!
-
I've got a warm roof construction with a pitched roof. In part of the build this forms a vaulted ceiling, and in the rest it will become attic space. My gut feeling is that I should just plasterboard the whole thing, to leave a neat final surface that hides and protects the VCB. There is also the fire protection issue, where plasterboard will protect the frame (well, rafters in this case) from damage for a period of time, Just curious about what the normal practise is? I have a feeling that boarding vaulted ceilings will prove to be a right PITA of a job so just want to check that it is really necessary or at least a good idea to do this even on areas that will not be seen.
-
My foam ones from Cat are still going strong after a year. Don't know how much they cost, were a present from MiL!
-
Ah good, glad it's not just me! I was fitting the VCL to one gable yesterday; the wind was howling outside and clearly air was getting in somewhere because the whole thing blew up like a balloon. At least the VCL seems pretty airtight, I could not press it back against the wall at all. This morning the wind had changed direction and it was flat as a pancake. Expanding foam just isn't airtight, not 100% anyway- that's my conclusion. What's your plan, by the way?
- 30 replies
-
- 1
-
-
- timber frame
- insulation
- (and 2 more)
-
To be fair, Silverline can be found clogging up shelves in lots of places, not merely Toolstation. And, yes, most of it is utter garbage. I have bought a few Silverline items over the years and now regard them as more or less 'disposable'- useful if you need e.g. a certain size of drill to do a one off job. Out of curiosity, I bought a pack of ten screwdriver bits from Silverline, for about £2. I think I got through the whole pack in a day!
-
My build is practically sponsored by Toolstation. Don't knock it! With a £10 minimum delivery they have probably *lost* money with all the stuff I've bought. And there is never any quibble over delivery- in contrast to 'proper' trade suppliers who tend to phone me up sheepishly ten minutes after placing my order online, to ask if I can pay the delivery surcharge that was conventiently not mentioned anywhere on the website.
-
I can see why you're tempted, but how are the patio slabs going to create a waterproof seal? You'd have to lay an impermeable membrane under them as the joints between the slabs will always let some water through. As you probably know, clay is notorious for swelling and shrinking according to moisture content. So any water getting past your slabs, or rising up from below, is going to upset your nice level patio and open up the gaps between the slabs even more, making things worse.
-
Temporary ground sheets/surface
Crofter replied to Vijay's topic in General Self Build & DIY Discussion
Recycled fill means crushed rubble etc, it can work out cheaper than freshly dug and crushed stone, but it might contain various detritus from demolition (bits of glass, wood, etc). Perfectly fine as a basic fill material that will have something else on top. -
I ordered a pallet of 50mm, and two or three boards were closer to 40... the vast majority were bang on 50. It'll be luck of the draw, though.
-
Why not just use chipboard? You could probably go up to 22mm and still work out cheaper.
-
Just to wave the banner for sticking with the low energy route: There is a saying in boatbuilding that the first boat you build should be for your enemy, the second for your friend, and the third for yourself. Something similar may apply to houses- the learning curve is steep, and you might find yourself glad to have a chance to do a self build prior to building your forever home. You don't want your forever home to be full of things you wish you could have done differently. So consider whether this house can be something of a trial run for some ideas or methods that you want to use in your next build. Obviously you will need to keep an eye on cost, but it would seem like a shame to embark on a completely different type of construction.
-
@lovo If you are facing an export limit per install, what would be involved in setting up a second, separate, connection/installation?
-
Discount Offers of the Week
Crofter replied to Ferdinand's topic in General Self Build & DIY Discussion
Yes it was indeed me. I gave Zorin a whirl but also really liked Ubuntu. At some point I *will* set up my laptop as dual OS. Just when I get around to it. I even offered the job to a mate who does this for a living and he said it was really easy and that I should do it myself. -
@ProDave Yes got that bit- I meant about leaving gaps for wiring,. Presumably no point in having gaps in the studs, but you do want holes or gaps in the battens? Just asking because this is what I'm doing this morning!
-
Did you mean to say batten, rather than stud?
-
Great progress, well done!