
Leaderboard


Popular Content
Showing content with the highest reputation on 11/01/18 in all areas
-
....if the weather man says it's raining! So goes the old song and me, too, by the end of this week. The roof itself has been watertight for a couple of weeks now, but there was still significant water ingress from the gulleys hidden behind the parapets formed at the top of the ground floor. However, my flat roof guys have been back on site this week and are working hard. Today they were finishing off the long, east facing balcony and also moving onto the south facing parapet; they will continue around the building and should have the main part of the house all finished off if not by Friday, then certainly early next week. This is a great relief as even though I know that the building would dry out, there is something deeply distressing about seeing puddles of water lying on the slab after rain, despite the main roof being on, so I shall be very happy to have this part of the build completed. Photos of the gullies and balconies to follow later this week. Stepping back to last week for a moment, some of the window snag list was ticked off, primarily the shattered panes of glass. One was in the south facing ground floor lounge area and the other was a unit in the north east bedroom. Norrsken were back exactly when they said they would be and got the main jobs completed so that things are set for the return of MBC. The remaining snag list are a few adjustments to the windows, for example where one of the lift and slide windows is too tightly fitted against the seal/brush and the frames rub when it's opened or closed, and then a few cosmetic issues such as shallow dents in the frames. We've agreed to complete the rest of the list once we're getting into second fix rather than get in the way of all the frame completion and first fix work. Last week also saw the return of Darren from MBC to fix my wonky wall, for which the solution was low tech but effective. A sleep deprived but determined Irishman with a very, very large hammer who was prepared to beat the crap out of a steel beam, and that's precisely what he did. So the problem wasn't so much the wall above the window, but the section that housed the apex steel that sat above the window and that, it's now been decided, has a kink in it. The wall above the steel section and the one below it are both plumb but the inverted V-section above the window isn't due to the kinked steel inside it. I'm assured that everything is structurally fine and that there's no danger of anything shifting in a detrimental fashion and after Darren did his stuff the top of the triangular window section is now only 3mm out, where it started at 12mm and more further up. I can easily live with 3mm and it will easily be lost in the cladding. There is now a kick on the inside, but Darren will put some packers behind the service battens to make sure that the final internal wall is plumb for boarding out and everything else that comes after. And so back to this week, where the first few days have all been about activity on the roof. As already mentioned, the flat roof guys were back on Monday and also back were the solar PV guys. The solar guys had to start by removing the optimisers from where they'd previously left them on the roof as they are all going into the loft space. The idea behind this is that the solar panels themselves are highly unlikely to fail but if any of the optimisers do, it will be an expensive job to get to them to make any repairs. It would involve dismantling part of the roof as well as expensive scaffolding to gain access. Instead, the cables have come through a penetration in the roof and the optimisers will sit in the loft space along side some MVHR equipment, meaning that things are far more accessible in the future. The inverter will be in the garage and the cable has been run down along the roof, going through the parapet and through the garage ceiling, into the garage where it will live with all the sunamps and other kit. This is the route it's taking, to the side of the roof window and underneath the membrane that will line the parapet gully and, eventually, the garage roof. My velux windows arrived last week, which was another relief. My roofer, Dylan, gave me a call to confirm that they were in and the days that his team would be back. We'd already agreed that they would be on site on the 30th to co-ordinate and work around with the solar guys and they all worked really co-operatively, as they have done all along. I'm biased, of course, but I think that my roof is looking really great and the solar panels are pretty smart looking, too. Here are the panels from the other side of the flat roof over the stairwell. And a closer view of the trays and panels. This is the velux window that's over the shared bathroom. It's very low down coming onto the flat roof, but Terence and the other roofers, Pat and Mike, had already discussed this and decided how to solve the potential issue by using some more membrane and glueing the s*&t out of it all. This is the same window from inside. The light from this will be the only natural light source in the bathroom once all the walls are in place, so it's good to see that it floods in from its west facing orientation. We have another 2 velux windows, one is in the already well-lit south east bedroom, which I'm claiming for my own room to do stuff in, so I'm delighted to have it full of so much light. You can also see the prep on the balcony with the membrane being put down. The other roof window is the north east bedroom which will benefit from the additional light given its aspect. Here's a pic of the guys putting the trays into position on the main south facing roof. The pole that's in the foreground of the picture is the one that until recently carried the electricity supply cable. That has now been buried and back-filled today and Openreach will be around on Friday to remove their equipment so I will be able to dispose of the pole in due course. This is towards the end of the day when most of the panels were on and the slates had been put around them. There's plenty more work to come this week. The flat roof team are continuing and the pitched roof team will be back on Friday and possibly early next week to finish everything up there. My groundworker, Keith, is on site now as well, and we're moving all the shrub and hedge related debris from earlier in the year. I'm currently thinking that bonfire night seems an appropriate time to light up, so I may have to buy some sparklers for the occasion. My fire rated door was delivered today from Enfield Speciality Doors and my neighbour, Drew, will be installing that for me. He works in construction and having seen the tidy work he's done on his own place, he'll be doing a fair bit of internal work for me as well as, possibly, the tier cladding on the outside in due course. It's worth noting that I paid a premium to Enfield Speciality Doors to jump the queue in their production schedule to make sure that I got the door in time for the return of MBC. It's the one to go between the utility and garage so it has to be in before MBC return and I was prepared to pay an additional 10% to make sure this would happen. I was chatting with another BH member recently and it seems that fire rated doors really are tricky things to get hold of, let alone within a reasonable timescale. If you also want one that's insulated and looks good, be prepared to take a few months over this, assuming you find anything. I'm fortunate as mine is only between the garage and utility and doesn't need to be pretty. I may add extra insulation later but, for now, I just needed the fire rated door. Soil pipes and other bits will be sorted out as well before MBC hit, then we can really take the brakes off and go at first fix. Yesterday's buzz of the week was the Hercules.3 points
-
the main thing you want to look at when comparing 'acoustic' plasterboard is the surface density (kg/m² ), the higher the number the more mass it has and better it performs and a mass barrier From what i can see 12.5mm GTEC dB is 10.2 to 10.7 kg/m² , and 15mm is 12.5 to 13.1 kg/m². other boards as below; Gyproc wallboard 12.5mm - 8.0 kg/m2, 15mm - 9.8 kg/m2 Gyproc fireline 12.5mm - 9.8 kg/m2, 15mm - 11.7 kg/m2 Gyproc SoundBloc 12.5mm - 10.6 kg/m2, 15mm - 12.6 kg/m2 Gyproc plank 19mm - 15 kg/m2 Gyproc SoundBloc F 15mm - 14.1 kg/m2 Knauf Soundshield 10mm - 8.4 kg/m2, 13mm – 12.3 kg/m2 Knauf Standard Wallboard 15mm - 10.2kg/m2 Knauf Vapour Panel 15mm - 10.2kg/m2 Knauf Moisture Panel 15mm - 10.2kg/m2 Knauf Sound Panel 12.5mm - 10kg/m2 Knauf Fire Panel 15mm - 12kg/m2 Knauf Impact Panel 15mm - 12.8kg/m2 Knauf Soundshield Plus 15mm - 12.8kg/m2 Knauf Performance Plus 15mm - 12.8kg/m2 Knauf Plank 19mm - 14kg/m2 Knauf Core Board 19mm - 16.3kg/m2 So between 15mm GTEC dB, Soundbloc, and Knauf Soundshield Plus, the GTEC dB is marginally more dense, but if you go for Gyproc SoundBloc F you get a bigger increase.3 points
-
It wasn't as easy as I thought it would be but we got there.2 points
-
Er why then your row of mosaics would not line up, you can chase your arse a round that bathroom for the next week and you will never get everything to fall where you want it in the grand scheme of things you normally walk into a room and the whole thing hits you the crisp lines the mosaics the pockets, the whole thing nobody apart from you will be looking to see if you got a whole tile in the centre get it finished and stand back and give yourself a pat on the back. Procrastination will just send you around and around. Move on. Looking good, but it will look a whole lot better when it’s grouted.2 points
-
What he will have gained from that is he will be your plumber of choice for anything else and you will recommend him to others.2 points
-
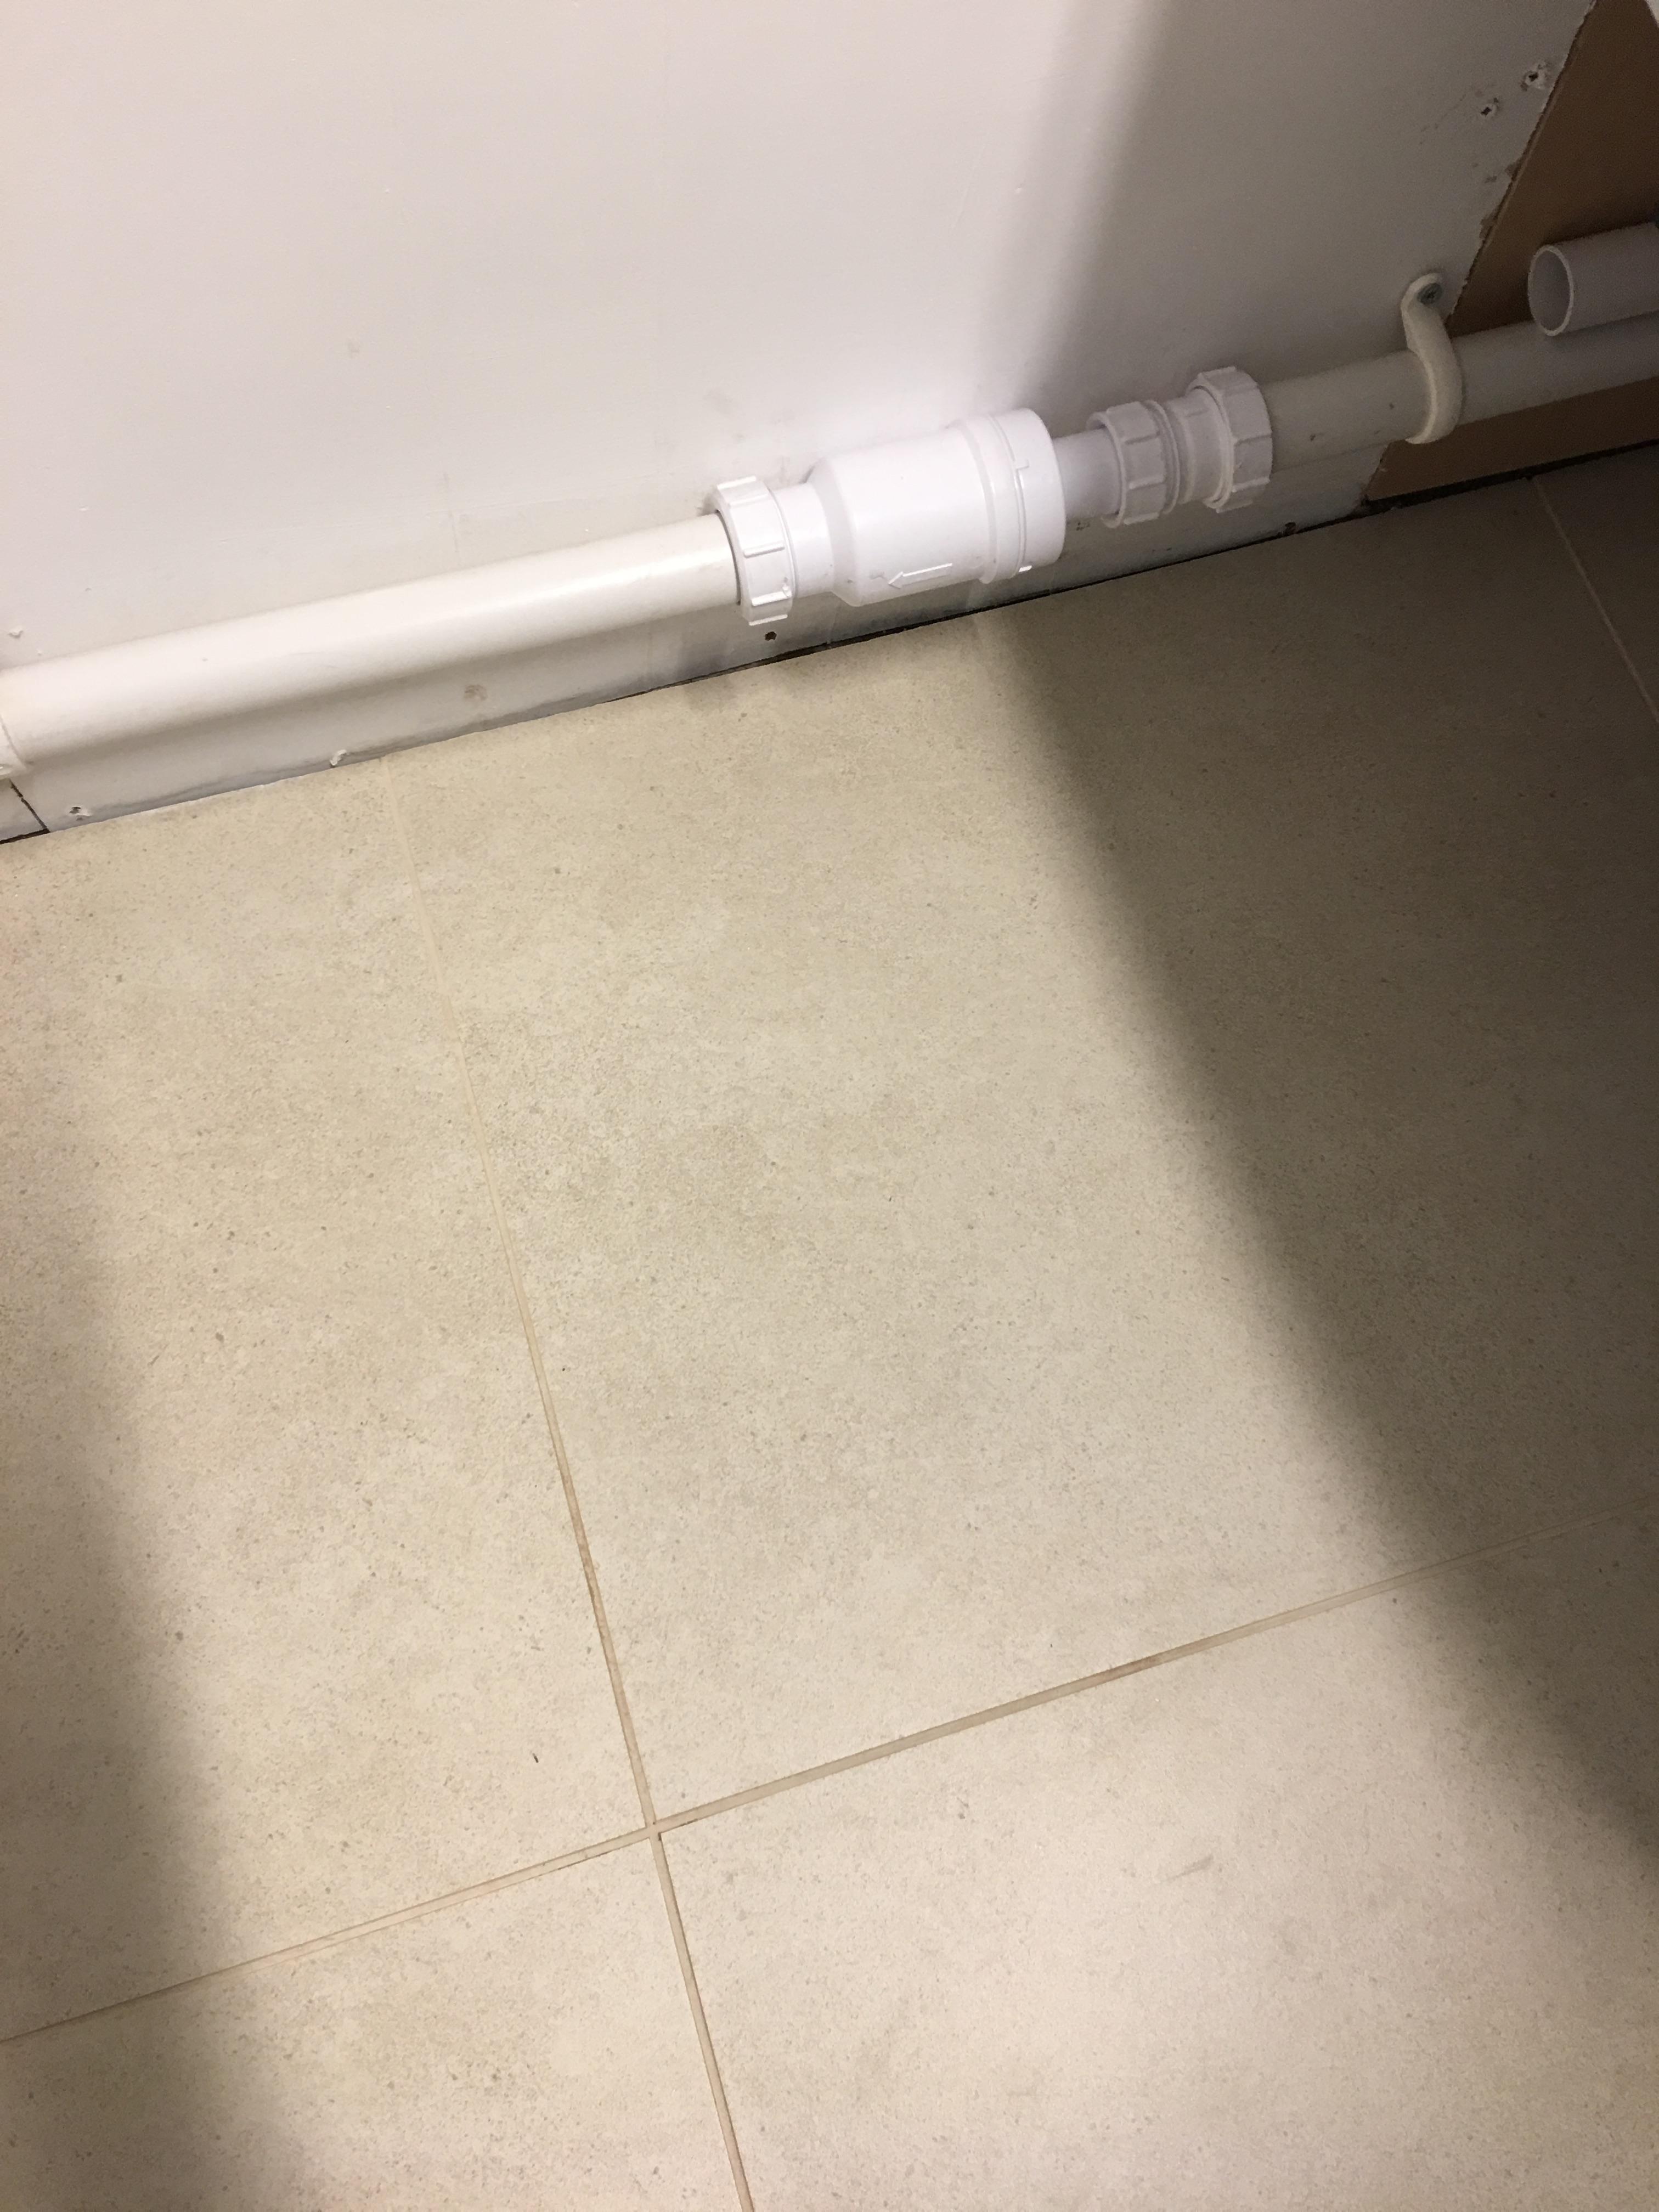
Great news I finally persuaded a plumber to come and fit the waterless trap (I rang 5 before i got one that turned up). He has fitted it on the straigt run after the mvhr condensate junction so it catches both boiler and mvhr condensate as suggested here. He said it should be ok but has left me the cut piece of pipe in case it doesnt work and so we can fit it back on with adaptors. He was a lovely man, knows nothing about these type of houses but was fascinated, 5 minute job and an hour talking house......he refused to take any money for doing the job either. What a star and what a rare find. Thank you all for the help on it, another thing ticked off the list (installer still not materialised)
 2 points
 -
CCTV...2 points
-
I regularly use both Exactly the same1 point
-
It’s what we do1 point
-
Gtec db, Siniat standard and MR boards. All 12.5mm, and supplied under our TF contract.1 point
-
Following a request, I have moved the discussions about using a Willis heater as a backup to a new thread here1 point
-
It is more likely 35mm2 cable that being the area of the conductor. Your ducting is fine. The cable diameter is about 15mm including the sheathing.1 point
-
Try Knauf Soundshield Plus as it is also tougher / harder and holds fixings better. They recommend it for schools etc. Out dryliners used it so I don't suppose they paid over the odds v. normal DB board.1 point
-
There are good trades people out there, keep his number, he is worth knowing.?1 point
-
The command unit needs to programme the GMC with all the set values, I believe, so what's probably happened is that the values were stored in the Command Unit, but weren't transferred to the GMC until you changed a value. My guess is that at that time the Command Unit may well have transmitted all the parameters that were stored in it to the GMC, which has now stored them. Still worth cycling through all the settable parameters, I think, just to be sure that everything looks right. The chances are that the alarm may relate to a setting not having transferred, with a bit of luck.1 point
-
1 point
-
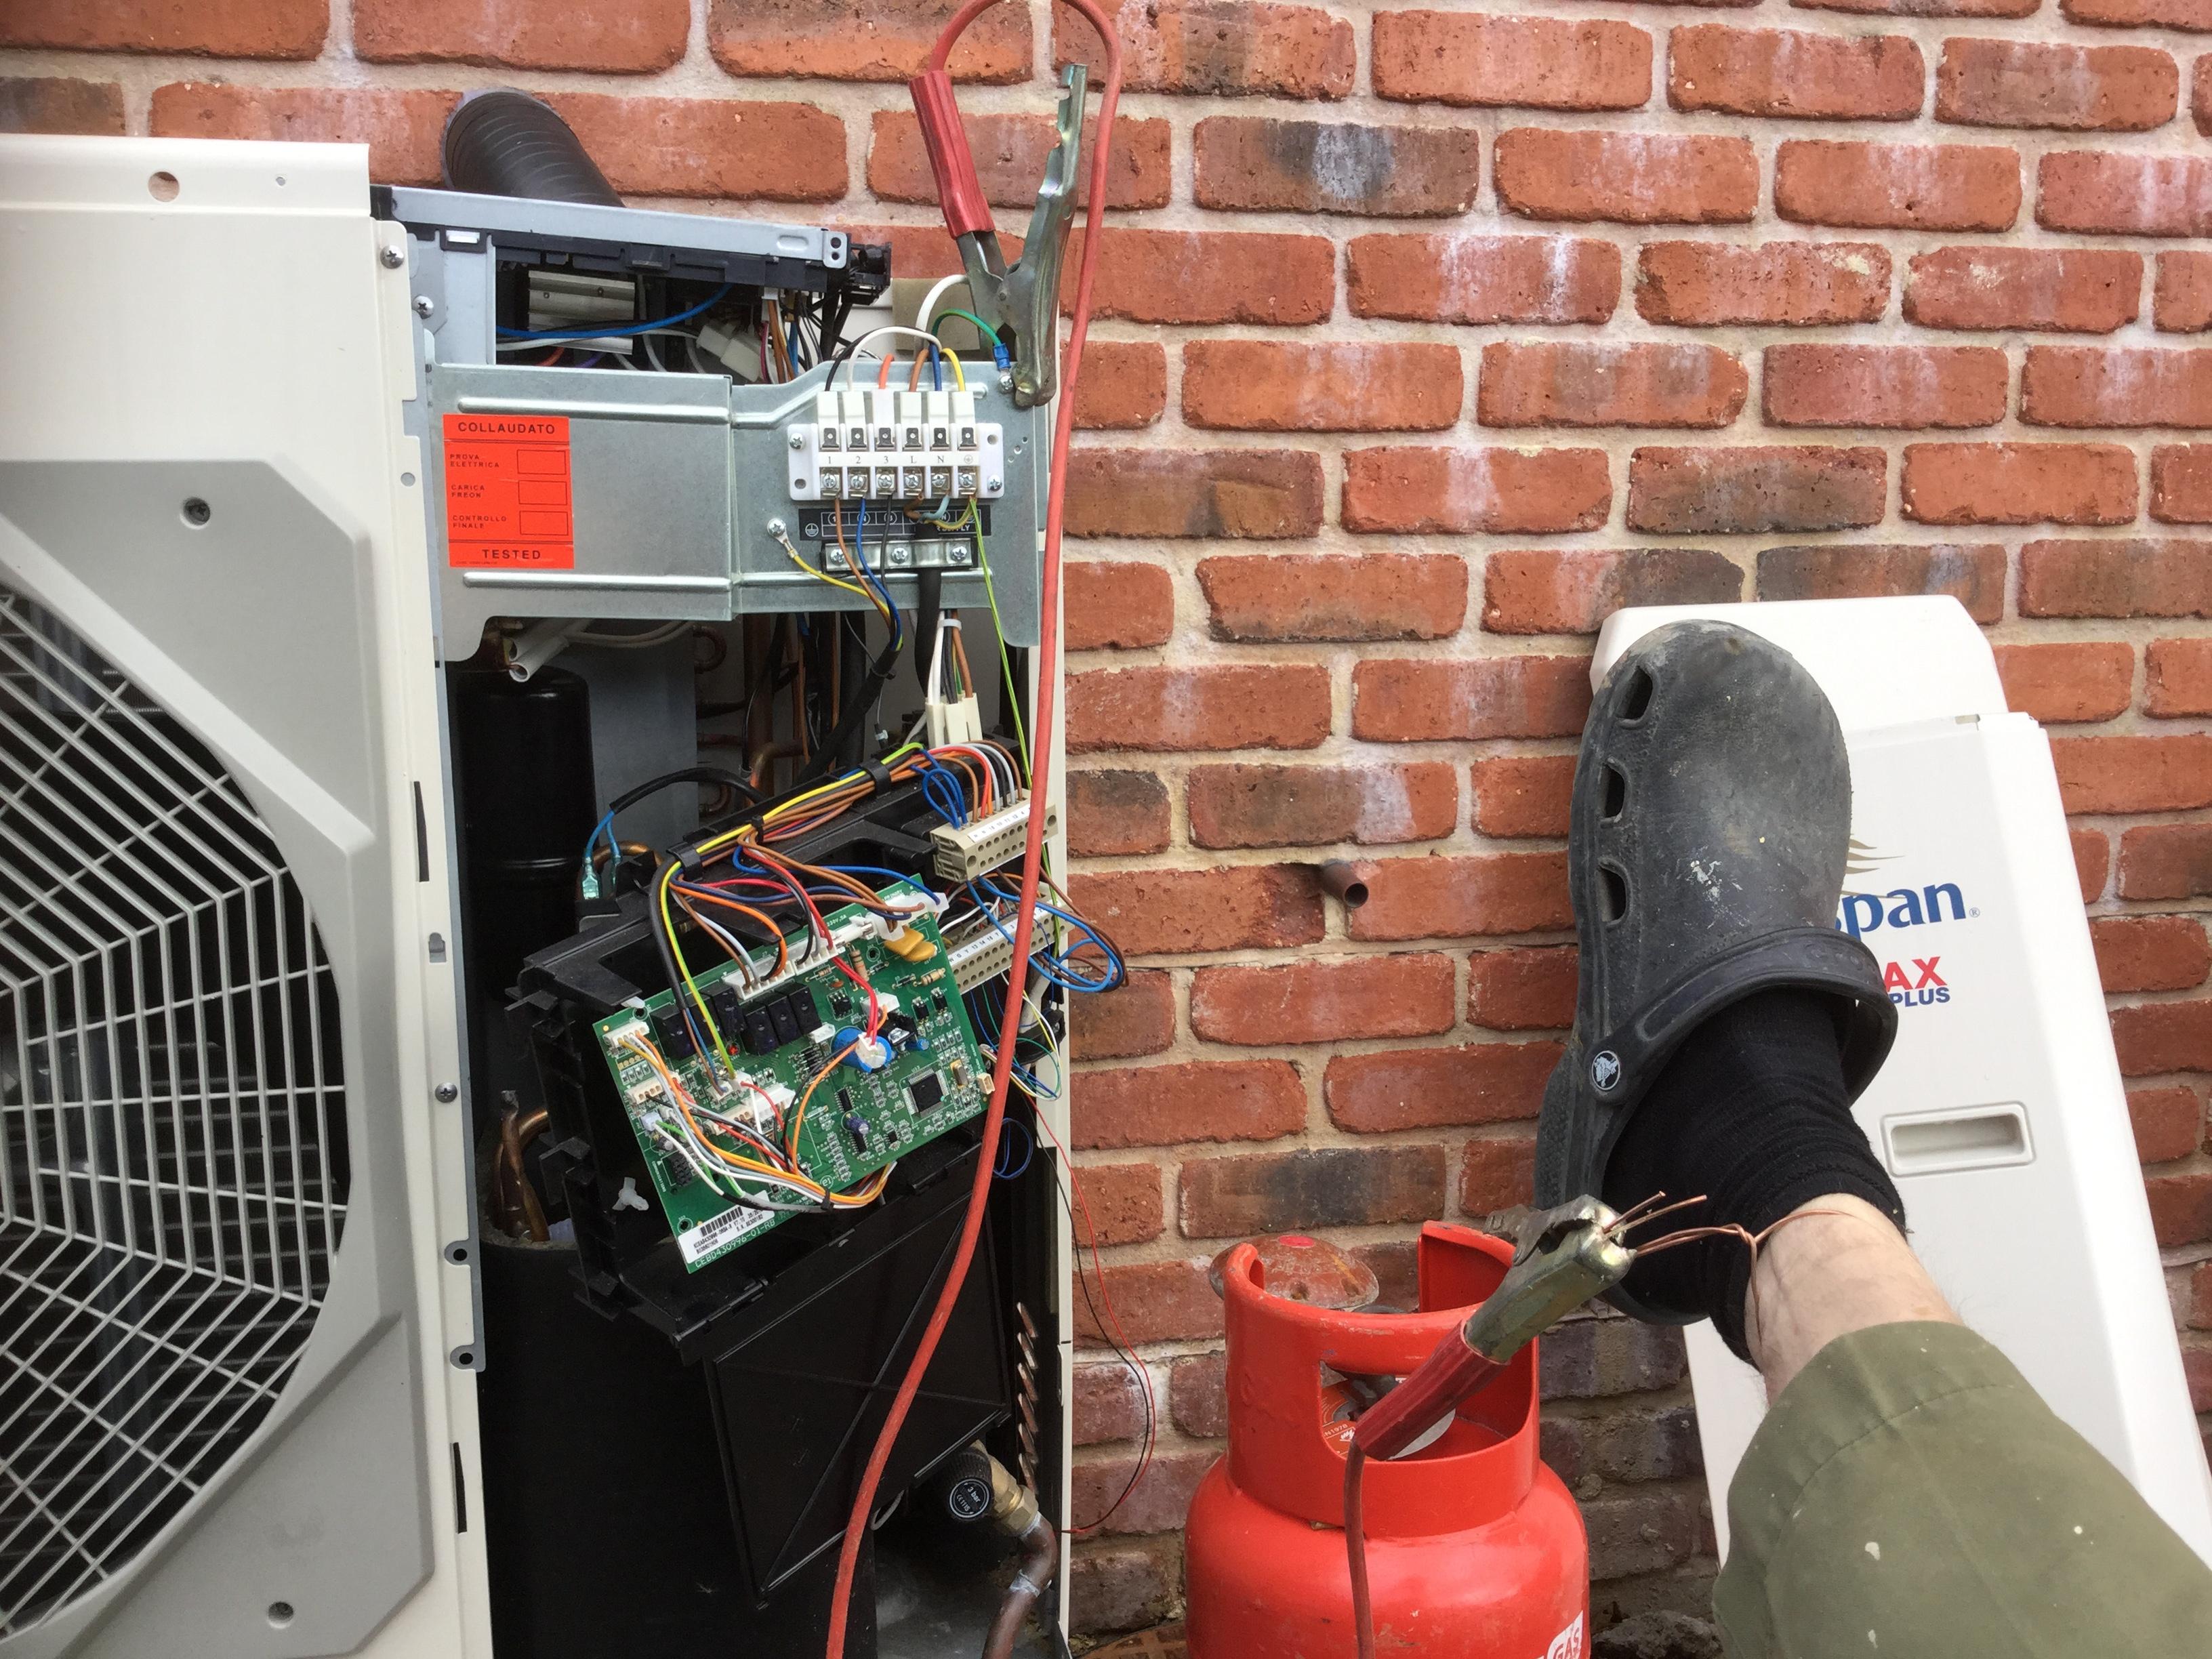
Yup, got that, thanks a lot. I am just trying the ASHP (after changing the GMC board) to make sure it works as it was an EBay special with no guarantee ?. I will pick your brains again about heating curves once I establish it works. ALL HAIL THE KNOWLEDGEBLE ONE. ! @JSHarris This is yet another example of the good will of members, sharing invaluable knowledge .1 point
-
But well done for soldiering on. Follow what SIG say to the letter. If you are not sure what is specified, bat it back to them.1 point
-
A bucket of dirt with a rod banged in makes a convenient portable earth point...1 point
-
.........Stop press........., now it’s stopped raining I have looked at mine and I am getting about 14v ac from my 12v transformer. (So that’s not blown, ) phew. I have replaced the board and.............my little led is flashing as it should ?and no error codes on the command unit. I am going to review the wiring and confirm it’s all ok then try it out. Here’s hoping. ? what do do you think of my high tech earth strap???
 1 point
 -
Prob “long enough” for him lol.1 point
-
I've got Python code writing to and reading from MQTT. There are libraries for that but it's simpler, and probably more robust, to just run the Mosquitto command line clients (mosquitto_sub and mosquitto_pub) as subprocesses. E.g., if the MQTT protocol is ever changed I think the CLI clients would be much more likely to be updated in sync with the broker in the Debian repos than separately developed libraries. I use MQTTDash on my phone for looking at what's happening sometimes but most of my debugging and testing was done with the CLI clients. I also input data (e.g., electricity meter readings) using mosquitto_pub.1 point
-
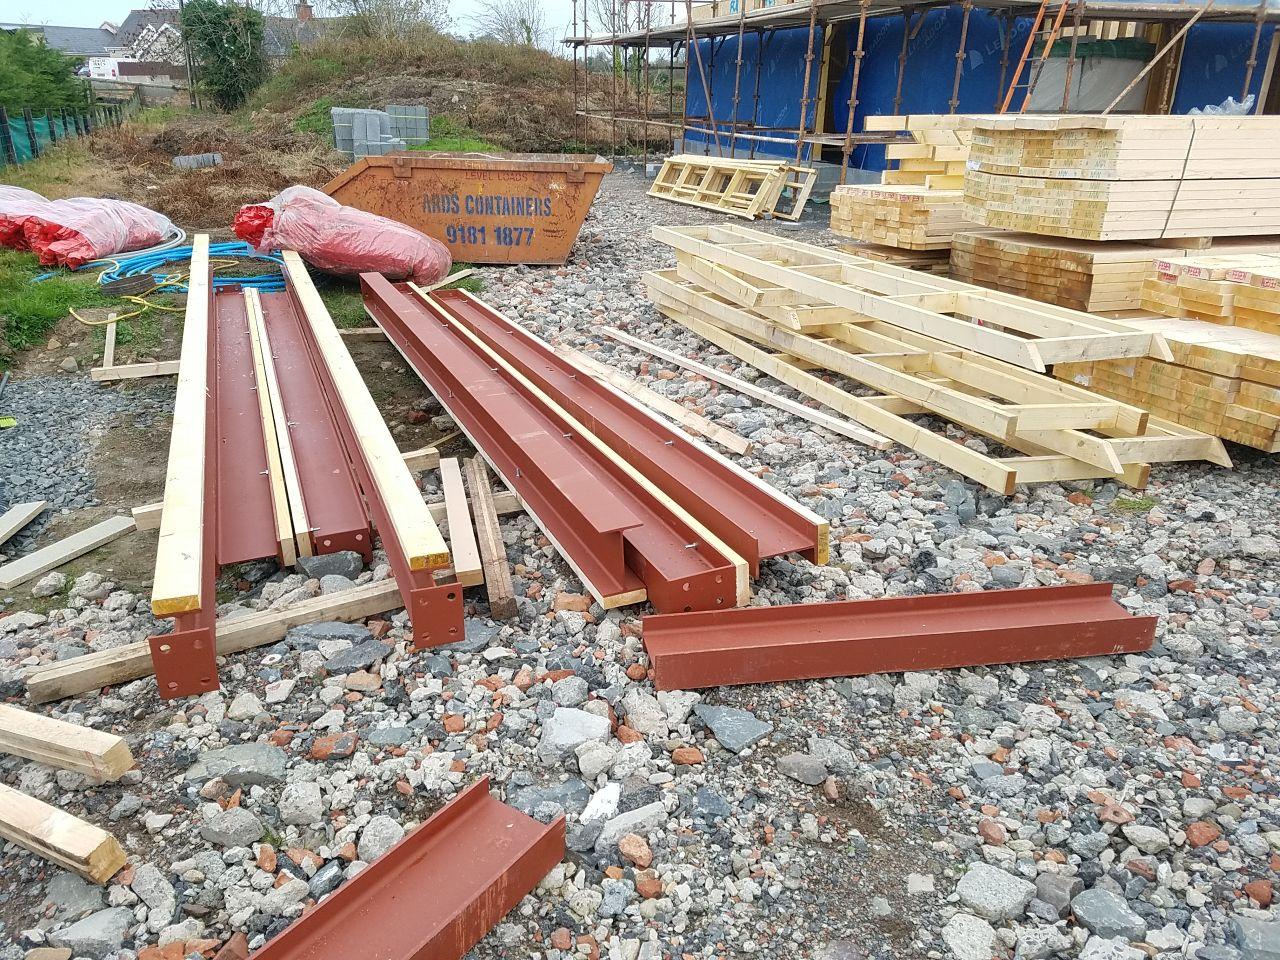
Personally I wouldn't paint them. Blowtorch to scorch? Or an external beathable dark stain? I think the stain would last better, and would darken further over time. (test first on an offcut)1 point
-
Crimewatch in the late 90’s kids tv in the 80’s...1 point
-
Take note @Onoff!1 point
-
Why would a hot tub plug into a pop up socket in the kirchen?1 point
-
Not a place to cut corners. Expensive if a mistake is made.1 point
-
Grey matched silicone = ✅ CT1 harder = ✅✅ Stain the white grout ? = ✅✅✅✅✅✅ Stick with me kid ?1 point
-
A full sheet of 6mm ply is £12 from B&Q. Hardboard is about £8 How much is one wrong piece of glass in comparison ......????1 point
-
Have you bought the grey CT1? I’m guessing not , because if you had, you would NOT be recommending it for this application. CT1 in the 1mm grout line? What colour? How is the white grout supposed to make a seal against the CT1, or how would you stop the grout so there was a gap for the CT1 to go in the last 1mm? Not going to happen ?? Read back, as I mentioned using the white grout and ramming it under the tile and into the intersections where the grout lines rise. Then I mention using grey silicone. Not inferior when used to your advantage ?. White CT1 goes custard yellow and anything other than clear is the worlds biggest pig to get a token bead with that doesn’t look like it’s been applied by a Wildabeasts hoof. Just imagine the grey over spill going onto the white grout, and from there it’ll be downhill to the booze cabinet. CT1 isn’t available in shades of grey, and the grey they have will look like gutter sealant. To summarise, I’m not a fan of that idea1 point
-
Stuck with CT1... No gap. Tbh I've been using the trims to get a "best as it gets" line to try and hide my dodgy tiling.1 point
-
loads we could talk about here. I cant give you a cost off hand for my DIY EWI but I recall it was approx 60% of the quotes I was getting which, again from memory, were in the order of £90 - £120 per meter squared all in. reasons I went DIY in addition to cost saving: method statements from suppliers were often behind the times in terms of detailing. for example, I religiously foamed every joint in the EWI boards to ensure thermal continuity, most of suppliers said they didn't do this, one said they filled any gaps with base coat! I used thermally broken fixings which via a special tool are recessed below the EWI surface, these are then capped with a little EPS disc. As well as being better thermally, this also removes the risk of a proud fixing "grinning through" your render. I also used frame seal beads around all the windows, another small detail but one which greatly improves the quality of the reveal render finish and the wind tightness (no need to silicone). I used a PVC starter track, many suppliers quote aluminium which creates a cold bridge should you also go below DPC. So these were all examples of detailing which would have cost me extra or just not been done. Next up, below DPC. Several just weren't prepared to do it, still caught up in trade folklore about the sacred DPC. I think the tide is turning, many system suppliers now have below DPC details, usually called plinth EWI. Most would require the DPC be continuous so break the EWI at the same level. This has been discussed at great length on the other place, and general consensus is that there is no reason to bother breaking at the DPC for reasons of dampness. This means you could just run one pass of EWI from footing to soffit. However, using a starter track does have the benefit of providing a nice level bed for the first course of boards. In my case it also allowed me to break up the work and get the main elevations done. Next year I will install the plinth layer of EPS below the track, slightly recessed, and then go right down to the top of the footings. I fitted the boards myself. It's not too hard once you've done a few, getting the first course plumb and level is key, then it's pretty easy. An 1800mm level and a 2.4m feather edge were hand for checking flatness and plumb. I got whole elevations within a mm or two variation over the 2.4m straight edge, my renderer was very impressed which meant I'd probably gone a bit overboard! I don't much like the texture and finish of the standard thin coat render which most systems use. Avoid, in my opinion, the acrylic and silicone thin coat finishes, go for silicate which is very mineralic and matt and could be painted over in the future with a mineral paint. Another option would be a use a mineral paint over a nicely float finished base coat, that would be lovely I think and very suitable in a period building. I used Baumit render. Very good product and was very happy with the on site and phone tech support. I used their nanopor fine silicate finish which is a very fine grained and very matt, very happy with it. If you are ever over the east side of kent you are welcome to come and have a look and I'll talk you over the whole EWI experience. You can have some fish and chips on the beach afterwards.1 point
-
End-of-the-day score? GF framing complete, FF decked out. Snags? Scaffolding needs reset higher as the final design means they're decking out the ceiling from above. and one short interior wall is a block's width out, built on the wrong side of the like we think. But nothing insurmountable. Oh and for various reasons the panels aren't factory insulated. Hey ho, it'll still get done. Loadsa timber, steel, and cavity barriers. kitchen/ snug from the kitchen end. Steels are holed- inline with the joist webs- for cabling and ducting Upstairs deck. Amazing to watch the floor cassettes swinging in (big!) and fit so neatly. Feels pretty stiff already but I think there's some extra sections of strongback to insert between the cassettes? Perimeter of the cassettes is insulated internally with 3" PIR and yes they remembered to set them on a strip of polythene to wrap for airtightness.
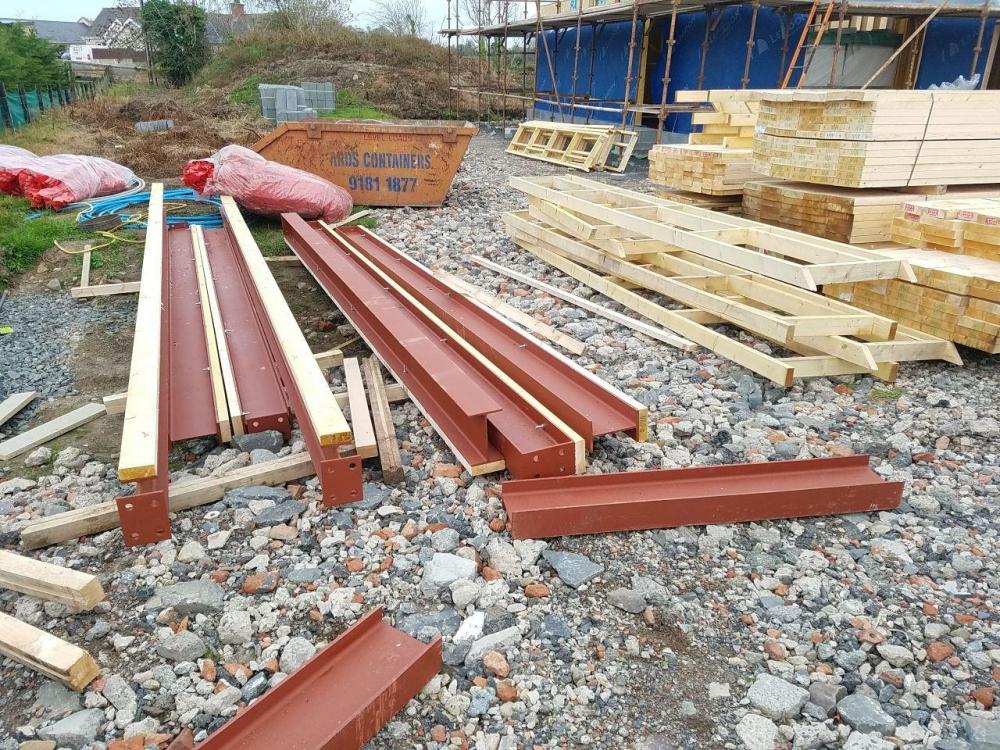
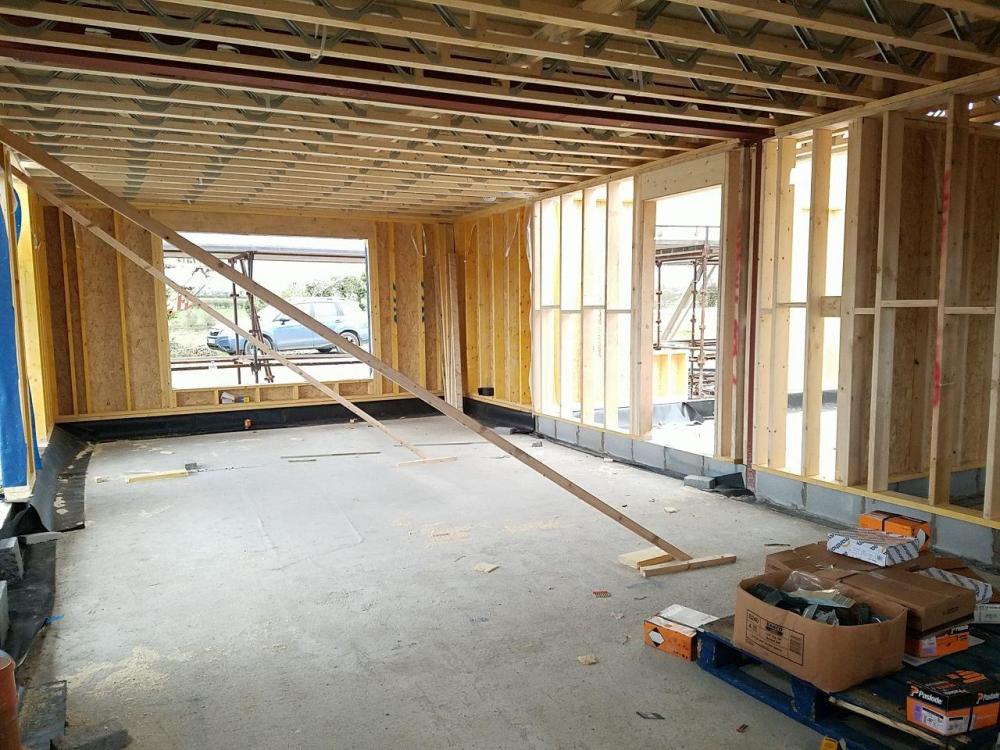
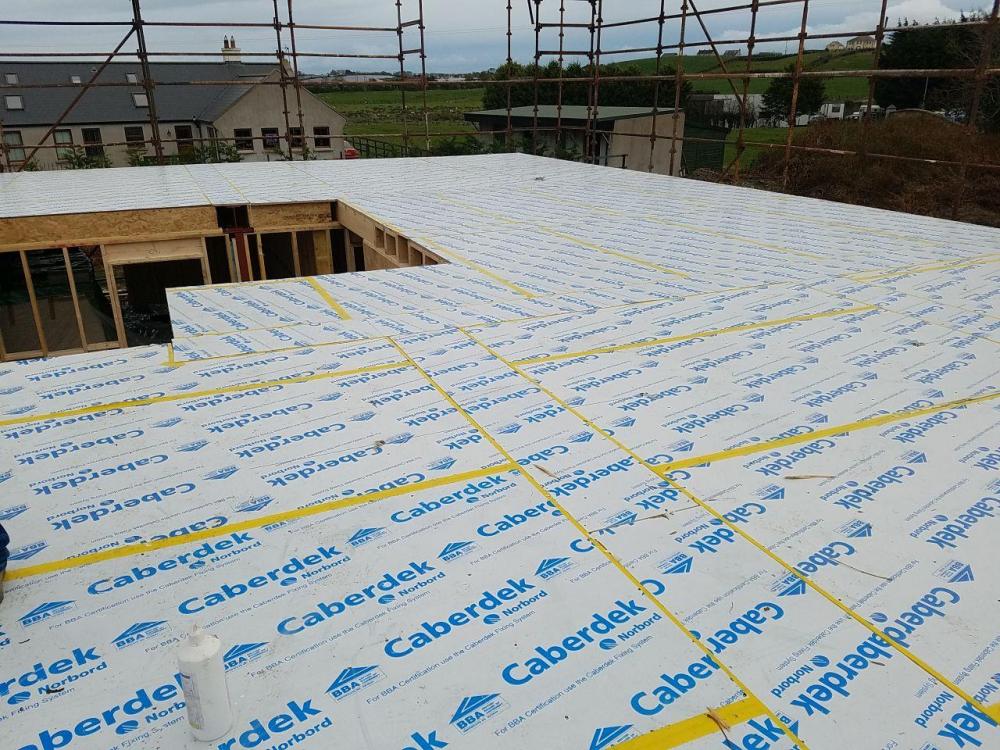 1 point
 -
Wow indeed! I bought the watch (a 1968 Omega Seamaster 300, RN miltary issue) at a surplus sealed bid sale. It had been issued to me in 1973, I handed it back early in 1974 and it was then declared obsolete and sold off, with a load of other stuff. I put in a bid (I think for £20), just because it had been "my" watch at work, and no one else bid so it became mine. Last year we were watching Antiques Roadshow and I spotted a very similar watch, same model, same year, same back markings, being given an auction estimate of £25,000. I took photos of mine, sent them to Bonham's, who agreed to put it in their July sale this year with an auction estimate of £30k. Word got out before the sale, and I was contacted by serious collectors, and I sold it for an undisclosed price that was well over £20k. One thing I learned was that the posh auction houses, like Bonham's, charge really exhorbitant fees, both for the seller and the buyer, plus they have to charge VAT. This means that sellers don't get anything like the hammer price for items like this and buyers pay a lot more than the hammer price, too. I got a fair price for the watch and it's now pride of place in the collection of a private collector. Only around 100 of these watches were made and only a few survive, as they are a divers watch and so inevitably got abused, plus the MOD just scrapped lots of them, only very few were sold. Military watches now fetch daft prices. My everyday watch is the aircrew Seiko 7A28-7120 that I was issued with in 1984, and which was written off when I stopped flying (for work) in 1997, so I got to keep it. That's now worth upwards of £1,000 and rising. Meanwhile, the "fake" Rolex Oysterdate that I bought in Singapore for a few pounds in the early 70's turned out to be genuine, and is now being restored (with some of the proceeds from the sale of the Omega Seamaster 300) and I rather suspect that it will have to be added as a separate item on to the house insurance when I get it back. I've never been one to collect watches, or value them, so it's a bit odd that the past year has seen three old watches of mine become worth a few bob. Just a pity that I never got my hands on my ex-wife's diamond-encrusted Cartier, that was a gift presented to her when we went to a party held by Sheik Isa bin Salman Al Khalifa at his palace whilst on our honeymoon. I bet that's worth a few bob now...1 point
-
No problem fitting sound insulation between posi joists Just some odd bits of 4*1 slotted through to hold it in place (okay, yes I admit, from a pallet or 2) Didn't bother actually filling the space between the webs.
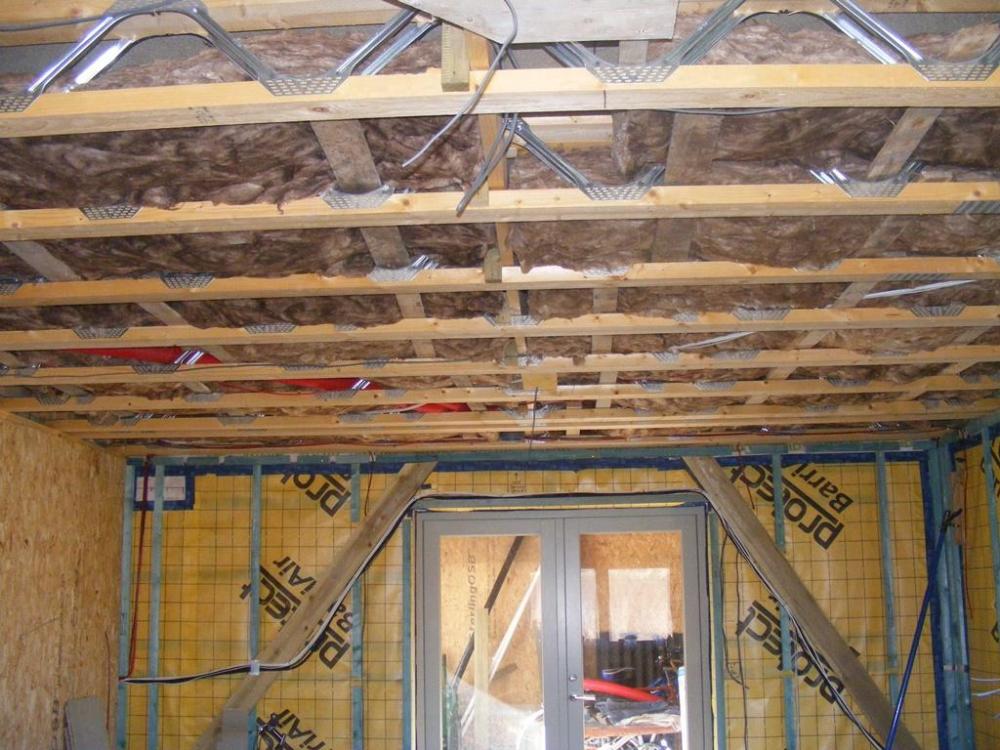 1 point
 -
Feels like a lifetime .....0 points


This leaderboard is set to London/GMT+01:00