Leaderboard
Popular Content
Showing content with the highest reputation on 10/16/24 in all areas
-
Typical fear of change is at work here. Same with electric cars. People see all the possible downsides of something new and none of the upsides. Worse still almost nobody I encounter seems to recognise that changing to ASHP is one of the critical things we must more or less all do to mitigate climate change. The ASHP/gas discussion is, in my experience, posed as one about todays running cost, not one about tomorrows societal cost and risk. To make things even worse, most people I speak to think that responsibility for mitigating climate change lies with the government not with individuals. Yet its individuals, not government, that have a climate footprint. Of course Government has a big part to play, but until we accept collectively that we are all responsible, not much will change or any change that does occur will be too slow. In reality we need to do four major things to reduce our individual climate footprint: 1. Heat our houses using an ASHP 2. Buy only stuff we need, not vast amounts of stuff we are convinced by industry that we want 3. Stop using planes other than in very exceptional cases. Use public transport predominantly and electric cars where that isnt practical 4. Stop eating meat and dairy (and produce that is flown in); or at worse cut consumption by 80-90% Actually the first is the easiest as it doesn't require a lifestyle change. 2-4 all require lifestyle changes.2 points
-
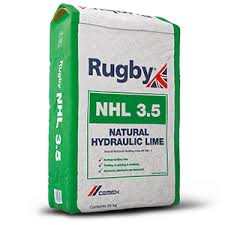
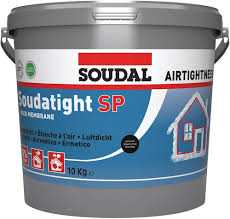
Be very cautious of foil faced PIR as an internal insulation. It has very very low vapour permeability and will actively trap any moisture that is behind it permanently. Unless you are willing and confident to seal every single screw hole and edge of it I would stay away. A more preferable method is a parge coat and a battered cavity full fill with mineral wool batts. A parge coat is a thin coat of wet plaster applied as an airtightness layer. You can use cement or lime but in this application lime would give more drying ability. Use plastering sand and (NHL 3.5) at a ratio of 2 sand to 1 Lime. Mix it to a creamy consistency and use a trowel to apply a thin coat. Alternatively it can be applied with a sweeping brush but it needs to be watered into a slurry first. Floor to wall junctions, internal abutting walls, window and door junction, penetrations and joists ends should be airtighed to the parge coat with a plaster-able tape or airtight paint. So. 1. Seal all windows and doors and junctions and penetrations. 2. Apply a parge coat. 3. Fix 70*42mm battens centres with hammer in frame fixings. 4. Install all wiring and services. 5. Install mineral wool batts. 6.Install sheets of plasterboard. You can play with the batten thickness and spacing required to fit your batts and plasterboard and ceiling height.2 points
-
As promised, a Q&A, to ask us anything about our Grand Designs project, which aired on TV two weeks ago. Forums like Buildhub, have been an great resource for us to learn from others, and so if this is one way we can give back, then happy to. Much of the 'technical' gets glossed over during the TV show, purely due to time constraints. So if there are specific questions about our building fabric, fire away. Rather than dumping loads of photos here, there's plenty of the process on our Instagram: https://www.instagram.com/thefoxesmaltings/ Disclaimer: We are first time self-builders, and I am by no means an expert, nor do I pretend to be one. There is still plenty of stuff I have no idea about, and plenty of you on here with way more knowledge than me! Based on any answers, I would love to know what you would have done differently, or things we could have done better. Who knows, there might be a next project... And of course, if you missed the episode, you can watch it on demand, on Channel4.com.1 point
-
Yes. It is plus and minus. But the quote will be a fixed sum for turning up and all the design and management, plus a sum per pile unit, so the + and- for depth are not the whole story, and are based on the actual cost of time and materials.1 point
-
It does. You have experience so play to your strengths. There is nothing like fitting the insulation yourself as you will get it right, builders are working against the clock. DIY insulation.. often delivers better quality of workmanship / air tightness which is a key requirement. You've obviously got a grasp of the basics on keeping a house warm while avoiding / mitigating condensation risks. In terms of using software... unless you really know your onions and understand the limitations of any software then trust your common sense... which it seems you have. As an SE / Designer I use a lot of different software design tools but always carry out a "sense check" as ultimately I'm responsible for what I design. Jeremy produced a great spread sheet which I've interrogated. It's a great tool to get folk enthused.. he did a great job here and a service to all. The spread sheet has it's has limitations but you can't knock Jeremy for that. At the end of the day I think it will boil down to buildability and what suits your skill set rather than the cost difference in the various types of insulation delivered to site? Remember that one day of a good trades person that you don't have to stand over can cost £200 -250 a day say.1 point
-
Was this the cost of the material or did you take into account labour installation cost, buildability, wastage and how complex it would be to make air tight. Often when I design the insulation I look at these things and think.. yes the higher spec insulation may give a better U value but getting it properly installed on site properly is going to cost much more overall. For self builders there is often no point in trying to be smart. If you get too technical a lot of local builders will either not do what you want them to do.. then you have a barny or they charge a premium.. and then still not deliver the quality of workmanship required for some of the high spec insualtion. Service voids are handy, the spark will love you for that as they don't like cables buried in insulation. Start with your structural TF stud depth. Then think about who / what kind of contractors are avialable / how much you are going to do yourself. Look at the structure of your TF.. does it have loads of dense clusters of cripple studs, noggings and so on.. then think about the spacing and wastage of the insulation, air taping etc. Keep it simple and buildable then use Ubakus say to add weight to your common sense assumptions and understanding.1 point
-
I love these... I think they are elegant. SE wise pretty straight forward to design. The rub is the connections at the top and bottom of the steel rectangular section.. often the builder leaves a mess with inadequate vertical and torsional (twisting) support. I know a bit but I think.. it's Marc.. that knows more.. can't remember his online name off the top of my head. For me it's the detailing and marrying it all up with the glass. SE wise the rectangular steel section is made to a tolerance.. not always straight and true. To that you weld stubs, tolerances here and on top of that, plates to take the treads. You can get distortion in the plates from the heat of the weld. All that adds up. Ok so now you have some steelwork that is a bit off here and there. Usually you can't see that. What is important is how you mount the treads level as that draws the eye if they are off level.. There are a few ways of doing this, shims, resin and so on. As a DIY project this is all perfectly achievable at reasonable cost... provided you put a bit of time and effort into it.1 point
-
There are some incredible Chinese cars coming. The Paris Car show was an eye opener! Actually, I like the new small Hyundai (or Kia) SUV. One thing I like is having no console between the front seats (except for a pull-down one). Longevity? Who knows. Most cars are made in China anyway. All built by robot. The Chinese car manufacture is wolds apart from some of the ones from a few years ago.1 point
-
I pay, because the quote I accepted was based on 1M trenches & me supplying all the wood for the shuttering (which I did, but the builder said it was too risky to use my old reclaimed ply & OSB). Fortunately, the spec' on the poured concrete hasn't changed - it's still 600 wide & 600 deep, but there's an extra metre of block work to go on top now, & a lot of extra muck away. I'll report back once I have the bill for the additional work.1 point
-
ive got underfloor in my 1930s house, all biscuit mix on suspended floors, works a treat so far. 170mm of PIR between the joists all foamed and taped, then the pipes within a dry mix and then chipboard floor.1 point
-
Exactly. I visited one of our solar customers who was an early adopter of GSHP. (it didn't work as it was undersized, but that is a whole other bag of fish...) This was one of the quieter pumps I've heard but sitting outside her cottage enjoying a cup of tea in rural Oxfordshire it could be clearly heard. She built a hit and miss enclosure out of clay lump and wattle and daube panels and trained ivy up the up the side nearest the house. Made it effectively silent for my next visit half a year later. I was involved in a project installing solar PV noise reduction road barriers for a short section of motorway on the south coast. The difference this made to very loud traffic noise a couple of yards behind it was dramatic. Imagine what could be done with a much quieter noise source like a heat pump. To modify my earlier statement: The problem is respect for others and a bit of extra effort, not physics...1 point
-
1 point
-
Based on having done it the 'wrong way' - the way I would not do it now - (1). (no parge coat, and *adhesive dabs* (as spec'd by the manufacturer 30+ years ago)) and (2).the 'right way' (warm batten method on a lime parge coat) and (3)(IMHO) the 'right right way' (rigid wood-fibre on an adhesive layer of lime, on a lime parge coat and with mechanical fixings) my preference, in order, would be 3, 2, 1. For rigid wood-fibre, yes, about 6mm (or the depth of the exg lime plaster if the house is old enough to have it. Would need to augment where, for example, skirtings and covings had been, and beware impervious paint. To fix the boards, apply a toothed trowel coat of lime to the back of the board and press firmly into place. Generally, and particularly if using T&G boards, make sure that the 'adhesive layer' does not get into the joint, or the boards will separate slightly and give you less-than-perfect insulation. In a rush. More later!1 point
-
1 point
-
Just been through your Instagram posts, very informative and some great links. Nice finishing and attention to detail within the build. Congratulations you've achieved a lovely home through the stress that goes hand in hand with self building.1 point
-
Tough Buttercup - a couple for starters 🙂 For Humans: How Different Sound Levels Can Affect You - Noise Project - not section on dB ranges and effects - 40-50 dB range is where most problems start - the same range as most ASHP Noise Pollution Isn’t Just Annoying — It’s Bad for Your Health (brainfacts.org) Noise and mental health: evidence, mechanisms, and consequences | Journal of Exposure Science & Environmental Epidemiology (nature.com) The Effect of Noise Exposure on Cognitive Performance and Brain Activity Patterns - PMC (nih.gov) Crosstalk between Oxidative Stress and Inflammation Caused by Noise and Air Pollution—Implications for Neurodegenerative Diseases (mdpi.com) For Wildlife: Evidence of the impact of noise pollution on biodiversity: a systematic map | Environmental Evidence | Full Text (biomedcentral.com) Frontiers | How chronic anthropogenic noise can affect wildlife communities (frontiersin.org) Songbirds affected by human noise pollution | Interviews | Naked Scientists (thenakedscientists.com) Anthropogenic noise affects insect and arachnid behavior, thus changing interactions within and between species - ScienceDirect1 point
-
Thanks for this. I need as much advice as I can get really - I'm a total novice. Fortunately, I have full confidence in my builder & his team. I wish I could say they same about the Arch Tech, who's turning my design into proper drawings. I think they're going to pump the trenches as dry as possible before they pour so they can get all the battens out - some of these are below the level of where the concrete's going. I didn't ask, but I guess the builder decided that on some sections, the pegs that are holding the bottom of the plywood in place aren't strong enough to last several days on their own.1 point
-
1 point
-
It doesn't seem that you need advice. But just in case. It's usually best to dig slightly short as it will get muddy and maybe soft and have to come out. So let bco tell you to take out 50mm more down to 2m. Plus it's OK to pour concrete into a wet trench but it must flow not splash. It will push the remaining water to the end and can be bailed out. Otherwise it mixes and a wet mix is a bad thing.1 point
-
The BCO who'd inspected our 2M test holes was away, so his colleague came along & he had a different view. One option would have been to stop work & initiate a protracted argument with BC, but my builder decided to do as he was told, & I'm happy with his decision. Our next inspection is due tomorrow - LA BCO wants to check everything immediately before the concrete is poured on Friday. I think it will be OK. The warranty inspector doesn't want to come again until he can see DPC.1 point
-
I originally was going the pile route but the cost was too high . None the less I had to have vibration alarms around the site whilst excavating. I’m surprised this wasnt a requirement in this situation.1 point
-
Just in case it's helpful - as this conversation seems to have petered out a bit, our experience was that we knew we needed a ground Investigation for any future engagement with a Structural Engineer, and also for the water connection pipe selection (local water company stipulated on their website) and that the LPA might have some questions as would our neighbours who are uphill on two sides from us. I sourced 10 companies and heard back from a fair few then rang around and had conversations with 3 and went with one who knew the self-build context and he helped a lot in terms of the brief. We might have overpaid (it was not cheap) but I felt super confident with him, and we have as far as I can tell everything we need. In the absence of a SE already (we are not yet at that stage) I wanted a GI so this seemed to be a good way to do it. We asked a SE friend to check the brief for us. I totally get it if you have a SE and they can offer to detail a brief for you - would probably mean you only commission what you need. Anyway, my experience in case it's helpful!1 point
-
Strangely that doesn't apply to the sound of the sea, or waterfalls or wind in trees. That's because, I propose, that it isn't created by someone else, and there is no point in being annoyed. Listen to a distant motorway and it could be a waterfall. That helps when staying in a travelodge type place.1 point
-
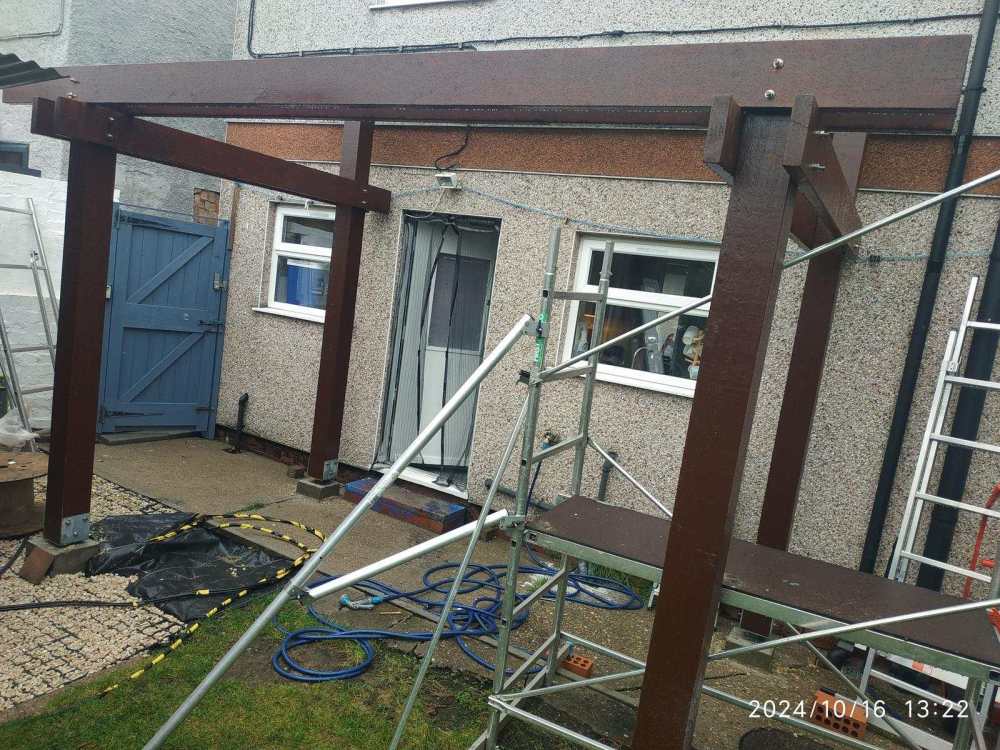
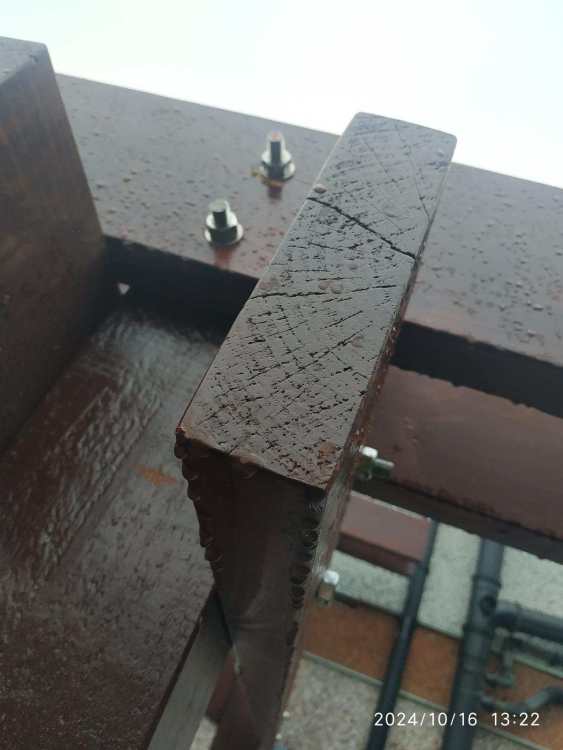
I already screwed everything together. I could not wait before the beautiful weather today I send some pictures later today. On the bases I used M10 everywhere else M121 point
-
>>> When a contractor quotes for piling it's an assumed depth just like most foundations. Can I ask - does this also work if they have to go less deep than they thought i.e. they give you a reduction?1 point
-
There is a heat geek video out there on settings for the Daikin heat pump. https://www.google.com/url?sa=t&source=web&rct=j&opi=89978449&url=https://m.youtube.com/watch%3Fv%3D-EUeqDSv5ag&ved=2ahUKEwiLtMPJuZKJAxVoxQIHHd4GOQMQwqsBegQICxAG&usg=AOvVaw0Ry-3OeQATO-3oa7i2d-ei You can adjust dT on yours I cannot do it direct on mine. Adjusting the dT adjusts how the ASHP operates, but also adjustable when the heat pump stops and starts.1 point
-
Iceverge, thanks for the comprehensive explanation of the parge coat much appreciated. As you can imagine the external face of the brickwork being laid flat results in any discrepancies in brick dimension showing on the internal face. In my mind to ensure that the parge coat is a continuous layer it would therefore need to be laid on quite thickly, perhaps in practice this wouldn't be an issue maybe a wet slurry mix would be the better option in that situation. I'm aware that PIR has its risks and they (along with many other factors) have all fed into my decision to go with this method. Understand the low vapour permeability of the PIR but don't agree that in my situation any moisture would be trapped behind the PIR permanently. The brickwork is bone dry, lime mortar pointed and I cannot see how that will change as it hasn't in the 1.5 that the brickwork has been bare, house unoccupied, windows missing, guttering leaking etc. Therefore the brickwork will provide a drying face to wick away moisture should in develop behind the PIR. I have considered a variant of your suggested design, are you familiar with the SWIP IWI product/method? The issues I have with it is that the battens are cold side of the insulation layer and VCL; with the warm batten method I am using both those issue are removed. Settling on a IWI design for this solid walled house has been the most difficult design decision. I'll be steering well away from pretty victorians for my next project. 🙁1 point
-
It might be a good idea to stay with the same insurance company. An old house we owned had been underpinned and we had to take on the same policy, as did subsequent owners. Not a huge deal, but you can’t shop around or they might cry ‘pre existing’ and not pay if something happens .1 point
-
The major parts are £1500 for battery, about £600 for a decent hybrid inverter, £900 for the PV panels, plus mounts and a few bits and bob, so about 50/50 parts and installation on your lower price quote.1 point
-
1 point
-
Hi everyone. I guess I’ve been lurking around the forum for almost as long as I’ve been scheming my-self build project. A long-held dream of a reasonably sized wrap-around extension - about 125m2 on the ground floor and 70m2 on the first floor, with large open spaces, large glazed openings, and vaulted ceilings. And now that I have planning permission, I am attempting to develop the design for a structural steel frame with Larsen truss type walls and ceilings. Only that this does not appear to be common, and maybe ultimately, it’ll prove not to be viable. But I’ll have fun learning….and trying. Regardless, I’m grateful to all those knowledgeable people that post here. Lots to think about.1 point
-
Welcome to the insane world of utility connections, you may end up paying over 6k in road closure fees for water , electric and sewers .1 point
-
1 point
-
Based on having done it the 'wrong way' - the way I would not do it now - (no parge coat, and *adhesive dabs* (as spec'd by the manufacturer 30+ years ago)) and the 'right way' (warm batten method on a lime parge coat) and (IMHO) the 'right right way' (rigid wood-fibre on an adhesive layer of lime, on a lime parge coat and with mechanical fixings) my preference, in order, would be 3, 2, 1. I do acknowledge of course that wood-fibre will come out significantly more expensive than PIR, and it is a matter of personal choice. EDIT: Note that, although my preference is for a parge coat (which I either bed the boards into wet, or to which I add an 'adhesive coat' of lime) if you do full perimeter beads of adhesive foam or dri-wall adhesive and make sure that they are deep enough to 'close off' all undulations, then you may have avoided the worst risk of 'thermal decoupling' - cold air movement between the wall and the insulation. By doing the perimeter beads and cross-hatchings you may ensure that if any 'leakage' occurs it is confined to a small area rather than occurring over the whole 2.8m2.1 point
-
Well all our talking here won’t solve the problem, let the guy do his inspection and give a qualified opinion 🤷♂️1 point
-
so it should be at least 2ft thick sounds like old age dry stone dykes fall down with age when they are not used as a retaining wall If it were me and its not i would tell him to just dig it out his side and get a dry stone dyker to rebuild it a days hire with a mini digger and couple of days for a dyker to rebuld it ly would no way class as a retaining wall in the true sense just relying on weight of stone to do the job and iam guessing its not leaning back tohelp the stone stay in situ should be at least a 6degree lean in at top if it was built as a retaining wall1 point
-
The wall is about 1.3m high, its dry stone & very old I doubt any foundations to speak of. Its sound apart from where the bushes & small tree are growing.1 point
-
Ouch. That would be very off-putting to the professional. They could reasonably refuse to allow it, and you shouldn't without permission: it could count against you even.. They would certainly decline to tell you their initial thoughts, lest it come back to haunt them. A witness is anybody. Partner, neighbour, friend. The best is someone who is a good listener and rememberer, who won't be distracted by the emotion of it. If they send you an email of what they saw and heard then that is a good, dated record. You can do your version to them while it is fresh.1 point
-
Hi SteamyTea, I’ve started my first post regarding the ground floor wall alterations with a few photos you may be interested in on the RSJ, Lintels sub forum but will also take a few today of the progress so far and add to here.1 point
-
Our piling company drove our piles while using an instrument for vibration monitoring - and sent the readings back to the company head office. I can't remember the brand name of the meter but here's a link to the kind of thing I mean. Faced with your issue, I would go onto the site and explain your concern. ask the site supervisor if the vibration is monitored AND reported (to their head office) invite the site supervisor to come into your home and experience the vibration If you get no real answer, then talk to the piling company head office. They will (should) be concerned because of the possibility of you claiming against them. No joy there, then Environmental Health in your Local Authority is the next call Its important to note that you cannot stop the work. But you can and should be compensated for any material loss. That means gathering evidence. Cracks that weren't there before the work, plaster falling off the wall - stuff like that needs to be photographed. The key question is : how much longer will the vibration continue, and - if there is evidence of damage and you need to claim - could you have a copy of the vibration monitoring results?1 point
-
Speak to the party wall surveyor and raise your concerns. Any damage caused to your property is the responsibility of your neighbour and the surveyors job is ensure any damage is recorded and rectified.1 point
-
Hi and Welcome to THE forum for people like us. Sound like a great project look forward to hearing more.1 point
-
After the above, I did a little more fine tuning and ended up Restart hysterisis of 4.9 and shut off hysterisis of 2.8. this suits heating and cooling. Moved the heat pump on to cooling using a target flow temperature of 14.5 at 30 degrees to 15 at 20 degrees, so cooling now also self manages, been on continuously since July, hot day the heat pumps runs 45 mins on and about 20 mins off and a cooler weather doesn't switch on at all, been off since midnight. Costs nothing to run. If it's sunny I need cooling, so PV available.1 point
-
Forgot to include the weather compensation curve. It starts at 10 degs OAT at a target flow temperature of 26 degs and goes down to -5, where flow is 31 degs. So flow temperature increases 0.33 degs with every degree drop in OAT.1 point
-
Made some adjustments based on information provided here and on Renewable Heating Hub. Prior to stating Below Target start delta was 8 degs Above Target stop delta was 0.4. Target flow temp 30.2. with a small WC curve rise to 35 flow at -3. This morning it was close to 11 degs, which is above where I would normally heat. After some tuning got to 2 starts per hour and a 15 to 20 min run time. The sun came out at lunch and the heat pump hasn't restarted, living room at 21.6. ASHP return temp is sitting at 21.1. So setting are quite different Below Target start delta is now 5.8 degs Above Target stop delta is now 2.0 degs. Target flow temp 25 at 14, with a WC curve to -5 and max flow temp of 32.6 degs. Upside is it should run without any house thermostats and generally look after it's self. Just need some warm weather to set up cooling. So the take away are 1. An aspect never discussed is how the heat pump responds to target flow temp. 2. What manufacturer default to may be miles away from what is needed. 3. You don't have to suffer short cycling, it fixable with a little time. 4. Base running target temp has been reduced a whole 5 degs - which should see an uplift of 0.5 in CoP.1 point
-
Mine did, (but I had no trees) he just knew the area and said “this deep and this wide” if you don’t ask you won’t know. On a previous renovation we came across a soft section of trench and the local BC officer just asked for a couple of rebar lengths over the area.1 point


