Leaderboard


Popular Content
Showing content with the highest reputation on 07/01/23 in all areas
-
If you read my posts, In my location they wanted £2k for a pump. That's £2000 pound. Sorry I've baffled you, we can't all be superman @Dave Jones😍5 points
-
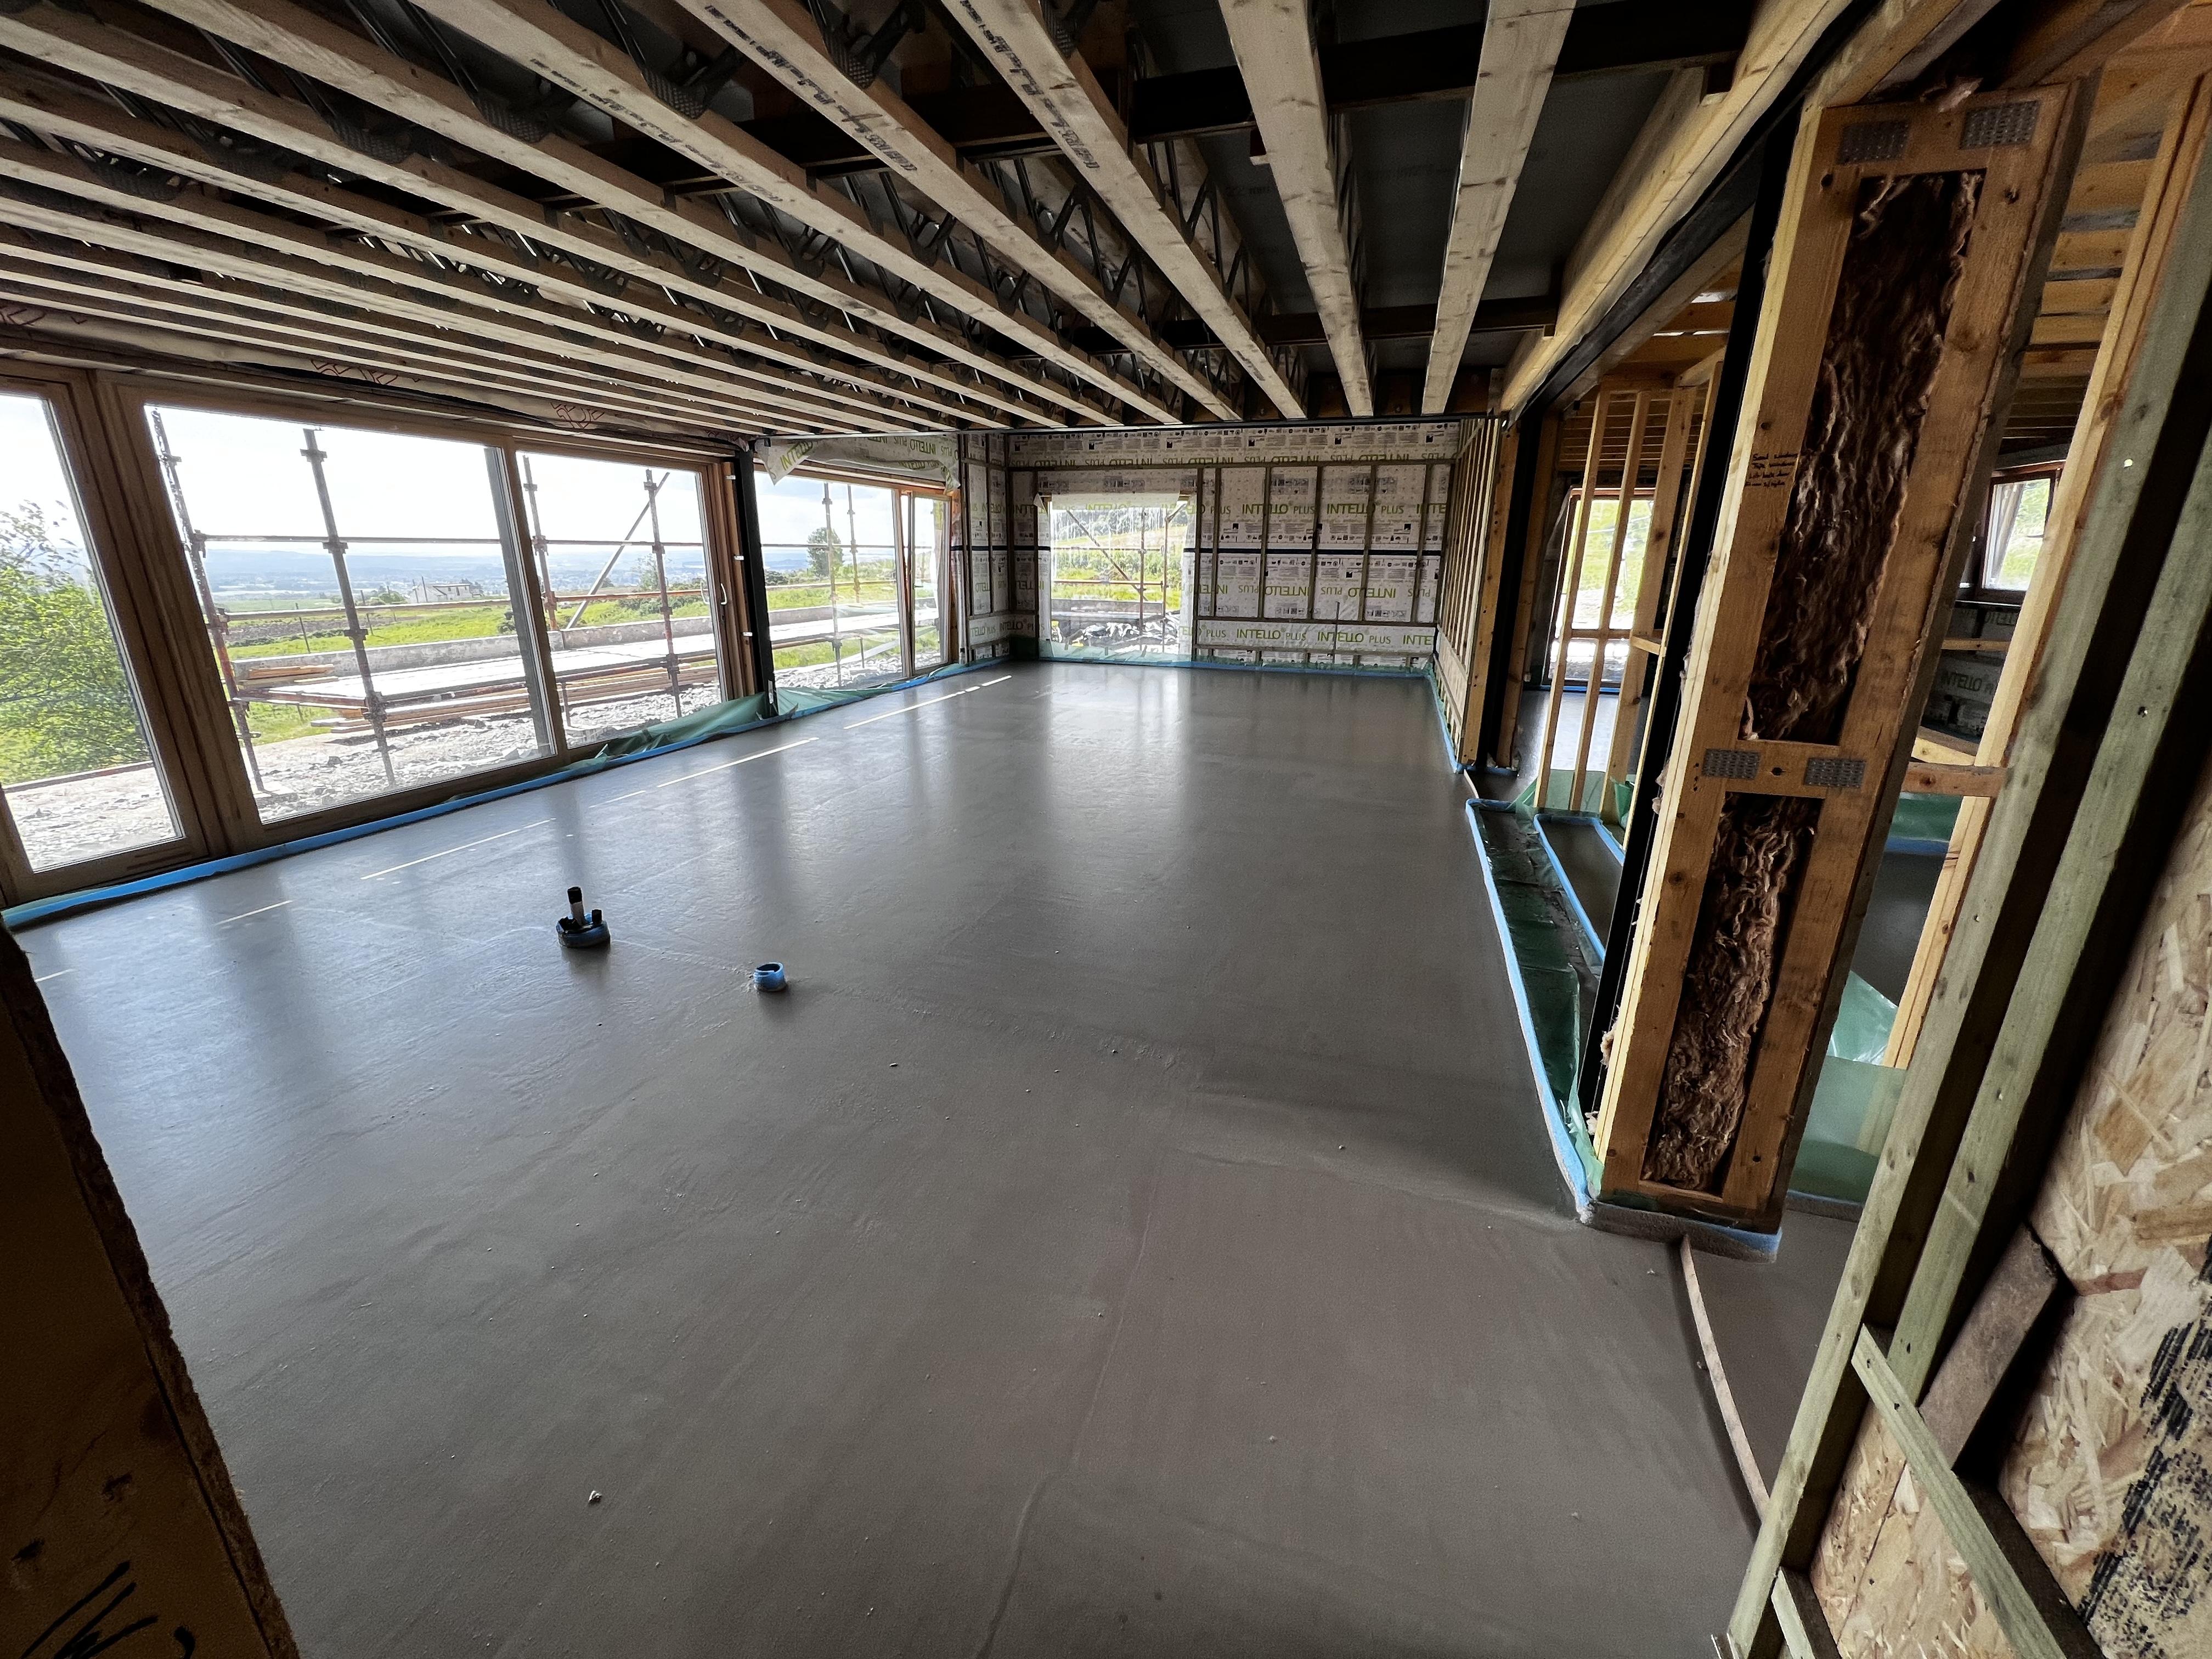
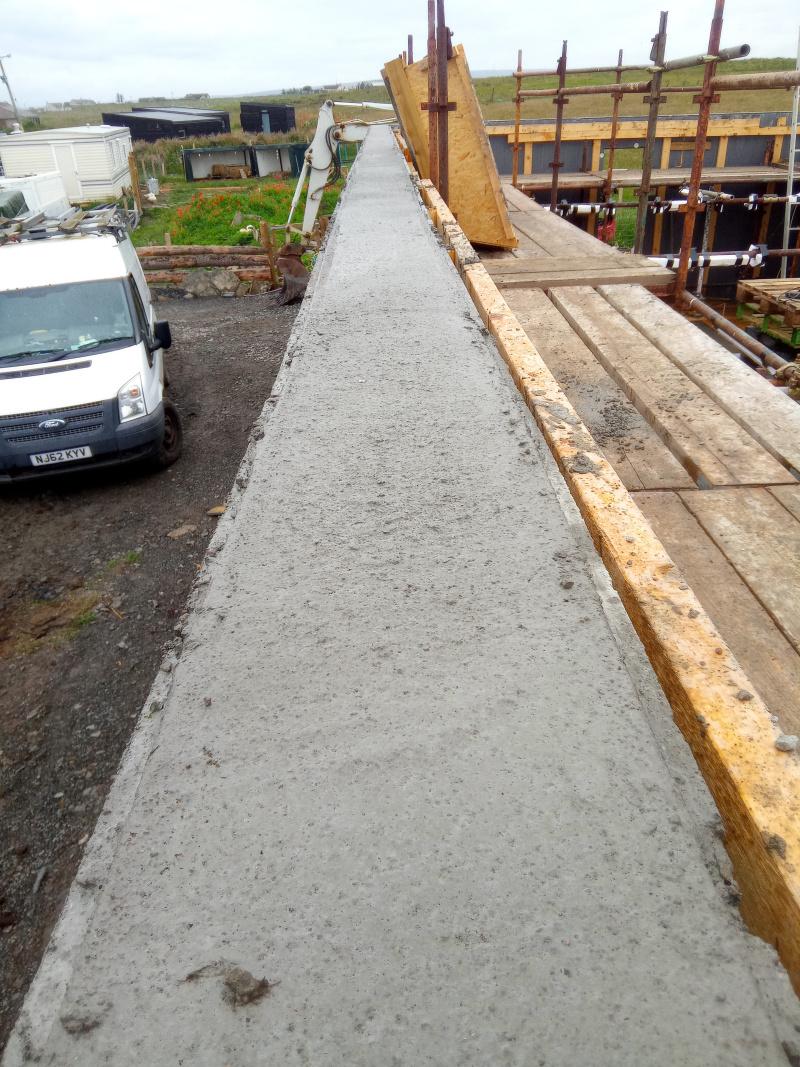
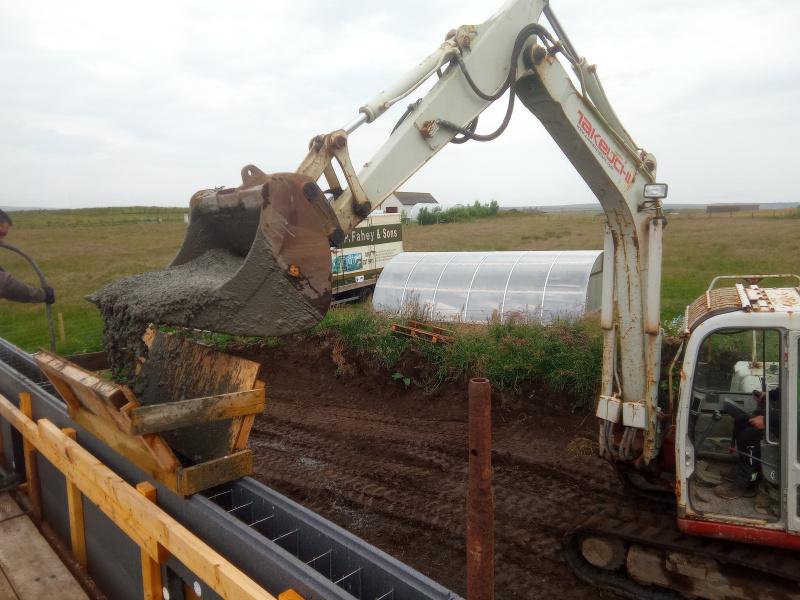
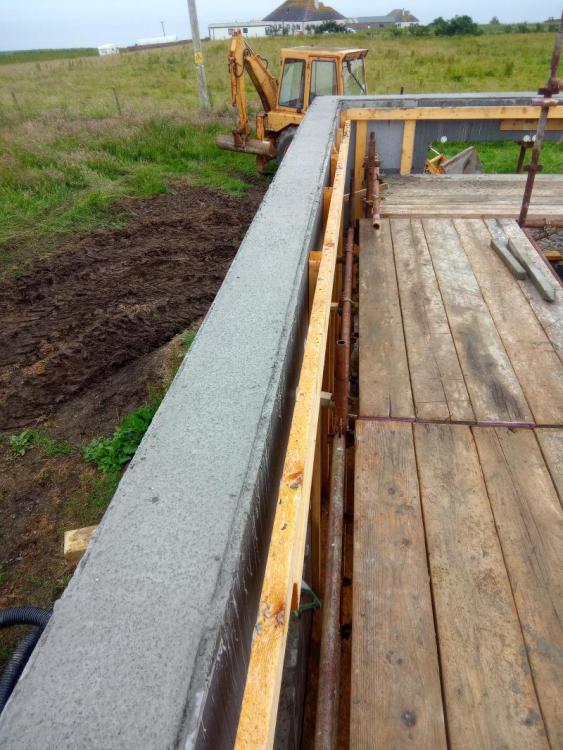
Day 48 of the build was a big one, we poured the ICF ( PolySteel) walls. Following the slab pour 2 weeks earlier, we start on building the PolySteel ICF walls. I've no experience with ICF, and thus can only comment on the usability and quality of PolySteel. The process is straightforward, all the blocks are t&g on all edges, so you simply use a bead of fire rated foam and push the blocks together. Each block clips to the last with two **clips joining the metal mesh inside the block together. Our rebar spec, was I think over the top, but basically we had a pair of 10mm starter rebars vertically every 300mm centres so the first two rows we had to position the blocks over the starter bars. In addition to this each corner block( 2 left-hand and 2 right-hand in our case per course) have 4 off 10mm L bars and pairs of 10mm horizontally on 300mm centres. Our perimeter is just shy of 40M, so all in that's just short of 2KM of rebar. Point 1, the spec calls for 400 mm L corner bars, (which I had cut and bent) you can't fit these. You can get 1 in but the other 3 need to be shorter on one side to get in, this was more so on the first two courses with the precast starter bars in the way. I ended up cutting 1 to 400mm X 300mm and 2 to 400mm X 200mm per set. These were tied in place to the metal grids in the PolySteel. With so many starter bars I made the ones located at windows longer so that they were around 80mm below cill height l, (this was when I poured the foundation.) This saved me adding extra verticals bars after, and in the main worked out. To cut out the windows I had to figure out a good way to cut the blocks. The Steel mesh in the block has a 30mm plate that sits under the surface of the IFC to allow you to screw into with self drilling screws ( one of the reasons I liked this block) For window openings This needs to be cut, I had an old rage metal circular saw and this worked amazingly, if I did this again I would buy one for the job. But I'm never doing this again😂 The most difficult part was cutting the mesh, this is 3mm bars, I used a small cheap set of bolt cutters which worked but was difficult getting into the cavity of the block and then squeezing the cutters. The angle grinder was too cumbersome in the tight space, and ripsaw with metal blade just too bouncy it felt like a bodge, so patiently cut hundreds of 3mm bars to make the openings. I think a small cut off air grinder would work well, as I did try a Dremel type cutter but this was painfully slow. At two courses high it was time to start bracing. This was done by fixing 4x2 to the blocks on 1M centres and at every opening ( the 4x2 will be re-used for studding later) I secured the timber to the blocks with 100mm baypole screws 3 per block in pre drilled holes. Below shows a bit later on but a 4x2 ring beam tied to all the verticals. We also tied the long walls (N&S) to each other with long ratchet straps and more 4x2. A little security if the winds picked up. Once 3 course we're built, I made the boxes for the windows and doors, basically 6x2 screwed through the ICF into the timber. These we're then sealed with some silicon and or foam. On the back of the 6x2 I screwed in some coach bolts to act as a key to fix them to the concrete. Each course we added the corner and horizontal rebars. We then erected some Kwikstage scaffold around the inside perimeter. This is old rusty scaffold but wasn't ready for the scrap man just yet. The bays fit really well, snug if you like. When I purchased the scaffold I also got thrown in a load of 5ft tubes, swivel, couplers and clamps. So I went around and braced the scaffold and tied each section to each other with short sections of pole. This made the stage rigid, lastly used some standards to brace the North and South walls together, creating a mesh in the middle. The final course of ICF seemed easier to cut out the openings, not sure why. All blocks were screwed to the vertical 4x2 and then the vertical 4x2 we're plumbed and tied to the scaffold. This made the whole lot rock solid. I used string lines to make sure the walls were straight and plumb before fixing to the scaffold. Now we put in the vertical rebar, pairs of 10mm rebar on 300 centres. Pic below shows the corner L bars before the verticals were fitted. To pour the concrete, around 12M³, a pump was put of budget as they would have to come from Inverness, we were quoted 2K, so reverted to the 360 bucket method. I created 2 pour boxes and 1 corner box put of OSB, to act as a funnel for the concrete. We poured in 600mm levels and vibrated the concrete. Moving the pour boxes along as we went. The first wagon had 7 cube so this would be over all the cills, once the cills were full, we capped them off and screwed some 4x1 in place. All working like a dream... When vibrating I noticed some of the ** clips holding the blocks together pinged off.. I went down to check levels etc, and noticed that one corner block on the SE corner, between a long window and large lounge window had moved😱. The t&g was holding but the was a 15mm gap. Ok panic starting now. We stopped pouring here and moved moved on but needed a solution. I'm not proud of this, but we used a haulage strap, through the window around and out through the door and back and ratcheted the section of wall together with some timber on the corners to prevent the strap digging into the ICF. Followed this up with some OSB and timber straps. Then the cheap electric vibrator we were using in to window voids gave up. Couldn't handle the stress of the day, my heart rate was in triple figure now. The hired in vibrator we were using from the top was still going strong, and I also had some cheap plate vibrators to hold against the walls which were doing enough. I went around all the corners and added more bracing, berating myself for not adding large strips of OSB on all the corners.why didn't I do that. If your reading this because your planning to use PolySteel then screw large sheets of OSB to the corners.. Ok, heart rate still in the hundreds, but the first truck was done, we were level, with the exception of the problem SE corner to about 1.4m. everything was holding and plumb. The moved corner will be ok, as long as it stays put. While waiting for the truck to go back and refill, around 90mins, I went manically around screwing more battens to the corners. The concrete was setting up on the SE so I was feeling a little better, but worried about filling up the corner With the excitement of the corner issue and my manic battening, I forgot to add the additional supports for the two large windows, these were left out so we could fill the lower part of the wall from the 360 bucket. We start the second lorry on the West wall, working out way to the SE problem, all working well, vibrating and filling as we go, shuffling the pour boxes around. Then the hired vibrator started smoking and gave up. Back to sticks and the flat plate vibrators for the last section. We skipped the SE corner and worked our way along the S and then W walls. With about 3m of wall to complete the digger shut down. Spanners out, more fuel, clean the filters, bleed the injectors, no go, dead. Ok. Fire up my old loader and get it as close as possible and shovel it in... No this wasn't happening, the steering piston decided to come off, an old fault that came back just at the right time. FFS anything else. Yes, those supports for the lintels I forgot.. Pete!! Those lintels are sagging argghhhhh. Acro props and some more tense moments we jack them back into place level and plumb. Ok back to the other fire. We were contemplating buckets when my neighbour brought his Manatu with a big bucket and managed with shovels for the last bit around 1/2 a cube. While the tops of the walls were being floated, and in anticipation for excess concrete we managed to fill some shuttering for a front path, and the start of the ramp to the rear door. This is the offcuts of ICF from the windows that will form the path and increase the levels at this corner hopefully softening the height in this corner. So it's done, it's up, my heart rate is now normal, and I think I dodged a bullet or two. But with DIY and house building you have to adapt to react to the events as they unfold. My list of favours I owe my neighbour has expanded. But we can sit here today and be proud of the product. the SE corner will need a little fettling to get square,but nothing to worry about. On wards and upwards. Day of rest today, just off the strim around the pods, guests due later.3 points
-
Every doorway or where it’s narrow. I know because I put them there 😂 We ended up at an average of 53mm2 points
-
Amazing stuff this screed
 2 points
 -
My wife's a spender on everything and anything, and is now encouraging me to buy tools to "even things up". That wasn't quite what I had in mind when I said we should balance our spending, but okay...2 points
-
@FM2015 I'm just about calming down. Breathe.. It's up, the walls are straight/ plumb, but the day had some issues. Used hoppers and a 360 until it broke🙈. I'll write up a blog, but we got 12.3cube in the walls, the 360 gave up with about a cube to go. Managed to finish with a manatu, buckets and shovels. Also managed to pour a foundation wall for the path with offcuts of the ICF. So beer time.
 2 points
 -
Well done - I always enjoy reading your blog entries!!1 point
-
You won't get that, water companies protect their data for obvious reasons- terrorism, sabotage, theft etc . Get in touch with your water company with your query and the will tell you the nearest viable supply. The answer is also much more complicated than what is the nearest pipe. It needs to be the right pressure, size, purpose (you're not going to put a 25mm tapping on a 1200mm raw water trunk main or a pumped supply to a reservoir.)1 point
-
😞Not really the answer needed on a self build (DIY)forum. If it was the admin could put that in a banner on the landing page and be done with it.1 point
-
It was firewood a week after I took this BC tried to tell me it needed to be concrete I pointed out the wording Usually Tarmac or concrete After a bit of pitch measuring and try to lift it off the ground He signed off with landscaping incomplete1 point
-
I did an unvented course a few week back in Inferness, the waterless trap is acceptable, after the tundish. The D1 and D2 discharge pipes still need to be correct diameters and lengths etc, but they can discharge into the SVP, but can't use solvent weld, push or mechanical joints.1 point
-
https://www.amazon.co.uk/Silverline-427633-Impact-screwdriver-bits/dp/B000LFTU1O/ref=asc_df_B000LFTU1O/ Just twist the right way, then twat it with a mallet.
 1 point
 -
Excellent reading. Well done. The reinforcement doesn't sounf excessive to me 10mm is just a heavy wire. Small poker packing in. Yes vibrating pokers are the business. But never underestimate the ability of a long 2x2. It won't shift so much air out of the mix, but it will get flow round and into corners, and combine successive bucket loads.1 point
-
I often tile directly on to flo screeds 5 days drying time in plenty of time in this weather I always use the same adhesive as the tiles Flexi Bagged Ardex for timber Keep it simple Don’t buy expensive products for the sake of it1 point
-
What would happen if they went pop before realising the drawings?1 point
-
They give us 45 Mins to unload and then £1 a minute. The guy driving the digger was the truck driver, who was rewarded with some cash, I had agreed this with the company The excitement with the second truck ended up with about 90 mins waiting time, the first truck about 40mins so all in not too bad.1 point
-
The way the house building industry is funded is rubbish. I think this is due to the time for invested money to be returned in a useable product. Hence what we all do is buy one brick, one plank and one nail at a time, pay people at short intervals and watch our houses slowly go up. Everyone's exposure is small, you buy a brick and some mortar, pay a mason and your investment is secured quickly. The disadvantage is you negate the advantages society leant two hundred years ago in the industrial revolution with the efficiencies and quality improvements of mass production. Anything build in a factory like trusses, kitchens and windows are all bespoke to fit in with aforementioned bricks. Hence they have only one customer for the product made. The manufacturer is really exposed. If one person doesn't pay they're left with £££££ of product they can't sell. They respond to this by gambling on the creditworthiness of the client every time they make a sale, often going bust in the process or else demanding large amount of cash upfront like MBC and shifting the risk to the client. As they are the top end of the market and have clientele who can afford to self insure, who can blame them. If MBC were building a standard house type X that could really be erected in any one of 100 clients sites in a blink of an eye their risk would be much smaller. However if they prebuild a bespoke slab and kit for @Furnace and they don't get paid they are goosed. Until we all agree to live in extremely standardised houses we will have to live with the risks of building brick by brick or else exposing ourselves to the creditworthiness of manafactuers and they will need to do the same for us.1 point
-
+1 to that. I have often wondered why nobody else fills ICF like this, at least on a single storey building. And this shows it can and does work. If only the digger had not had a grump it would have gone sweetly to completion. There have been plenty of Grand Design type programs where the concrete pump is not working and they are frantically trying to fix it before the load of concrete in the waiting wagon goes off.1 point
-
@Furnace. I get the above, and agree with you. When i was building a couple of large houses for a developer several years ago, all the contracts to plumbers, brickies, electricians, roofers, plasterers etc, had a 10% contract value retention for 6 months from house completion. The developer thought he was being smart. However, all the contractors simply loaded all of the quotes by 10% and treated it as a "If i ever get it, it will be a bonus" If a manufacturing company is say involved in producing 10 timber frame houses a month. Materials, power, rent, wages, etc during that time could be considerable. To cover this may involve borrowing money which will cost. I can see it from both sides, but agree that regardless of what companies house checks you try to do, you are going to be at huge risk of paying up front for a timber frame from any company. That's why i wouldn't buy One. From the other side. I used to run a small company producing bespoke hand built furniture, Kitchens, Bedrooms, Vanity Units, Media centres etc. I used to have 25% on signature of contract, 25% 12 weeks before delivery due, 25% before delivery. I had lorries parked, and refused to unload them untill funds in my account. Final 25% within 14days of completion. This ment that i didn't have many clients, but provided me with a decent income for 20 years. I was never exposed to a client not paying me (even if i got a knock for the last payment i was more than covered) The value of my contracts were between £35 to £200k Over the years, i was offered a lot of work that i turned down, because they were not happy with my contract terms, and i was not happy with the contracts they were offering. I knew many companies doing similar stuff to me that went under due to being exposed / not being paid. Perhaps i could have made a lot more money if i had taken more chances. I will never know. I would have been happy to have worked with some sort of escrow, but i would have involved lots of extra work in admin, and i might have needed to borrow money in order to fulfil my parts before getting my money. The end result is that my already hideously expensive kitchens would have cost even more. Say my timber frame company is cash rich. My company is able to use that money to make more. In it's simplist term sat on deposit with a bank. That is earning my Company interest. Take that away, because i am now using that money to make your timber frame......It ain't hard to guess that the cost of your timber frame has just gone up. It kinda sucks both ways, But i still wouldn't be buying anything off me, if i still produced any of my stuff. Not on my contract terms.1 point
-
I think fitting a kitchen is about a lot of other things. making sure pipes are long enough to reach into rear of units without joins, bringing pipework under sink to ensure the space under the sink is usable, with isolation valves in every service having separate sockets for washing machine and dish washer if applicable I.E not plugged into a double socket. having plywood in the walls at the correct height for wall mounted units, base units etc so that it’s just screwing into units, all this makes installation easy. I like pre-made units now, my time is worth more, and I have more demands on my time. oh and making sure high level units are at a correct height for hob clearances…1 point
-
We had an insulated raft foundation and the SE only wanted a soil plasticity test from the centre of the slab area. He told me what was required, I dug a hole, put a soil sample in a plastic bag and took it to the laboratory. £50 for the results, it was thirteen years ago though.1 point
-
Looks like a really nice neat job. You should be proud of yourselves.1 point
-
Good to see another member of the SleeplessSelfBuilderClub. Welcome.1 point
-
Only really true for a high heating demand, not true at all if the heat demand is below about 20W/m2 and the lower it gets the smaller the difference becomes. The difference between 100m and 300mm centres is 1 to 2 degrees mean flow temp. The only real difference between 300 and 100mm centres is reaction time to a heating input. With 100mm being much quicker. Most heat pumps for example will only output 25 degrees flow at the lowest setting. With UFH due to the very slow reducing return temperature, controlling heat source can be an issue. At 25 degree flow mine for example would fire up and run for about 20 mins, then take a break, looking for a return drop below a set threshold, but lots of hours later the return never did, I had to up the flow temp to 26, then it all worked as it should. Nothing is black and white.1 point
-
Not that hands on 🙂 They might be able to remove negative ones from their website, but not from forums like this one, blogs, trustpilot etc.1 point
-
As I've said elsewhere, the key battery feature for me is shifting daytime export that would otherwise get 15p to the peak export window at ~30p (new rates). The key feature overall is the higher export rate. The symmetry in rates means you can charge the battery in the cheap window without thinking about it, but nothing says that you have to. Any import is offset by later export, though as I said over in the other thread Octopus just narrowed the inefficiency allowance in their latest price update: Hybrid inverters always prioritise PV for self-use before pulling from the battery, yes. Even if prioritising feed-in or force discharging, the house still uses the energy first before export takes place. My average export unit rate on flux since March has been a little over 25p. As it is a complex tariff, I agree that it needs careful thought before use.1 point
-
Try the "water heating" button and see what icon lights up, then try to change temp.1 point
-
From what I can see, you are shuffling through the view temp menu, you pressed set temp only once, and it didn't change the menu to "set temp", according to this youtube video, I see no point in pressing view temp, you need to play/understand how/why the set temp button doesn't take you where you need.1 point
-
My thinking is to fully charge the batteries in the Flux period, then hold the charge to the peak period, so nothing used from batteries until then, then fully discharge the battery during the peak. Anything generated above house load is exported. In the above scenario the size of usable battery becomes limited by your charge/discharge rate, my maximum charge rate in the Flux period is 8kw, so 24kWh for the three hours, same for discharge.1 point
-
Well, that was fast. All switched over :D. So, battery set to charge 2-4:59am and 3-3:59pm; and to force-discharge 6-6:59pm. Heat pump set for DHW 2-3am, and to let the house cool down a bit (not much) 4-7pm. I *think* it also makes sense to bring the house to 20°C between 3-4:59am, in the hopes of coasting until the solar shows up, certainly for March-April and Oct-Nov, but less sure about that. I'm really not keen on being very warm overnight. Might give it a try though. The only other thing to do is add more batteries :3.1 point
-
I found the Rational quote quite ridiculous More expensive than building the house and workshop 420m2 And that was supply only1 point
-
We used pallets from our build. The heavy concrete ones were useful for a bridge.
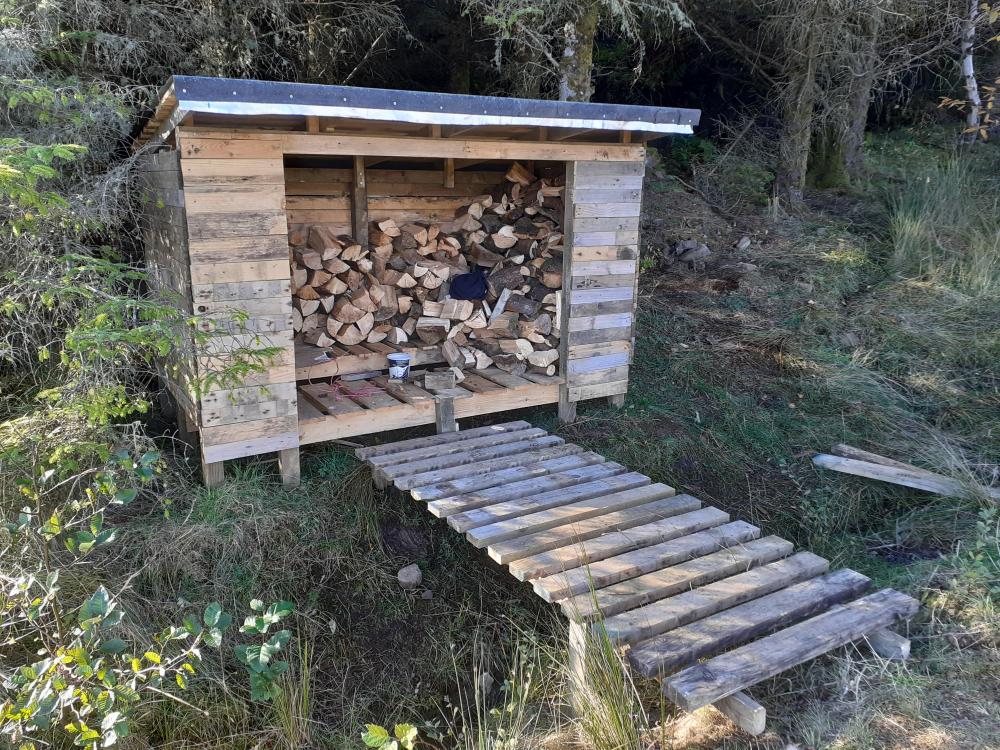 1 point
 -
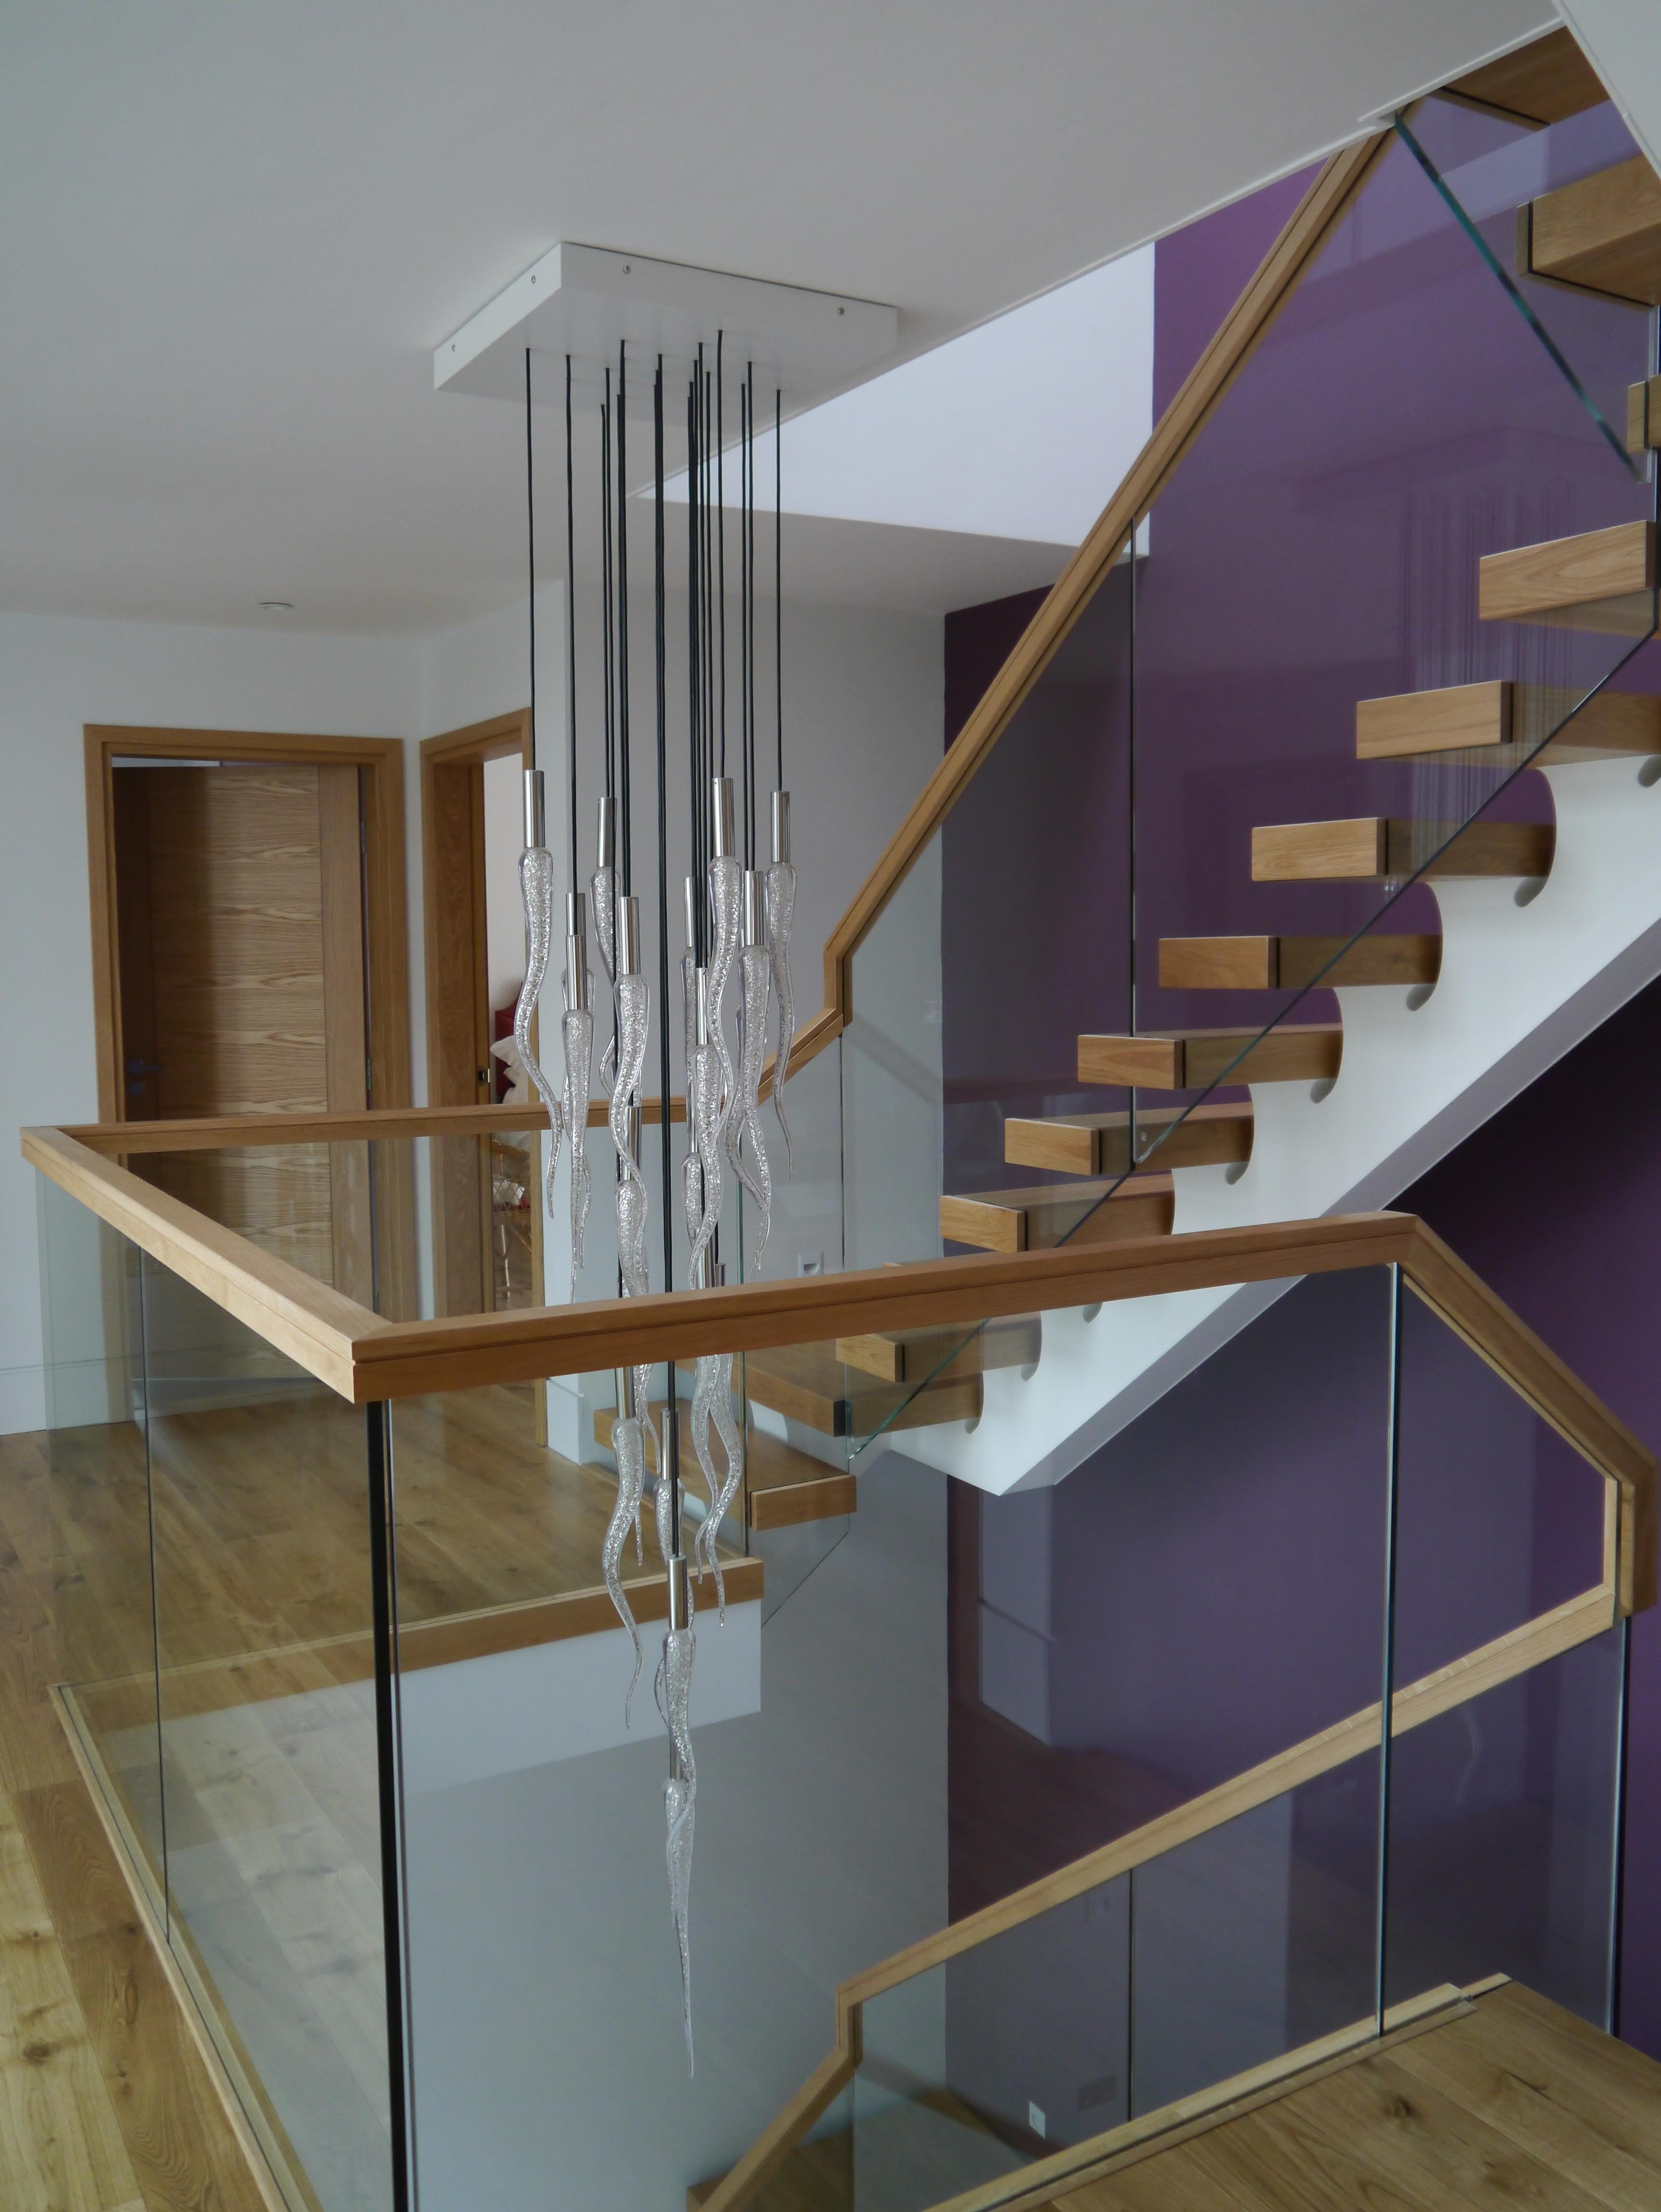
Our stairs were designed and manufactured by a specialist stair manufacturer in Dublin - Jea Stairs, Colin Walsh. colin@jea.ie - see www.jea.ie, The stairs were all assembled in the works, for acceptance, diassembled and shipped to the UK, with the glass balustrades delivered separately. They did a great job and Colin was very helpful. with practical advice and support. I attach a few photos
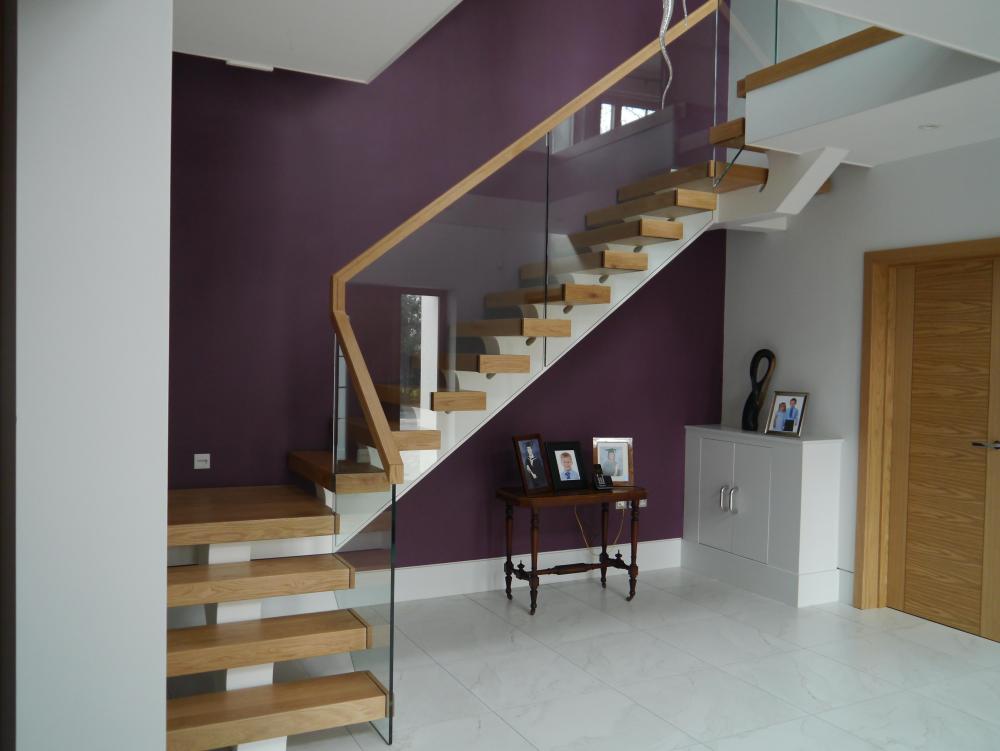


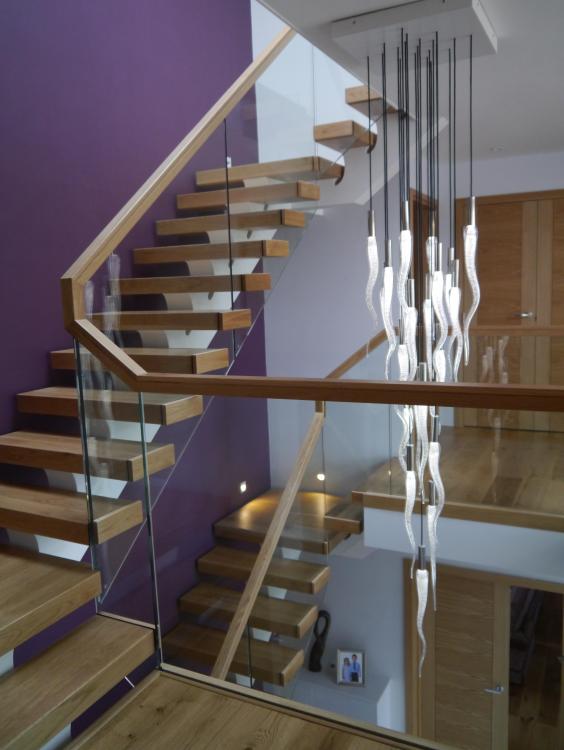 1 point
 -
You can't change the temperature with the "view temperature" button, that is viewing actual temperature, not the set point. Instead you use the "Set temperature" button where you can cycle between water leaving temperature and DHW tank temperature and adjust them. You have no doubt tried that and found it does not do anything. You clearly have not discovered the bug feature in the software. You can only adjust these temperatures when the heating mode is on. So even though it is the middle of the summer and you don't need any heating, go and turn the heating on. Then you will find you can adjust the hot water tank temperature. Then go and turn the heating off again. I can't remember if I discovered that by accident, or someone else told me.0 points
-
Talked this issue through with SWMBO the other day. She made a good point - " Do I tell you what you should have in your workshop, Festool this Festool that .... ? " And quick as a flash I replied "Ermmmmm, dunno wot you mean .... the tools you buy are just as expensive as mine though " Took a while to calm that one down ....0 points
-
risk all that effort by not hiring a couple hundred quid pump for a couple hours. baffling.0 points
-
Digger was not a fuel issue, first thing we did, clean the filters, purge the air etc. It tried to fire but you could hear a solenoid clicking out immediately. Definitely a wire issue/ electrical. Plus the machine just stopped, no coughing etc, just like it was switched off. Not my problem for now. Day off, then clean up and strip the scaffold tomorrow.0 points