
Leaderboard


Popular Content
Showing content with the highest reputation on 04/10/22 in all areas
-
I’m completely off grid at one property, and have been for 50yrs…. Trust me, generating electricity yourself with reciprocating engines isn’t fun, or cheap… if you really want to do it, you want a Honda ex5500 and modify the cooling system so you can plate load it into a TS and get most of the energy out of that gas.3 points
-
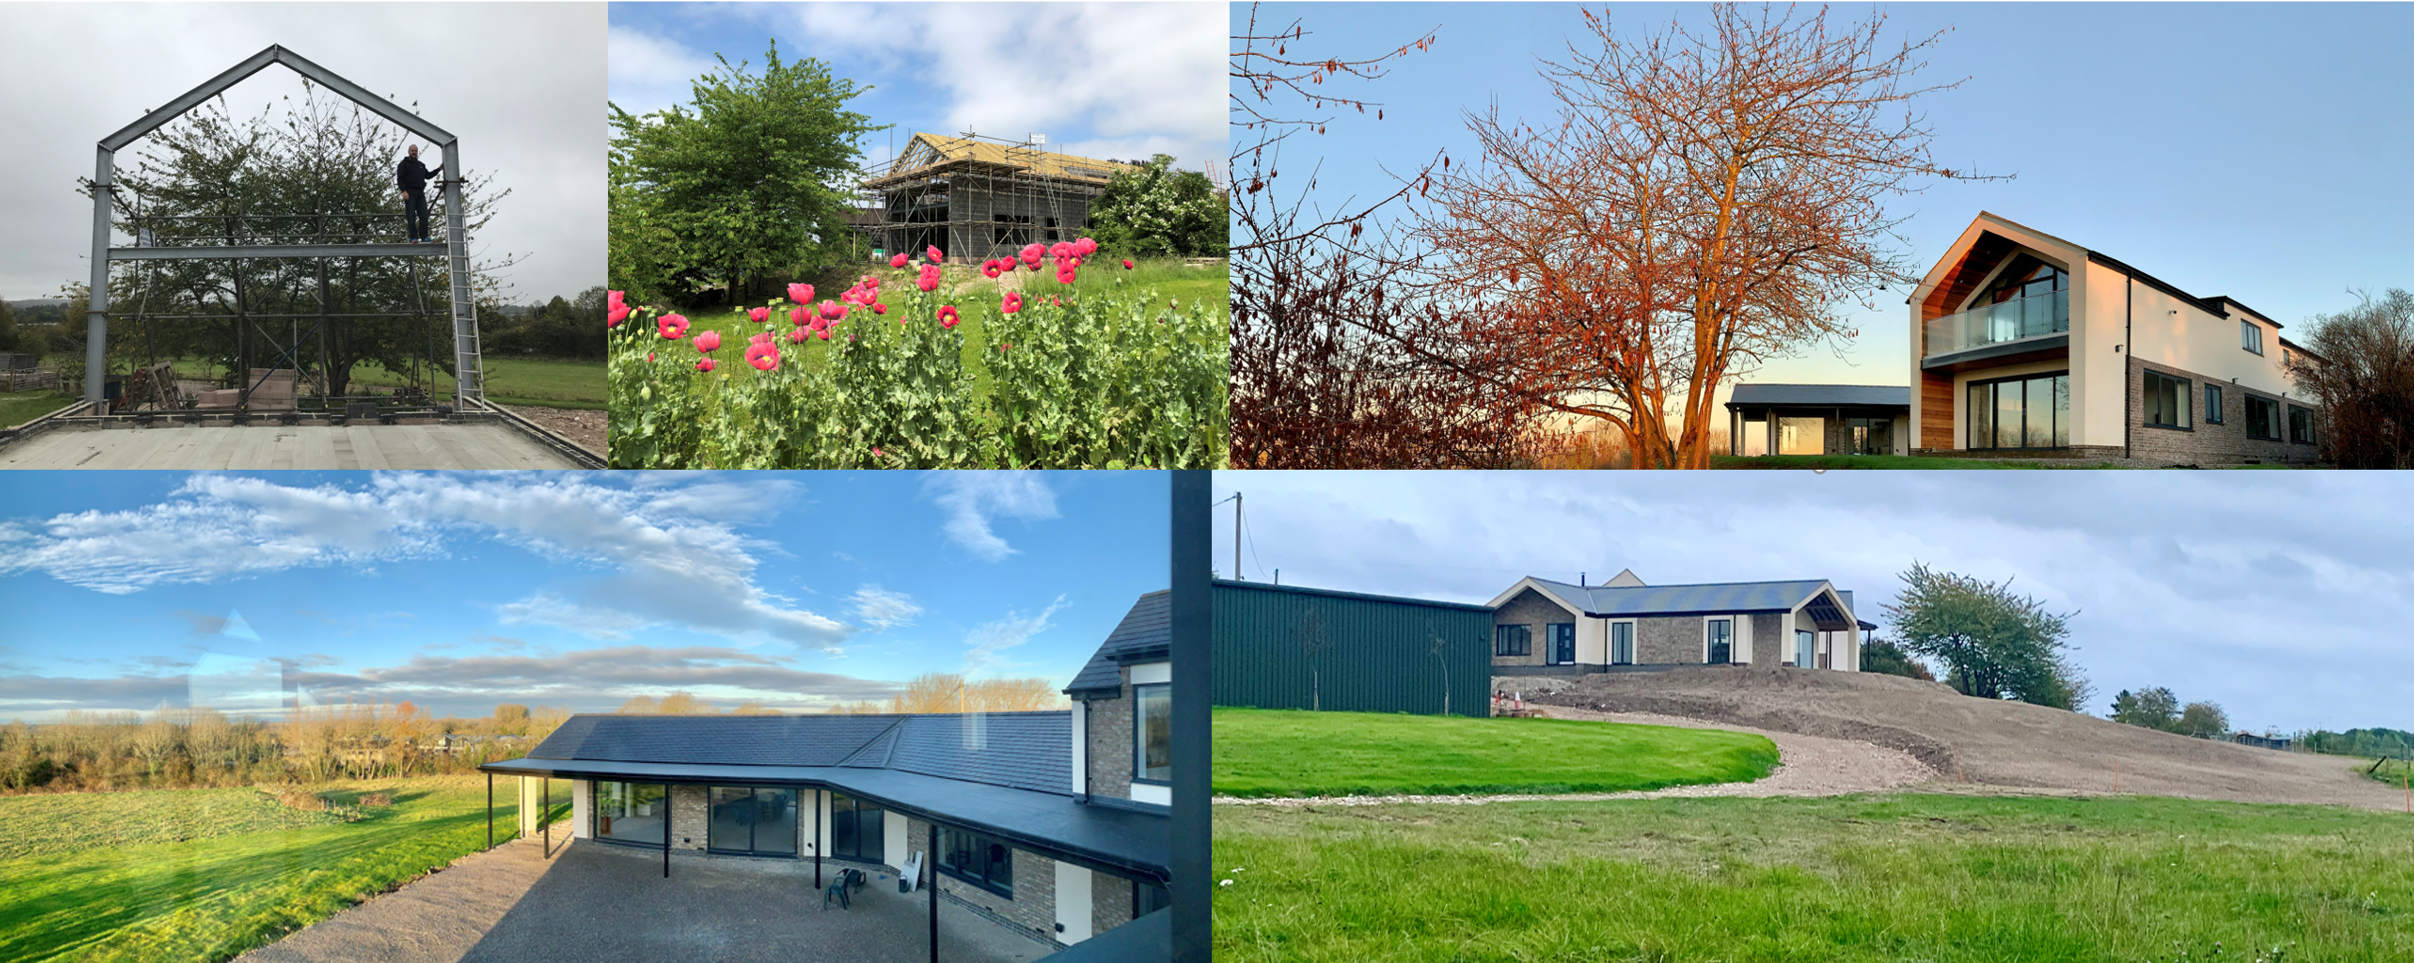
finally got some scaffolding down, got trim to finish cladding after a six week wait so just a little more to do on the dormers and it can all come down. and before anyone points out the down pipe isn't vertical, it will be, currently just temp. slow progress but progress 🙂 gonna sell the other plot 'cause we ain't doing this again!
 2 points
 -
...and remember that holes in steels need to be positioned wrt the pozijoists too so there could be a to-and-fro between the pozi designer and the SE (if they're different people) I just asked our TF guys to design in a couple of holes in each steel and had no problems routing the services from that point on.2 points
-
I’d just go straight over it We go over old render that has been painted or sealed with other coating1 point
-
Hi I've just completed a detached new build, the process took me 5 years it was harder than I thought (but don't be put off!) and it has been an absolute emotional rollercoaster with huge highs and very low, lows. Loads of insulation and Celotex, 14kW Air source, 2 MVHR's, no solar, block and beam upstairs and downstairs, underfloor heating both floors, wood burner.1 point
-
I don't mind telling you its been pretty stressful and of course I've made mistakes. I've done a lot of the work myself, its made me incredibly humble, especially now I know how hard some guys do work through the horrible wet cold days when you see them up scaffold. I've also used brickie's, roofers and specialist skills. I've have had to really try to focus on just using any milestone as a success worth celebrating and not getting too down when things start going backwards. I think you definitely need help with the "mind over matter" when doing this sort of project so I suggest to anyone starting this sort of thing you rally your friends and tell them you are going to have some tough days that way when you just need a shoulder, you've got one. That said however you must remember you're doing something very few people do or would even attempt to do, that in itself should keep you going on the crappy days. The design is my own but copied some bits from architecture seen on google images.
 1 point
 -
Buy a new roll get some of the black dpm joining tape get some scissors and get on your hands and knees and patch it all up. fairly simple really. If it wasn’t important then why put it in in the first place.1 point
-
Can you hide the wall by raising the floor level either side of it by the height of the wall. Then you will really show off your coping stones.1 point
-
I guess this is giving you sleepless nights I had something similar. Someone will be along for a proper answer but I have some bitumen repair tape if you would like it. PM me for details to see if you are nearby enough to collect it.1 point
-
Personally I'd only bed them on a full mortar bed. Heavily laden with SBR. I'd then pipe the joints with the same stuff. Do it properly or water will get under them, freeze, expand and loosen them over not too long a time.1 point
-
I've done exactly what you're advocating, that is got the packers level and CT1'd in place. Then slopped the mortar on. Put the "stones" on and they will only bed as far as the packers. Just can't recall where I used the technique. Not sure if shrinkage will be an issue as mortar/ concrete shrinks back a bit I believe.1 point
-
My smugness ended today . I got up properly to look at my cast concrete with a spirit level …. It wibbles and wobbles around . It’s not level . So I embedded frame packers in cement at the low levels so that my spirit level shows level between them .Now when I bed the copings ( I think these biggies are maybe 60kg each ) they will sink . So I will put packers on the wall and cement around them to the level . Assumption is coping will only drop so far until it hits packers and cement. Someone say this is a good idea please 😁👍1 point
-
One thing you have to consider when specifying an MVHR unit is the pressure drop from the duct runs and the outlet nozzles etc. You need to see the MVHR fan curves (supply and extract) that way you can see exactly at what point on the flow/pressure curve you are at, when at normal speed and boost. The higher the pressure drops the system causes the harder the fans have to work to overcome the system resistance. Once you know the above, you should be able to see where you sit on the noise curve for the MVHR fans. Also you need to consider duct noise generated by flow velocity, and the attenuation given by supply or extract nozzle and plenum chamber (distribution box). All in all lots to consider, but generally oversizing MVHR units is the way to go, but not so big that min speed is over the duty point of the system. Also ducts are better larger, as the longer the run the higher the resistance to flow (pressure drop). So one reason you may have been specified different units, could be duct size and duct length, as shorter bigger ducts (or double/triple ducts) have less flow resistance and a smaller unit can more easily cope.1 point
-
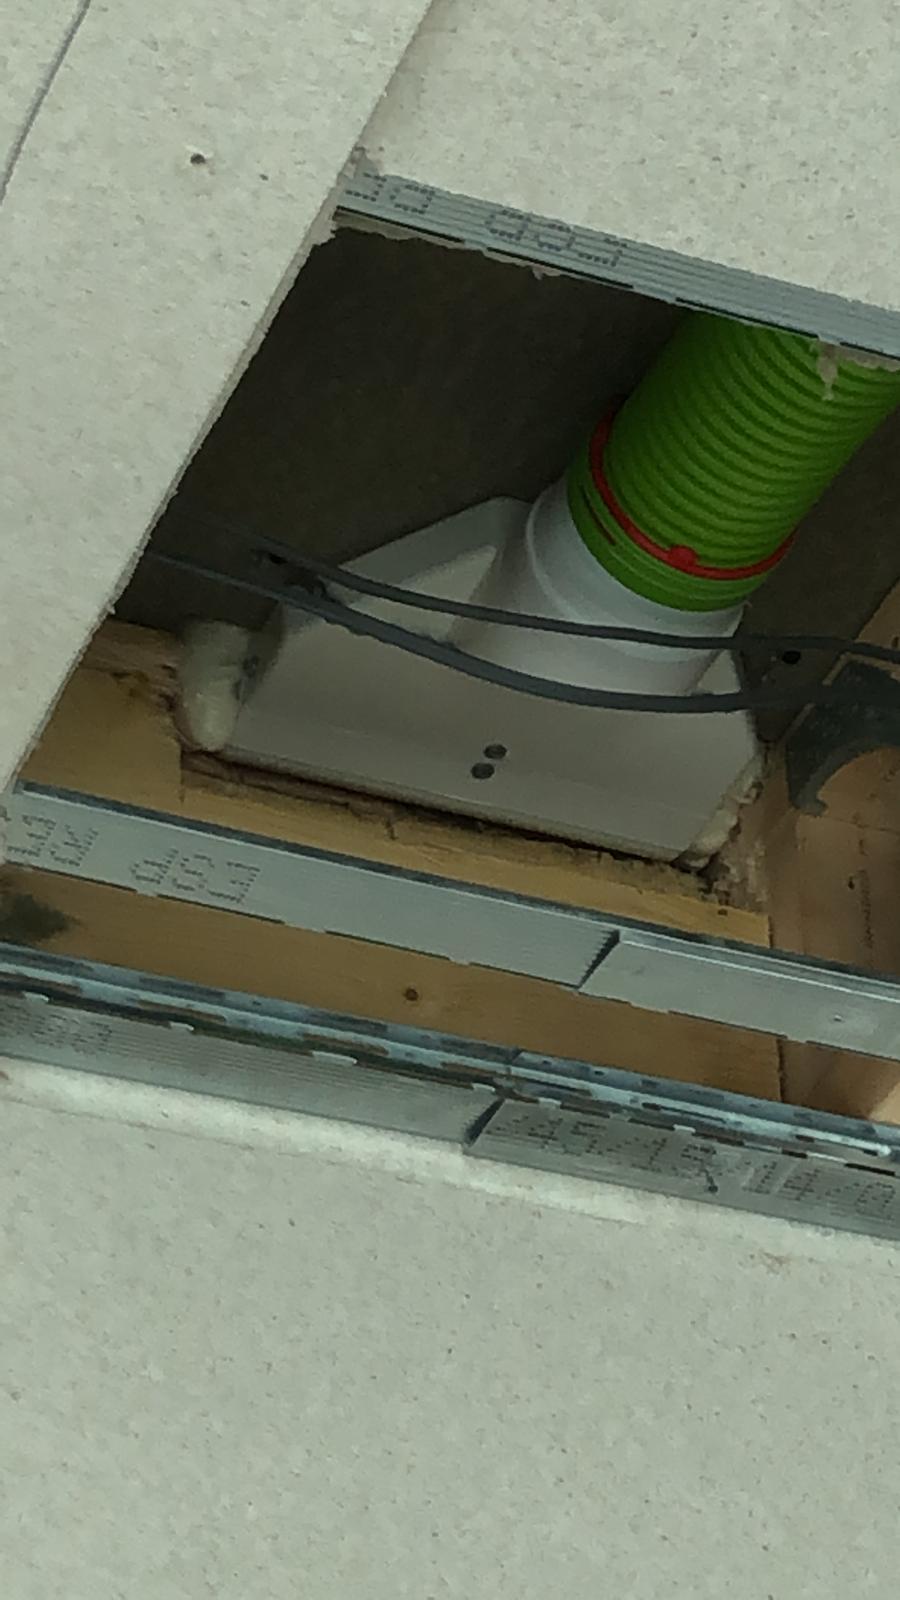
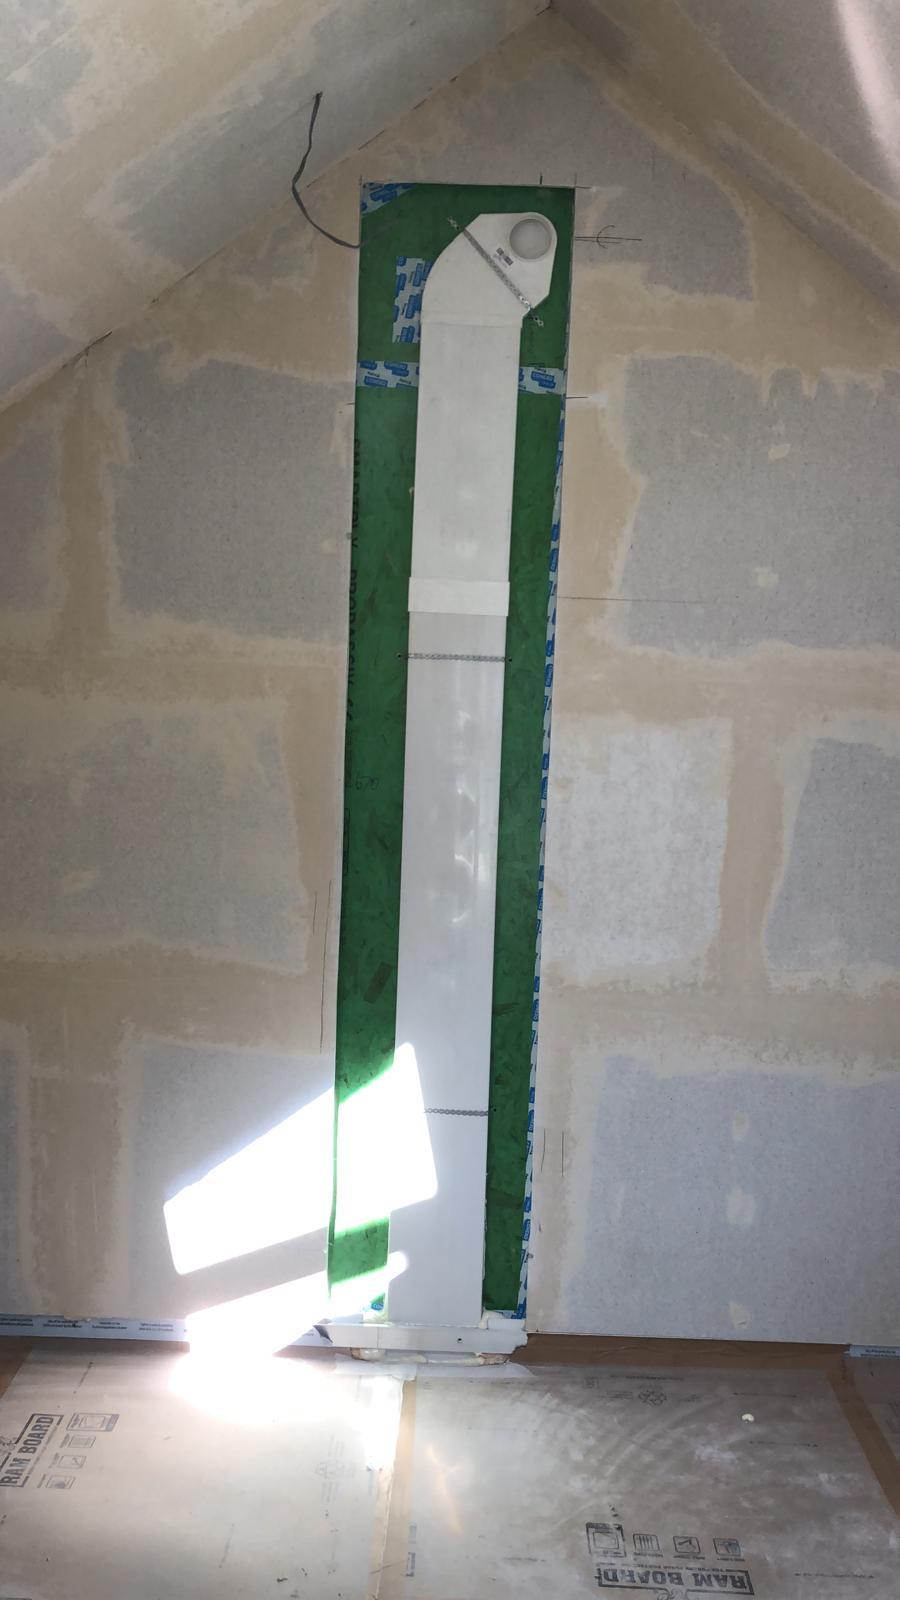
Designing 2 such projects atm, so have specified the steel penetrations centres to be at 400mm recurring so the posi joists can drop in retrospectively, manipulated to avoid these locations. The joists will be wiggled about to suit during installation, so best to discuss this with the joist designer as well. Remember that posi joists will be in joist hangers in most instances ( not all ) so you will lose 70mm of each 400mm centre void with the wing of the hangers, so that can mean only 2 ducts per joist void. Can be done with most at 400mm c’s and one or two strategic 600mm ‘service sections’ that has beefier joists allowed either side to compensate. I never spec posis at 600mm centres tbh as most designers will fall to the default deflection allowances and beam count to give the best quote, often leaving deflection factored in at north of 12mm of movement allowed. NO THANKS! 👎. I like a structural floor not a reasonably priced trampoline. Also good to remember that rectangular aka oval ducting is available too, so on one current MBC TF I’m bringing fresh for a bedroom and extract for that en-suite up in a ‘4x2’ stud wall with ‘oval’ ( which is rectangular-ish but what the hell ) to allow those two ducts to rise without boxing in in either of the rooms. Also(!) remember that you can get 225x25mm ducting, which can allow you to hide your MVHR ‘duct’ in a 35mm service batten space. Very handy when you have OCD like me lol. I cannot tolerate boxing in, and many of my clients marvel at the solutions I come up with to get away from that requirement.1 point
-
There's some good sense mixed with a fair bit of tosh on Heatgeek.com. What they call "advanced weather compensation" is Weather Compensation combined with Load Compensation. Load Compensation modulates the heat output according to the difference between the set temperature on the room thermostat and the actual temperature in the room. But this requires that your boiler or heat pump knows what the room temperature is. You could never infer the internal temperature from the return water temperature unless you got rid of all heating zones, TRVs (or the UFH equivalent), never cooked, never lit a fire, never opened a window and never left the building.1 point
-
We hired a all singing all dancing Wagner from Speedy £80 for the week1 point
-
Steel pegs in the outside skin. Window in the cavity touching on the back of the outside skin, nothing bridges my cavity, not even lintels 🙂1 point
-
Listen to @HerbJ. We built our houses at the same time with the same TF and many of the same trades. I did not specify steel penetrations and only managed to get my MVHR ducts routed by the skin of my teeth and pure luck that a few gaps were available - even I needed to go the long way round for a few routes which was less than optimal. Also had to use some very creative thinking on 110mm fouls and bath/shower wastes. Wider bore water pipes, especially insulated runs will need similar consideration. Cables should be fine as you will likely have a small service void between the steel and plasterboard beneath.1 point
-
Can’t you dig the soil away from the wall? if not can’t you dig a French drain and install perforated pipe to get the water away from the house? And reinstall the soil?1 point
-
Generally the bigger the unit, the less it has to do, so is used at the low end of its performance curve, so for a given duty will be more quite. Pre heating - we are in NE Scotland and not needed it so far this winter, I wouldn't bother. Only really needed below around -5 (ish) Post heating, unless your heating demand is below 10w/m2, there is not enough heat carried by the air to be effective. Enthalpy, again would not bother, not really any benefit in our (UK) environment. We don't get the long periods of sub zero temperature, which leads to air drying. Which is where enthalpy comes into effect. The other thing to consider is Coanda effect supply nozzles. These can be used to throw air across a room and simplify pipe routes. I used two units one small doing two bedrooms and two en suites and a large unit to do the rest. Simplified the routing considerably.1 point
-
Hi @BartW im currently in discussion with BCP and they will do a basic design for free which in your case would not be of much use but for £100 they will do a detailed design, the questionnaire asks for all the details , joist depths and directions, web joists and size, and steels , with a lot of emphasis on steels placements and a caveat that basically says if you move the steels so it's different to the plan submitted don't blame us if your mvhr doesn't fit as we have planned it.1 point
-
This contains a lot of valuable information that should help you. You need to start separating your problem areas and make some decisions to move forward and make progress. I don't think you can sensibly keep all your options open until you have installed the TF and steels, without delays and additional costs The specification of your MVHR unit may be separated from the routing/layout of the ducting, given that you seem to have decided on the unit's location and if you have decided to use flexible ducting. More design work and decisions are essential if you have decided to use rigid ducting, but also more important to start thinking about it before your install the TF and steels. Certainly is - don't do it! It may compromise the structural integrity of the steel work1 point
-
There is a heat loss spreadsheet on here, think it's in the boffin corner. Unless the ground floor is insulated I would not fit UFH, as so much heat will go downwards to heat the earth below the building, your heating bills will huge. You will have oversized rads so you would run them the same as UFH at low temp for long periods. Our last property was circa 1830, the downstairs walls were battened out and rock wool insulation used then plasterboard. But you will remove around 100 to 115mm from each wall floor space. The other two floors had no additional insulation in the walls, the heating bills weren't that bad really. Look to minimise drafts and air leakage. When you install the log burner have the chimney sealed around the flue pipe, I think they vermiculite fill it afterwards. If you make a good job of draft proofing you may may need to consider ventilation afterwards, dMEV fans install in the same holes as normal intermittent fans, but provide slow and quiet controlled ventilation continuously.1 point
-
Calculating the heat loss will be super-tricky if you're uncertain of the wall makeup. Even if you took a core sample it probably varies a lot anyway. Another approach is to temporarily use a thermostatically controlled electric heater and monitor power consumption vs. average outdoor temperatures over a period of time. If the heater (or possible more than one) does its job and maintains a fixed indoor temperature then the average daily outdoor temperature difference divided by the total kWh for each day will give you a slope from which you can read off the heating loss per degree difference indoor to outdoor. From this you can estimate your space heating demand for whatever worst case you require. Domestic hot water is a separate exercise that you can do with made-up figures.1 point
-
Yes to solvent weld. I find using plenty of adhesive gives you a few extra seconds to ensure everything is aligned. I also put depth and alignment marks on the pipe with a sharpie during the dry run. You should switch to uv stable pipe where it's exposed or perhaps sleeve it between wall and stack. Our stacks are all internal so not an issue for us. You can certainly run pipe in screed but a 50mm pipe in 75mm screed might be prone to causing the screed to crack. If the trap can't move you also need to be much more accurate with positioning it vertically and horizontally. If it can move slightly it can be pulled up to the underside of they tray if you are a few mm out. I think putting the trap and pipe in screed is more appropriate for a tiled tray or wet room where you can screed to the level of the trap.1 point
-
I wanted to type (expletive deleted) off ; but I couldn’t0 points
-
Bet you're a proper fanny magnet! 😂0 points
.thumb.jpg.bac90f3bbf6868cf2118d010d936c99d.jpg)


This leaderboard is set to London/GMT+01:00