Leaderboard
Popular Content
Showing content with the highest reputation on 03/05/19 in all areas
-
And so almost another month has gone by but progress is still being made on the build and, just as importantly, hubby and I got away for a week's holiday in northern France just as the warm weather hit. After our abject failure at R&R over Christmas, it was wonderful to have a really relaxing break without illness or stress and come back refreshed for the final push on the build, which is just as well as there's a busy time to be had over the coming weeks. In the last blog entry, I detailed some of the painting and kitchen fitting that had been going on and there's been more of this recently. I've been getting the colour coats onto the walls upstairs but haven't managed to complete a room yet apart from the kitchen, but I'm generally pleased with the neutral colour choice. I say generally, though, because in the lounge, the different light in there makes the wall colour bring out the warm tones of the internal window frame finish which makes them look a slightly odd peach colour. It's not awful and I'm not going to change it now, but if we ever redecorate (hah!) it will be something I check before committing. For the more vertiginously challenged amongst you, you may wish to look away now, as here's a view from the top of my internal scaffold tower when I was putting the colour coat on up to the vaulted ceiling above the gable window in the guest bedroom. And here are the colour choices. The purple will be on one wall only. It looks a bit garish at the moment but once the room has its furniture and soft furnishings in, it should tone well and add a bit of life to the room. Cutting in and painting up to the high vault was a bit of a challenge, but I got there. I really didn't want to get any colour spatter onto the white ceiling so opted to use paint pads rather than a roller and I was pleased with the outcome. They give a good finish over the sprayed mist coat and are far less physically demanding than a roller. I was painting upstairs as the flooring guys were in downstairs putting in the karndean (same choice as upstairs) and it kept me productive but out of the way. Given all the work that went into making the dropped section of the ceiling in the lounge area, I wanted the floor to echo this but not in too obvious a fashion and so the team took a laser reference from the inner square of the lounge feature and reversed the direction of the planks, using a feature strip to create a subtle border. First, though, they had to screed the floor with a latex self levelling compound. In preparation for this, I needed to turn off the UFH a few days before they arrived to make sure the screed didn't go off too quickly due to the heat of the slab. I turned it off on a Friday afternoon and they started work on the following Tuesday and it was just about perfect. Once the screed was down, the floor was scraped to make sure it was completely level and then primed. After the priming, the planks were put down. Here is the snug - I went in the weekend before the flooring guys arrived to get the mist coats and ceiling painted as it's far easier to do when you only have to mask the windows and not worry about any other area. Here's the long view of the kitchen/lounge area: And here's a close up of the feature border underneath the ceiling feature: Moving on from the flooring and painting, my joiner, Harry has been busy at work on the kitchen. In particular, he was working on the large walnut work surface for the island. I decided months ago that I wanted solid walnut for the island but then, as I'm sure happens to many, I had a last minute dither and started looking at other materials instead. In the end, I decided that granite or other stones really didn't give the colour tones that I wanted and laminates weren't wide enough. I sourced the walnut from Worktop Express as they were very competitively priced for what I wanted, and delivery was quick. I looked at using their online template service, but it was just too tricky to get the different profiles right and, in the end, decided to get Harry to make up the island top on site. It was absolutely the right choice as he's done a lovely job on it. Here's a photo of the finished top with the induction hob surface mounted into it. A word on the hob. You can recess the work surface so that the hob is flush, but I preferred it to be surface mounted, sitting proud of the walnut, purely from a cleaning point of view and so I don't have to spend ages digging out crumbs and bits of food debris from around a flush recess. These are the two worktops as they arrived from the supplier, waiting to be joined together. Harry routed along their length, used a biscuit join and then glued and clamped. The worktops being clamped. They look and, indeed, are lighter in shade than the first photo as they come treated with one coat of Danish oil. Harry put a further two coats on once he had sanded the finished surface. The area where there appears to be a base unit missing and where the surface projects beyond is intended as a breakfast bar area. There will be a supporting leg on the near right hand corner. Because the kitchen and island are large, I didn't want anything to be too matchy-matchy and wanted to break up any monotonous areas. Also, I didn't fancy walnut as the worksurface leading off the sink as I think that's asking for trouble in the long run. So, I went hunting through laminate choices. Way back when I was first considering the kitchen, I had been thinking about using large format tiles with a metallic type finish as the splashback, but it was proving to be a gruelling and not very fruitful search. When I eventually revisited this part of the kitchen a couple of months ago, I came across some laminates with exactly that type of finish, nice long runs (I need a 4m run for the back work surface) and with matching splashbacks. I also wanted to line the recessed area under the island with the same material to make it more durable and give a contrast in materials and textures. I sourced the laminates from a firm called Rearo and dealt with their Newport branch. They were lovely to deal with and very helpful. Here's the splashback applied to the breakfast bar recess. Harry beefed it up and packed it out with some ply and then put the laminate edging onto the ends to give a substantial look. Whilst we were away on holiday, my splendid general builder and neighbour, Drew, got on with putting the rainwater goods up. I'd ordered in soffits and fascias from Fascia.com as they had the width I needed in anthracite grey to match the slates and windows, as well as vented soffits, which save a lot of bother and look much neater. The guttering is all deepflow and was mounted onto black fascia board. I looked at other colours of guttering, but none of them were quite right and black guttering is so ubiquitous that the eye kind of slides past it. Having it mounted on the fascia board also reduces the visual impact of the brackets that can look a bit clunky. Whilst he was up there, Drew also mounted our swift boxes and bat boxes. We were required as part of our bat licence conditions to put a bat box somewhere on site, but this is something that we had planned to do all along. Also, there has been a dramatic loss of habitat for swifts that migrate to the UK to breed in the summer and we wanted to make provision for these too, in the hope that we're lucky enough to attract them to our site. These fabulous birds migrate 6,000 miles to reach their summer breeding grounds and are the fastest birds in level flight. Once they have fledged, the only time they ever land again is to sleep and recover from their migration flight and to feed their young. They are the most fabulous birds and I would urge anyone to make provision for them wherever possible. If anyone wants details of where to buy some brilliant swift boxes, PM me and I'll send you the details. Here are the boxes, all sited on the western corner of the north facing wall. Finally, today marked a milestone in the house progress - the scaffolding is coming down. Our foul and surface water drainage works start on Wednesday and the site needs to be clear to allow access for that. Any remaining work at height can be done from ladders apart from the cladding, but I will hire a separate mobile tower of some sort for that work once I've had a chance to identify what will be most suitable. The stone cladding arrived a couple of weeks ago, ready to go up once the drainage work is done, more details of which will follow in the next post. Here's the south face gradually being revealed. The crates to the right of the picture are the stone cladding. Here's the east face slowly coming into view. And another view of the same. Work planned for this week is more plastering, more painting (if I get the chance as I'm the plasterer's labourer this week), groundworks and starting to move some young trees to the site that we've been nursing in pots at home for 12 months. Next week, the en-suite bathroom will be started, the kitchen finished and the utility room kitted out. Plenty to do yet. TTFN.9 points
-
We must have been dreadful sinners during February, as we seem to have generated loads more than we did this time last year. Not sure if it's me or SWMBO that's the sinner though; I shall make some enquiries...3 points
-
3 points
-
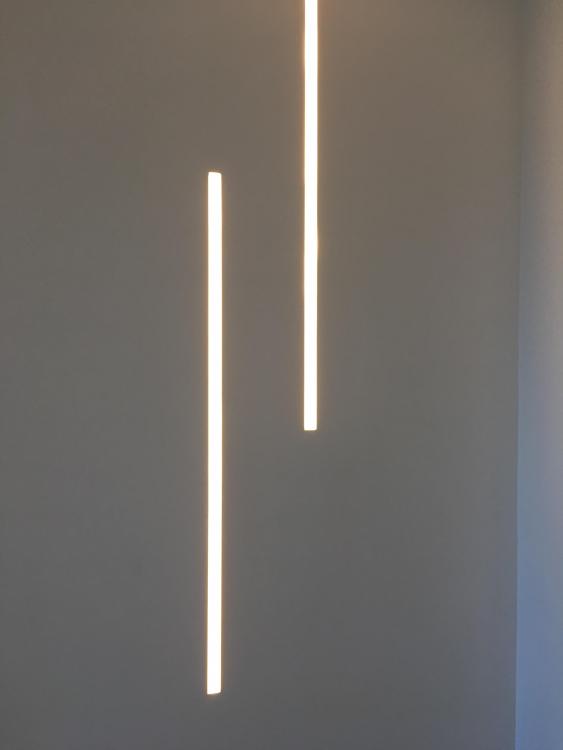
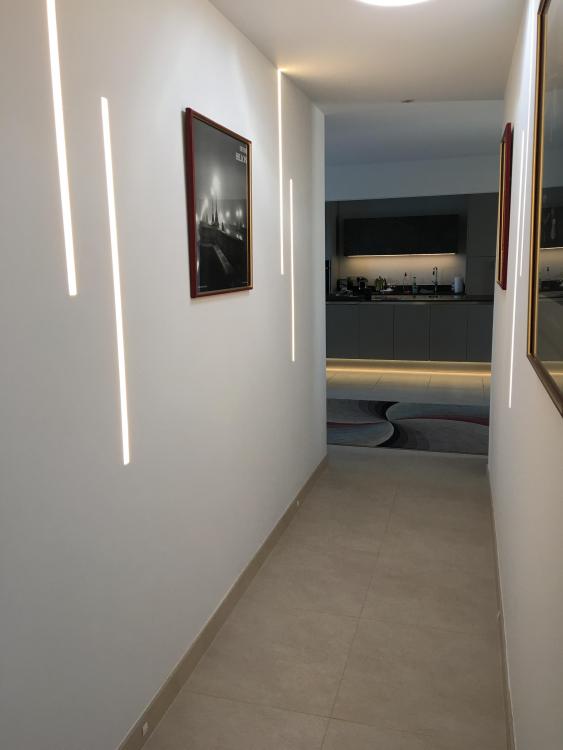
Following on from @readiescards post here, and @PeterW's recommendation in the same thread, we're looking for aluminium profile to carry the LED strip. This supplier (recommended by Peter) sells alu profile. Is it me, or are there really some profiles 10 times the price of others? And are the more expensive profiles 10 times better? BTW, I found this nice little video comparing diffusers for LED strips Anyone got any SNOG MARRY or AVOIDS?1 point
-
It is indeed an ordinary indirect cylinder, 140L stainless steel RM Aquastel. Jeremy's spreadsheet said 25-26°C floor temp was what we were aiming for. Mixing valve is good for 25-50°C, and was set at 3/10. Flow was steady 20°C and return around 17°C. I boosted the cylinder temp from 55°C to 65°C by turning up the wick a bit on Mr Boiler, and then went to look at the mixing valve... I set it midway (5/10) at 5:30pm today. By 7pm, flow was up from 20°C to 28°C and return was 22°C on concrete floors and 26°C on 1st floor. So fiddling with the mixing valve and giving the boiler a bit more gas seems to have sorted the UFH temps... ? Still suspicious that it won't cut the mustard if it gets properly cold outside, but for now we have heating!1 point
-
Habibat http://www.habibat.co.uk/ have a pretty much identical box and are the prefered choice around here. We actually made our own boxes for internal and integrated spaces. The ecologist provided the required specs for the openings, roost spaces and squeeze boxes as required.1 point
-
50m length of cheapo PEX is £30, attach to the pump and use as a poor mans drain jet or use the hose on the end.1 point
-
Option 6 after fixing it, which I will have to add to the Construction Cocktails page. The Forget-me-Shot. From the Simpsons. https://m.youtube.com/watch?v=Yi7e8mWV0Ec1 point
-
1 point
-
1 point
-
IFRS and GSE are similar systems. That’s retail list plus about 10% on eBay ... Try Wagner for a price for all the bits - they will design it too...1 point
-
1 point
-
I'd reject them, too, as they aren't dyed, so may well not be roofing battens at all. I believe that all roofing battens are required to be dyed a bright colour (around here they used to be blue, but are now pink, no idea why).1 point
-
1 point
-
1 point
-
I've fitted an Iroko worktop from worktop express recently. It was ok, but not the best quality. Don't delay in getting that post up to support the corner. I did and within a couple of weeks I had a 10-15mm bow over a 300mm overhang1 point
-
I will take some photos today and post them. It's an easy system to use. Called tier stone cladding, by CED Stone, via Sydenhams.1 point
-
Bang on schedule the raft components arrived on Monday morning. We knew it would be quite a big volume of material on a small site and getting it unloaded and put somewhere it would not get damaged or need moving was s little tricky. JUB insisted on sending the raft on pallets. Our builder was not that impressed with this as unloading the lory requires a folk lift which is something we don't have on site. So we had to hire a set of folks for the digger. With the raft safely stored at the back of the plot the work to prepare the site progressed. The drainage had been marked in the site setting out exercise along with electrical and water ducting. Trying to keep raft punctures to a minimum but also allow for future needs was a concern. In the end we kept it to a minimum with electrical conduit for the rain and foul water pumps and two for water. Along with the raft we received a letter from our neighbours complaining that I had put our water meter box on their garden wall. In retrospect a valid complaint, it was one of those decisions made in expediency without enough thought. Our water supplier Portsmouth Water will now only make new connection when an above ground water meter box is installed. I duly bought the one box they permit (so much for choice), water pipe and water conduit. Not having a house on which to mount the box, I made the required connections and left the box mobile so it could be put in place in due course. At which point I called in the Portsmouth Water, regrettably they said they could not make the connection until the box was in situ. Having explained our situation and the need to get water on the site it was suggested I could mount the box on the wall by our property. At this stage I should have thought about it rather than simply get on with it, my mistake entirely. The wall it outside my boundary, by millimetres true , but still NOT ours. Our neighbours were not impressed so Monday was spent moving the box and apologising to my neighbours. I shuttered and cast concrete into the wall footings and backfilled with type 1 MOT to repair the wall. Having done this I then putting in two concrete posts 200mm inside our boundary and mounting the water meter box on them. This is what I should have done in the first place. Slightly different subject, the Groundbreaker Water box, this is the only box that Portsmouth Water will connect to. At around the £150 mark it's a pretty hideous piece of kit both aesthetically and in product design terms for installation. Given their current monopoly and the fact that all new connections will require one it made me consider looking into producing an alternative. A swift kicking from the boss and I was reminded to get on with the house...maybe later once the house is done. . With the drainage in place the MOT type 1 sub base was spread over the raft area, levelled and compacted. Our builders ICF-homes did this with considerable care and we ended up with a good surface to spread the sand layer which was again compacted before putting down the membrane. Our structural engineers had specified a Radon barrier, we ended up using a standard plastic DPM as Radon is not a problem in our area. The DPM gets glued to the side of the raft sealing it and providing some additional protection for the polystyrene. . With the membrane down the work of setting out the raft. The perimeter is all keyed together It took a while to get the corners located precisely but once this was done the raft slotted together very well with a really solid interlock. The raft was then completed by adding the rebar, four layers around the perimeter. All in all a lot of steel, Pat and I spent most of Saturday morning helping get the rebar in place and wire tying it to make is solid before the concrete pour. Our raft is now complete and this week the surface water drainage will go in. Along with the problem with the water meter box our neighbours also bought up the "Party Wall act". Doing a self build is nothing if not educational. The act came into law following problems with basement excavations in London. It dictates that excavations in close proximity to your neighbours 0-6M have to be notified and agreed. In our case we were within notifiable distance, but fortunately were not excavating to a notifiable depth. Our builders were not familiar with the act and no mention had been made by building controls. The act did effect our other neighbours and I contacted them letting them know what work has been done. Fortunately all the excavations were made and backfilled without incident. Hoping for a less eventful week to allow us to regroup before our first block delivery next Monday. As this is the first build for JUB in the UK the factory are sending someone on site to assist with the build and wall bracing. It's very positive to see the house taking shape, we have our EPC which suggests we should require in the region of 68wats/K to heat the house which is great, but we still only come out as a "B" energy rating! the rating system is bonkers.1 point
-
Aldi patio cleaner concentrate: https://www.aldi.co.uk/doff-path%2C-patio-%26-decking-cleaner-/p/0696892725739011 point
-
Tonight I ventured back into the bathroom and had another crack at the silicone! As @Construction Channel wisely said "less is more". 5mm is thus my go to size now and imho it looks infinitely better. Simply put there's less silicone to screw up, mistakes are smaller etc: There's nothing that'll cover up sh!t tiling though, it is what it is.1 point
-
He muttered something about we are already paying council tax for the caravan so it is not urgent, and he has enough paperwork at the moment. I am tempted to fit my upstairs doors, but leave the downstairs ones off, at least until after June......1 point
-
We have had another reprieve. I was just doing some stuff at home this morning when a strange car drew up and a man in a suit got out. It was the council tax valuer. He came into the house and got as far as the hall, at which point he declared "it's not finished is it See you again in about June. Thank you."1 point
-
The other thing you need to consider is the route the various service pipes will take, look out for structural elements that can’t be drilled or notched.1 point
-
Our PV has been running for a while now, and having switched to E7 I'm finding that far and away the greatest proportion of our purchased electricity is now at the cheap rate (around 8.5p/kWh). With the good weather we've been having lately the house has been "energy neutral" (i.e. not using any grid power) by around 09:00 each morning, and has tended to stay like that until around 16:00. Every day that "no cost" window is getting longer, and reducing the time when we are using full price electricity.1 point
-
Hi Russ, With 4.0kWp at your location, due south, 20° roof (your roof is one shallow pitch isnt it?) The PVGIS page says you should generate 3840kWh per year A new but cheap 4.0kWp system should cost you <£2k. DIY install. Assuming your grid electricity is 14p per kWh (today's prices, will surely be more next year) So when you have consumed 14,286kWh of PV generated electricity it will have paid for itself. (200000/14) If you consume 100% of the 3840kWh generated that is 3.7 years payback (14286/3840) Realistically you may only consume 70% so 5.3 years payback (14286/3840*0.7)1 point
-
You're not alone. At the end of last winter I bought algae remover and used on a large section of wall that was unpointed flint blocks, largely shaded over winter and looking green. The algae remover (from TP I think ??) wasn't sufficiently expensive for me to engage with home-brew ideas, and it worked well enough.1 point

