Leaderboard


Popular Content
Showing content with the highest reputation on 11/15/18 in all areas
-
Having got all my water issues out into the last post, it's time to move on to happier things and talk about other progress. Actually, that's a little unfair because there is a lot of work in all the flat roof stuff, far more than the pitched roof, and aside from the wet stuff it's going well. At the end of the penultimate post, the solar PV panels were just going on and the pitched roof was also still a work in progress. The building was still a shell with no power and plenty of work left for MBC to do, and outside was largely untouched apart from the buried mains cable that was terminating in the garage, into the meter moved by the meter fairies. Let's start at the top and work our way down. The solar panels are all in now and all the slates around them are done. All the velux windows are in and the ridges were done last week. We have a dry ridge system. I had to ask what this was and was told 'that means there's no gunk underneath the ridge tiles'. So technical that even I could understand it! Here's the stuff that they line it with. When they roll it out, it has a corrugated wave shape to it and each side is sticky - one for the roof ridge surface, the other for the ridge tiles. This is Mike, one of the roofers, bringing the final tiles right up to the ridge before putting the dry ridge stuff over it. And here's a view of the ridge tiles in situ, fixed to the sticky stuff and clipped together. We have 3 ridge lines on the roof, all meeting somewhere over the north east bedroom. A plate of good old school lead was shaped to cover the meeting point of the 3 ridges, creating a neat flashing for the centre. Here's Terence welding the lead to create the flaps going down each gully. Here's Terence putting it into position on the roof: And here's a close-up of the same thing. You can see the fixing for the dry ridge system unrolled next to it. Staying with jobs going on outside, there were some groundworks that week, too. I needed to get the electricity supply cable trench back-filled and whilst we had the plant on site I decided to get a few other jobs done. The Openreach guys turned up that week and the old redundant BT cable was removed, so that old electricity pole is all clear now. My neighbour has already bagsied it, so there's no problem with disposal. One of the groundworks jobs was to open up the ground between the garage and the lane. I'm not getting the driveway done quite yet but I did need to get it clear because my sunamps will live in the garage and it will be a lot easier to get them forklifted straight into the garage from the lane rather than trying to drag them all through the house. Keith got onto it, clearing around the side of the garage a little, too. There is an area of concrete there that used to have a shed on top of it. For the time being, I'm keeping that there as it's nice to have a surface that isn't clay. And then this is the view from the lane up to the garage. This is, in fact, where the pedestrian entrance to the old bungalow was, hence the gate that is still there. Once we've got rid of the scaffolding, we can clear the remaining few feet of the entrance and make the proper driveway. Keith will be doing most of the work on this, but I need to get someone with a ticket to do the dropped kerb between the lane and the verge. It's outrageously expensive for what it is - just for the 6m stretch of opening and 2m back, tarmac surface, that will be the princely sum of £1,200 plus £285 for the licence from the council. And that's the cheapest quote out of 3!!!! I will be continuing the tarmac for the driveway, and also around to the side of the garage so that there's hardstanding for a couple of vehicles next to it. And Keith's final job for that week whilst the plant was still on hire was to scrape the grass from what will be Paul's pond. I marked out the original perimeter and he took out the line for this but then I did that typically female thing and told him it was no good and I wanted it to be bigger. Naturally, he obliged. Not that we had much doubt, but for the sake of interest, Keith dug out a small trial pit within the pond perimeter, about 1m deep. It has filled up nicely with the subsequent rain and shows no sign of draining any time soon. I may have cursed our clay for its giving the need for piles, but we certainly won't need a pond liner. That's most of the outdoor stuff for the time being, so let's step inside and see what MBC have been up to this week as they've starting on the prep work prior to the airtight test. This is scheduled for next Tuesday, 20th November. The velux windows have all been boxed out and they've been drawing the airtight membrane up around the web joists forming the roof/ceiling. This will be the main/shared bathroom and it's only natural light source is the velux. It's rather nice to think I can lay in the bath looking at the stars. Assuming it's not raining. The green tubes on the far wall are for the MVHR. A close up of some of the MVHR tubes to show the careful taping around them where they come through the membrane. This is the main bedroom that has been battened out now. I've wedged some bits of timber under the membrane that's underneath the window to dry out the water that came in at the weekend after the tanked balcony incident. All the battens have been screwed on, much to the chagrin of Darren. It's probably not so necessary somewhere like a bedroom, but in bathrooms and the like where the weight of tiles and mirrors can be considerable, I wanted the peace of mind that the battens weren't going to move for anything and so requested screws rather than nails. This is the north east bedroom, below where the three ridges meet. The guy putting up the plasterboard will be cursing me here. Heading downstairs, the insulation changes a bit here. Instead of being all blown cellulose held behind the membrane, there is celotex in certain places. This is beneath the parapets and the balconies and it's been used here because less depth is required than for the cellulose, allowing the ceiling to be level throughout the ground floor. If blown cellulose had been used, the entire outer edge of the ground floor rooms would have had a step down to allow for this. That's pretty much it for now, but the next lot of work has been scheduled. The vertical slate cladding is booked in to start on 3rd December and this is being done by my roofers as it seemed logical given that they're using the same materials as on the roof. I'm nagging and cajoling them to see if they will do the stone board cladding on the stairwell walls as well; they may say no eventually, but I'm working on it as that will be pretty much all the stuff at height done other than rainwater goods. It would also protect the south west corner of the building nicely, as that's the direction for the prevailing weather. I'm aiming to get some more groundworks done in early December; at some point I need to get the sewage treatment system set in and also the rainwater storage tank. There is, of course, the rest of the pond to be dug out and that will need some muckaway. I'd rather get it done this side of the winter as we can then let it fill up with rainwater and see how it settles. Internally, there's some work on soil pipes and the MVHR, but no sign of the MVHR unit itself. Once MBC have completed their air test next week, we can really go at it with first fix, so I need to make decisions on external electrics. On order is the big brise soleil for the floor to roof window in front of the stairwell. The plans for this look great but I'm waiting on a production date at the moment as the framework is a first fix item. The wooden fins can go on any time after that. Similarly, I have a guy coming to measure up for the external motorised roller blinds for the other large south facing windows. As long as sufficient clearance is left with the cladding, these don't need to be installed as part of first fix so we're not so reliant on a production date for these. They have a lead time of 3 to 4 weeks. There's plenty that I've omitted, I'm sure, but it will all follow in due course. It will be great to get past the air test and make some good progress in doors. No aviation buzz this week, but the hunt was out today. I stood on the top lift of the scaffolding late this afternoon watching the horses and riders galloping over the distant fields down near the river and could hear the hounds baying and the horn being blown. I'm not sure what they were hunting but it all seemed very evocative on a late autumn afternoon and really brought home just how rural our place is.2 points
-
Not too hand . I know there is one though ? Photo to follow ; what are you looking for ? I.e what could possibly be wrong ? ?2 points
-
Contact Jack @ https://www.albagreenoakframes.co.uk/ Top bloke! Did our trusses, best prices by far.2 points
-
But he's already shown himself unable or unwilling to comply with the legal requirements. Those posting on here can only see what you provide photos of; from just those they can hardly reassure you that the final result is kosher so you'll need to get somebody else in to inspect it. So why bother with him? I think you're past the point to just cut your losses and go elsewhere.2 points
-
I'll get the popcorn while I wait, this could be fun,1 point
-
Strange I watched that on Tuesday as well ? Working my way through all the series.1 point
-
Less yapping, more snapping ??1 point
-
Yes that will be fine, so long as the primer is touch dry1 point
-
Yes, there's a hot water version, but it needs water that's a bit hotter than the phase change material melting point (58 deg C for the DHW Sunamps) in order to work. Phase change storage isn't like hot water storage, in that the temperature of the phase change material (PCM) stays constant whilst it melts and absorbs heat energy as it changes phase. This means you can keep pumping heat into it at 58 deg C until all the PCM has melted, when it will stop absorbing any more heat without the temperature increasing. This constant temperature during phase change is what makes the Sunamp such a damned good hot water system, as it delivers water at around 58 deg C from fully charged to fully discharged, whereas a hot water storage system will tend to reduce the output temperature as it is used.1 point
-
Looking at the position of the over pressure valve (not right at the top of the tank) that might be the Tornado, with the expansion vessel built into the top of the tank (so one less thing for the idiot to get wrong) @pocster how much more does the top of the tank extend beyond what is shown in the picture? But if it IS the Tornado version, is their enough room above it to access and service the expansion vessel from above?1 point
-
We did a comparison between a number of systems and the Pex-A systems were not a patch on the JG or Hep2O systems for a number of reasons. The key ones were : - hot water (above 30c) pressure capability is significantly lower than established systems - warranty of 10/25 years depending on systems vs 50 years (from Wavin) - interconnects between new / old requiring specialist fittings - cost of installation / tooling and skills to install were more complex - ability to decouple or remake joints or change layouts was restricted with press or weld systems. - long term availability of spares / replacement parts were not locally available. - standard vs non standard pipe dimensions meant increased number of interconnects and increased price. The key reason for sticking with a 15/22/28 standard was that it was immediately available and did not require any specialist skills or tooling to install, along with a simple method to connect with existing installations or indtustry standard fittings. In terms of flow rates and restrictions, neither system (Pex-A or Hep2O) provide any significant restriction to flow as whilst Pex-A uses expanded pipe around a full bore fitting, the Hep2O sleeve is now stainless and does not impede water flow at all. There are also a whole host of issues around the actual design of the fittings and what happens if you apply lateral stress to them which are based on the material they are made from which makes them susceptible to low flex failure but that’s beyond this discussion I expect....1 point
-
Yes, apart from you don’t need to check his gas, unless he has altered the gas supply or flue. Do you have a pic of the expansion vessel for the UVC? Should be white or silver, about the size of a football or a bit bigger. Let’s check the ? out of this eh ?1 point
-
And make sure the hole is deep enough, nothing worse than bottoming out thinking the fixing is tight.1 point
-
My Experience with these screws is that the pilot hole is critical, don't use a worn out SDS drill, get a new one as factions of a mm make one hell of a difference to the torque you need to apply. Also once you start driving it in keep going until its fully in, stopping is also a problem I found, I did the last bit using a spanner rather than the impact driver. Good thing is they usually unscrew if required.1 point
-
I think we're all open to trying new ideas; arguably self-builders tend to push the boundaries when it comes to trying new methods of construction and early adoption of new technology. Information from the web is inherently untrustworthy though, particularly when content is being commercially funded, or has been produced by someone with a vested interest in a product or system. That's one reason we work hard to keep this forum non-commercial, so that advice given can be as unbiased as possible and weighted to give more credence to those with real-world experience of a product or system. The key thing here is really how much practical, hands-on, experience that anyone advising any product or system actually has with using it. Videos can be helpful in terms of illustrating how to use a product, but will inevitably be produced and edited to highlight the view that the person making the video already has. There's no substitute for practical experience, which is why I'd trust an opinion formed by a decade or more real experience over any video on the web. If you have a lot of experience of using Uponor Q+E, and can let us know the advantages and disadvantages that you've found from a few years of your own practical, hands-on, experience in a range of installations, then it would be welcome.1 point
-
There is a heat loss spreadsheet on the forum that you can put in all the different types of wall construction and cavity widths and see where your sweet spot is. You will need prices of Epson beads, rock wool, cavity boards etc to figure it out though.1 point
-
Sorry John but you have no idea about my knowledge or what I've previously done so I neither appreciate or find that comment helpful - for reference I have a significant amount of experience around M&E systems and controls going back more than 2 decades so my attitude is one based on experience rather than manufacturers website and YouTube videos. I have to say if you spend £750 on a single house pipework then there is something VERY wrong ..!! The total first fix pipework - both in "cheap" Hep2O and copper for a 3 bed, 3 bath house recently done has just nudged the £250 inc VAT mark as it was decided to do the plant room in copper not Hep2O. That is everything including all tap tails, ASHP, tank connections, and other items you CANNOT do with your snazzy Uponor stuff as the MIs require you to use copper for such as boiler tails. MCLP does have its place, and its used extensively in commercial premises where there are long runs and also for ease of install and to prevent alteration by users. The concept of using this in a residential build is limited as it is not easily adapted as there are very few (ie none) fittings available at mainstream suppliers that can be used without the tooling and so it cannot be modified by consumers so is likely to be a reason for not purchasing it.1 point
-
The only failures I have heard of is when the pipe is scratched before fitting, not allowing the o ring to sit properly. I was taught to protect the pipe where fittings were to go.1 point
-
I must admit I ran 10mm for hot feeds to basins and the flow rate is excellent.1 point
-
Exactly my experience. The first electrician I used not only did a poor job, but didn't register the Part P chit with building control. I chased him, then chased the body he was accredited with and they pretty much point blank refused to get involved, saying it was a matter between me and their member, nothing to do with them. If it hadn't been for another chap being prepared to inspect, test and sign off on this work then I could have had a problem. I'm convinced that the accreditation scheme companies really don't give a stuff as long as they get paid by their members. No one polices them, AFAIK.1 point
-
Should be unemployed.1 point
-
The width of the cavity will be determined by what you want to end up with. Some installers use graphite beads which will give you a better overall u value which means you can have a narrower cavity. You will have to contact the various companies near you to find out what beads they do and then what width will meet building regs. If you want the house warmer then the cavity will have to be wider,150mm at a min but that's up to you. Beads will be blown in under high pressure so fill every single gap. As they are covered in glue they set in the cavity to form a single lump with tiny holes for any water that gets in from the outside to trickle down to the bottom. Rockwool and cavity boards you are at the mercy of the guy putting them in. If they don't get put tight to the wall then heat escapes and the expensive insulation is worthless. With Rockwool drops of motar can leave air gaps as well. Icf would work as well. How is access as you will need lots of concrete and a big pump.1 point
-
No, it's fine. The problem is only with the plasticisers in PVC cable sheathing, and polyethylene, or any other plastic that doesn't use plasticisers to make it soft and pliable, will be fine.1 point
-
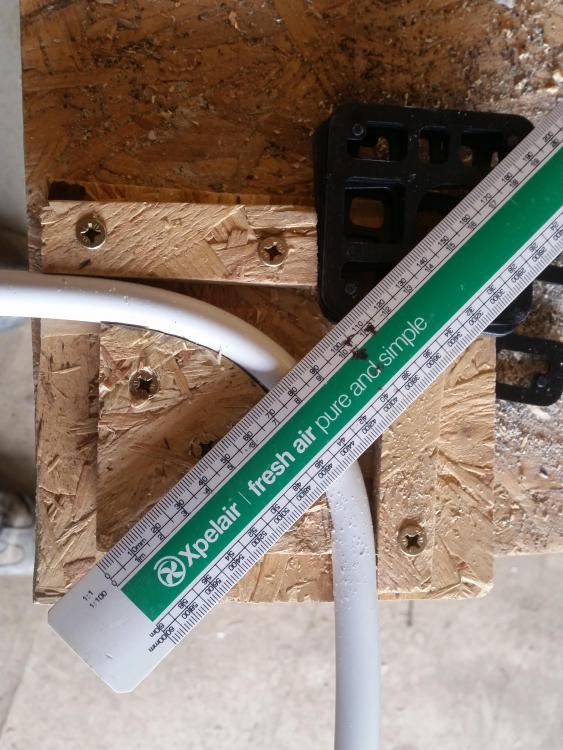
Ok, quick trial with a wooden former and I can get the pipe in with a 90 deg bend, so I will build formers into the wall and run it as one continuous length of HEP 2 pipe. PS Other air handling companies are available - but perhaps they don't give out free scale rules at exhibitions.
 1 point
 -
Soldered copper for me with bends formed in the bender rather than elbows where possible.1 point
-
Accrding As a Welshman he has good cause, according to the Super Soaraway Sun: https://www.thesun.co.uk/news/4429826/welsh-blokes-are-the-best-endowed-in-britain-but-east-midlands-men-deliver-the-most-satisfaction/ Around here it is the favourite word of the ladies. We do not need the extra 0.55 inches. F1 point
-
We decided to use the same shade of grey as the zinc coloured metalwork for the doors and windows as well. When the cedar cladding silvers I wanted to rename the house Shadezogray but it was vetoed.1 point
-
We spent a long time pondering over our choice of colours. Our build will be clad in limestone and we were worried about getting a complementary window colour. We began by buying a K5 RAL colour chart like this one: https://www.amazon.co.uk/RAL-K5-Classic-Semi-Matt/dp/B002LFVOZC/ref=sr_1_1?ie=UTF8&qid=1542230285&sr=8-1&keywords=ral+colour+chart+k5 The colour chips are a reasonable size, so that gave us a good starting point to narrow it down to a smaller number of colours. The next step was to buy a small sheet of ply and then cut it up into approximately A4 sized chunks. Then off to our local Brewers decorator centre - they will mix paints to any RAL colour and can do small sample sized pots (Albany brand, I think) for a few ££ each - can’t remember exactly how much but it was less than a fiver each. We bought about half a dozen, undercoated the ply and then gave it a couple of coats of the RAL colours. I’m pleased to say they ended up looking almost exactly like the RAL K5 colour chips and the larger size helps you narrow it down even further. You won’t necessarily get the right sheen but the colour was certainly a good match. It worked for us and got us to an informed decision, I’m pleased to say. It worked well for us - so much so that we bought some Farrow and Ball sample pots and did exactly the same for our potential kitchen colours. Kitchen will be a custom painted one from DIY Kitchens.1 point
-
Have you seen any kind of wall ties that would be suitable for what you are planning??? Doing a build is hard enough to do so try to make every stage as easy as you can. For what you are looking brick and block will be the easiest. If the boundary wall will be the same height as your wall then you can use blocks as they will never be seen. Any where that will be visible you can build it in brick if that's the finish you want. As for insulation just make the cavity 150mm,175mm,200mm,300mm. Pick one that suits what you want to end up with. More insulation means more heat kept in the house but more cost. So work out what suits the budget and run with that. The wider the cavity the more attention you need to pay to the window and door junctions. Cavity closers or return the block work will be your option. As for the type of insulation that you could put in the cavity I would go with eps beads blown in to fill the cavity. You can also go with rock wool type materials. Have a chat with your architect and see what he thinks will suit your needs on your site.1 point
-
Yes, the standard cells use the PCM 58 material, which runs at around 58 deg C, the newer material is PCM 34, that runs at around 34 deg C, and is better suited to UFH. The Sunamp PV uses the PCM 58 material, AFAIK, hence the earlier comments about it not being best suited for use with UFH. One option that I may well consider in future is to replace our buffer tank with a Sunamp Stack fitted with PCM 34 cells. That would be charged via the ASHP and provide both DHW preheat and UFH buffering. The big advantage is that I could get around 3 times the thermal storage capacity in the existing space, which would be a very useful benefit.1 point
-
Disappointing week. I've been waiting three months on a decision by the bank about splitting the property folio and allowing me to sell the old house but keep the side garden to build on. They are concerned if I don't sell the house they are taking a risk as the LTV would then exceeds the Central Bank limits. The reduced property value post split plus the fact I've only a year paid down on the mortgage plays into this. I thought they would hold the side garden as security but it doesn't work like that.... I've been talking to a few banks and my solicitor about options but the clearest to date is either to split the property at time of sale or wait a year, pay down the mortgage to get it below the 80% LTV threshold (depending on the valuation), then in a year ask the same question. I'm all ready to go to tender - have builders lined up and the tender package written but without the bank's approval I can't proceed. I'll wait to see if any other options emerge but getting access to the garden has been an issue from the start. I tried to buy directly off the previous owner but the banks didn't play ball, and now again I'm hitting institutions that we bailed out calling ME a risk! Anyway, rant over. Turns out nothing is simple. I can only ask the questions, the replies sometimes confound me! Let's see where we are in 12 months......0 points