
Leaderboard


Popular Content
Showing content with the highest reputation on 04/27/17 in all areas
-
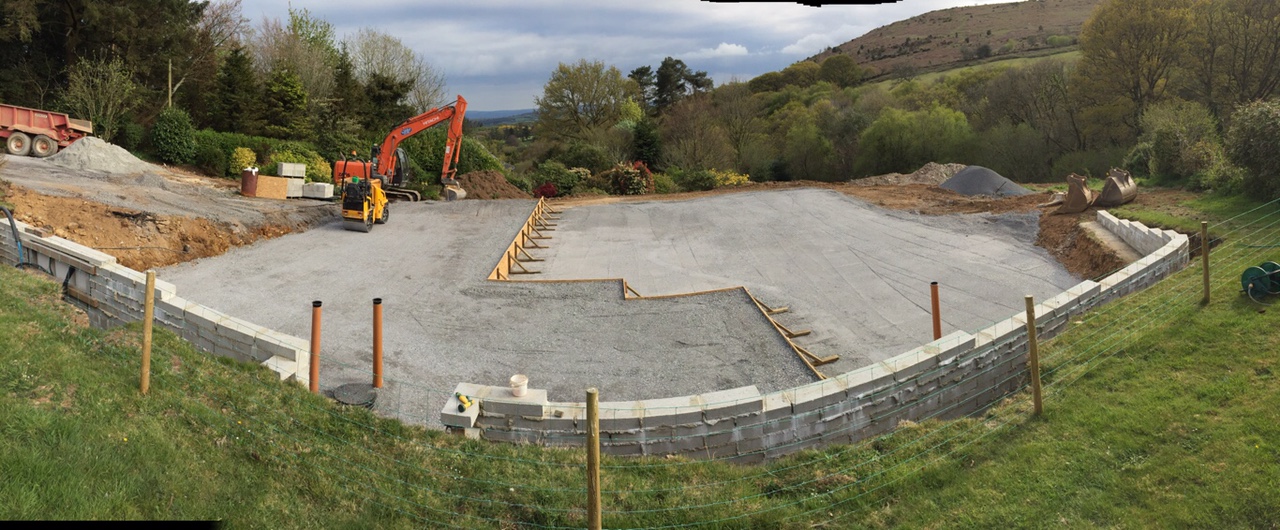
We're 4 days into our groundworks and the slab prep is nearly there, another day of levelling and rolling and we will have it cracked. The ground works guys (and me!) have been putting in 10-11 hours days all week. Several hundred tons of earth and rock moved and close 150 tonnes of new material added. Our split level slab makes things much more tricky! Ill be really glad when this bit is over!
 4 points
 -
Door lining 'kits' come with the head set out for each door size, 30" or 33" are typical, and have rebates in the head to accept the legs. Those rebates are the size of the door plus the required gap so you don't need to calculate anything. Forget trying to build the studs to take the lining direct as the stud work will just not be straight enough, and usually has a slight twist too, so allow a 5-8mm gap over the overall width of the lining, either side, to accommodate packing accordingly. You need to allow for flooring when affixing the linings so that you end up with a 3-5mm gap between the floor and the underside of the door. With wooden flooring I'd make that a minimum of 8mm to allow for a small stone to have been carried in by someone's shoe, which, if caught under the door, will leave a lovely arch shaped deep scratch as the door drags it across when opened / closed . Put a 600mm spirit level on the floor where the lining is to be fitted. If it's out, work out by how much and cut a packer / shim. Sit that packer under the leg that's low prior to starting affixing the lining. Fix the hinge side first, plumb and true, and take your damn time doing so. This extra effort now will save masses of grief and planing etc when you come to actually 'swing' ( mount ) the door, so basically invest lots of time on the linings and the doors will swing themselves. As you pack and screw the lining, working from the top down, you'll need a framing level ( 1800mm ) to use as a straight edge to check that your lining is perfectly flat all the way through each fixing interval. Try and coincide with the hinges but not exactly in line, just above or below so you don't get a conflict when cutting the hinges in. Space the screws ( 2 per interval ) quite wide apart, which will allow you to train the lining to stay at 90o to the wall parallel. Fix the opposite leg again working from the top down and check the opening size each time to ensure your not tapering in / out. Its easier if you have a door there so you can hold it it in the opening when you've finished screwing up, to check you've got equal gaps at the sides and head. Just a brief glance will identify any problems, but the framing level is your friend so you should be all good. Drink beer, and relax.4 points
-
Good news I managed to get this condition removed.3 points
-
I nave added a new entry in my blog at the usual place http://www.willowburn.net detailing the airtighness membrane. Look for the recent entry called "Airtightness detail" This has actually been sitting for several weeks now but lack of internet meant I could not post it sooner. P.S can others confirm the blog is displaying properly. I find on my desktop, that is currently running Pale Moon browser, it serves up what looks to be the mobile version of the blog, and I can't find out why. My other computers display it properly.2 points
-
Oh the horror! Cut it square, sand the edges, maybe paint then hoover it all before you cover it up. You never know who's going to look in there in 20 years time and think "What anal f***wit had too much time on their hands (or a wife he wanted to avoid)?"2 points
-
Just a wee tip in case it helps anyone else- whilst I was looking around for something to use as support on board joints that didn't have a batten under them, I came across what seems an ideal material: offcuts of 22mm chipboard flooring. My cavity is 25mm so it's a snug but easy fit, the chipboard is pretty stiff, and I had a pile of offcuts that were going to end up in a skip otherwise.2 points
-
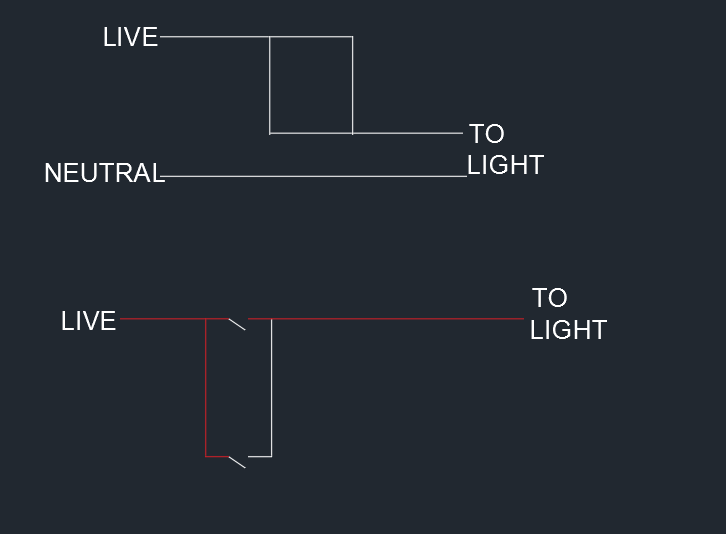
The emergency lighting is fine, we can essentially ignore it, it will have a live feed direct from the lighting circuit which is its permanent live to charge the batteries, there should be a little charge indicator LED. Just out of a matter of interest why do you have EM lighting in your home? It is very rare to see it in a domestic situation. So, you have a parallel switched circuit then. So look at my original reply regarding how it works and look at the attached image, basically if you imagine a piece of wire sitting horizontally in front of you, this is the live. Then imagine sitting below it horizontally another piece of wire, this is the connection to the light. Now if you want to switch it on you need to continue the circuit between the two, so you get another piece of wire and lay it across the two horizontal wires to bridge them - the power can flow from top wire to bottom wire and the circuit it closed. Now take another piece of wire and drop it across the two horizontal wires, nothing will happen, it just means there are two paths for electrons to flow. Now if you lift the first piece of bridge wire you put down the light will remain on unless someone lifts the second piece - your pneumatic switches work exactly the same way. The reason you have 2 wires at each terminal of the the switch is because that is the wire going on to the second switch to create your long horizontal wire in our explanation above. Look at the bottom diagram and you will see the red lives comes along, but another red live goes to the bottom switch. The white is the black in your case which goes back to the other side of the first switch it is paired up with a red which goes to the lights. Any pneumatic switch will work: http://www.screwfix.com/p/elkay-columbus-pneumatic-time-delay-switch/68088?kpid=68088&gclid=CM_gmKrnxNMCFQ0R0wodVGIE6A&gclsrc=aw.ds&dclid=CPTdp6rnxNMCFawB0wodjgYC-w
 2 points
 -
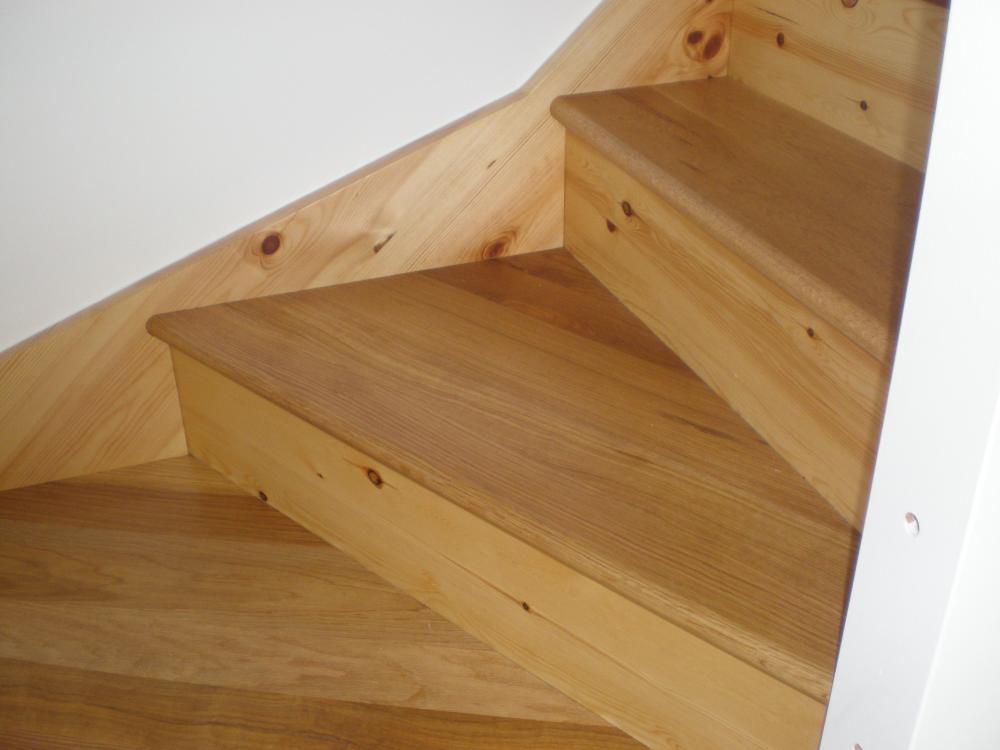
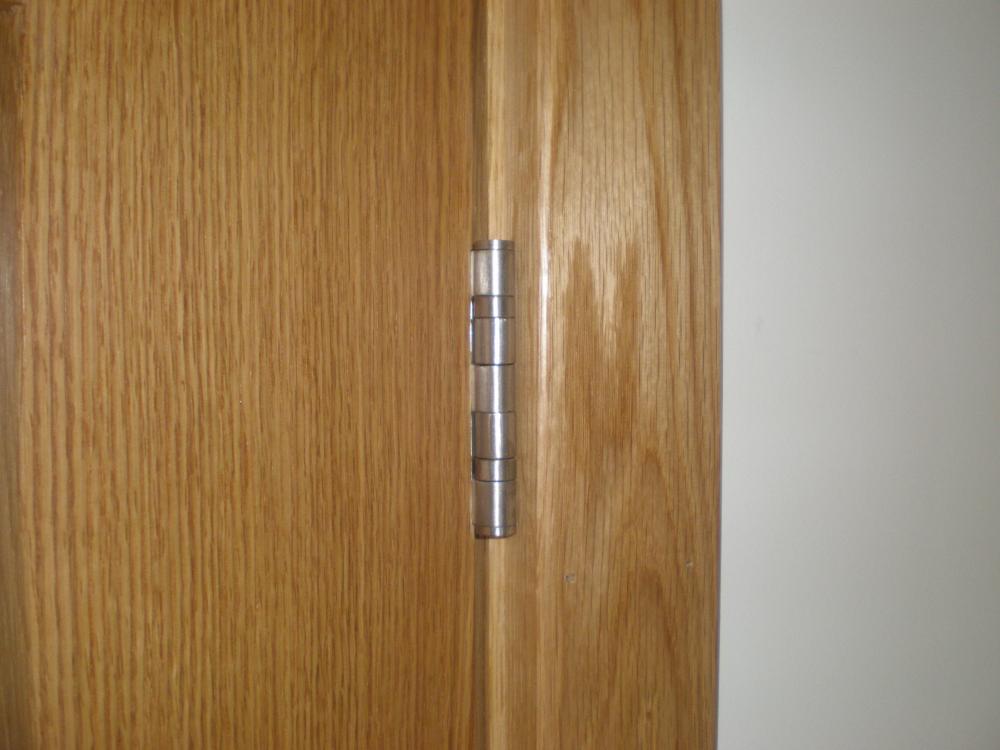
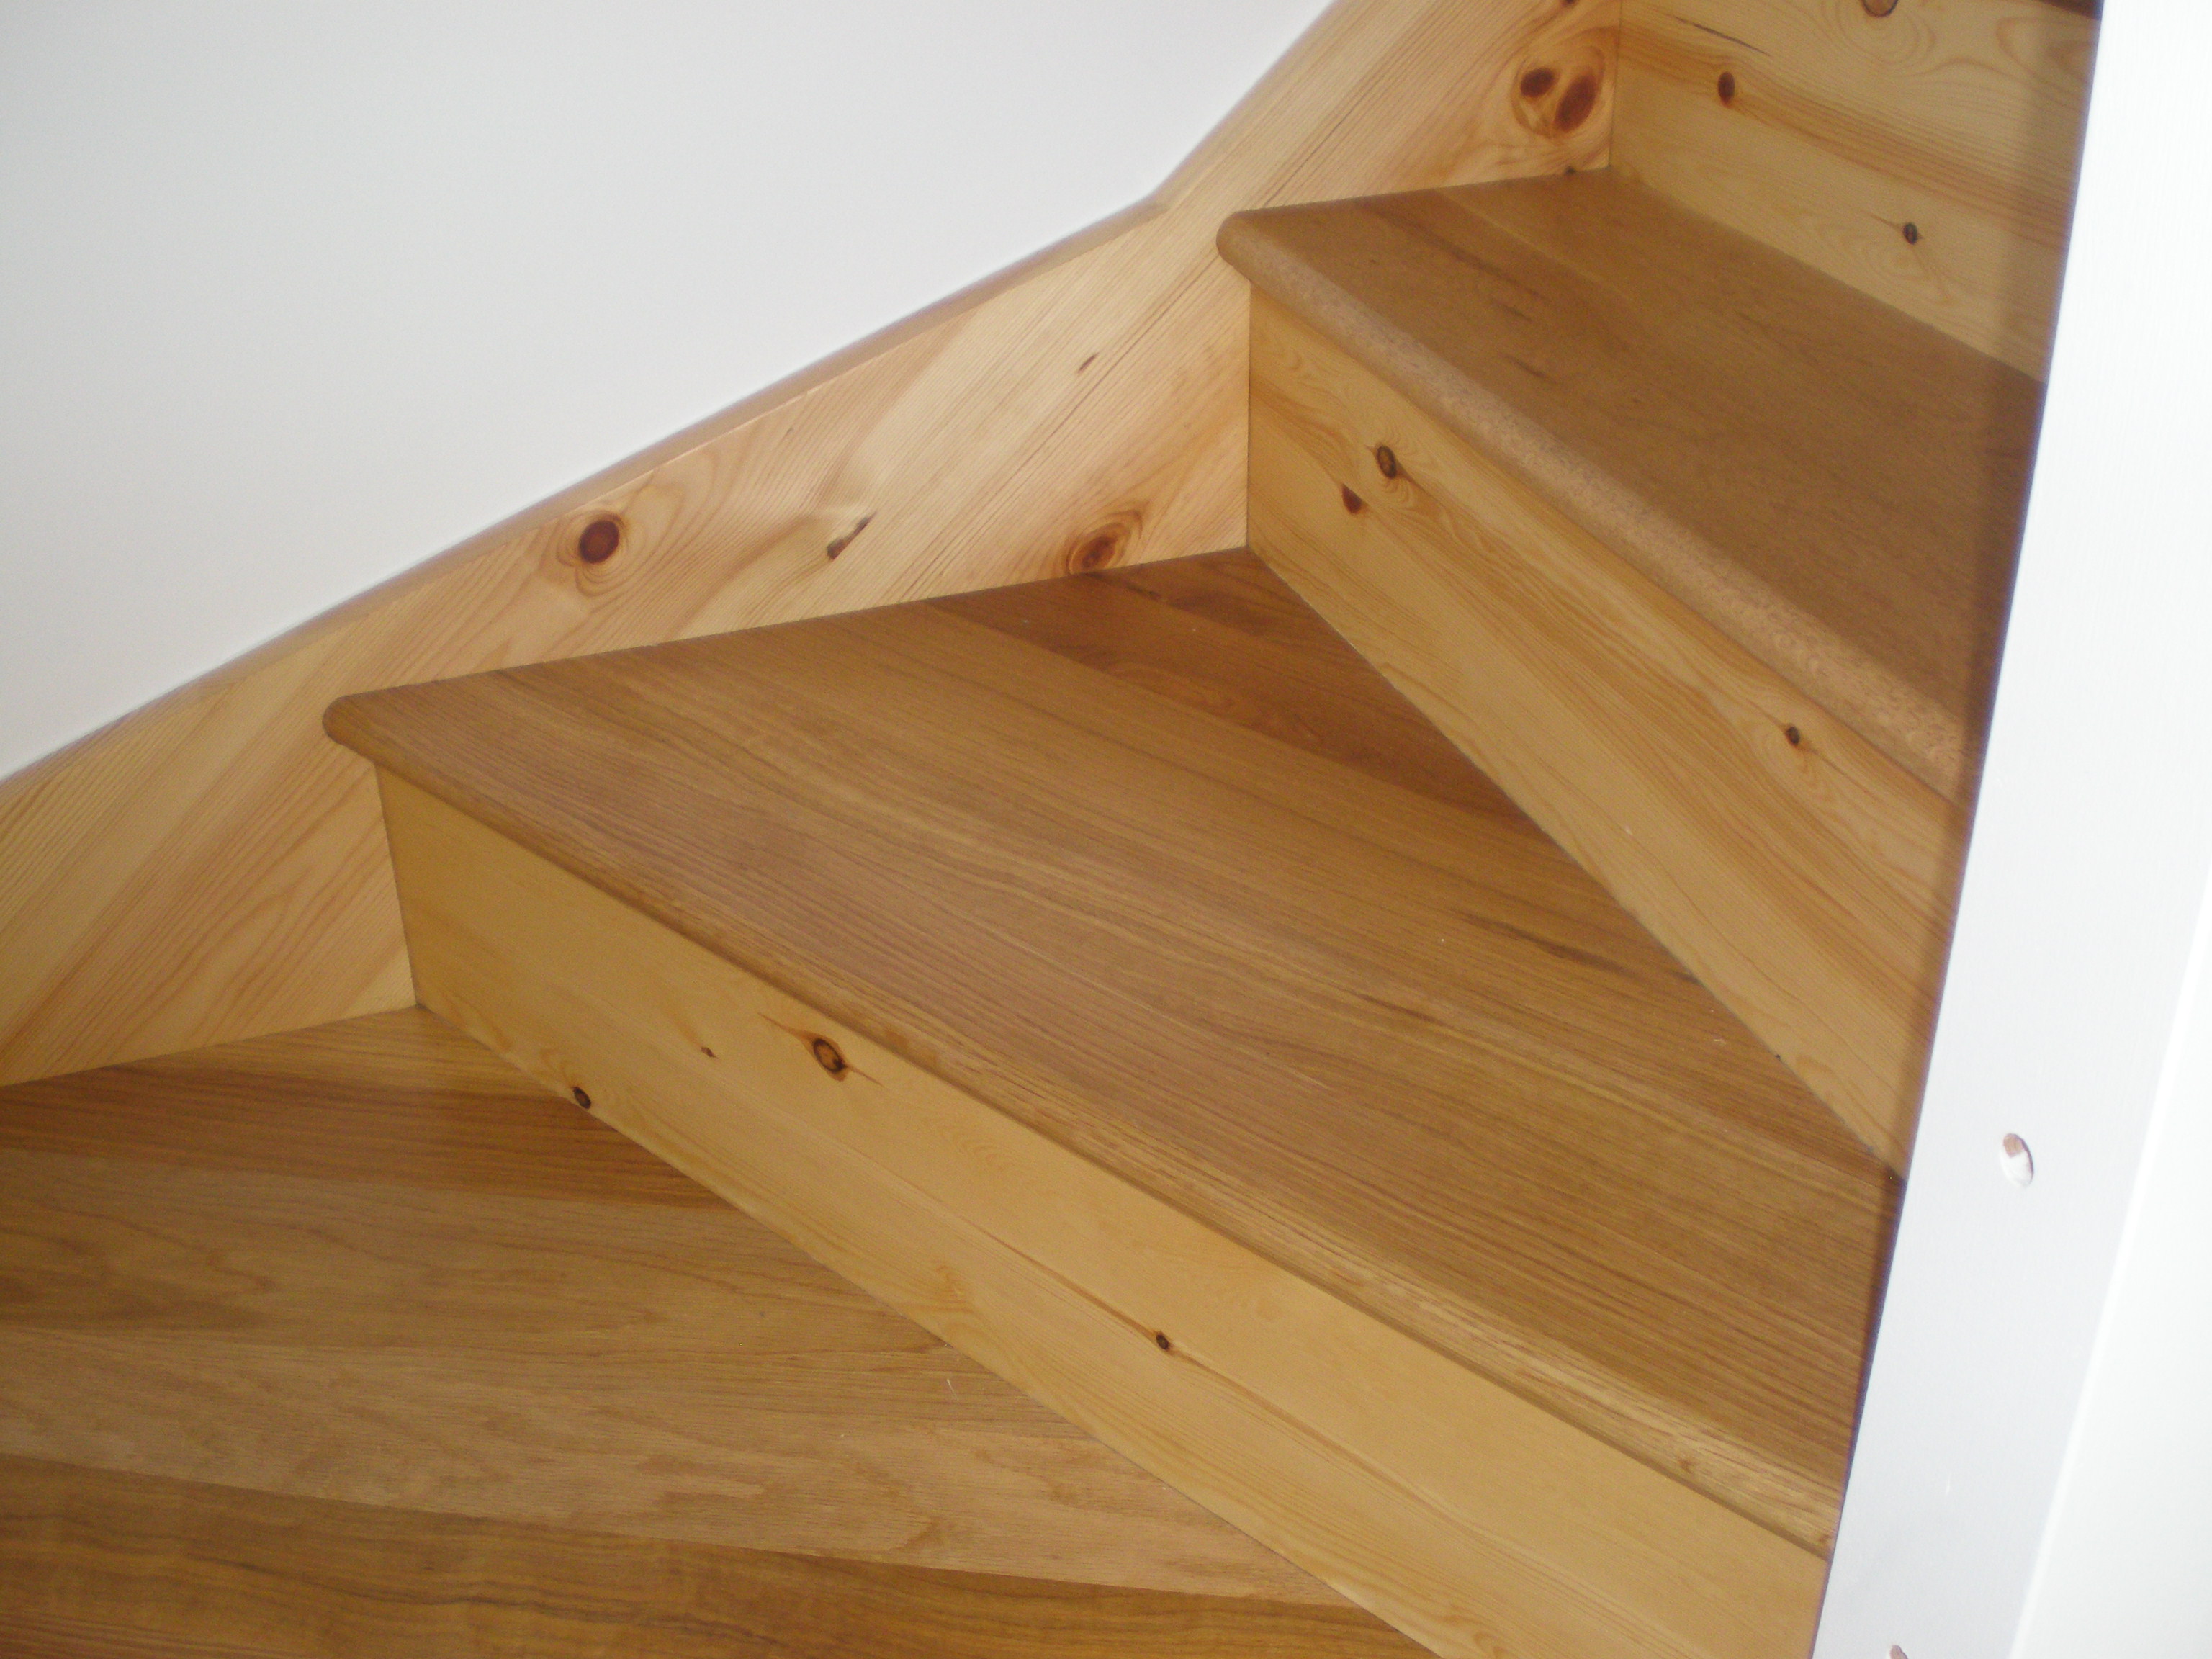
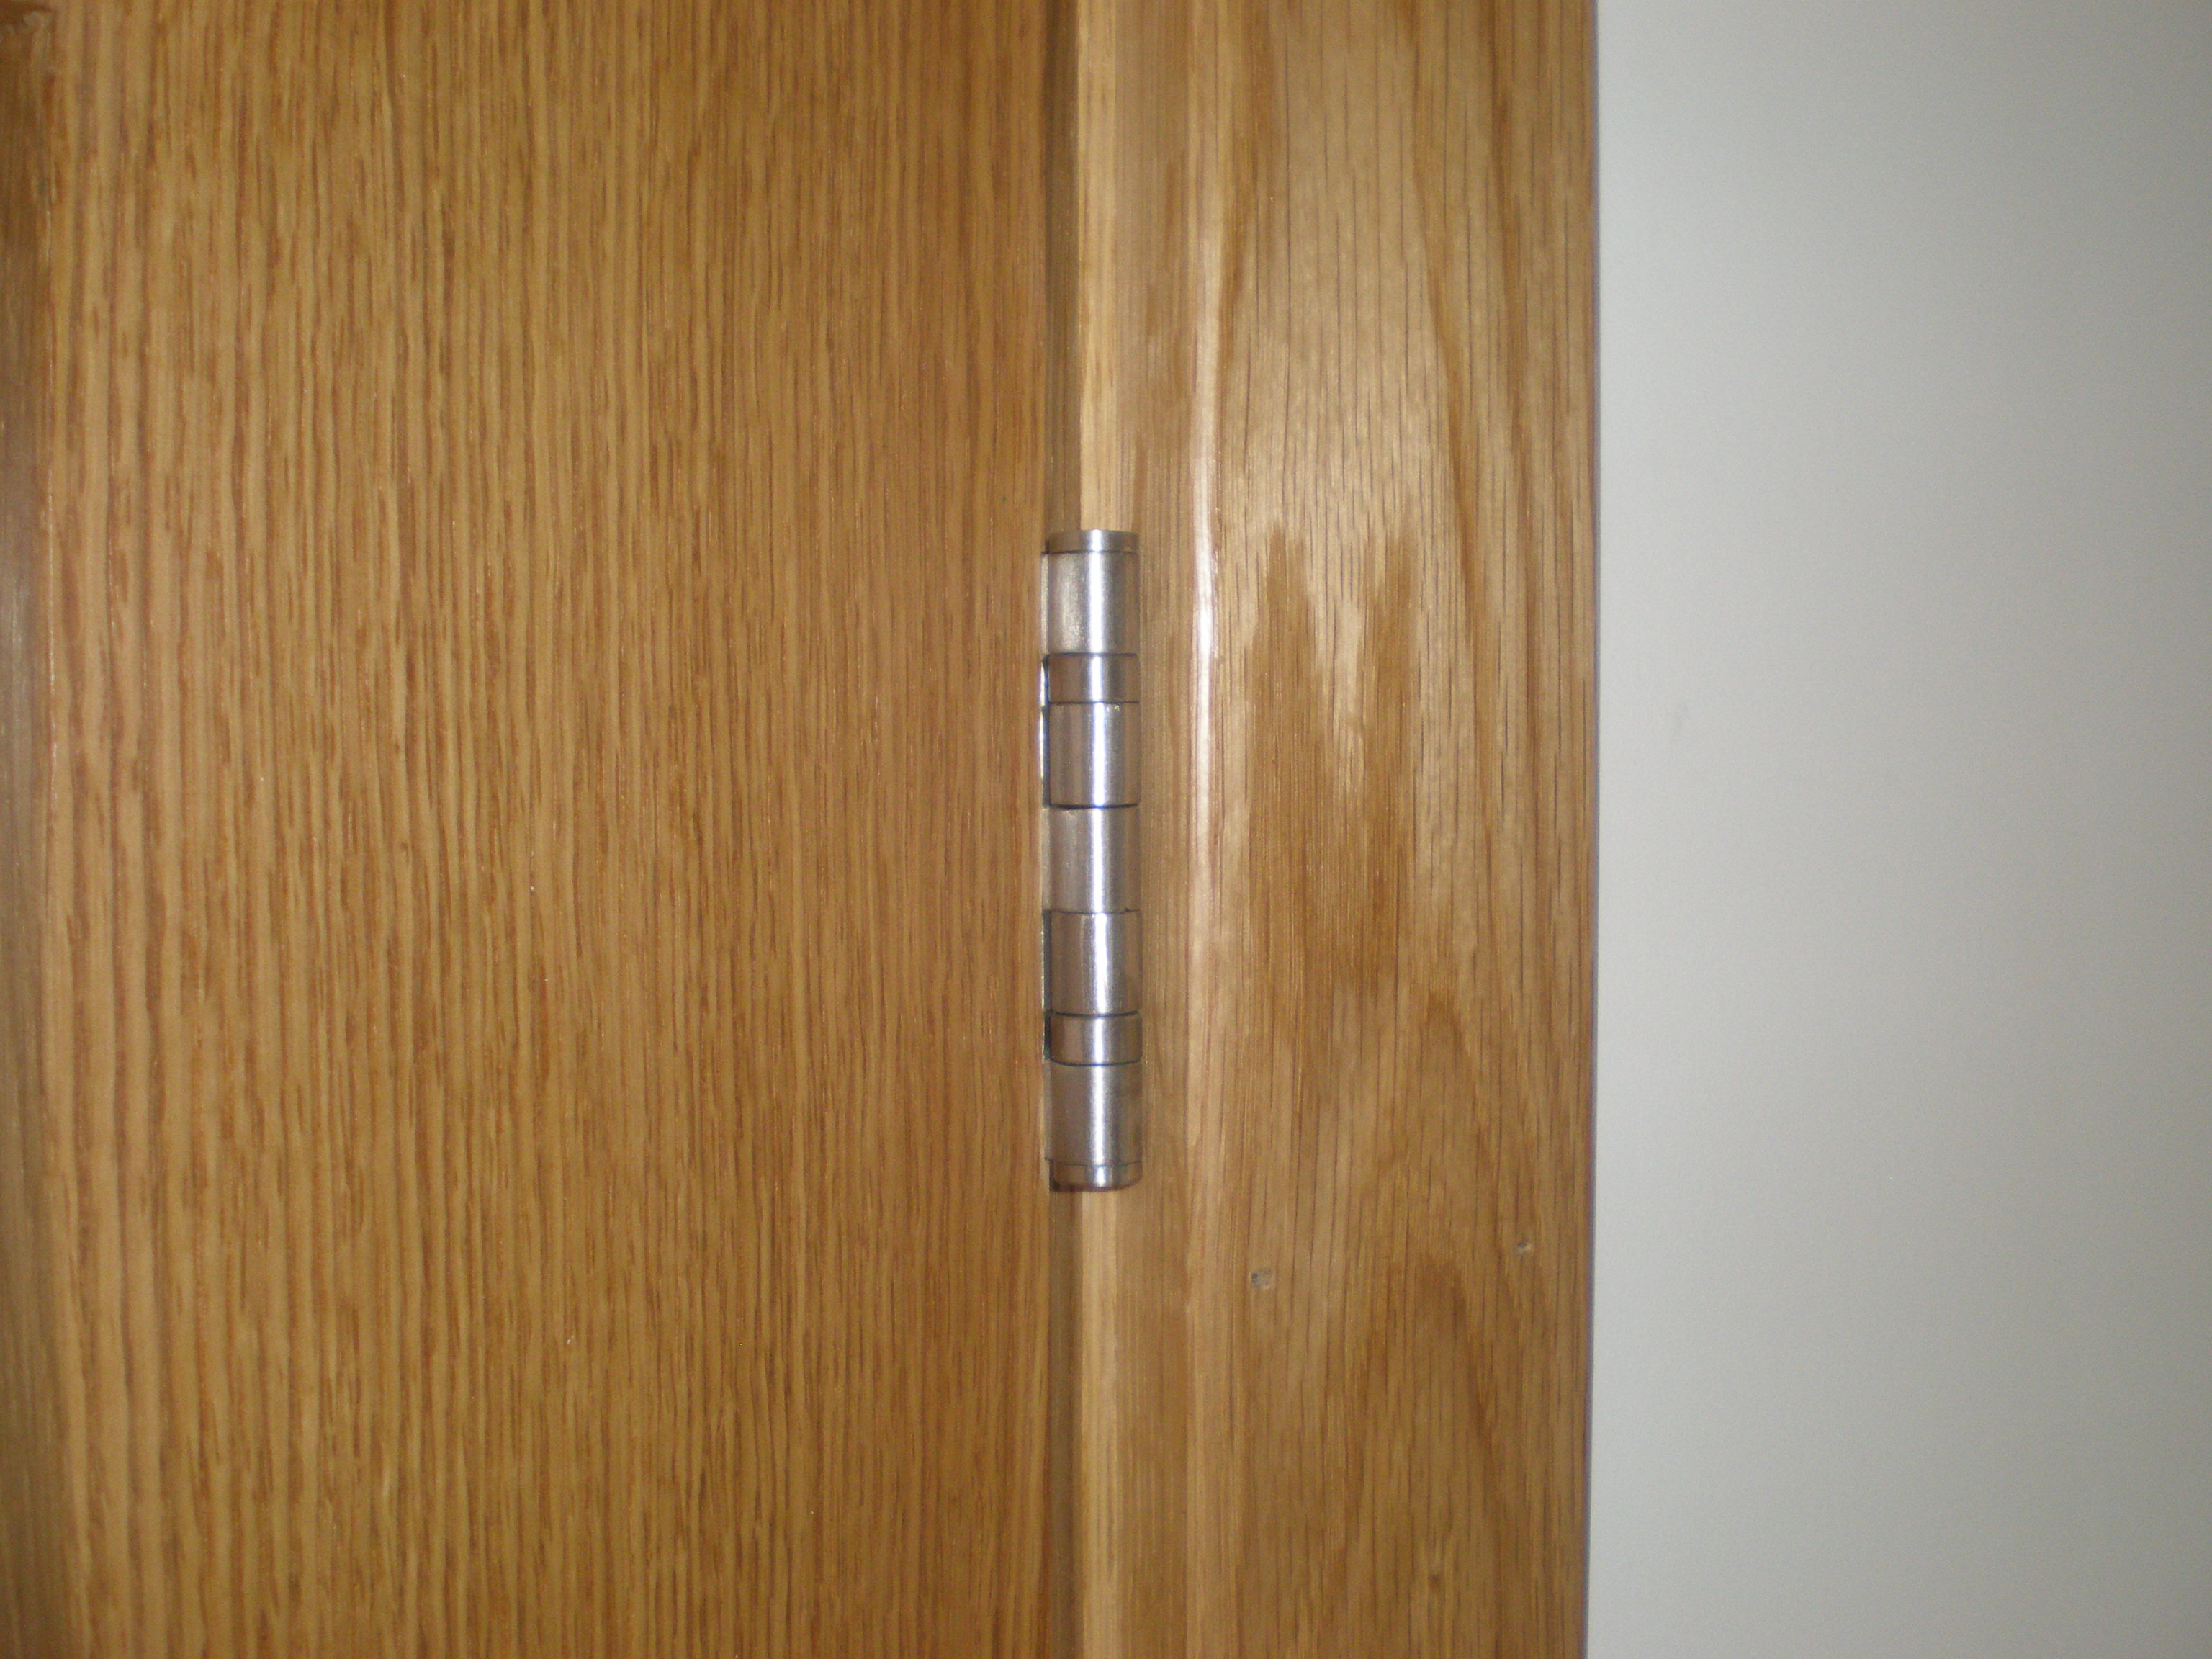
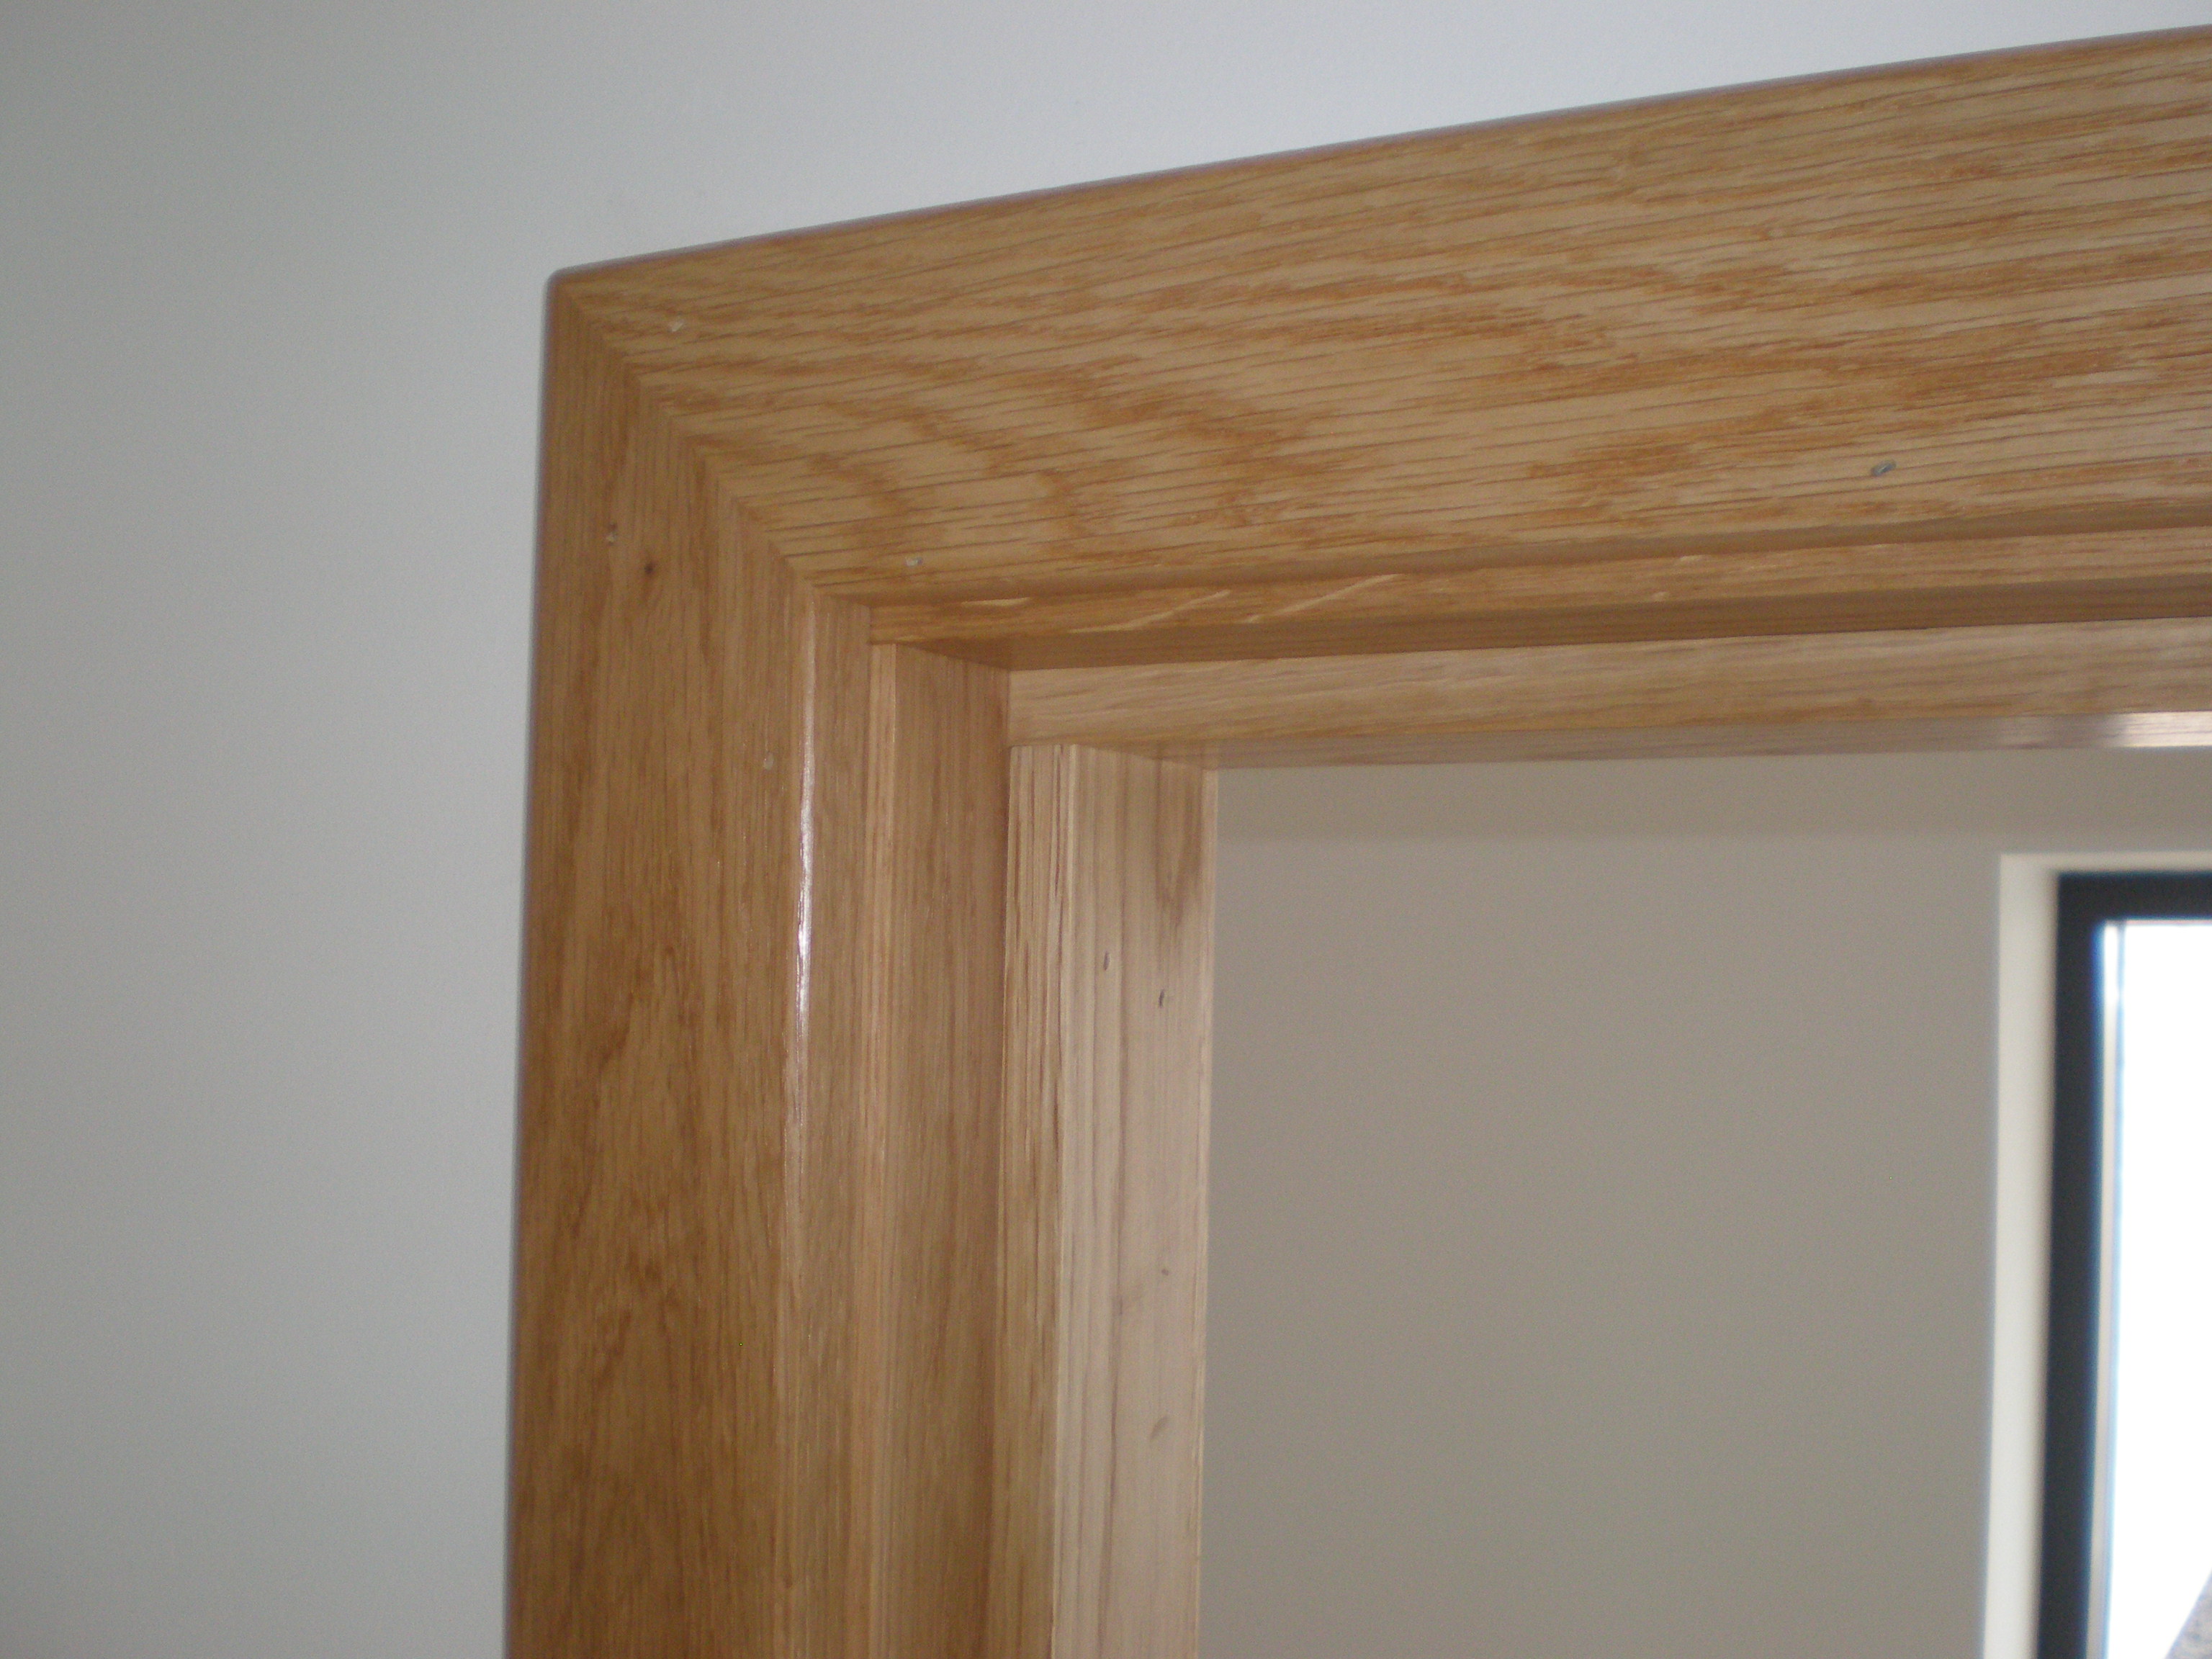
Our finishings are all oak - linings, stops, facings and doors, and the finished product looks really, really good. Well worth it if your budget can stretch that far. The linings were packed off the openings to ensure they were plumb, doors hung, stops fixed on then finally facings fitted. Rebates for hinges as shown in pictures. In terms of finish, if oak isn't an option for the linings and stop, white or off white woodwork can work well. I would avoid staining softwood to look like oak, as its impossible to get the softwood looking like oak, or at least that's what we have found having tried in our last two houses. One option, which may seem a bit odd ball, is go for softwood linings, and facings and simply oil them to bring out the natural beauty of the wood. We did this with our staircase (softwood stringers and risers, oak treads)
 2 points
 -
On the subject of heat damaging components I'm still a bit concerned about this American obsession with using 'foil faced poly iso" i.e PIR to insulate their solar thermal panels. They reckon it's the best thing. I was under the impression it would melt/catch fire at the sort of temperatures achievable but maybe that's EPS? If not then 50mm of Wickes finest, on offer Celotex will be going on! It'd mean I could ditch the reflective aluminium sheet I've used before above the Rockwool / under the can stack. I'll probably insulate around the perimeter too this time.2 points
-
Having gone through the process of considering then discounting travertine as our floor covering of choice, we eventually settled on a porcelin tile to cover those areas (kitchen, utility and vestibule) that were not having oak flooring laid. Unfortunately for us, the person who we believed was going to be doing our tiling (and does virtually all of the builders tiling), at the last moment refused to undertake the work in our house. Quite why I've not been able to establish, nor has my builder. To say I was put out is an understatement. My builder was none too happy either. Fortunately, he was able to pull a rabbit out of the hat a couple of weeks later, in the form of Tony from Australia, a tiler on an extended visit to Orkney. As neither of us had seen his work, we agreed that he would tile an initial small area and decide whether he would do the whole job on that. We needn't have worried, a really nice and hard working guy, he set about measuring and marking out, discussing patterns and the best way to achieve the look we wanted. As the tiles started to go down, we could see the care he was taking, and we are more than happy with the result. Due to insufficient clearance under both the front and back door we ended up creating mat wells for the door to open over, edging the wells with aluminium trim. Moving into the bathrooms, where we had decided to use the same porcelin tiles, we tiled all the walls to half height, and finished with a simple straight edge aluminium trim. In the picture you can see the bulkheads we created to conceal the cistern and give a finished height of 1000mm, and the frame / surround for our bath. Access to the cistern / basin trap is by a removable tile (held in place with silicone). If for any reason we do need to get to the cistern and the tile breaks, I have 6 boxes left, so a healthy supply of spares. In the utility room, the units and oak worktop were fitted. A 50mm offcut strip from the utility worktop was used to create a handrail on the staircase, as required by building control. One of the key uses of our utility is as our clothes drying area. Readers may recall from earlier entries that we have a section of vaulted ceiling in the utility which now accommodates two clothes pulleys. Each pulley can take a full load of washing which means all washing can be hung up above normal ceiling height,out of the way. I fitted the utility MVHR extract in this space to ensure moist air is drawn away, and can happily report this particular feature to be very effective, drying all washing overnight. Through in the kitchen, plinths were fitted, doors put back, appliances installed and the worktop (quartz) lifted into place. On the island, we decided to go with a quartz splashback, and to finish with oak on top. We're very pleased with the finished look. On the other side of the kitchen, we are still undecided how to finish the splashback, so in the interim have a length of quartz. We may opt for tiles, glass or leave it as it is. We also have to decide how to finish the underside of the overhead units. This was something I flagged at the design stage but I was overruled in the quest for a 'clean look'. We have the option of fitting a piece of pelmet or a piece of shelving matching to the doors / carcuses. I suspect the later would give a better overall finish. Next entry: 2nd / final fix electrics1 point
-
In my mind im going round in curcles, but you are probably right, do this as a temp measure.1 point
-
Ive spent most of the last 4 days simply running around keeping things tidy. And of course making what seems like dozens of decisions "on the fly" each hour. This is my first full self build but I've done 3 full refirbs/conversions for our previous houses. I cant abide an untidy site!1 point
-
We should have it fully installed by tomorrow. I'll run a temporary power supply to it and report back on cycle times.1 point
-
I mentioned in another post, there is a Graff unit where I have been working this week, with the pump housed in the garage. My observation was the pump was running 5 minutes on, 10 minutes off.1 point
-
Edit - @Vijay beat me to it Costco sell nice looking garage flooring in rolls sometimes. I took this pic off their US website as they only sell it in store here https://www.costco.com/NewAge-8'-x-20'-Versaroll-Garage-Flooring.product.100300491.html I don't know if they have it currently, but I found it on Amazon, I think it might be a bit cheaper at Costco. https://www.amazon.co.uk/gp/offer-listing/B00TPQL94Q/ref=dp_olp_new?ie=UTF8&condition=new1 point
-
Costco definitely still do the matting in store, saw it the other week. Just noticed, it's discounted at the moment - http://viewer.zmags.com/publication/263ae8ed?utm_source=Promo&utm_medium=Email&utm_term=Coupons&utm_campaign=emailFY17MVM11#/263ae8ed/21 point
-
My understanding is that it runs the pump for 30 minutes on, 15 minutes off, from what I've been able to glean from various sources. This seems to be about right, as the 15 minute rest pauses are enough to save a bit of pump power and wear and tear, yet not not long enough to allow sludge to settle out and compact around the air injection holes.1 point
-
The Graff tank going in today. Although the instructions supplied with the pump are limited you have to set the date and time on the unit and it definitely makes references to "cycle rest pauses".
 1 point
 -
I gaffer a bit of pipe to the end of the vacuum, stick it in the hole and it works a treat.1 point
-
M12 same centres as the joists. Make sure you don't clash with the hangers or joist ends. Threaded bar is cheapest. Make sure you vacuum or brush out the holes properly.1 point
-
I agree, those plastic interlocking tiles look the business but they cost a bloody fortune (the ones I've looked at anyway) Daft as this idea may sound, in my existing garage, in the end that I use for motorbikes etc, I fitted some carpet tiles that I managed to locate free from a job I did. They make it a lot more comfy underfoot and if you leak too much oil on them you simply take up the mucky ones and replace. They also sweep/hoover ok as they don,t really have any pile on them.1 point
-
That includes removal of spoil. I had another prices that was higher but in the same ballpark.1 point
-
Get yourself over to Interparcel, basically a broker: https://uk.interparcel.com/ I have business accounts with TNT and UPS but actually find these guys to be cheaper. I probably use these guys on average of once a week - never had an issue yet and you can deal directly with the courier you then choose to book with. Just get the sink well boxed up and send away - if sinks are on some list then say it is ceramic components. I don't know the dims and weight but I just got a price as an idea for a 25Kg package 500 x 500 x 500 from one end of the country to the other and it was about £12 with tax. These guys are brilliant for eBay sales. I send gearboxes and differentials and all sorts with them - heavy heavy objects.1 point
-
First delivery driver put it on the wall but on its side .... this one picked it up with slings and lifted it up onto the first floor so we could twist it in the slings and then put it perfectly onto the padstones so a bit of "adjustment" and it was pushed into place with the sledgehammer ..! Next ones are a challenge as the hiab can't reach ....1 point
-
yes liking the looks of Thermabead for example, brick outer, medium density inner, plaster finish gives a value of .181 point
-
Travis Perkins De Walt Drill / Driver clearance. Here De Walt have a good 18V hammer drill driver and 2x1.5Ah X-RAY batteries for £120 inc VAT. This is the model which has been my mainstay since 2013. I paid £150 in a Screwfix Sale, and has been excellent. https://www.travisperkins.co.uk/DeWalt-DCD785C2-18V-Xr-Li-ion-Compact-Hammer-Drill-Driver/p/550474 Ferdinand1 point
-
I nominate Nick for best mixed metaphor on Buildhub!1 point
-
Why not just put the ducting in just now to give you options at a later date.1 point


This leaderboard is set to London/GMT+01:00