Leaderboard


Popular Content
Showing content with the highest reputation on 03/31/17 in all areas
-
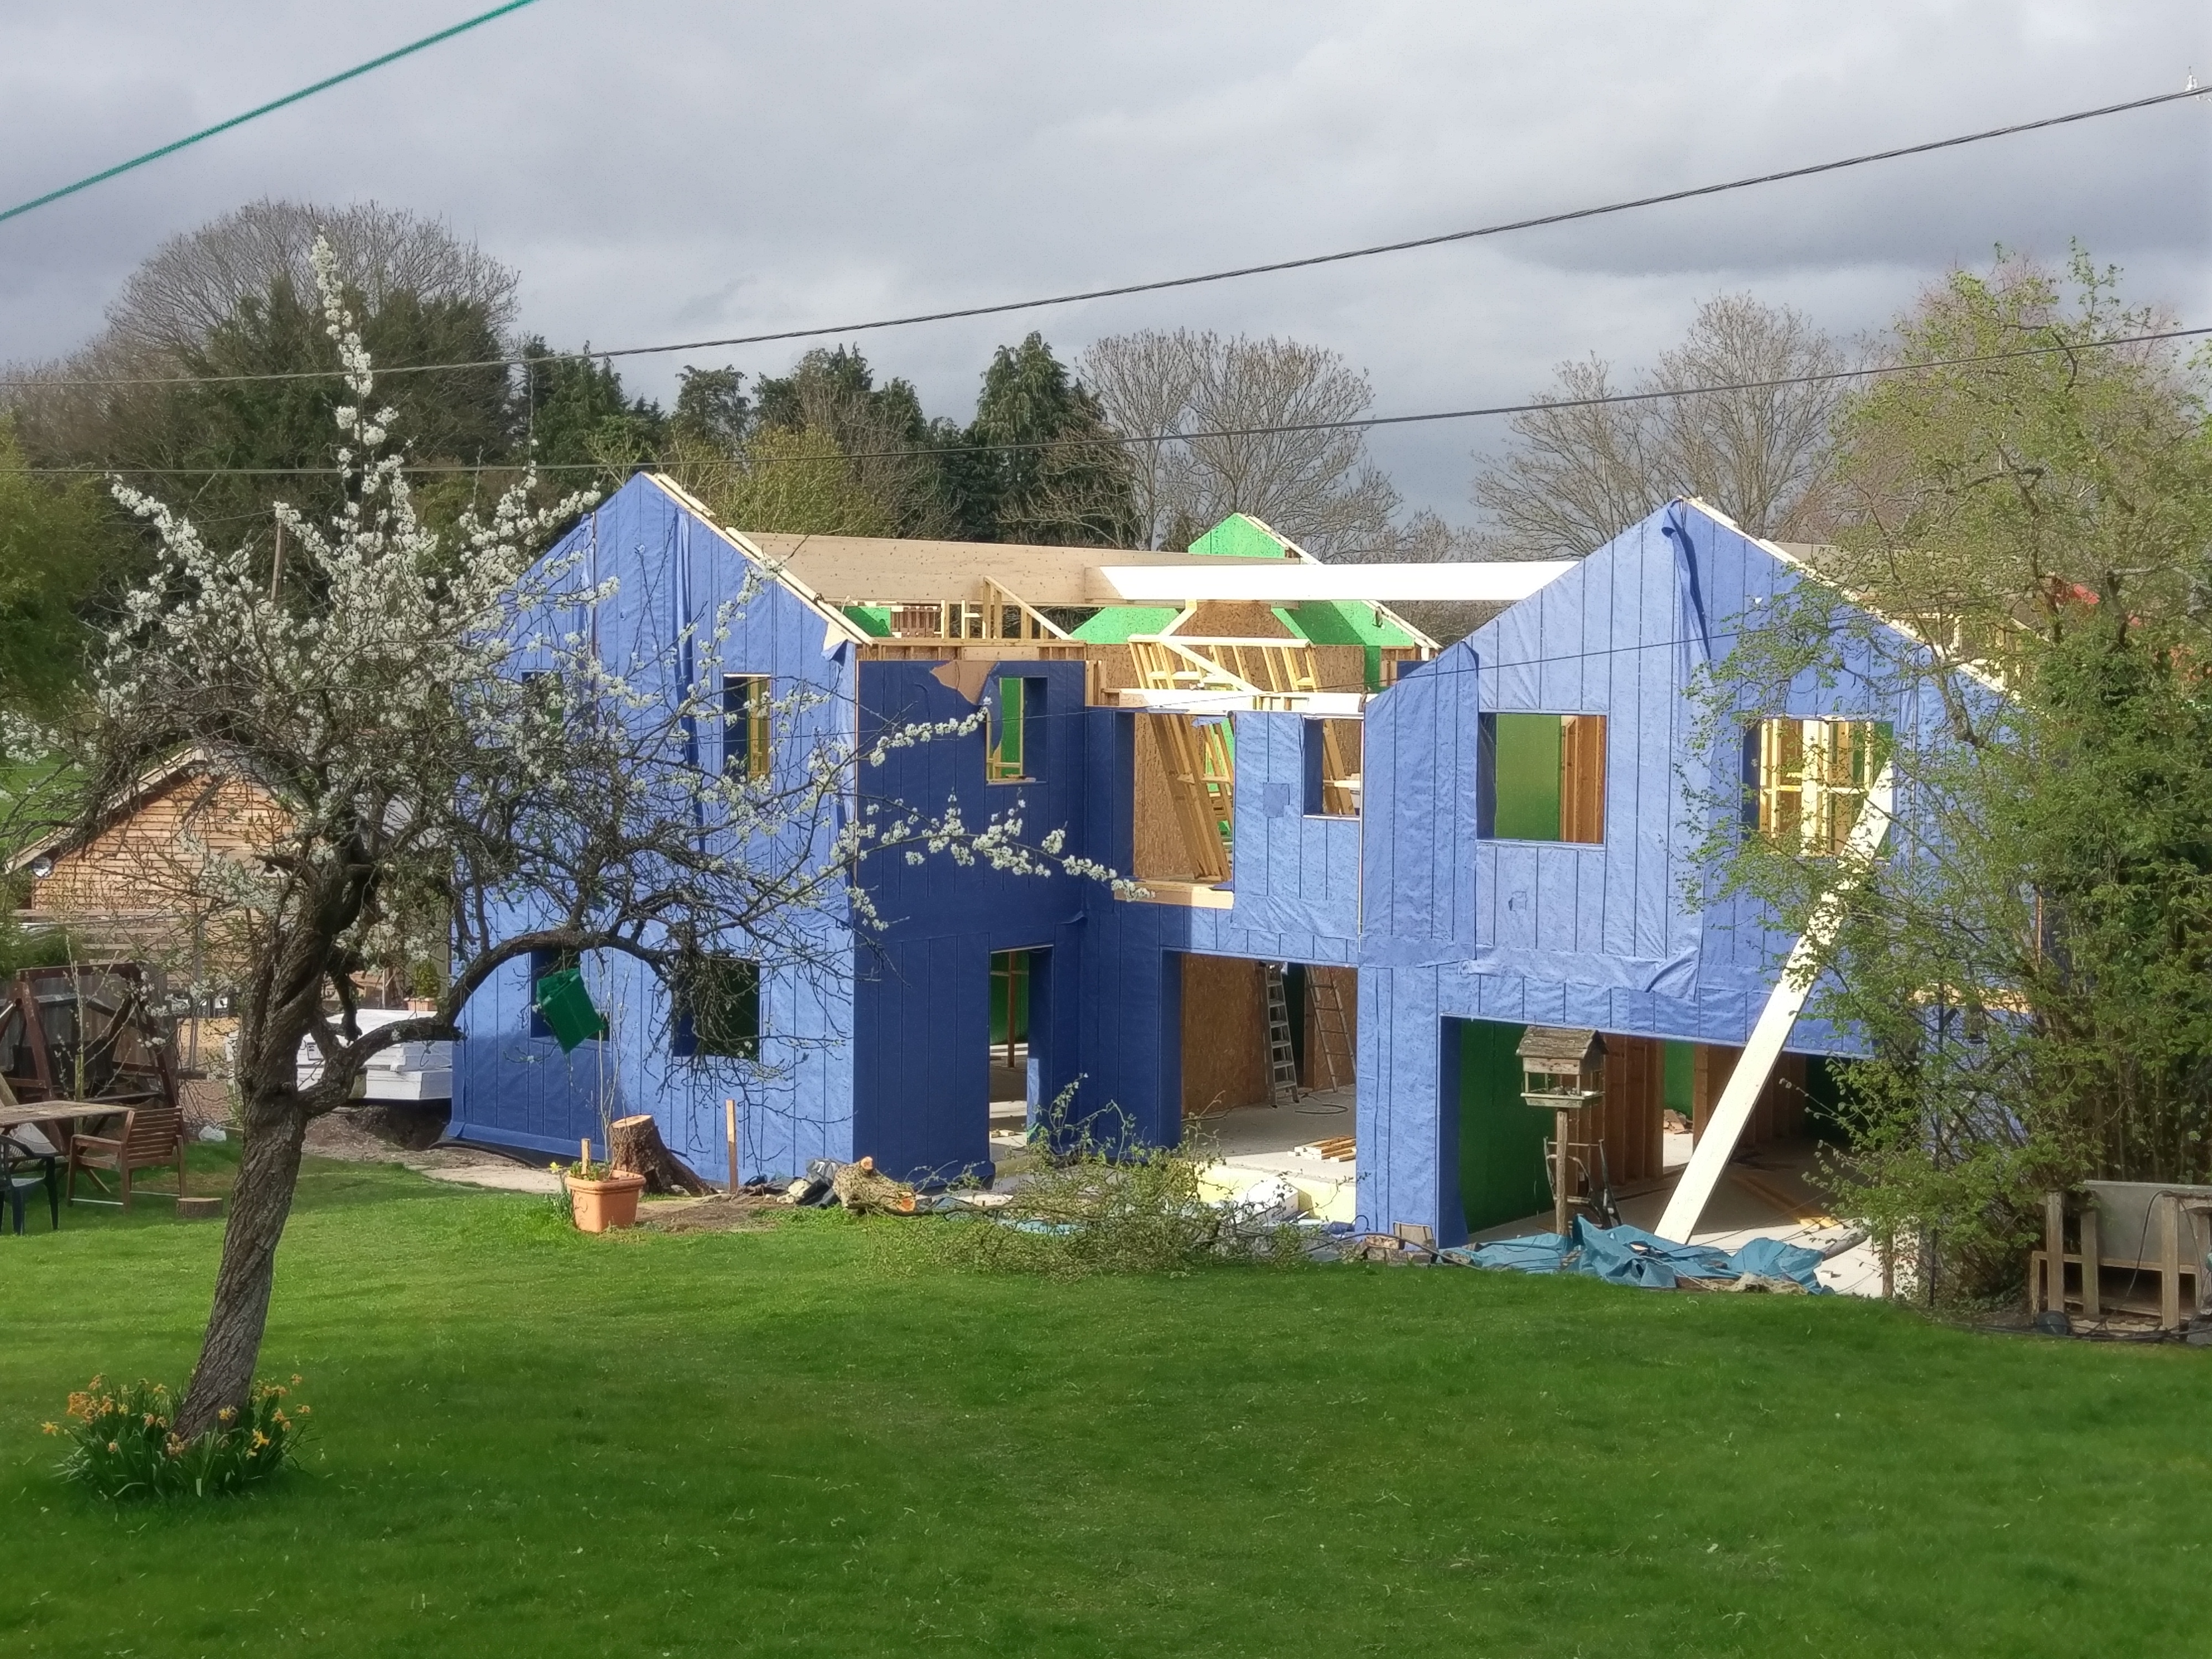
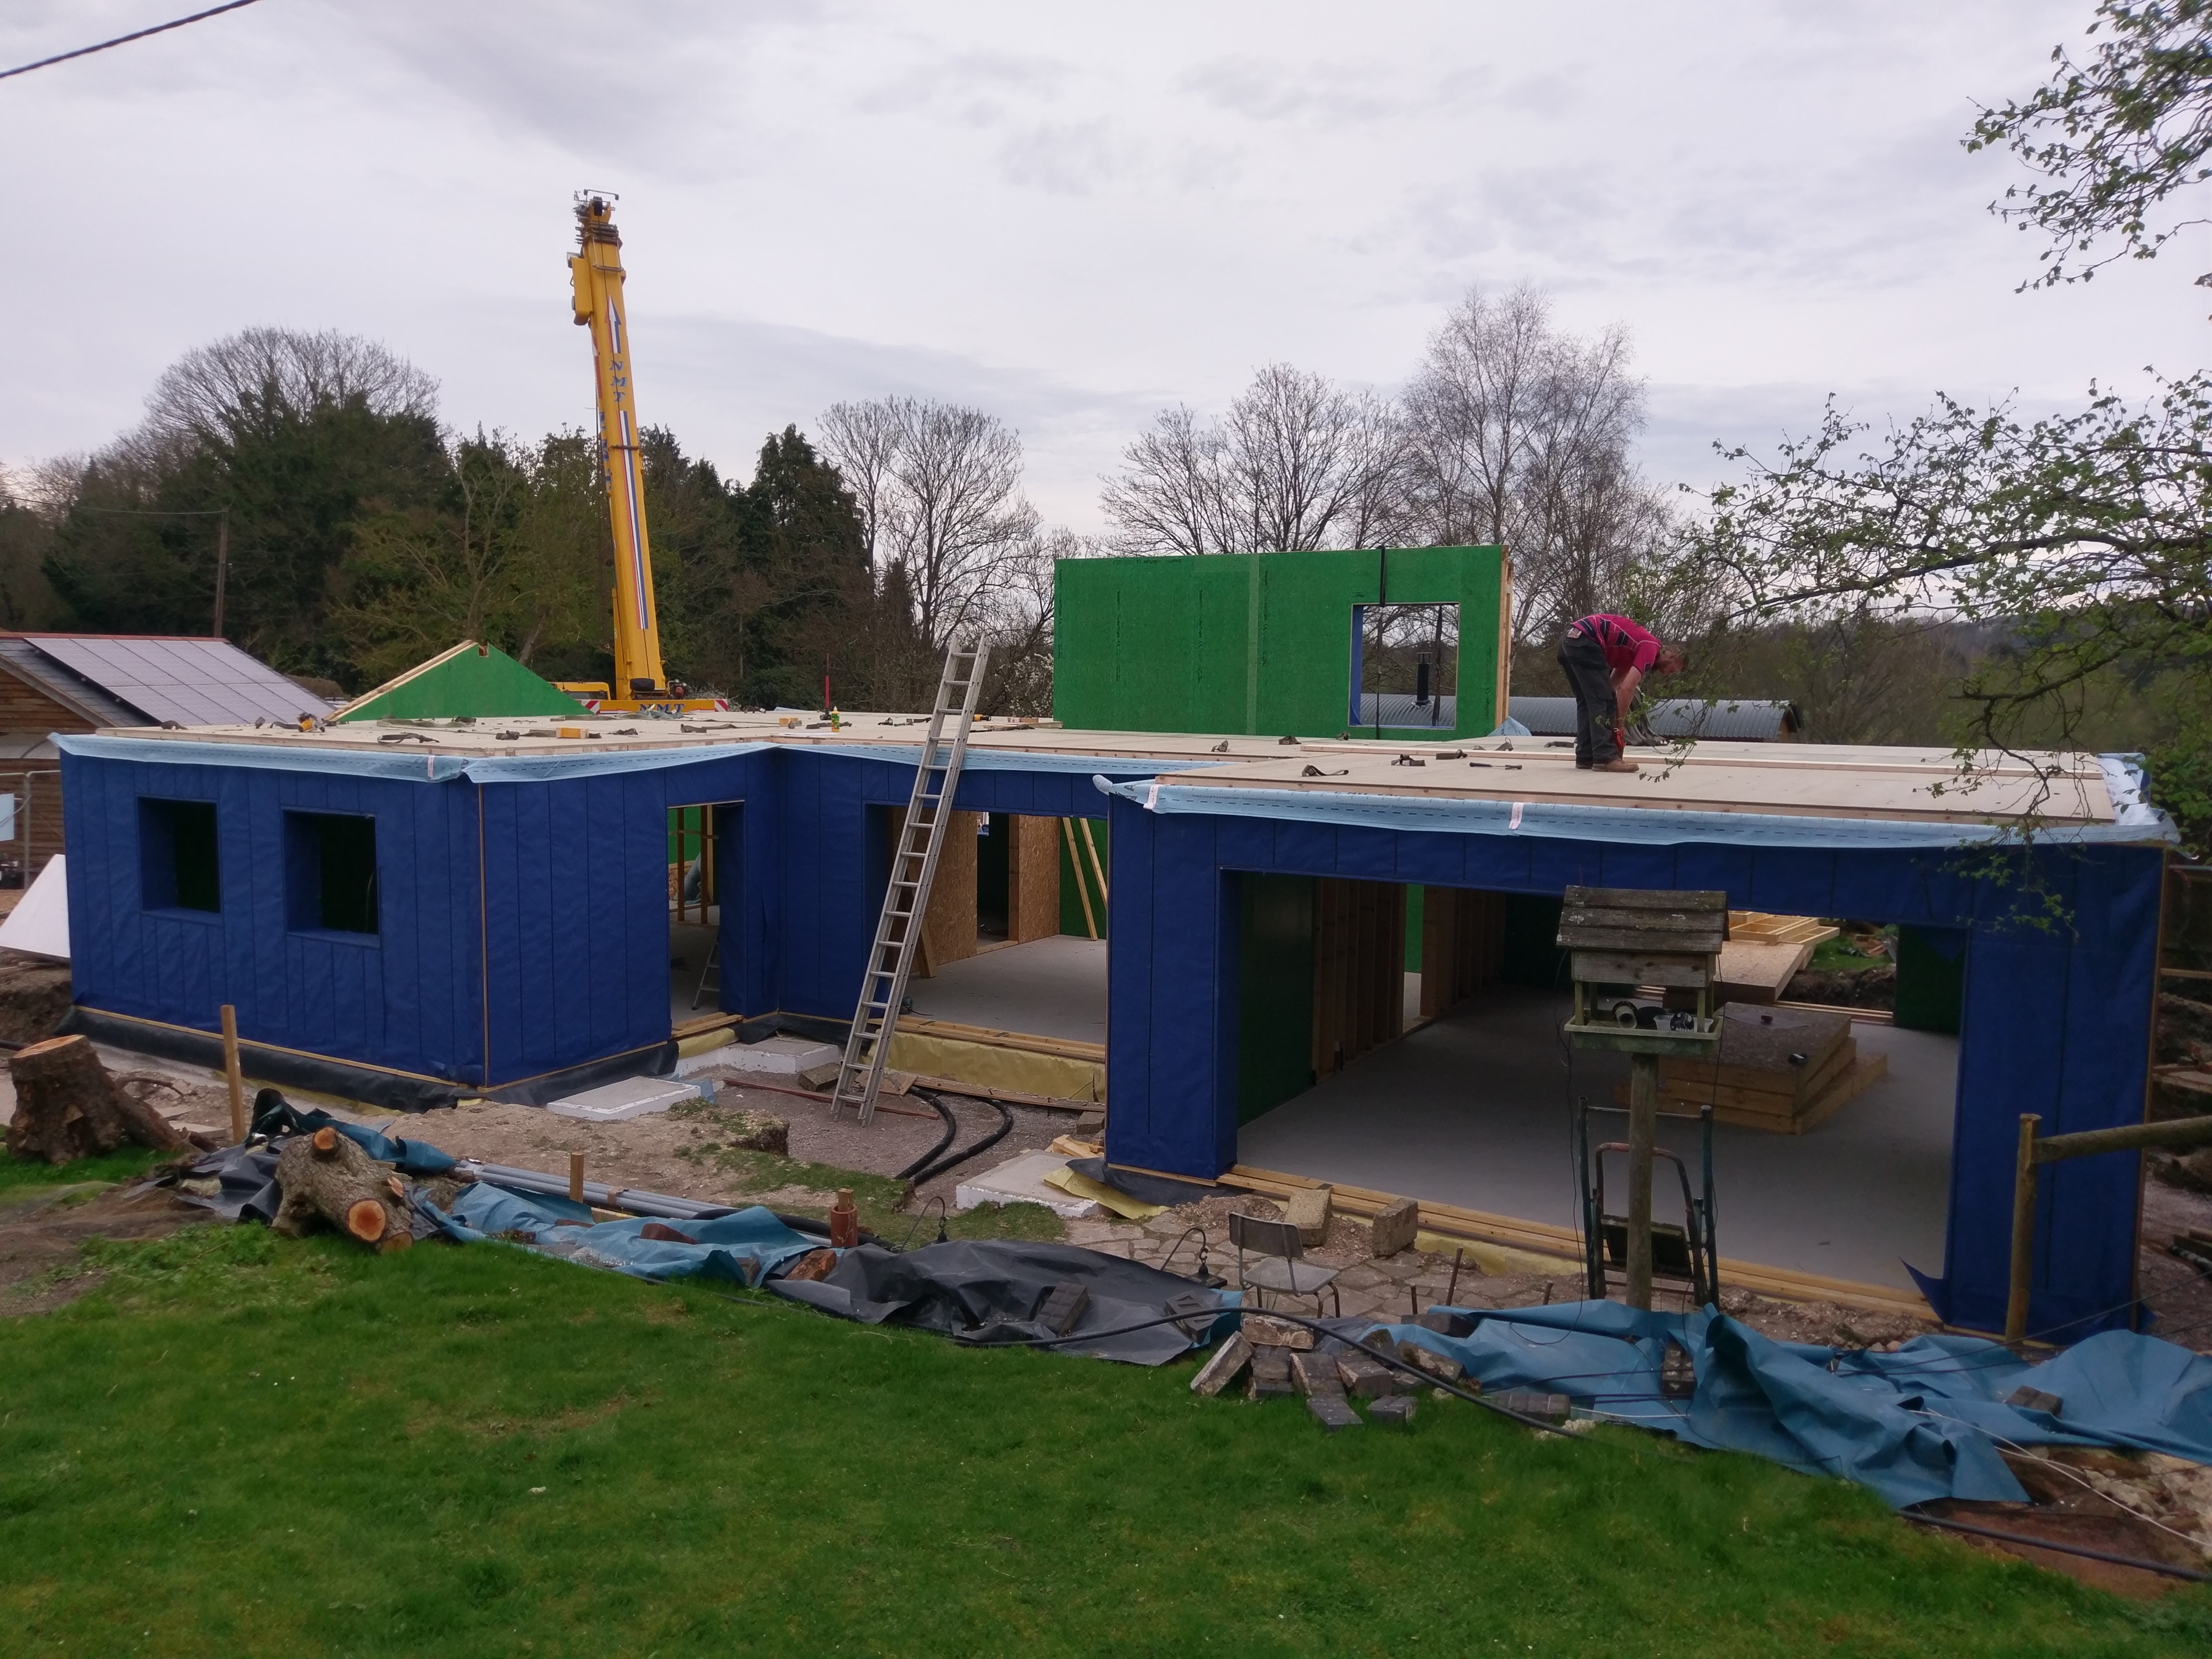
My experience was the whole ground floor, including all the internal stud walls, plus most of the flooring on the first floor and a few parts of the first floor walls. I was getting in the way on-site, so I left at around 10:30, when they were still lifting stuff off the lorry with a 100ft jib crane. I came back around 16:30 and all the ground floor external and internal walls were up.4 points
-
You will also need the frame up first in order to install a cavity tray at g/f level. There are lots of people on here to help (& that's what we're here to do,not to patronise) so please take the advice given to get some professional help in. At the very least,write off the next week as far as progress goes & post as many pictures,architects drawings etc as you can. I can't imagine the stress of a self build-tackling diy outside my own sphere of knowledge is bad enough so I'd hate to see things south for you.3 points
-
@Crofter is your man for inspiration. Sounds very much like his build. If you make it that warm and cosy everyone will move out of the house into the shed. Didn't you ought to finish the bathroom before starting a new project?2 points
-
I sprayed our last house inside and out, we backrolled the last two coats. House was 360m and it took no time at all. We are positively stuck in the dark ages in this country. Sprayed all ceilings, walls and interior woodwork. Including doors. Even spayed all the facia as we couldn't get the colour we wanted. Advice for @JSHarris buy lots of masking tape and brown paper, I guarantee the bit you don't mask will get overspray on it. Who said if if you have 8 hours to cut a tree down spend 6 sharpening your axe. This is so true for this spraying lark you will spend 3/4 of the job time in prep and a 1/4 chucking the paint about.2 points
-
2 points
-
Have you got your plasterboard delivery ready to pop up on that first floor? Your boarders will love you forever!2 points
-
If I'd owned a digger I'd have done just the same! We had a minidigger in for one day during the work the week before last, but it was the landscaping chaps own one, so a lot cheaper than hiring one. I hate grass with a passion, and if I'd had my way the whole garden would have been hard landscaped, but SWMBO was insistent about having a lawn, so we laid turf last year. My condition for laying the turf was that she would have to cut it regularly, and I even went and bought a lightweight, easy to use, Makita cordless mower for her (good bit of kit if you already have Makita tools and battery packs). Needless to say I've ended up doing the lion's share of the grass cutting...........2 points
-
Thanks very much indeed for the tips, much appreciated. I've watched a YouTube video where the guy (American) went through the cleaning and re-lubricating stuff, but hadn't realised that you could just reverse the nozzle to blow it out. I've just had a look and it seems the nozzle works like a key, and can be just turned through 180 deg, very handy. Painting the garage in an hour sounds like magic!1 point
-
I have had a couple of projects done with these. They are fine with emulsion. Thinner paint is easier. Cleaning is vital. If the nozzle clogs you can rotate it 180 and clear out the crud. Only worth using if you have a large area. If you are spaying plaster / plasterboard, the finish is excellent but future blemishes can't be covered with a roller or brush. Fantastic for a mist coat on new plaster. It works on almost the opposite principle of the HVLP kit. Your garage should take less than an hour to paint.1 point
-
no cd or sat nav but a kettle/fridge/microwave etc never go hungry1 point
-
Thanks for all the advice my SE is too busy appearing on grand design and my architect - well ; he's been paid and gone . good isn't it ?! will get block work up to damp course then sort a company to spec structural timber and roof structure . i do genuinely appreciate the help - and my lack of knowledge is due to not building before and having no support . cheers all1 point
-
No words of wisdom, but the decorators I've used have just finished the spray work at mine. 2 base coats of watered down contract emulsion and 2 top coats of Little Greene. Goes on very fast and the finish is first class. Seems to make the plastering look better as it gives few blemishes to focus on. One draw back is future repairs by roller or brush will likely stand out more, although the decorator I used believes some paints are more forgiving than others. The only thing I noticed is, just like for spraying cars, release the trigger as you change direction to avoid putting to much paint on.1 point
-
Came across this by accident. How to dig a trench on difficult ground using compressed air. I've no idea if you can hire one in the UK.1 point
-
Sorry to be blunt but there's no real way of sugar coating this - you urgently need to get some professional help with this build. Your questions demonstrate a basic lack of understanding of simple construction issues and it's some of the scariest stuff I've ever read on a self-build forum. What involvement have you had so far with your Building Inspector? Have they approved your foundations?1 point
-
technically he could build it in panels and put the membrane on while they are still on the ground, (I had to on my back wall) But its a stupid idea and you couldn't tie the two skins together afterwards anyway so as advised above, just don't do it....1 point
-
Apparently i have the biggest one he has seen
 1 point
 -
Not really just talk to your local BCO. Im fairly sure they will say the same1 point
-
Whoaaaaa there!! your timber frame needs to go up first,roof on,windows & doors fitted,then your outer skin is built with ties fixed to the studs & lintols over openings also restrained back against the frame. It's about 10 years since I worked on a timber frame,but at that time we were leaving compression gaps above & below all openings in the masonry. Think all the ones built in the 70's have issues with door frames squashing up as the building settles over the years.1 point
-
Ties for timber frame are screwed to the outer surface of either the timbers or the OSB if present. The screw and tie will cover any hole in the membrane. An external single skin of blockwork is not self supporting at 3m tall and is dangerous - it has to be tied back to the frame as even wind suction could pull it over. Do you have the full set of plans for the design ..??1 point
-
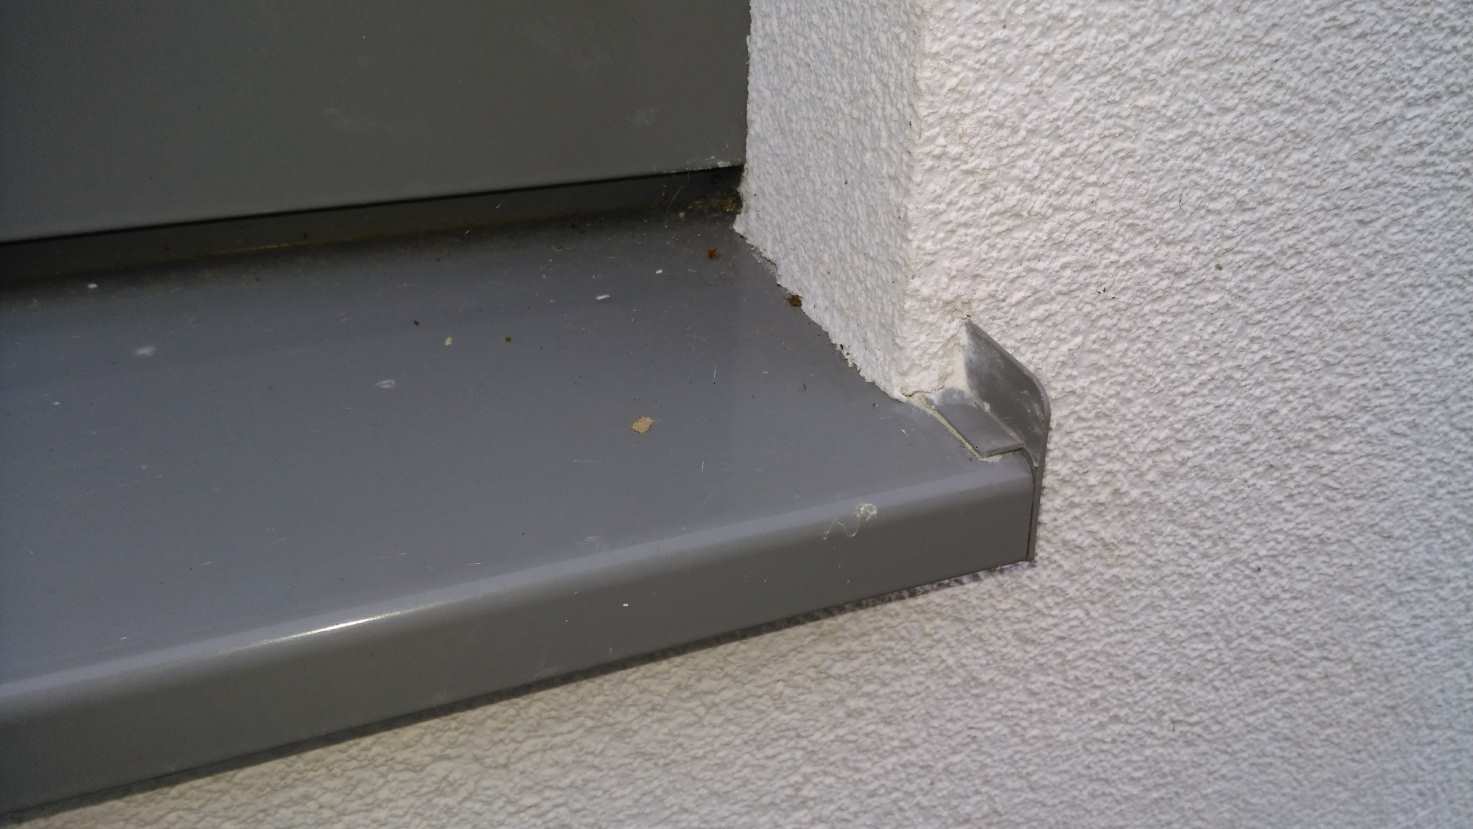
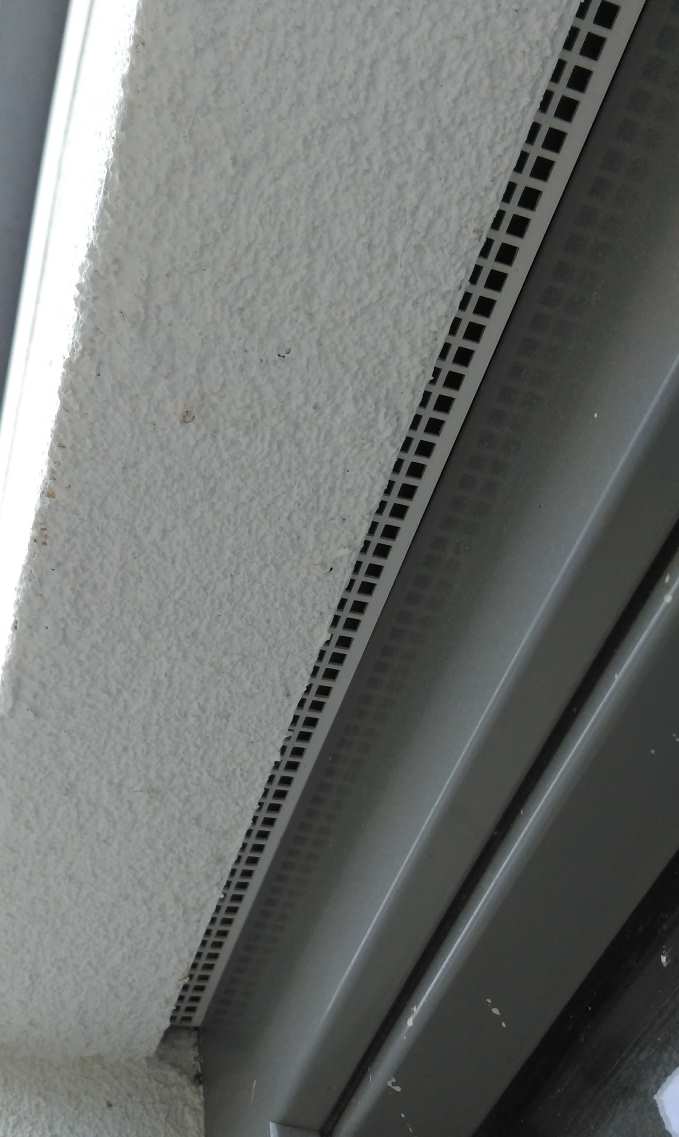
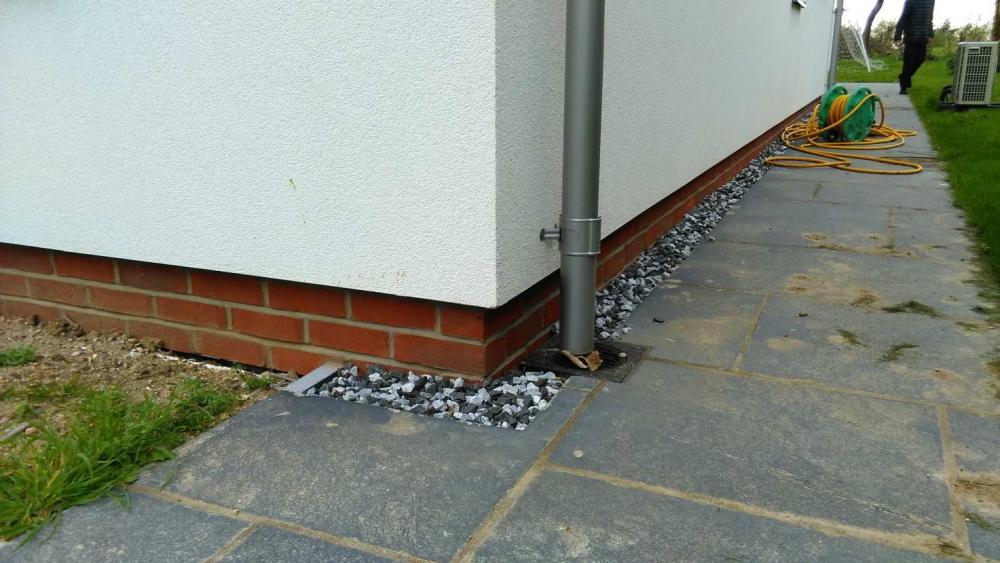
Do factor in the price - I was surprised (unpleasantly so) at how expensive it is. Love the look, though. The detailing should be done with your render system supplier - each one seems to be slightly different, however attached ours. The fuzzy image (no 3) shows detail under the aluminium cill.

 1 point
 -
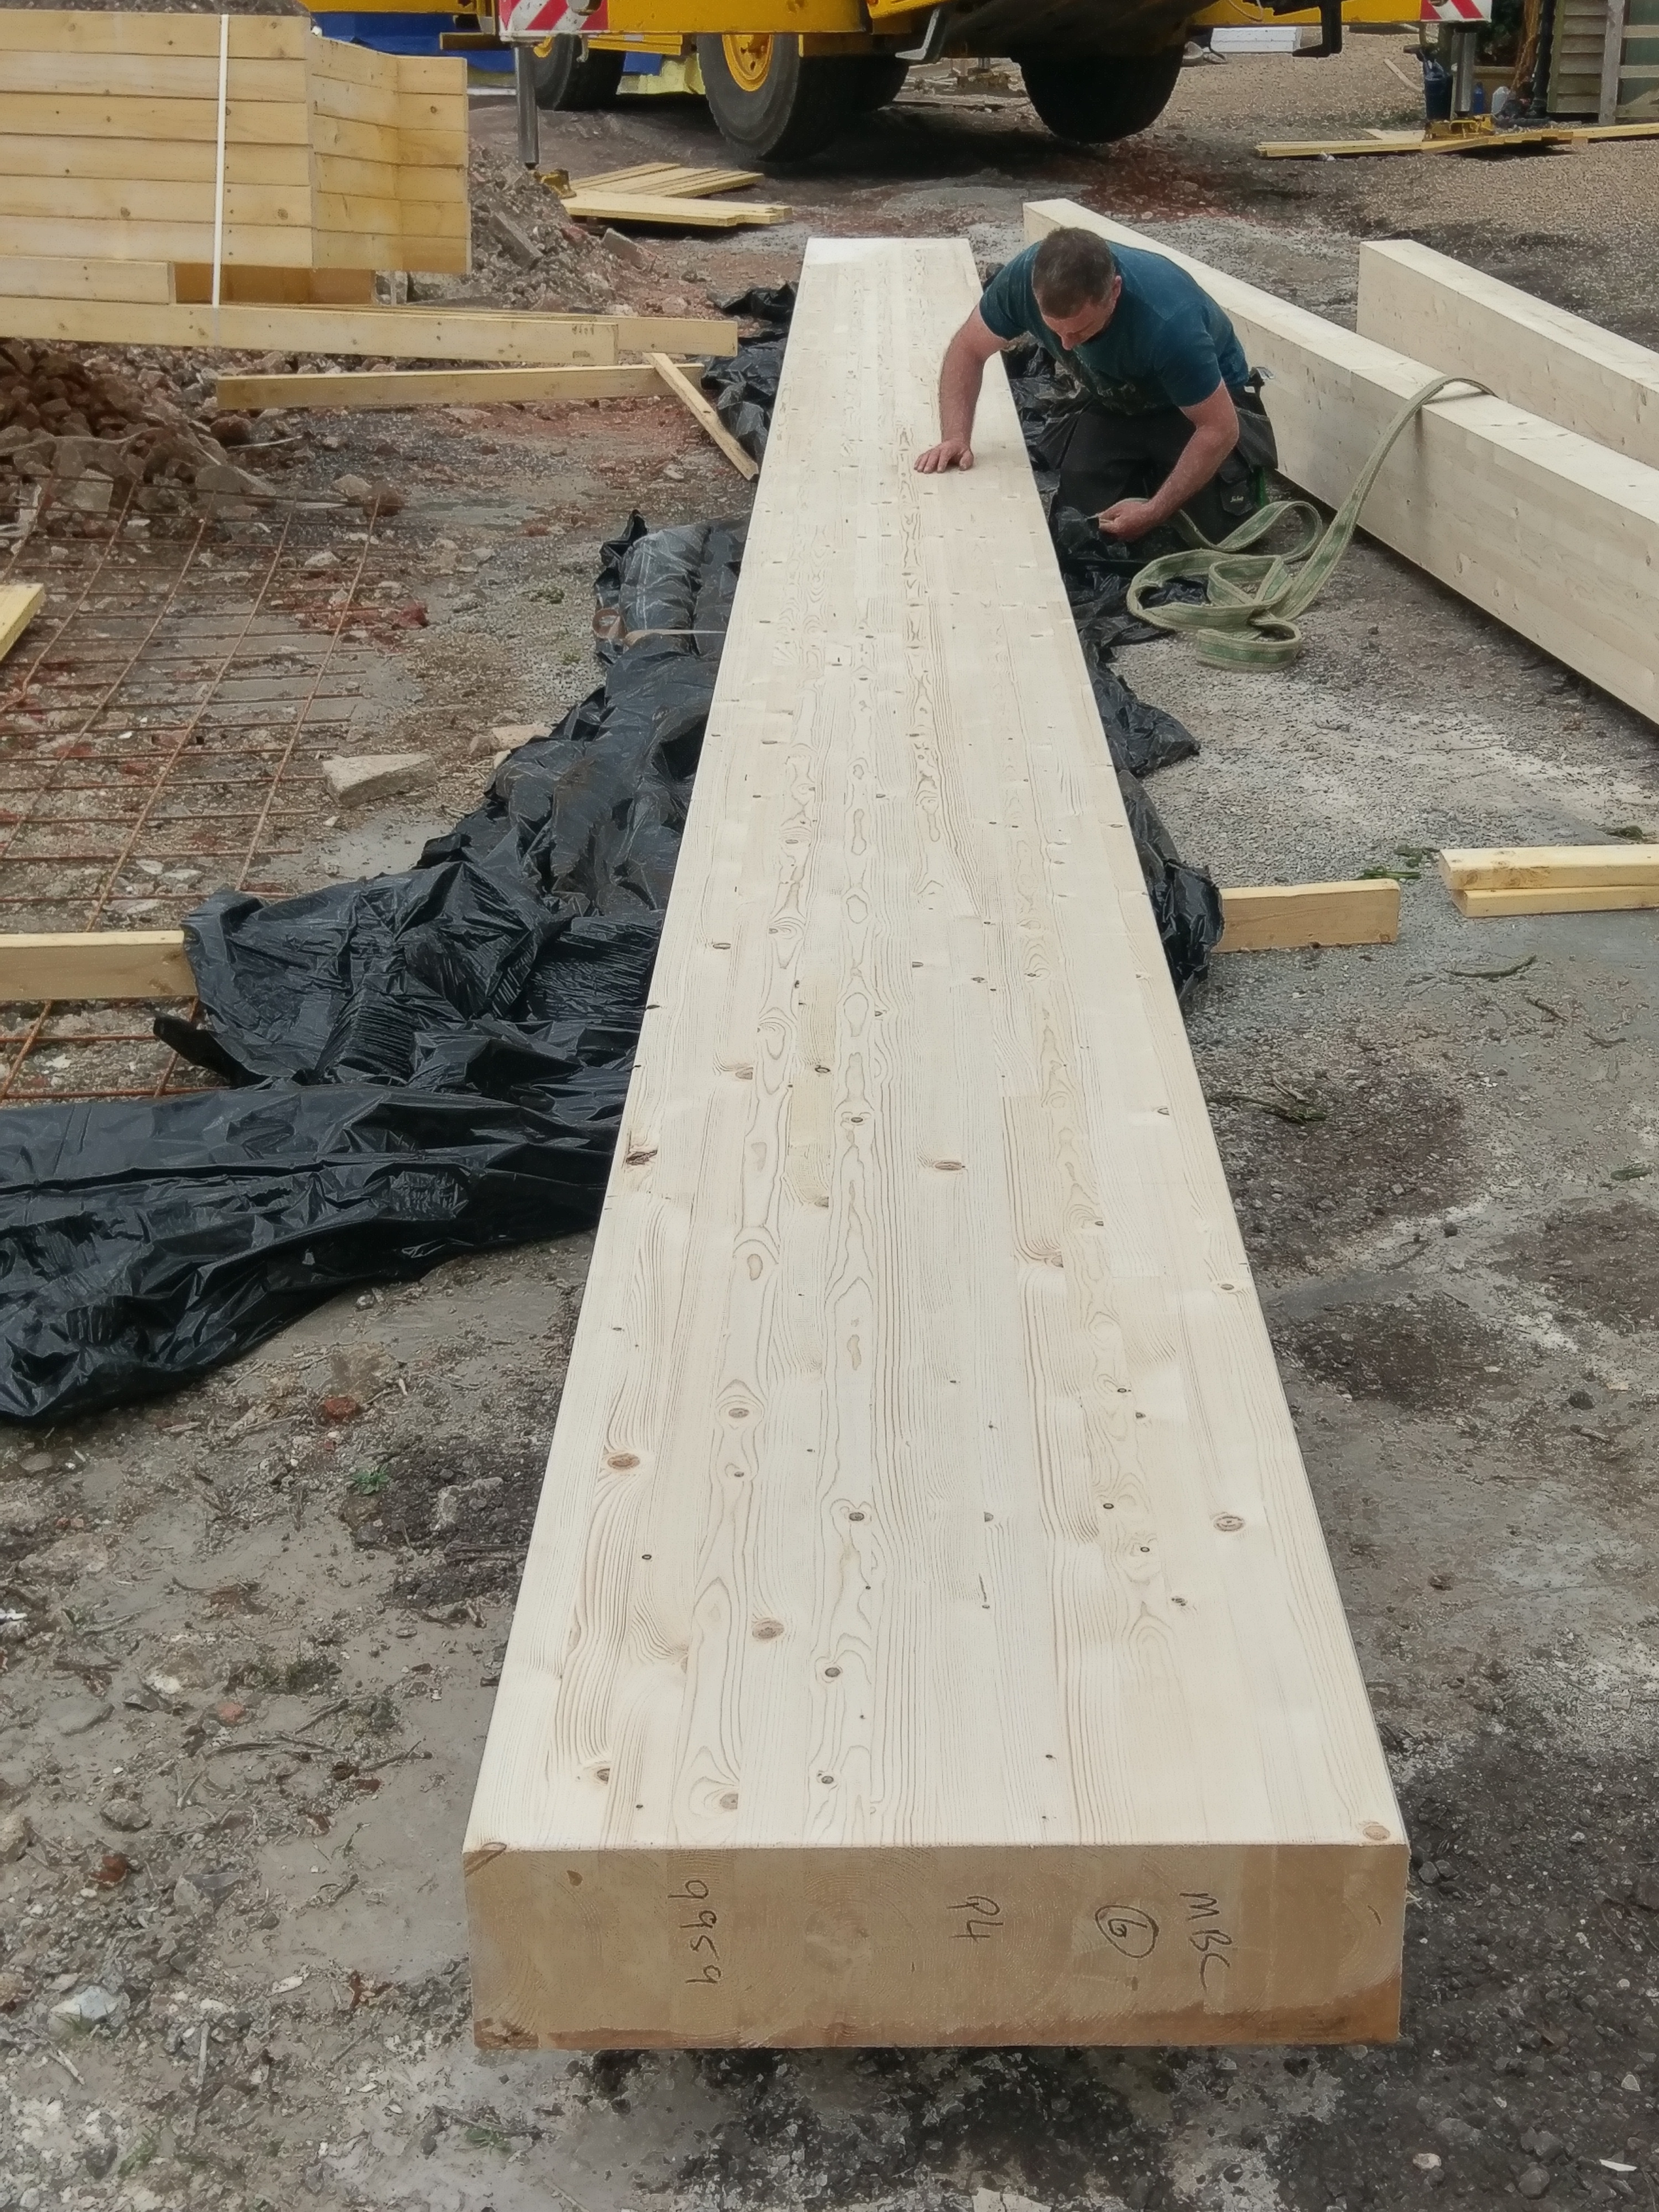
Just had my mid build BC inspection. I do not need to box in the Beautiful 10m Glulam beams as only holding up roof saved me a bit of work1 point
-
@SteamyTea Nick, I've actually done a few runs now, including shuffling the cans in the bundle just to make sure that there aren't any material differentials for the probes on the outside of the bundles. My test rig went through a number of refinement steps and I now have enough confidence that the test rig is working well. Having the water in a heavy tumbler starting as ~35-40°C and naturally cooling to room temperature over 6hrs or so is enough to generate a stable temperature glide that allows you do fit linear regression curves to the XY plots. Letting the water cool naturally at this ~1-2°C per hour is slow enough that the internal temperature gradients within the tumbler are smooth and there is no material internal convection. Tying the probes in a tight bundle around the fat part of the sleeve overlapping the can keeps them at the centre of the water mass but with 1-2mm separation between cans Sitting the bundle in a metal eggcup keeps it clear of the glass surfaces and at the centre of the slowly cooling water mass. There is little point in over sampling, so I take one set of readings every 5 mins, and log the average reading, pus the error against average for each individual probe as a tab-separated listing. I can then cut and past this log output directly into Calc (or Excel ...) for XY plotting and calculating linear fit using the slope and intercept functions. These calibration results are stable to <0.02°C from run to run, so I have confidence that the readings adjusted by this calibration data are mutually accurate to this sort of precision. And just for interest to give you a flavour of what coding this ESP8266 chip in Lua is like, here is the small program which logs the tab separated results to the USB serial comms port. I could have logged this to a UDP listener socket on my PC instead with another few lines of code, but USB was easier in this instance: -- make the timers global so I can stop them from the IDE. tmr1,tmr2 = tmr.create(), tmr.create() local ds = require("ds18b20") local to_string, print, gpio2 = ds.to_string, print, 4 local saddr, addrs = {} local tmr1,tmr2 = tmr1,tmr2 ds.init(gpio2) addrs = ds.get_addrs() if addrs and #addrs > 0 then local n = #addrs for i = 1, n do saddr[i] = to_string(addrs[i]) end print("Avg", unpack(saddr)) tmr1:register(1000, tmr.ALARM_SEMI, function() local t,avg = {}, 0 for i = 1, n do t[i] = ds.read(addrs[i]) avg = avg + t[i] end avg = avg / n for i = 1, n do t[i] = ("%8.3f"):format(avg - t[i]) end print(("%8.3f"):format(avg), unpack(t)) if avg < 20 then print(("Stopinng at %8.3f"):format(avg)) tmr2:stop() end end) tmr2:alarm(300000, tmr.ALARM_AUTO, function() ds.convert_T(true) tmr1:start() end) else print("No OW thermometers found") end1 point
-
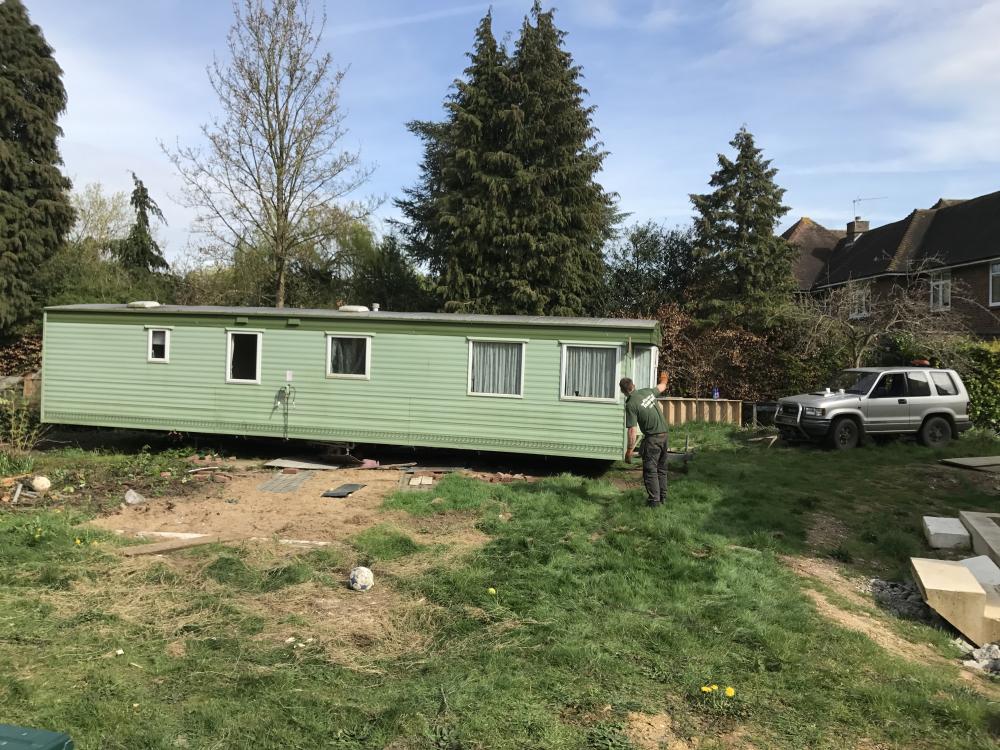
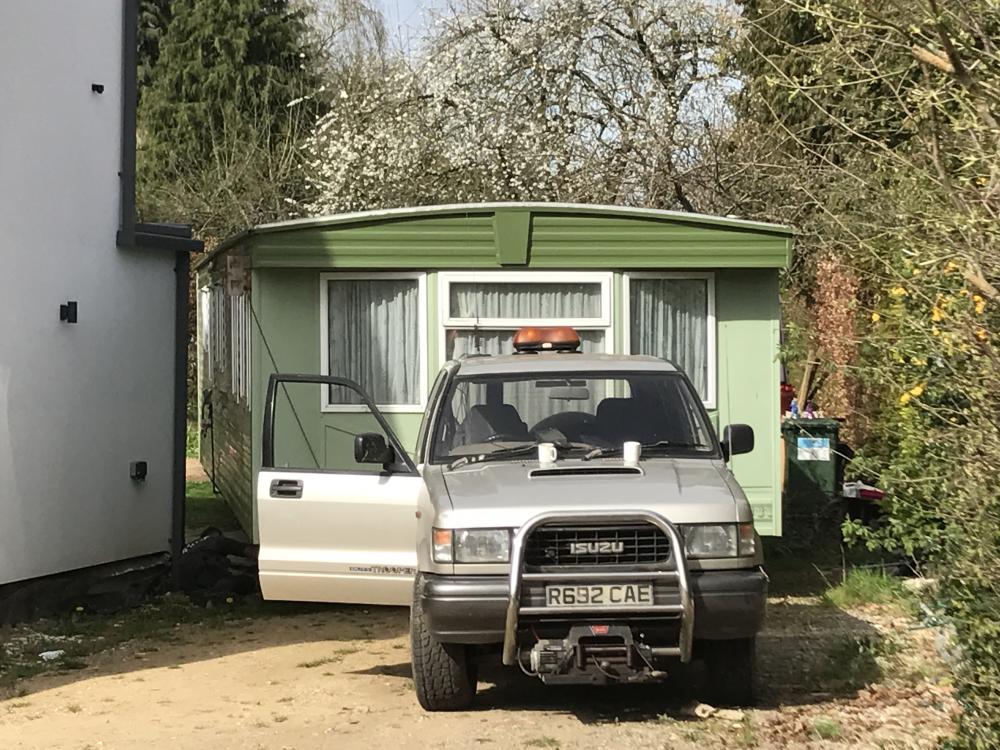
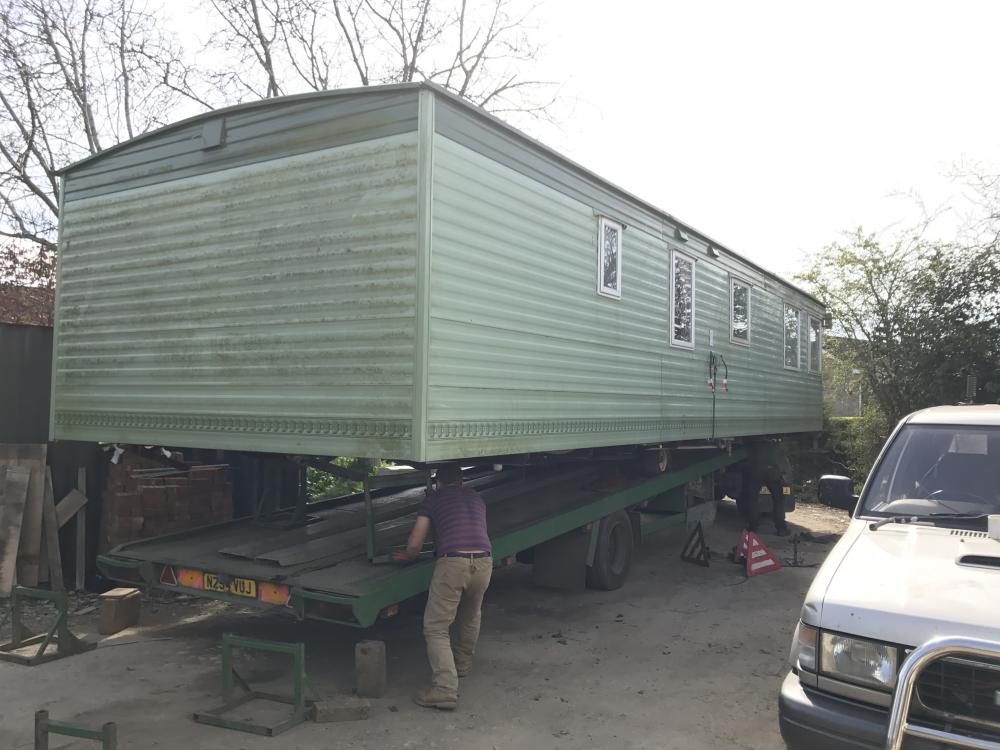
It was a tight squeeze but we got it out the opposite side of the site that it came in on. Ended up selling to the caravan mover as I kept getting messed about by other self builders. Hard to believe that it's been on site for nearly 3 years and we lived in it for 18 months. Can't say I was sad to let it go... Can start work in the back garden now (funds allowing)!
 1 point
 -
1 point
-
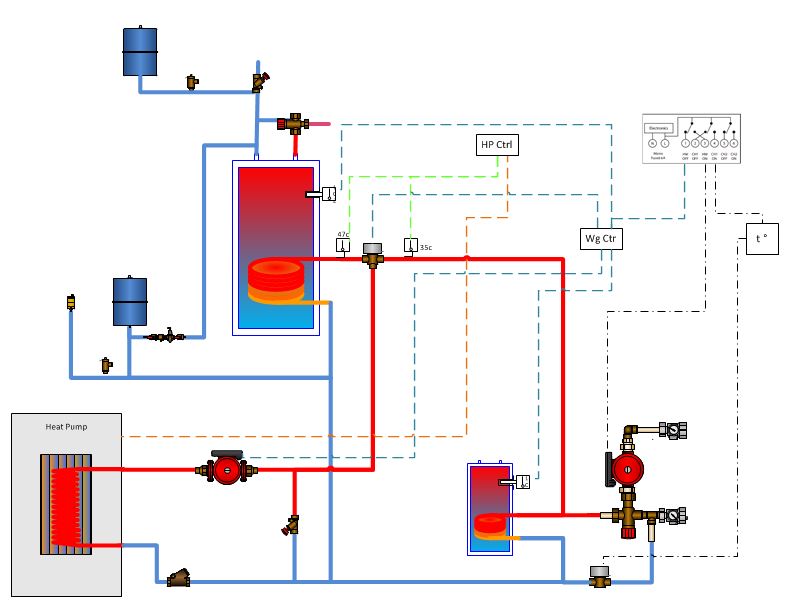
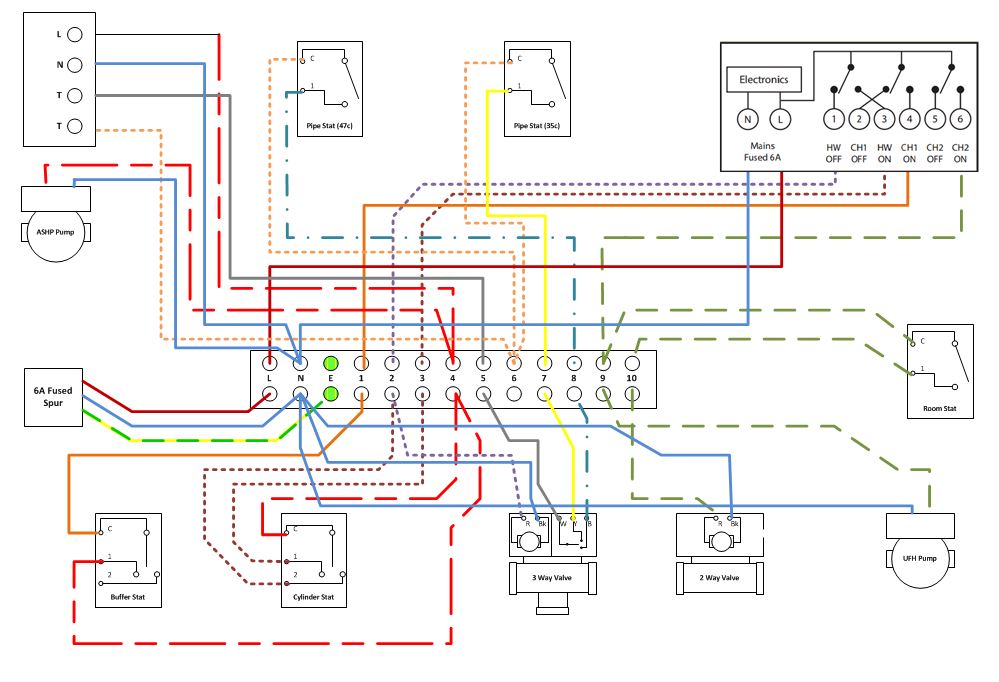
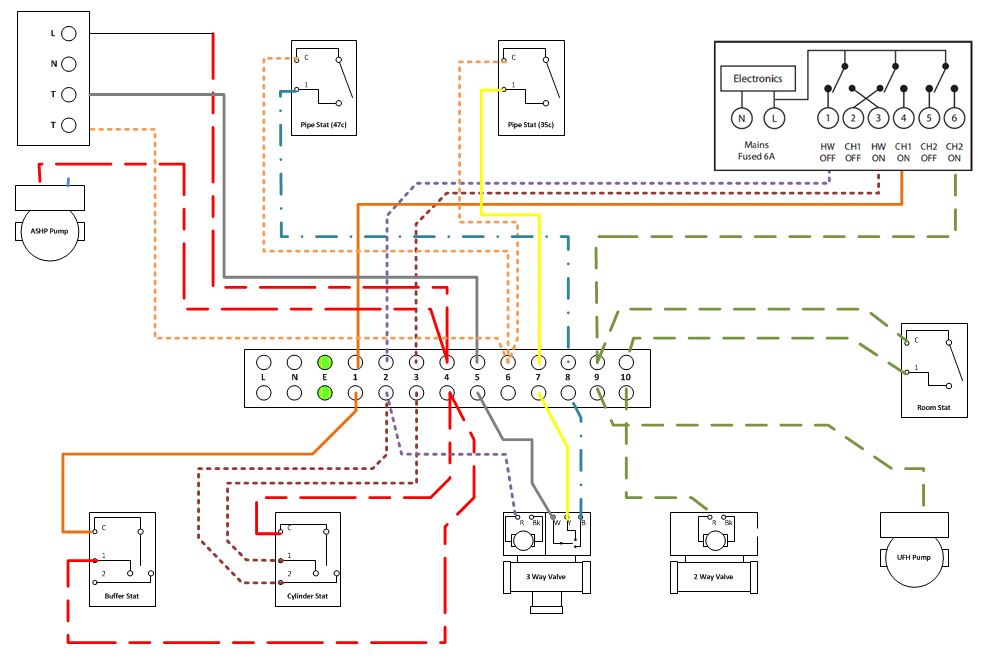
So this is mine less the PHE which I don't need. Buffer at 0.5Bar/atmospheric pressure. Use a 3 channel timer - one for DHW, one for buffer and one for circ pump and the stat to control the valve to the buffer. W-Plan modified to allow change over of the pipe stats needed to control the ASHP temp (47/35) And last one with power/neutral removed for clarity
 1 point
 -
Finished everything, hand printed the house warming invitations, went shopping and left crispy duck in the oven and cold beer in the fridge.?1 point
-
There's a great deal of choice on this. Fortunately all the vital statistics are available on the BBA certificates (don't consider any membrane which doesn't give you the cert number). I didn't have a spec to meet but made a choice based on availability, price, and getting what seemed like a good product for the money. I have an exposed site and a slow build so the stuff needed to be able to last as the only weathertight layer for several months. I used Glidevale Protect TF200 on the walls, and for the roof I went with Cromar Vent 3 Pro, which has not let a drop in since I installed it last summer. The wall membrane was not quite so impressive and there was a rip with consequent leakage at the SW corner of the building, but patching it with another layer solved that problem.1 point
-
I knew it i was waiting to see who would be first1 point
-
But even Clive doesn't work to these tolerances1 point