JFDIY
-
Posts
498 -
Joined
-
Last visited
-
Days Won
1
Everything posted by JFDIY
-
Buy a roll of 10mm you'll use it on the house build
-
Is it worth removing the filter and seeing if the speed drops? I'd have thought that the filter will dry by itself with the airflow through the unit. Removing it for half an hour would tell you if that is what is driving the speed up. Be worth checking the condensate drain is clear If you can, but I think that's a front panel off job
-
When at 24% was there an alpha symbol on the display? This indicates it's running based on humidity control. Ours has been running a few % higher than normal the last couple of days on humidity, think I'm trying to day the planet though as I think I set the Rh at 55% and I bet it's higher than that outside some times at the moment
-
Wish I only spent days mulling things like this over, it's usually weeks.....?
-
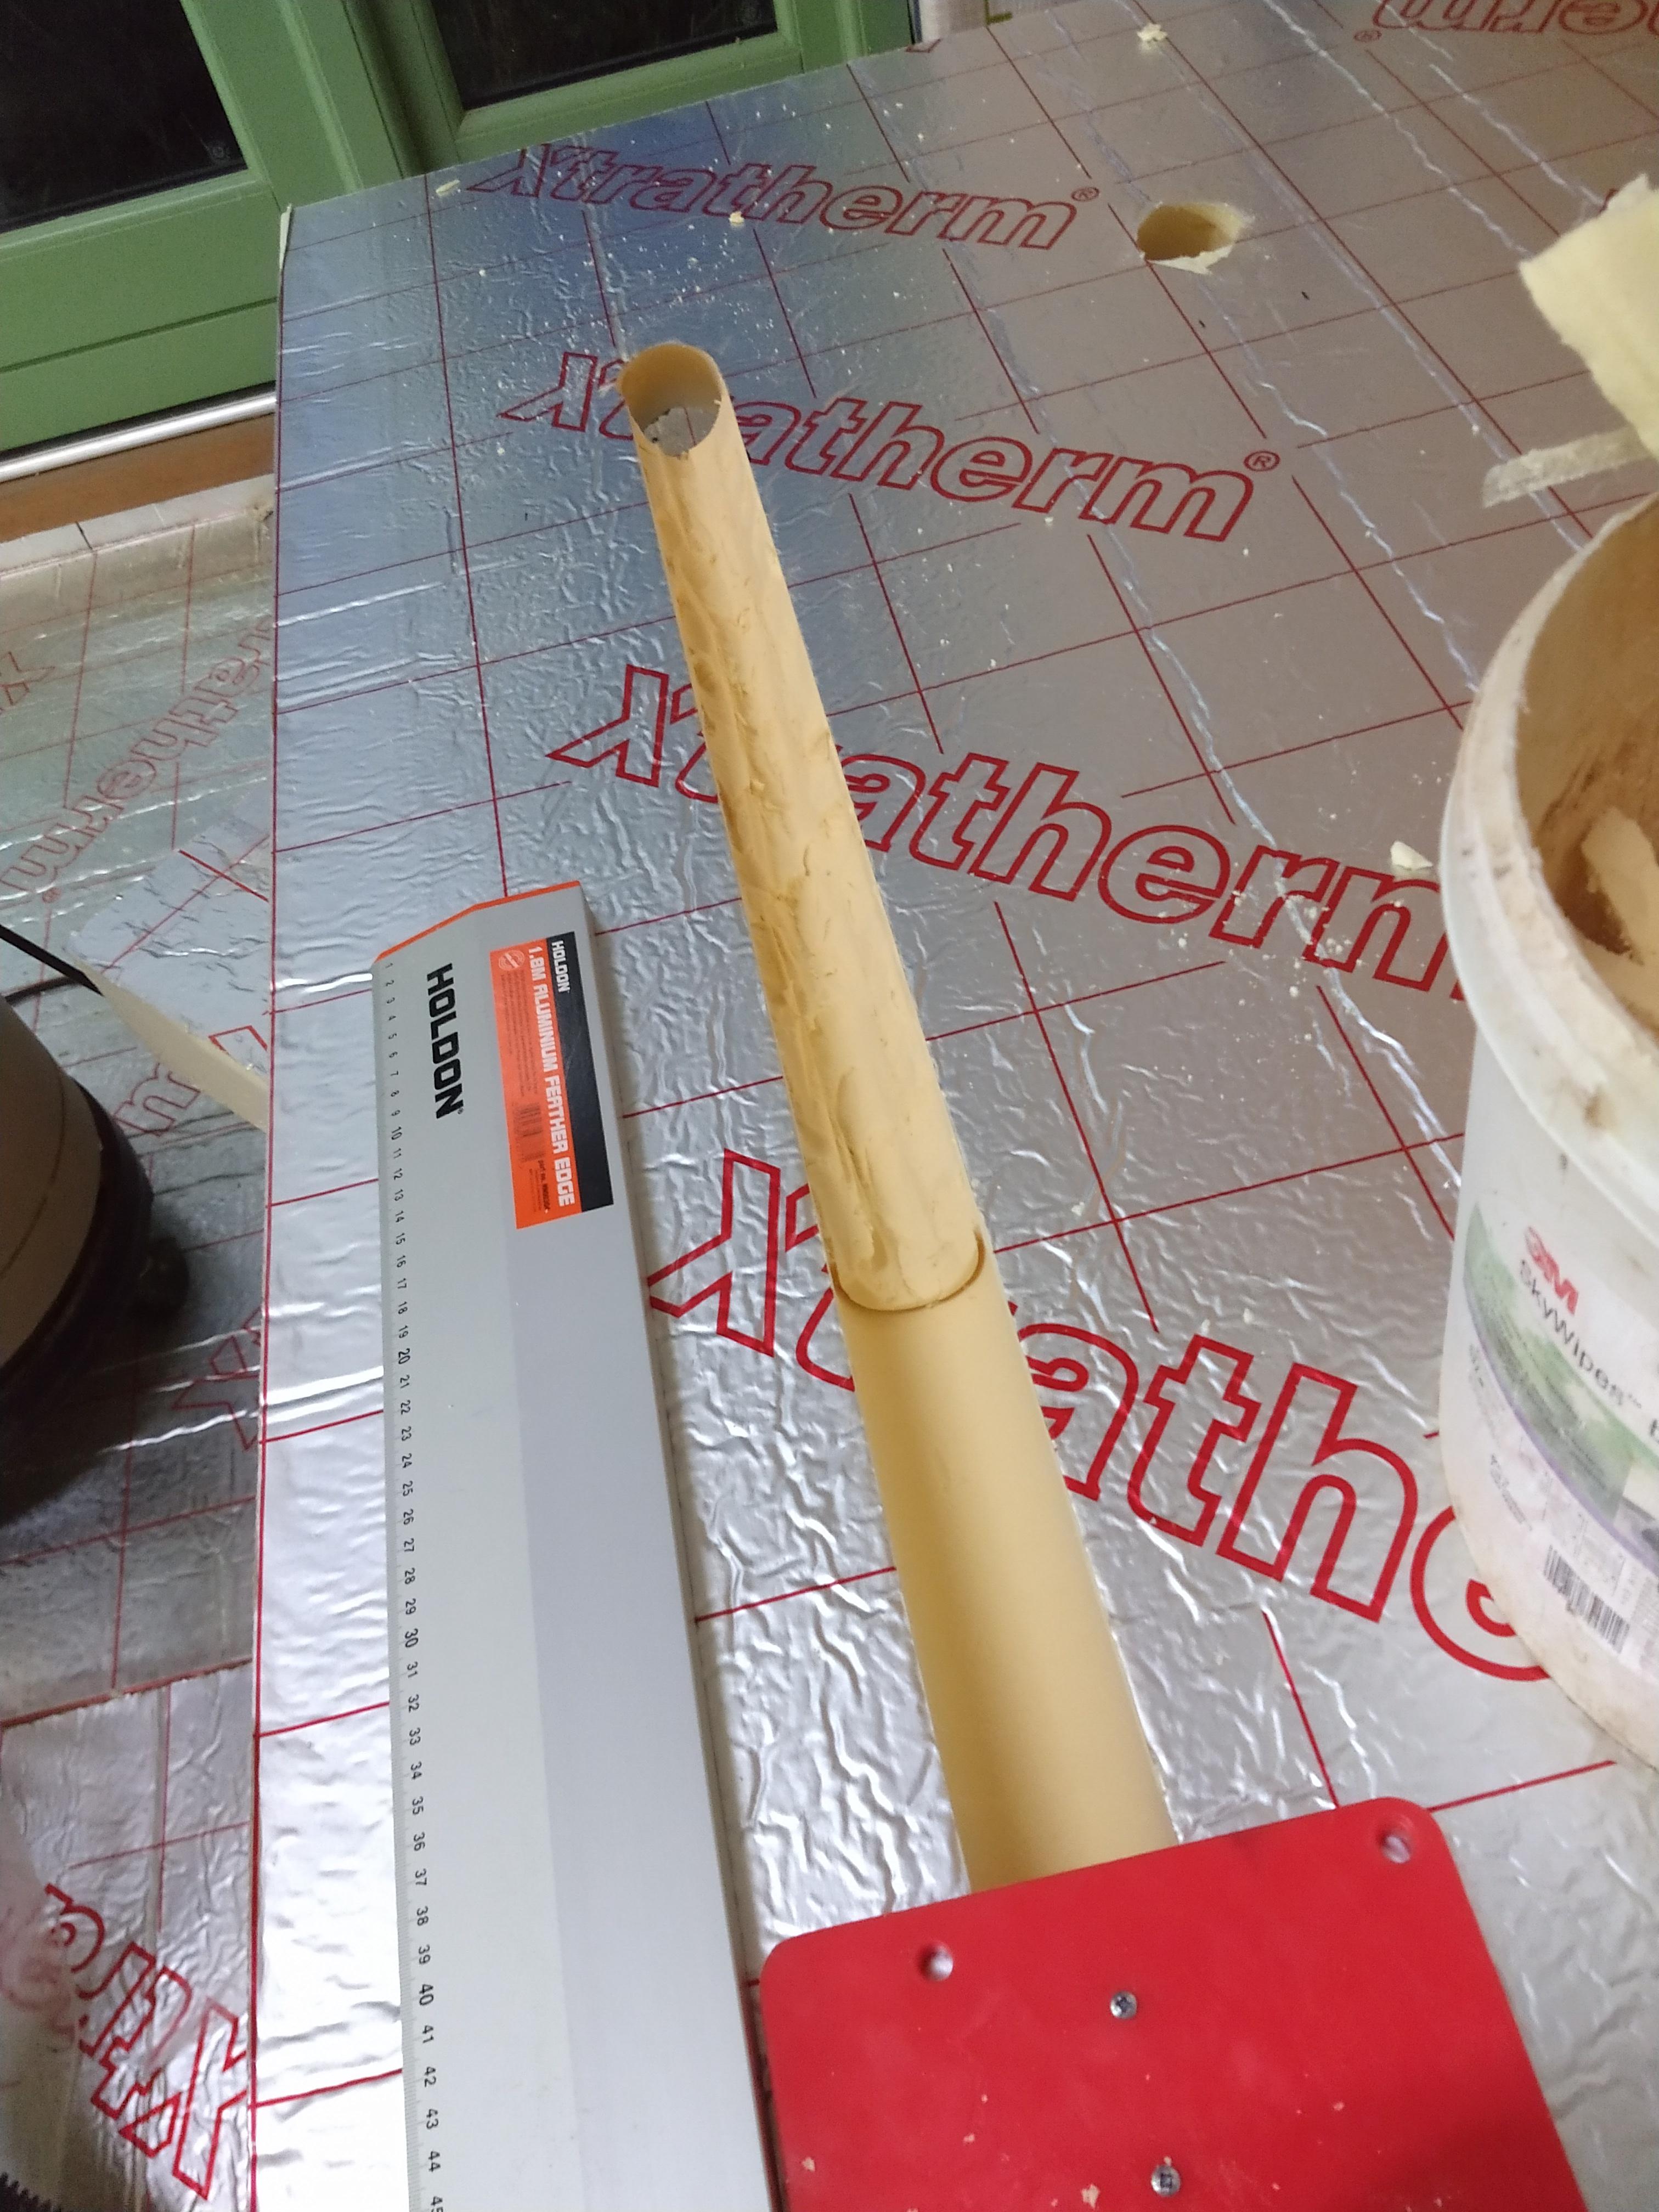
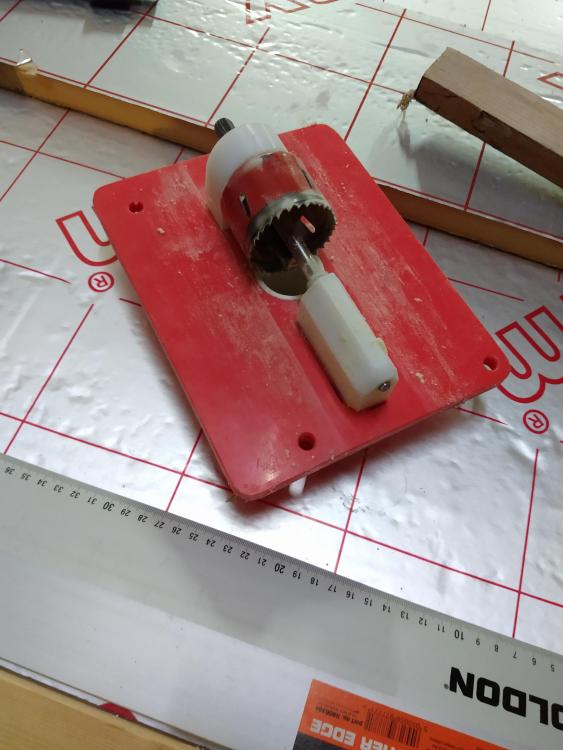
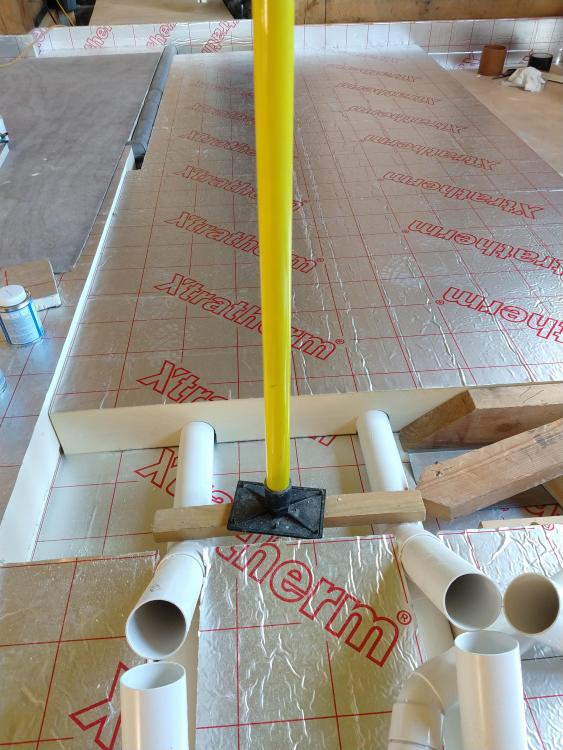
As the title suggests, I work in engineering and it's a bit of a curse sometimes. I decided to run some 50mm solvent waste pipe as ducts to where our kitchen island will be, for passing services at a later date. These are in the thickness of the insulation under the screed. Anyone who's tried to cut channels in PIR will tell you how rubbish it ends up. I still wanted as best as I could, full support for the screed and no voids or big areas of expanding foam which I'd have needed if I stopped and started the boards either side of the pipe Here's how it ended up. Pretty pleased with that. And here's how I did it I rough cut the channels, then clamped a straight edge as a guide fence. Then run the home made hole saw sledge down it using a long 1/4” extension and universal joint as a driveshaft as the drill wouldn't pass down the slot. Note also the dust port for vacuum extraction which was essential to stop it all clogging up. Also found running the holesaw backwards made it grab less which is a trick I'll use again when holsawing PIR Time to build tool was probably 3hrs and the tidy up operation was 5mins per slot. At this rate I'll be competing with @Onoff in OCD stakes


- 35 replies
-
- 10
-

-

-
Check out item number 261995719615 on eBay, I bought a roll for the same purpose as you, but not used it yet. was delivered inside a week at height of lockdown
-
Have you tried a 32mm push fit fitting, they are smaller than solvent weld. I would have thought a compression type joint would have worked, if not as pretty
-
I wouldn't try and screed it level then repeat the same build up, you will still get voids and take a lot of time to get there. If its coming out anyway I'd remove the top layer, the drill the OSB to the side of the CLS battons with a big hole, then inject underneath them to fill the gap. You can get specialist 'flowing' grouts for this, but my only previous was filling deliberate 40mm void under large steel structures where money wasn't a consideration and we poured from one side with a big hopper to get full fill over 5m X 7m Anyway in this case you don't want to pump so much in it all starts to float on it. Might get away with self levelling or similar poured in, tricky part will be not deflecting it locally (by standing on a soft spot) while your pouring in the jollop. Flowing grout would be less susceptible to shrinkage during curing than self levelling compound
-
I'm considering a small consumer unit in a kitchen cupboard, so I can wire everything direct to without isolation switches, then size breakers to suit appliances
-
If you're having an insulated floor then I'd consider casting two big blocks at the start, with proper bolt boxes and cones and just accept that that part won't be insulated, the put the insulated slab around it and de-couple them to stop cracking
-
Looks like it wants to be on two manifolds to me, lots of long loop lengths in that. Eg. Loop 1-1 goes all the way around the edge of the first room when you could cut a groove in the insulation and pass straight across and under the other loop and save 10m of loop length
-
I watched a YouTube clip on making them, not complicated, but you need fairly large flat press plates, the ones on the clip I saw could do a 6m joist in one set-up. But I'm sure if you could press one full web section (2ft?) At a time it could be done
-
Steel tape measure (class 1) and a decent 'site' quality laser level with receiver.
-
I've seen it on eBay, but the postage starts to mount up
-
As you say it might be redundant, can you trace it back to anywhere? H inside and out if possible If it were mine, I'd find the ends, see if it's capped, if it's open then happy days. If it's capped i'd consider opening it up, but be prepared to be isolating the gas and calling a plumber if it is live. Best do it during a period where you can live without the boiler for a few days do it can be done at leisure rather than an emergency call out.
-
Semi permanent ladder setup for a stairwell.
JFDIY replied to epsilonGreedy's topic in General Self Build & DIY Discussion
Prior to lockdown you could get a straight set of stairs from Travis Perkins or build base for about £140. If memory serves these are based on 2400mm (12 treads @ 200mm rise) . To get your extra height set the top step 200mm below top floor surface then the extra 400mm can be found by making a two step box at the base of the stairs or fixing some timber to the stringers of the stairs to extend them and then just having a couple of treads to make. Another option is look for some scaffold stair treads, I've seen them for £10 each on eBay, some poles and clamps and you're away. -
You can always put more insulation in if you change your mind as you go, either in layers or one layer, you can make almost any thickness within reason to fine tune things. I haven't checked recently, but my BCO stated insulation is cheaper than concrete......
-
Think you build a brick chamber around it then cut the top out. Gravel is presumably to key into the base and benching.
- 24 replies
-
- 1
-
-
- inspection chamber
- foul water
- (and 1 more)
-
A small wall, a shared space and a tough landlord
JFDIY replied to TomB's topic in Building Regulations
If it bothers you that much you could cover the cost for their side to? Should only be a few hundred £ to do something acceptable over and above of doing your own at the same time, and it would add more than that to your property. If you fail on the correspondence and don't want to stump up extra cash, you could re-do your side of the path, run an edging strip level in height with their path on your side of centre. Then widen your side to a proper width in matching edging, this will establish your path as looking decent and still leave them access, you ride would then look correct and theirs not so..... -
Wouldn't you just fill the holes with blocks once the vent is finalised on the outer skin? Or does the floor go in before the outer skin is established? And I suspect the 450mm from a corner requirement is in the space to be ventilated, so inside skin. Might be worth a chat/email with building control, it's nice to build exactly to regs, but if you can work with BC to make it easier for yourself then why struggle.
-
MVHR in large volume New Build
JFDIY replied to Triassic's topic in Mechanical Ventilation with Heat Recovery (MVHR)
Yes, 0.3l/s equates to 1.08m3/hr per metre of floor space. As most manufacturers quote in M3/hr then it's probably easiest to use those units. -
As you've rebuilt the rusted deck, the gearbox has surpassed its expected lifespan then? ?
-
I worked out all my bond and brick positioning before putting the first drop of mortar down, for both inner and outer skins. If you want a particular layout you'll have to get right into the detail, I suspect the brickys will just put them to drawing, or whatever is easiest for them.
-
Sealing between riser sections of an I/C
JFDIY replied to ToughButterCup's topic in Waste & Sewerage
If they're round cross section rubber O-rings you can buy the cord and just join with super glue. https://simplybearings.co.uk/shop/Seals-O-Ring-Cord/c19_4549/index.html?page=1 Need to make sure it's clean before flying with thinners or car brake cleaner etc, but easy to do. -
Personally I can't stand the creaking plastic guttering does when it expands/shrinks with temperature. But that is probably not a big enough reason to spend five times the price on metal, but I did anyway.