


Onoff
-
Posts
21128 -
Joined
-
Last visited
-
Days Won
206
Everything posted by Onoff
-
Impractical waste of time imo...I want them! Can we rather than should we in action!
-
Never heard of this until now. Got to one if the coolest things ever! And SO much easier for the vermin to get into the roof! Some ideas here: https://guttercentre.co.uk/Rain-Chains-UK-Made-in-Japan/
-

How do you install this sort of bath?
Onoff replied to ProDave's topic in Bathrooms, Ensuites & Wetrooms
You turn the big knob on the overflow on mine and it has a rigid control "cable" that operates the pop up waste. As you know I've spent ages on mine so I can get to everything relatively easily. Better so far than the push to shut / push to drain sprung waste in the upstairs basin, that's carp! -
How do you install this sort of bath?
Onoff replied to ProDave's topic in Bathrooms, Ensuites & Wetrooms
Flexi waste is nothing special: I used a waste similar to the video @Tennentslager posted: If the bath isn't drilled then I wouldn't. Have deck mount taps on the wall and fill via the overflow. If you must have traditional taps then as mine were to the wall I made them removable using an Easy Fix kit: https://www.tapwarehouse.com/product/bath-tap-easy-fix-kit-bef001?gclid=EAIaIQobChMItePf7eLF1gIVQuEbCh1_EwzrEAQYASABEgKc4fD_BwE (Can't believe you didn't want to wade through my thread! ) -
So I got the Aldi inverter stick welder. 'Tis a diddy thing of beauty. Smaller and lighter than you can imagine but at the same time feeling robust: Going to try it out on making a little pallet buster.
-
Nearest we got was magnetic PAINT in the playroom.
-
Screws driving us screwy
Onoff replied to ToughButterCup's topic in General Self Build & DIY Discussion
+1 Superb on 22mm T&G flooring. -
Wall plates: a continuous run of timber?
Onoff replied to ToughButterCup's topic in General Construction Issues
Radial arm saw actually! How about on a bed of muck first in Ian's case then backed up with resin studs? -
Wall plates: a continuous run of timber?
Onoff replied to ToughButterCup's topic in General Construction Issues
Here's one I made earlier: It's got galvanised expanded metal stapled to the underside to provide a key to the mortar. -
Screws driving us screwy
Onoff replied to ToughButterCup's topic in General Self Build & DIY Discussion
Don't know if any cheaper here. My mate got all his decking screws from them albeit pre Brexit and said that even with delivery to the UK they were cheaper than he could get them here: https://www.klokow-gmbh.de -
At 220m this is in danger of becoming the longest thread... (Long way to go compared to some though! )
-
Discount Offers of the Week
Onoff replied to Ferdinand's topic in General Self Build & DIY Discussion
I've been warned off the welding rods as it seems to be pot luck as to quality. Allegedly they have different makers make the rods according to the best deal they can get. Accordingly sometimes the rod's will be good and other times not. -
Screws driving us screwy
Onoff replied to ToughButterCup's topic in General Self Build & DIY Discussion
Hark at the Discount King! -
Screws driving us screwy
Onoff replied to ToughButterCup's topic in General Self Build & DIY Discussion
Karma with a dash of serendipity I call it! Just to show I'm not biased: https://www.screwfix.com/p/pro-grabit-screw-bolt-remover-set-2-piece-set/2951v EDIT: £90 and counting! -
Screws driving us screwy
Onoff replied to ToughButterCup's topic in General Self Build & DIY Discussion
You could try something like this: https://www.aldi.co.uk/damaged-screw-remover-set/p/094899148133700?gclid=EAIaIQobChMI-8ak47bA1gIVzbXtCh2MMAUMEAQYASABEgK7L_D_BwE You run the cordless ccw and it bites into the mullered head is the idea. Sometimes they just strip the head even more. You could...drill say a 50mm hole in a bit of scrap ply. Centre that over the problem screw and attach to the shuttering. Then use the Starrett sans the pilot to remove the section of shuttering the screws in. The scrap bit keeps the cutter on centre. Then get some moles on the screw. Even if it shears off at least it'd let you remove the sheets save for little rounds here and there which you could take off later. -
I'd have been cacking myself cutting that! So do you drill (core?) holes in the corners & cut to them? Thinking sharp internal corners and stress points etc.
-
Working at Height Regulations as in no handrail. (This from a man who thinks a pallet on a forklift is a safe working platform!)
-
I only like plain doughnuts but our one will have those pink iced ones with sprinkles on.
-
A qualified sparks friend went in there with his "carry the bags" / labourer. Once he'd signed up after showing his C&Gs the girl turned to his mate and said "Do you want to sign up too?". Gave his details and didn't even have to show any qualifications. I've been at the regular counter before when an ordinary bloke has been buying lots of electrical stuff, more than once the counter person has suggested they have an Electricfix card. Cash is King!
-
That flint looks superb. WAHR 2005?
-
Discount Offers of the Week
Onoff replied to Ferdinand's topic in General Self Build & DIY Discussion
Should have been £79.95 so I'd say so! A weird chain of events...I recommended the Aldi welder to the BiL. Under their referral reward system he gets £10 off of his first order over £45 if I email him. So he got his for £59.95. I then got an unexpected £10 voucher. I figured it'd be the same thing as in you'd have to spend £90 to use two vouchers. I posted the Aldi link on the car and welding forums and loads of people asked me to email them so they could buy the welder at £10 off. When I read the small print in the T&Cs it said referral rewards are accumulative. Anyway you can ONLY get up to £1500 in referral rewards! So...I used 5 referral rewards and got £50 off. Since then I've a few more so that'll but some air tools. Result I think is the word! -
Discount Offers of the Week
Onoff replied to Ferdinand's topic in General Self Build & DIY Discussion
I just bought the Aldi compressor, came delivered yesterday. Not bad for £29.95: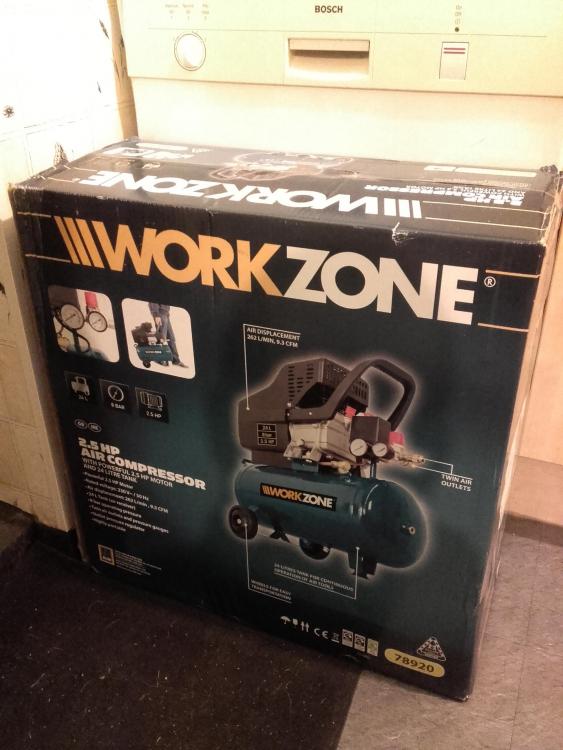
-
All about Amica: http://www.ukwhitegoods.co.uk/help/about-the-appliance-industry/manufacturer-information/2883-amica-wronki And you can look up here about any other maker: http://www.ukwhitegoods.co.uk/help/about-the-appliance-industry/manufacturer-information/
-
Help! Floor being poured tomorrow. Lots of air in UFH loops
Onoff replied to oranjeboom's topic in Underfloor Heating
Don't know if this is of any use: http://www.everbuild.co.uk/403-Concrete-Hardener-Dustproofer -
Couldn't agree more. I'll help anyone to the nth degree, karma and all that. There comes a point though. Sh!t on me or mine and as Mr Gilbert said "I can be one truly, nasty, fu****!"


