
Conor
-
Posts
4138 -
Joined
-
Last visited
-
Days Won
12
Everything posted by Conor
-
No, I think they are reasonable for their heights. Our 2.4m high wall has a 1700mm toe and 1200mm heel, all 200mm thick with two layers of reinforcement. If they were part of the building structure, where the ground slab and other corrected walls, your concrete would be reduced by about half. But building abasement comes with other Complications and costs.
-
We have 4 mixers in total in our house. Three work perfectly, the fourth won't do cold water, we have it all the way across on the cold setting for a comfortable shower. Are all three of your showers the same make / brand? In that case I'd say the hot water isn't hot enough. Try setting your tank to 50c.
-

150mm or 125mm concrete screed over insulation for ufh?
Conor replied to JayDee's topic in Underfloor Heating
150mm insulation and 100mm concrete with a layer of A193 mesh to prevent cracking. Tie the UFH pipes to the mesh, set 50mm below the top. Does 100mm floor insulation even pass the BC requirements? -
Is Solvent weld pipe into pushfit boss adaptor OK?
Conor replied to MortarThePoint's topic in General Plumbing
Virtually all of my branch connections are solvent weld into 40mm rubber bosses. They're called universal for a reason -
Is network gear mounted on wood ok?
Conor replied to vagrantly3893's topic in Networks, AV, Security & Automation
Any risk of damp or condensation? Looks like a loft? -
Reolink argus eco. Pretty flawless. Apart from me breaking the solar panel mount. Don't need any subscriptions and can upload to your own FTP server.
-
Passive Slab UFH Cooling Control Strategy
Conor replied to Dan F's topic in Air Source Heat Pumps (ASHP)
I just manually turn it on at the room stat with the ASHP controller set to cooling mode and a flow temp of 13c. You'll only need to use the cooling once in a while during heatwaves. You certainly wont need to treat it like winter heating. The effect is rather subtle, you wont overly cool the house and you only really need to run it during sunny hours. We ran ours 24x7 during the June heatwave for a few days and it never felt too cool. If you need it more cooling than this, I'd be looking at other strategies - shading, air cooling etc. -
You only need 50, it's not that expensive and easy to fit if you use the non itchy recycled stuff.
-
Don't listen to the sales pitch, ask for overall performance figures, and compare to industry standards. Is this for just one or two windows or the entire house? When it comes to windows, as the weakest (thermally performing) component of a house, function has to come over form. I understand as a designer that might be tough to hear! The ratio of glass to frame makes a huge difference. If you are after a style with lots of small panes and lots of frames, you are going to be disappointed with performance compared to large format glazing. You'll have to greatly reduce the size and number of windows to hit the performance targets.
-
100% possible for a careful and competent DIYer. Did most of my design and install myself. That, along with the MVHR work was the biggest saving over hiring a trade. With 200m² UFH area, you're looking at fair amount of pipe work and water volume. If you run it at as a single zone, then you may not need a buffer. For what you need re pipe spacing, boiler size etc, you'll need to do a detailed heat loss calculation, then an UFH design in likes of loopcad. You'll also need to design it as a low temperature system, i.e. low flow temps suitable for an ASHP to pass new building regs. This is where correct setup of blending valves water volume etc is a challenge. Boiler will be wanting to send out water at 55c and see it back at 45c. But your UFH will want something like 30c. Best of luck, keep asking questions. I do agree with others re ASHP, but it's not my build. One last thing, I don't think solar thermal stacks up compared to PV. With PV you can heat via a diverter bit also offset your own usage. Moot point if you don't have enough suitable roof surface tho.
-
It looks like a very short pipe run, I wouldn't worry about it. BUT the pipes should not be that close to the unit, they should be tight against the wall. Can you move them or pull the unit it out more?
-
Screening design for heat pump - comments invited
Conor replied to JamesPa's topic in Air Source Heat Pumps (ASHP)
I really wouldn't bother, you get used to the look and low hum in no time. They are much quieter than you think. Stick the unit in and then see if/what bothers you. -
Self build funding - what would you do differently!
Conor replied to Harmony's topic in Self Build Mortgages
We built in 18months which I think is reasonably good for a self managed build. But the entire process from buying the site, to moving in, took 3.5 years. And we spent way, way more than anticipated. We've just had to take out another £30k loan to do the landscaping and a few finishes. Cash is king, sell up, ring fence your money and get started. If you have £300k, after you fees, design ,demolition, services etc, you will have £250k. Things will cost a lot more than you think, so you should have a build design that will cost £200k to build. That means a max of 150m2, 1.5 story house, with budget/ modest finishes. -
Depends on the material. I used a little acrylic sealant on the connections then taped over the join with aluminium tape.
-
Demolition of single storey extension and concrete floor removal?
Conor replied to flanagaj's topic in Demolition
Yes, I'd remove the slab as you'll want to get a good bit of floor insualtion in to the new extension. For removal, two options. Do it now, yourself with a mini digger with pecker, and a large skip. It'll likely only be 100mm or so thick. Option two, just leave it for the builder who is doing the extension to worry about. They'll need to do their own digging etc. Yes,.you need building control involved. If you intend on using the existing footings, you'll need to show them that they are suitable. -
VAT reclaim
Conor replied to MPH243's topic in Self Build VAT, Community Infrastructure Levy (CIL), S106 & Tax
Well done. Out of curiousity, how did you fill in the "move in date" question? We did similar, but was only a few months ahead of BC approval, not two years. -
One thing to bear in mind about "faster construction time", is that you'll likely have several months of design time, looking for specialists etc etc. In which time you'd have built a standard timber framed house.
-
BCO said it was the actual working area of the kitchen within the open space. We still went with a beast in our last place at 800m³hr. For that flow rate you need mim 150mm ducting and a short run at that. New house, MVHR. Hardly ever use the (recirculating) hob extractor, not really needed.
-
25mm will be fine, 32mm is the next size up and you wouldn't get bigger than this.
-
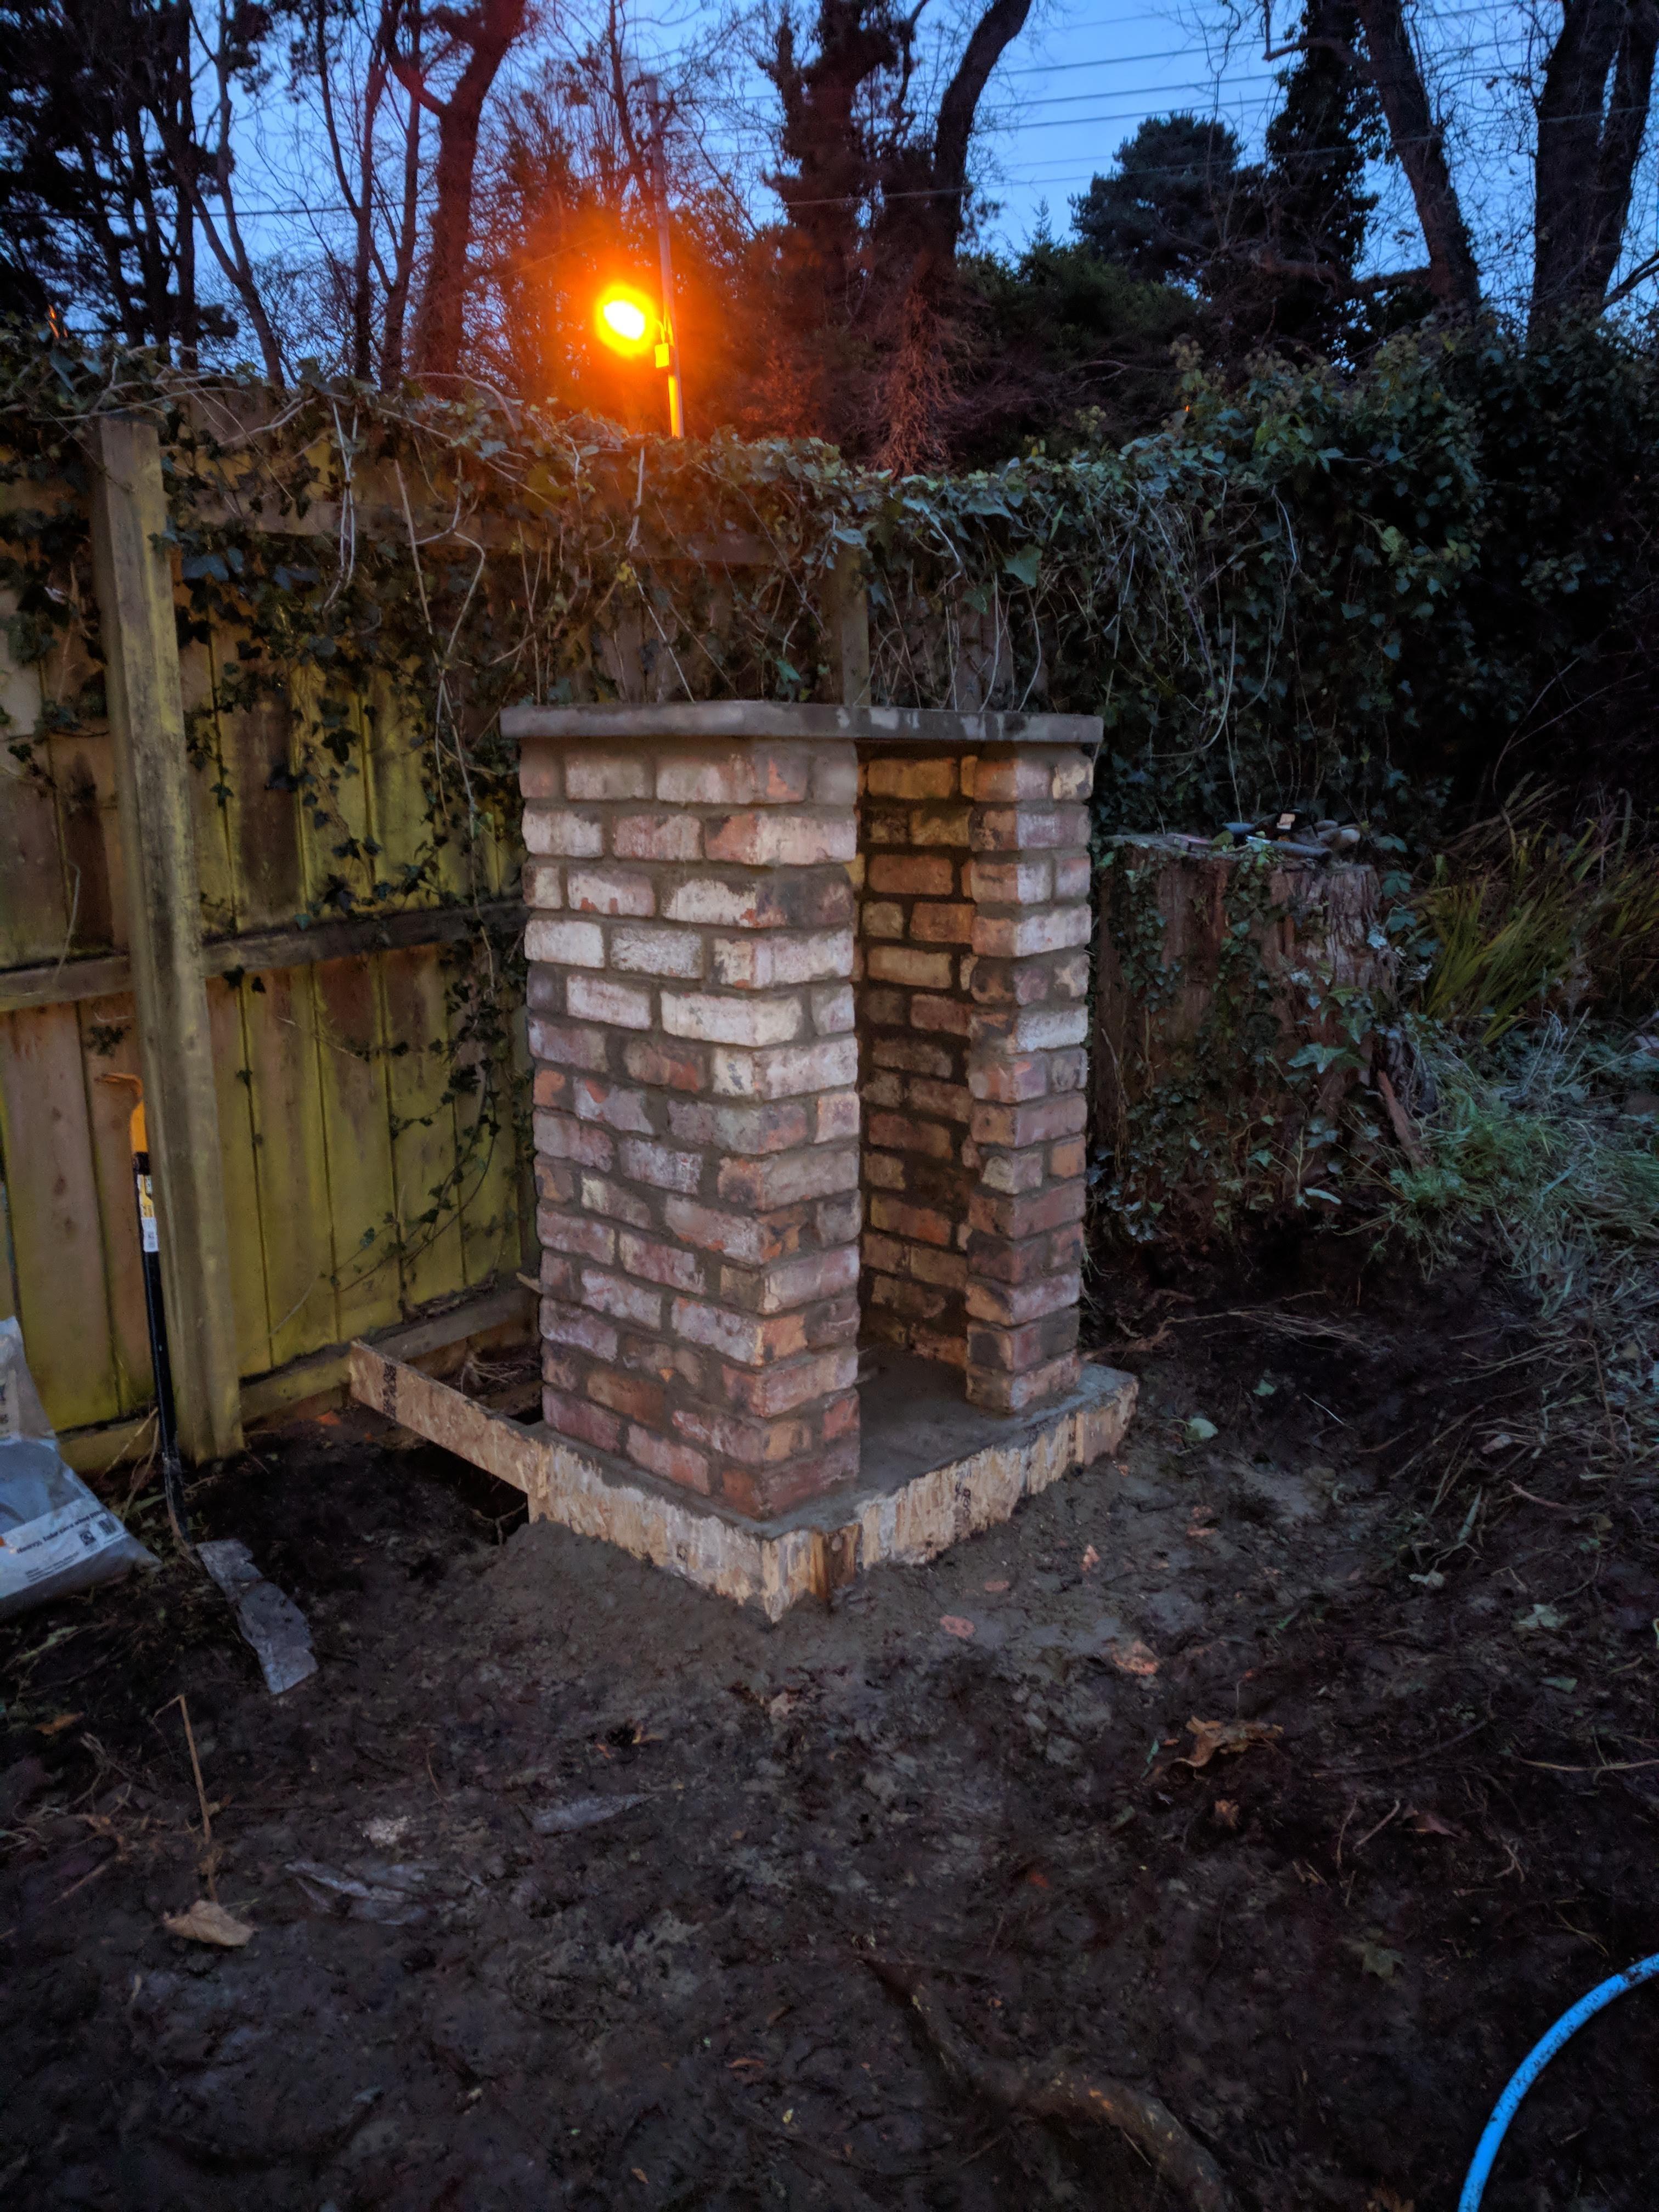
Yeah. 600x900 flag. Mine is 900mm wide and 600mm deep, you can get away with a 600x600x slab but doesn't leave much room inside for your 110v transformers etc. Brickwork slightly short of this. Other DNOs may vary.
-
Brick on 100mm concrete base with 100mm duct innolace.. I put a simple osb door on with sliding bolt.

-
Definitely no to the first two questions. You'll create a massive liability for somebody in the distant future.
-
How does my boiler know when my rooms are heated to 20C?
Conor replied to vagrantly3893's topic in Boilers & Hot Water Tanks
I thought it was compulsory to have at least one central thermostat control alongside TRVs under building control regs? -
Insulating an unused chimney in old stone cottage
Conor replied to MikeJH's topic in Heat Insulation
Remove the chimney entirely. Sounds like it's not doing anything. -
There are various batten positions needed for the panels, panel fixing point, tray fixing, clamp fixing. Yeah, read the manual first!!!