Nickfromwales
-
Posts
30984 -
Joined
-
Last visited
-
Days Won
328
Everything posted by Nickfromwales
-
The salamanders are cracking pumps. If you Google that one you may find it has brass impellers.
-
? The problem is particularly acute if a shower / bath booster pump is fitted. It can actually invalidate the warranty.
-
Your not supposed to have the two at the same end as the splashing water has bubbles and your supposed to avoid drawing that out so as to avoid drawing air into the system, to reduce possible air locks. Maybe drill the tank connector through and slide the 22mm pipe all the way to the other end to make a dip pipe . This is to alleviate problems when the tank is nearing empty / has low water levels btw, so don't look at it from splashing up high POV. ?
-
Simple. For each fill valve you need the equivalent capacity for overflow. 1 & 1, 2 & 2, or 2 & 1x 32mm overflow ( combined ).
-

Hot outside but darn cold inside - PV direct to heater?
Nickfromwales replied to readiescards's topic in Photovoltaics (PV)
Like it. Much better with a fan heater. -
It would need additional support thats all. Dont fit a second fill valve unless your running a second independent overflow pipe .
-
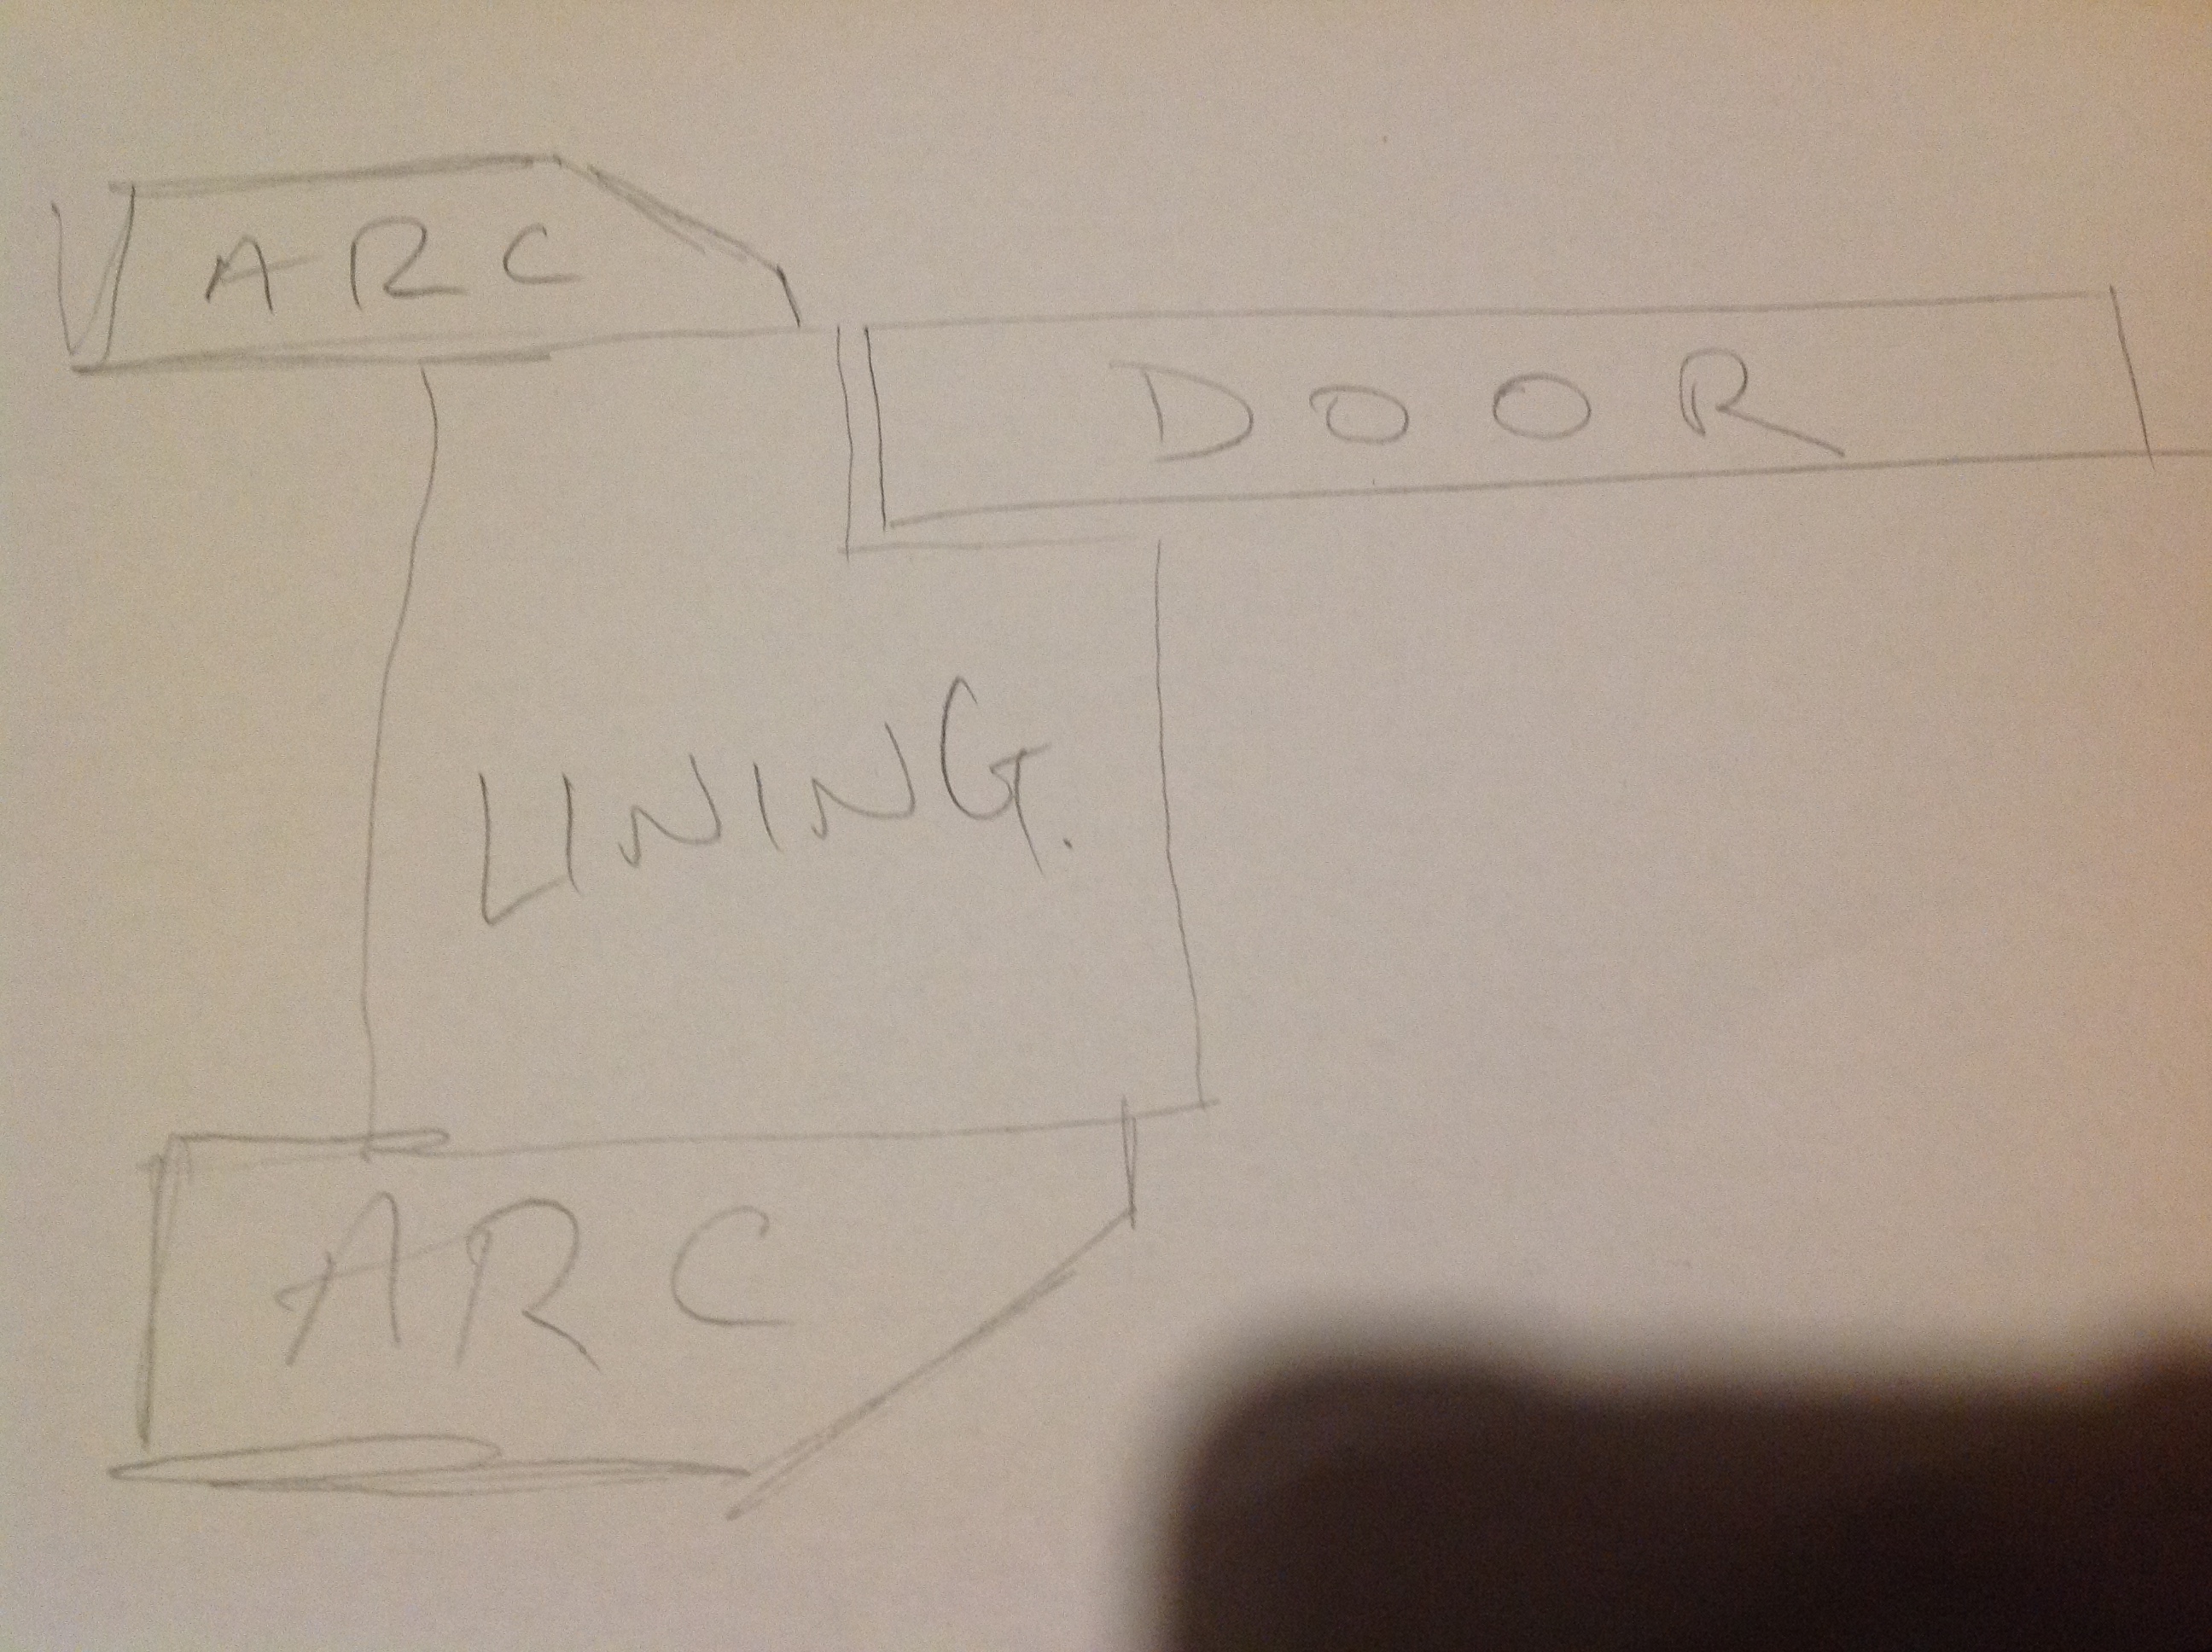
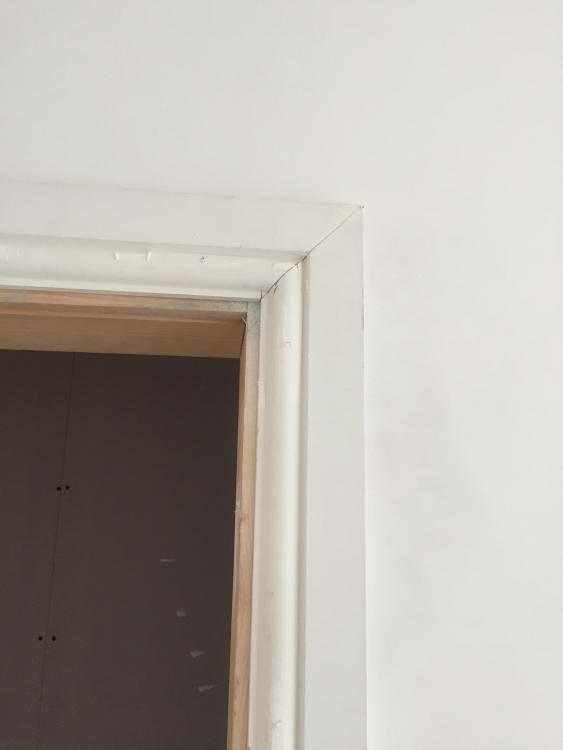
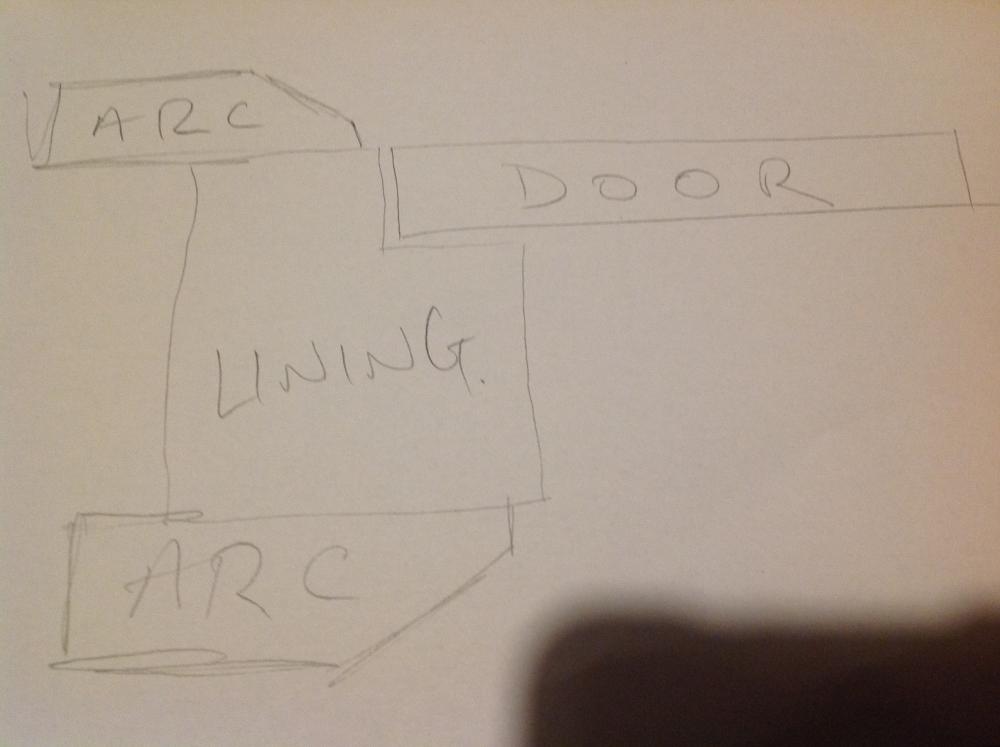
Current job. Set a little further back from the lining here as these will be fire doors with bigger than normal ball raced hinges. You also do not fit the arcs flush with the lining as if you open the door past 90o then the door will hit the face edge of the arc and cause the door to start pulling the hinges out . The rebate is the part in my pic where the door resides, otherwise, without a rebate, it would just be a square bit of wood.
-
Until they arrive....... yes, you just compo it in and bobs ya uncle. Not designed to be 100% watertight, but they're not far off it TBH.
-
You need to replace that ASAP boyo .
-
Beware when using this discipline. If you have a hallway / corridor with multiple doors, opening both in and out, the architrave head height will differ, as per the stagger shown in my ? drawing. . Anyone with OCD will soon spot it.
-
-
Cheers for clarifying
-
Do you not have 6a lights / 32a ring etc? Just 50's?
-
This is only NOT mental IF your not doing the UVC anytime soon Even more so if you go for another header tank.
-
What? Are you serious?
-
See, always best to check. My mates just done a 4 storey student digs and had to have another phase brought in for the 7 or 8 electric showers. I was sure he said they'd allowed diversity on the showers ?. I have slept since then though ?
-
5000w / 230v gives just short of 22A so ~66a of your domestic 80a supply gone. 6000w / 230v gives just short of 26.1A Theyre resistive loads so you'll be able to allow for diversity but others on here will know more about the specifics of that rule than me . @ProDave / @Steptoe ? 2x 6kw sounds the better option TBH, with a boost control which feeds the E7 immersion with grid electric. You can use one of these with a changeover contactor.
-
Don't be misled by guidelines which don't compare apples with apples for UVC size. Remember that you are having a direct with immersions NOT one fed off a boiler and wet coil. Big difference between the two as the recovery times are worlds apart. Forget about house sizes, "x size UVC for a 4 bed house" etc etc as DHW consumption is unique to each property. If a family stays and all use the shower in rapid succession then you'll even struggle with a 200L TBH, so you need to draw a line somewhere. To reheat from cold with just an immersion takes MUCH longer, and you also get less meaningful input from them whilst the hot water is being consumed eg they can't replace the energy being used as fast as it can / will be used, even more so vs a wet 'high recovery' coil. I'd say allow 70-80L of DHW per shower, and about 10mins worst case 'towel time' between showers ( for recovery ) as a benchmark for your calcs, and you'll be ok. That For starters you'll want a dual immersion tank, ( so you have redundancy / failsafe heater ), and if you go Telford then I know you can also specify 6kw immersions instead of the standard 3kw. With dual 6kw you could get away with a 150L or 180L imo based on an estimated 70/30 split of DHW/DCW consumption. The killer is two long showers back to back, so maybe for you the 180L is the safe limit. You can even buy UVC's with 3x 5kw immersions too, so one of those at 150L would suffice. There are plenty of solutions to this problem, just need to fine tune the criteria and size accordingly.
-
Some basic plasterboard questions
Nickfromwales replied to Crofter's topic in Plastering & Rendering
Yes. Totally agree. I suppose we assume too much on here and hope that each person will be blessed with great tradespeople, but unfortunately a few butchers still get through the net . -
Design and cost of hot water heating system
Nickfromwales replied to volcane's topic in Other Heating Systems
? -
Some basic plasterboard questions
Nickfromwales replied to Crofter's topic in Plastering & Rendering
For your pride and joy, the finish is the last thing you'll be looking at for life, so I'd agree, TnF'd just doesn't cut it. I don't care how good a blob of filler is sanded, it's still proud of the board. Skim for me every single time. -
Some basic plasterboard questions
Nickfromwales replied to Crofter's topic in Plastering & Rendering
I never have. No tiles fallen off.........yet. I do tank all the wet and splash zones so I sleep at night. -
Some basic plasterboard questions
Nickfromwales replied to Crofter's topic in Plastering & Rendering
I've only ever TnF'd commercial jobs / offices where one of these pays for itself in one day. Need to hire an industrial vacuum though. Makes sanding almost pleasurable. -
Design and cost of hot water heating system
Nickfromwales replied to volcane's topic in Other Heating Systems
Fackin TINY. ? -
Some basic plasterboard questions
Nickfromwales replied to Crofter's topic in Plastering & Rendering
The only thing your guy will benefit from is you cleaning out his buckets which will save you his labourering / costs . Stand down on everything else .