


Nickfromwales
-
Posts
30340 -
Joined
-
Last visited
-
Days Won
297
Everything posted by Nickfromwales
-
If you go for an ASHP, then I'd go for 3 runs of pipe to a void for the areas in spreader plates, that will give you more volume so less temp required to get the equivalent w/m2, and in the screed id go for 150mm centres. You want to get the volume of water & cross-sectional area up, and the flow temp down 3 pipe plate No reason why the LG and GF cant be on the same manifold as that'll be the highest point and will vent itself without issue. Manifolds are available as big as 12 ports so no bother from that PoV but will save you cost / complexity / extra 22mm primary HP pipe runs to the 3rd manifold / no 3rd wiring centre and less physical size / impact for the overall installation. I'd be very surprised if you cant do that off one manifold tbh, ( + the second manifold for FF of course ). Ask the question with your chosen supplier
-

WC Concealed Cistern Access in a Fitted Unit?
Nickfromwales replied to MAB's topic in Bathrooms, Ensuites & Wetrooms
Avoid the B&Q stuff, it really is dog shit. Im fitting vanity sinks and WC's in my current job purchased from there and the quality and finish is just disgraceful. How they allow stuff through quality control is beyond me. Utter shite for what they're charging for it. Looks great in those pics, just wait until you see what actually turns up. -
WC Concealed Cistern Access in a Fitted Unit?
Nickfromwales replied to MAB's topic in Bathrooms, Ensuites & Wetrooms
You won't get that cistern flush plate into the short panel of the vanity unit linked. TBH ive just done one identical to the first link and I just fitted the regular hide-away cistern and then simply bonded the sit-on sink top with 4 dots of white silicone, between the underside of the top and the top of the carcass. Then I applied a bead of white all round to prevent water ingress. If it ever needs an overhaul you simply peel off the silicone, run a long blade type craft knife through the 4 dots ( 4 five pence sized dots is ample to hold things in place ) and lift the whole thing off. Worth the effort as imo these really do look nice when fitted. -
That would have to be a plate with a welded flange, pre drilled to accept the wall fixings and the steel ends. Do-able, but more cost / complexity. Id rather plate the steel with timber and butt the joists up to that so the timber sits flush with the steel, that way there is no boxed-in beam showing underneath the ceiling level.
-
Bath Surround / Boxing In, and concealed pipework
Nickfromwales replied to Onoff's topic in Bathrooms, Ensuites & Wetrooms
Change of £19 for the 300mm one. Fitting two of these exact ones in my current job. Will show a pic tomorrow. Looks the dogs bollocks for the money. -
Yes, saw that but it can only be both, eg inbuilt would be sitting on the last course of block. As its a flat roof, you may be able to detail some cold bridge mitigation in but it would be negligible / useless. "Attached" is the other option where the steel is mechanically fixed to the block. EWI may help, and allow you to go cheaper on the block.
-
What will support the steel and stop the cold bridge with that being end-exposed? Plate it and 'gallows bracket' it? Will need to be an UC then and not an UB?
-
Off-grid new-build timber A-frame in Caithness, NE Scotland
Nickfromwales replied to Ed Davies's topic in Introduce Yourself
Agree its a wasted space otherwise, but what will keep 10 tonne there? Will the weight simply be spread over a long distance and things beefed up as required? Bespoke tanks ? Its an interesting idea so im keen to better understand it. Thanks. -
ufh Xtrafloor® Flex Pro under LVT - any good?
Nickfromwales replied to readiescards's topic in General Flooring
Another good reason to ditch it. With the thinner liquid screed I think you'll be over the safe threshold for the floor temps.
-
-
Just trying to work out how to kill off the cold bridge where the steel meets both ends of the building. For the front, drop back to regular thickness blocks to get a 100mm deep pad stone, prob 600mm wide sat on the under-laying full depth blocks and then the outer edge will be the thinner course of thermalite ( eg so the steel stops 100mm into the 215mm deep wall ).
-
Bath Surround / Boxing In, and concealed pipework
Nickfromwales replied to Onoff's topic in Bathrooms, Ensuites & Wetrooms
Just realised I'm fitting the same valves in this job. For the money, the flow rate is excellent.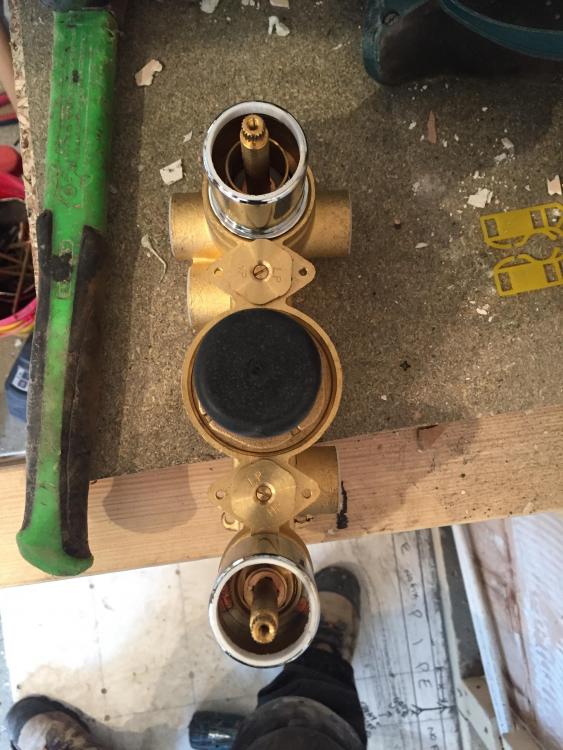
-
How about a piece of PB like I said? By now I'd have had 3 walls 4 courses up !!!!!!
-
Off-grid new-build timber A-frame in Caithness, NE Scotland
Nickfromwales replied to Ed Davies's topic in Introduce Yourself
Hi and welcome to our new hideout . Im intrigued as to where this 10 tonnes of water will sit? Ill definitely be looking at the links later, some evening reading. Always pricks my ears up when I hear "off - grid". -
I'd go for the deeper thermalite and 75mm insulated stud work with 30mm insulated plasterboard over the studs. Warm as toast.
-
I was just going to say steel spine and normal joists but @PeterW beat me to it. Steel will be better and quicker IMO with no need for extra detailing with the pozi joists required. Just drop them in as your building the walls up. Cheap enough and logistically simpler.
-
You need one manifold and one pump and blending set per floor minimum. Im not so sure you can't do both floors with 2 sets. Why are they mentioning 3 pumps? 3 pumps would mean 3 manifold locations, so are you doing towel rads off a 3rd ?
-
Founds?
-
Change of £200 sounds good for mixed colour units. Check the distance required with your BCO and don't forget the overhang needs to be allowed for gutters / downpipes etc.
-
+1. It would be careless of us to continue advising you without being there and testing on your behalf. There are folk who we trades refer to as "know enough to be dangerous" and as you have inadvertently damaged ( severely compromised the integrity of to the point it is dangerous ) your own wiring through mis-adventure then yes, the time had come to get a sparky out. Its probably a very quick fix so explain you've sought help and have identified the issues so they don't pull your trousers down. ? "Make the call".
-
Go to a local uPVC manufacturer / supplier and make the openings to suit whatever 'mis-measures' they have for sale. Means buying the windows and doors up front but could be less than half price. Cant you squeeze it over a 1000mm away from the boundary and then avoid complex 'fire proof' finishes ? Do you think you'd get pp for room in roof over a conventional garage? Or too much ? ?
-
Turn the water pressure back up immediately. Every time she flushes a loo the water pressure will drop and your black milkshake will be creeping into her fresh water feed. I would possibly go back and edit the bit about you wishing she was brown bread too, in case you do accidentally kill the "old dear".
-
UFH in slab or screed, eps or pir insulation?
Nickfromwales replied to Tin Soldier's topic in Underfloor Heating
Any DER / TER figures yet for fabric and ventilation heat loss ? -
I'll draw it out later and post it
-
Getting 230v to zero V and back again between L1 and neutral will tell you the switch works . You have 3 neutrals most likely. 1) the loop in ( 230 v being brought to the switch back box ). 2) the loop out ( 230 v being sent to the next light fitting / back box ). 3) the neutral from the light. Loop in live / loop out live and switch wire live ( Common ) will go to a connector block and then to the Common of the switch, or they will all be stuffed into the Common terminal. Light fitting live live will be going into L1. Fog lifting ? .


