Nickfromwales
-
Posts
31372 -
Joined
-
Last visited
-
Days Won
345
Everything posted by Nickfromwales
-

Advice Needed – Localized Floor Collapse Above Plumbing Pipes
Nickfromwales replied to BonnieW7's topic in General Plumbing
Are they heating pipes, or a hot & cold? 20mm doesn’t leave much (any) room to insulate effectively. 15mm pipe with 9mm wall insulation = 33mm diameter, x2. You can buy a thin (3mm) neoprene tape LINK which may suit and give you that little bit of wiggle room. -
I have some odd, inbuilt aversion to this needing any kind of constant (continuous / maintained) signal or feed to function, and am favouring something that flip / flops with a single ‘hit’. I may need therapy……but I do also like belts, braces, and for my phone to continue to remain silent each and every night.
-
Advice Needed – Localized Floor Collapse Above Plumbing Pipes
Nickfromwales replied to BonnieW7's topic in General Plumbing
I’ve done these types of jobs hundreds of times over the past 35 years, and defo zeto need for a stainless plate; I think that would make the repair fail again. Do as you suggest, clear the trough and hoover it all out. Prime (saturate) with 50/50 PVA/water, applying copiously until you don’t see it being sucked into the concrete any more, and then pour in some of this: Will be right for life after that goes in there. Mix it with fresh water and to a consistency a-la a thick gravy. If the pipes are bare copper, try and tape these up with gaffa / duct tape. Lay it directly on to the soaking wet PVA mix and don’t fear that being any compromise to it, it’ll be fine.
-
Does an island need to be fixed to the floor?
Nickfromwales replied to saveasteading's topic in Kitchen Units & Worktops
1) Fit and forget 2) Never let me down 3) Tried and tested CT1 or Ever build Stixall, which I think is the same stuff / different packaging, but as we realised on site 2 weeks or so ago, Ever build stuff is a 1/3 of the price if you hunt it down online; ergo I’m 2 of 3 boxes of EBSA down, 1 to go. I failed to put up an argument for CT1 for bulk mastic work (such as topping up where the Norrsken fitters left off), but for the wetroom shower former / waste / trap etc I won’t use anything other than CT1; as I am employed by clients to do things, I cannot (point blank refuse) to compromise on stuff that my names going on (plus I am obvs then liable for too). As principal consultant I could not, however, offer any good reason to use CT1 on the many large doors and double height gallery windows etc, as there was (still remains) a huge volume of ‘goop’ that is anticipated to be needed to complete that specific task, so calculated bean-counting had to be on the table for discussion. -
These are OK, but are poor on an ASHP vs gas boiler. If a horizontal is used with an ASHP you should install a stratification pump across cold in / hot out, to ‘stir’ the contents of the cylinder and max out the heated volume of water. The pump is energised by the cylinder stat, so comes on with DHW reheat cycle only. @Stu789 assuming room sealed / external air fed WBS?
-
Typically these are still at the old 7” off floor to centre dims, to sympathise with retrofit. They just raise the rim, and the rest of the pan stays put.
-
Does an island need to be fixed to the floor?
Nickfromwales replied to saveasteading's topic in Kitchen Units & Worktops
Lifting the legs up one at a time, and then setting them back down again into a blob of CT1 (10p piece sized is fine) will be ample over the number of legs. I’d say you’d be fine doing this with just the front legs, so easy to do / easy to reverse without going commando on your belly. -
Moving an incorrectly placed soil vent pipe
Nickfromwales replied to Bancroft's topic in General Construction Issues
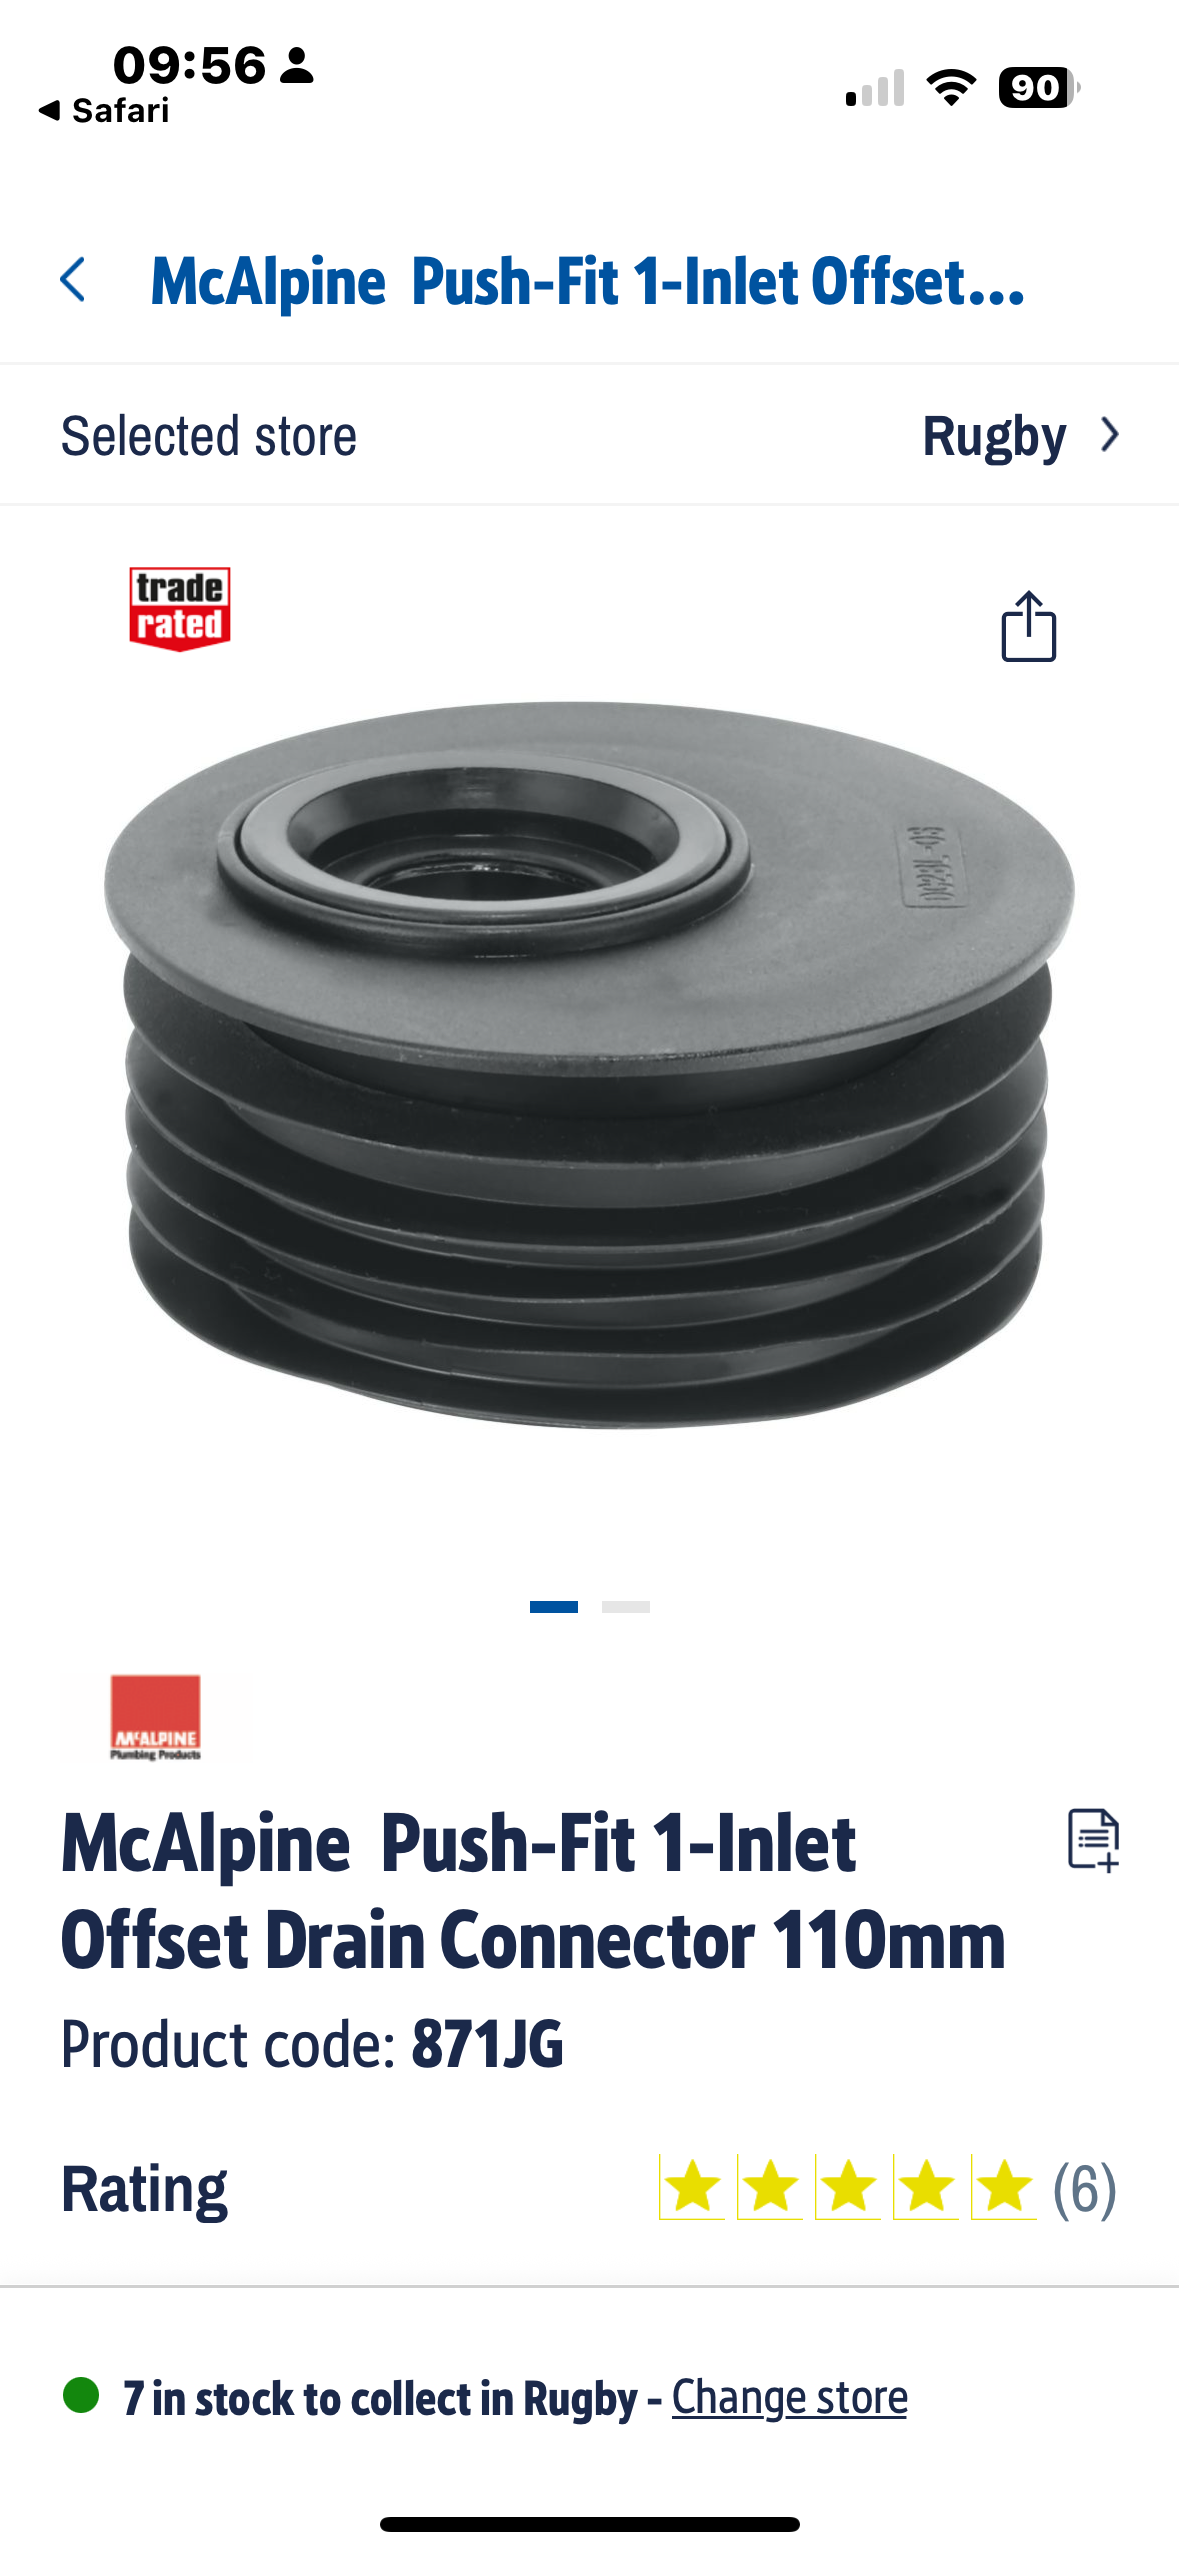
One of these, and have a piece of 50mm pipe dropping through it with a 100-150mm tail, as this will be more forgiving than a solvent weld joint; given you’ll be fiddling with it and working around it as you lay the new 50mm pipe. Set the falls in place with off cuts of PIR insulation or plastic packers, then foam into place and leave to cure for a few hours / day. When cured you trim it square with a handsaw and then butt your sheet PIR up to that. Make up any deficit with more foam, job done.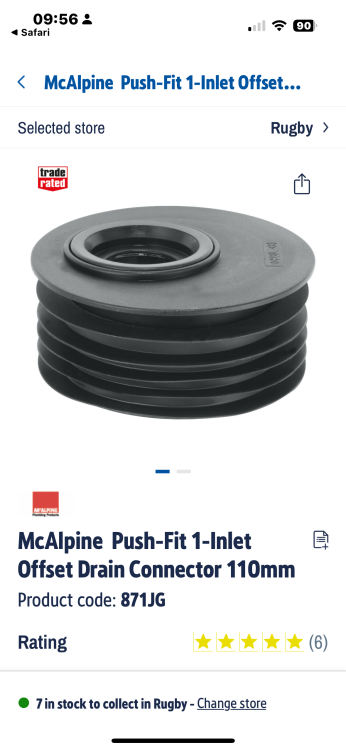
-
Moving an incorrectly placed soil vent pipe
Nickfromwales replied to Bancroft's topic in General Construction Issues
As above, just reduce to 50mm and move onto the next part of the build. Do NOT start savaging the slab!!!!! -
A robot in cyberspace says this: 13 A latching contactor relay (or bi-stable relay) maintains its state without continuously powered coils. A momentary pulse "sets" the contacts closed, while a reverse polarity pulse or a separate mechanical/electrical reset pulse "resets" them to the open position. This saves significant energy and prevents buzzing or drop-out during power dips. [1, 2, 3, 4, 5] Why Latching Contactors are Used Standard relays and contactors are "fail-safe," meaning they require constant power to hold a circuit closed. Latching contactors are highly beneficial in specific applications: [1] Energy Efficiency: Ideal for systems that stay on for long durations, as no power is consumed to keep the contacts engaged. [1, 2]
-
Indeed. I was just wondering how you’d set this up long term, as I don't really want a contactor energised for eternity in the likelihood it will never be released; other than annual proof-testing, hence my ‘single shot’ thoughts of just having the relay trip the breaker. Maybe a latching device which is thrown by the Aico relay, and then requires a manual reset, given the core issue which is a loss of power to the house or just the smoke system which meant the relay would close and MVHR would come back on again; I guess at that stage it wouldn’t matter!?! Number 1 concern is preservation of life, eg get peoples arses out of the door ASAP, so if there’s a fire then the first 30 mins is the focus. I’ll see if there’s a contactor that would latch open, after a single shot of juice was given from the Aico relay. Anyone?
-
Cheers. That’s the likeliest plan, yes. Was just a brain-fart, as zero potential exists there (to talk of).
-
Does an island need to be fixed to the floor?
Nickfromwales replied to saveasteading's topic in Kitchen Units & Worktops
I just bond a 2x2 to the floor and the bottom of the end panels, x2 minimum, using cheap silicone so it’s easy to remove if you want to. There’s too much play in the legs to fix just a couple of those. -
Preparing to Screed - What to consider....
Nickfromwales replied to Mulberry View's topic in General Construction Issues
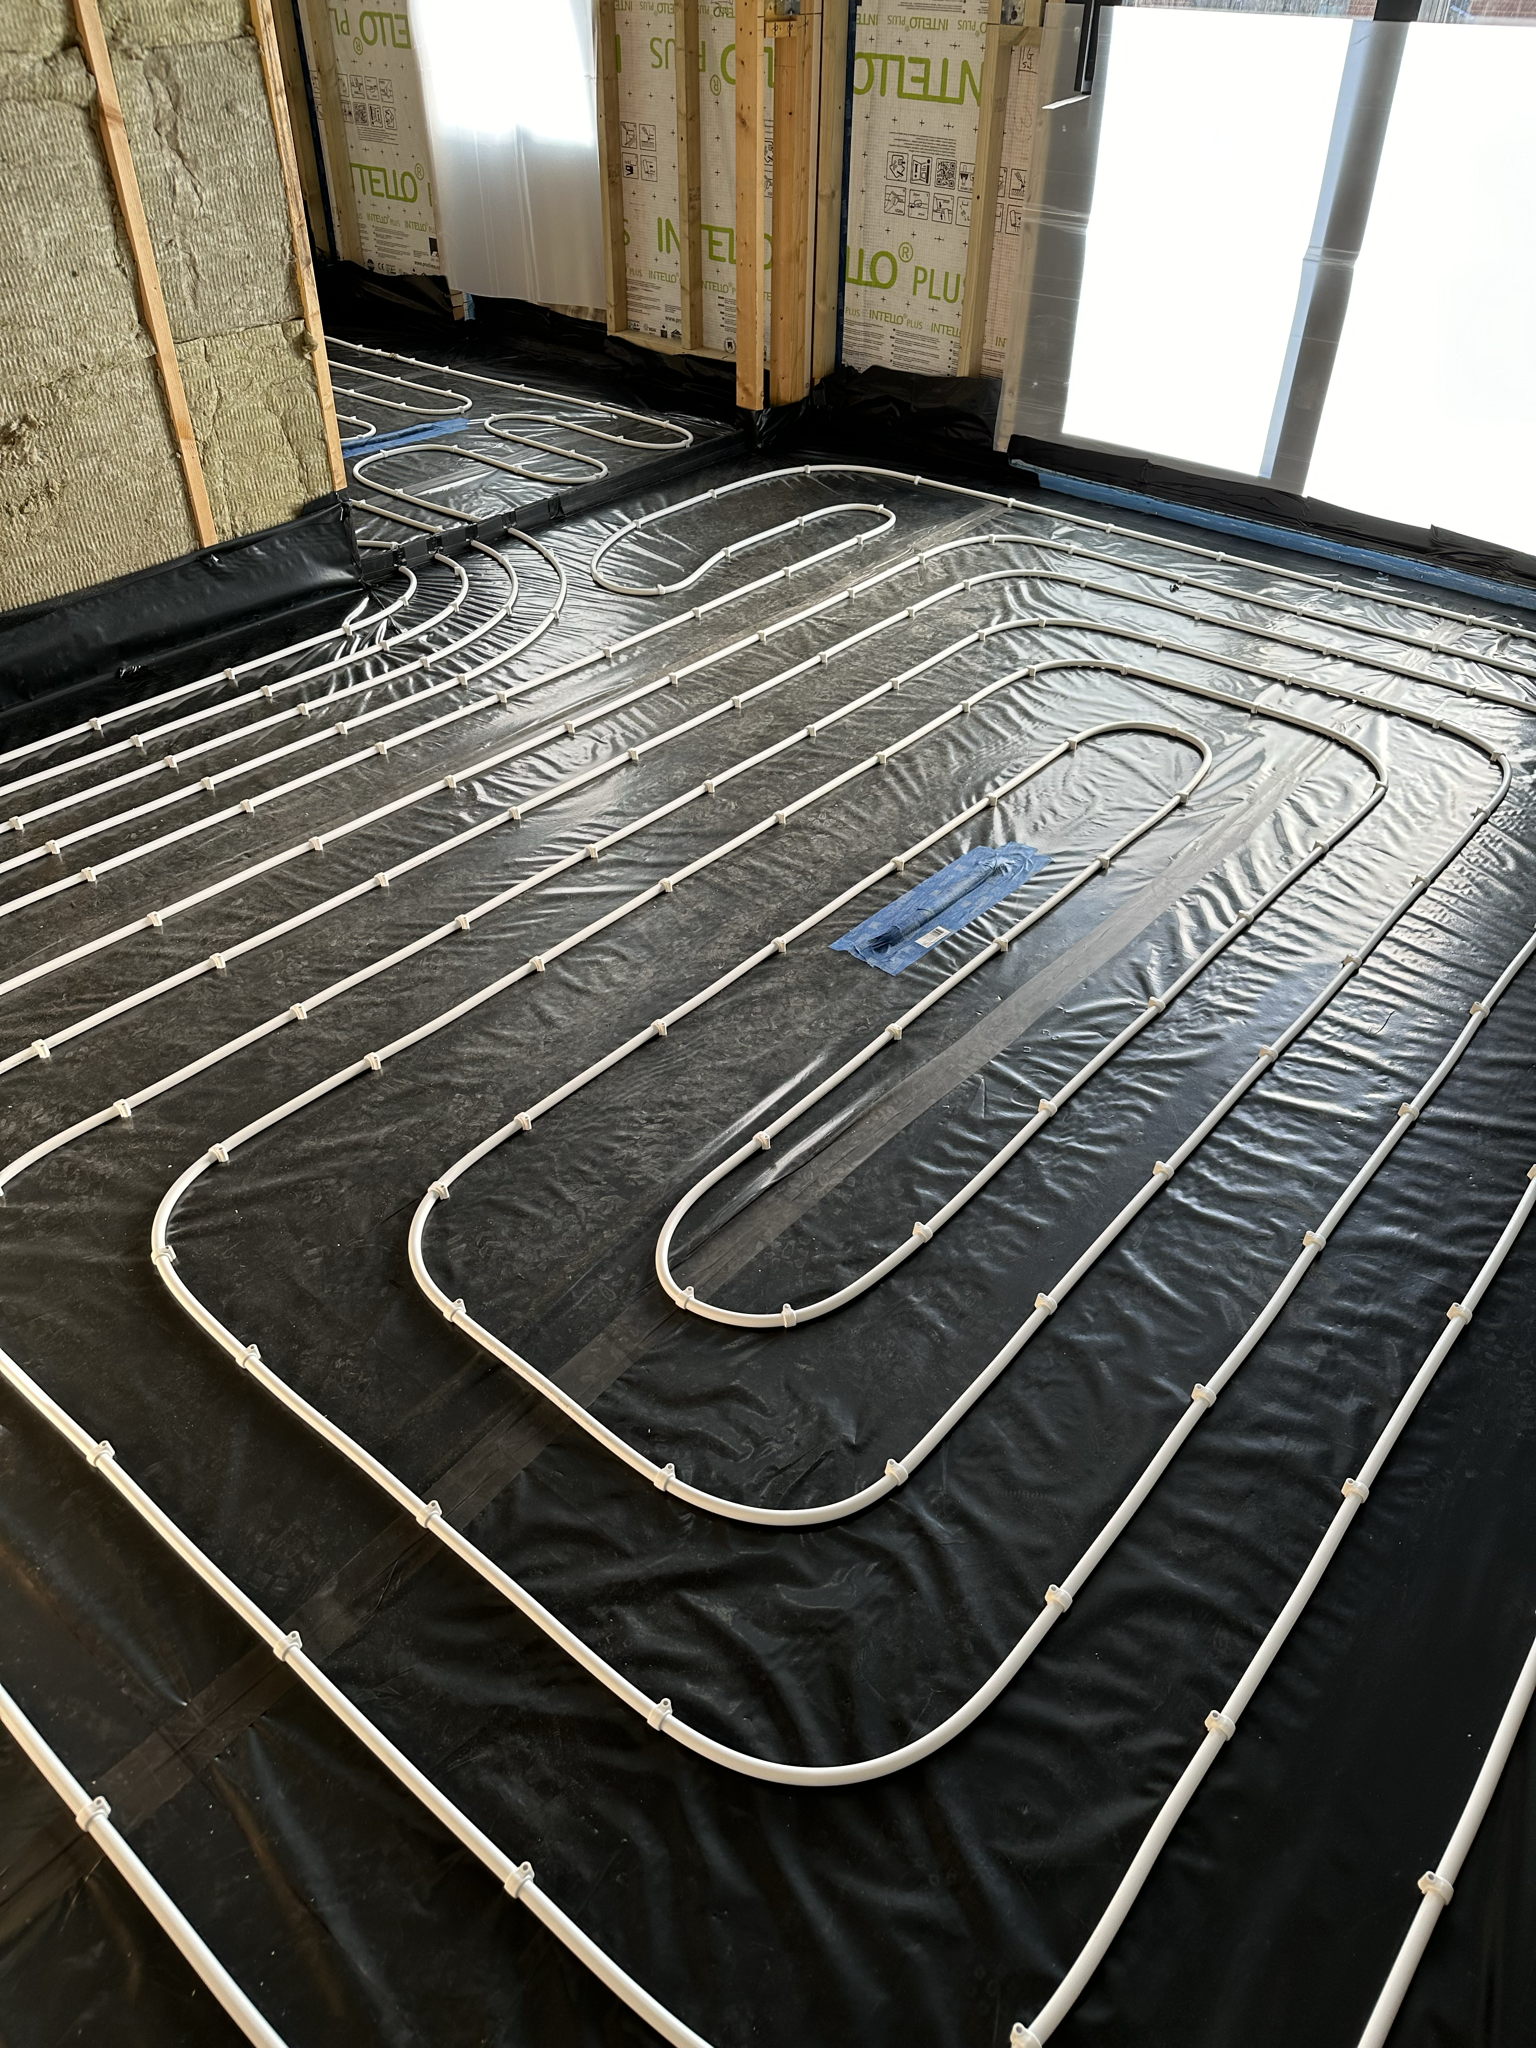
For the last split-level slab I did we simply put 2 manifolds in, one on each level, and worked well. I have done one very big GF UFH job and put the GF manifold on the FF landing, in the cupboard under the stairs to the 2F, and this worked without issue. So, I guess as long as the manifold is always at the highest point, to collect and get rid of air/gas, then you should be fine to have the manifold on the higher level and feed down and back up from there. For laying of UFH, just forget the old ways and lay the pipes inverted and then you are 95% just turning 90 degrees instead of 180. Simples!!!!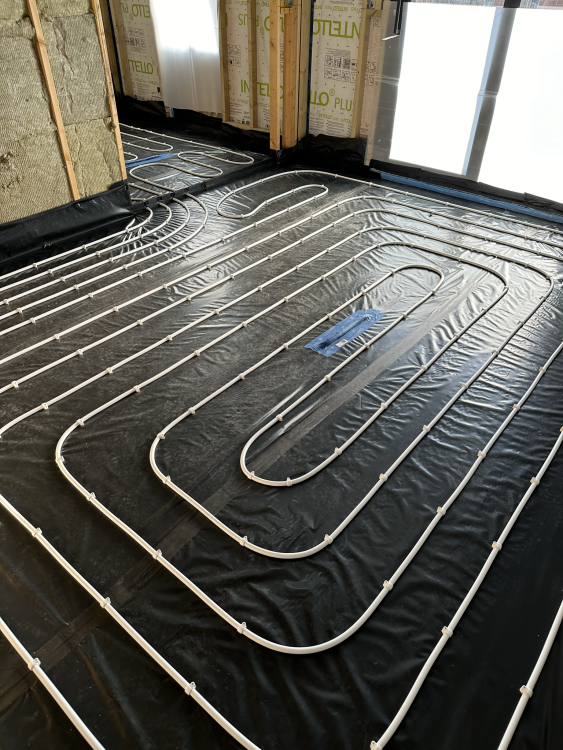
-
Not sure who that’s for, but, you know me……. The main isolator in the CU is a switch, and after that each 1ph or 3ph circuit is protected individually. Caveat with 3ph is, you need a 3ph MCB to give you the over current protection, and then a higher amp rated 3ph RCD locally to give the earth protection; 3ph RCBO’s don’t seem to be leaping into my lap? Anyone? @Mattg4321? @ProDave? @Onoff?
-
Preparing to Screed - What to consider....
Nickfromwales replied to Mulberry View's topic in General Construction Issues
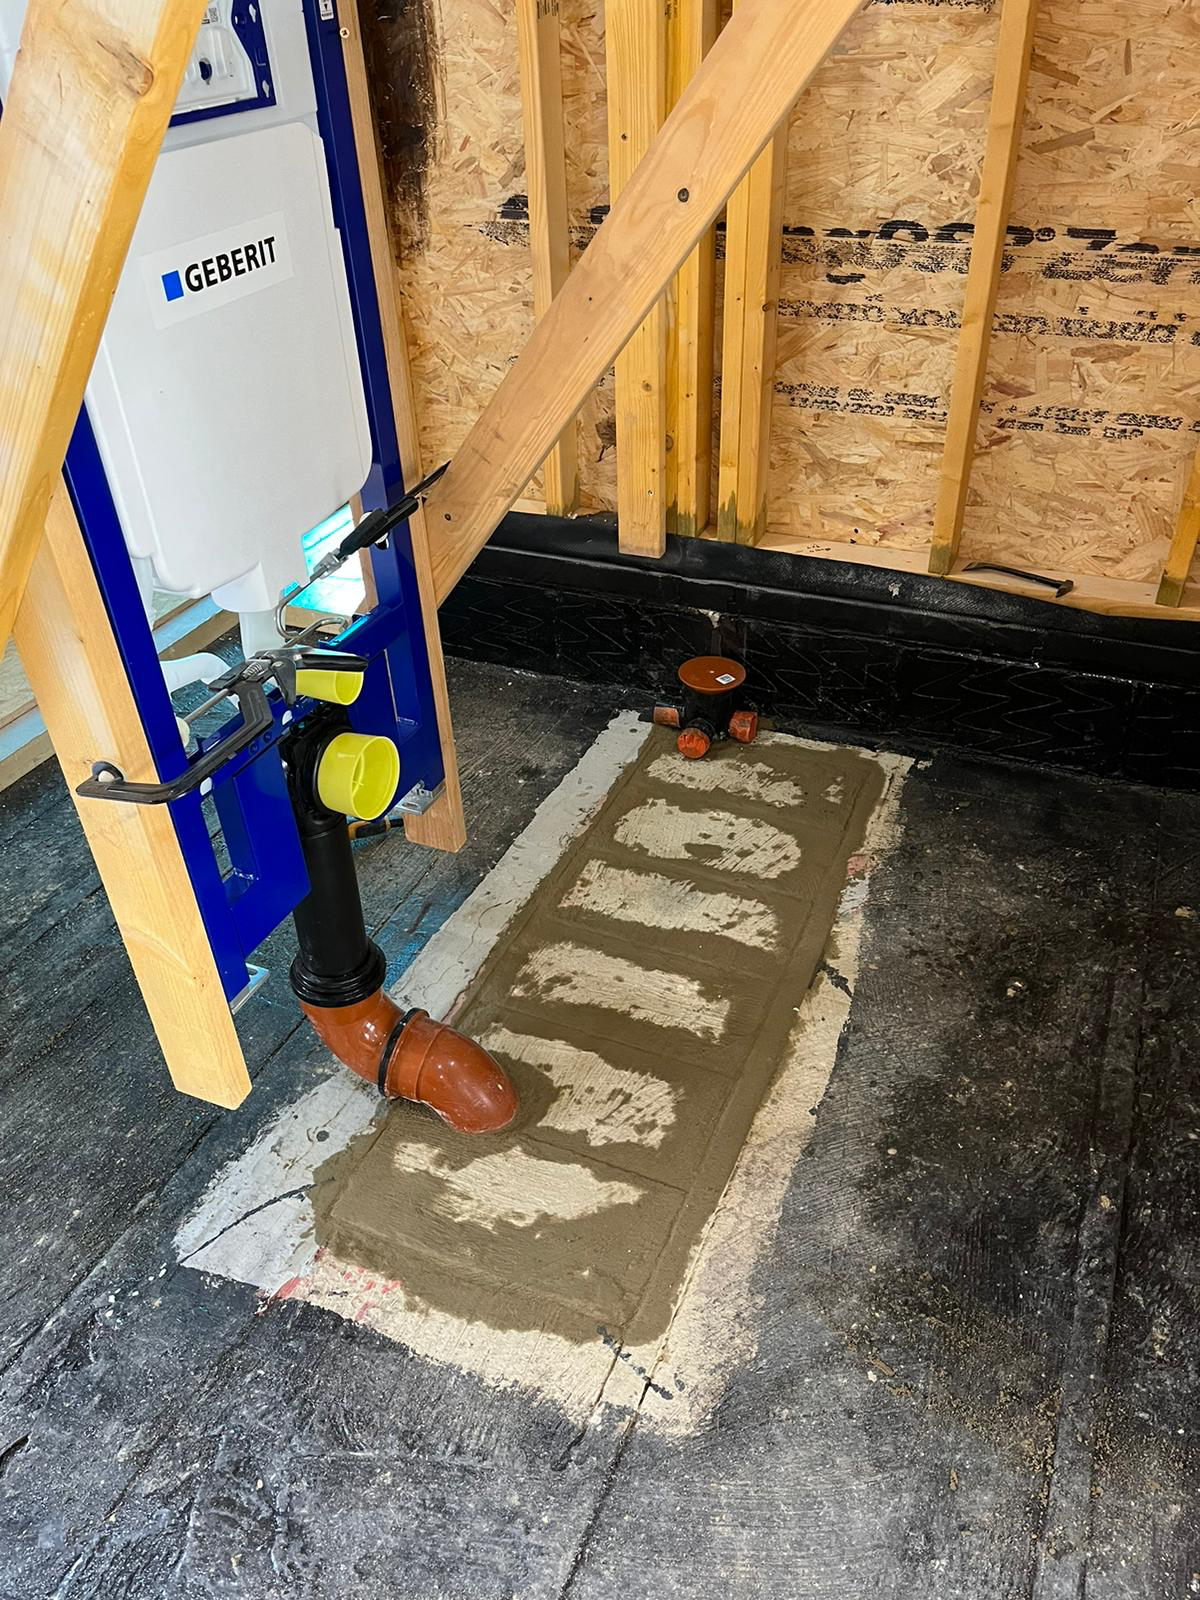
I chatted this through with one previous client in Gravenhill, as they only allow a B&B floor there. We decided it best to buy a few (very) large tubs of black jack (liquid DPM) and use that to make the B&B airtight too; this was brushed up the upstands too. Here’s a pic of it, please ignore it being wrecked temporarily to install the WC pipe where it actually needed to be, lol. Back in the trenches again This was done vs a sheet DPM, and imho this is night & day better. Zero tape / dodgy internal and external corners to fold. 👍👍👌 Oh, and yes, I did have to suspend that WC frame in place, FFL calculated and datums a plenty, stud wall created virtually in mid air, before the polished concrete went down……. I had about 4mm of tolerance to play with. All was A1 of course as OCD wins every time lol.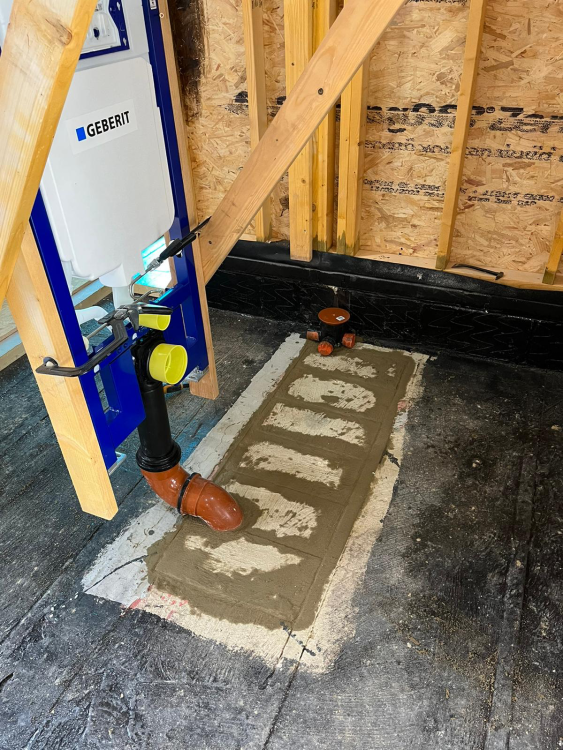
-
Preparing to Screed - What to consider....
Nickfromwales replied to Mulberry View's topic in General Construction Issues
Nope. And there isn’t a ‘wrong way’ here btw . Most UG pipe is sold ‘socket-less’ meaning it is just straight pipe (plain ended as you call it) which is directionless and completely normal. FYI a ‘socket’ is what the plain pipe goes into for each joint, so you get single or double ‘socket’ bends, one male and one female end, or both ends female. We’ll learn you good, boy!! -
Preparing to Screed - What to consider....
Nickfromwales replied to Mulberry View's topic in General Construction Issues
I just use a few ‘turns’ of squirty foam to give said wiggle room, but as above, more importantly, gives you the option to slide a fitting (with its knuckle) after removing some of the foam. I am in the process of fine tuning the 1st fix for the GF cloak WC that this particular pipe services. There’s a full 20mm of ‘wiggle’ there, allowing me to get the fully-back-to-wall close coupled WC in to perfection. Cost, £5.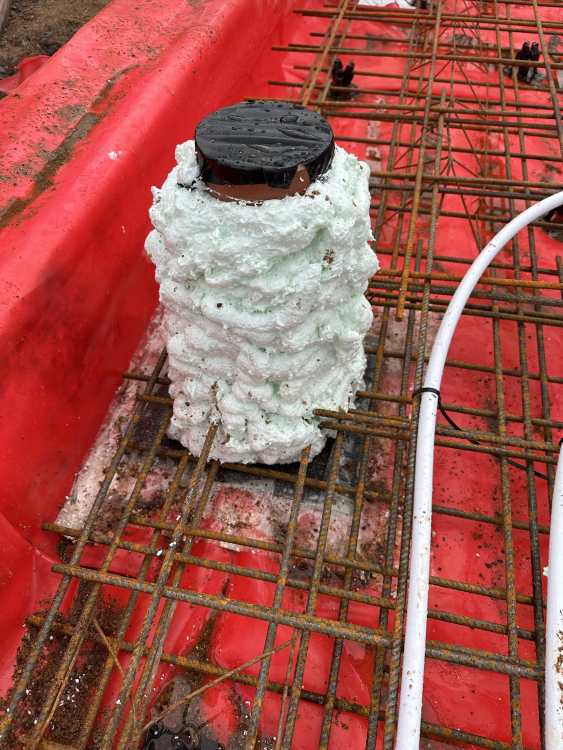
-
Where are all the Blown Cellulose Installers?
Nickfromwales replied to SBMS's topic in Heat Insulation
Massive lump of a thing tbh. Gordon Lewis operates off a 13a plug out of the back of his van, small hopper and tired / busy old fella constantly tossing bales into it, and the man is like a dog with a bone; literally fills every last nook and cranny until the pump wont push the Warmcell down the pipe anymore. If anyone wants Warmcell blowing in, he’s a legend. And Welsh. That’s a win-win lol. -
This puts any of our challenges into perspective
Nickfromwales replied to saveasteading's topic in Boffin's Corner
Imagine being the persons sent down there to install those props?!?!?! They’d have had the 2-finger salute from me. Feck that. -
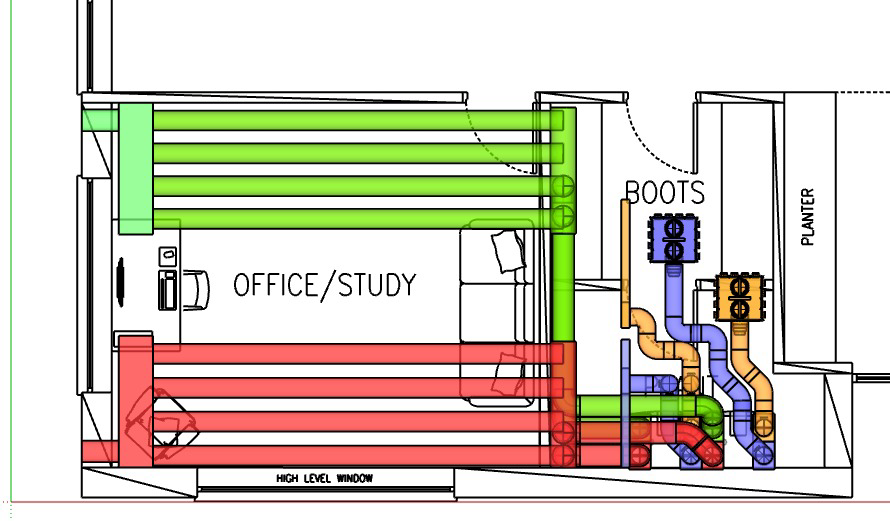
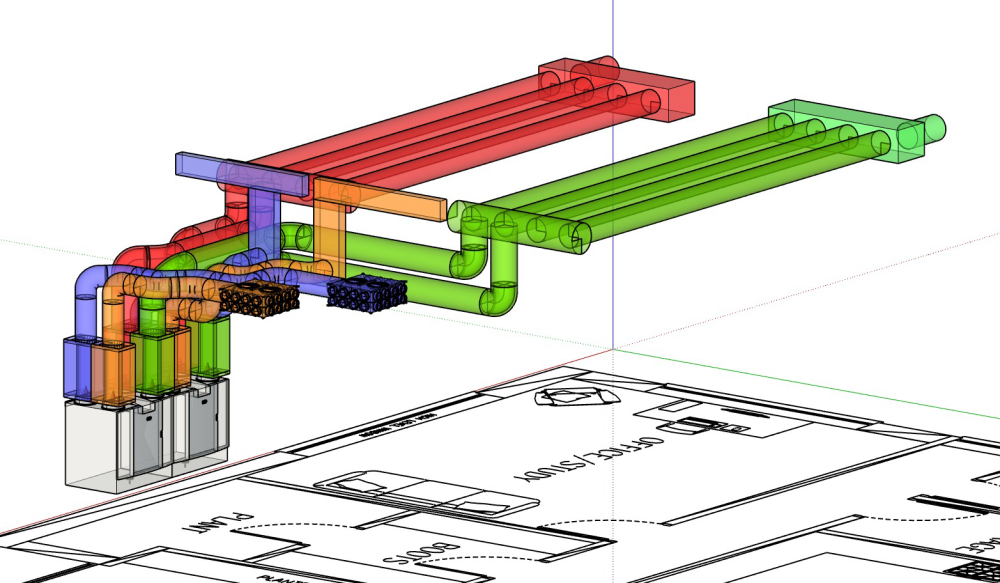
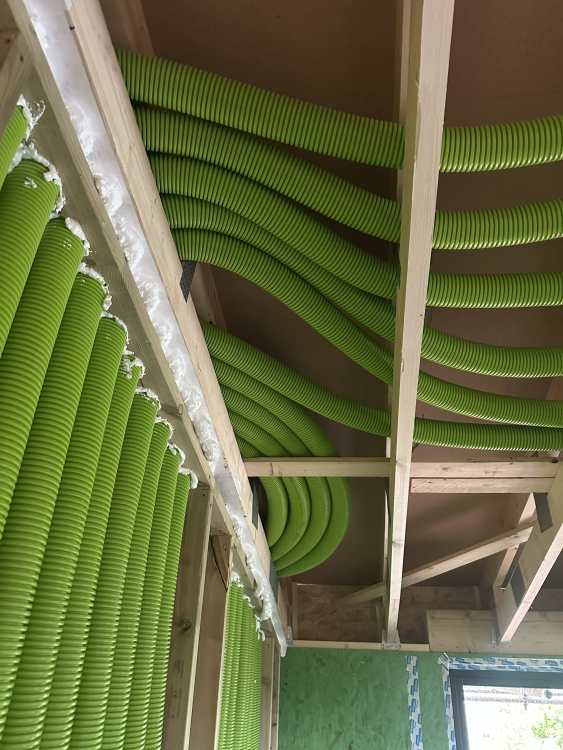
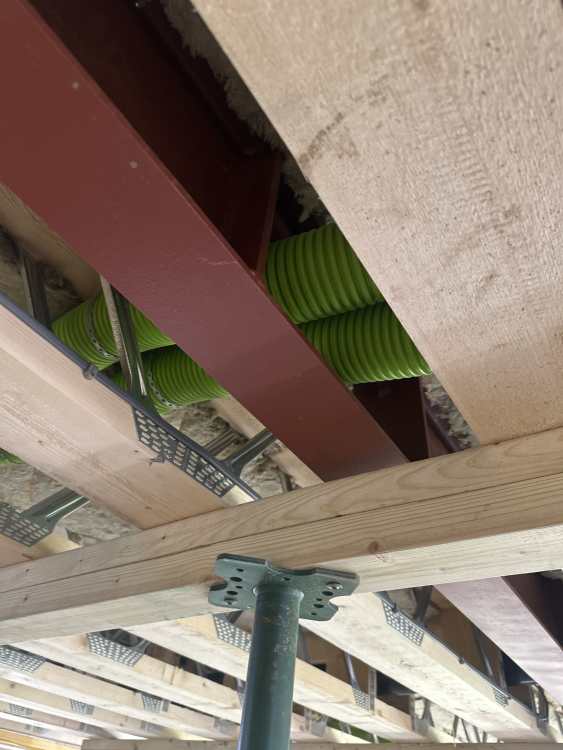
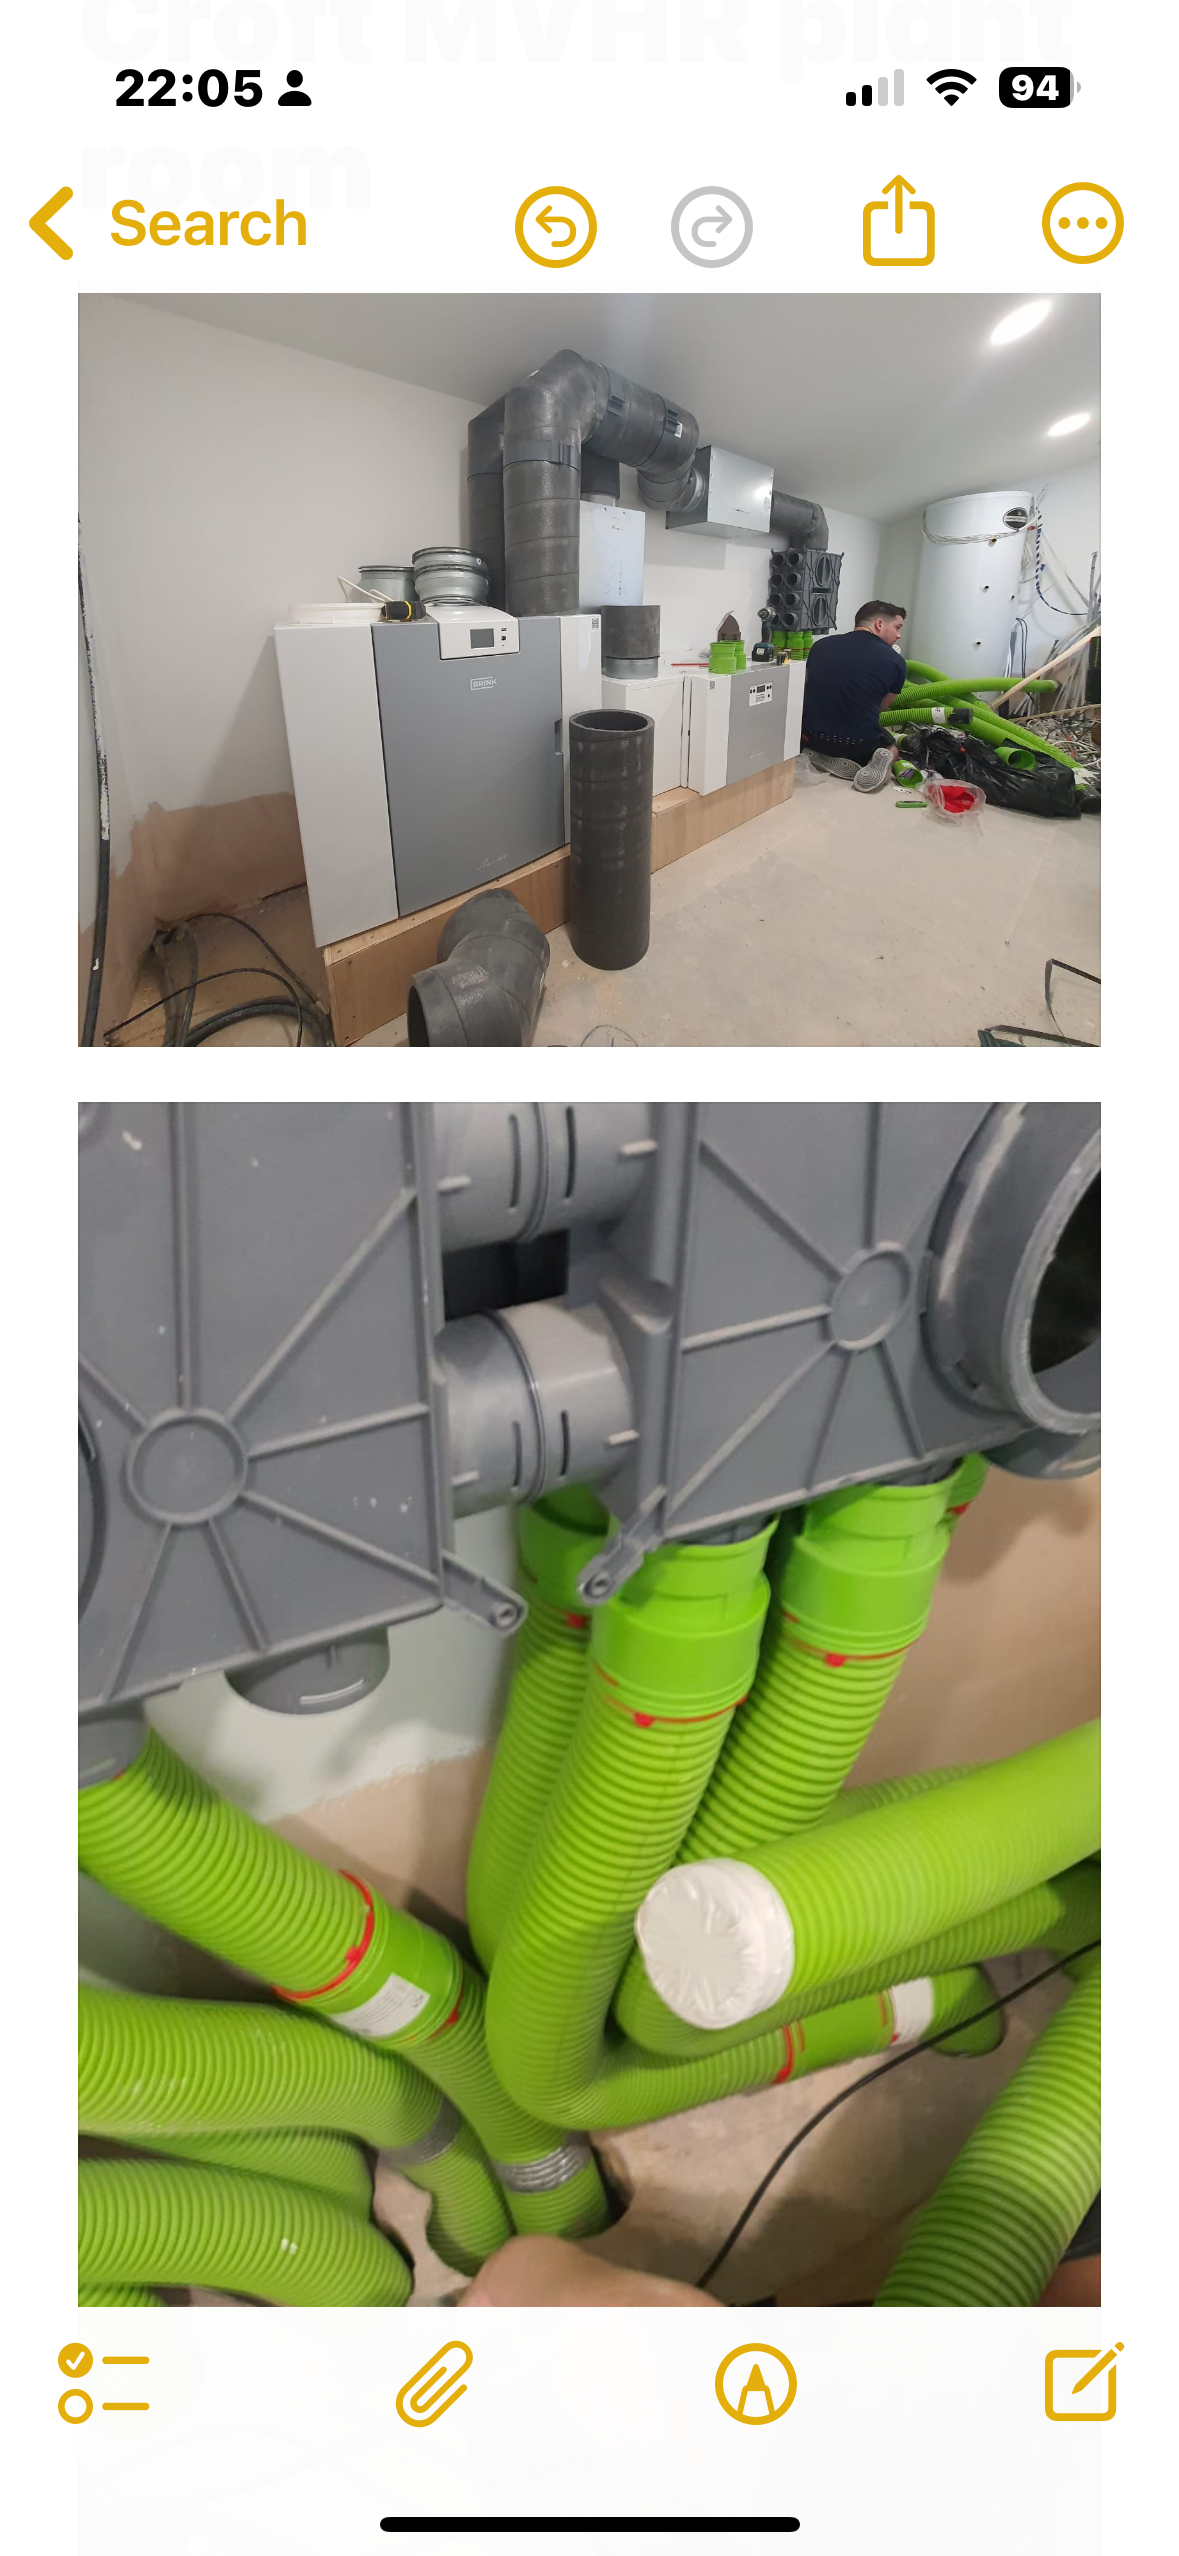
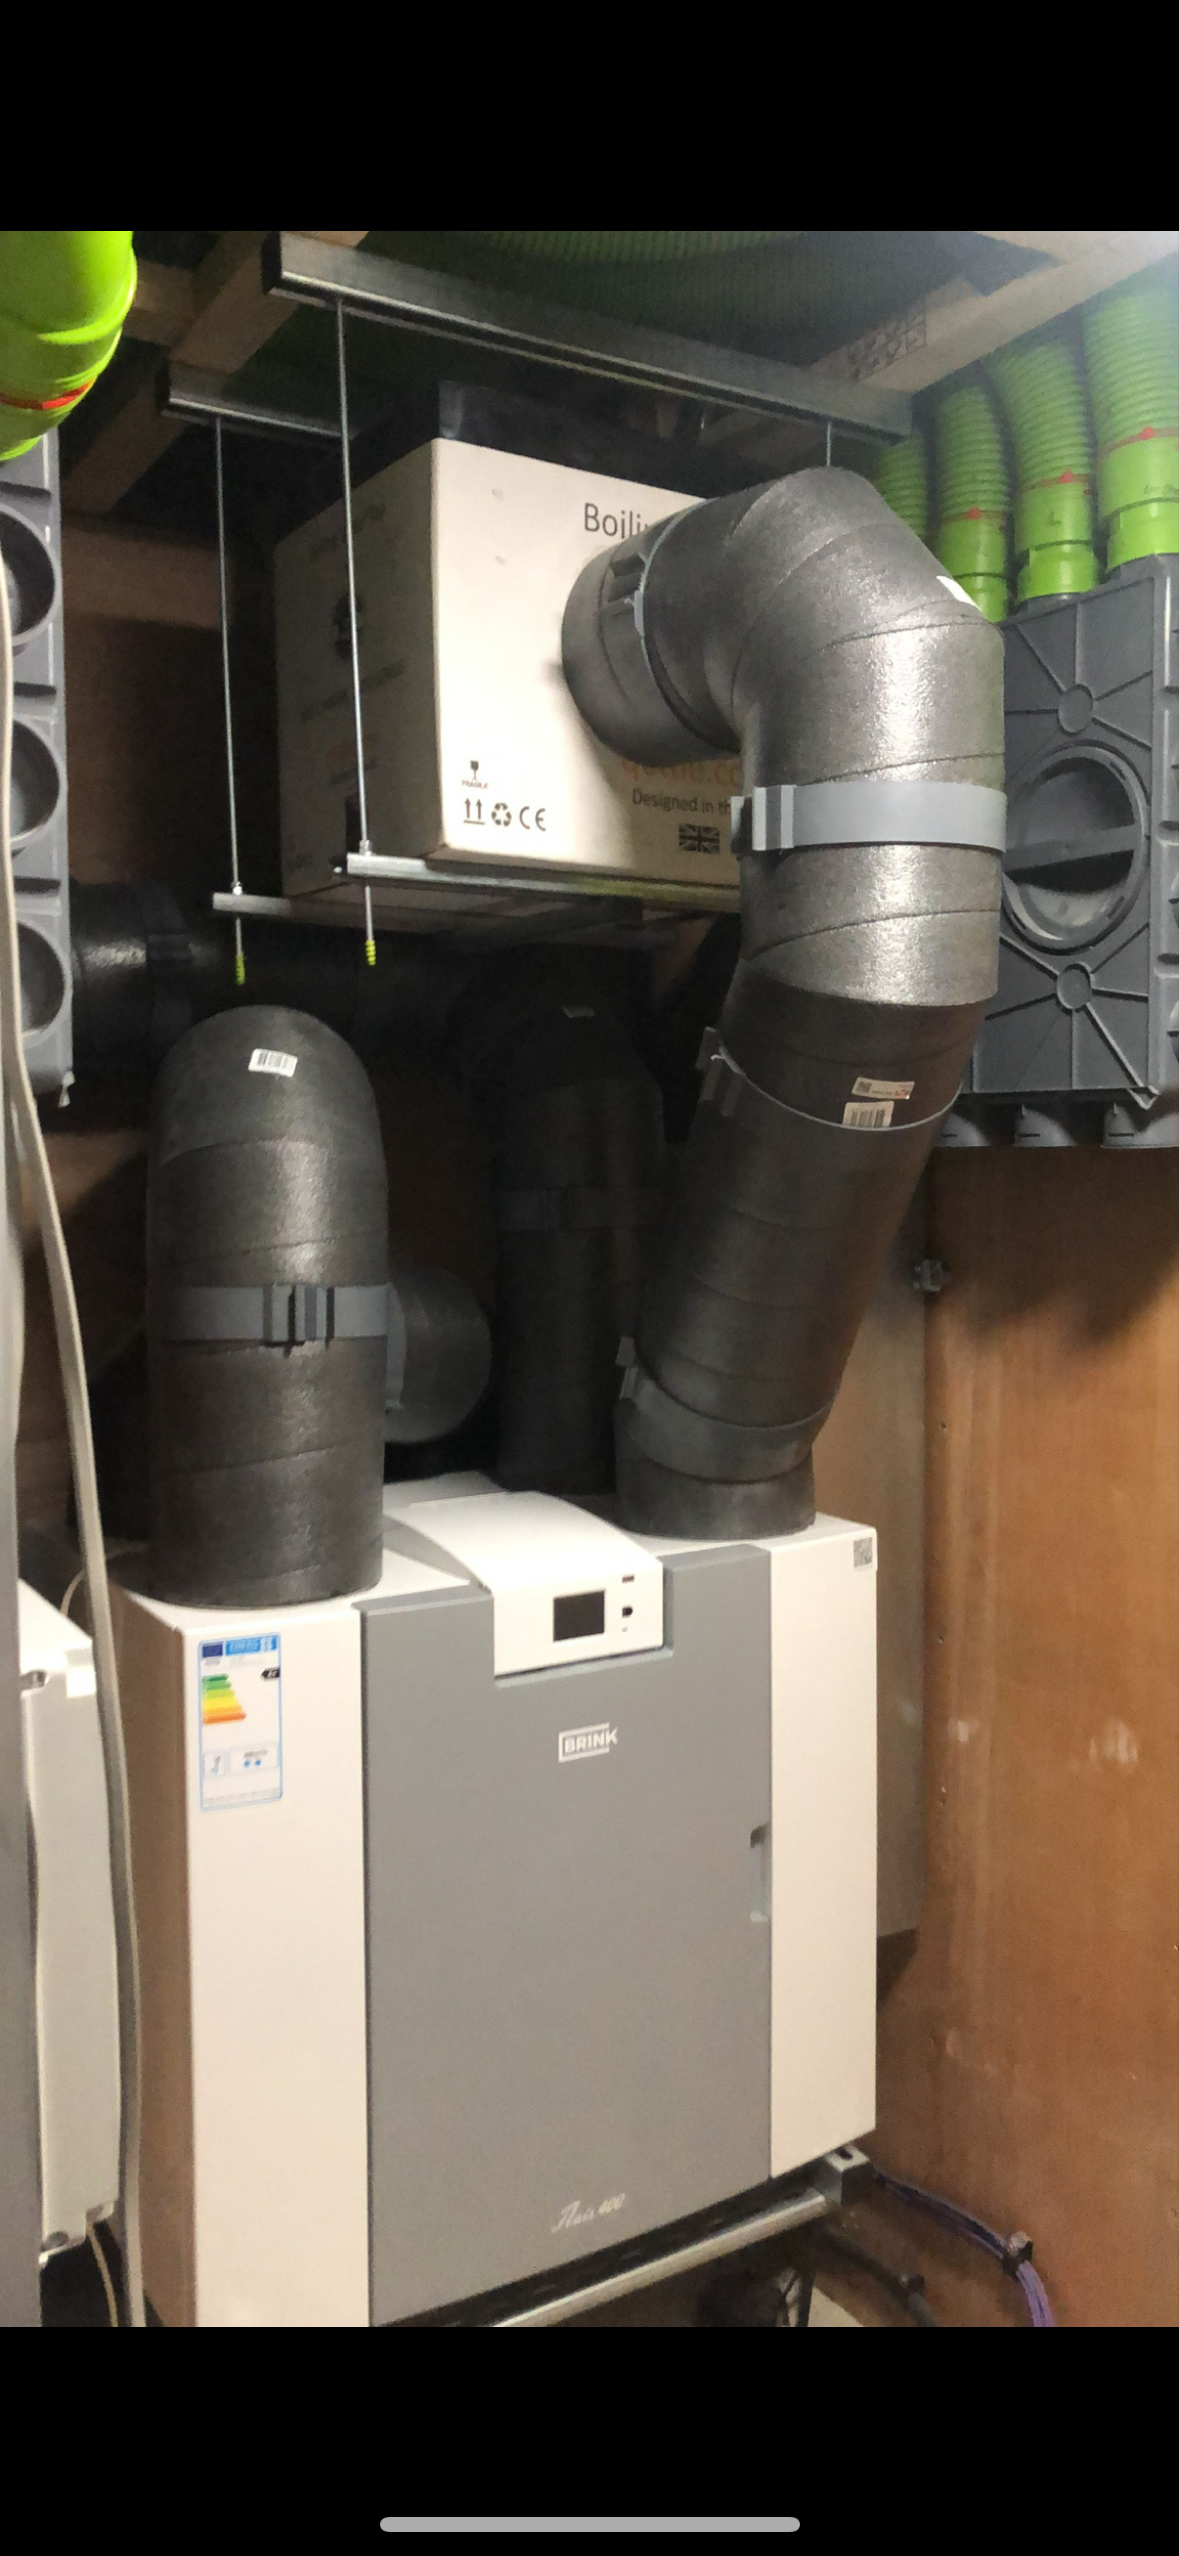
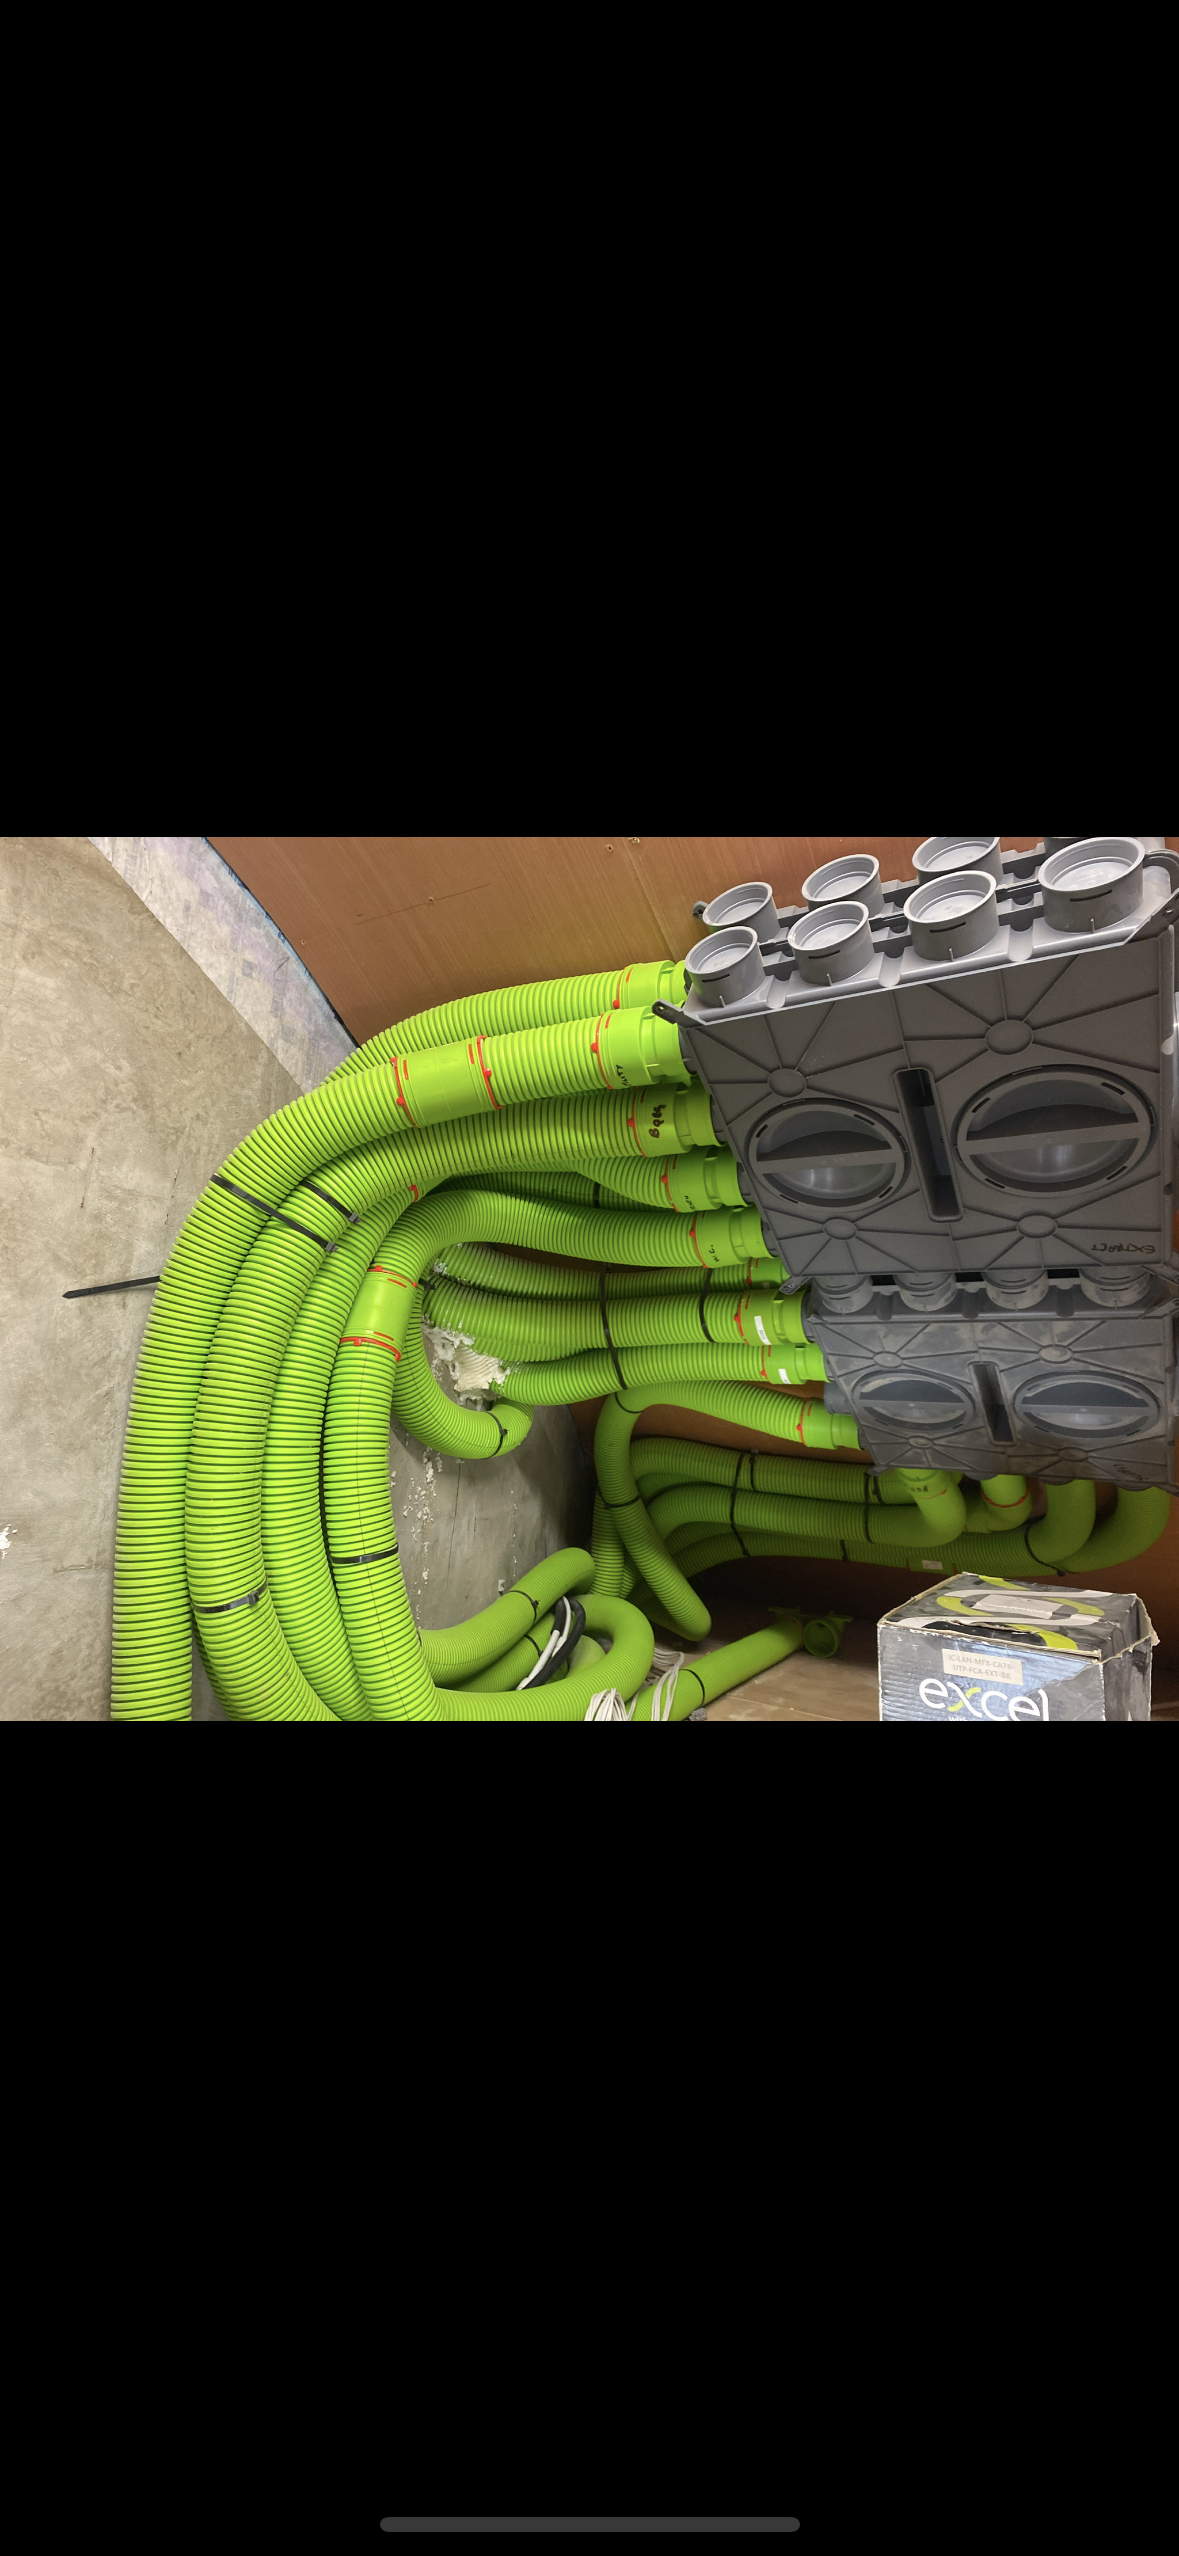
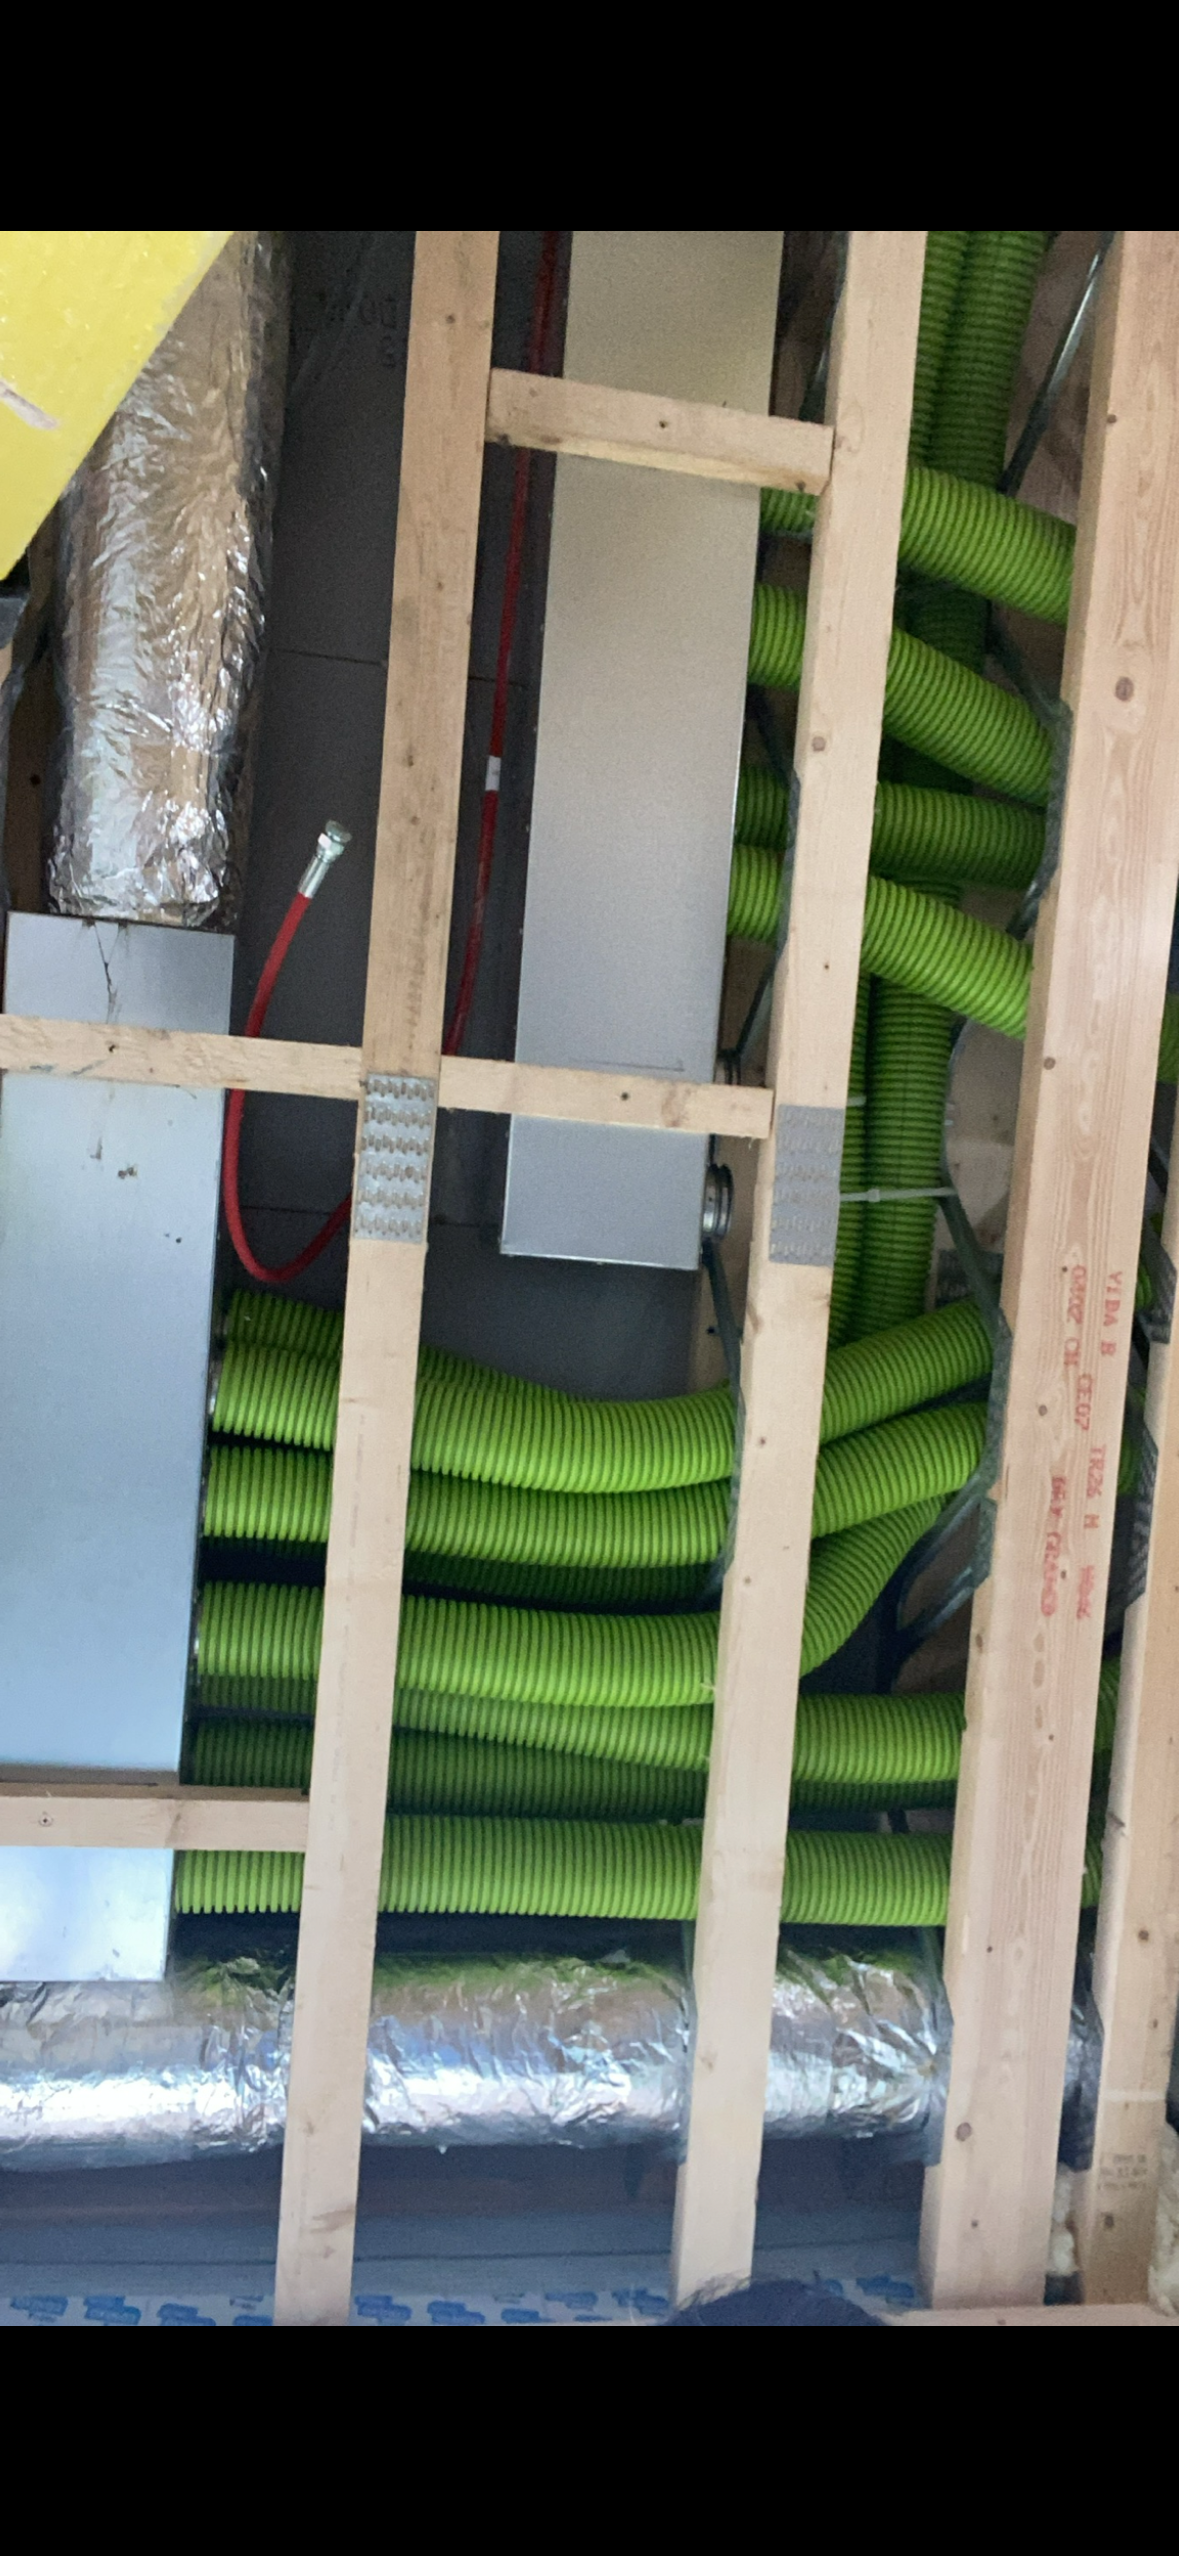
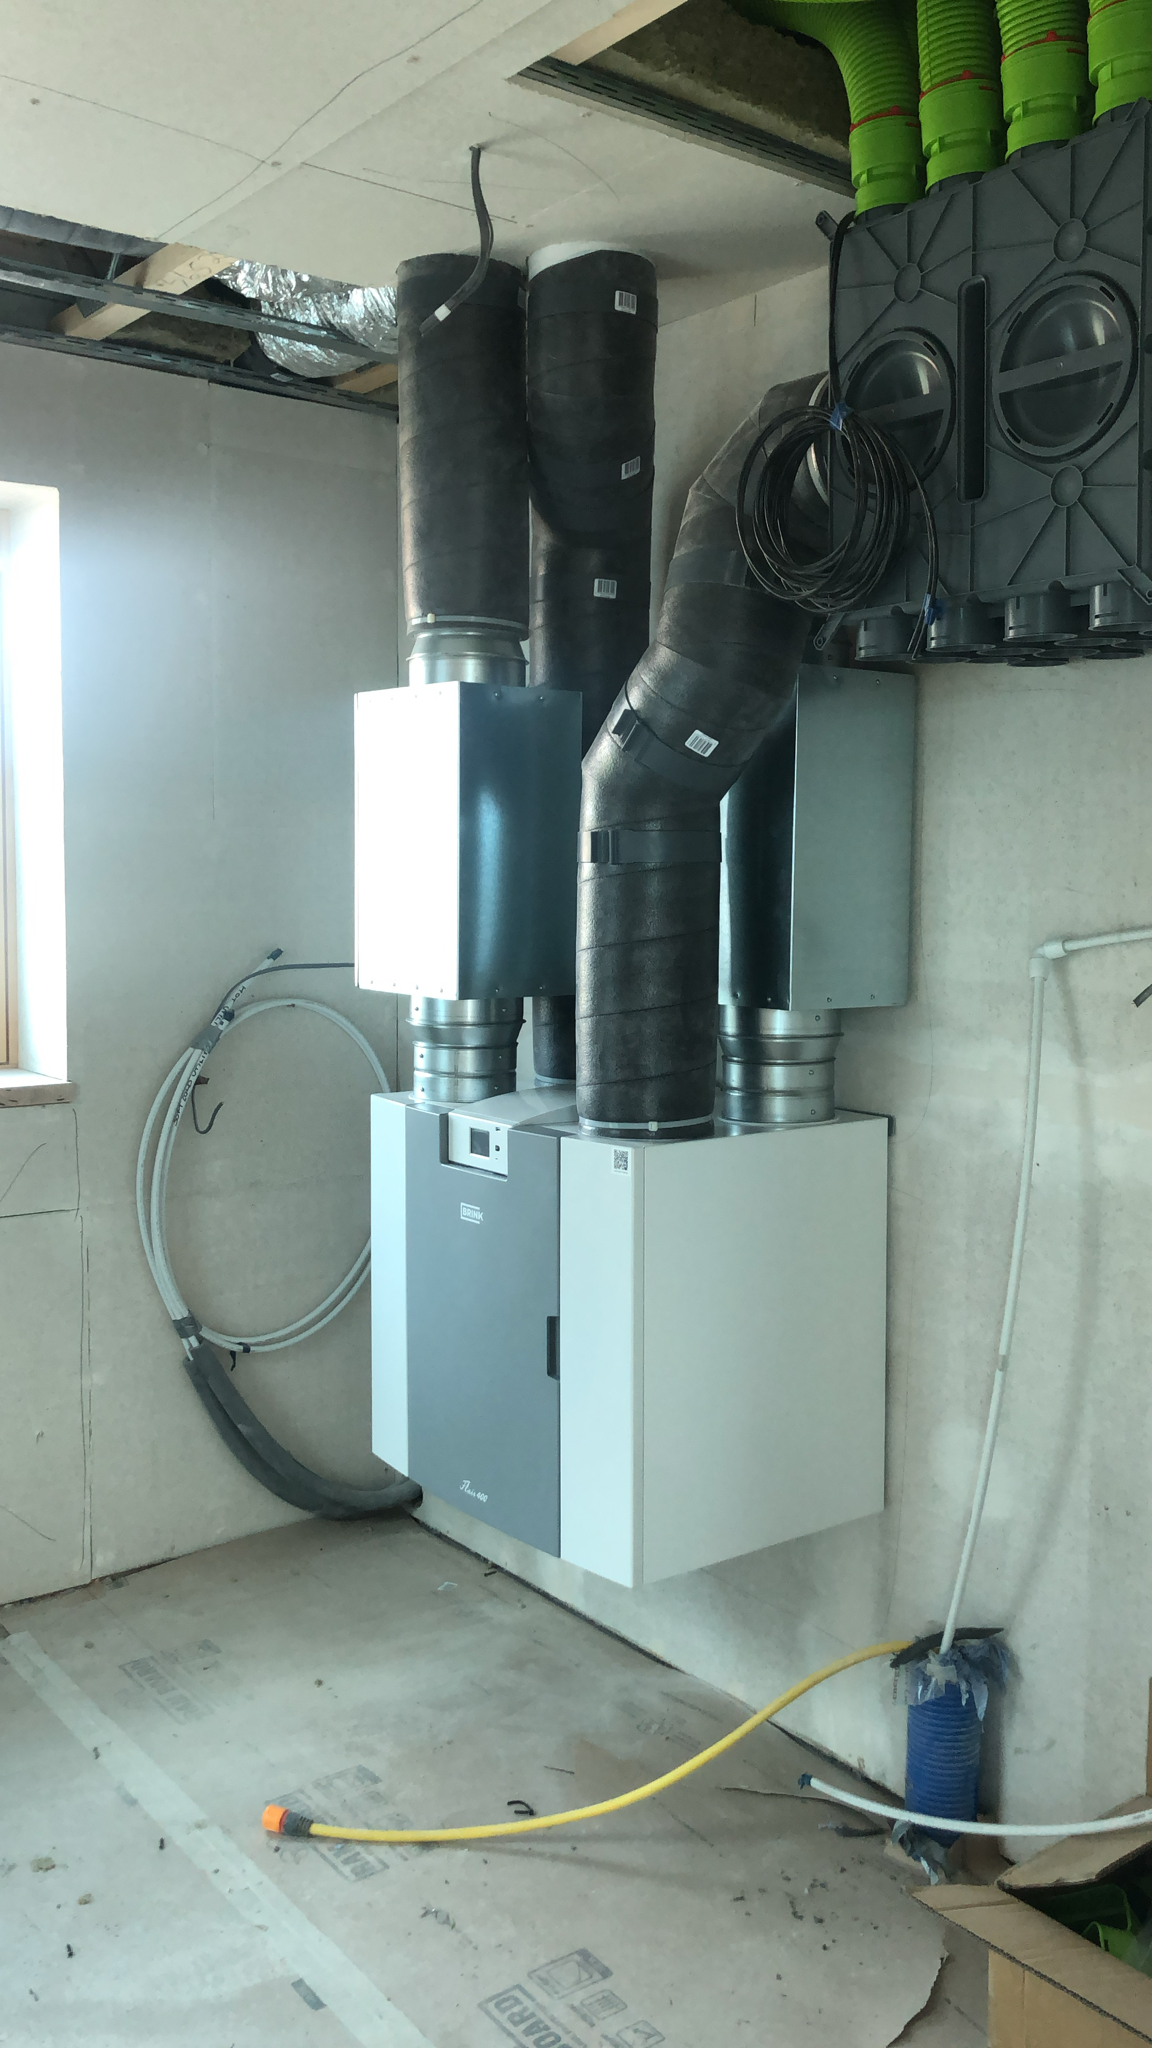
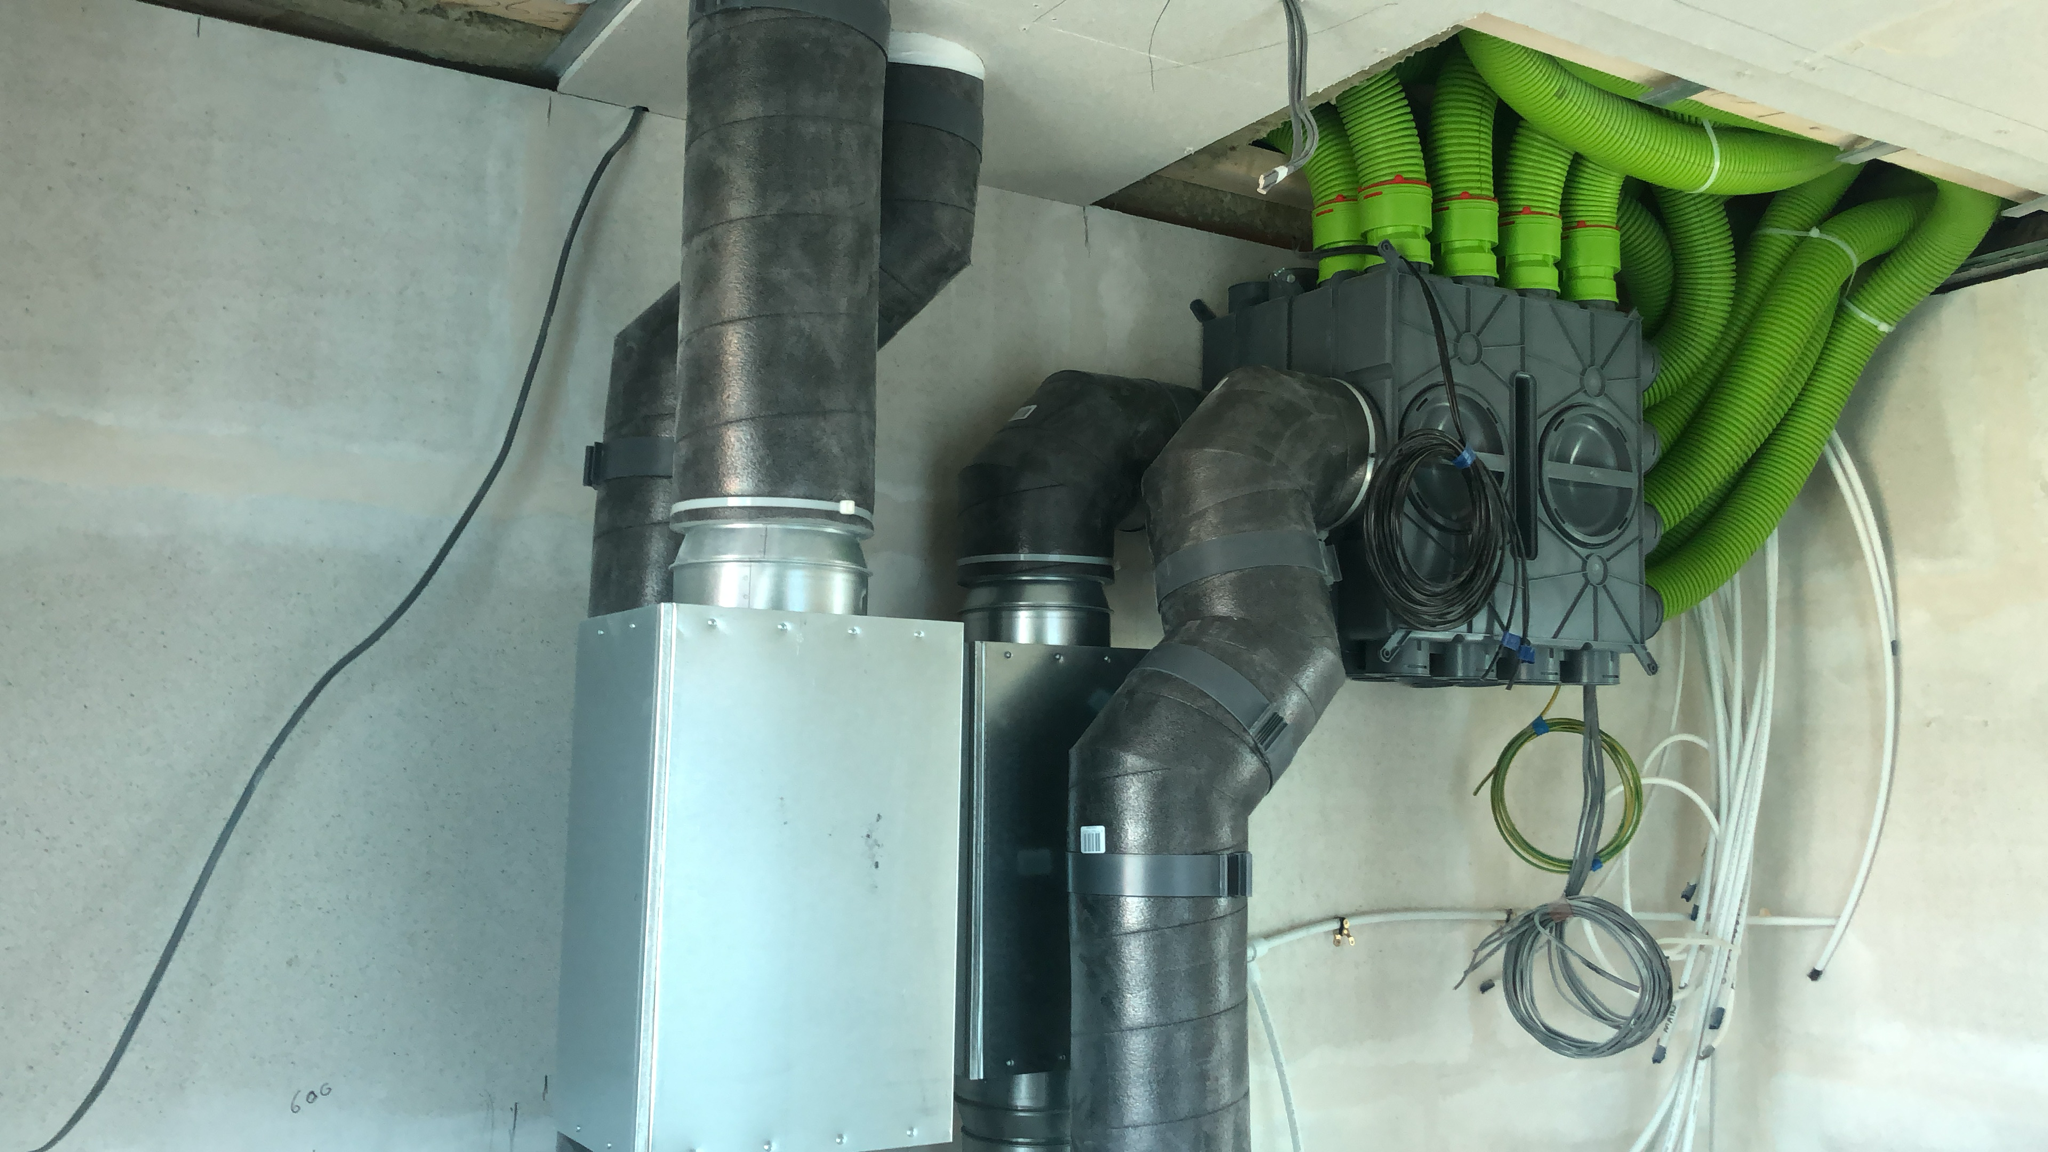
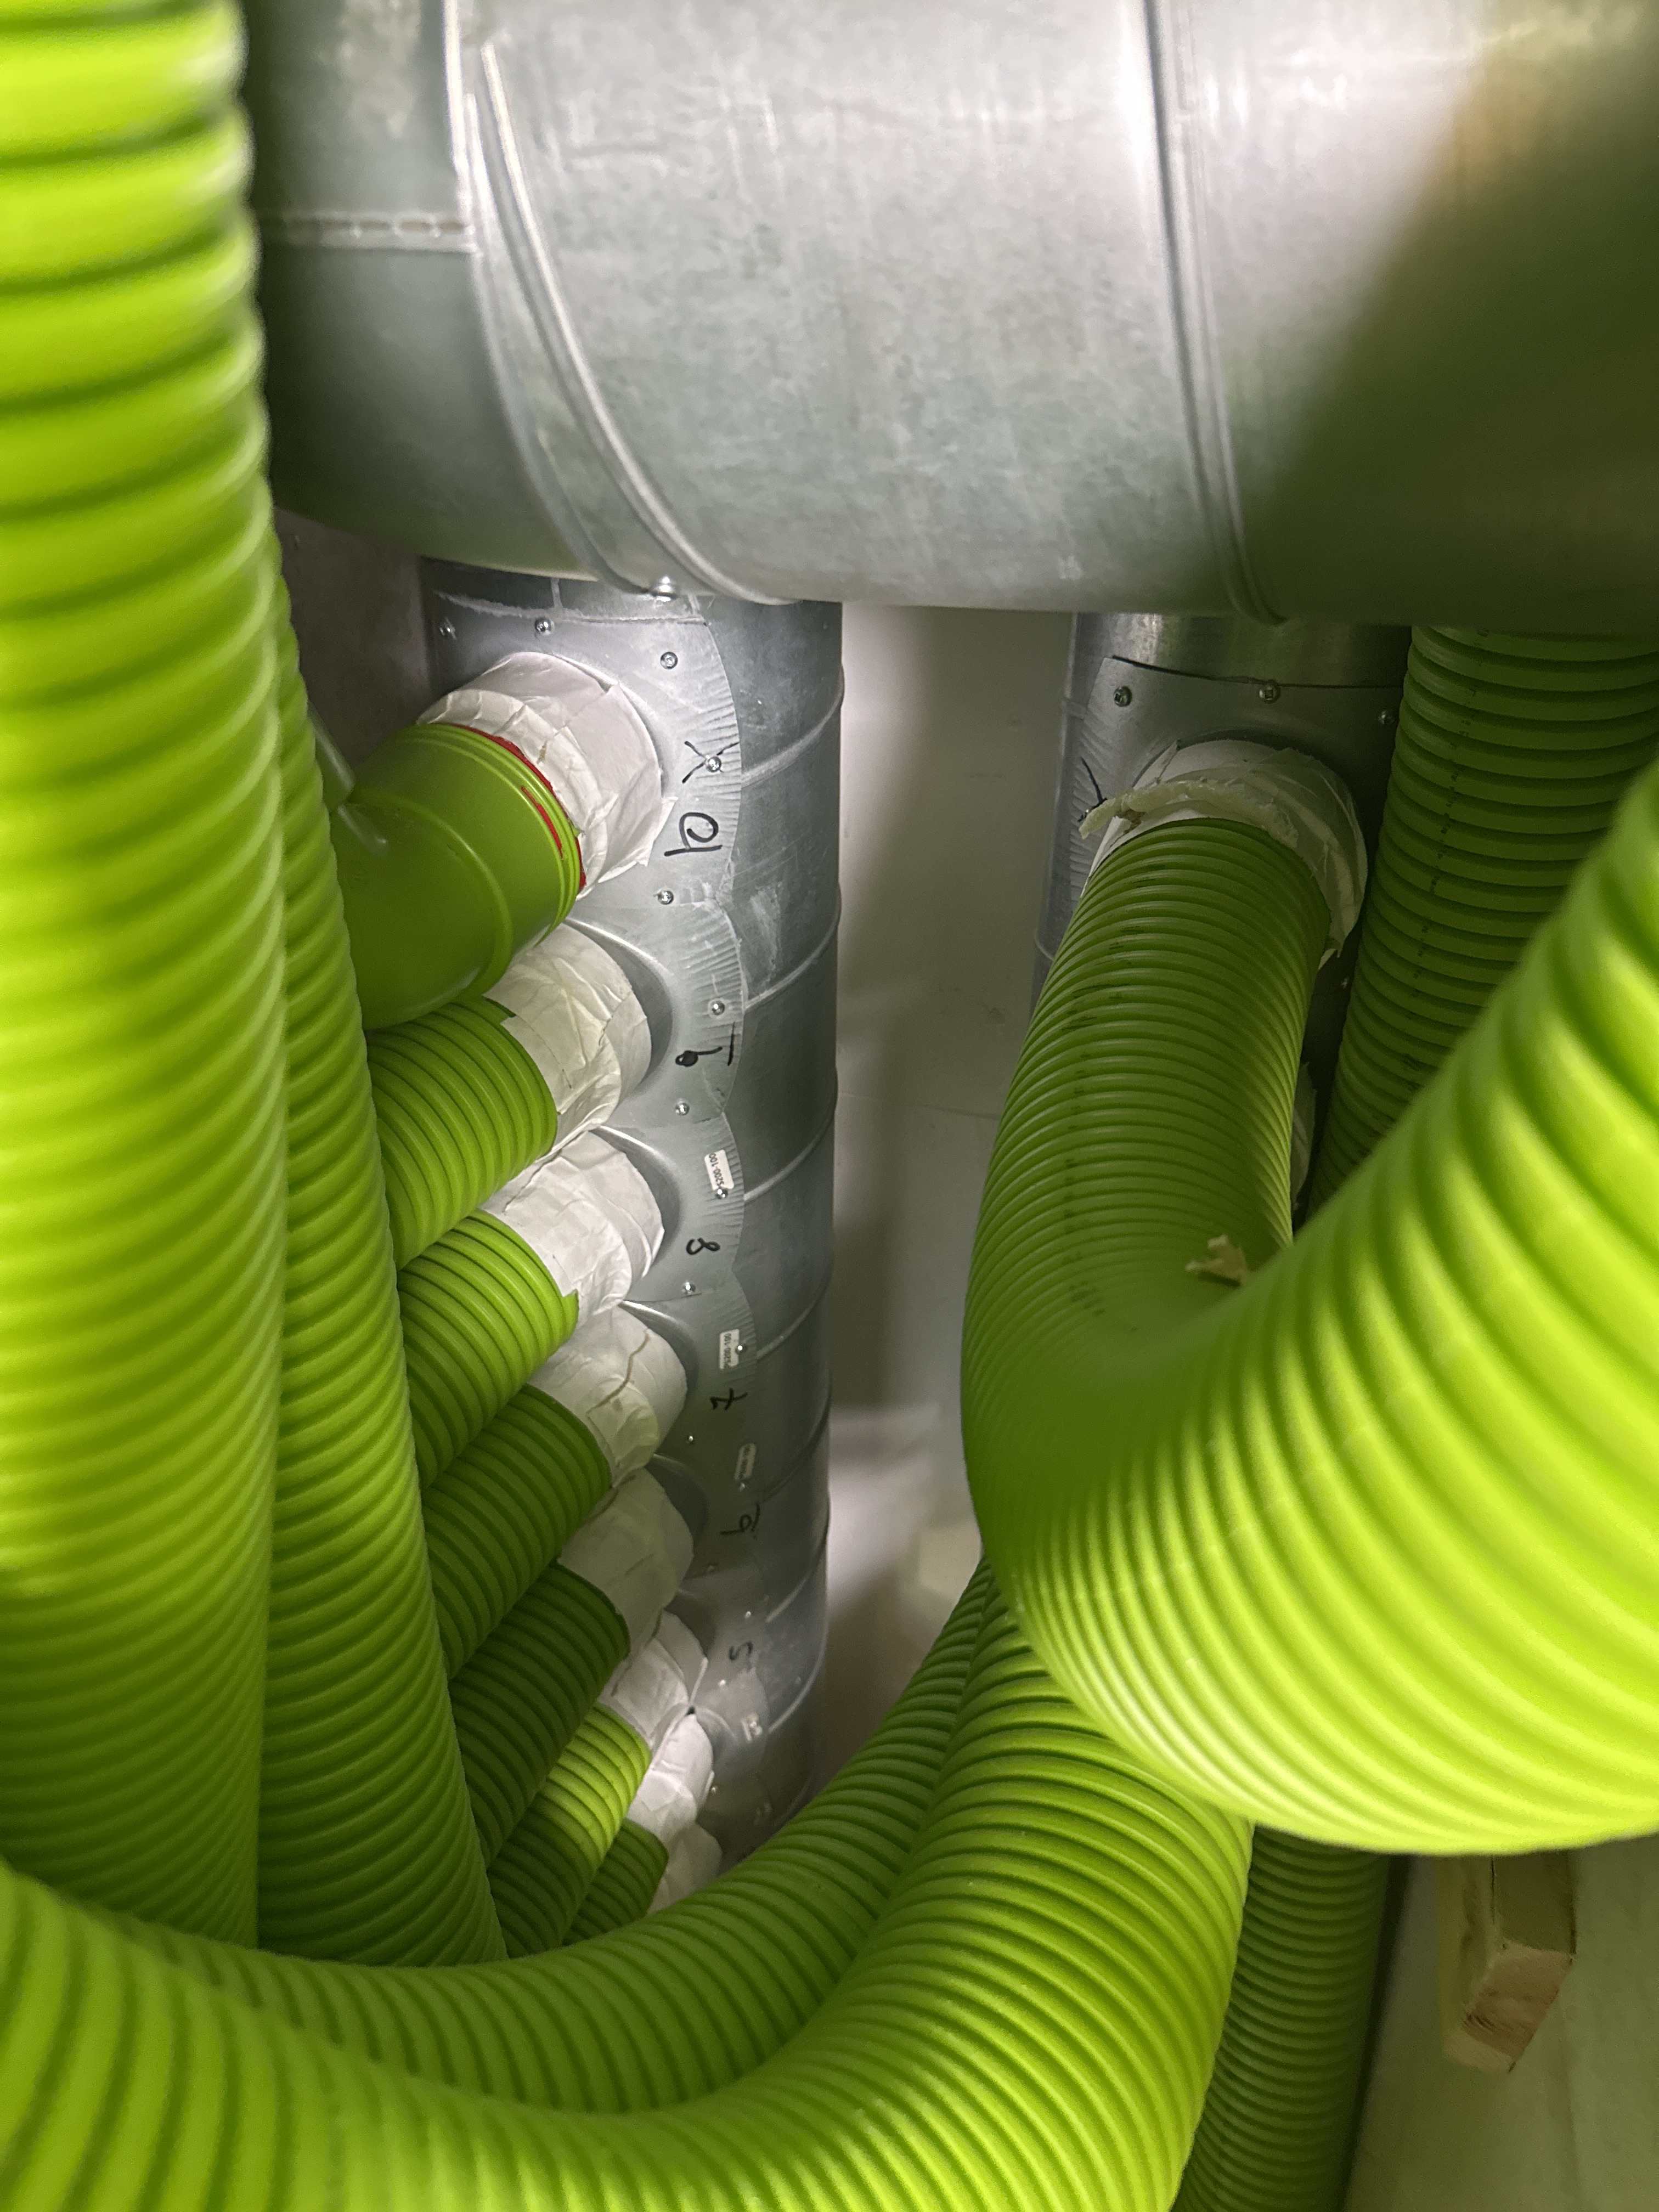
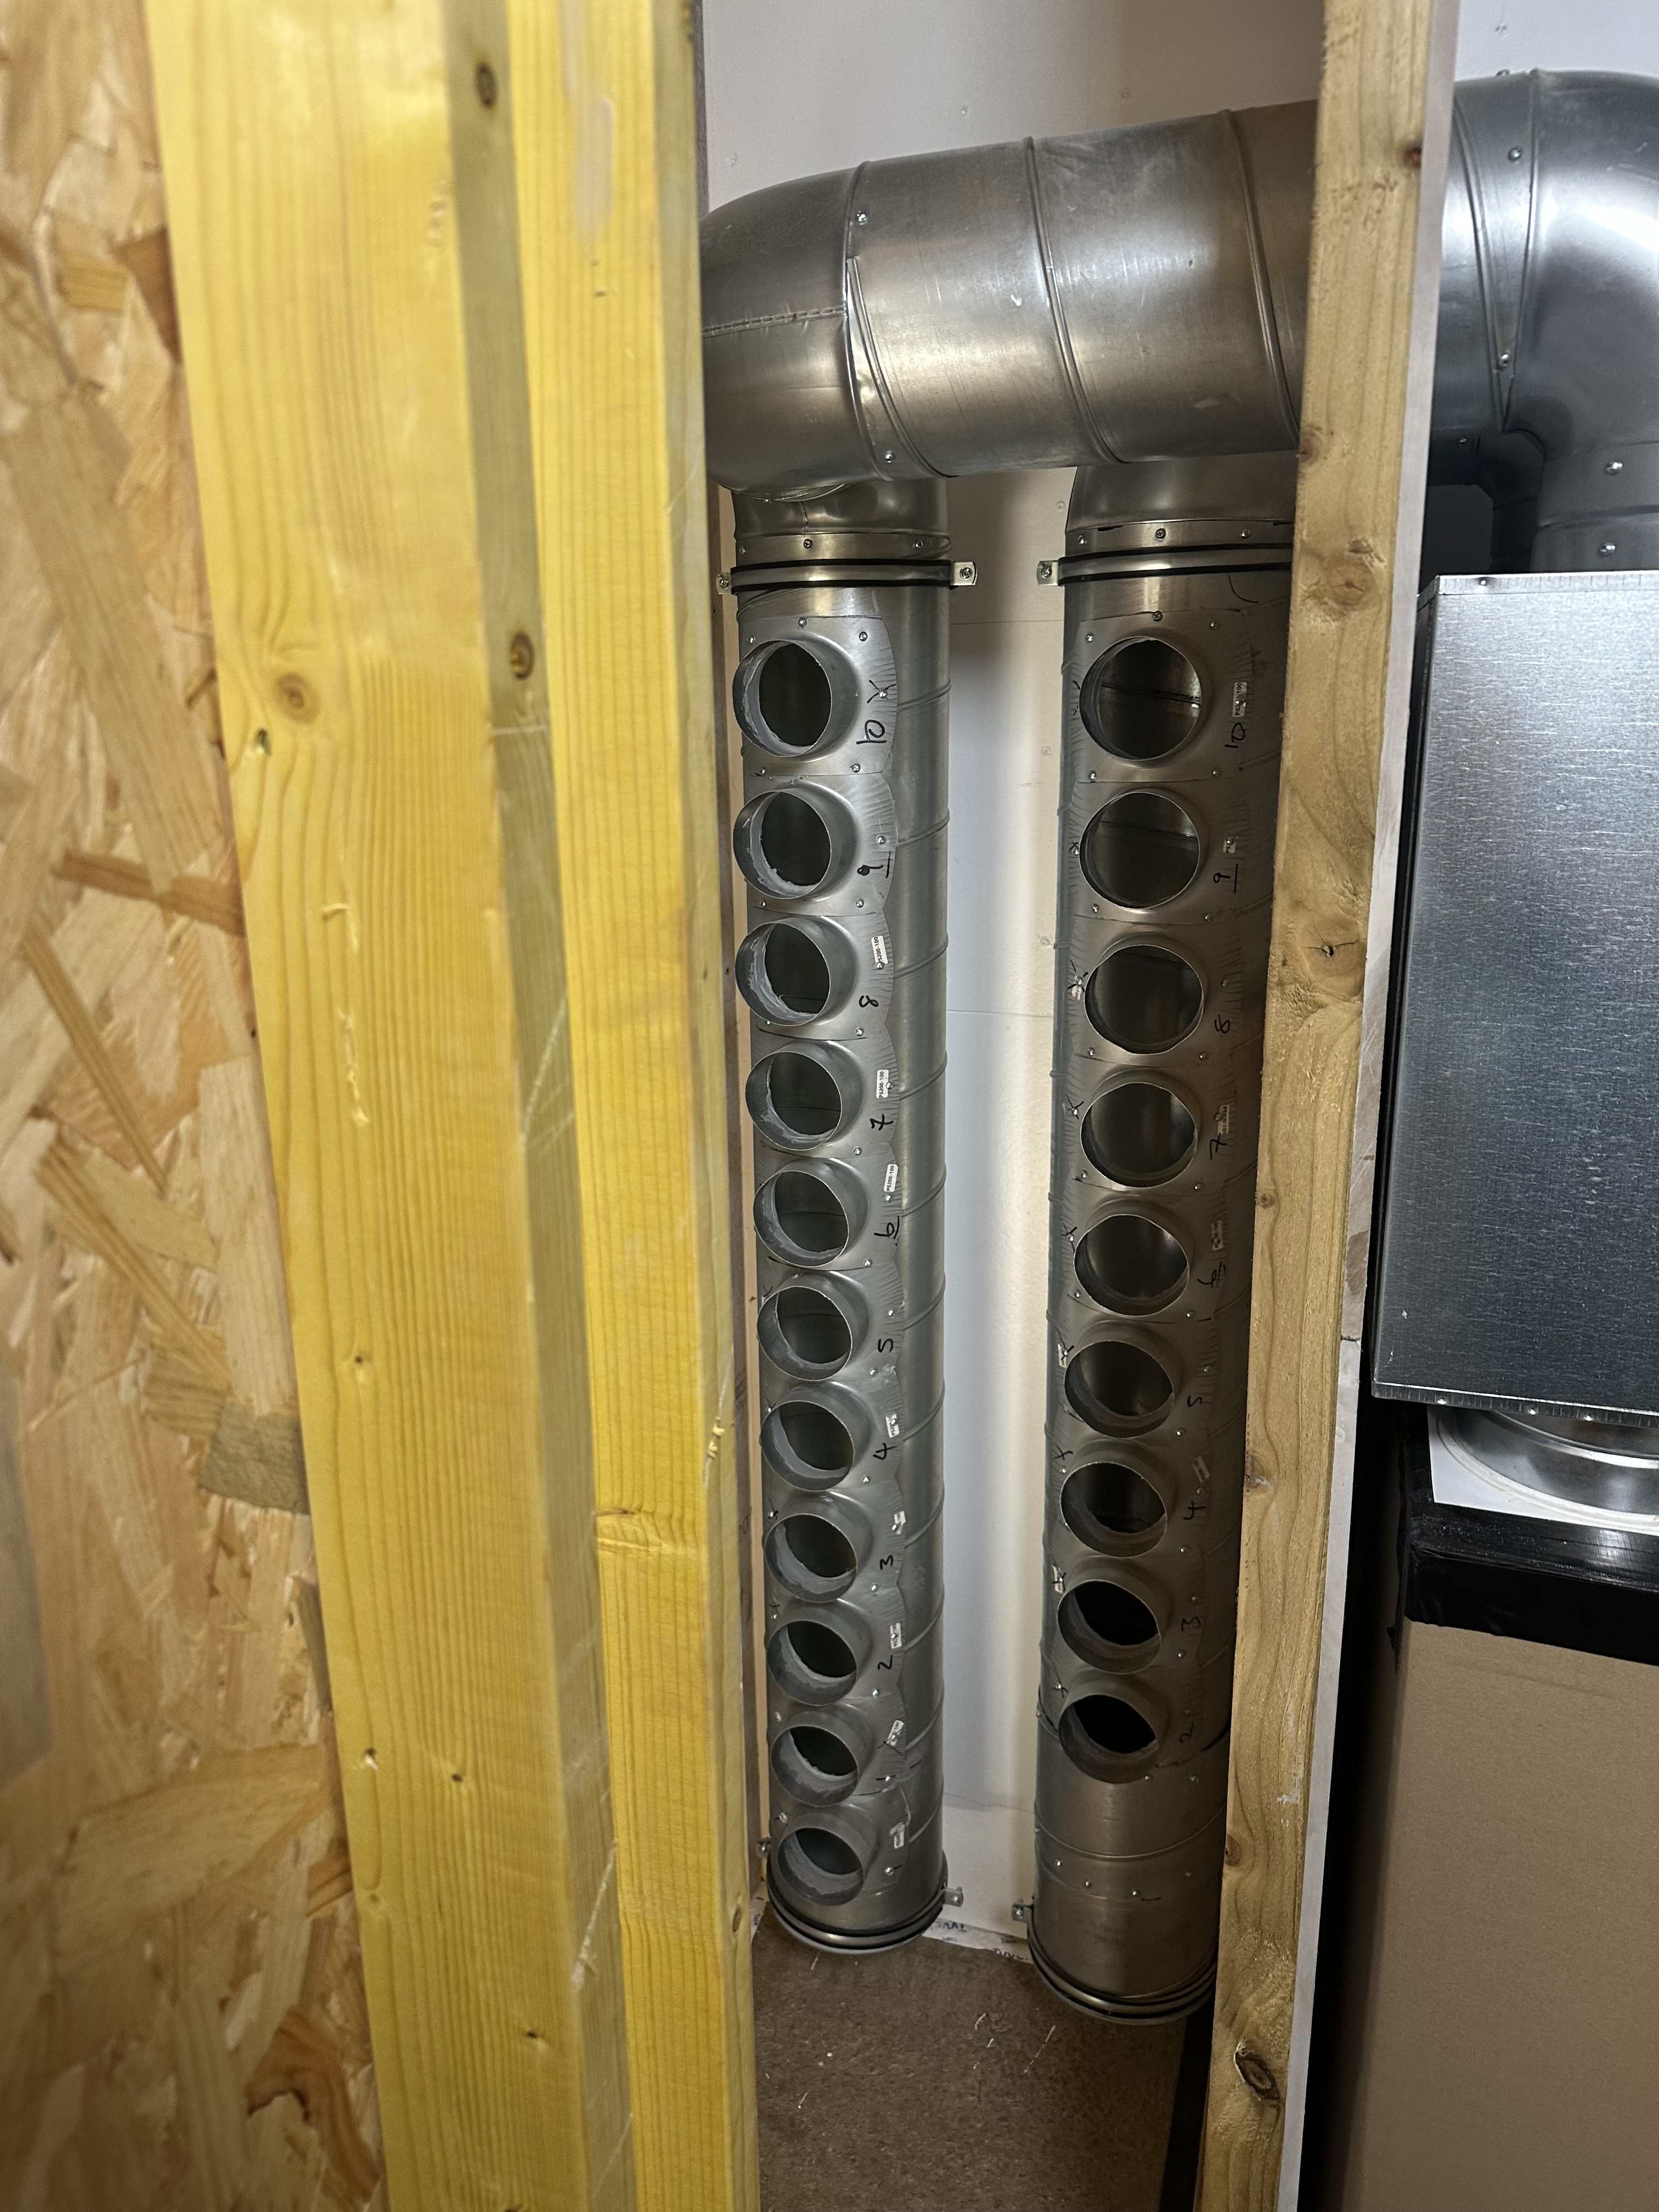
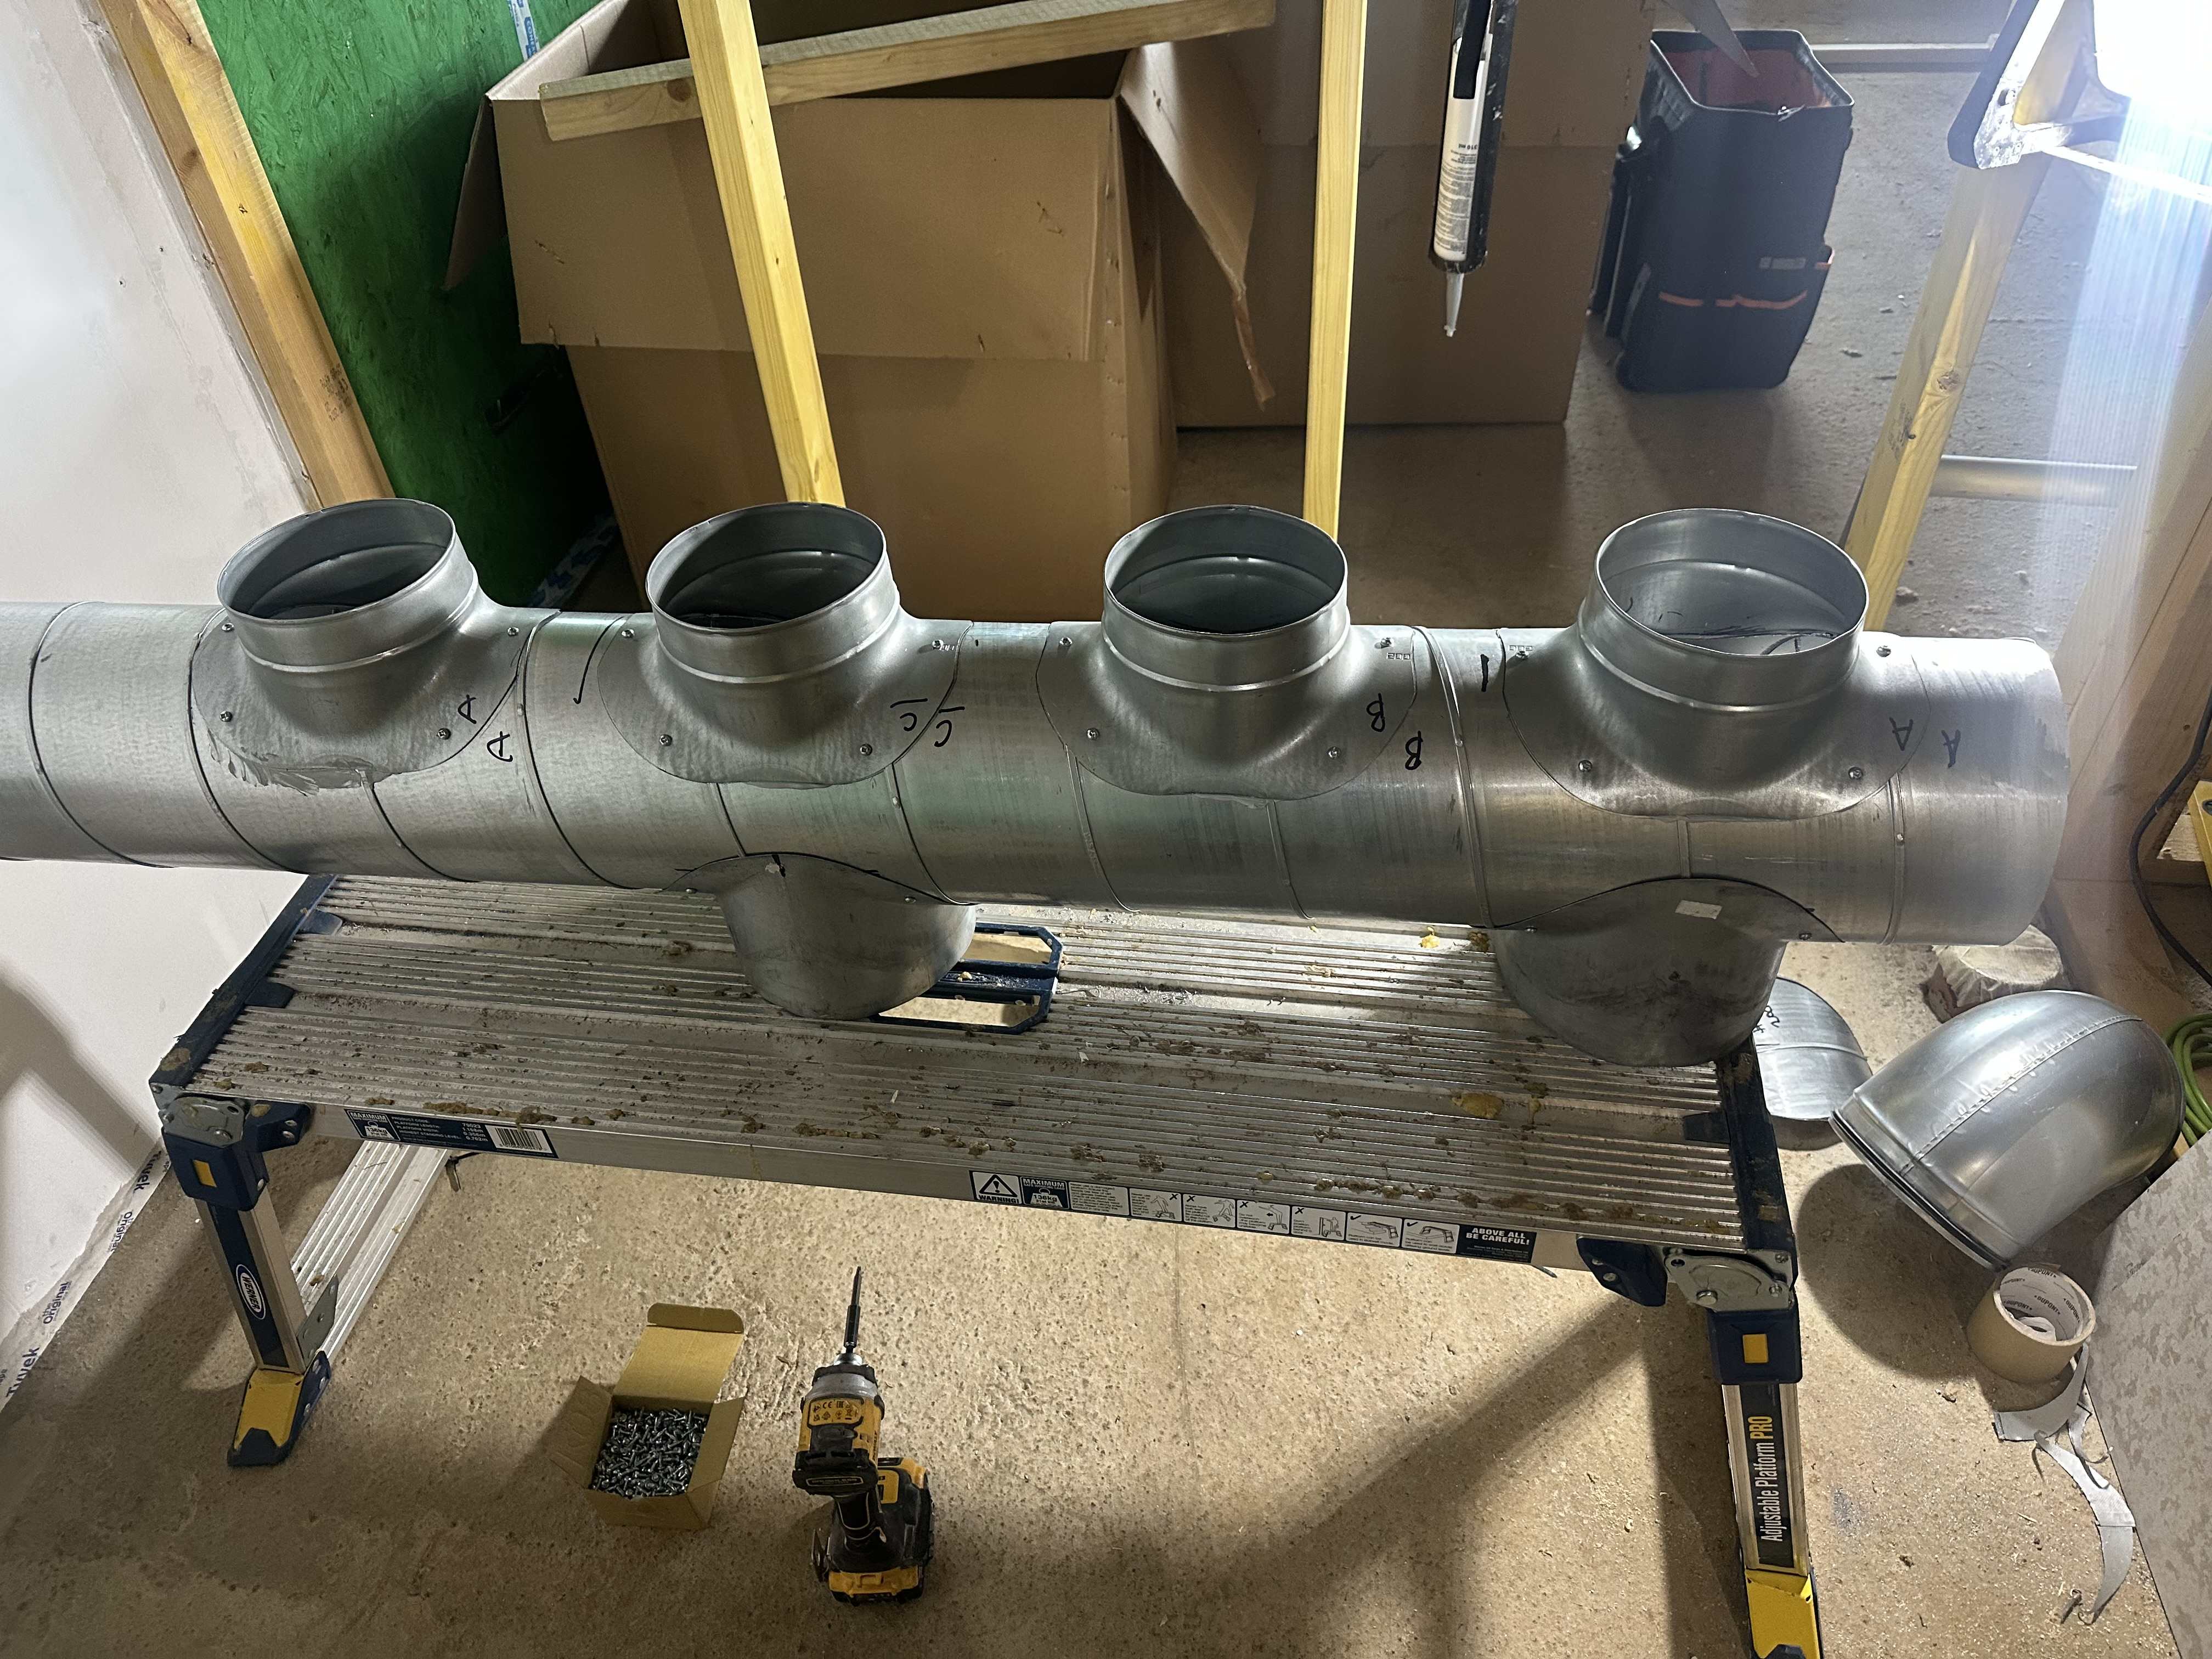
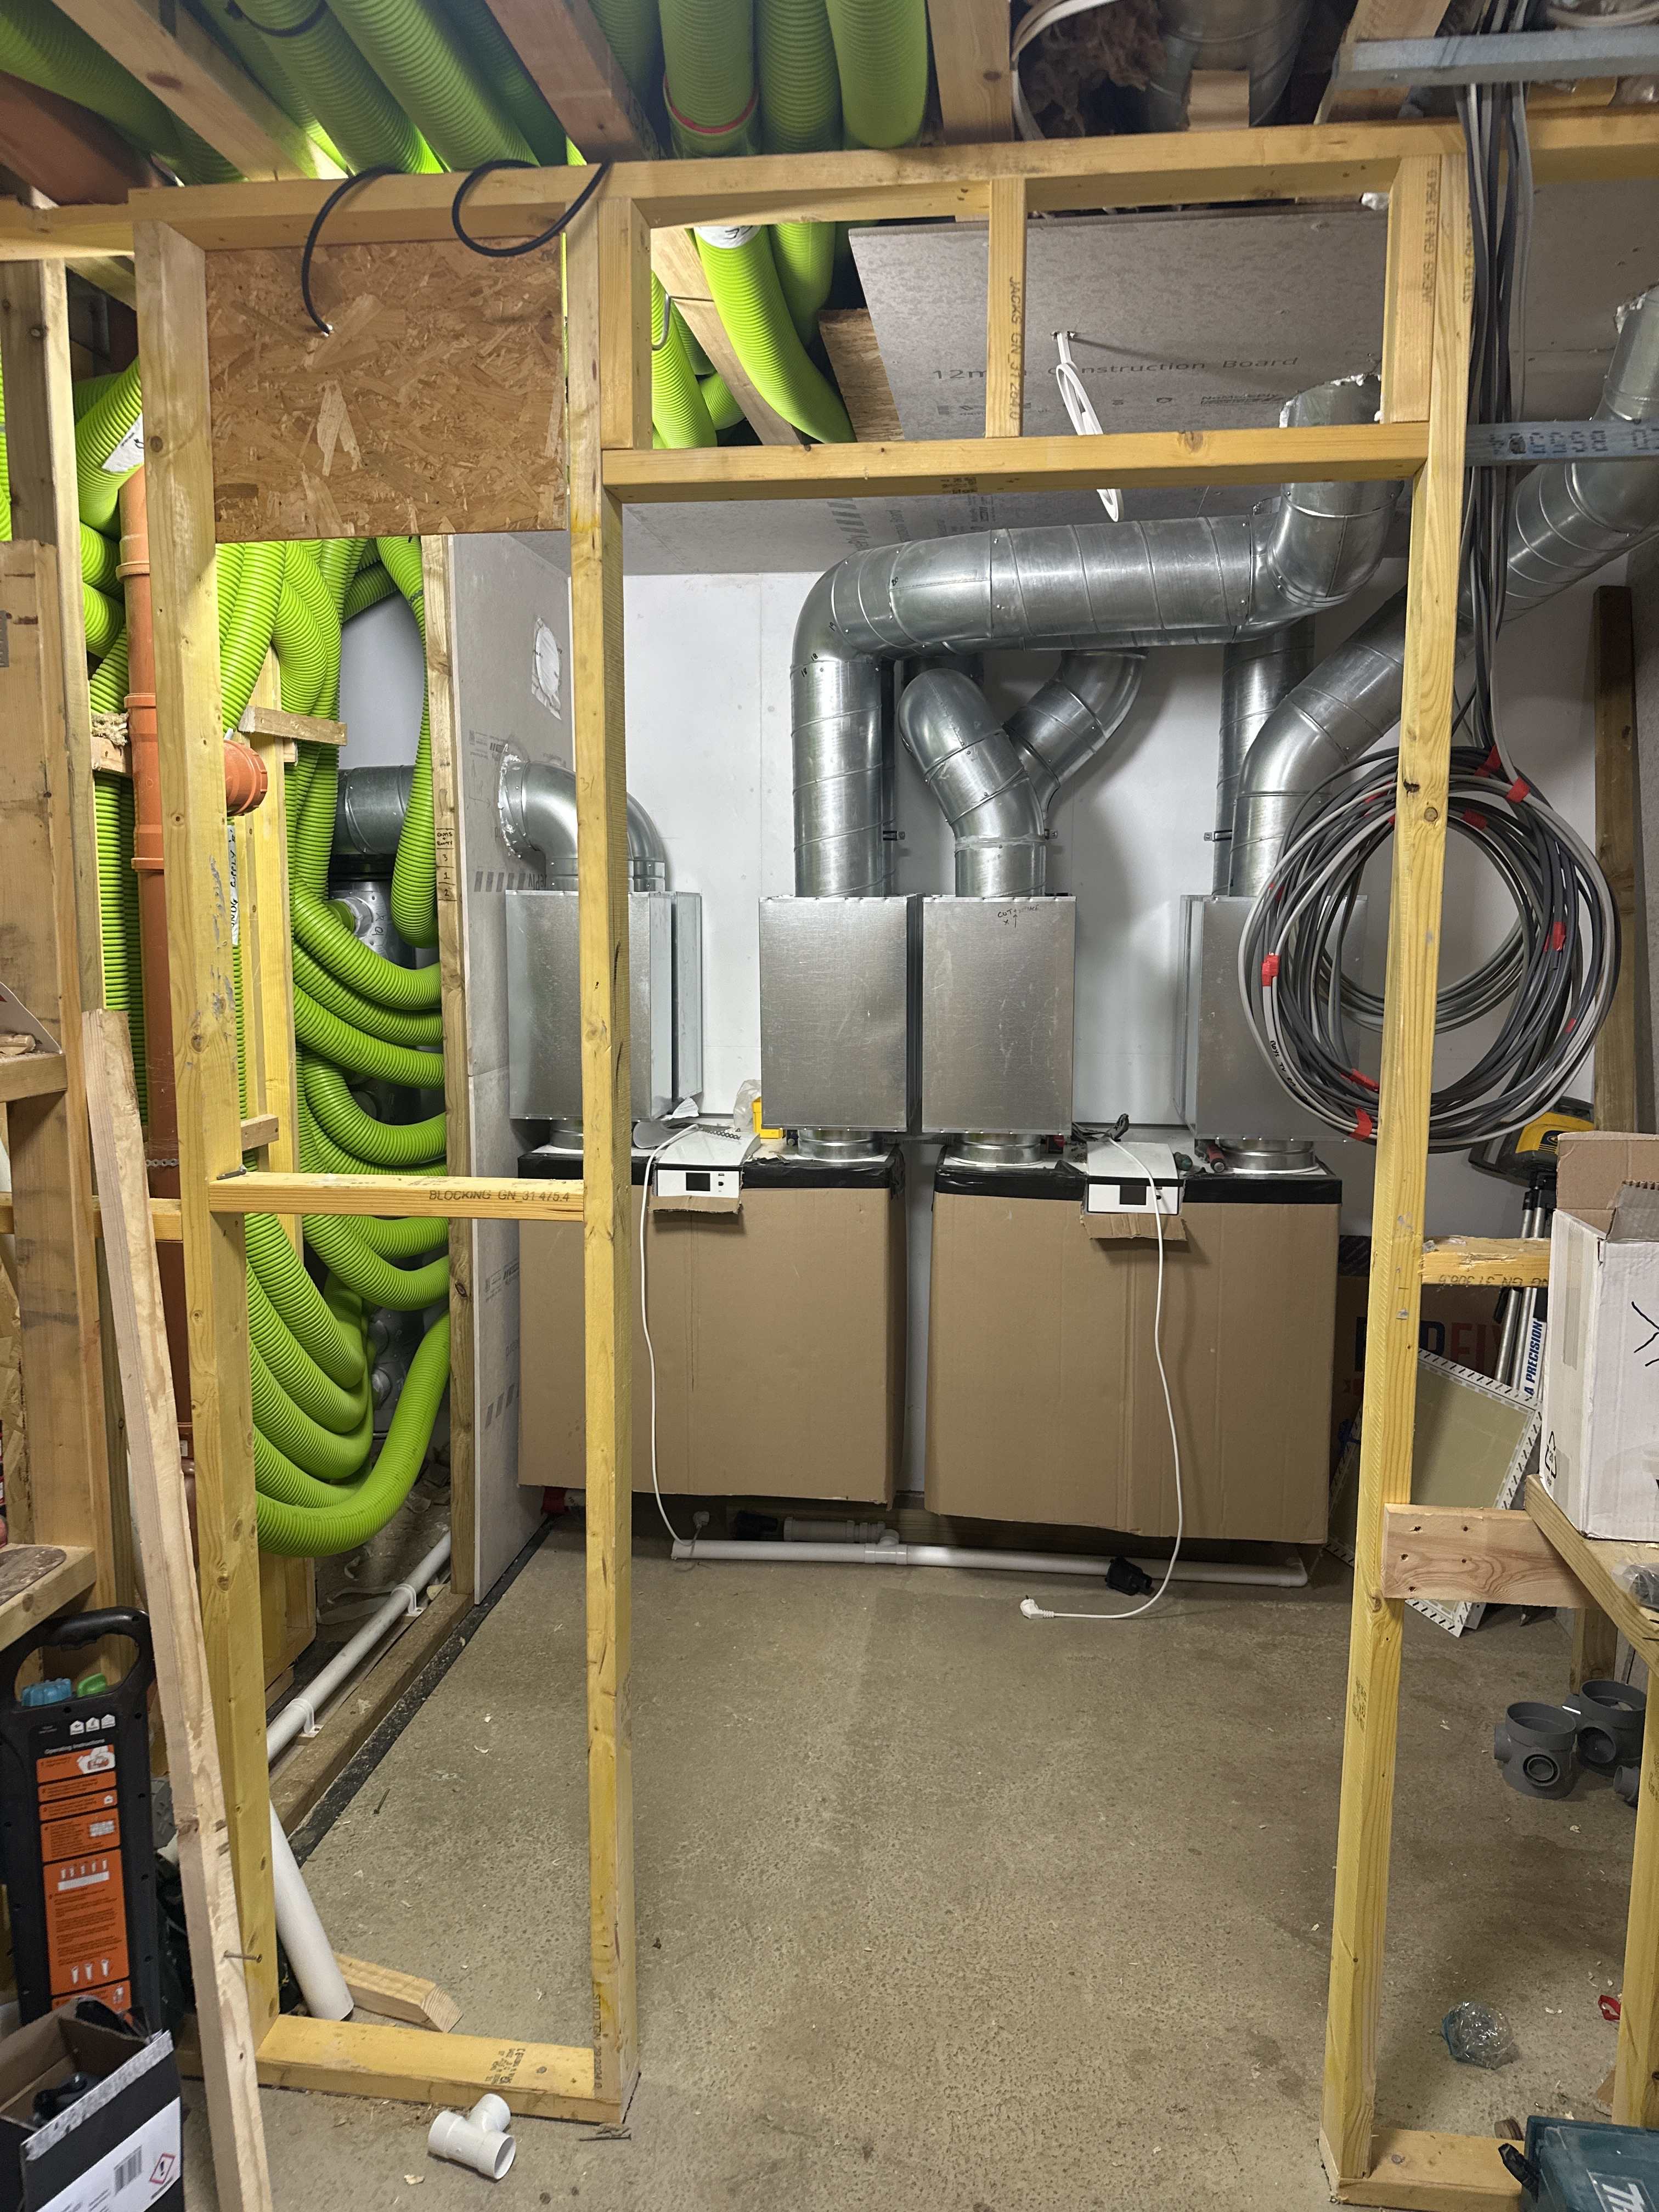
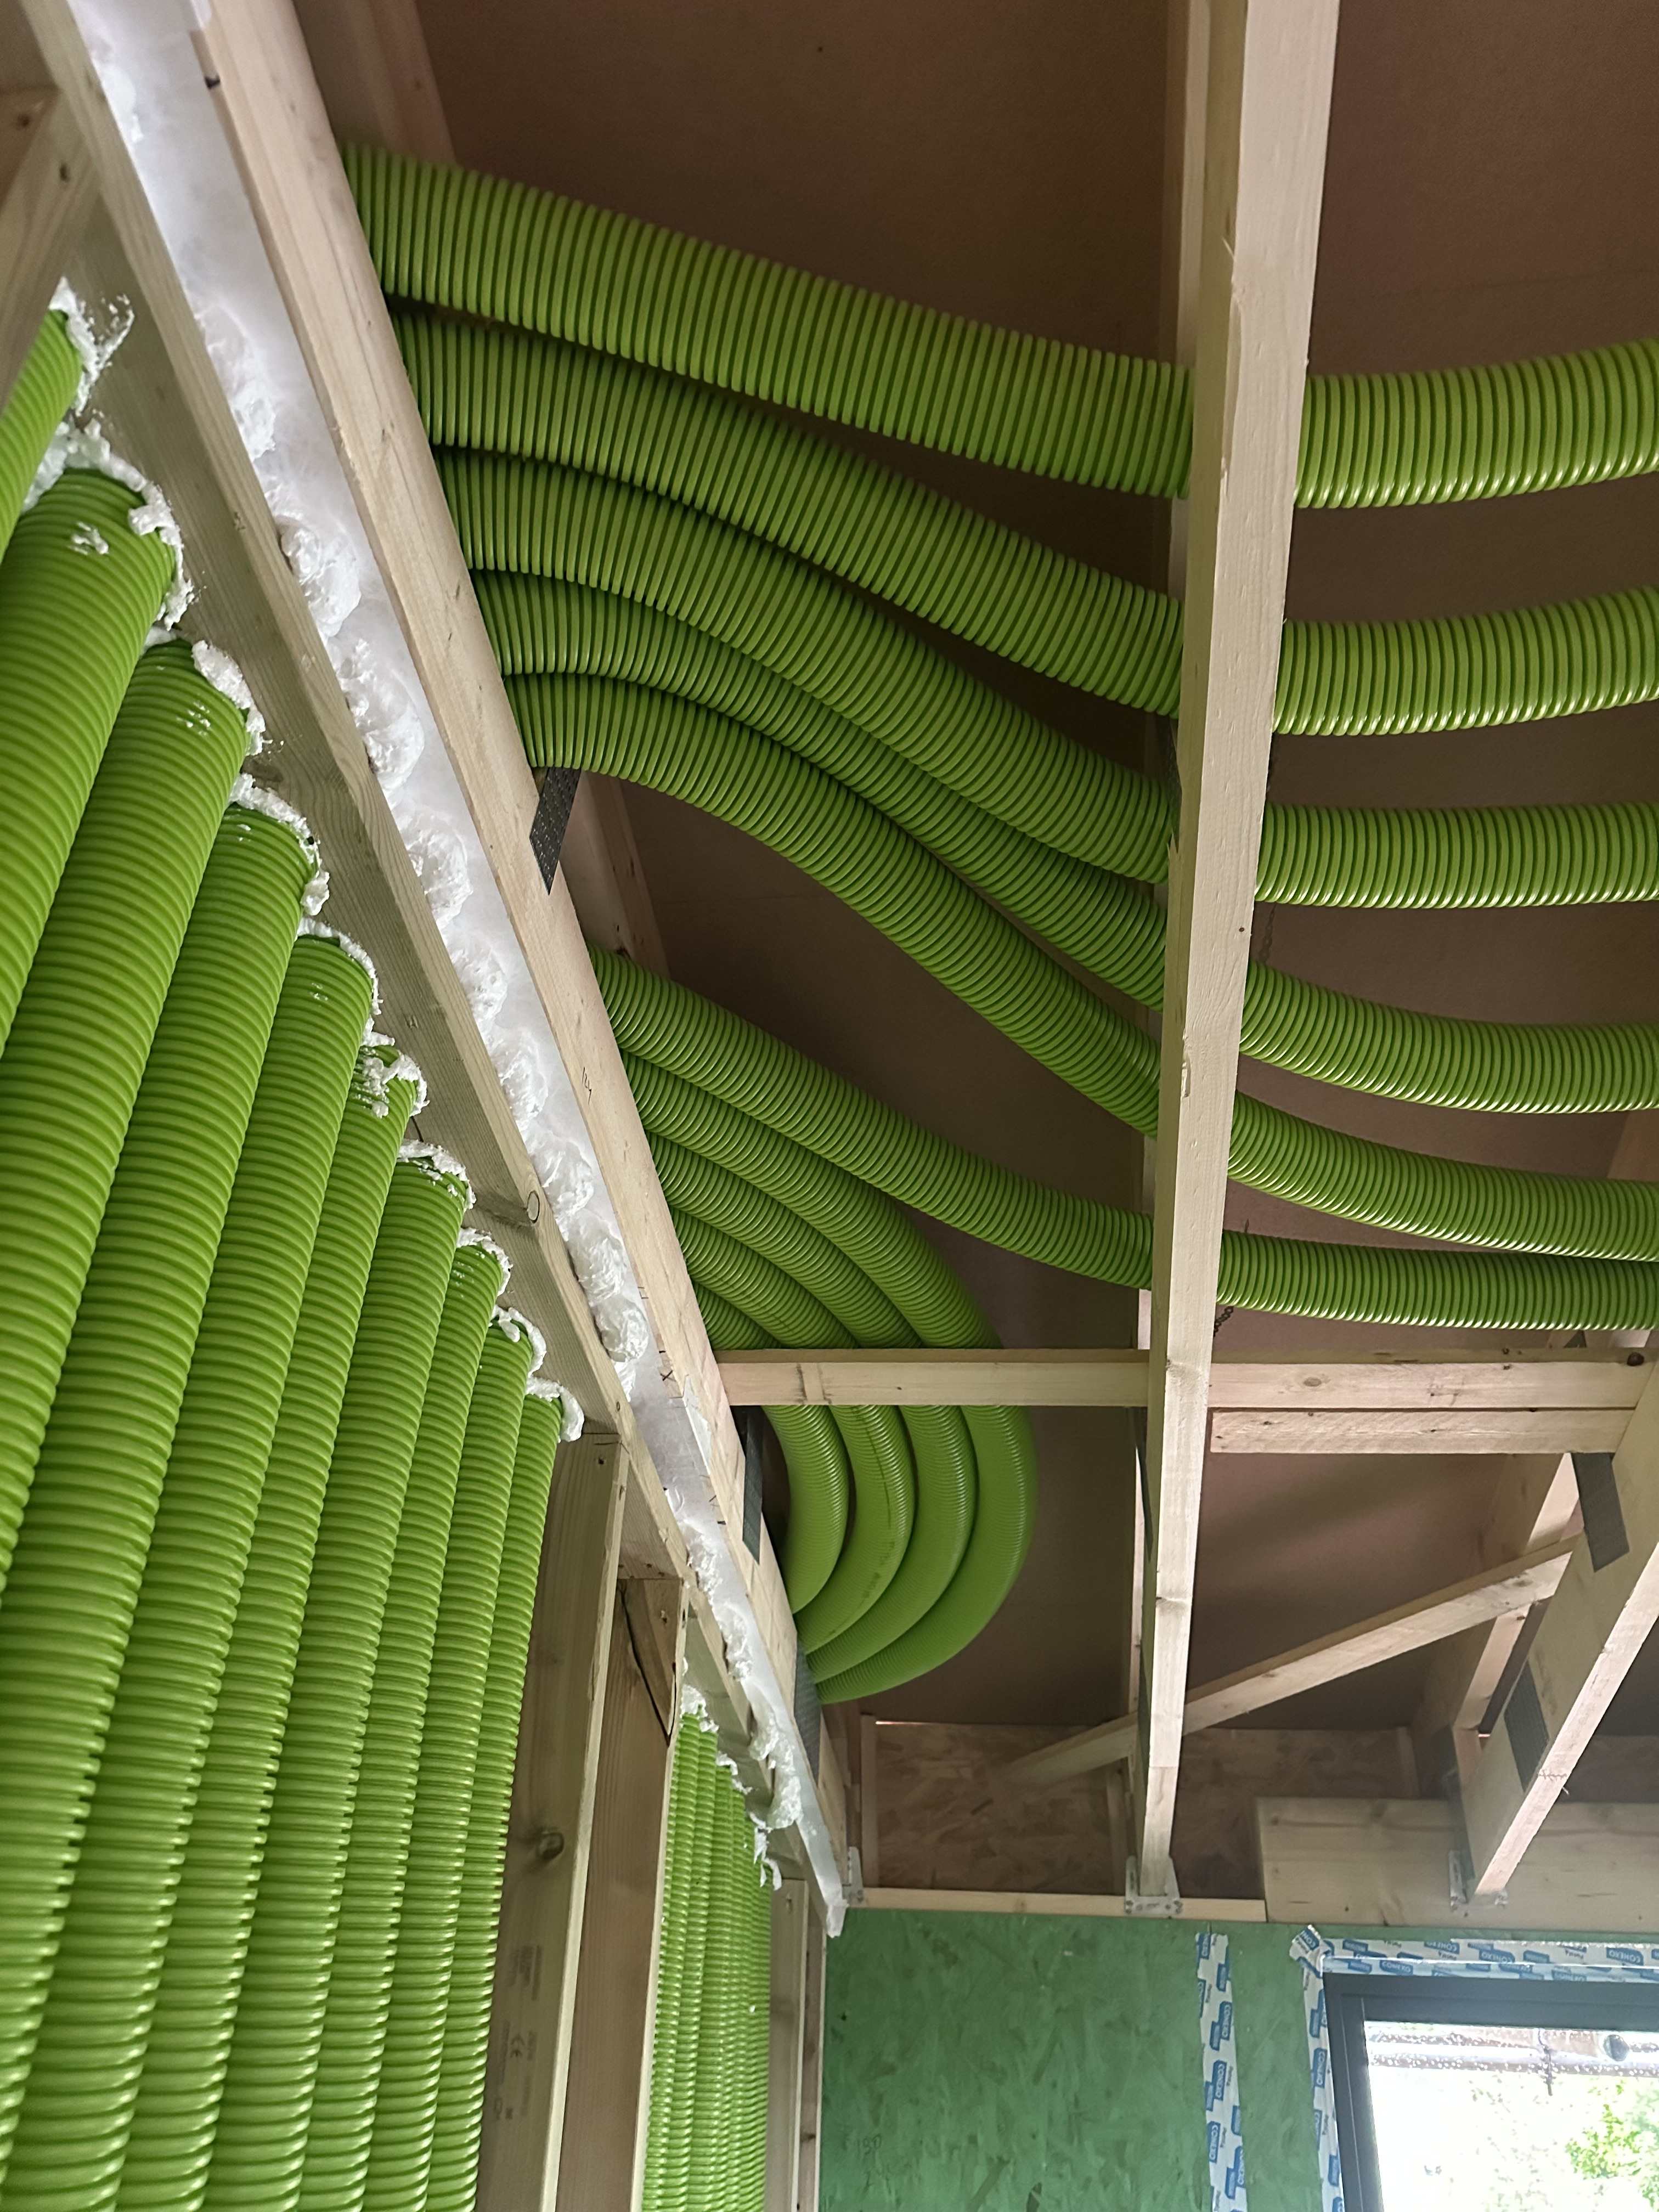
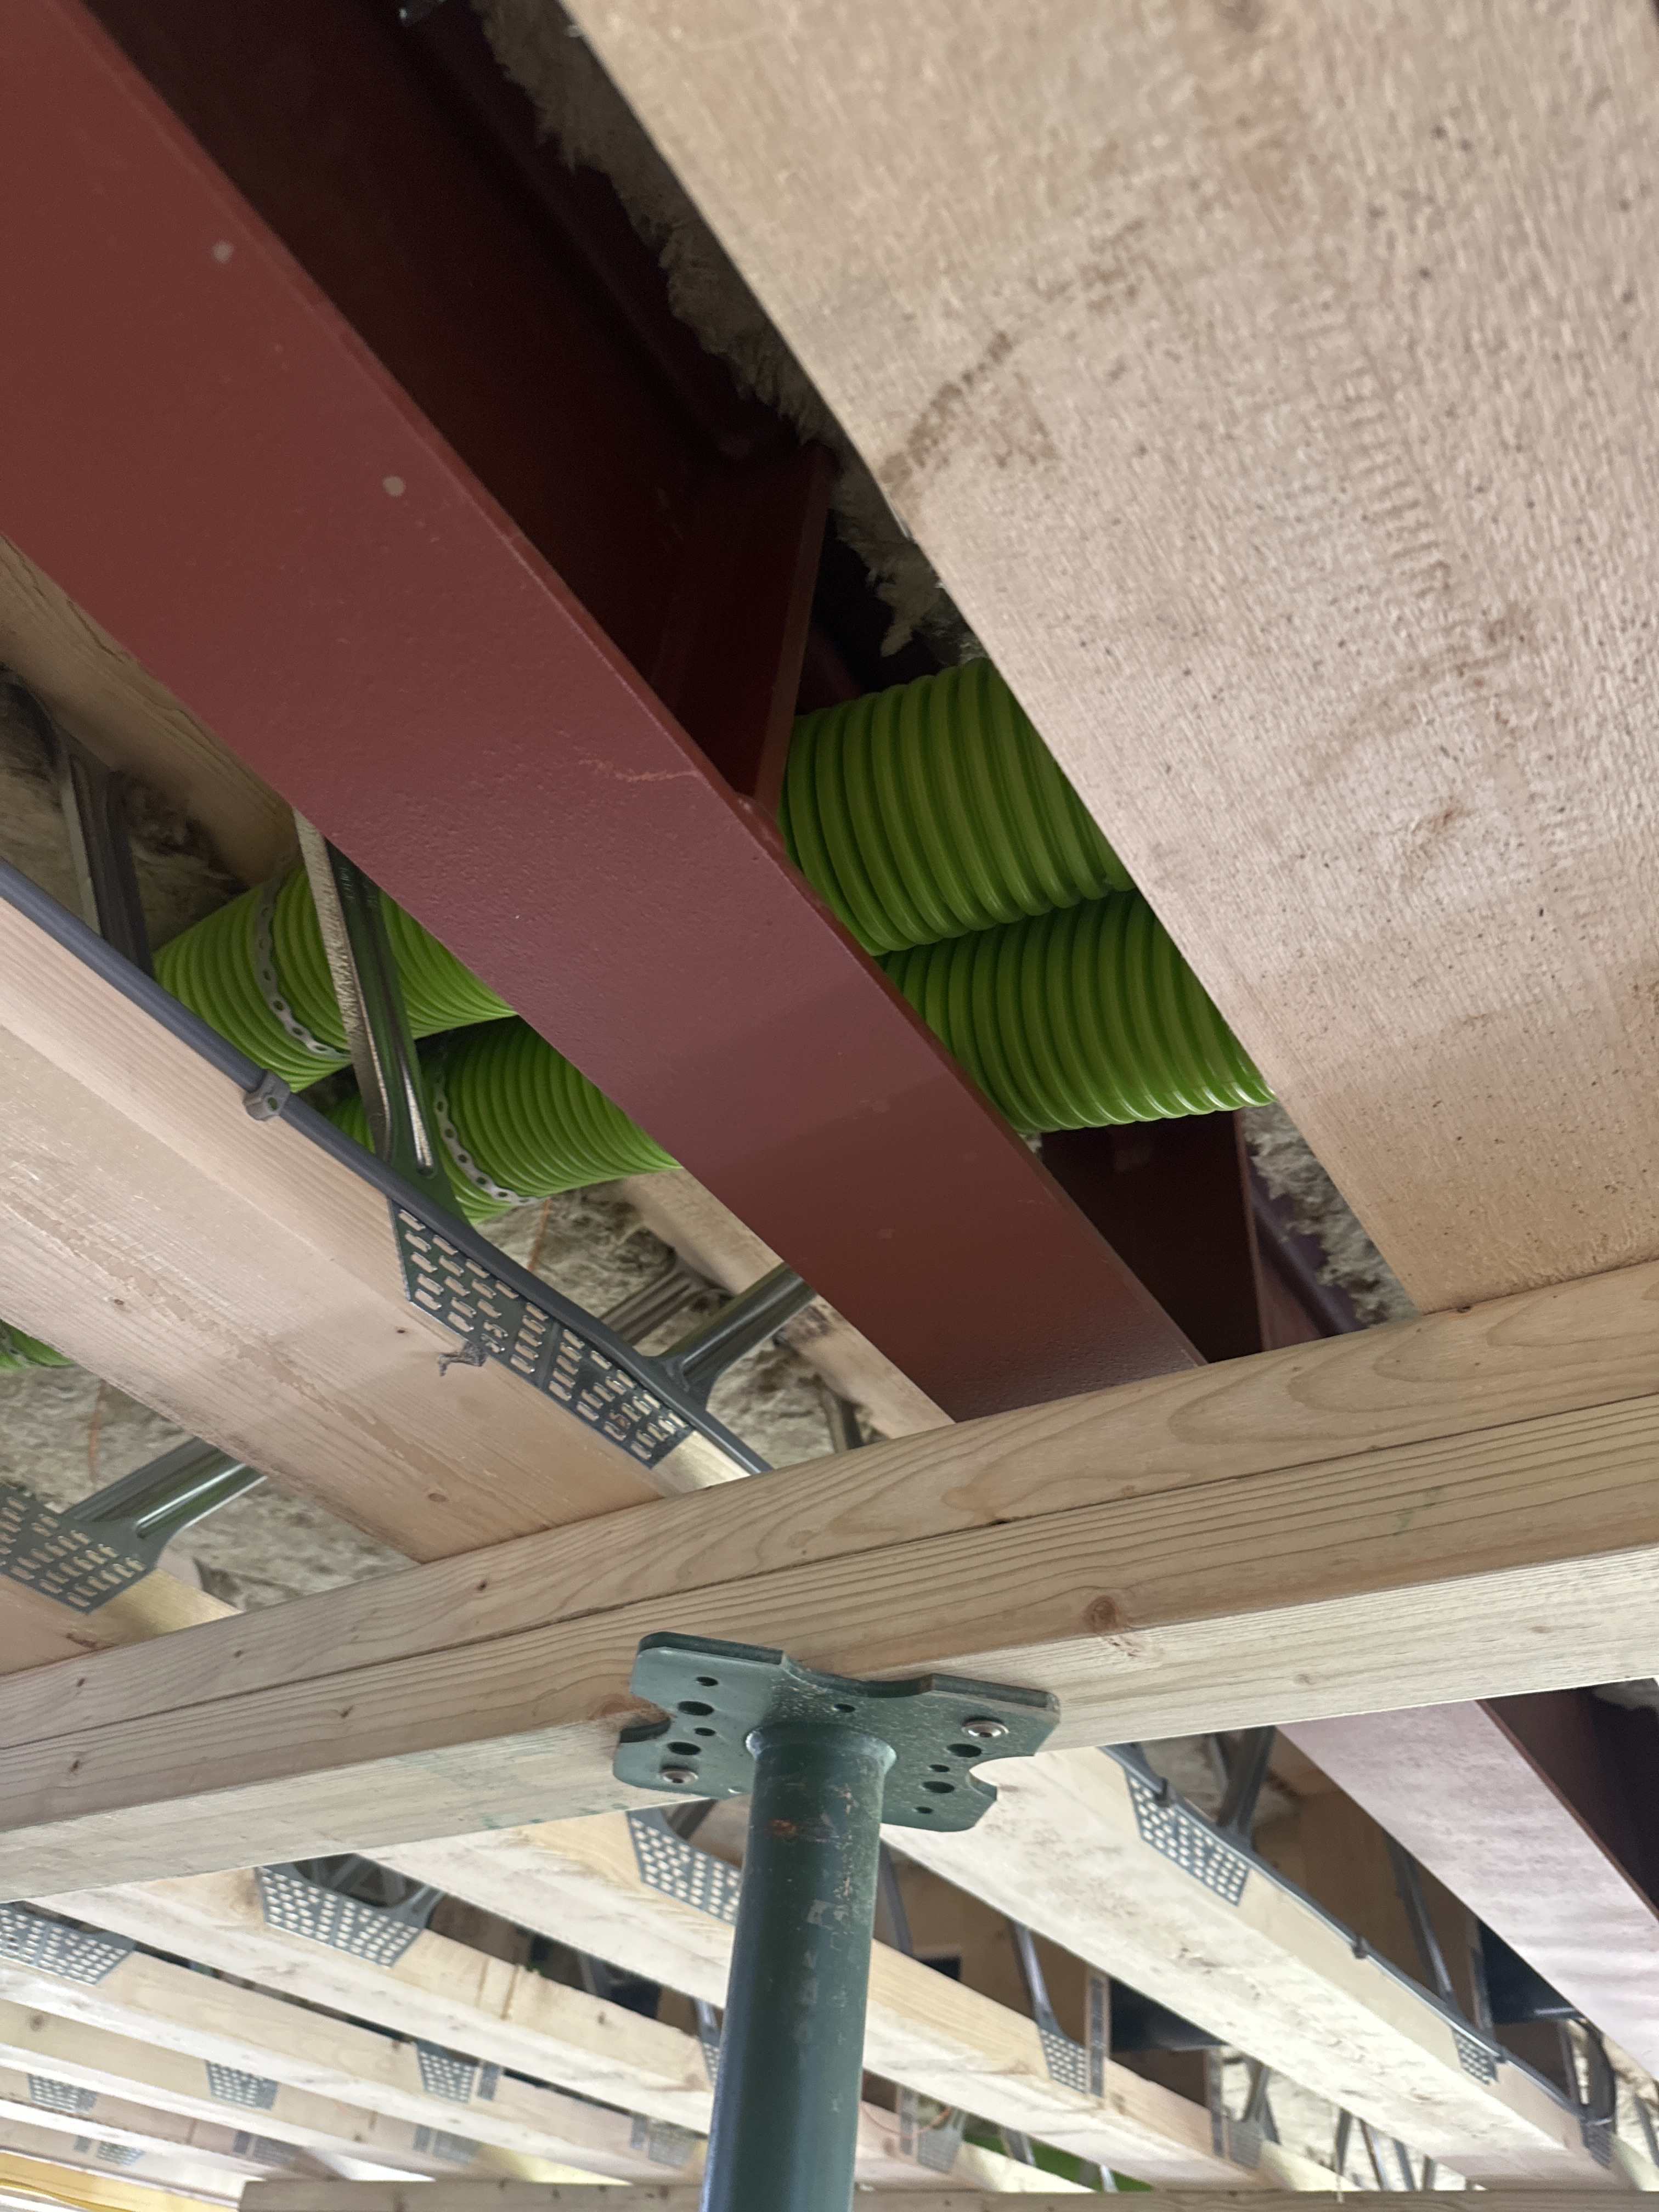
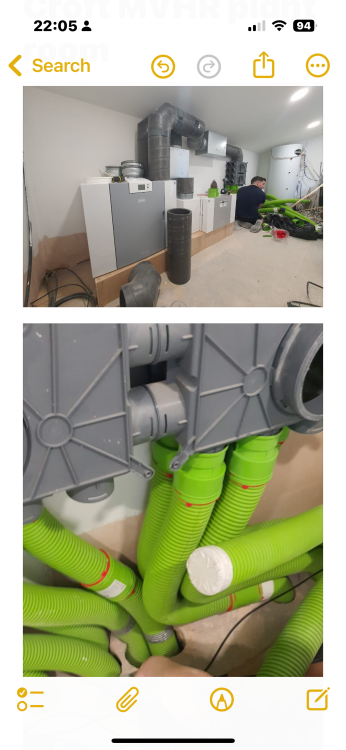
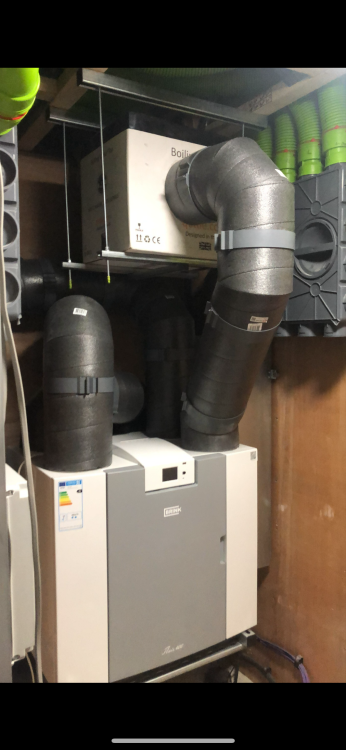
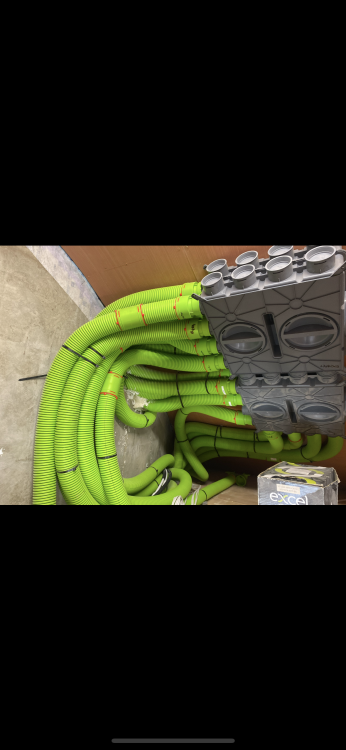
Nothing whatsoever wrong, if they fit in the space you have. We had to preserve space here for the mist system box-o-tricks, 19” rack for LAN, 3ph CU, (and more), in that one plant room, ergo I had to get inventive and make space. The original design had the 24 port Ubbink manifold boxes specified, but it meant encroaching into the adjacent coats / boots room which wasn’t going to fly. Happy to use them where you can though! And you can get bespoke box manifolds made up to fit in the posi joists too: I offer up the bare boxes, mark the metal webs onto the side of the box with a sharpie, then drill and fit the top hats to take the 92mm ducting. IMO there’s a lot of real estate up there so why not utilise it vs lose GIA / have to make boxing in etc?
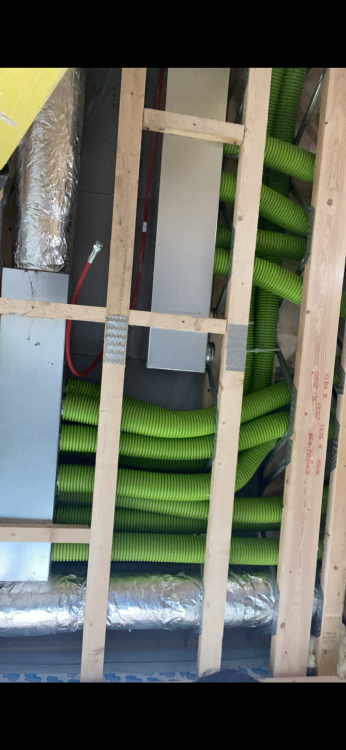
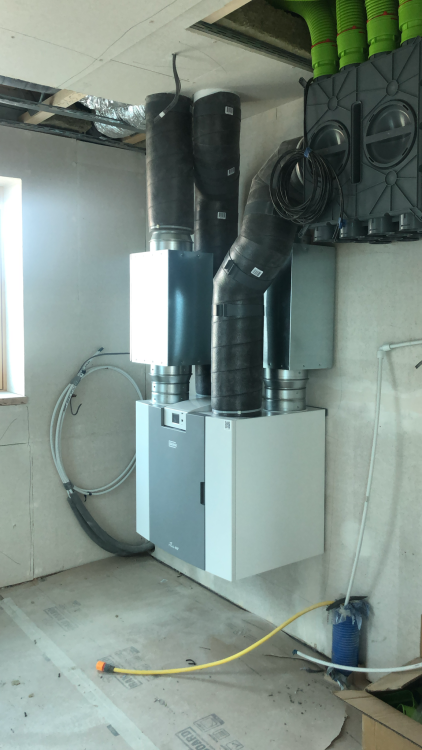
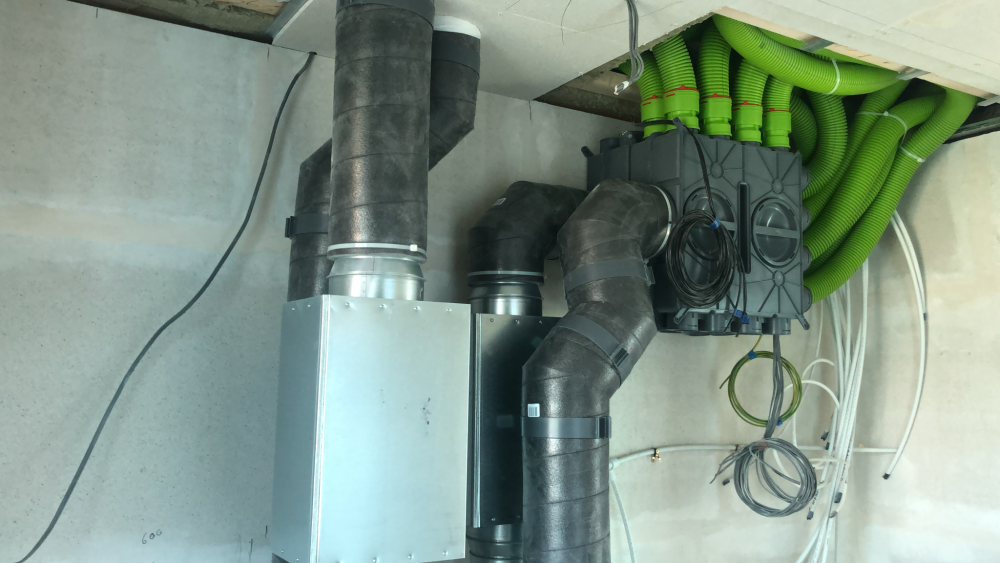
-
Sticking Aerogel to steel
Nickfromwales replied to Great_scot_selfbuild's topic in General Construction Issues
By the time its squashed or has fallen half apart, during cutting and installation, I'd beg to see anything that offered much of the assumed uplift there tbh. Any small thermal separation will offer huge dividends here, but hey-ho! -
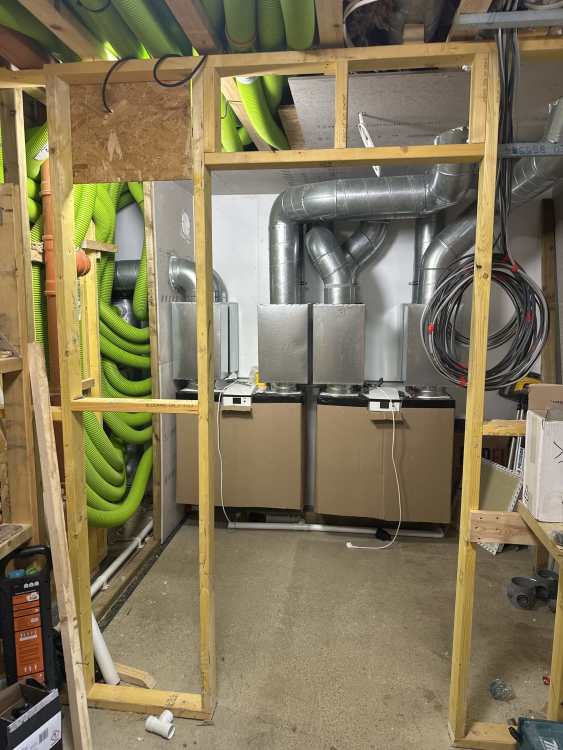
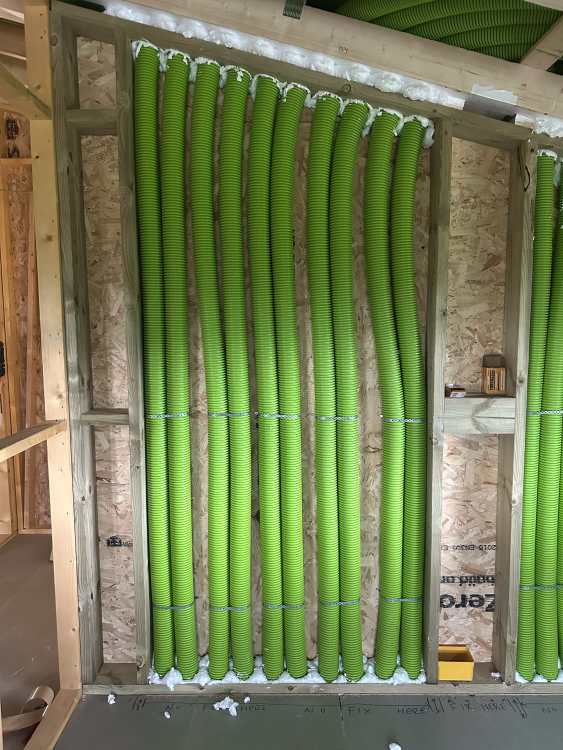
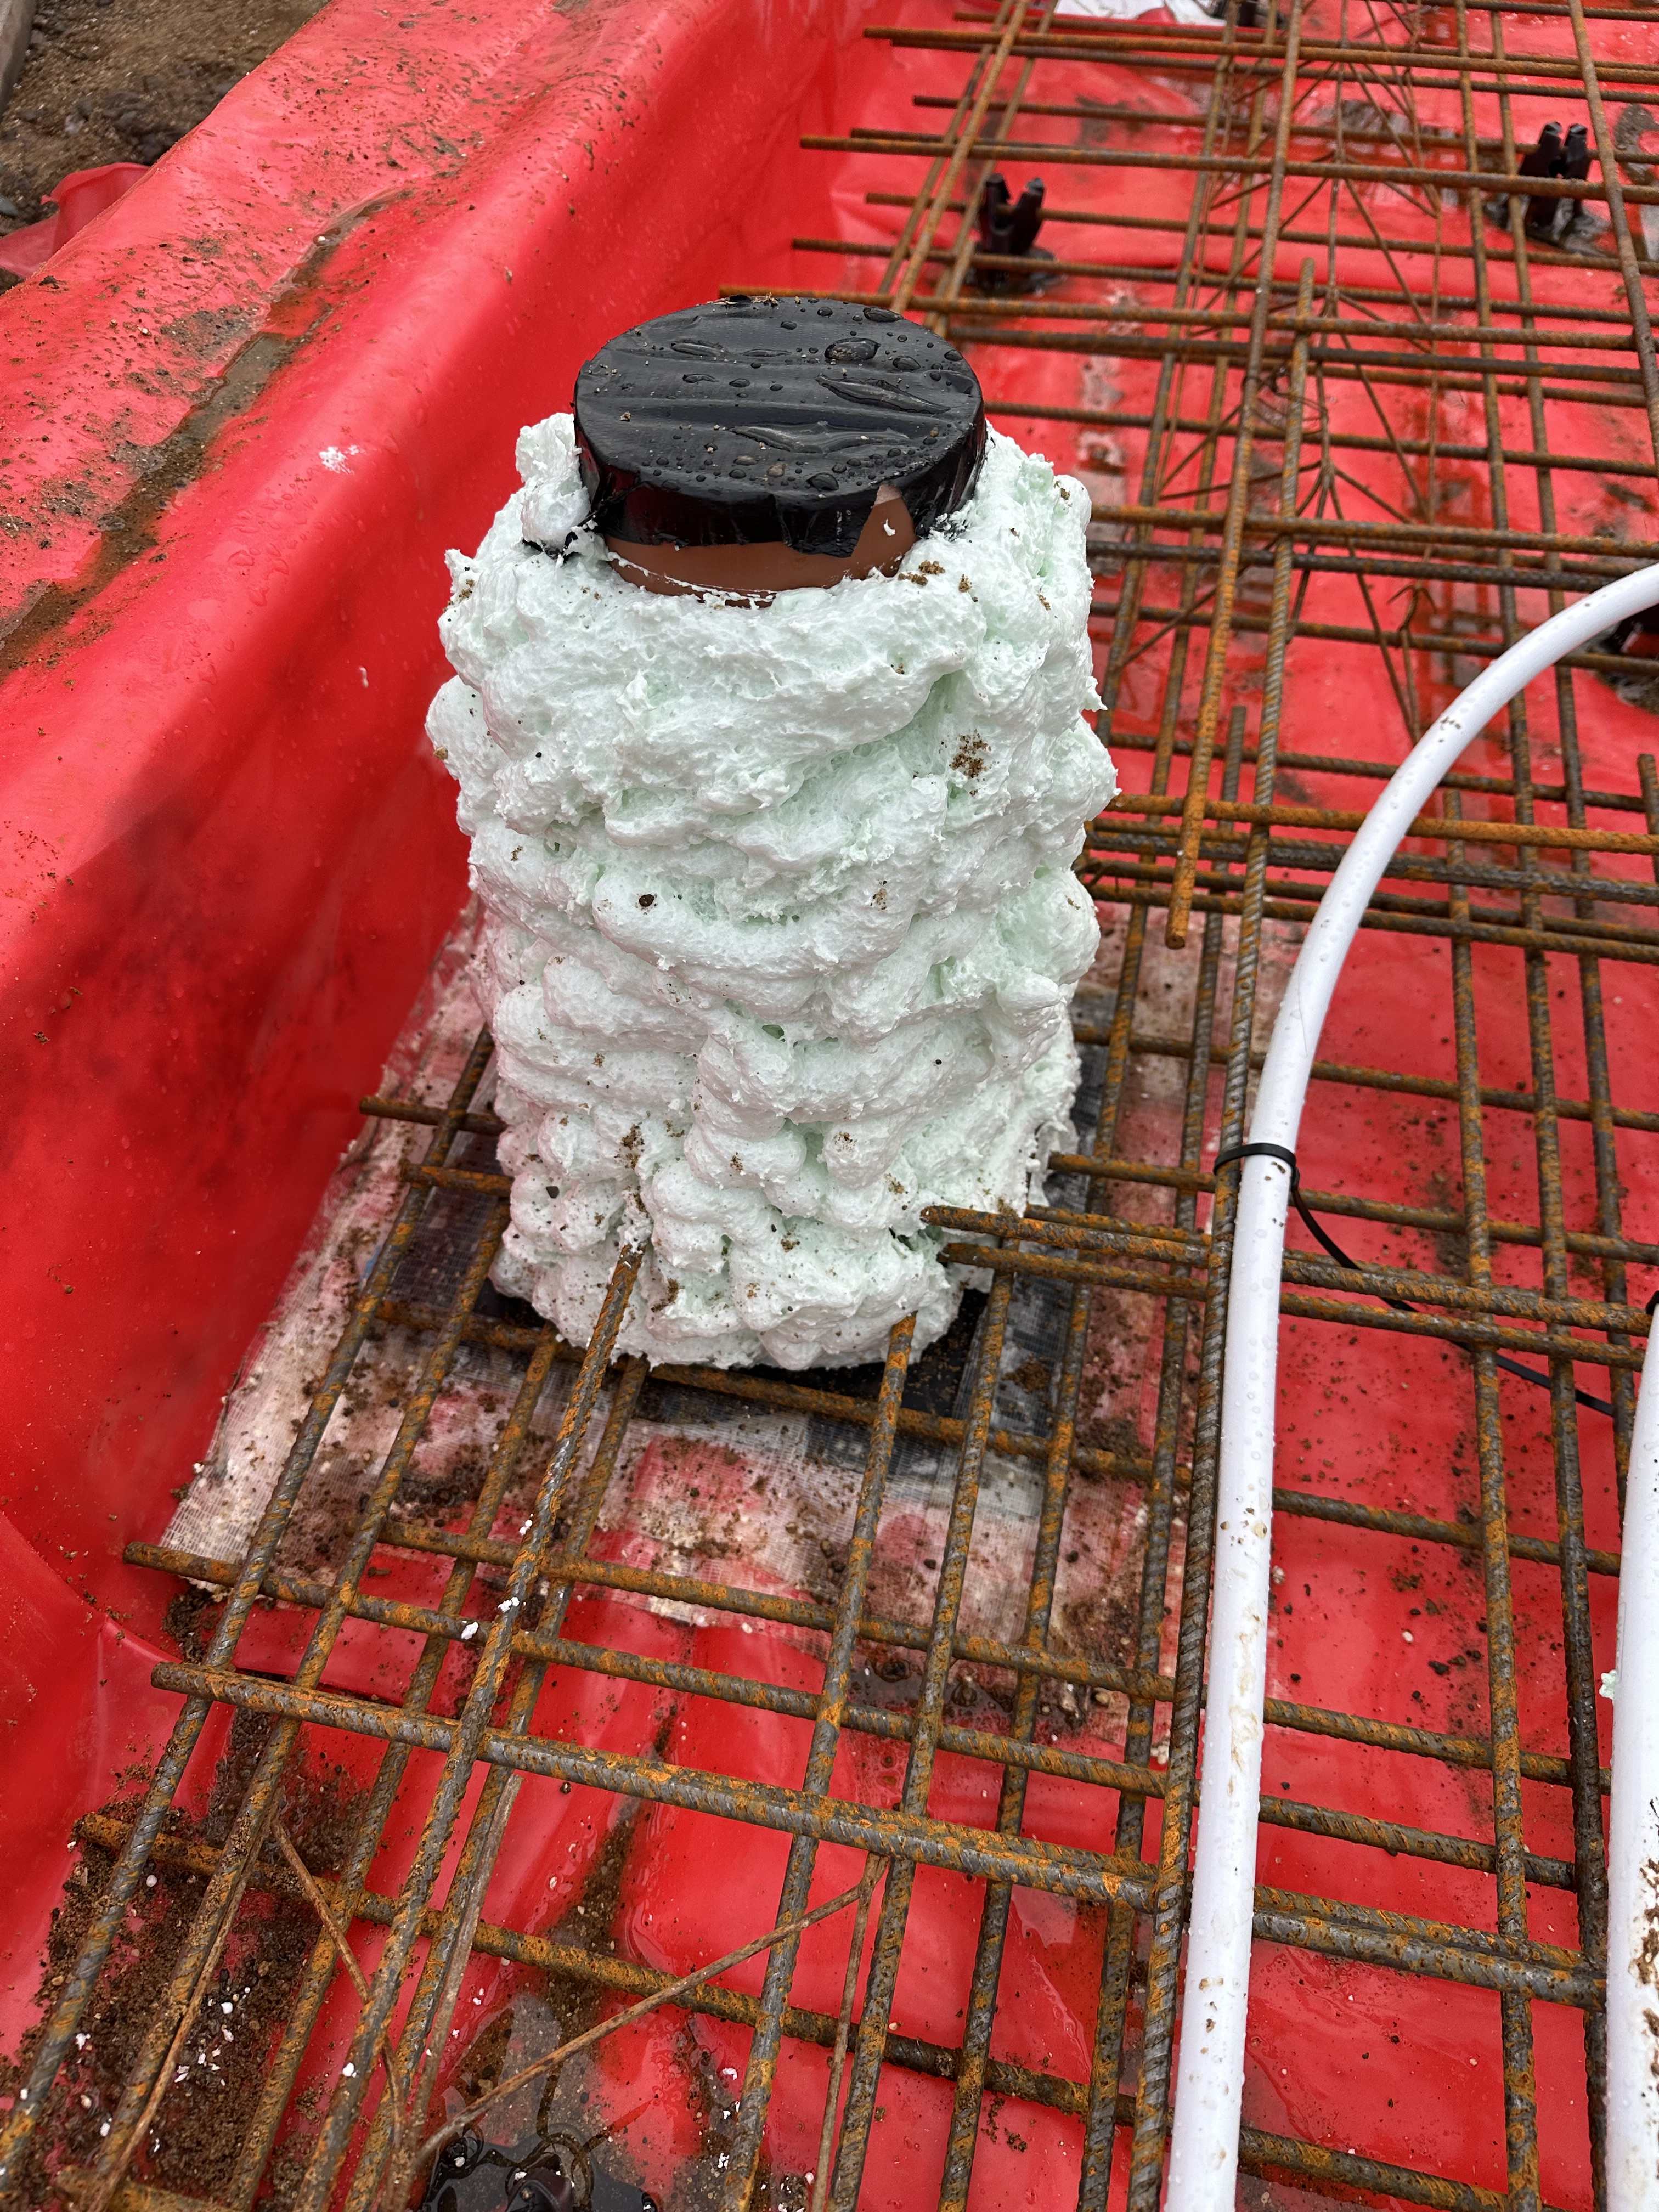
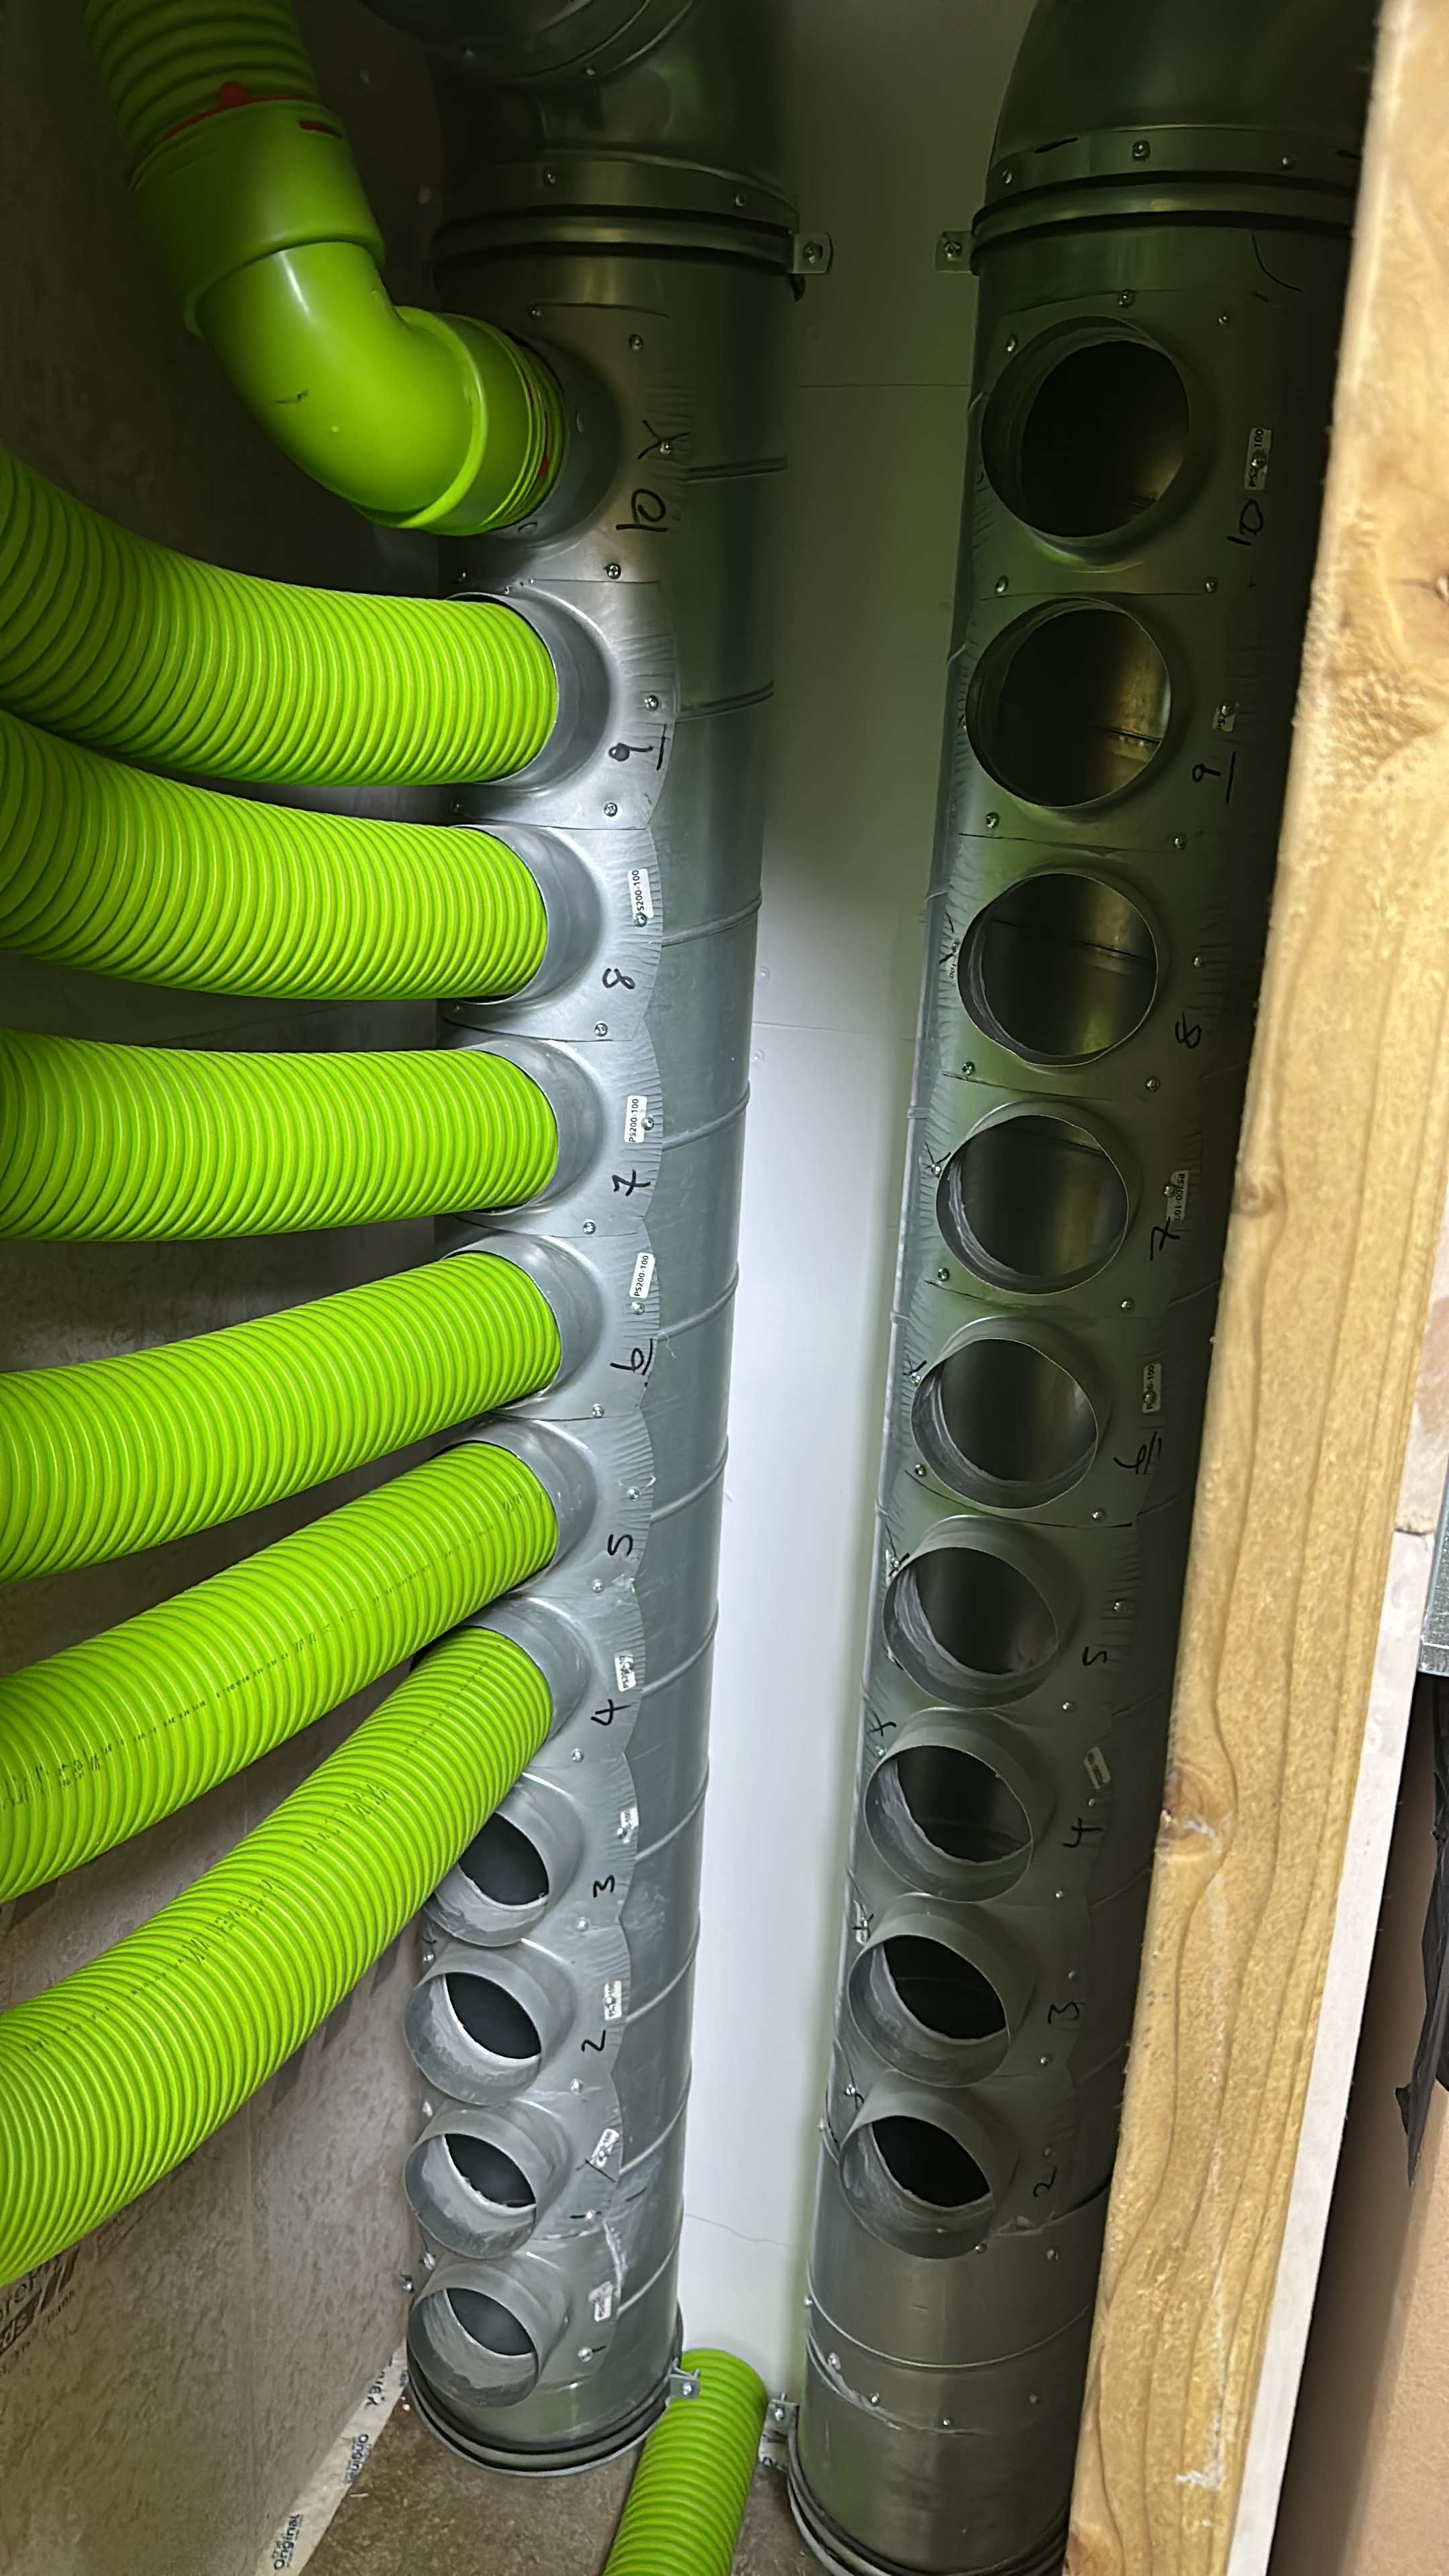
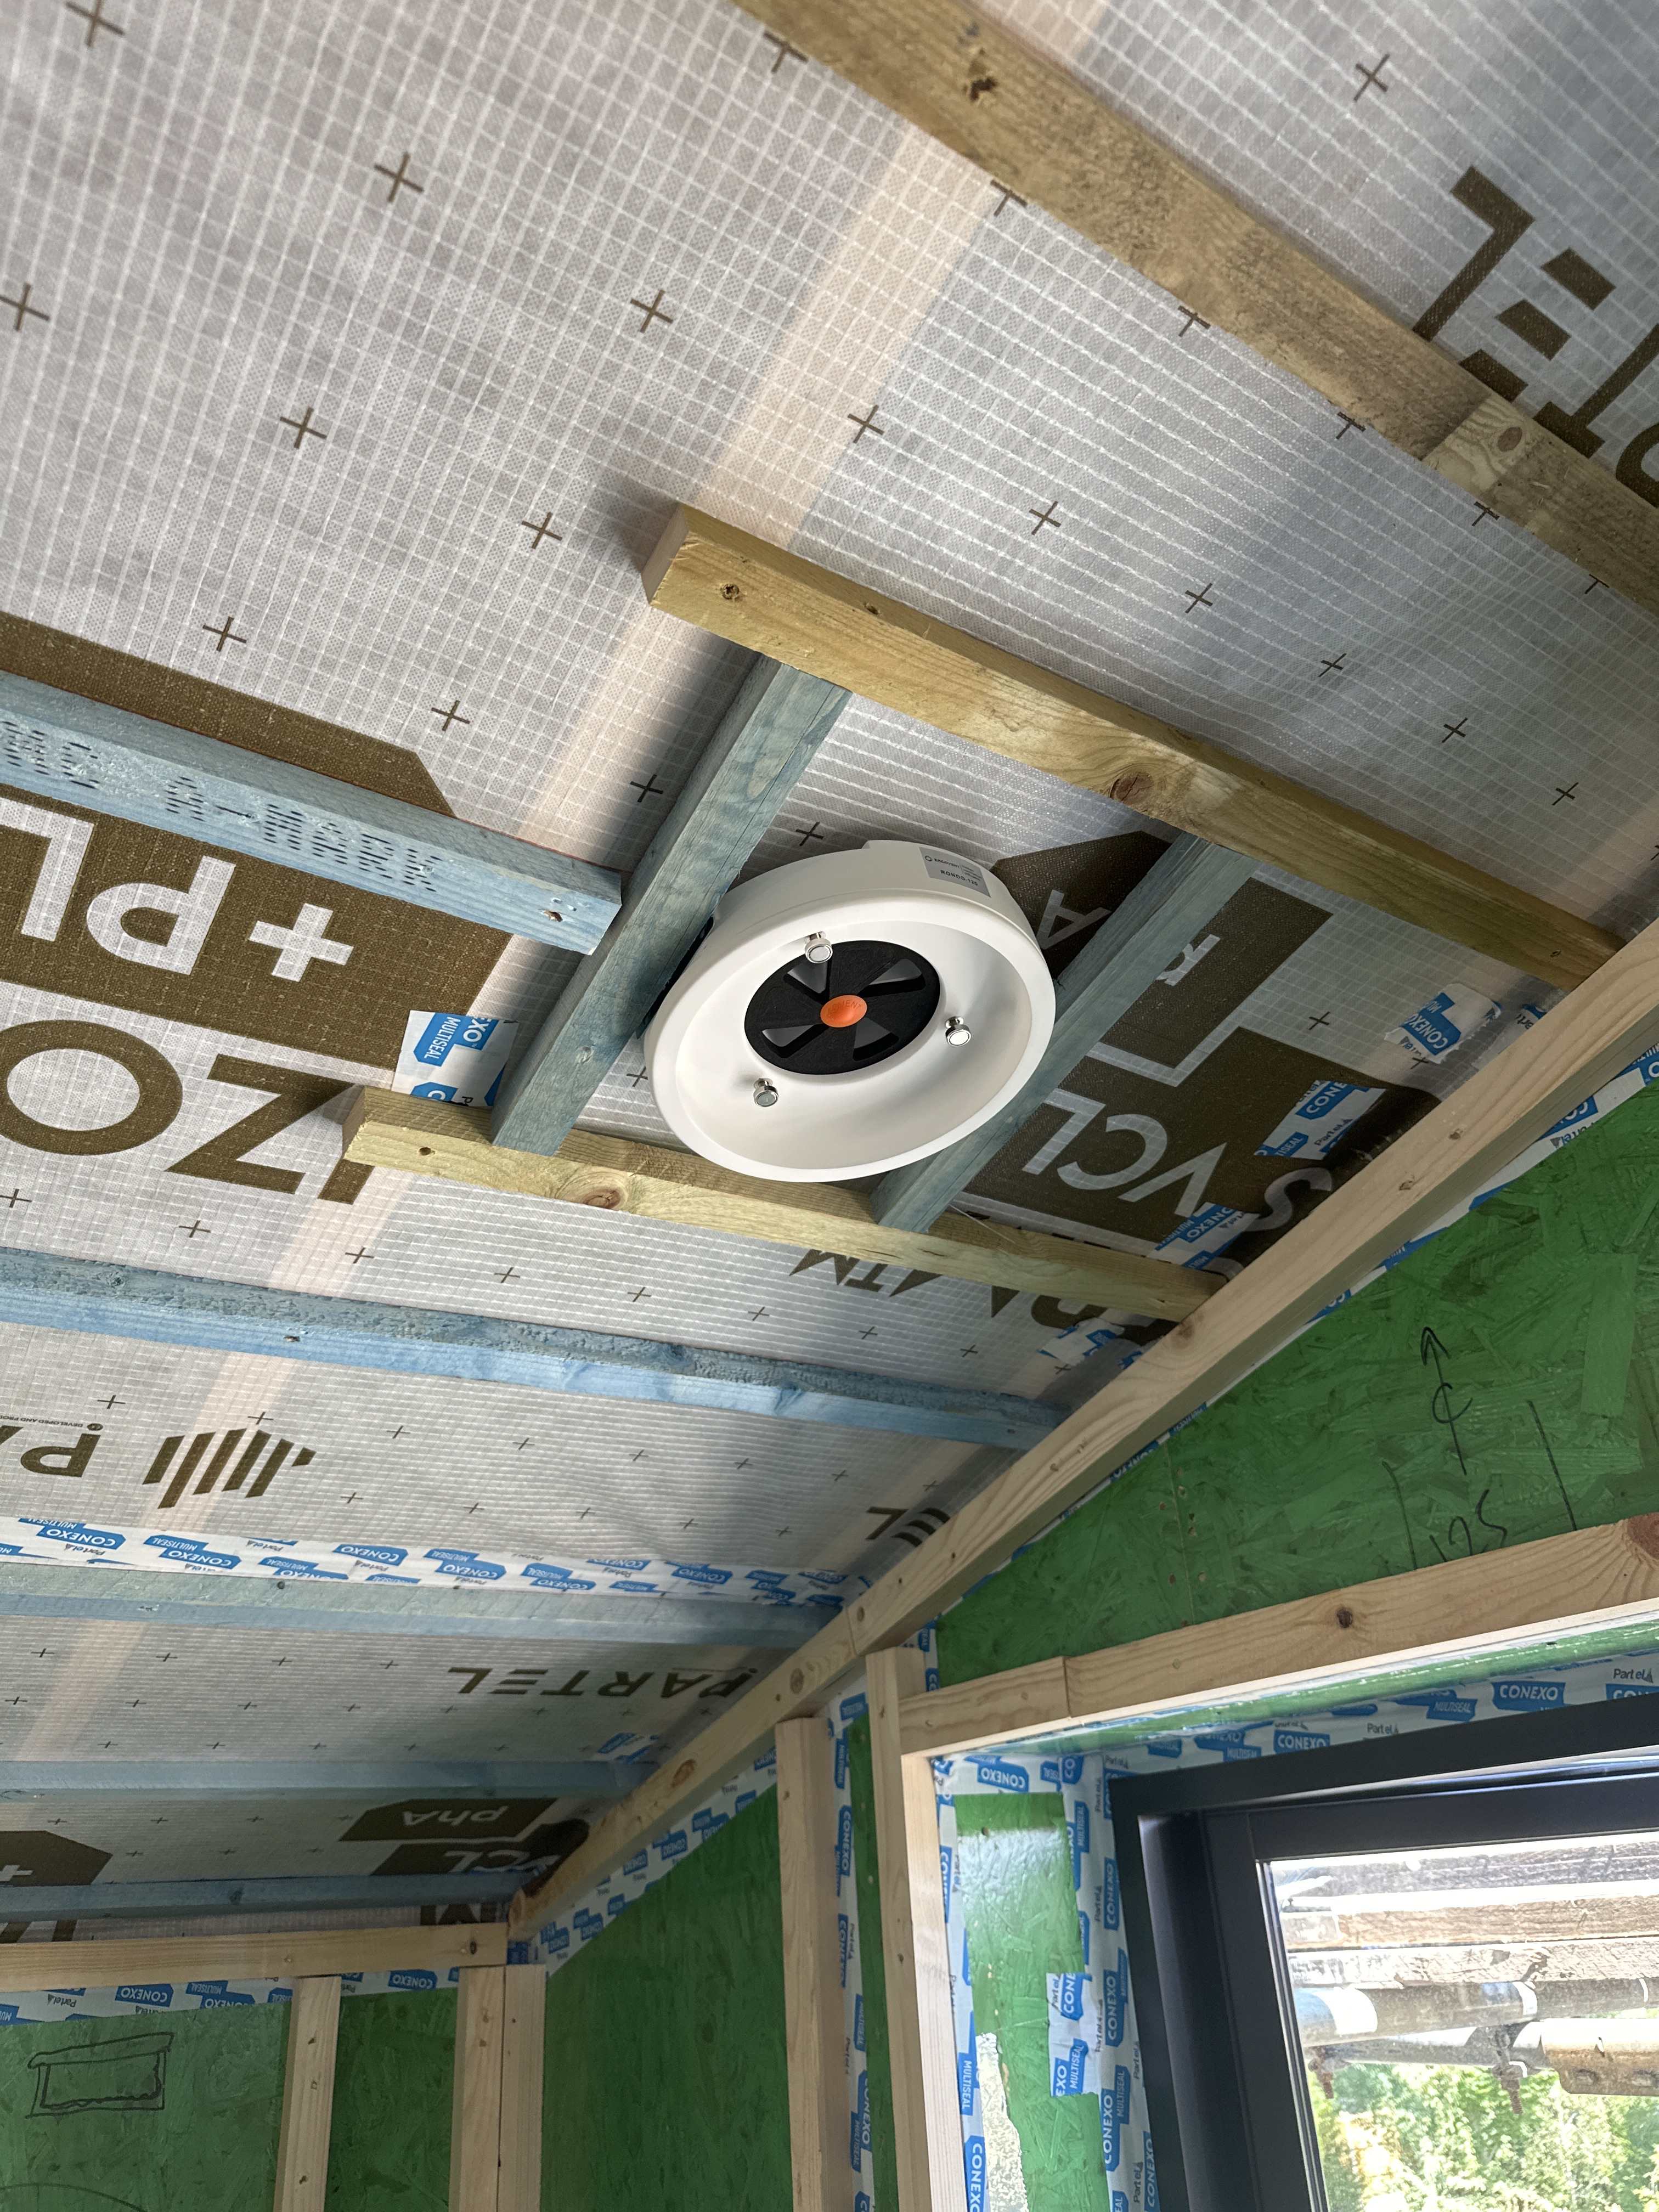
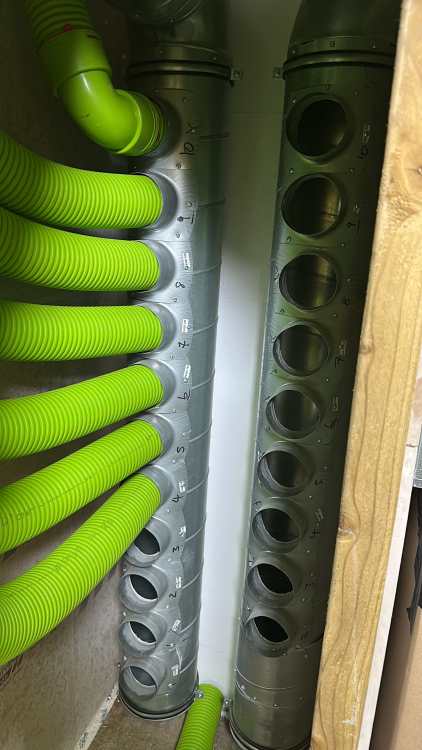
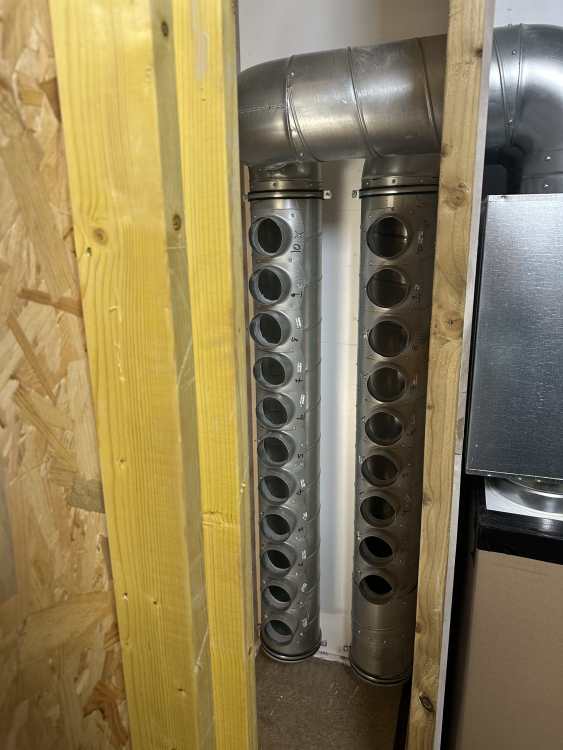
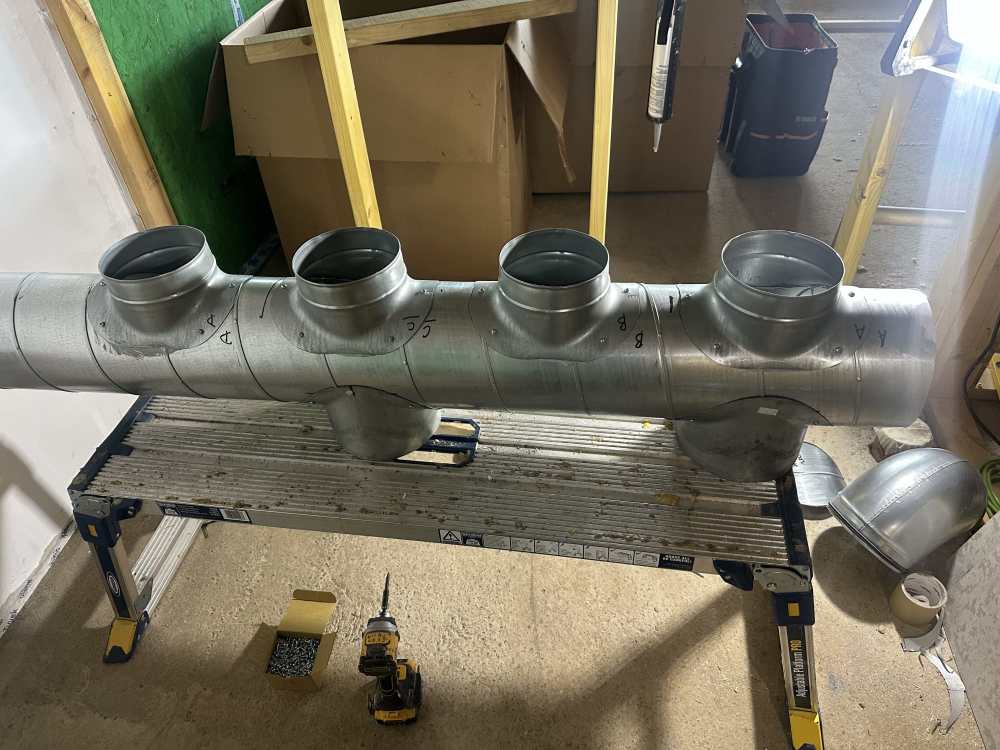
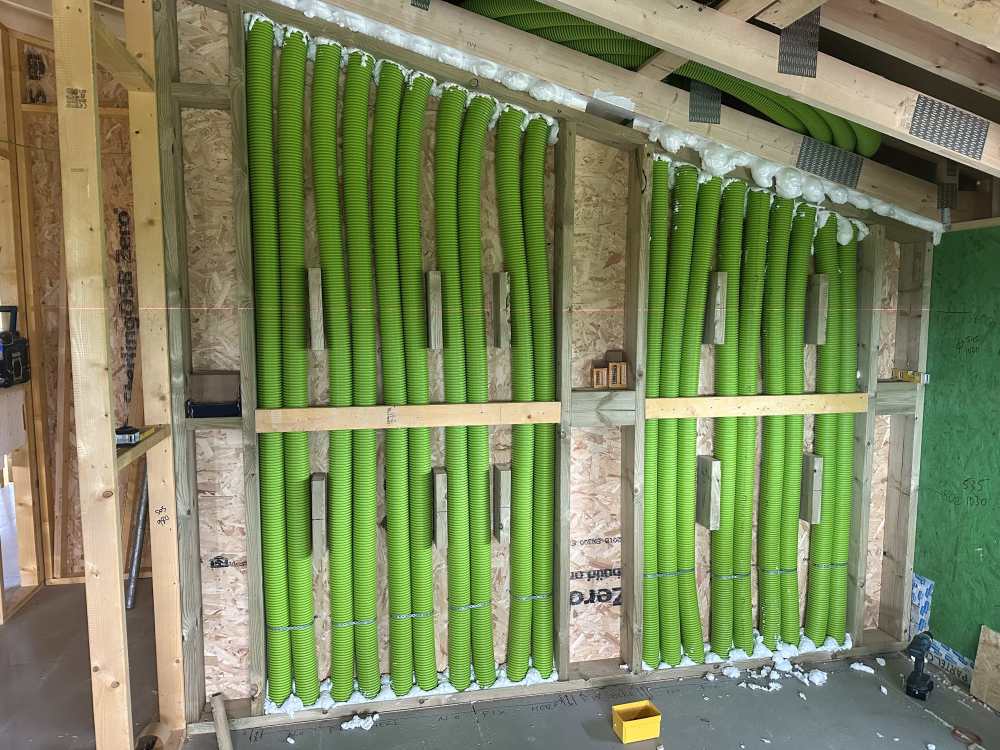
Made them all myself on site. 4x 160’s over the office to outdoors (vs out next to the front door, yuk!) to 2x 200 (1 per unit), probably lost 2 pints of blood with all the sharp edges…..all part of the ‘fun’. Doubled up on the black rubber o ring seals and then 2 full turns of AT tape for good measure. And in the plant room posi joist voids I made 2 more 200> (x)qty 100mm ‘manifolds’ which were facing upwards, for supply and extract on the 1st floor. Where it was near impossible to apply the foil insulation to the fresh intake I just used cans, lots of cans, of expanding foam aka Kingspan in a can. Mummified it as you can see, to deal with 0°C incoming air temps / condensation control. Air-tightened with FM330 and green smartply, so MBC could tape to my bits without losing any integrity (scored 0.35ACH on the test last week ). Zero need to get into these ever again, as the distribution systems are all zero maintenance.
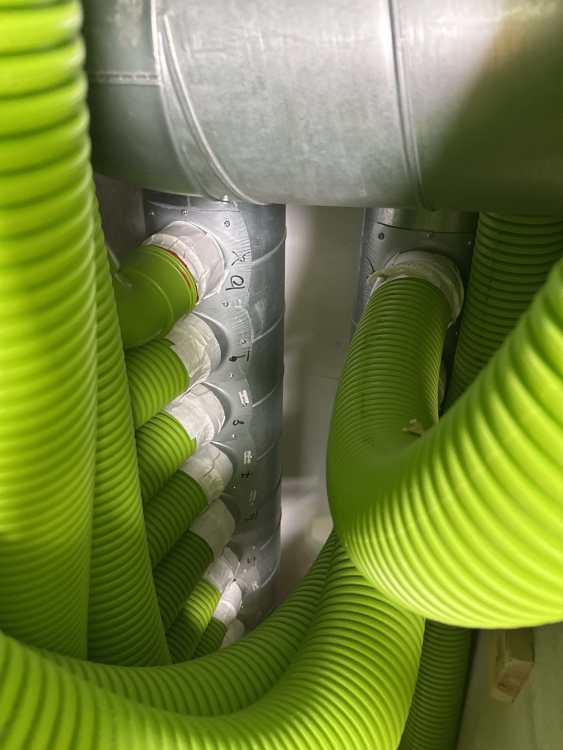
-
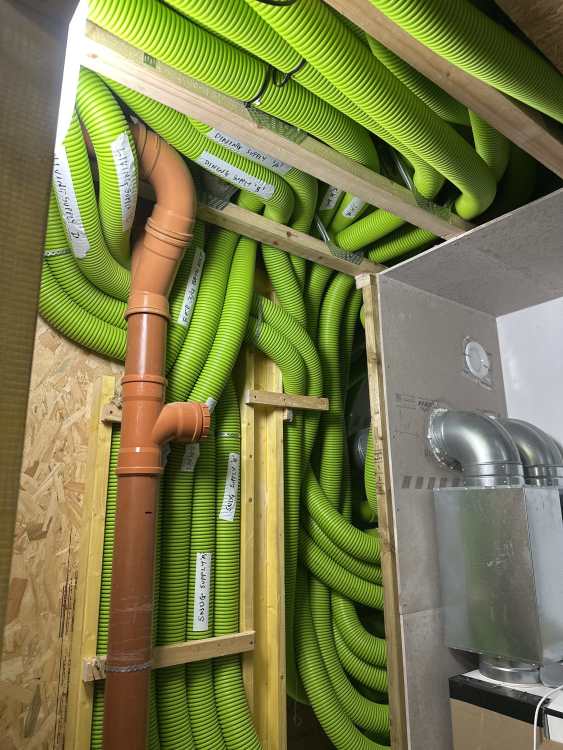
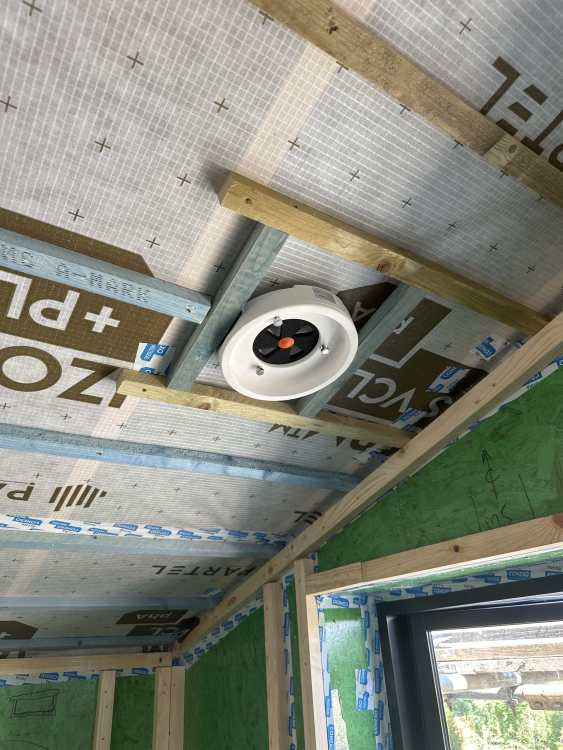
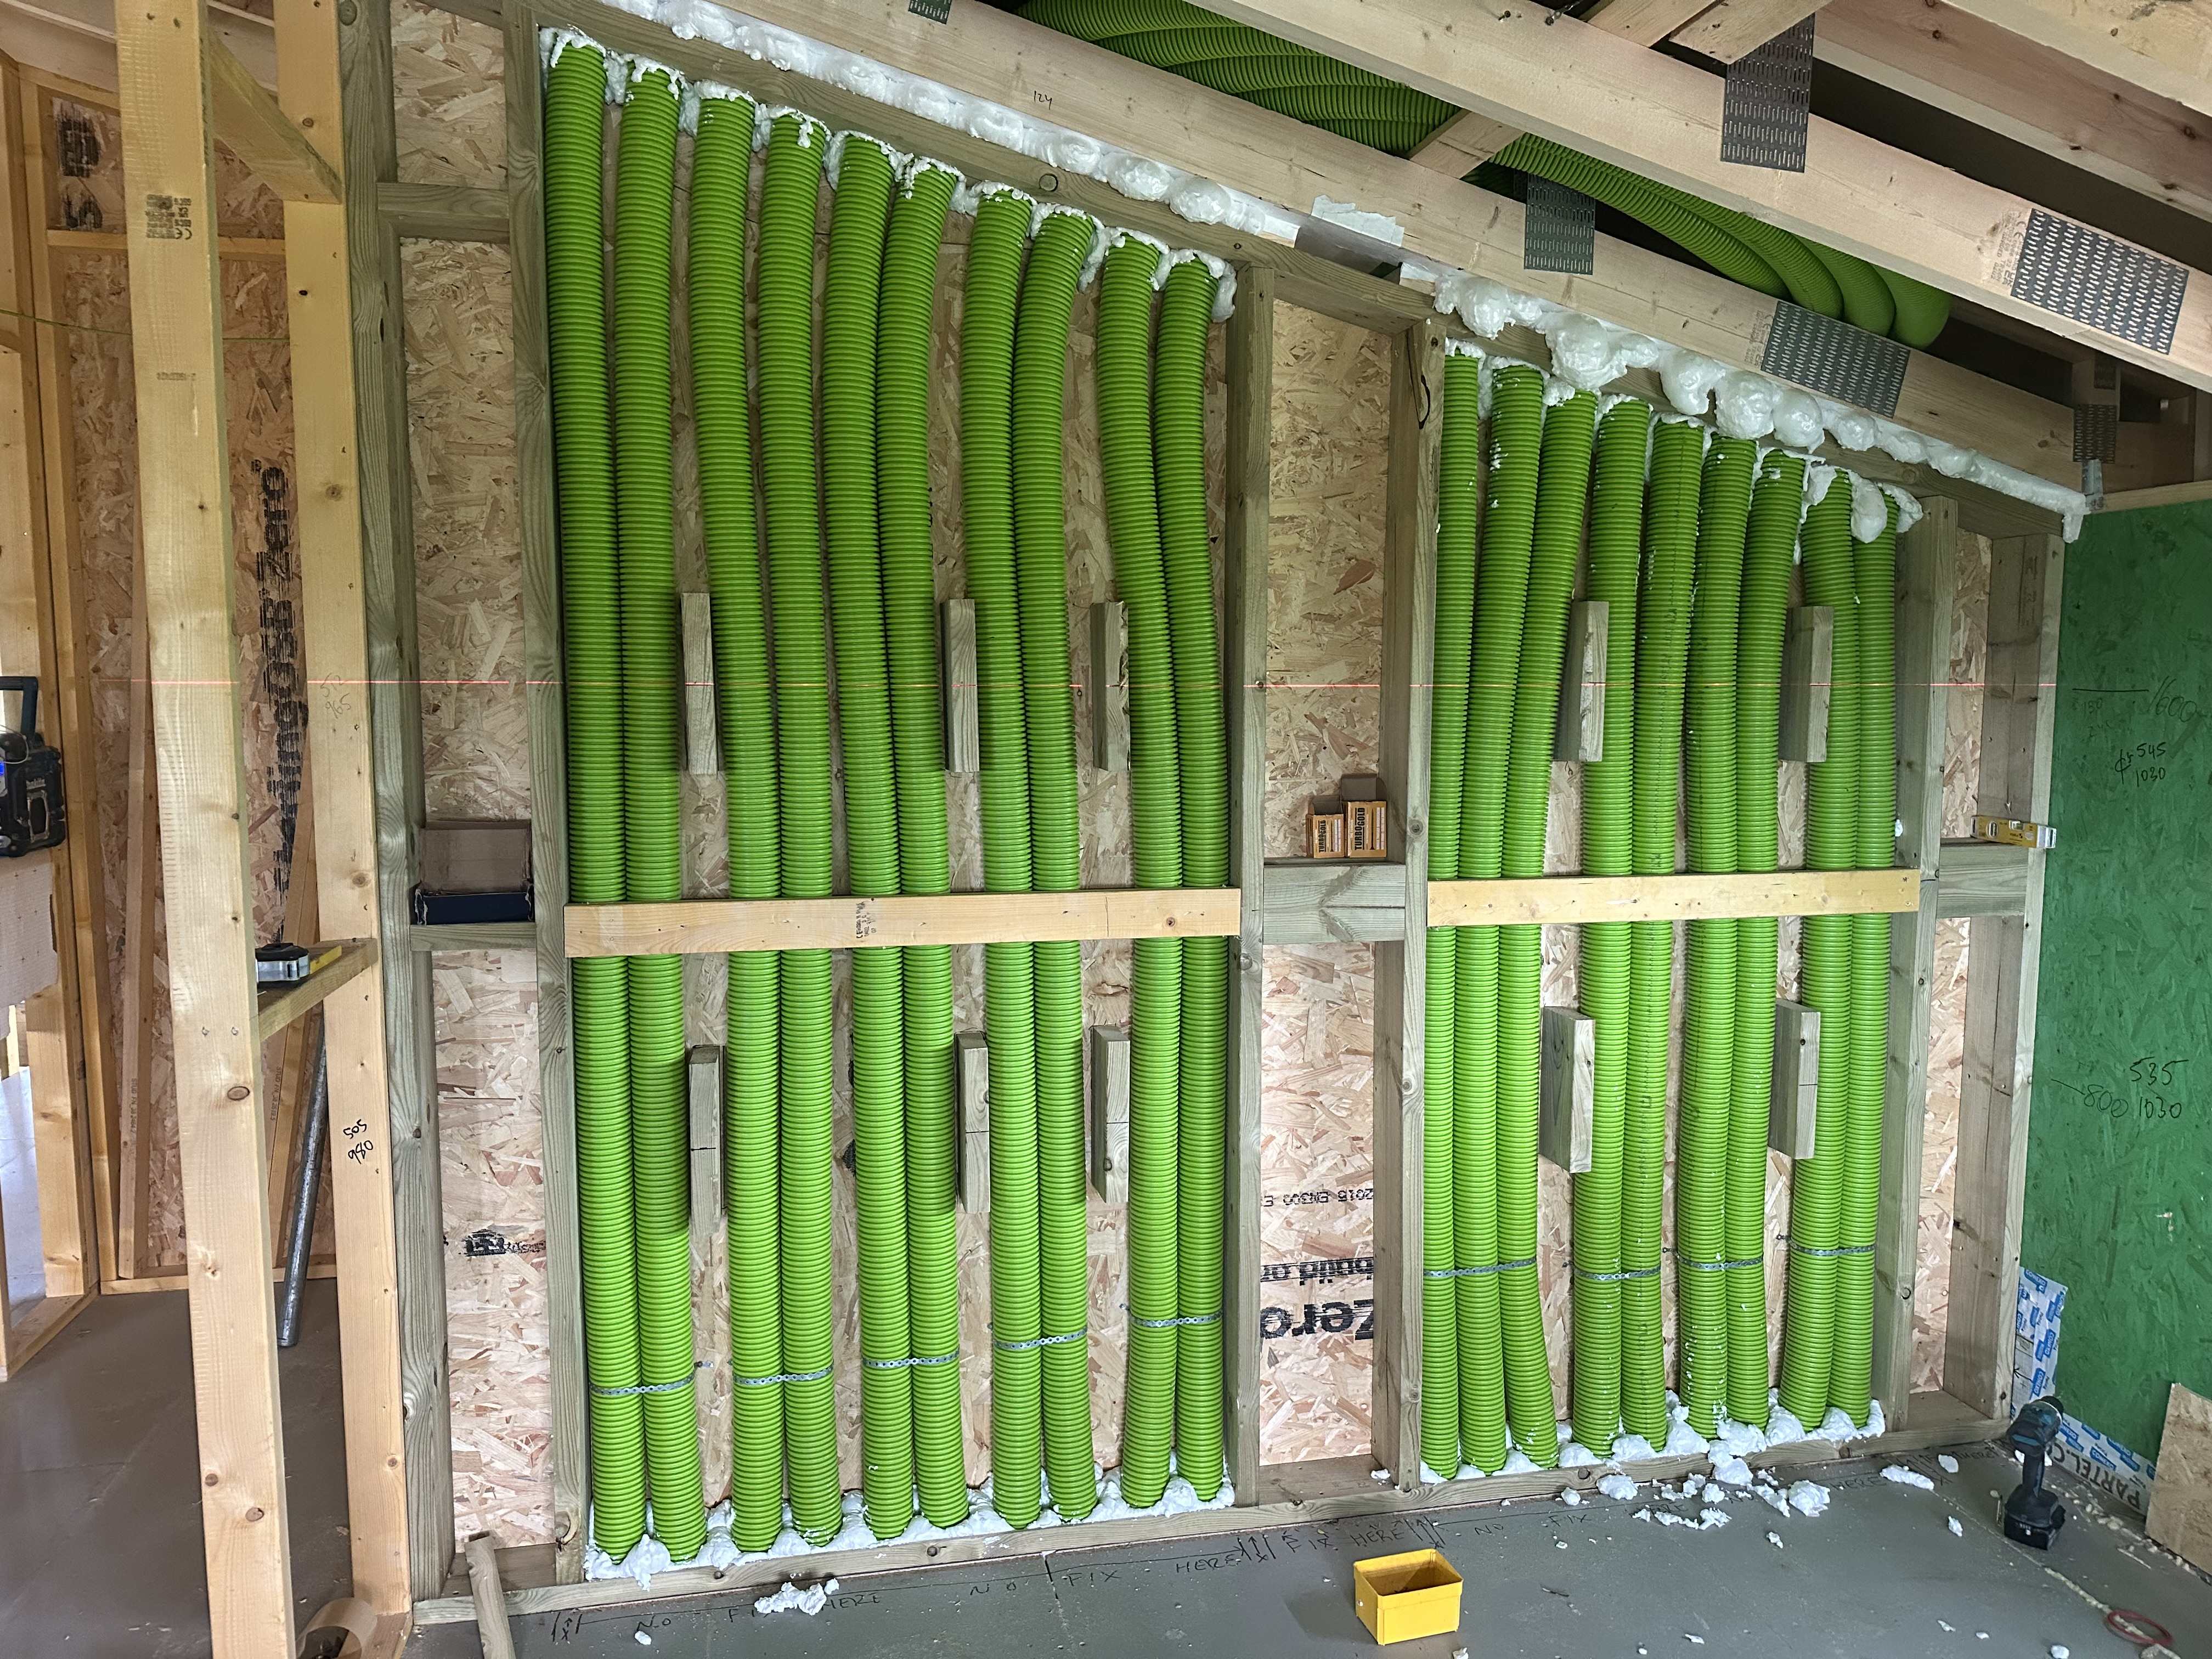
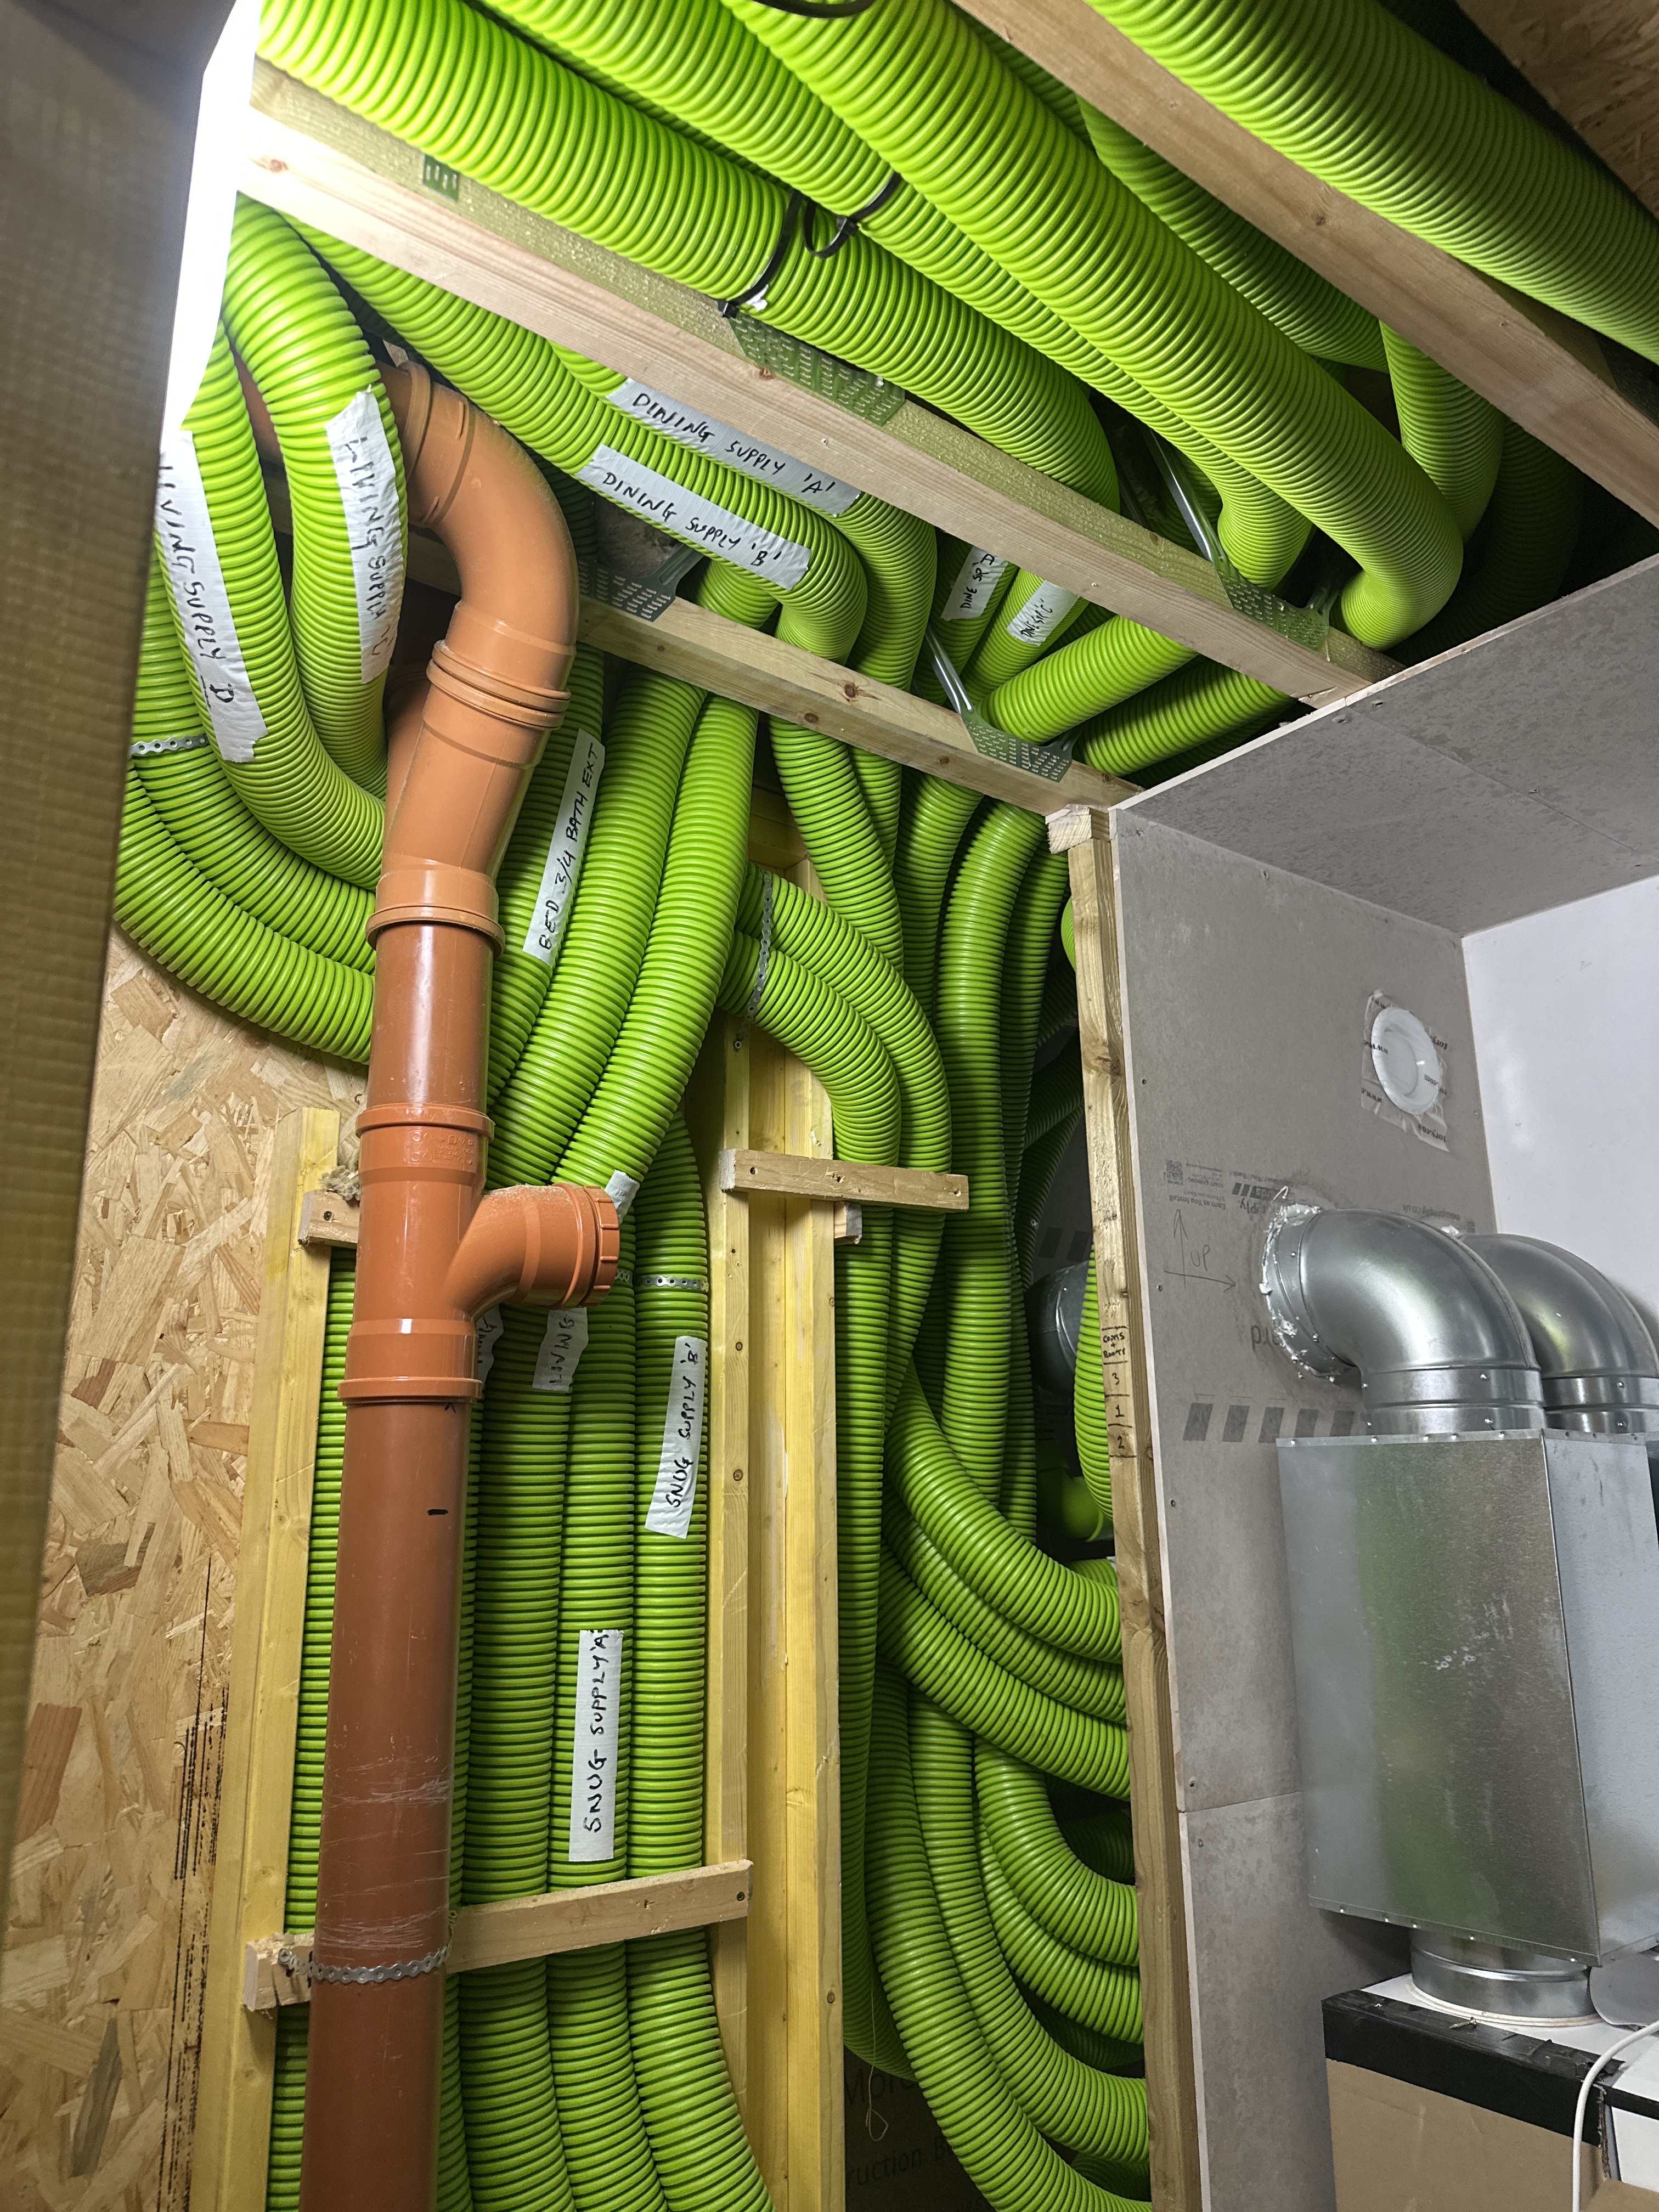
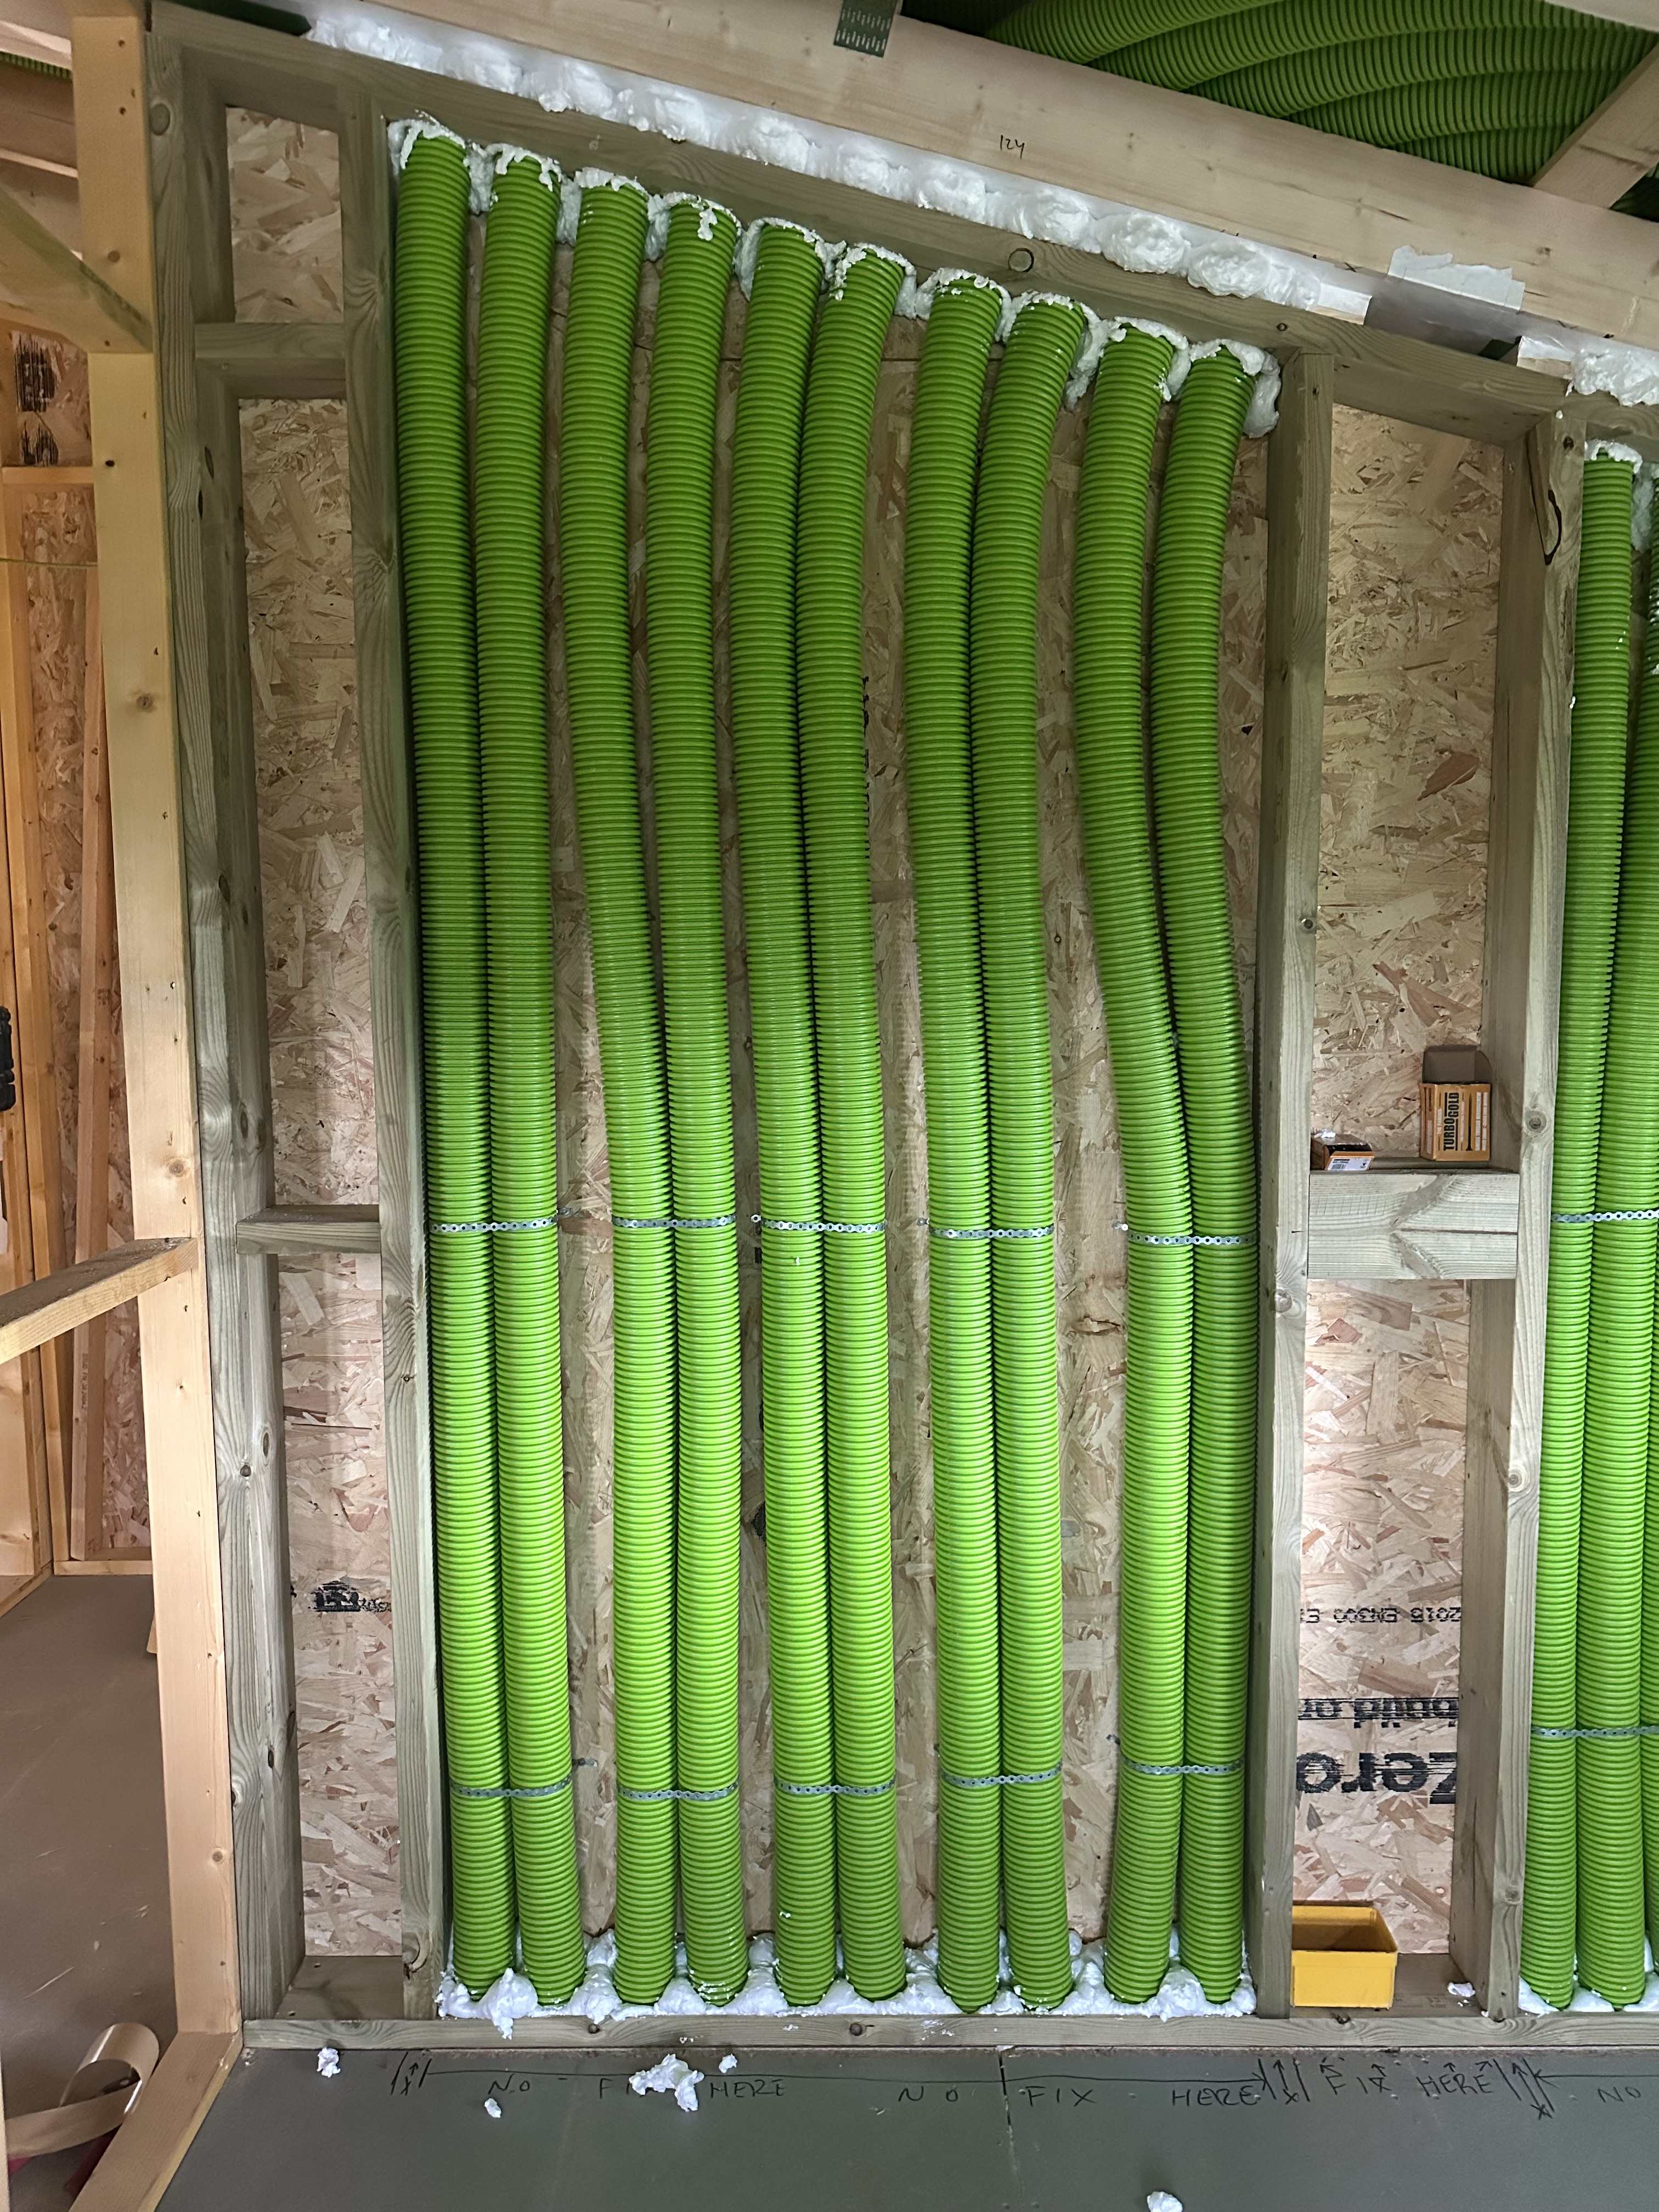
There’s no way in hell I’d have got 200mm > 160mm > 100mm spiral metal ductwork in here, plus all the soil and waste pipes, just zero chance. I prefer the radial as I can fit the stuff in pretty much with zero impact on the layouts, and zero cross talk etc. Seems to run a lot quieter too; this one is a whopper of a system but is absolutely completely inaudible in the rooms on 25% fan power (not commissioned yet, but I expect we can run closer to 20% on trickle). Pulling these flexible (enough) ducts in, one by one, needs thought but is relatively easy for 2 people. Don’t dream of doing this on your own as that’s just too much hard work. It looks ‘lots’ because it is! 40 ducts in total.
-
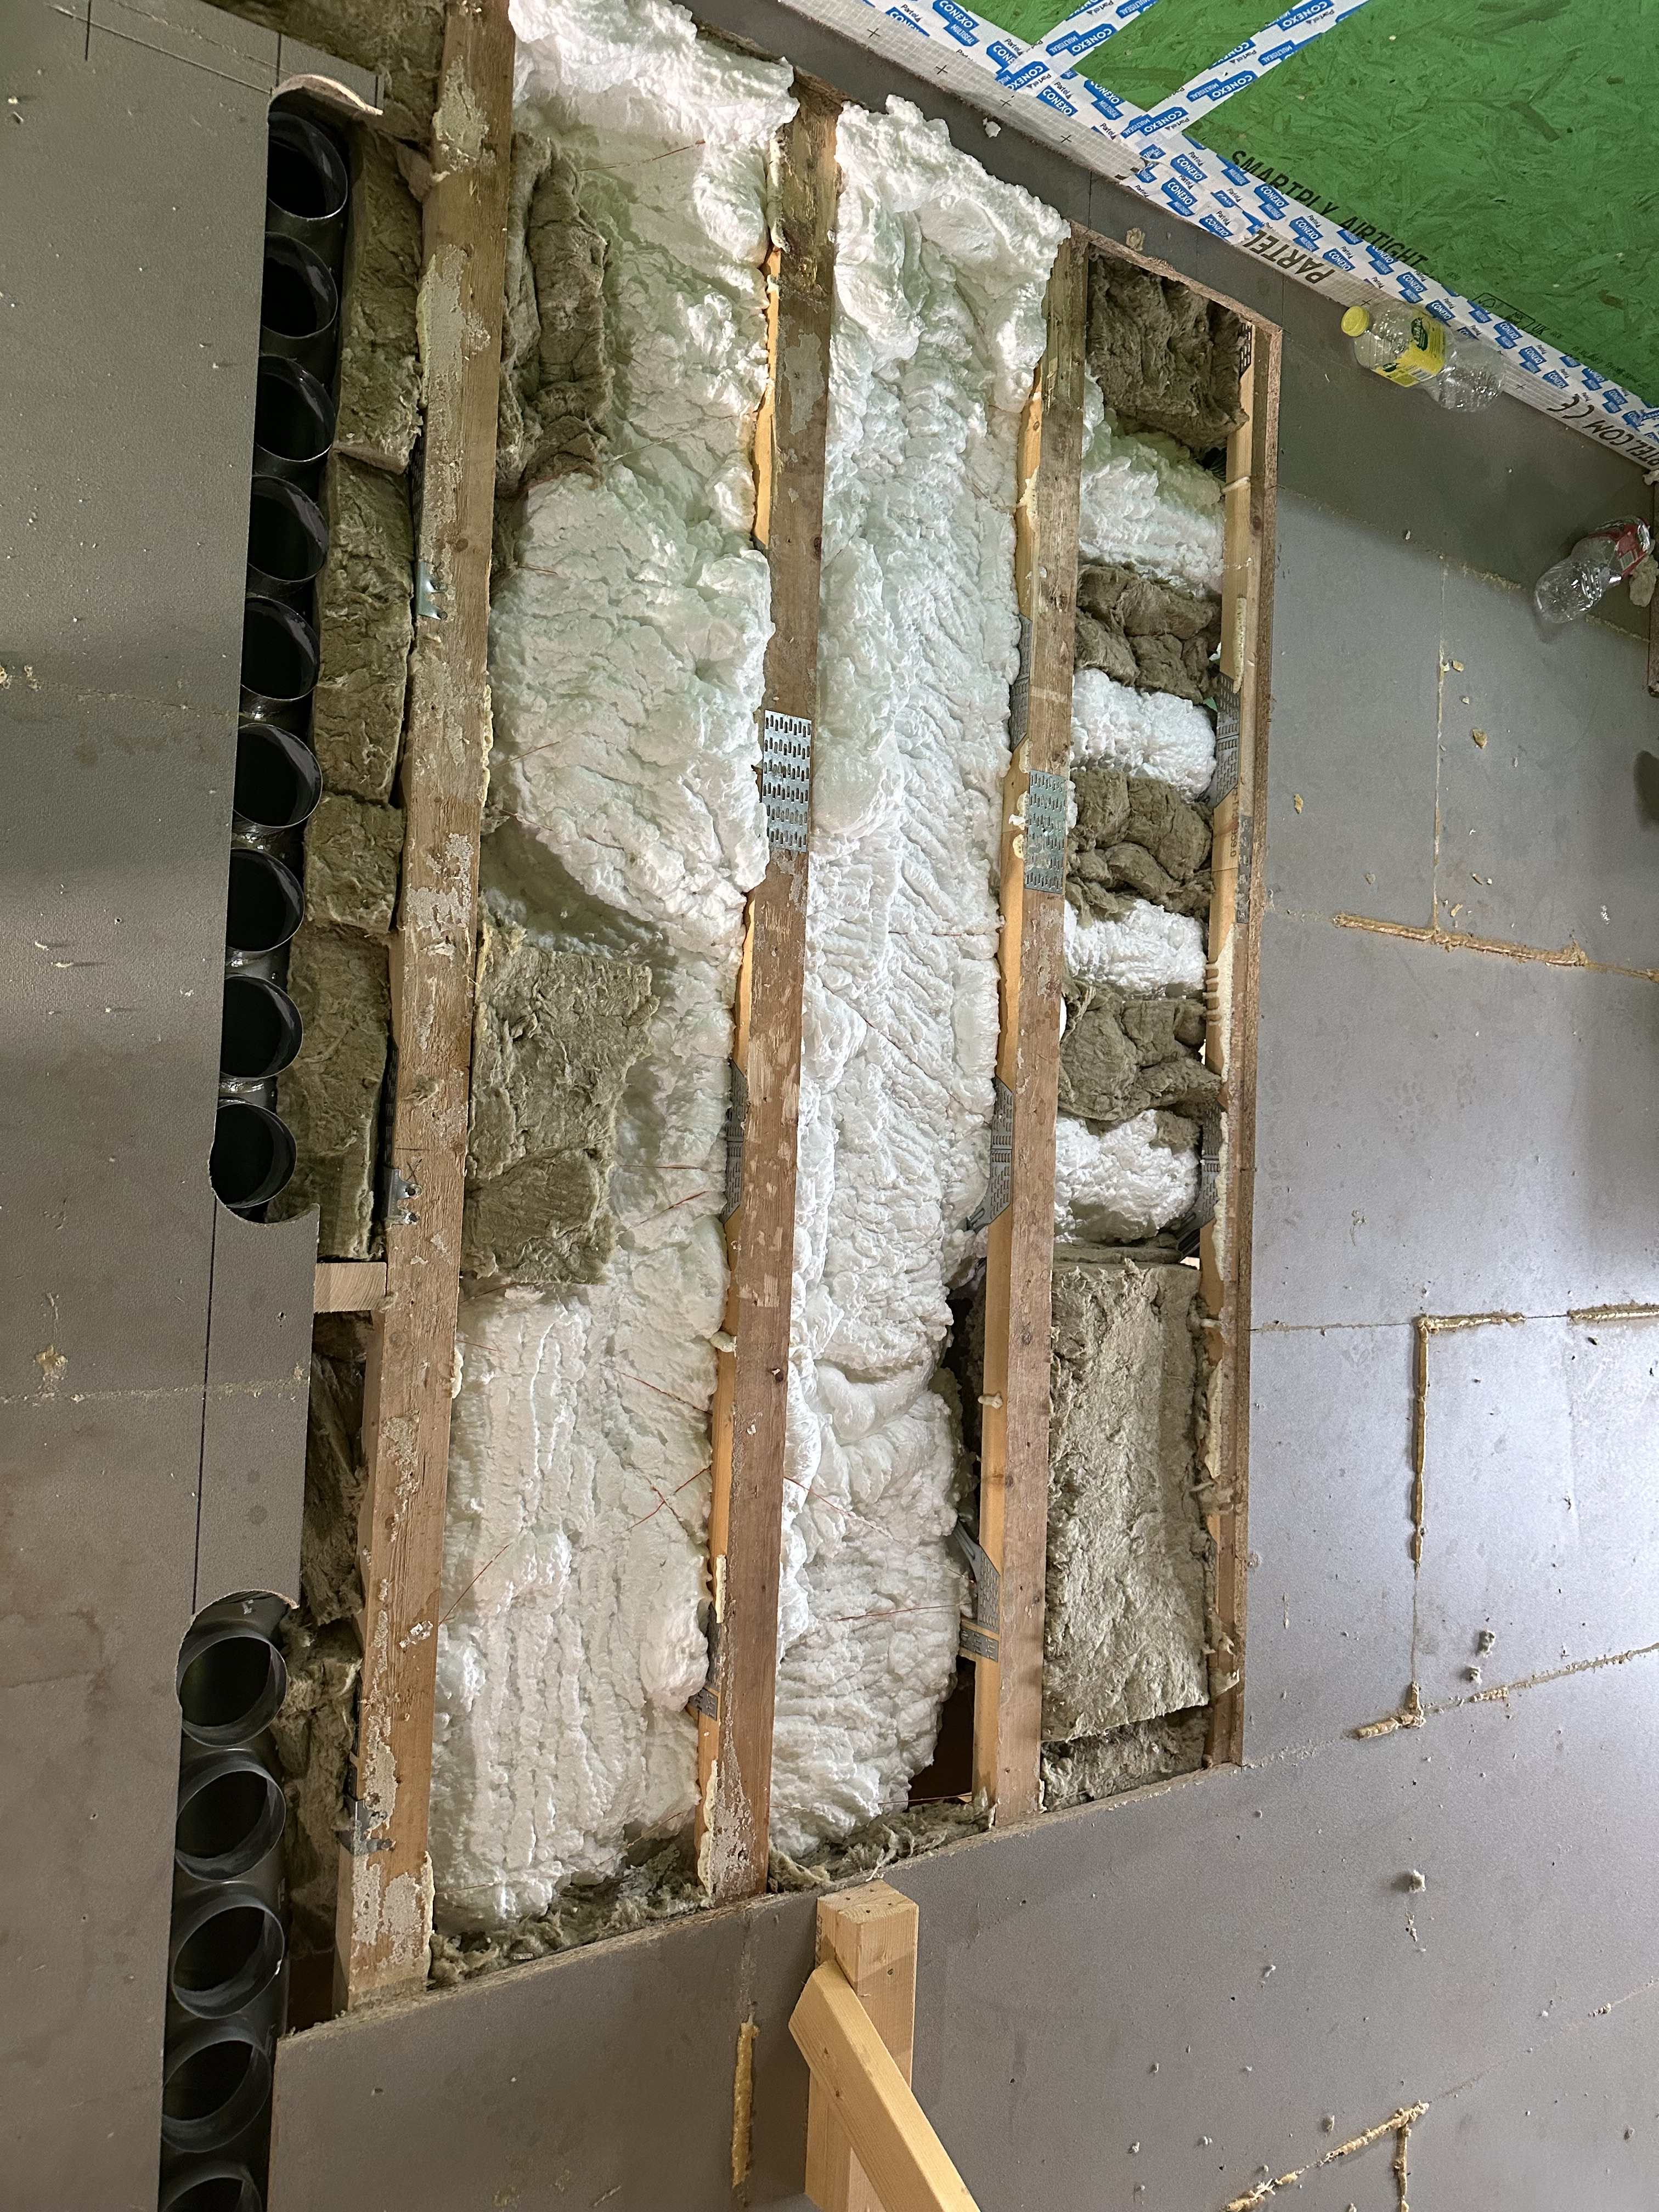
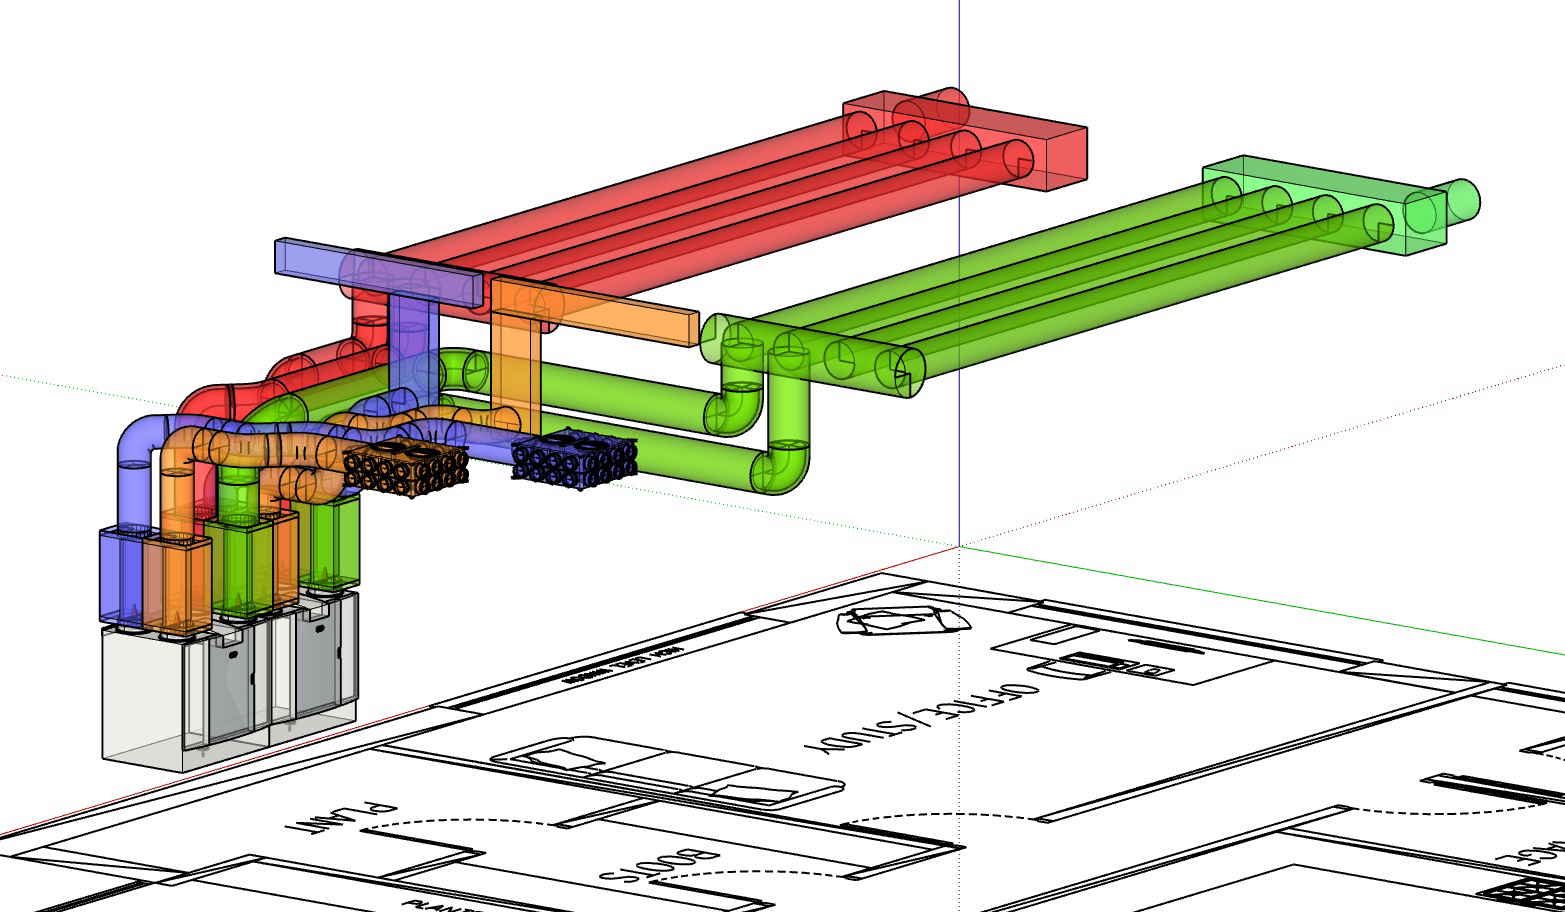
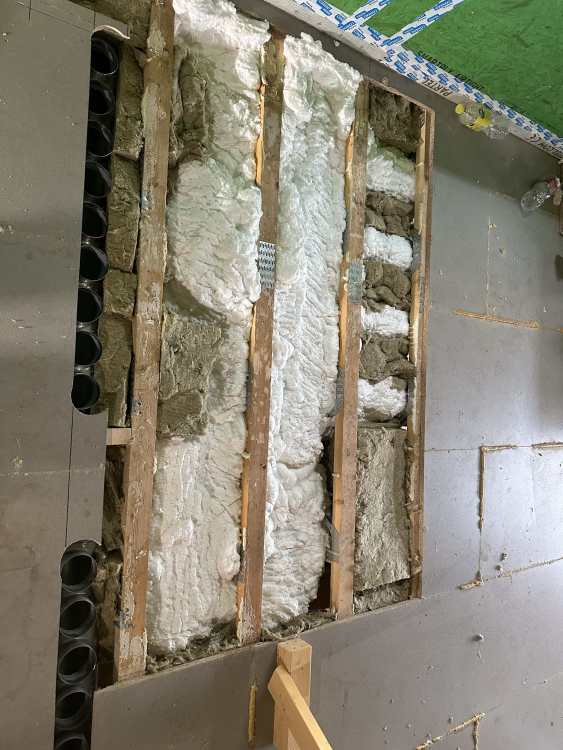
Current plant room design: Designs via CVC Systems, Oxon, supported and then installed by some good looking welsh fella: Ground floor First floor 7” wide service riser for 18x 92mm ducts for FF into posijoists. Then plaster-in ceiling outlets through, bar a few cheaper ones for where they don’t need the extra time/money. Basics of layout at the design stage gives me the number of ducts / outlets and then I just crack on basically, adapting to suit reality. Steels were designed in by me, many months before concrete went down, which makes life easier with penetrations where they’re needed; all considered to delete any boxing in or loss of GIA whatsoever. Tres bien 👌