
Leaderboard


Popular Content
Showing content with the highest reputation on 08/20/23 in all areas
-
So to recap: we bought an old house with a bit of land at the back. We tried to get permission to knock it down and do a new build passiv house in the backland. The council said no no no, we lost an appeal, then put in ridiculous plans for a massive extension with basement on the existing old house, plus a large stable block on the back land where we wanted the new build. Council said yes yes yes, thats fine, please go ahead.... Having never built anything major before, we hired a 9 ton digger and a small tipper truck and set about digging a hole. The basement would start over 4m back from the existing rear wall of the old house and as long as we graded the excavation where possible and used plenty of sheet pilings, it would work out fine. To get rid of the clay soil, we just spread it out on the land at the back saving quite a bit on grab lorries. We originally planned for a four week hire of the plant, but we ended up taking about six weeks. Prior to digging I made a few test trenches to check the soil and water level. We also found an in depth soil survey from a major development next door. Once we had the hole dug in the right place, and sorted some temporary drainage, we set about levelling and pouring the basement slab. This was designed to be 300mm concrete on top of a tanking membrane, with tons of rebar. We just followed the drawings and building control came a few times to check it all. The waterproofing was overseen at each stage so we could get the warranty as well. We poured the slab in winter of 2022 and had a few cancellations due to frost. In the end we made an insulated temporary roof over the basement and used gas heaters the night before the pour just to be safe. The concrete went in very well, i think it was two loads of waterproof concrete, then we could start on the nudura walls. The hardest part of this section was wiring all the rebar together and getting the 20mm OD L bars in place which connected the slab to the nudura walls. These were doubled up all around the perimeter every 8" and a pig to get in amongst all the rebar mesh. Assembling the nudura walls was very straight forward, once i got my head around the idea of a common seam - where due to the plan measurements, the nudura blocks needed cutting and joining together. We had done the nudura course and the rep was very helpful with all my questions. Once built up, building control came out again and we ordered another three loads of water proof concrete for the walls. Where the walls joined the slab, we used an expanding waterbar and kept it dry until we poured the walls. We hired a concrete pump for the pour and because it was a basement we just used the nudura walkways and scaffolding to allow the pump hose to get round the whole perimeter. I was concerned about blow outs- especially on the first load dropping down into the bottom of the wall so I over did the shuttering on the outside of the nudura - including 220mm x 50mm floor joists screwed all around the perimeter outer edge, plus lots of OSB shuttering at all the weak points. It all worked well and it was a major relief to get the walls filled up.4 points
-
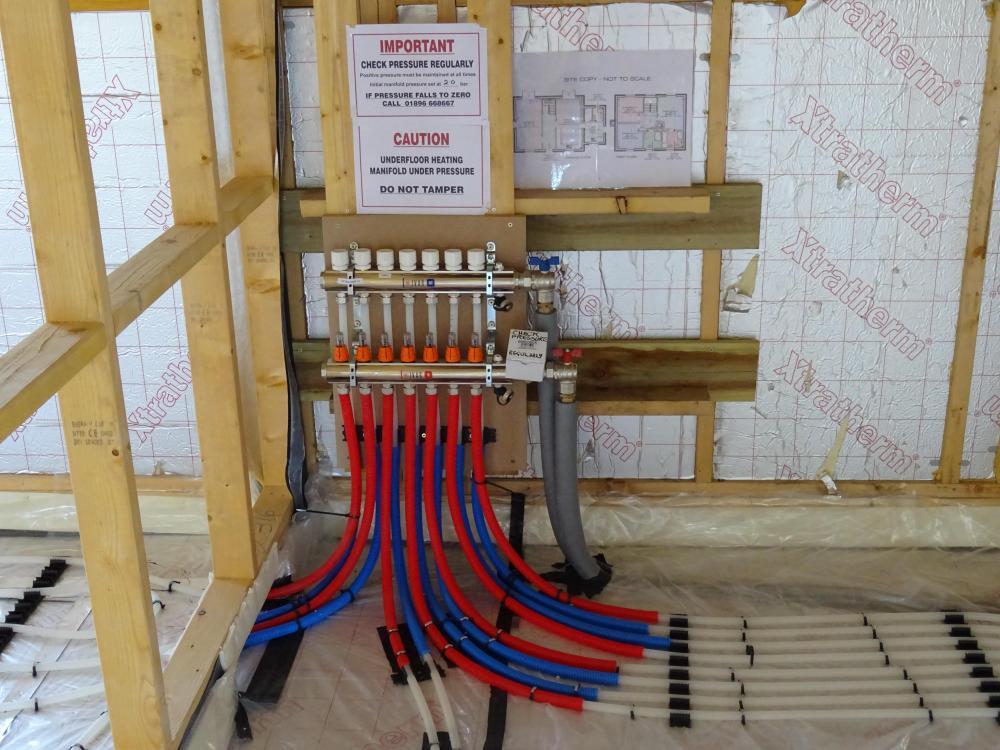
Hi Thanks @Redoctober for sharing the photos back in 2019. I hope you don't mind me using your UFH photos posted elsewhere on buildhub. We will be laying liquid screed first and then plastering as suggested by many and as shown in the photos by @Redoctober. We will too be screwing the manifold to MDF board and then screwing MDF board to concrete block wall. All good so far. However, I'm unsure about how the plastering (dot and dab and skimming on a concrete block wall) will be done behind the manifold MDF board? If it's just as simple as tilting the MDF board forward then will that damage the screed or pipes/connectors? Thanks
 1 point
 -
Good evening wise ones. I have exhausted my Loopcad trial and while i figure out using Virtual machines on my PC to access another trial i asked for a design online. It may not have been a wise choice but hey ho ! The design i have been previewed does not use the pipe layout style that coils to the centre and then back out again to even out the hot and cold areas. Did i explain that well? If you understand me please tell me what that style is. Thanks in advance keith1 point
-
Yes just sour grapes from MCS as they can see their cartel collapsing and losing it's previously protected status as a monopoly. As above, anyone can connect a PV system to the grid, so it is not a "safety" issue. It is pure politics that until now you could only get paid for export if you pay the monopoly lots of money.1 point
-
It feels as if two people in the decision chain made one or more mistakes each. It happens. Fit a door.1 point
-
I use a site hoover while doing insulation in the loft. Collects air borne particles, saves having to wear a mask and the breathing issues with a mask1 point
-
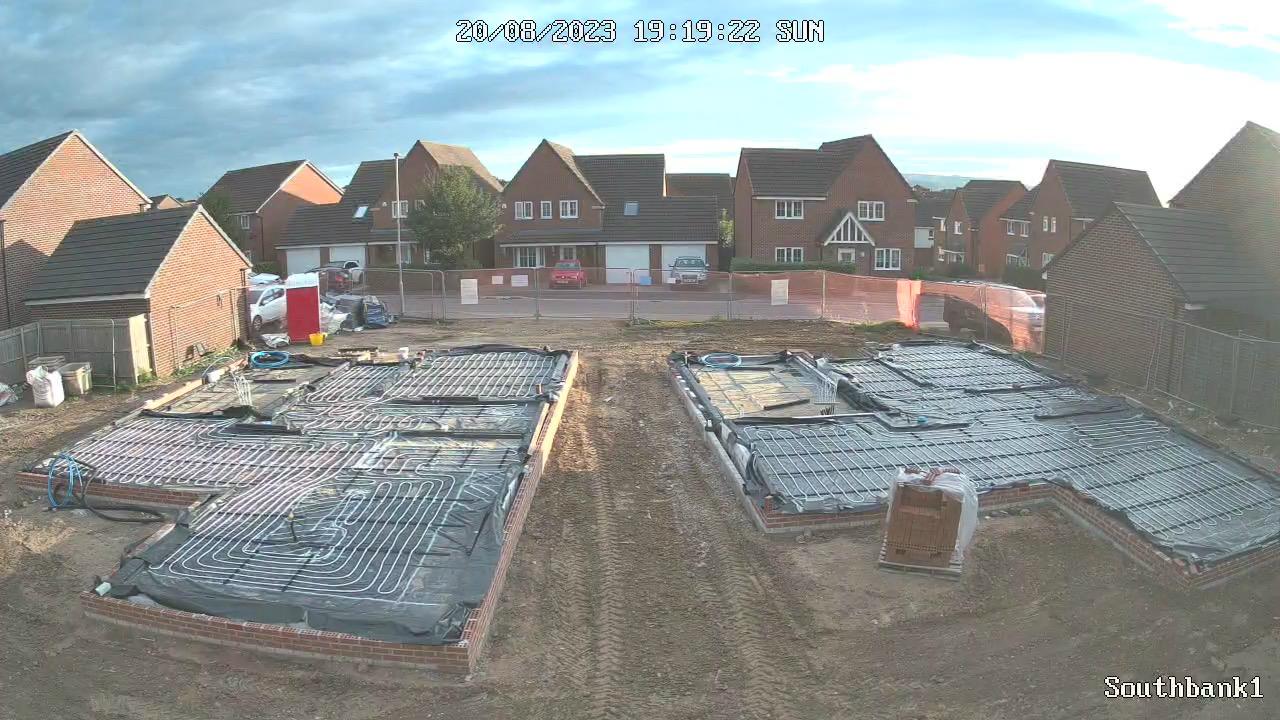
Both plots are ready for the oversite pour now. It was planned for last Thursday but due to the heavy rain that was forecast I postponed it. There will be a small cost involved but better safe than sorry. It’s not going to cause any delays as I had planned to get all the foul drainage in next week (I’m still waiting for my sky plastics delivery after 4 weeks) and to stone the site up ready for brickwork and scaffold. It’s also a shame the supplier of the hardcore has re discovered the beer glass and has gone awol. I’m on to plan b with a more expensive supplier. This has been a frustration since demolition because the demo contractor was supposed to leave me 100 tonnes of crushed brick as part of the deal. I’m now learning that many people don’t do what they promise. I need to go back to some paid work for a few days ( for a rest mainly) today is my first day off in 5 weeks.
 1 point
 -
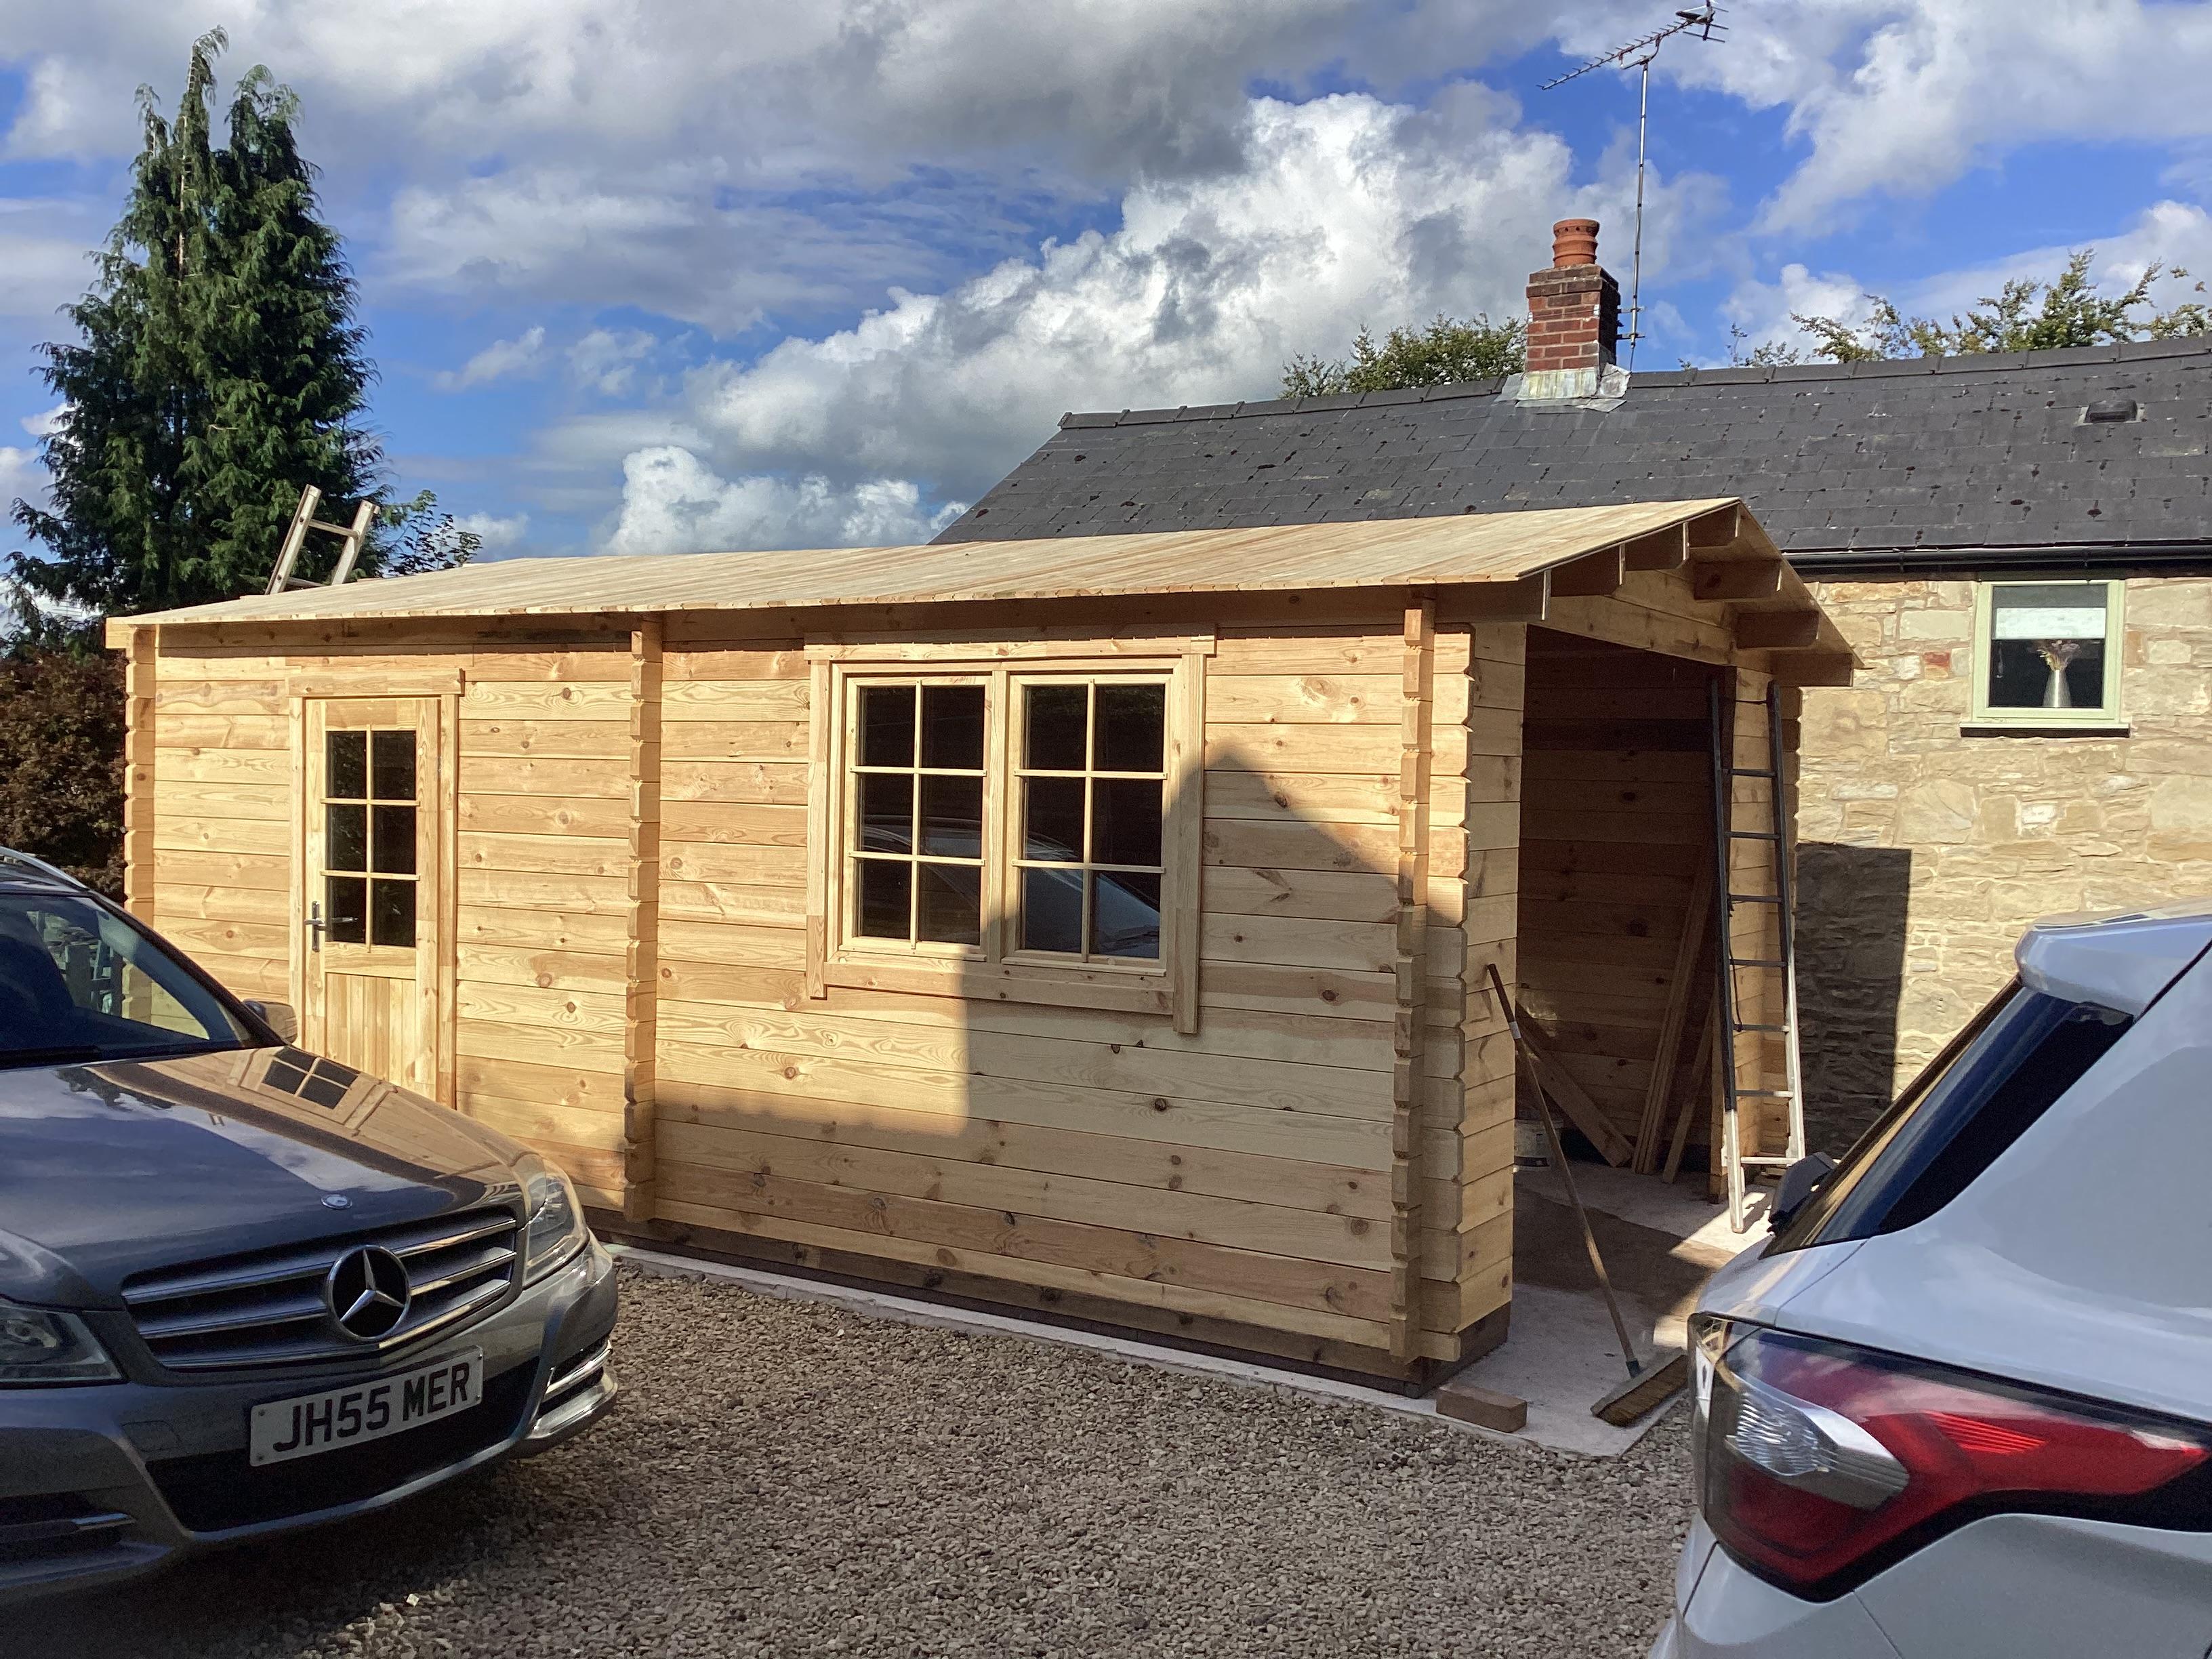
Well a couple of fruitful days and mostly finished, pottering to do with facia,s and eves etc and roof shingles, could not have done it without my Team, my mate and his wife who both worked very hard. Just need to talk to garage door people about what to buy but I think an ordinary up and over will be fine for what I want.
 1 point
 -
You'll get condensation on the face of the boards unless you have a vapour control barrier underneath. Last thing you want in an old building.1 point
-
Somebody will pay for the camper vans. Same for the scrap metal.1 point
-
My builder told me to choose handles that have their own return spring and not rely on the spring in the latch to lift the handle. I guess he'd seen the problem before. Google found.. https://www.morehandles.co.uk/blog/door-handle-not-springing-back-how-to-guide-from-more-handles/1 point
-
It’s probably better to get your studs fixed down first
 1 point
 -
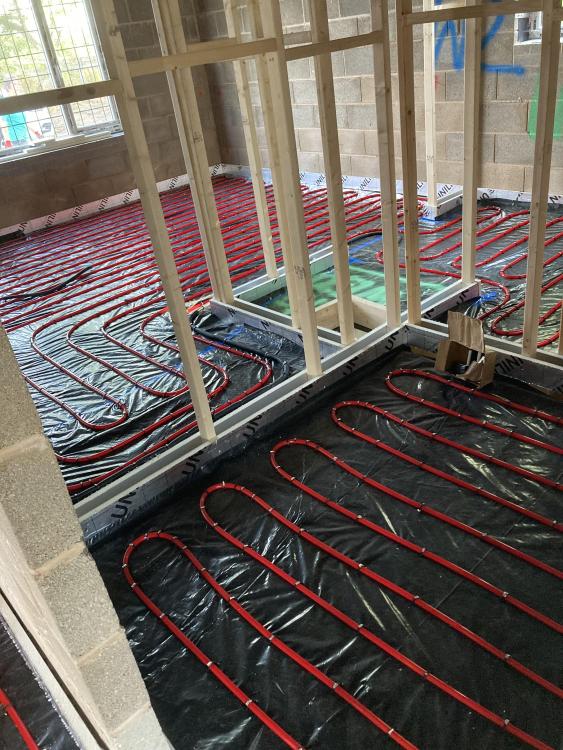
Thanks. I have asked for someone to do me a design via the website Fiverr. I do indeed intend to have a low flow temp of 35 degrees, with 150mm centres and yes the house is quite well insulated.1 point
-
Just as an update, I haven’t been on the site for many months. My husband is still hospitalised albeit he is now in a brain rehabilitation facility. How I’ve survived this period in my life I don’t know, it will soon be a year. Sadly he has no memory of building this house and although I have been bringing him home for a few hours at the weekends he has very few memories of the last 5 years. Funnily enough he does remember building the last house 15 years ago! I don’t know what will happen but sadly I don’t think there’ll ever be another self build.1 point
-
We have an MBC twinwall with 300mm blown cellulosic filler between panelvent on outside and coated OSB3 racking on inside, with battened out service cavity inside that. We use 2 × 110 foulwater piping for through-slab main ducts, but we added then added our other penetration ducts after the racking out was done, and most after filler was blown. We use a standard process which my wife and I did ourselves (not one to delegate): We decided on the placement and o.d. of each duct depending on the requirement e.g. external lights, satellite cable, ... these varied from 20-40mm. I then used a 60mm × 15mm masonry bit to drill a pilot hole in-to-out and then used the appropriate hole cutter inside and out to right-size the opening by pulling the masonry bit back to on the opposite side to give clearance for the cutter but other than that, returned the bit as a through guice to avoid losing the hole. I then cut a piece of the correct o.d. abs pipe to about 100mm longer than the hole, and notched on end with a multi-tool to form a simple cutter. This pipe could then be slid over the bit, then hand twisted / pushed to core the hole through the insulation using the 60mm bit as a centre guide. Once through, each pipe was taped to the panelling and siliconed to seal, then multitooled to leave a ~10mm flange. Once the cable / service was in place, the pipe void was foamed and siliconed to make air and moisture tight. The whole process once practiced took about 30 mins per service opening.1 point
-
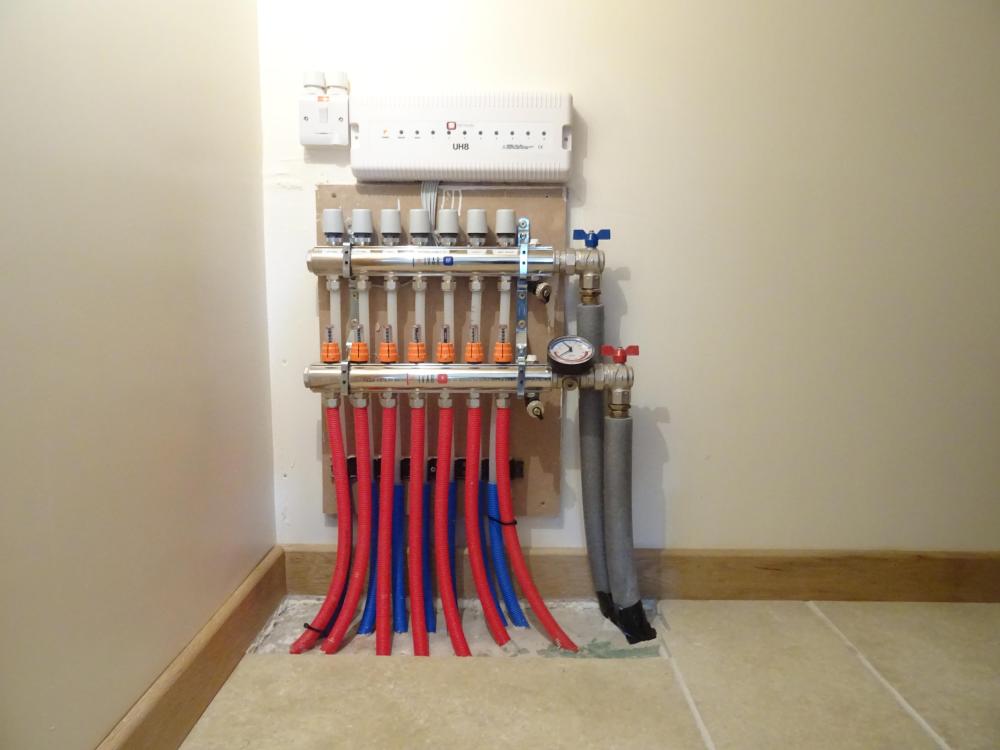
I wonder whether the plumbing differences are marginal? The controller might be more important. I have Uponor plumbing and Heatmiser wired controller. Works fine. Also, half-a-dozen zones (some peeps have only one). This gives me full app control, but that does mean I'm dependant on the app supplier (Heatmiser in this case) (a) staying in business, and (b) keeping their server going. Having said that, it wouldn't be a big deal to swap the stats & controller, I swapped out from a Uponor non-app-based stats/controller to the Heatmiser one myself in a couple of hours. I forget the exact cost but it was around £400. Personally, I would stay away from the wireless stats/controllers - you'll see that some people on BH have had reliability problems with them. Wired also means you don't have to swap any batteries.1 point
-
Or you just drive the pump from the thermostat switch. I would use the manufacturer controller every time. Set it to weather compensation, balance loop flows. No thermostat other than the valiant control. Operate as a single zone. If you have a towel rad stick an electric element in it, to make it dual fuel. Good for summer towel drying. Also gives you two zones to comply with building regs1 point
-
As above, but think you meant to say is you have multiple loops on each floor and you want to operate each floor as a single zone. On the manifold, each loop will have a flow meter and isolation valve. You don't really need to have an actuator. The thermostat will call for heat and start the UFH manifold pump. The mixer valve will limit flow temperature. You need to then balance the system so each room is at the correct temperature, so to increase temperature you give more flow, to decrease temperature less flow. No need for floor sensors or that much complication.1 point
-
You don't need any of that. Just setup each manifold as a zone. E.g. one per floor with a single stat for each. Let the ASHP control the water temp and the room stats to simply call on/off. There really is no advantage to anything more complicated like this in a modern, well insualted house. Don't need the actuators, sensors or individual stats at all. You can set the "heat" in each zone by setting the flow rates. Your UFH design will tell you roughly what flow rates you need for each zone. We have this setup with a 60l buffer. Works well for the rare times it's needed.1 point
-
https://www.elementshop.co.uk/prowarm-aluminium-spreader-plate-390mm-x-1000mm-with-150mm-centres-bulk-buy-1-to-9?gclid=EAIaIQobChMI987eh4W8-AIVFIBQBh0pnw6NEAQYASABEgL-MfD_BwE1 point
-
That’s interesting, sounds like it’s carbon neutral ? ... on that note, I’ll get my coat ....1 point
-
https://www.current-news.co.uk/mcs-express-concern-as-octopus-drops-accreditation-requirement-from-smart-export-guarantee/0 points


This leaderboard is set to London/GMT+01:00