
Leaderboard


Popular Content
Showing content with the highest reputation on 10/29/18 in all areas
-
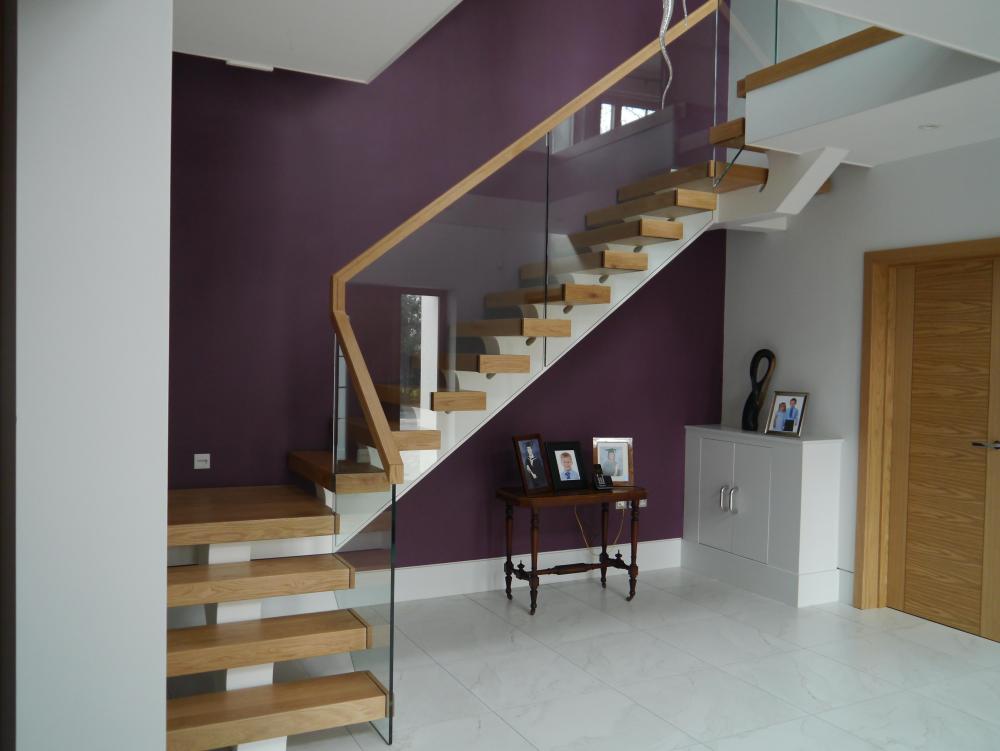
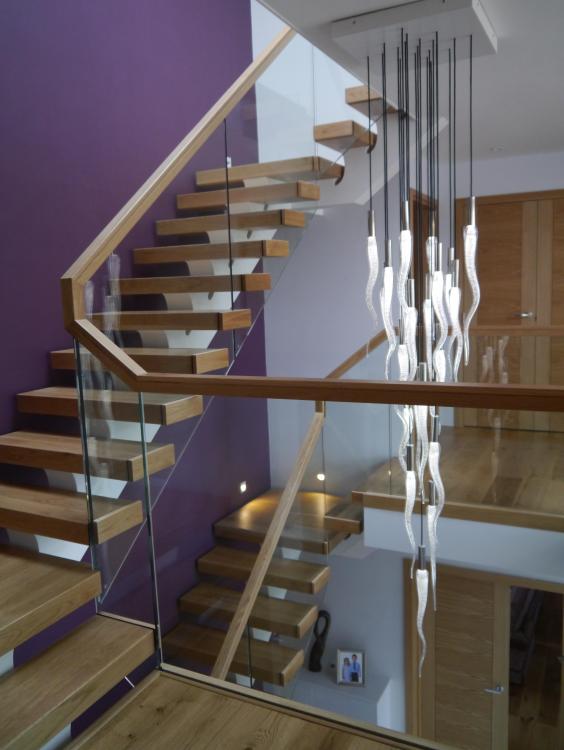
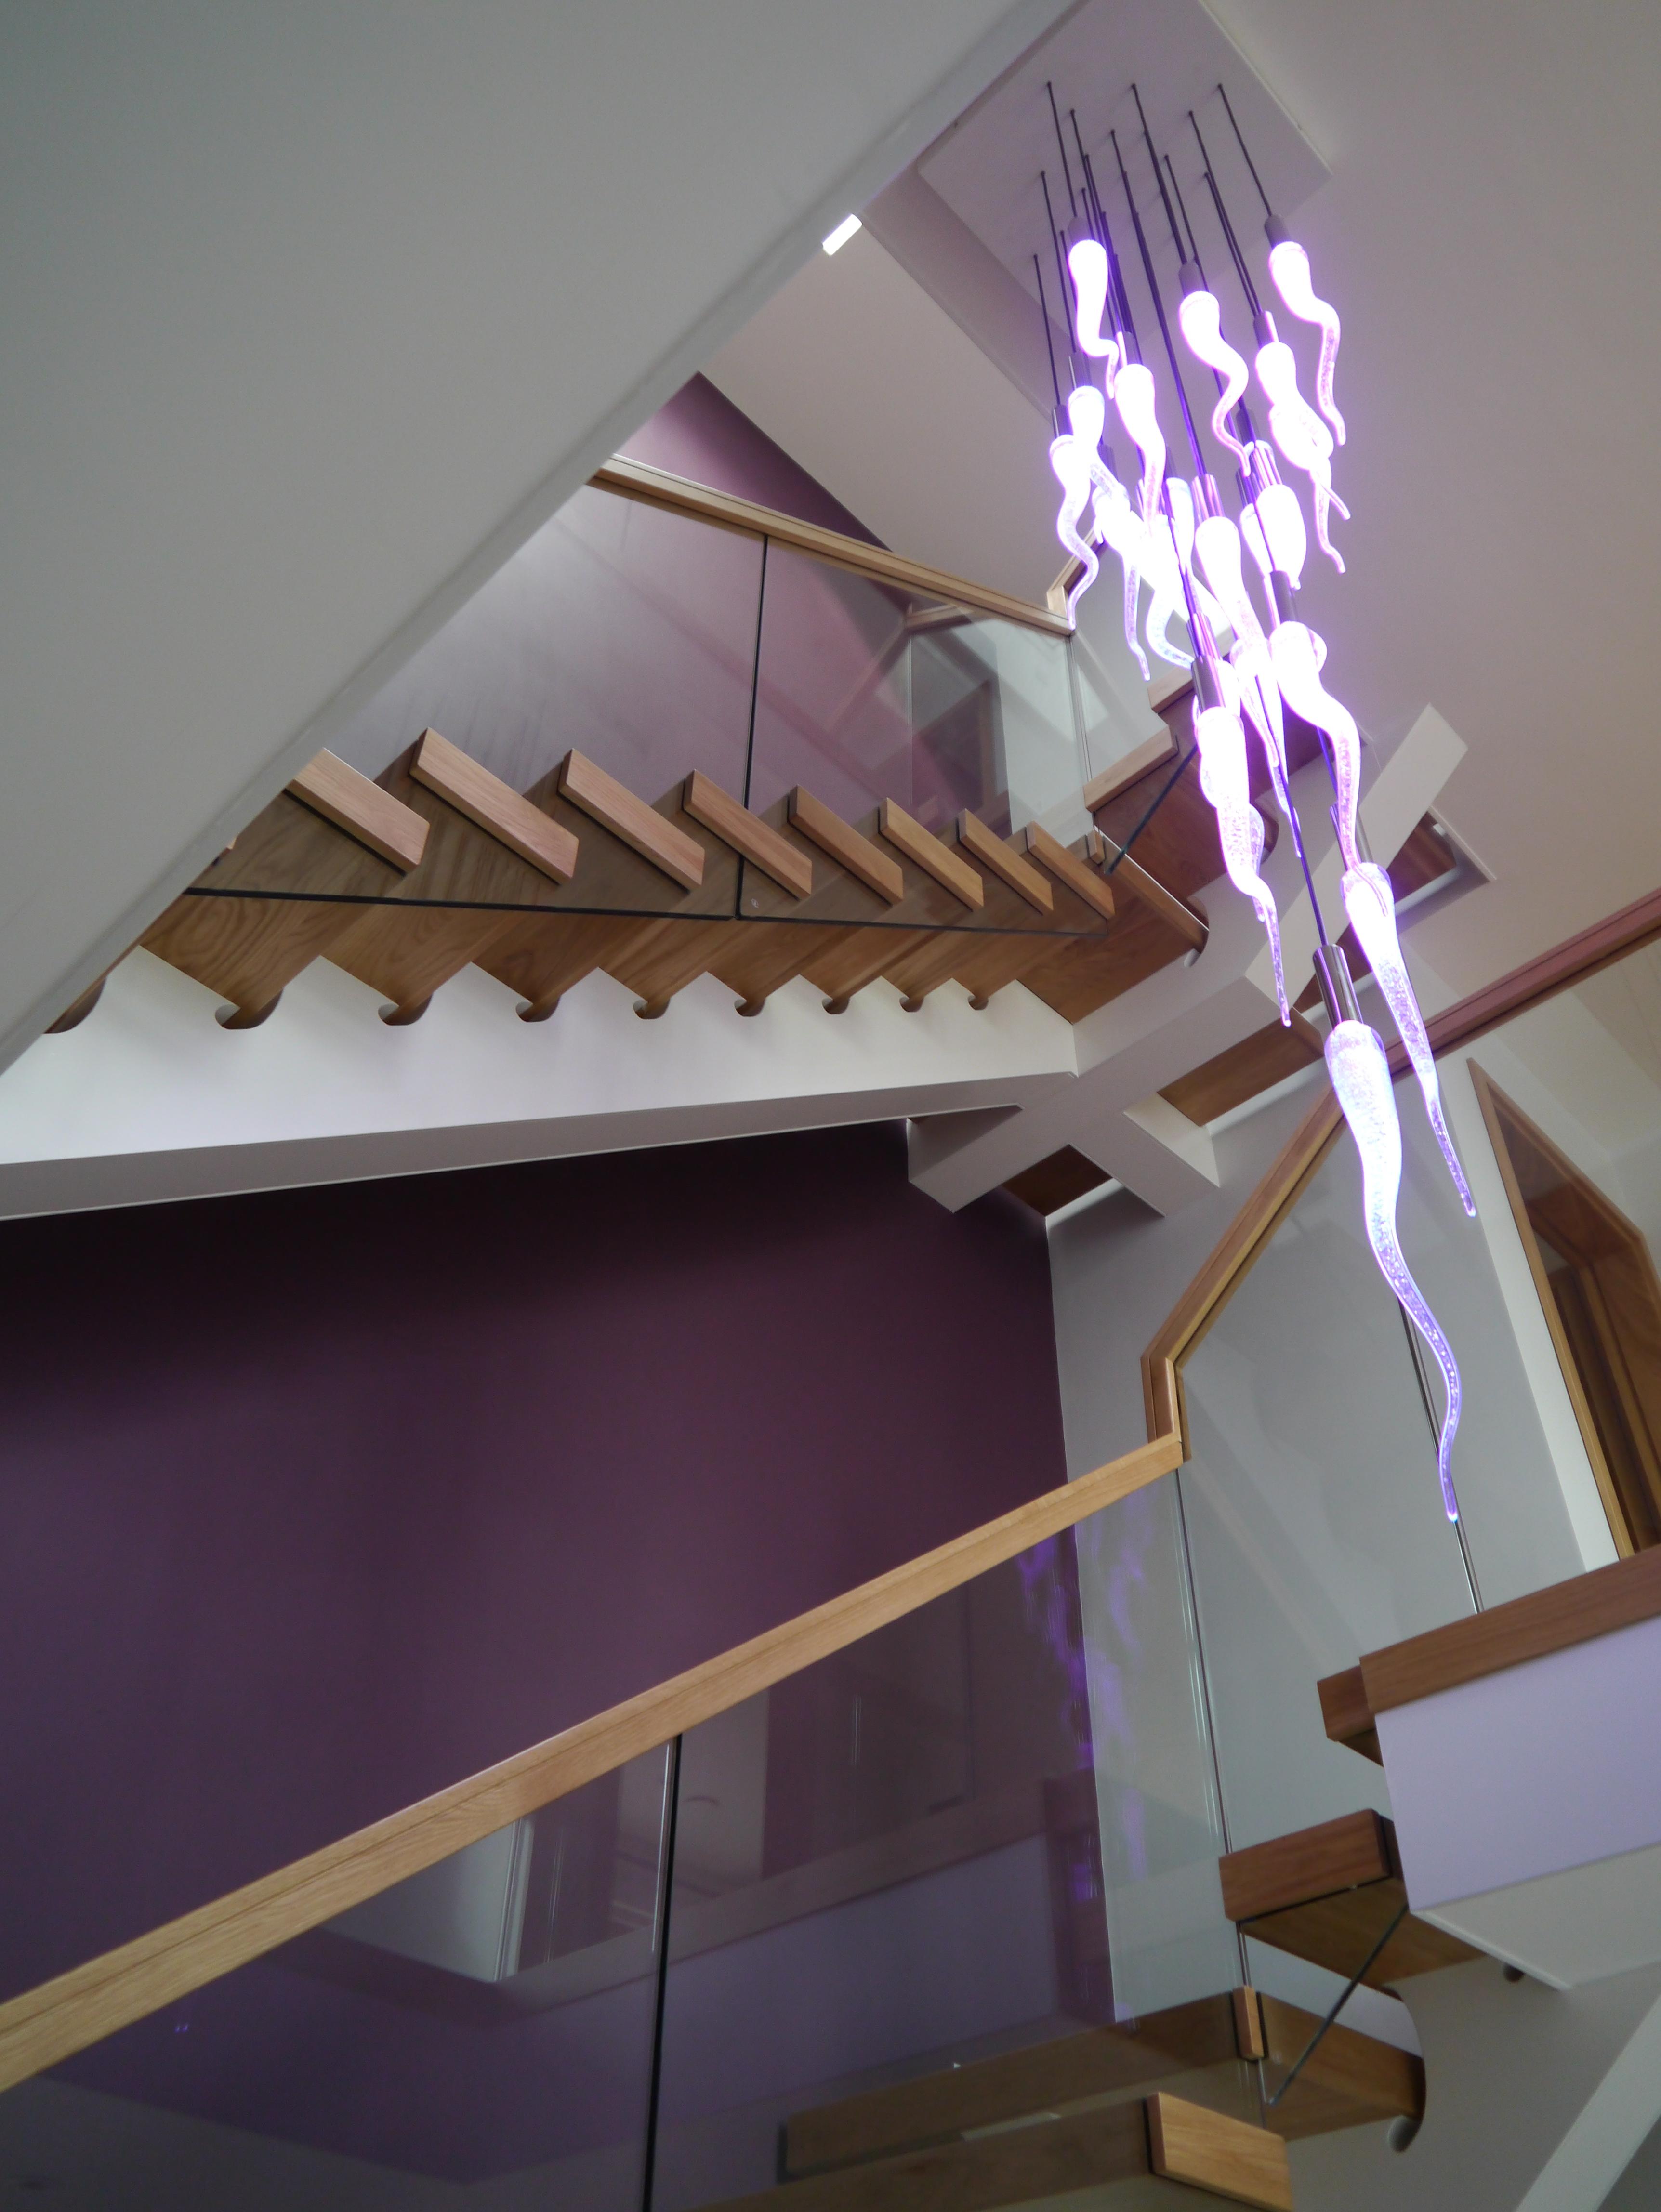
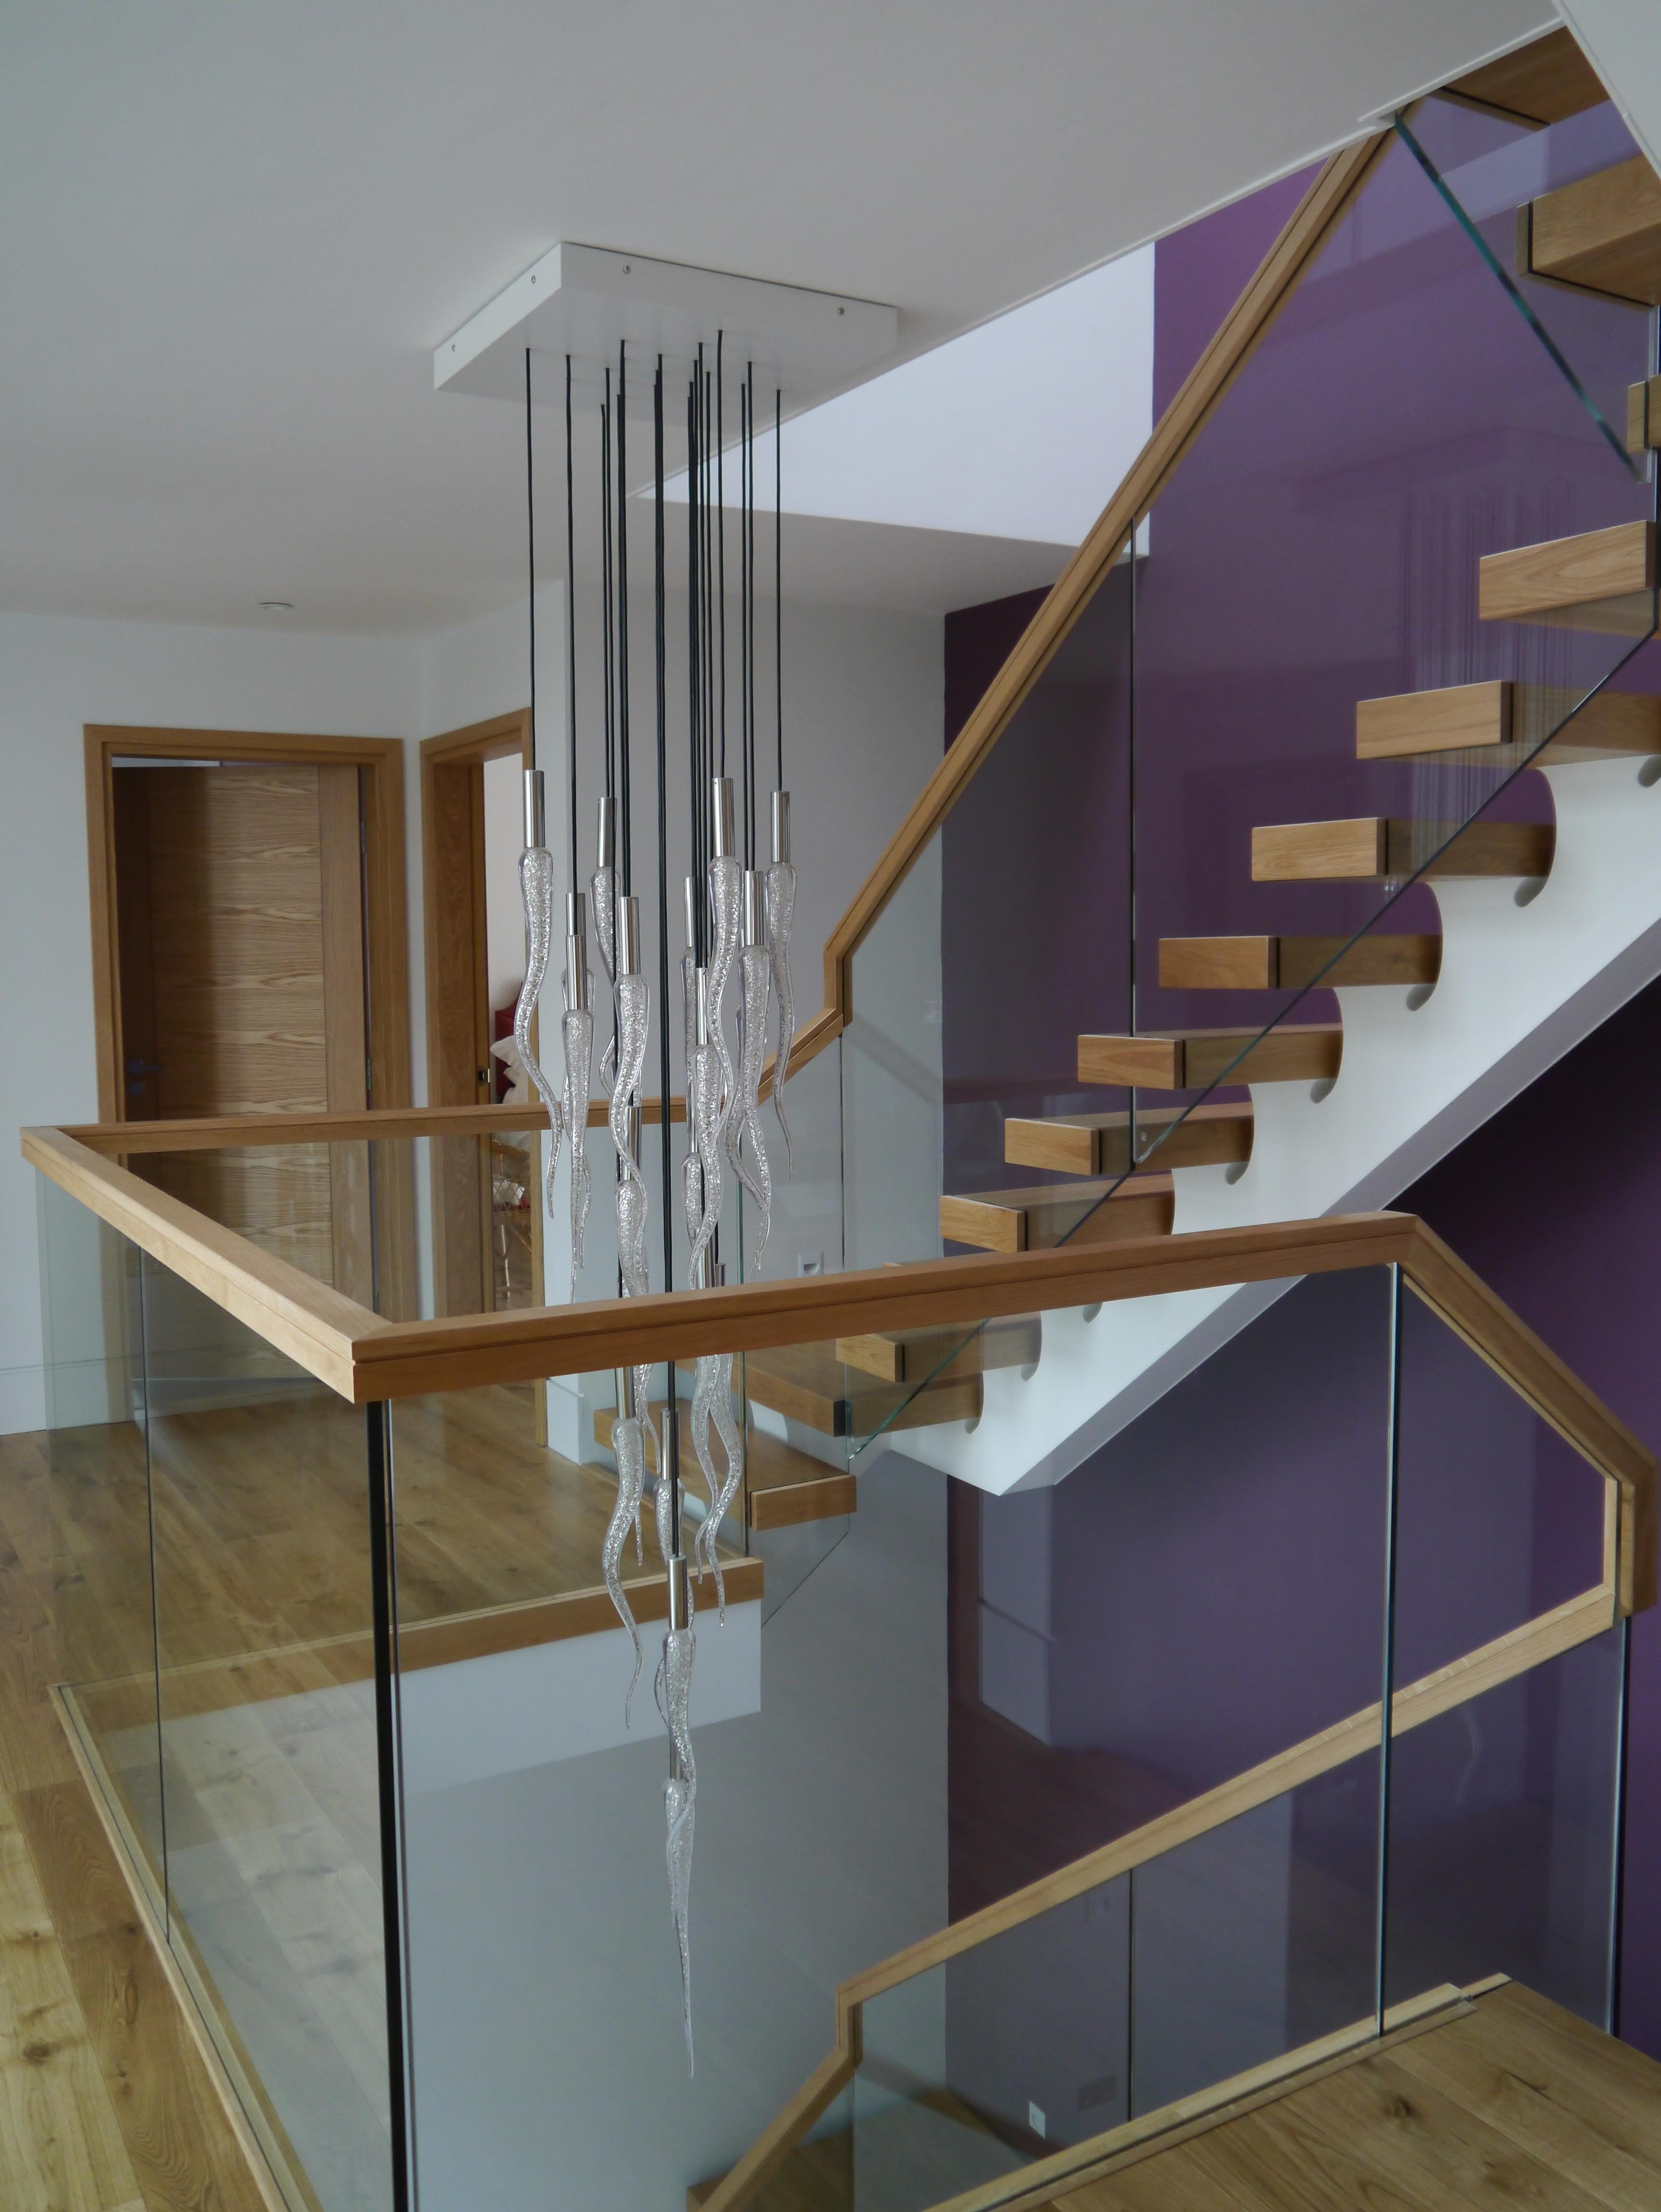
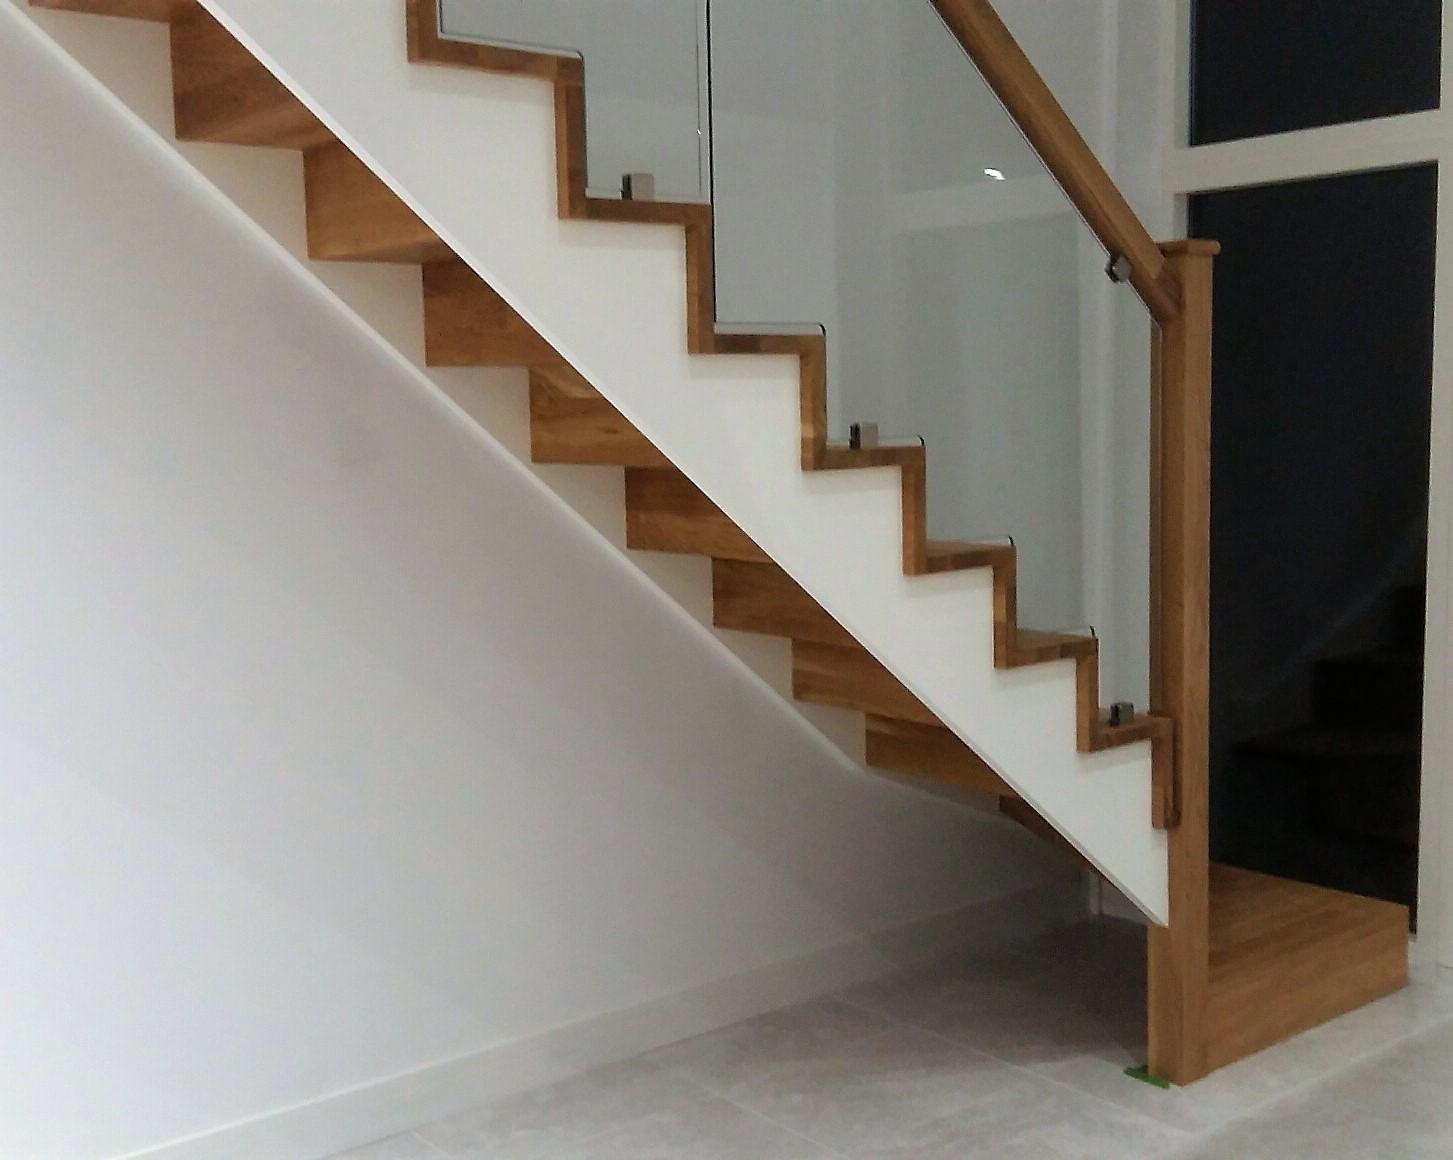
Our stairs were designed and manufactured by a specialist stair manufacturer in Dublin - Jea Stairs, Colin Walsh. colin@jea.ie - see www.jea.ie, The stairs were all assembled in the works, for acceptance, diassembled and shipped to the UK, with the glass balustrades delivered separately. They did a great job and Colin was very helpful. with practical advice and support. I attach a few photos


 5 points
 -
Some pics and a vid clip..... first floor.mp4


 4 points
 -
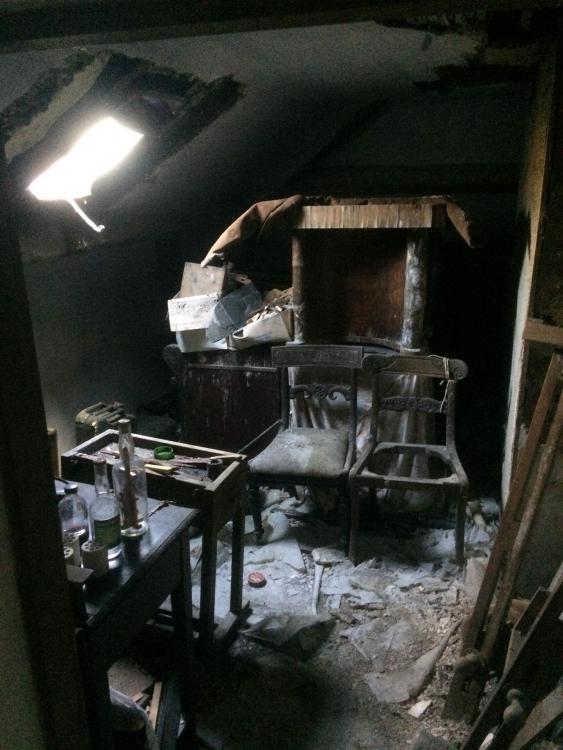
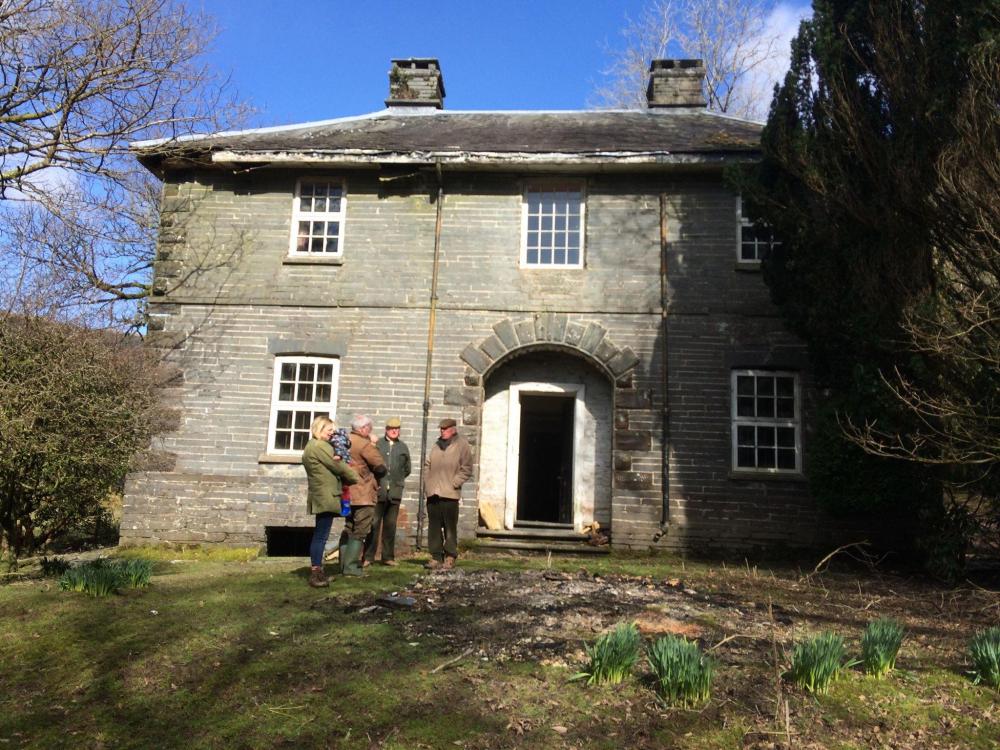
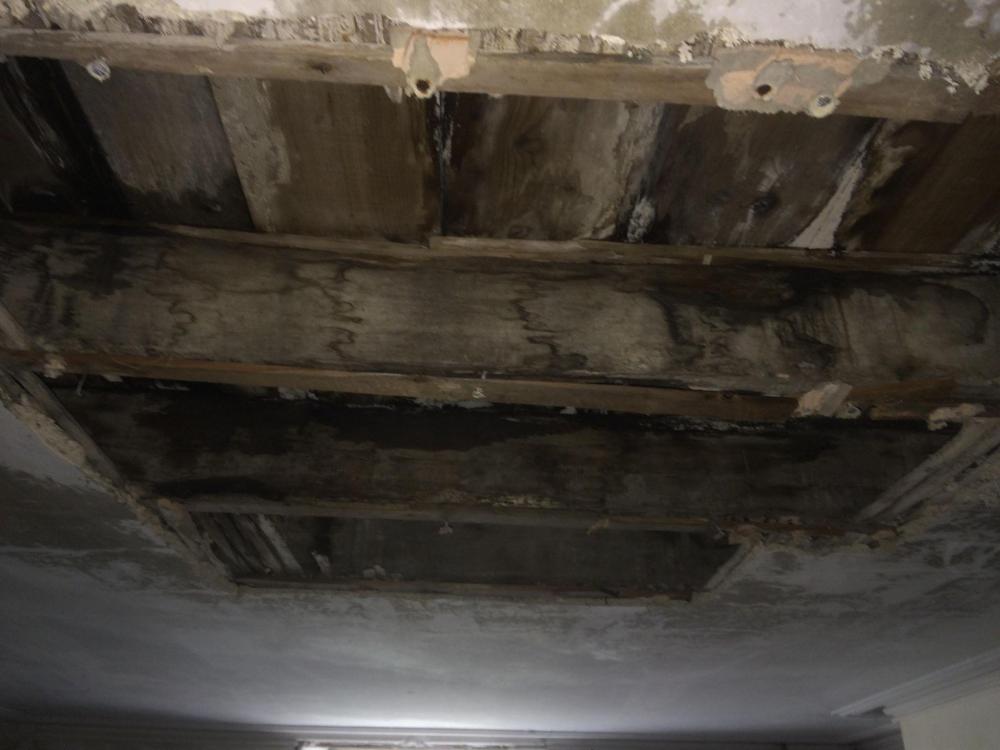
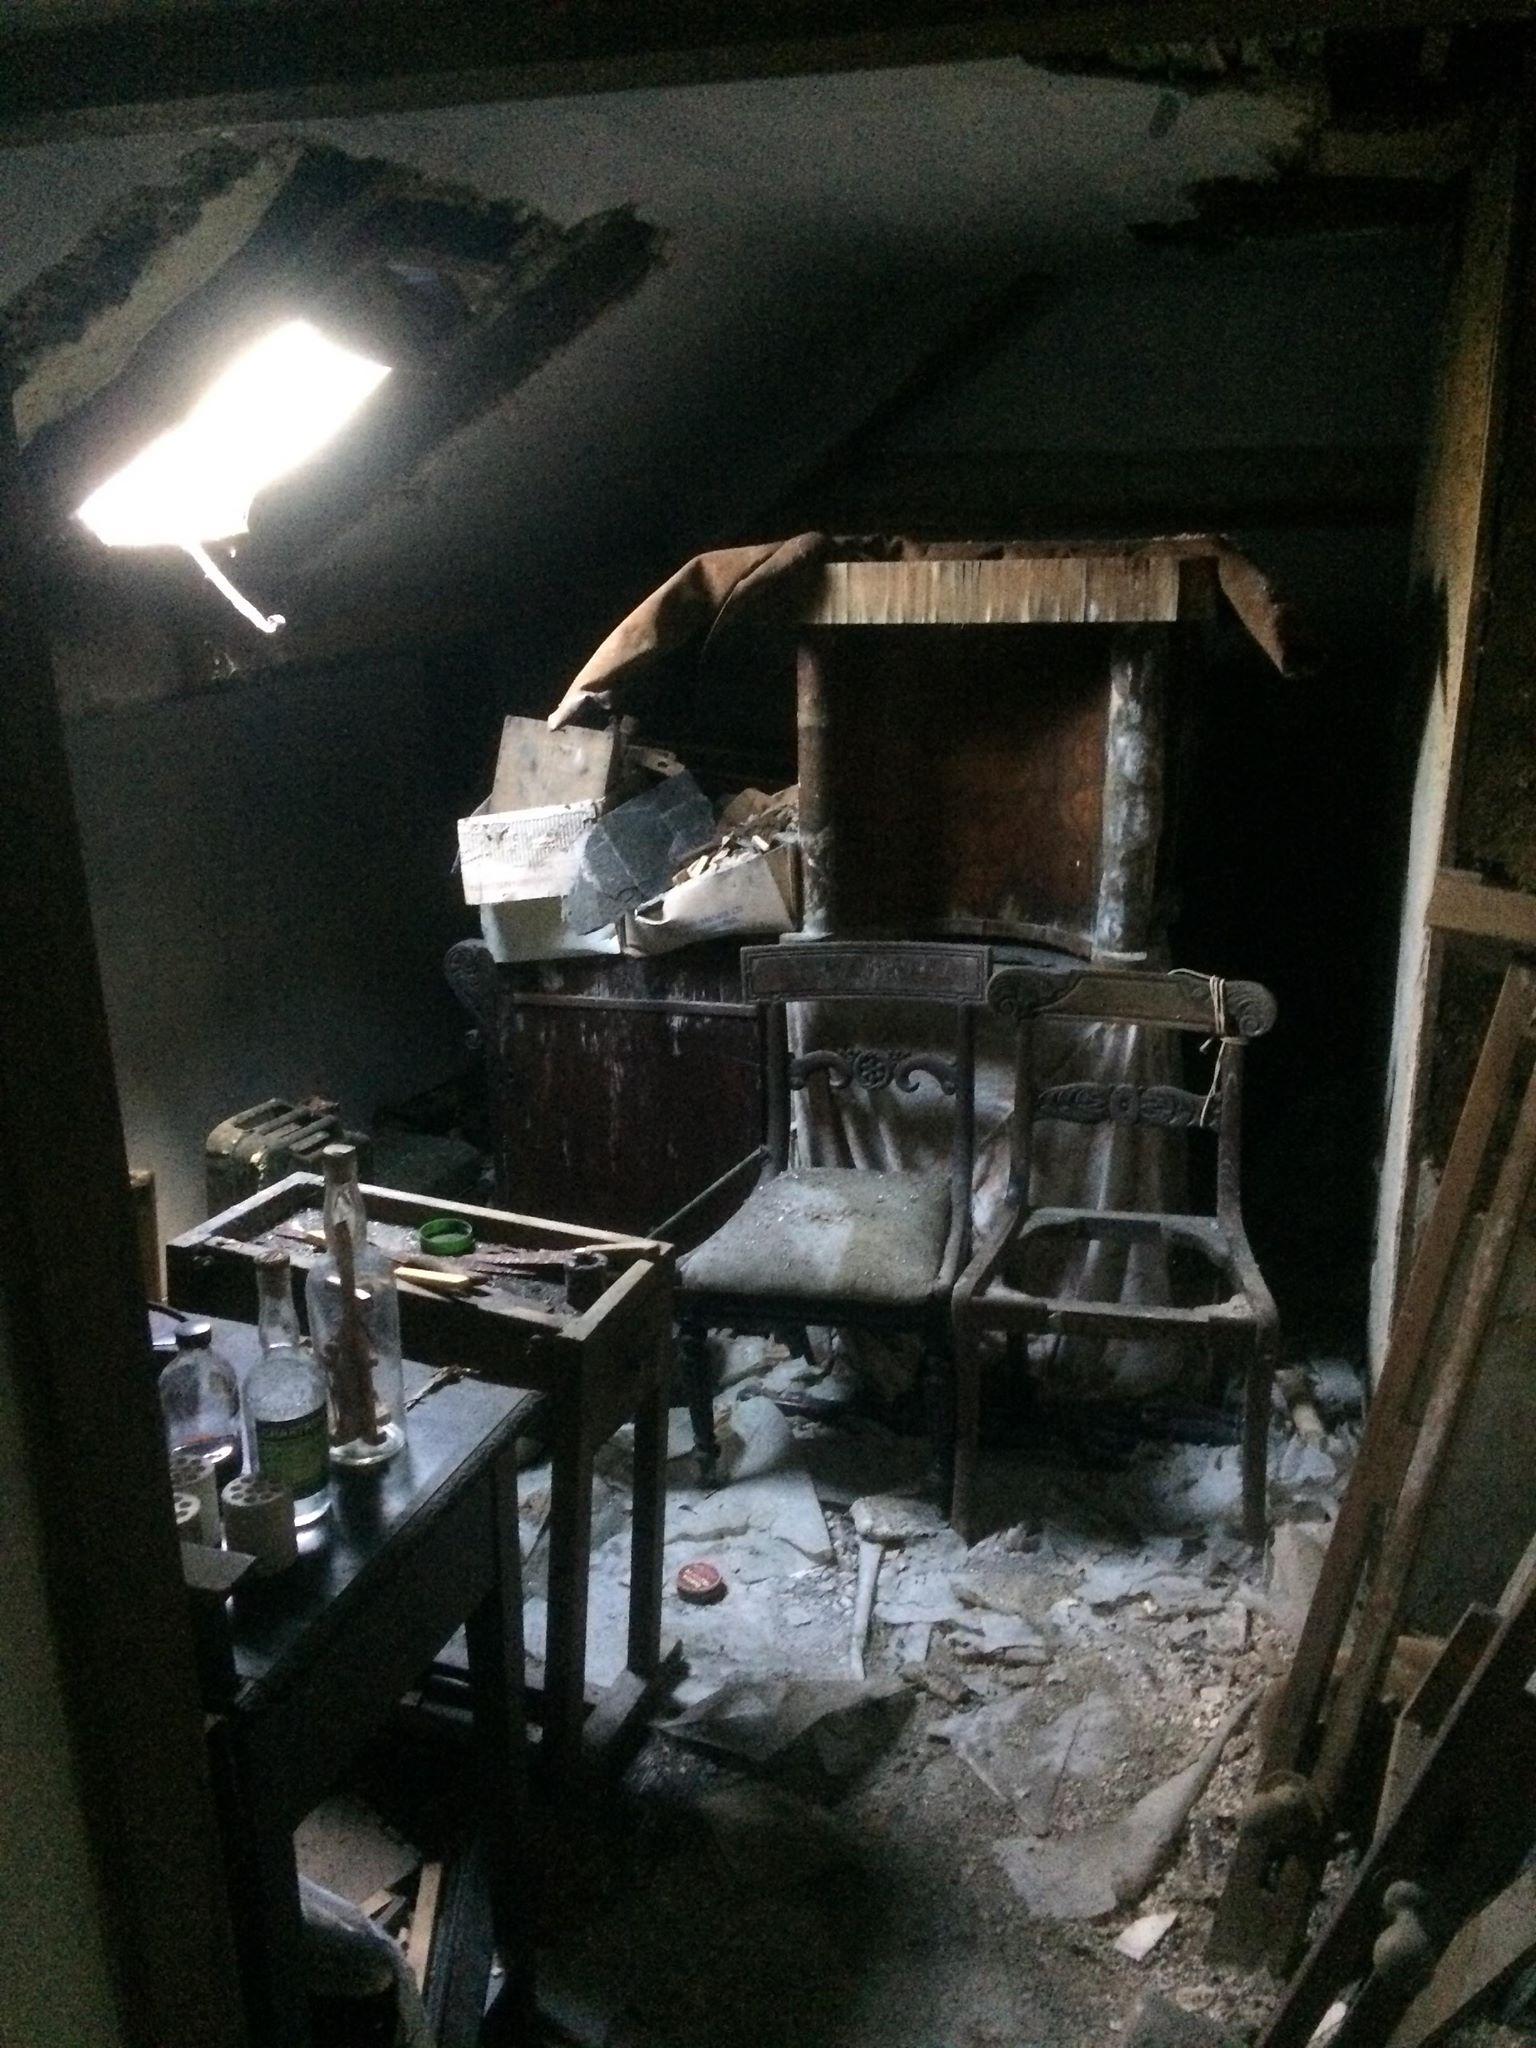
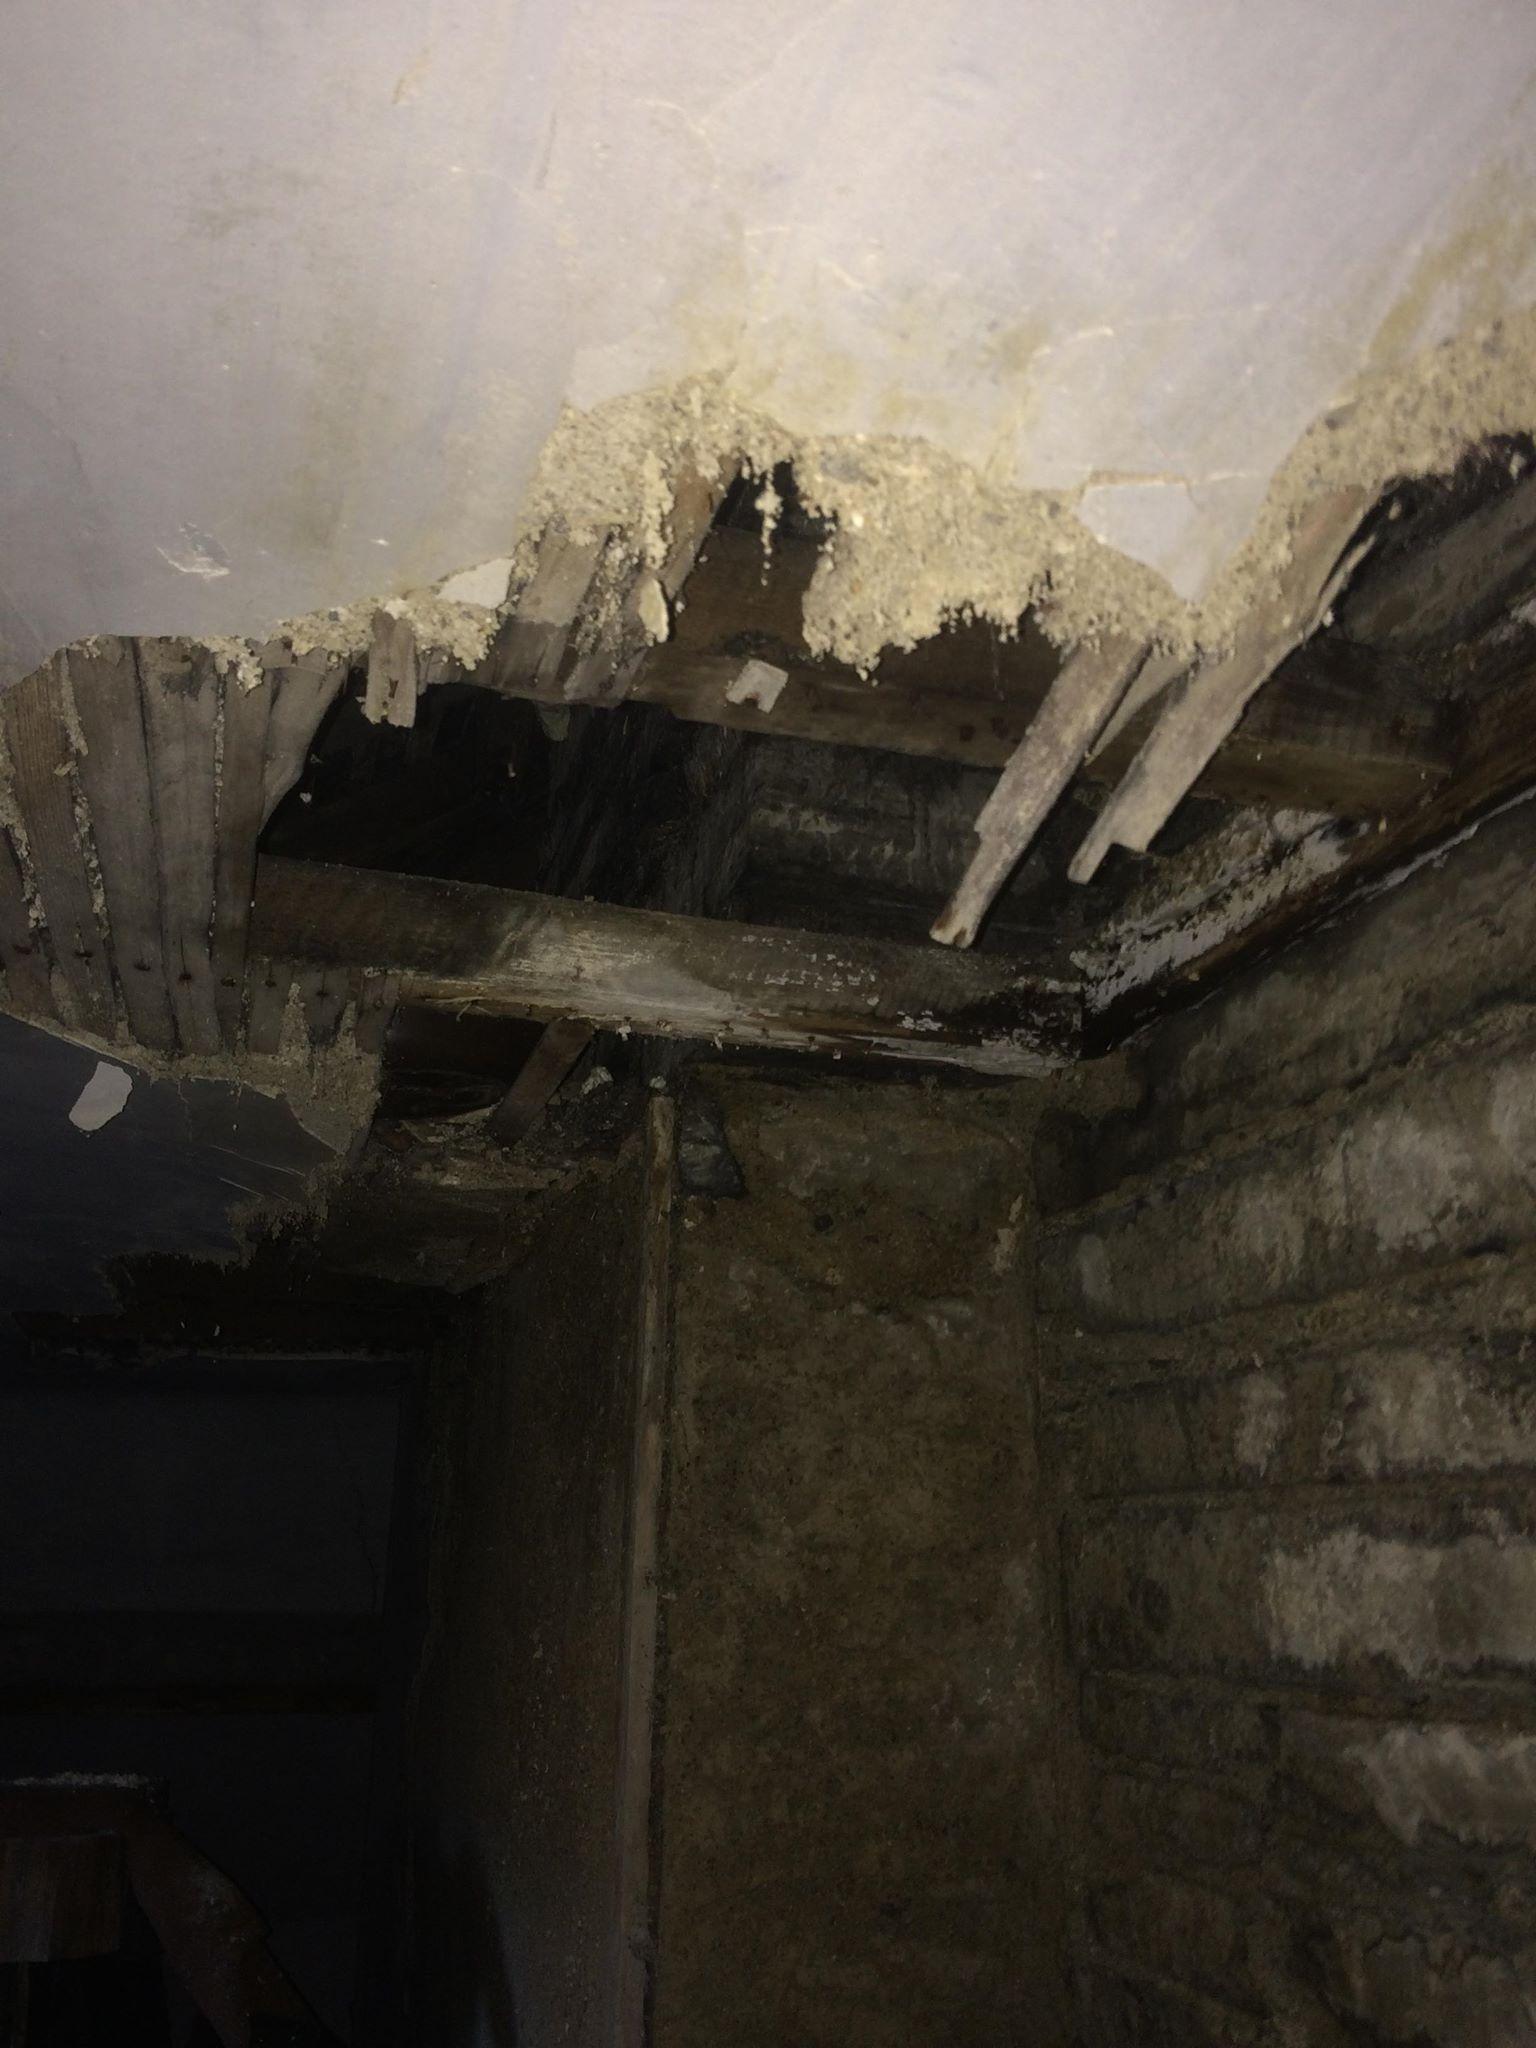
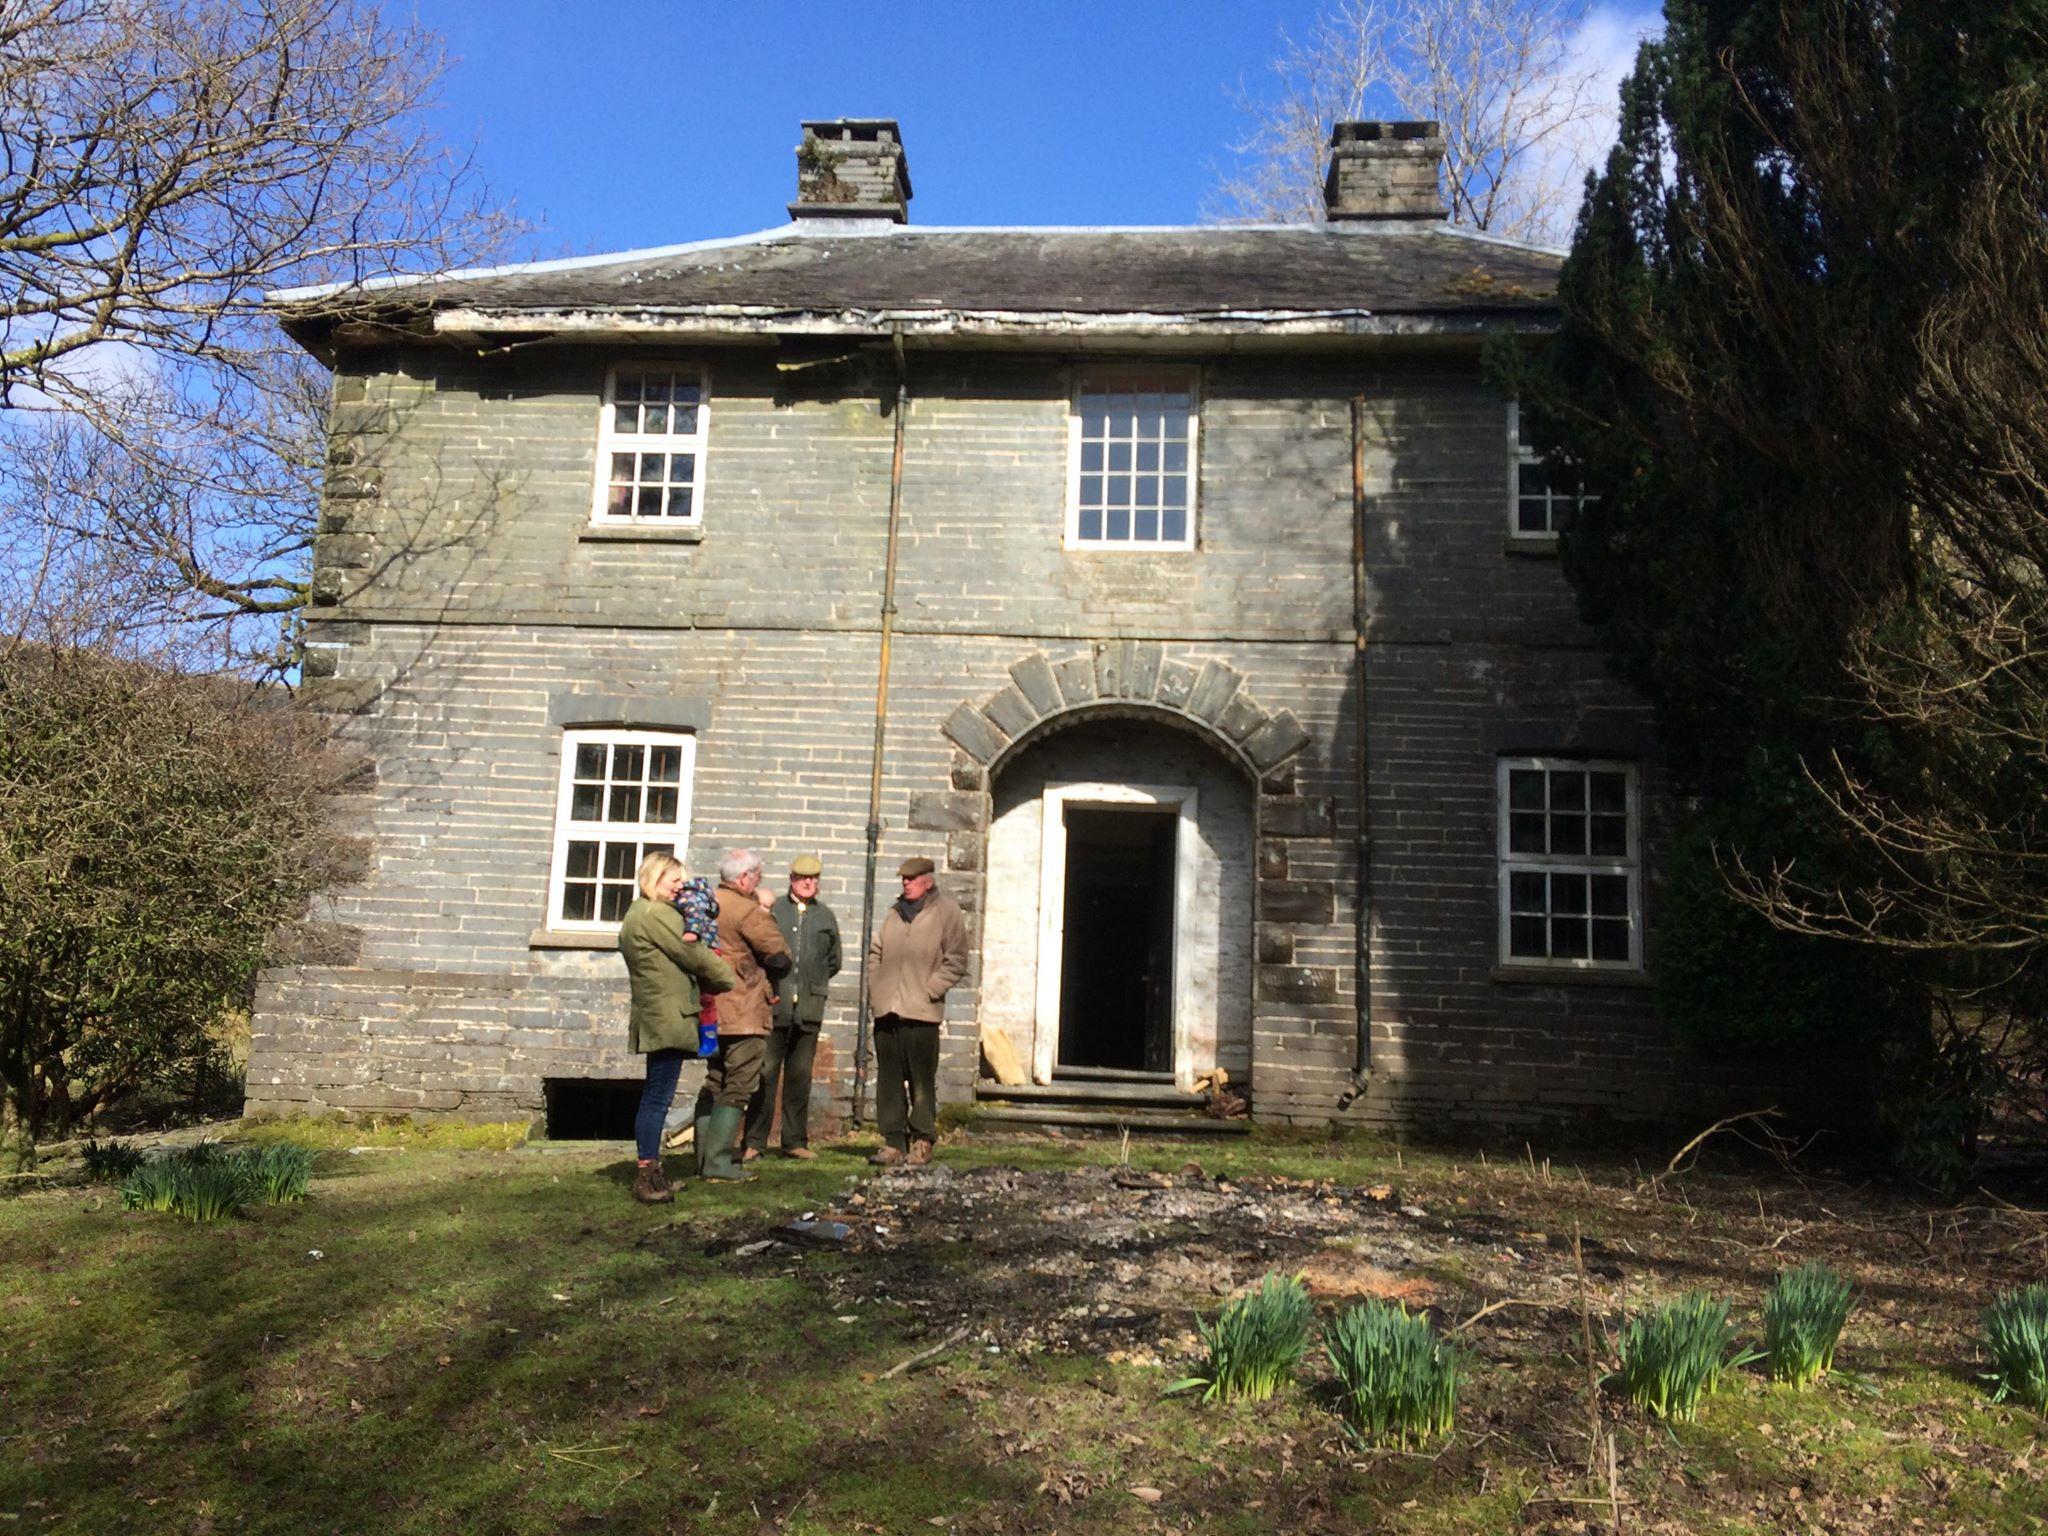
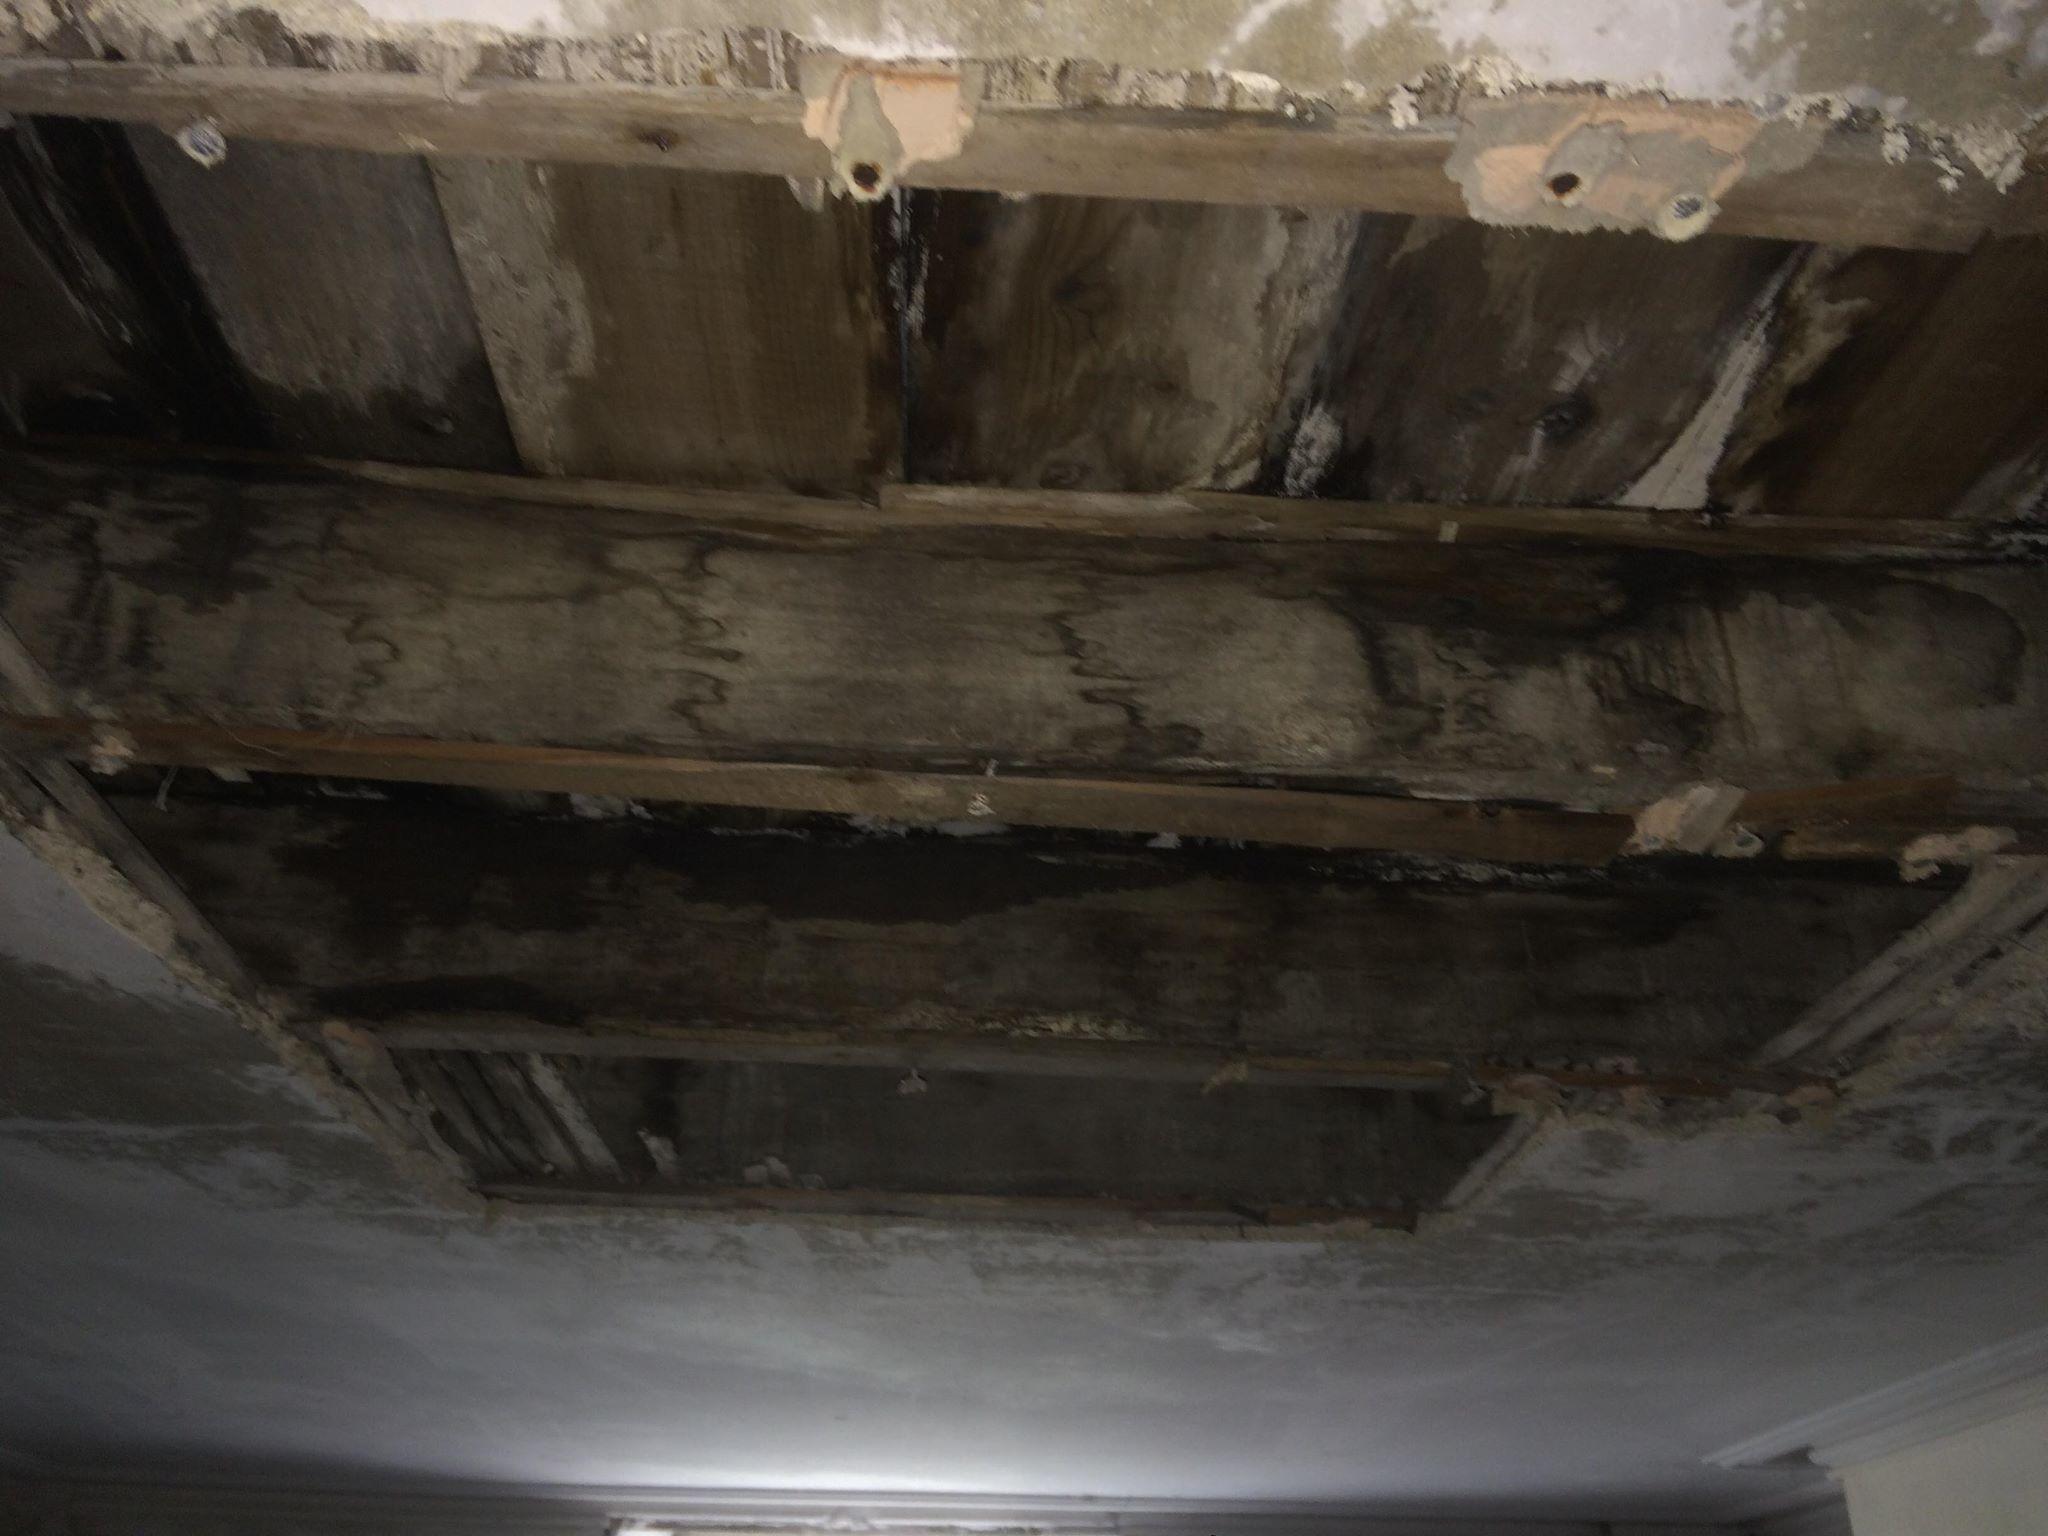
I thought I'd say hello having stalked this site for a few months. We're looking at taking on the type of project most sane people would walk away from, but happily the wife and I have a healthy dose of insanity which keeps us ticking along. It's a detached mid-Victorian house, but perhaps more Georgian in its appearance and style, which is tucked away down a valley and accessed along a mile and a half track. It's been unoccupied for the last ten years, and pretty much untouched since the 1920s/1930s. Much of the furniture in the house is from that date, having been left from owner to owner. It's never had an electrical supply (or even internal wiring), and apart from design and installation of a complete offgrid energy supply, it needs a full reroof with new guttering and drains, repairs to the chimneys, re-plastering in many internal spaces, renovation/replacement of the staircase, new DHW and CH system, full plumbing, two new bathrooms, new sewage system, upgrading of the private water supply and treatment, new sash windows, new external woodwork. It's also grade II listed and has a resident roost of lesser horseshoe bats. Despite the list of issues, it is though fundamentally a well built house, with slate walls and sound internal timbers (although I fully expect to uncover gremlins in due course). It's also perhaps one of the most beautiful houses I have seen, and set in a stunning location. It's a private sale scenario, and ultimately the final sale price will be dependent on the equation between the tenders and the forecast completed valuation as we'd be looking at a renovation mortgage. We have an offer agreed with the vendor based on our current projection of costs, but we've essentially got to develop and move forward the first stages of our plans 'at risk' as it could either all fall through in terms of the financing, or we may even choose to walk away if any real deal breakers are uncovered. As it stands, over the next few months we will be drawing up the LBC, and draft and issue specifications for the tenders based on a few distinct packages of works. Hopefully we will be in a position to complete in the spring. As its a private sale, and the current owner probably suspects that he's unlikely to easily find another mad couple quite as keen on this as us, he's given us the space to do both the heart as well as the head phase without worrying about other potential buyers. We've been spending the last six months digging into the feasibility, getting surveys and opinions of some of the critical elements, and each time the answers are there and we've been able to move onto addressing and working through the next issues or questions and so far no deal breakers have turned up. Everything we'd want to do is technically feasible but getting tendered costs against these though is a very different question! The irony is that we were not looking for a project at all, but this one has sort of found us. Previously we've only ever needed to do very limited works on previous houses - bathrooms and kitchen refurbs, bits of repointing, roof tile replacement, external decs, chimney lining and so forth - so a major renovation is new for us as a couple. I am fortunate in that my job has meant that I've been around a number of projects involving historic buildings over the last ten years, but it's very different when you can rely on the collective expertise and decision making of a project manager and a professional inhouse team full of technical experts to when its just up to you and the dog. Although, reassuringly it seems the dog does sometimes know more than me too.3 points
-
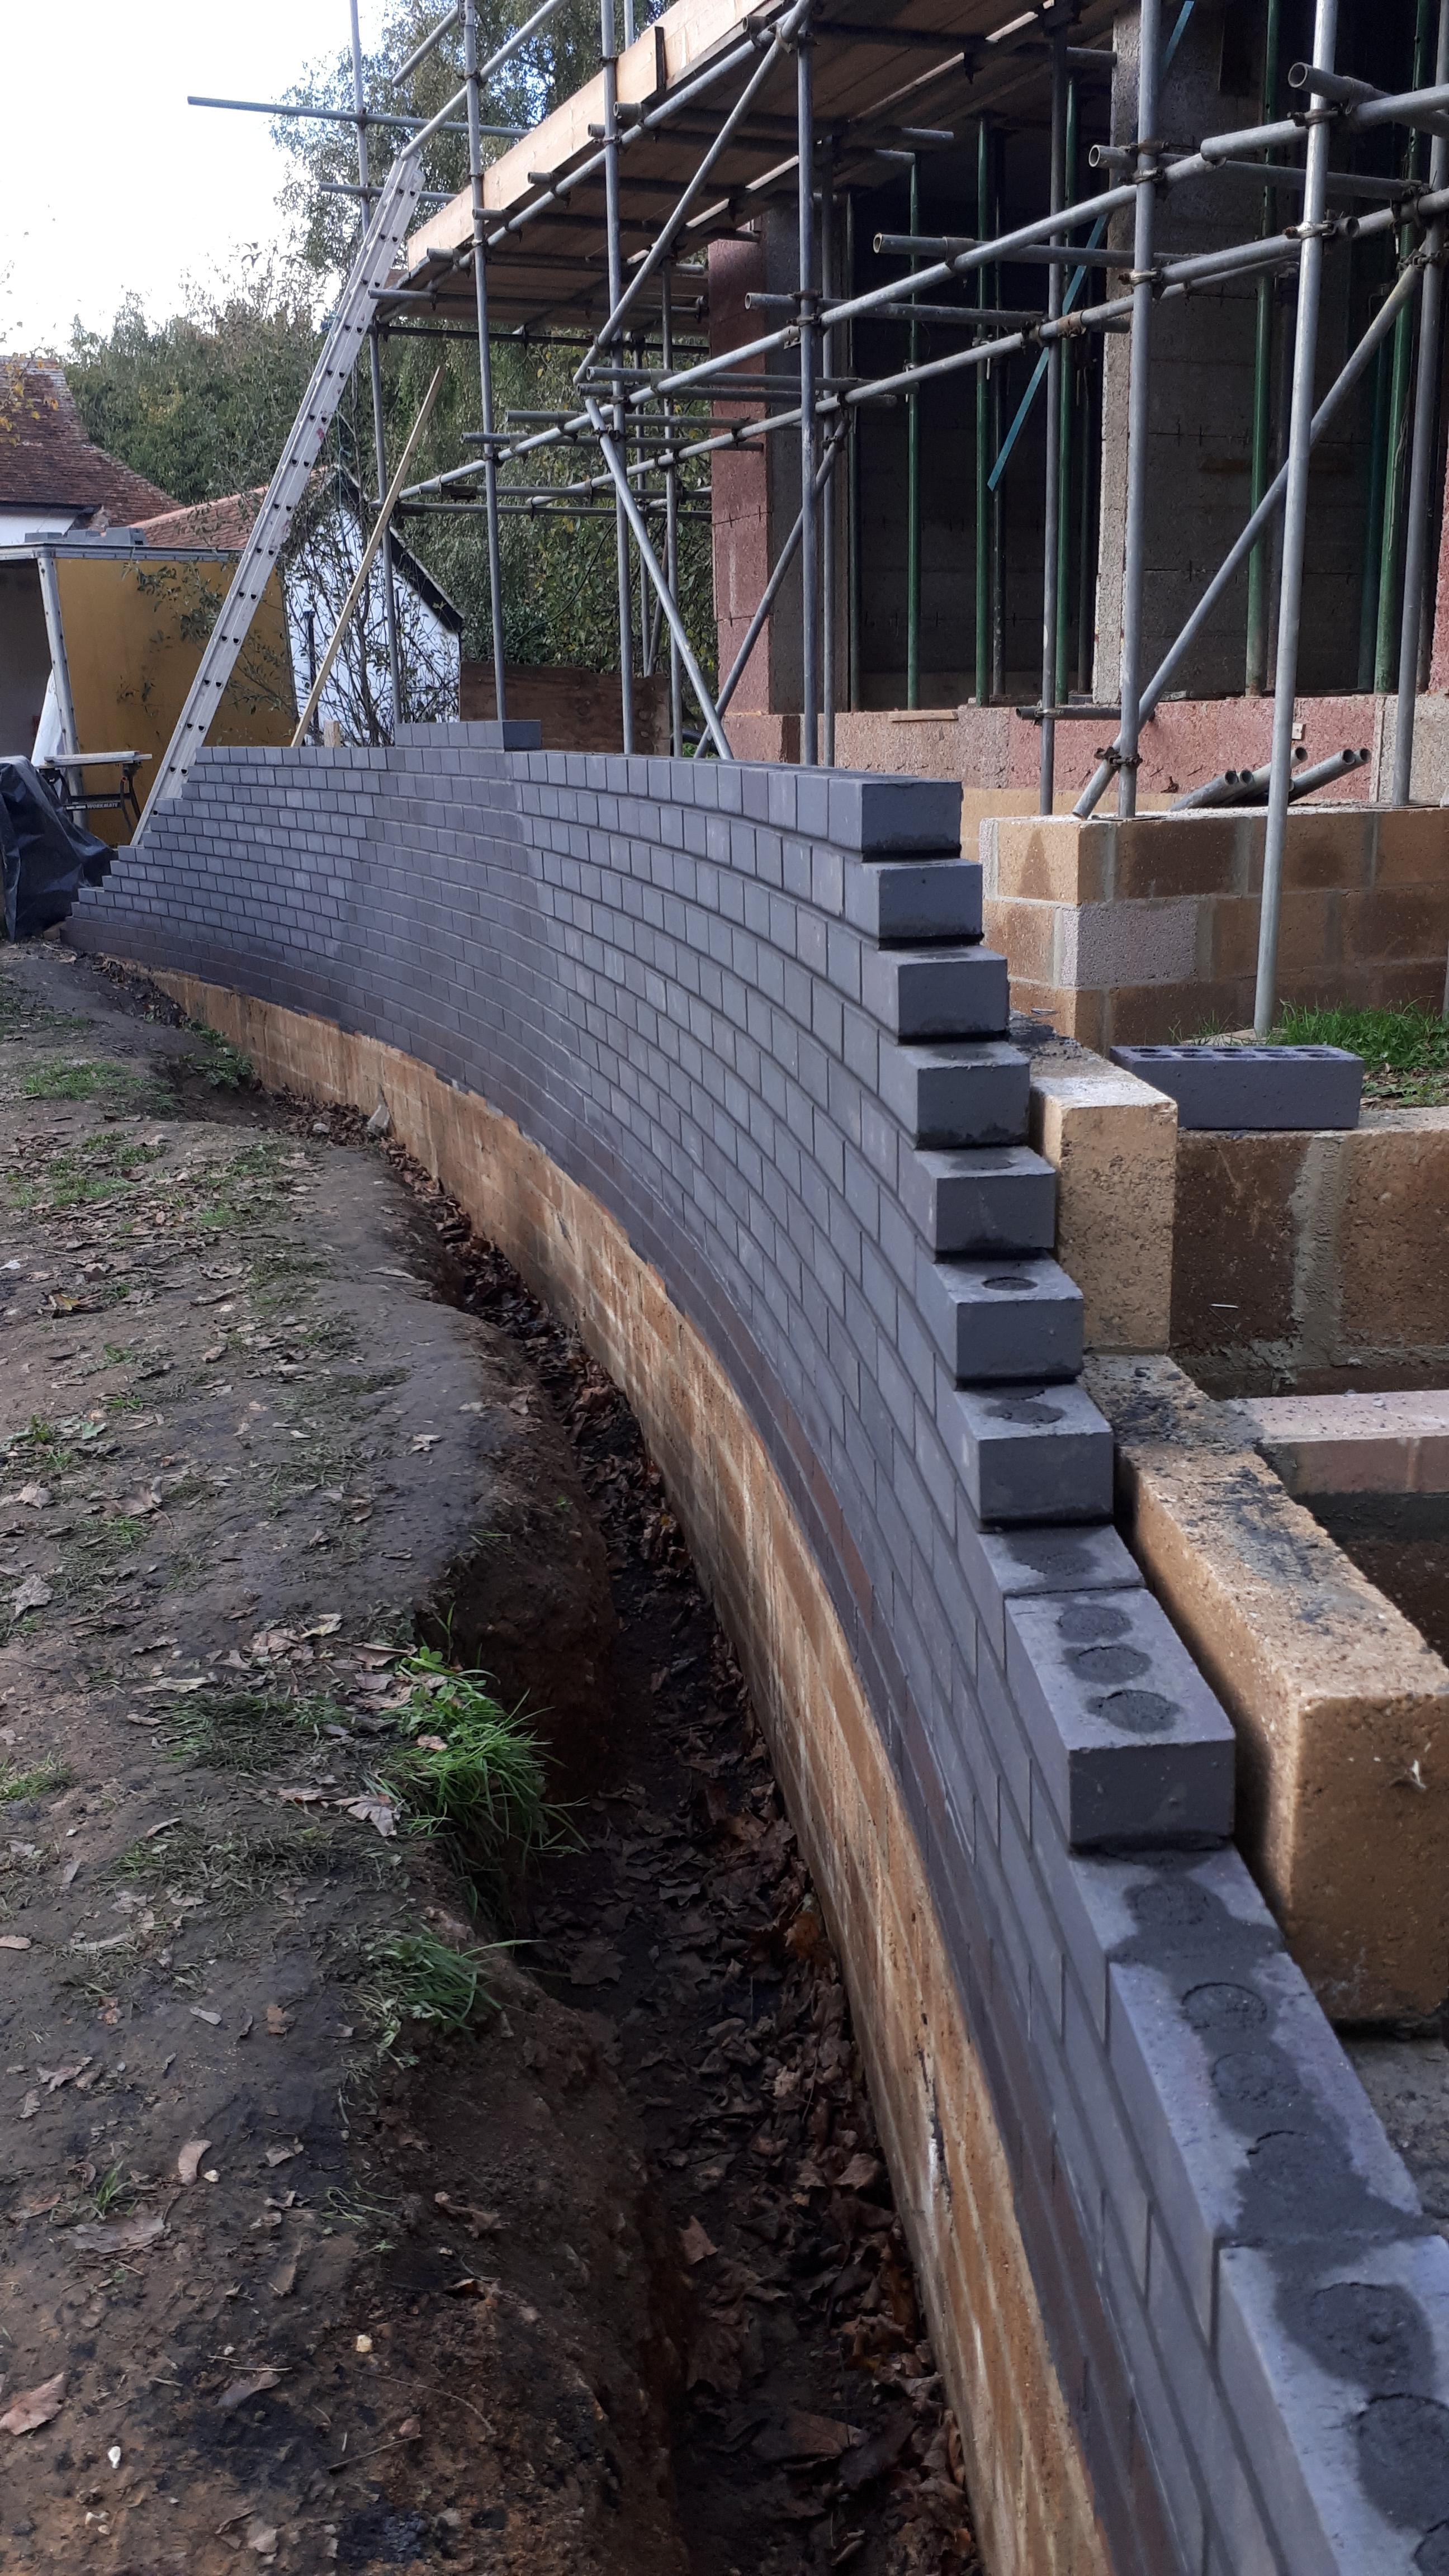
Hello all, I've posted a few times here but thought I would introduce myself. I live in east Kent near the coast and am 2 years into the extension, loft conversion and major renovation of a large bungalow. I've been a DIY'er for many a year but took it too another level when we found a dream project (rather rundown and barely habitable) home in a large plot which was too much to pass up. After a few years spent securing planning consent, we eventually started work in 2016. The house was in two sections - an almost derelict timber framed bungalow (which was barely habitable) and a more recent (but still pretty grotty and very badly insulated) long, barn-like extension which was built by the previous owners as a granny annex. The advice we were given was universally knock the whole lot down and start again but we costed that up and reckoned we could do the job for half the amount by keeping the long annex as a basis for the house, demolishing the timber framed buildings and extending back onto the freed up footprint. It also meant we could live in the project and do it in stages. I had some eye-watering main contractor quotes and quickly realised that the only way forward was to manage the work myself using sub-contractors and doing lots DIY. We started in April 2016 and spent two weekends with a reciprocating saw cutting down the old timber framed building. I then had sub-contractors each for ground works for the extension, block work, 1st fix joinery for the new intermediate floor and roof timbers for both extension and loft conversion. And finally roofers for both slate and zinc cladding to new dormers. I also did EWI to the existing building DIY fitting the insulation and then had a local renderer finish. I also DIY fitted 20+ windows and doors. There were lots of tricky issues and decisions along the way, some intensely stressful periods, and It's already taken way longer than planned, but remains largely on budget. Most of the major works are done but I have an empty boarded-off stair well with a ladder to the entire upper floor at bare timber/1st fix stage to tackle and finish over the months ahead. I've also got a single storey kitchen to externally clad with more insulation and timber, heaps of landscaping to do, also MVHR to fit and commission, two bathrooms to install, plus a load of decorating, snagging and odds and sods to take care of. I expect it will take another couple of years before it's really at a point where we can call it done. I'll post a few pictures here at some point to give a flavour of what we've been up to. I've been following discussions here with interest and finally go around to signing up recently. I'm looking forward to joining in with the discussion.3 points
-
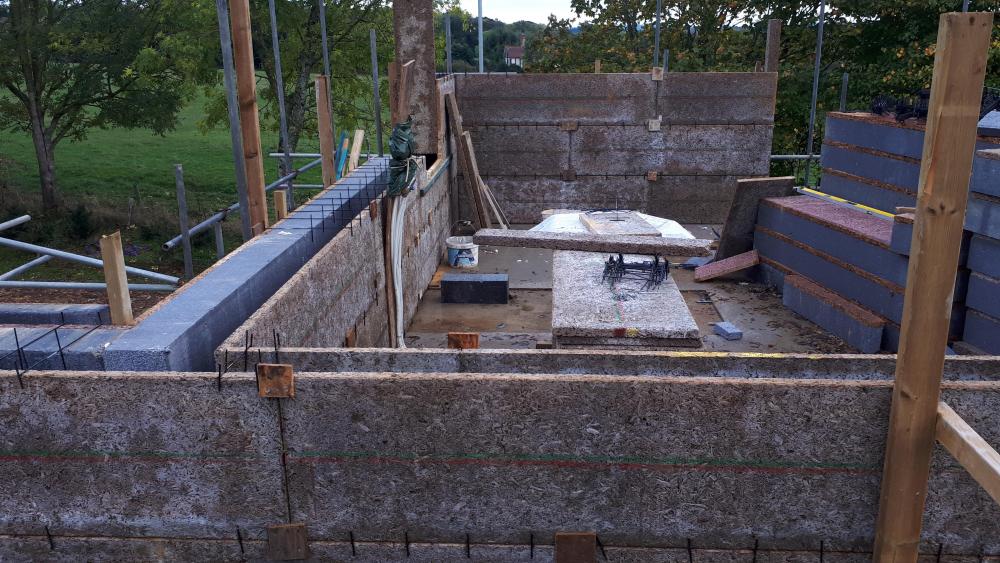
Hello and thanks for a really informative forum. We are building a 220 m2 icf structure on the Isle of Wight in a reasonably exposed SSW facing location. The house will be clad in a mixture of Tata standing seam steel and larch, with a Tata roof. We have concrete floors with underfloor heating and will be using mechanical ventilation (MVHR). Work started mid June and we have been helped by a dry summer and autumn. I anticipate we will be measuring up for windows and for roofing mid to late November. I attach a couple of pictures and plans. 169_TR02_REV_J_PROPOSED_GROUND_FLOOR_PLAN.pdf 169_TR03_REV_J_PROPOSED_FIRST_FLOOR_ROOF_PLAN_AND_GARAGE_PLAN.pdf 169 TR06 REV H PROPOSED NW SW ELEVATIONS.pdf

 2 points
 -
? I remember my dads friend getting it put in, my dad told him he was mad in the head, he proceeded, my dad got a phone call one snowy day to say his mate had got out of drive no issues at all, but the road had 8 inches of snow so he had to reverse back and park up ?2 points
-
Saves a fortune on salt!2 points
-
They are talking crap ?. There is still a 10 year rate and it’s governed by HMRC so there shouldn’t be local variations. See here: https://www.gov.uk/vat-building-new-home/eligibility The 5% rate still exists but the 0% rate is much better as it means you can buy materials yourself and fit them yourself and claim the vat back. You can’t do that with the 5% rate as you can only get that if you employ a VAT registered builder (there is no reclaim process). I would give HMRC a ring if you are not 100% sure if you are eligible as there is a lot of money at stake and being eligible (or not) may determine how you go about the project. Also have a read here:2 points
-
The difference between the two units are simple. The early units didn’t get an immersion heater as such. The early development version ( the SAPV ) was just a closed cell with the only means of importing heat to the PCM being dealt with via the heat exchanger. Basically that means you need to heat water outside the cell and then send the heat backwards through the same heat exchanger that is then, in turn, used to export heat to DHW. The heat is produced by a very small Willis type inline water heater which has a pump and a flow switch. The pump speed regulates the flow so when the PCM is at or near frozen it runs slower to send the correct flow temp to the PCM. As the PCM heats through the pump return increases so the pump speed increases to pass water through the Willis heater quicker to maintain the correct flow temp. If the pump or flow is out of sync for whatever reason the Wilis can boil like a kettle and therefore the Willis OH ( overheat ) stat operates. As that’s seen as a terminal failure it requires manual resetting. In the newer, far far simplified UniQ range the immersion heater actually resides in the base of the cell, internally, and is surrounded by the PCM in the same way as the heat exchanger is eg 100% immersed / encapsulated. No need for pumps / Willis heaters / flow switches / PHE / and no need for all the inter-connective pipework necessary to convey ‘wet’ heat. As the SAPV is indirectly heating the PCM it can use variable flow & temp ( variable but continuous current ) to input a continuous flow of heat energy. The ‘complication’ that SA had to overcome with the SA UniQ unit is; as it has the immersion direct into the PCM it has the ability to immediately overheat the surrounding PCM which would destroy it. The ‘melt’ characteristic of the PCM doesn’t deal very well with intense / accuse heat energy being introduced from just one concentrated area ( that the contact surface of the encapsulated immersion achieves ). ( For info, the PCM can be destroyed by putting too high a temperature into it. Basically you can cook and kill it with no possibility of recovery. This is why there is the need for modulated flow and heat control with the SAPV. A bit bit like you wouldn’t use a blow lamp to defrost the Xmas turkey as you’d burn and ruin the outside but the inside would still be frozen solid ). Therefore the UniQ Qontroller has a programmed pulsed output which is used to gently heat and melt the immediately surrounding PCM around the immersion. It pulses on every minute or so iirc and injects heat in chunks. When the lower thermistor registers heat the Qontroller ( I think ) then let’s rip with full bore heat input. So, every time you fully discharge an UniQ unit it will go back to what I call the ‘defrost cycle’ as described ( so is not a one time first switched on event, it’s an every heavy discharge > reheat event ). The UniQ immersion also has an overheat stat, so terminal OH ( failure of the electronics to control the heat input for any reason ) would cause that to trip and isolate the immersion for safety. The UniQ range with an ‘e’ prefix ( eg 'eDual' ) have an immersion and are primarily intended to be heated by electricity. Units without the prefix ( eg 'Dual' ) do not have an immersion and are to be heated indirectly ( by a boiler or ST / high temp ASHP etc ). Now, pay attention folks..... An UniQ +I ( eg 'Dual+I' ) has an immersion. This unit is meant to be heated indirectly ONLY but you can ( say if the boiler / other goes tits up ) go and then heat it TEMPORARILY with the immersion in the same way you can with an UVC for eg. You should not heat that unit indirectly and with the immersion simultaneously, so basically if you have solar PV available during the day and your boiler is running you shouldn't use the PV to fortify the boiler flow, eg it should be one or the other. That would require a changeover arrangement where excess pv injection then disconnected the boiler call for heat ( demand ) signal temporarily and accordingly. Oh, and there’s other configurations available too, but my thumb hurts now. If you think that’s a lot to remember then feel my pain. I’ve forgotten my kids names since working through the chuffing manual ?2 points
-
Yes of course. Personally I would still just ct1 (no grout) my thinking being if there is any movement it might be in the junction between wall and floor but everyone has their own way of doing things1 point
-
Just fit them horizontally with the side outlet uppermost, and fit bottle vents to automatically release any trapped air. Prob best to avoid heat rising to the heater base tbh, but can’t really say it would be to any detriment as I’ve removed scores of them ( immersions ) top-loaded and facing down in old copper cylinders. Sealed and pressurised is totally different to gravity / convection flow, so imo you can fit these however you like and they’ll work A1.1 point
-
Still finishing painting mine: oak treads and risers, softwood strings and glass balustrade. This was the best compromise between style and cost I could find: It's a stairbox design, rock solid, and a third of the price of the steel/oak/glass design on my original wish list.

 1 point
 -
We'll be very sensitive to the ecological aspects on this - it's something close to my heart and I'd want to know we're putting the wider land and landscape into a more sustainable and connected condition than it is now. In my view climate change and ecological breakdown are something future generations will judge ours on.1 point
-
Mine was put there by LG the manufacturer of the heat pump, it's function being to help heat hot water, as an emergency heater if the heat pump has a fault, and to help defrosting. The pipework looks to be about 22mm.1 point
-
Are you serious ? Your heating pipes are buried in the driveway heating the ground ?!?1 point
-
My parents took one of these on when me & sis were just under 10. That was 5000 sqft+, Grade II Listed and they were still doing bits of fabric 25 years later. The roof was done in sections over 2 decades. At the end our all-electric energy bills could run at £5k a year easily was the whole house in use. Looks like a great project, and I hope you have a decent amount of land too. My immediate comments to try and add to your thinking. Is this a blitz project of less than 2-3 years, or a long-term one of more like 8 or 10 years? ? 1 - There may be something to be said for doing one area first and moving in to that (like a small apartment). If you are doing serious work, you perhaps want to be onsite since it is in the middle of nowhere. 2 - Pay very careful attention to the stuff you will only do once, as you will be living with any cockups or underinvestments for a loooooooong time. Particularly applies to restoration of fabric. eg insulate and ventilate properly - what will the lifecycle costs of poorer insulation look like after 15 years? If you are off grid or electric only, then energy use is important. Do you have a planned strategy for energy yet? I might argue that putting in skirt insulation should be one of your first things to do, if you do not plan to dig out the internal floors. 3 - Is it worth you seeking to become competent in some sort of trade area - one that you will need always whilst you are there? That can be fun and save significant cash. Looking at the pics, tree maintenance, woodwork (sash windows / furniture) or stone walling might be interesting and useful. 4 - Perhaps find yourself a multi-skilled handyman type locally, who is good at lots of different things - and plan to use him for the next decade if it works out. You will get good advice as to other trades man, and hopefully somebody less expensive that Competent Persons who you can use without the same worry. Also, that type may be more available for short term and minor jobs whilst Tradesmen have to do a lot of their main thing to stay certified and have a less chopped up schedule. I'm currently trying to draft a piece arguing that having a good generalist around is beneficial for self-builders - currently mine has been helping a forum member from 2nd-Fit on, and has done dozens of very different things that would potentially require several different recruits if no generalist was around. 5 - Pay attention to your tax strategy as well as legal and construction strategies, eg (and speculating) I think a lot of the structural stuff can be offset against CGT when you sell it, so is there a chance for one of you to buy it now, then sell it to the other when you roll over the renovation mortgage. I think that some things eg windows can be treated as capital or maintenance depending on how you play it (and the words you use). No idea whether any of this would be worthwhile - but have a look. 6 - It may be an idea to build a good double garage quickly, for secure storage, or two for a roofed central section to be added later. Requires no PP. 7 - If it as isolated as stated and a Private Sale, then consider whether there are any 'facts on the ground' that you need to create before any authorities come to visit eg a lake. They always get far more enervated about stuff that isn't there yet, so if you need it or it is something that they will flap about, perhaps put it there first (judiciously). Our listed building was not visited for more than 30 years, and was in the middle of a large clump of trees. "Repairs" can cover a multitude of sins, and if eg you "repair" your whole roof you maybe able to puts loads of inroof solar on it without anyone noticing. My parents repaired entire outside walls without telling anyone as dad was an architect - by traditional stonemasons and with all blocks numbered and restored exactly, but to an extent that the top floor and roof were structurally stood on acros for months. Regulations are tighter now, I think. 8. Consider carefully what to buy and what to hire. I would eg buy scaffolding. Ferdinand1 point
-
Your going to have to hose it to get rid of dust so it's clean for the new mix to key to it. All loose edges removed.1 point
-
That is exactly where we found mice getting in at our old house. The gap was really small, too small to poke a finger up, but the little buggers could get in and climb up inside the cavity with ease. I filled the gap with expanding foam, to get really deep penetration, let it cure, then cut it back just below the surface of the brick level and sealed all around the pipe with a thick bead of silicone. The reason I used silicone is that the gap was a consequence of the original mortar having fallen out, probably because plastic pipe expands and contracts a fair bit with heat, so over the years it had cracked the mortar.1 point
-
Get some fibres from Wickes, for one thing to do. eg https://www.wickes.co.uk/Sika-No-Crack-Concrete-Fibre+Powder-Admixture---90g/p/154064 F1 point
-
Depends how straight the tiles are. If like most ceramic they have a slight cup to them then you may well be better off doing the gap and siliconing. Put some packers down to rest the tiles on and pick the best tiles out of the bunch and see what the results are like. PS, so does everyone else1 point
-
At this time of year hampers can be good ... of interesting food that people would not normally buy. Then if they do not like it they can give away to family and friends. I usually get my tenants a bottle of something like a non-alcoholic ginger or rum & raisin traditional tipple with the card, and usually something else. F1 point
-
Put some chocolate down at the hole with some more in a trap and try to entice your lodger out.1 point
-
I so feel for your dear lady. She is being very understanding. Get rid of all the rubbish near the house and get some professional advice about getting rid of whatever is in the walls. Some poisons are designed to be slow acting, they eat the poison then go away back to their nest and die there so you dont get any smells.....if yours is trapped then it will stink if it dies in the wall. If it is a squirell they dont generally poison them they trap them.I find a one man band pest controller usually more help than big national company. Having the eps base it is the thing that has bothered me most, i worry about rats nesting underneath and chomping their way through. I used to live next to a river and was constantly on my guard about rats getting into the house although they never did. My neighbours were more cavalier about things and they got them in the kitchen under the cabinets came in via gaps around the wastes behind the backs of the cabinets........ Oh and another method of rat catching which was what we were given by the local man in Doha when we lived there. Rats were a real problem and you could hear them all night. method is....good size piece of ply, spread some contact adhesive (evostick I think we used) some tempting titbits on top, put it where ratty can get at it, watch and wait and when he comes for the delicacies his feet get stuck in the glue. When he is stuck bash him on the head with something heavy. Job done, start again and wait for the next one LOL1 point
-
Many years ago the building to the rear of the fire station where I worked was being completely stripped and it was full of rats. One of the lads came running into the brew room and said come on there is a rat under the I beam that we used to cut up when training. So three of the largest firefighters went outside armed with shovels and got ready to turn the I beam over to give it a smack and when they saw the size of it they all run like mad and the rat just run off. Needless to say the banter was very good when we got back in the brew room.1 point
-
Yes I'm sure we'll keep/restore some of the furniture. Earlier in the year I opened a drawer and found a George V penny which gives a sense of the timelessness there. Elsewhere there's a photo album and letters from a soldier in the first world war (I'll track down a museum for this one once/if we complete on the purchase). The area is well documented from a historical source perspective, and the accounts from when the house was built in 1868/1869 even survive.1 point
-
I have plans for a snowmobile if you're interested...1 point
-
Remove a brick again, pour in some rat poison, and replace the brick again.1 point
-
Have a good read through the claim form. The notes will go through how to assess eligibility. The council are possibly thinking of the listed buildings scheme that did withdraw the 0% provision. Looks like a wonderful setting. I can see why you’ve fallen in love with it but wow that’s so much work!1 point
-
5V is a bit marginal unless you go for heavy duty cabling. 60W of devices will require 12A and remember that at a PD of 5V, the diversity will become a big issue. IMO, better to use 12 or 24V and per-device Buck step-down DC-DC convertors (which cost pin money) to drop the voltage to 5 or 3.3V as required.1 point
-
Great progress. Interestingly our inspection chambers, drainage surface and soil pipes were put in at foundation stage. I was quite surprised at the cost of the materials! Where is your surface water going to?1 point
-
We designed the zones in the landing and upper sitting area here to work as separate zones in case someone wanted to put a stud wall in to make an extra bedroom in the future so I guess any potential partition could be similarly designed into the UFH layout.1 point
-
The issue is with zoning heat into the separate rooms If one ever turns out to be a bedroom for eg and is smaller then you may have no option of having that room run cooler or warmer. After that theres no problems at all. Plenty of good products out there to bond a sole-plate stud instead of screws or nails With 50mm screed you will need a good degree of flow control as the temp swings will be quite acute. What standard are you building to?1 point
-
It makes a massive difference moving the air pump from the GRP compartment in the top of the unit to a solidly built housing. I made a stone chamber on a solid concrete base to house our pump and alarm system. Not only did it reduce the noise so that it's now practically silent, but it also makes checking and servicing the pump a great deal easier.
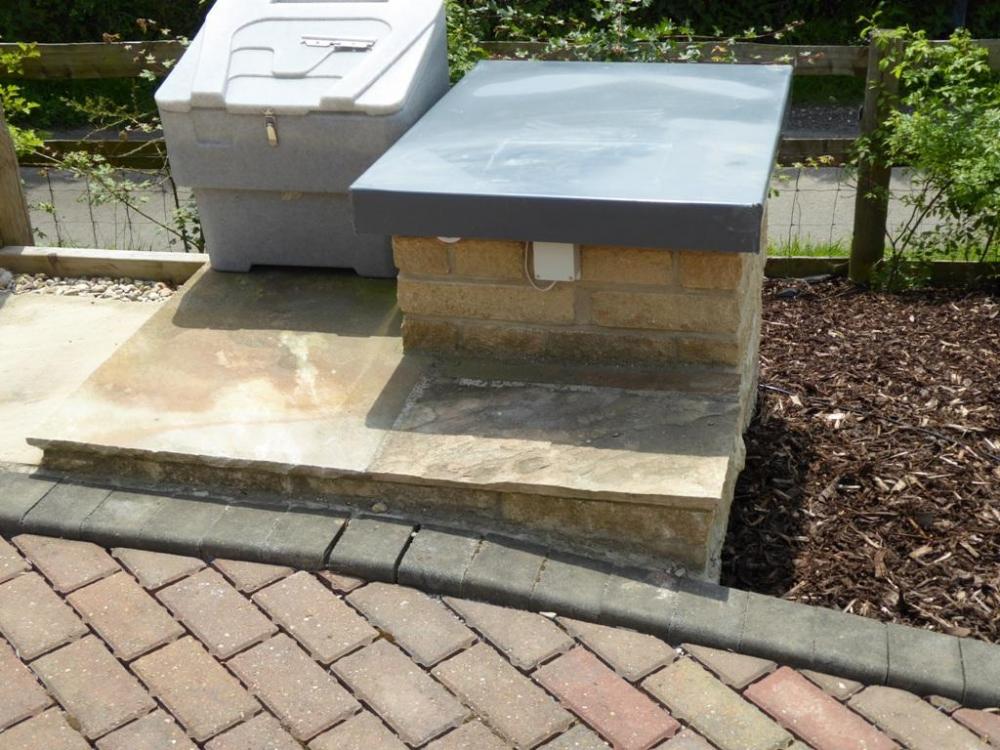
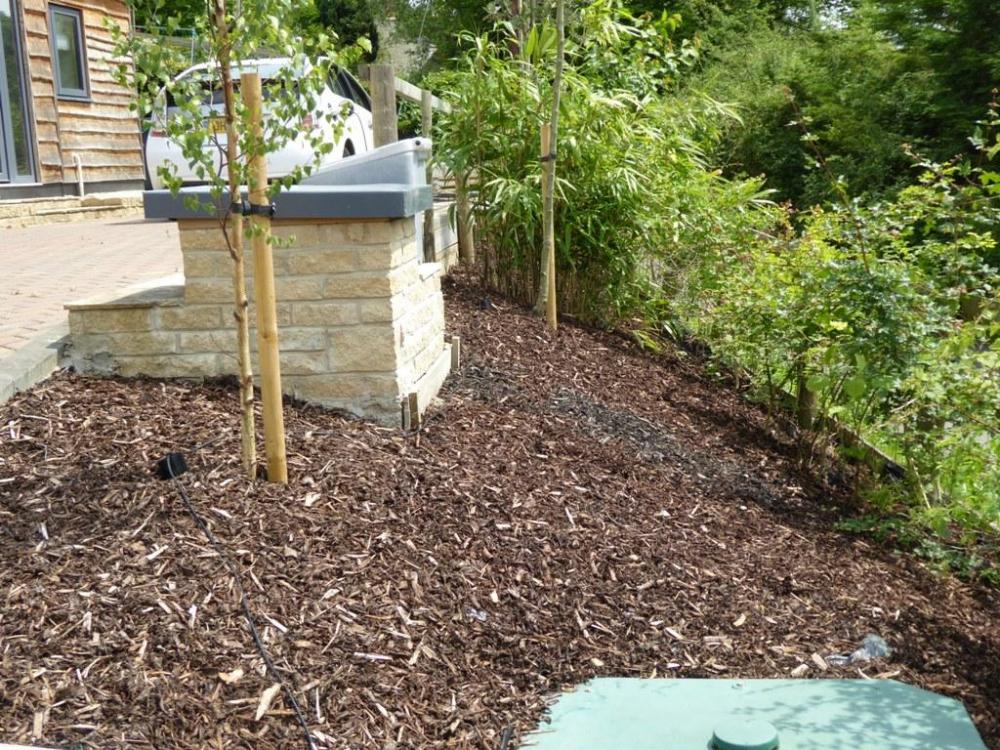 1 point
 -
Try using Catnic for the roofing. Same product as Tata but a lot easier to deal with.1 point
-
I don't think it's a good idea to use a liquid dpm on top of a still-damp Calcium Suphate screed like yours. It would be okay with a sand cement screed or concrete but calcium suphate screeds have a high gypsum content. If you use a liquid dpm before the screed has dried out properly it will trap any residual moisture and there is the potential for the gypsum to swell up and become soft leading to your floor finish debonding. http://www.contractflooringjournal.co.uk/blog/anhydrite-screeds-handle-with-care/ Edit: I've read that some manufaturers of liquid DPM claim they have products suitable for use with calcium sulphate screeds but it's not something I have any personal experience with. EG: http://www.uzin.co.uk/products/calcium-sulphate-screeds-need-uzin/1 point
-
my first post here ! I did a fair bit of research into anhydrite when our 60mm screed was poured. Laitance removal is required where there is a need to bond a floor finish or intermediate product to the screed. The laitance skin can debond from the screed causing failure of flooring systems. I read conflicting views on whether laitance removal speeds up the drying process, I found a study (which I will try to relocate) which found it made no difference. I found most suppliers recommended removal of laitance as speeding up drying but none quantified it, all required it where a bonded floor finish was planned. All of the suppliers I considered permitted the use of UFH to accelerate the drying time. Ask your builder for the contract documentation or at least the supplier's name so you can ask them for the aftercare documentation, they all provide this with the contract as a backside covering exercise. In this you should find guidance on drying and whether you can use UFH. Our documentation went into some detail about UFH temperature control and increasing from ambient temp in 5 degree intervals over several days. We ran ours at a low 35c degrees supply temp for a week and it was bone dry (following a period of 6 weeks of natural drying). I don't think you need to remove the laitance if you are laying a floating floor (not glued down). I nearly forgot to mention that our screed supplier stipulated 48hrs of wind tight drying (all windows and doors shut or openings poly sheeted and taped). It then required 7 days of natural drying/curing before use of force drying with UFH was permitted.1 point
-
Make sure the bottoms of your trousers are tight! Seriously...saw one run up the FiL's leg.0 points


This leaderboard is set to London/GMT+01:00