Leaderboard
Popular Content
Showing content with the highest reputation on 11/24/24 in all areas
-
Hi all, My wife and I are in the early stages of setting up a self-build home in Orkney. We don't have any construction experience, and am extremely glad to have found Build Hub - browsing around has shown how much experience and advice there is on here! In particular, I've been reading @Stones' blog and @MarcelHoldinga's updates on their similar projects with a great amount of interest. We're a couple with a young child, and our self-build ambitions come from a place of hoping to make a safe and comfortable haven for our daughter as she grows up. We have family in Orkney, and the friendliness of the local community was ultimately what made us want to make the leap - we've been searching for a stronger sense of community since the difficult COVID years. We've got a plot of land and are beginning the planning permission process. The intent is to build an efficient and open-plan ICF property on one of the North Isles. Happy to be here, glad there's such a rich source of info on self-building!3 points
-
Do not forget insulation size on the pipes!! We had a nightmare of a job pulling 4 x AC pipes through together with the insulation on. 110mm duct was stupidly ambitious, but narrowly managed to make it work. Also bends disproportionately add to the resistance pulling things through.2 points
-
Timber frame spans a whole plethora of abilities. In the states they often build with single "4*2"s at 16" oc and cardboard sheathing. Literally cardboard is stopping the walls from collapsing like a house of cards. Then they nail vinyl siding straight onto that and asphalt shingles onto the roof deck. Couple it to some absolute basement level Home Depot vinyl sliding single pane windows and you truly have a pile of junk. Compare it to a timber frame of 225*45mm timbers with 11mm OSB racking, proper airtight detailing, a battened services cavity, blown cellulose insulation and a proper ventilated rainscreen and it's a million miles away. Would you consider concrete blocks for the house, that's what we did. There was concrete trucks needed for the foundations and the floor but that can be minimised without too much trouble.1 point
-
When I priced it 6 years ago it was very expensive. More than double the cost of a wide cavity wall. It requires a hire of specialised bracing. It needs to be externally clad or rendered like EWI. Synthetic renders were 3 times the price of sand/cement when I looked.amd I wouldn't consider them as durable as sand and cement over blocks in a wet location. You typically need a concrete skip and crane/excavator or a concrete pump on site to pour the walls. Off the shelf ICF blocks are often just about there regarding U values and often need additional insulation. Lots of steel is needed for the walls. As the ICF blocks are a specialised material the option of just popping to a local merchant for an extra one isn't there. More if a problem if you live in a more remote area. To be balanced I did say there were advantages. Good airtighess. Excellent thermal bridging. Quick in the right hands. Very strong. Somewhat diy-able Can work well for awkward shapes.1 point
-
(expletive deleted) me - talk about going off topic ! Anyway - to solve all problems - everyone is a homogeneous blob aka an ‘it’ . There are ; 75 ( and counting ) genders summoned up . So many definitions means there are no definitions….1 point
-
Could be, in which case I’ve no idea what that setting means, almost seems doubled up doesn’t it?1 point
-
As a guess, I’d say system charge power rate is depth of discharge, 100% will depend on what battery is attached, but in any case will shorten its lifespan, 95% is a better option. And system charge SOC limit I would guess is the lower limit at which point it pulls from the grid for a short while to prevent the charge from going too low, again prevent unnecessary damage to the cells.1 point
-
Probably worth going round the dpc with hot water and a sponge I used a single sided render tape (Jaffa)1 point
-
1 point
-
1 point
-
1 point
-
1 point
-
@Pocsteryou can get various products for sealing porous ground, one is called bentonite, it is used for sealing up voids in clay when used to build the sides of a lake if it’s leaking. I wonder if you can find something that you can dril a few holes in the ground and pump it in under pressure to find its way to the gaps and cracks. just a thought.1 point
-
1 point
-
Indeed. When referring to a person unknown most people would opt for 'they' rather 'he or she', as in: "someone called but left no message - I don't know what they wanted". No one would think 'they' referred to a plural number of people in that sentence.1 point
-
BEFORE you depressurise it to fix the leak, you DO have the fill loop needed to re pressurise it afterwards?1 point
-
I made some small guttering for a little outhouse here made from 32mm drainage pipe cut in half and glue gunned together, or a funnel glued there with a pipe attached 🤷♂️1 point
-
Really difficult to suggest a solution but might a little dam of silicone bead to stop the water tracking where you don’t want it then it should drip into a container or somewhere it won’t cause trouble. emoji was not meant to be sad but “what the feck do you do?”1 point
-
My problem is both of those are plural terms, i.e you are talking of more than one person. Until someone tells me otherwise, all I can come up with for one person is "it"1 point
-
So, depressurise your system, if it’s in a static I presume it’s not two storey, then undo that top bolt. I think there will be a rubber ring thingy (technical term) in there.1 point
-
However on these fittings it’s the olive that produces the seal, it annoys me (OCD) with people that put PTFE tape on all threads 🤷♂️1 point
-
Back it off smear with Jet Blue Plus & re tighten. Worked for me on an 8bar incomer. I use it religiously now on compression fittings. No messing around with PTFE tape. It just works and the joints never weep / go green.1 point
-
I would be inclined to isolate it and replace the fitting Usually less hassle in the long run1 point
-
No as the previous application has been finalised/closed. If anything, you would just re-submit those previous reports with the new application. But even then, I don’t know how that would work as the proposals and the description of the works are different. You need to refer to the LPA’s validation list to see what is the trigger point for needing such reports.1 point
-
I like the idea of trench fill foundations here. Mainly because you could dig and pour them in a few hours if you had a good ground works team and digger man. Thinking out loud here and assuming the site is very wet indeed...... I would get a digger in and dig 4 trial/monitoring holes onsite well outside the foot print of the house. Based on the advice of your engineer I would agree a depth for the bottom of the foundations. Then monitor the water level in the holes. When you were confident it was low enough, and there was zero rain forecast swiftly get a digger in, dig the trenches, consolidate the bottom, drop in some rebar and pour the trenches off a laser level. You'd only need a window of 2-3 dry days. It would need nothing near the level of accuracy of a raft or insulated raft and you'd be out of the woods regarding the major risk of the ground turning into a quagmire. I wouldn't even get rid of the topsoil beforehand as you'd be exposing yourself to getting caught out by a shower of rain that could turn your site into a swamp. That could all be done after the foundations were poured. Even if the top of the foundations weren't perfectly level the imperfections could be taken out with a secondary pour or some blockwork. Someone please tell me why this wouldn't work.1 point
-
It's not connected yet, but I've got the Shelly Shelly Pro 3EM - maybe the same one that @SuperJohnG has. In particular I'll be using it to detect when the power to my UFCH Willis heaters is cut by my load sheader*, so that the operating hours of the heaters is extended to make up for the outage. *It temporarily cuts the power to the heating & hot water if the overall electrical load approaches the 45A maximum permitted by the electric meter, to ensure that there's plenty of power for everything else.1 point
-
I.m not 100% sure that the lack of buildings means that a bat survey should not be required! On our site, where there never have been any buildings, a biodiversity report (including the possibility of bat roosts in trees and flight paths) was required.1 point
-
1 point
-
Yes, stopping the movement of air stops moisture (and air) passing through the structure. More-or-less, but there's a graduation of behaviours. In simplified form: Closed cell foams don't absorb moisture so condensation will tend to run down the wall (and the wall-facing side of the insulation if its in contact with the wall). Foil-faced PIR can absorb some moisture from the wall (but not through the room-side foil facing), so some condensation may get absorbed while the rest runs down. Mineral wool is hydrophobic so although some condensation may run into the fibres it won't get absorbed, though some may be held between the fibres (or start to run through them if it gets really wet). Many natural insulations behave differently. Instead of absorbing moisture (taking in liquid water) like synthetic insulations, they adsorb it (take moisture vapour out of the air and bind it within the fibres) before it condenses to to liquid, reducing the risk of condensation. Which is why a real wool jumper still feels warm even when 'wet'. It also dries well by reversing the adsorption process. Consequently natural insulations are the preferred option, provided they're not going to be subject to high relative humidities for extended periods (typically not more than 80% RH for more than 3 months of the year in winter) - which is partly why I'm using hemp insulation on my current renovation in France. However natural insulations do cost more. Also worth knowing that sheep's wool has been be problematic due to the risk of moth attack, though the 'Ionic Protect' process claims to have overcome that. Mineral wool would be second choice.1 point
-
RK38 and RK70 are lime/sand mixes, ready to use, with about 6mth shelf life (some say a year but I have had a few lumps lately!).1 point
-
Yes its pricey but anything done at this stage will certainly be cheaper than rectifying works after decoration is done, its along that line of thinking that I'm happy to sell on my already purchased PIR at a loss. WRT to using RK38. Do you use it neat by its self or with sand as a replacement for the lime in the parge coat.1 point
-
Yes, I was, on the basis if mineral wool potentially being less moisture-buffering than wood-fibre. I like (expensive!) Intello as it's good for pessimists (tends to become more vapour-open in warmer weather so that *if* any moisture has got in during the winter it may be able to 'breathe' back out).1 point
-
I made a video, but I'm not happy with it. I'll remake later if I can escape my family for 30 mins.1 point
-
It's dead straight on the pro side. On the negative side it is very conductive so ensure that the bottom of it is isolated from the cold. Be careful with wiring too that it doesn't get stripped by the metal. You might need to tie any studs metal or timber to the wall at an intermediate level if it feels wobbly. Get batts slightly thicker than the cavity thickness and wider than the gap between the studs. They'll just stay there then when you put them in. Mineral wool on rolls won't. You'll need batts.1 point
-
A parge coat is used to make the wall airtight, for three reasons. First, it stops stop cold outside air from reaching the insulation, which would degrade the effectiveness of the insulation and potentially lower the temperature within the insulation to the point where condensation forms - which is why it needs to be on the outside of the insulation. Second, it stops the wind from blowing outside air in and drawing inside air out. Thirdly, it stops air escaping due to the 'stack effect' - that is, even on a day without wind, warm moist internal air is more buoyant than the outside air, so will rise and escape through any gaps, drawing outside air in as it does so. If the building is airtight, the air pressure inside the house and inside the insulation will be more-or-less identical, so there's nothing to drive that warm moisture laden into the insulation. So, in answer to your question, no, it won't. That leaves only differentials in relative humidity as the means by which moisture (moisture vapour) can move through the materials and into / out of the insulation. Which is why, if one has been specified, a vapour control layer will always be on the the warm side of the insulation (or at least not more than 1/3 of the way into the insulation, according to a well-known rule of thumb).1 point
-
The parge is a mix of sand lime cement in the ratio 3:2:1. It is applied to make the interior face of your external walls as your airtight layer. You should return it on any internal walls by say 3-600mm to avoid any leaks at this junction. I choose 63 mm CLS timber because it is the thinnest studwork lightly to be any way straight. You could screw it to the wall but it'd need a lot of shims and drilling to get it straight and fixed. If you feel it us still wobbly you could fix it through with a hammer in fixing here and there to the wall. You'll need to shim it to avoid it being pulled out of line though Fix a top and bottom plate using a vertical laser level, mark your centres and cut your studs to fit and you'll be through it in no time by comparison. I would probably use 400mm centres but for the most efficient use of labour I would make sure its a snug fit for whatever your preferred batt insulation is. Normally 12.5mm plasterboard is best kept to 400cc.1 point
-
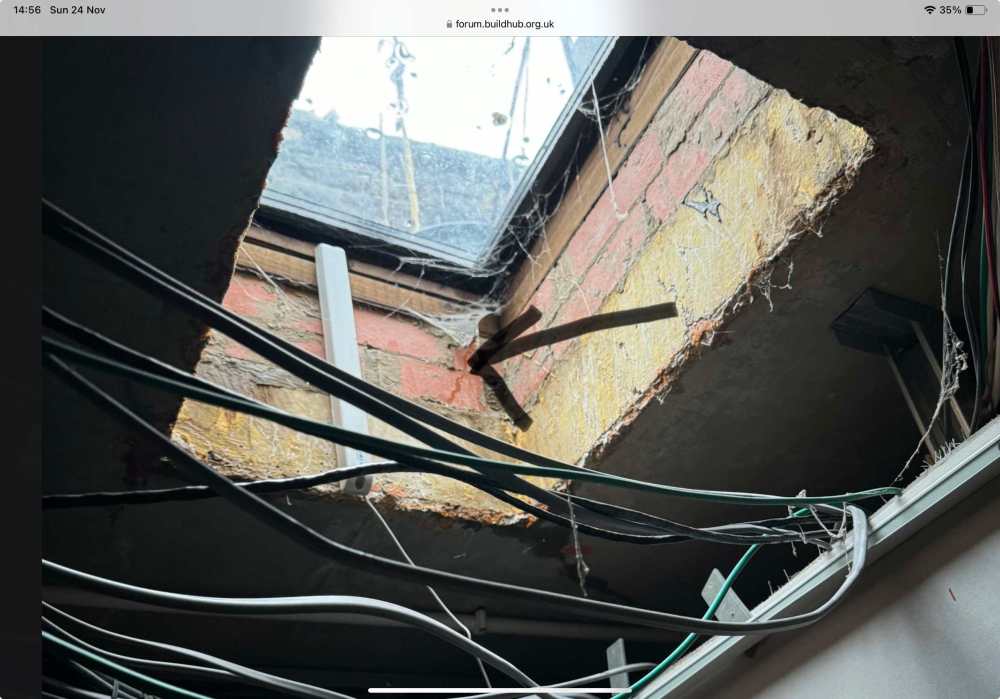
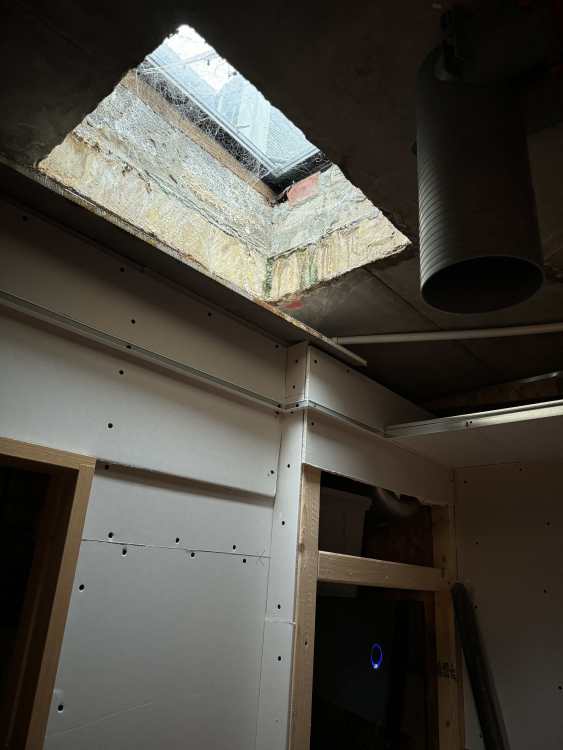
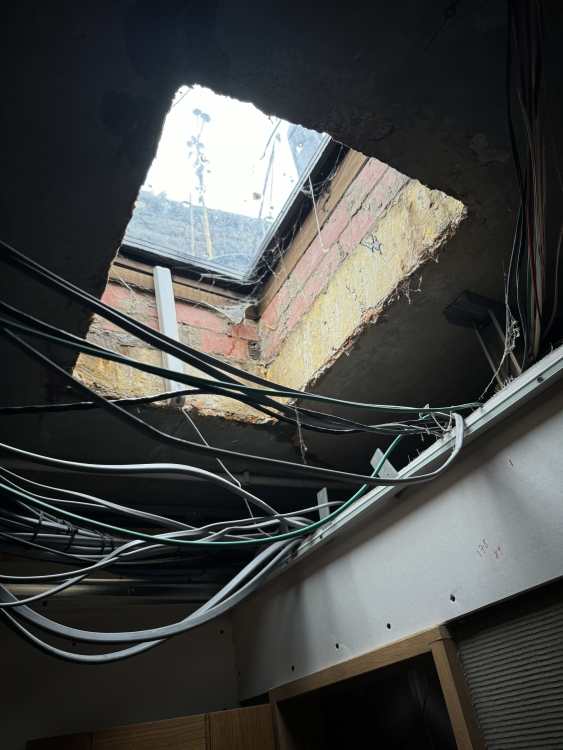
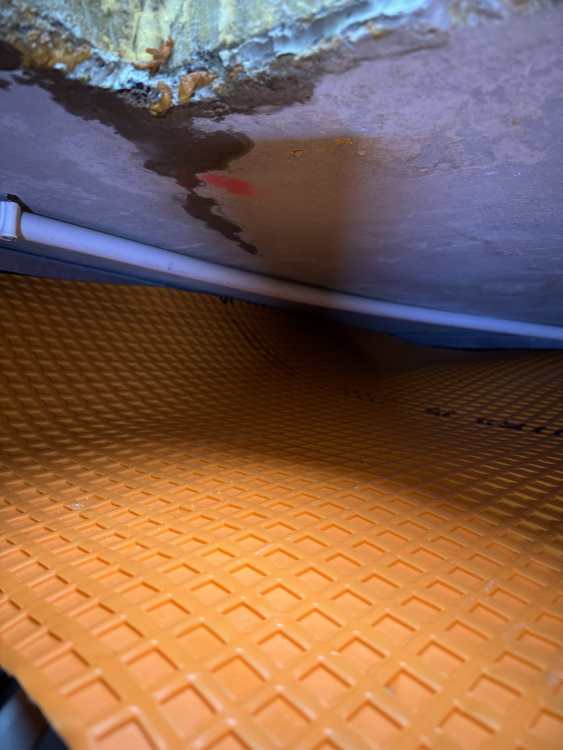
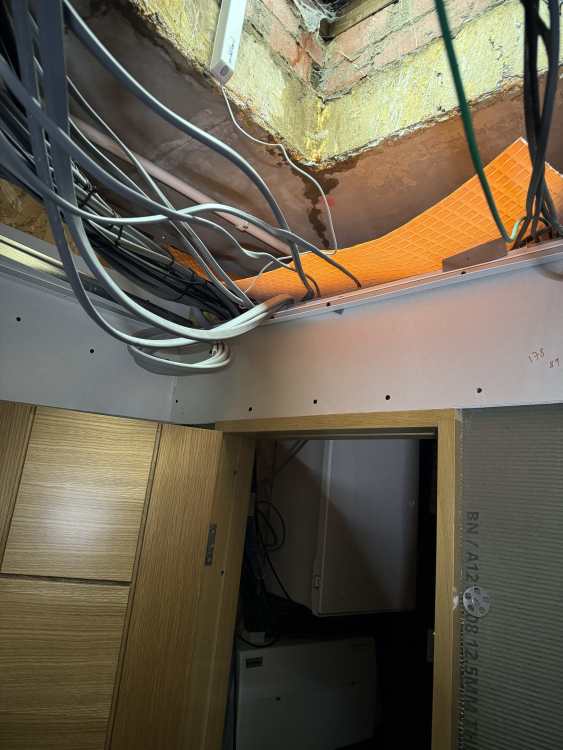
Ok - stop laughing that’s the 1st thing . The ongoing saga continues- due to the storm etc has got a bit worse understandably. So the glazing does not leak . I believe water is getting in outside the plot running down the wall and getting in over the concrete slab . If you look closely at the glazing you can see water comes in only above the concrete I.e dry as a bone above this . I need to ( one day ! ) dig up the lane side outside that wall and try and fine any gaps -fill with cement . But of course - that’s not a guaranteed fix . So in reality I think I need a 2nd ceiling ( above tiles - below cables ) with the sole purpose of directing water towards the edge ( dimpled membrane on wall leading to perimeter drain ) Take any suggestions how to do this ! . My 1st issue is how to make a ‘tray’ that sits around the base of the Lightwells and directs water into a ‘ceiling ‘ membrane . Obviously once I think I have a solution I’ll empty the room , take down the tiled ceiling . So I’m thinking of a simple ‘wedge’ structure . The membrane sits in this ; and as it has a fall directs water to the outer wall . Its what I do around the sky lights that’s got me a bit stuck . Photos for amusement of current sky light leaks0 points
-
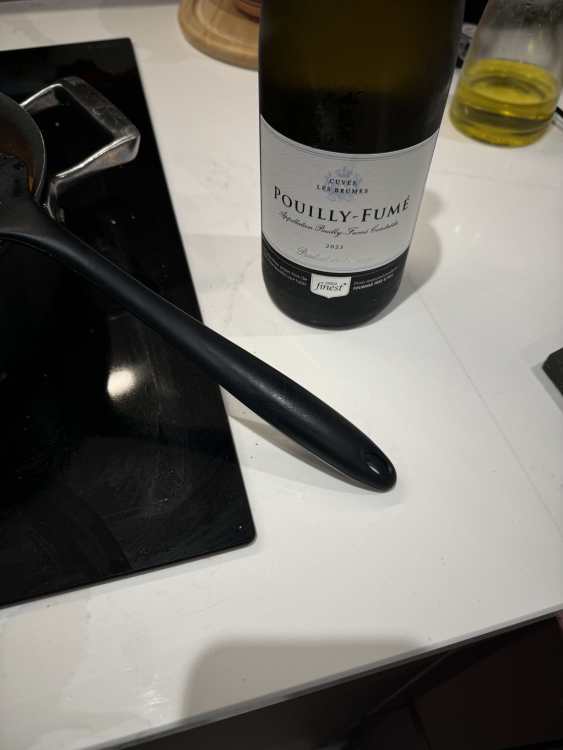
Cor, your well posh in Bristol, Tesco finest, show off0 points
-
>>> decided to look at the drips and procrastinate What a wise man.0 points
-
0 points
-
0 points
-
0 points


