Leaderboard


Popular Content
Showing content with the highest reputation on 01/24/19 in all areas
-
Single, white females with a penchant for wandering the CCTV covered communal areas in the noddy? Seriously though well done!2 points
-
4 rooms rented . 2 to go Attracting exactly the type of tenants I want ! ?2 points
-
I have already received a response from the gas folks, VAT will be credited back to my card ?2 points
-
Another option to extend the site of an AAV is to reduce from the 110mm to 2 x 50mm runs, or 4 x 32mm runs and route the groups of smaller bore pipes where the 110mm cannot be run. Create the opposite adaptation at the AAV end to get back to 110mm and fit the 110mm AAV there. You only need a 34 mm cavity for that.2 points
-
About 3 years ago I wedged an oak slither in a gap in our green oak ridge beam when we fitted them. It fell down last weekend and hit me on the head. Took me a good minute to realise what had happened, I shouted hello thinking someone was pranking me as I had the french doors open in the pitch black letting my dog out. Quite scary when your in the middle of a forest with no lighting hah. Creepiest thing was waking up one night to voices outside and opening the caravan curtains, some guy was just staring in. He got more of a fright than me though?1 point
-
Whatever band they allocate, it is worth appealing, you will often get it down a band.1 point
-
Band G is a pretty large band. A house at the top of band G can be twice what a house at the bottom of band G is worth. My house isn't small (350 m2) but there is a house about twice as big as mine next door but one and that's still in band G. You need to look at the whole area to see if any houses are coming in above band G.1 point
-
Has it been signed off? If not I suspect BC will want an amendment, and the council tax valuer will include it as habitable space. It sounds like a very easy "after completion" alteration. Perhaps leave the garage door to access a small storage space, and frame off the wall just a bit further in?1 point
-
I have never seen an UVC without a tank thermostat, that is one of the essential features I thought they all had to have. Even though mine does not routinely use the tank stat to control temperature (it has a separate temperature probe for that) the tank stat is wired to kill power and close the 2 port valve feeding the cylinder if it gets too hot.1 point
-
Bugger! Just done my 18th with a lad from Woking and he could have dropped one off. Probably won't see him for another 10 years.1 point
-
No. Totally different tool. Go buy a Lidl Parkside one: https://www.lidl.co.uk/en/Offers.htm?articleId=197901 point
-
Pear Stairs provide the half landing if you ask and it’s not expensive.1 point
-
I use tons of adhesive each year Always flexible Same with the groute1 point
-
A cold roof will be ventilated, so it could well be vermin. You won't see them just b by looking, they will be under the insulation. After a long period, you may see droppings. Put some rat poison down, that will sort them.1 point
-
Our house (timber framed) makes noises from time to time. Sometimes we get quiet bumps, sometimes (when the sun comes out) we get fairly loud bangs from the uPVC guttering expanding (which also made it "walk" sideways, until I fitted some stainless screws to stop it). The noises are more noticeable because the house is so quiet, being well sealed and insulated. I'm sure our old house made some noises, too, but we rarely noticed them as the background noise level was a lot higher.1 point
-
Warm roof or cold roof? I would expect it nigh on impossible to have visitors in a well sealed warm roof.1 point
-
@redoctober A couple of years ago I had a client who self-built a green-oak framed house. The loud noises from the oak at night as it dried out meant that his 2 young daughters were too scared to sleep in their own beds at night. What kind of noises are you getting?1 point
-
As an update I've created an .stl file and got an estimate from the site that @Temp linked to. It all seems straightforward.
 1 point
 -
Something I wrote in another thread. "Once the low expansion foam can is on the gun you leave it on until it is empty. You do not take the foam can off to clean in between uses unless you need to change foam types. You use the gun cleaner with the red nozzle on to clean excess, WET foam from around the nozzle (and anything you might get it on accidentally). You undo the knob screw at the back of the gun to adjust the foam flow rate and squeeze the trigger. When finished for the day you turn the knob to close the valve and clean the end. Put it aside and pick up the next day or next week, month etc. When the can is empty: Have an open plastic bag/bin liner ready. Have the gun cleaner at the ready with the red nozzle on. Unscrew the empty can quickly and put straight in the bin bag. Pick up the gun cleaner and use like an aerosol to spray up inside where the can screws on as some foam will be coming out there. Then screw the gun cleaner into the gun and give a blast thru pointing the nozzle into the bin liner. Remove the gun cleaner and screw on your new can of foam. After you have used the gun then yes you can leave it upright with the foam can still screwed on, with the base of the can on the floor for however long you want within reason. Cleaning these guns doesn't mean a quick squirt through. Pretty sure the instructions say to put the gun cleaner on and leave for X minutes before blasting through finally. This is more for if you want to thoroughly clean the gun and store without a can on".1 point
-
Have some isopropyl alcohol (available amazon / ebay) handy as it's the best for cleaning hands, windows, gun, etc afterwards when the foam is still wet.1 point
-
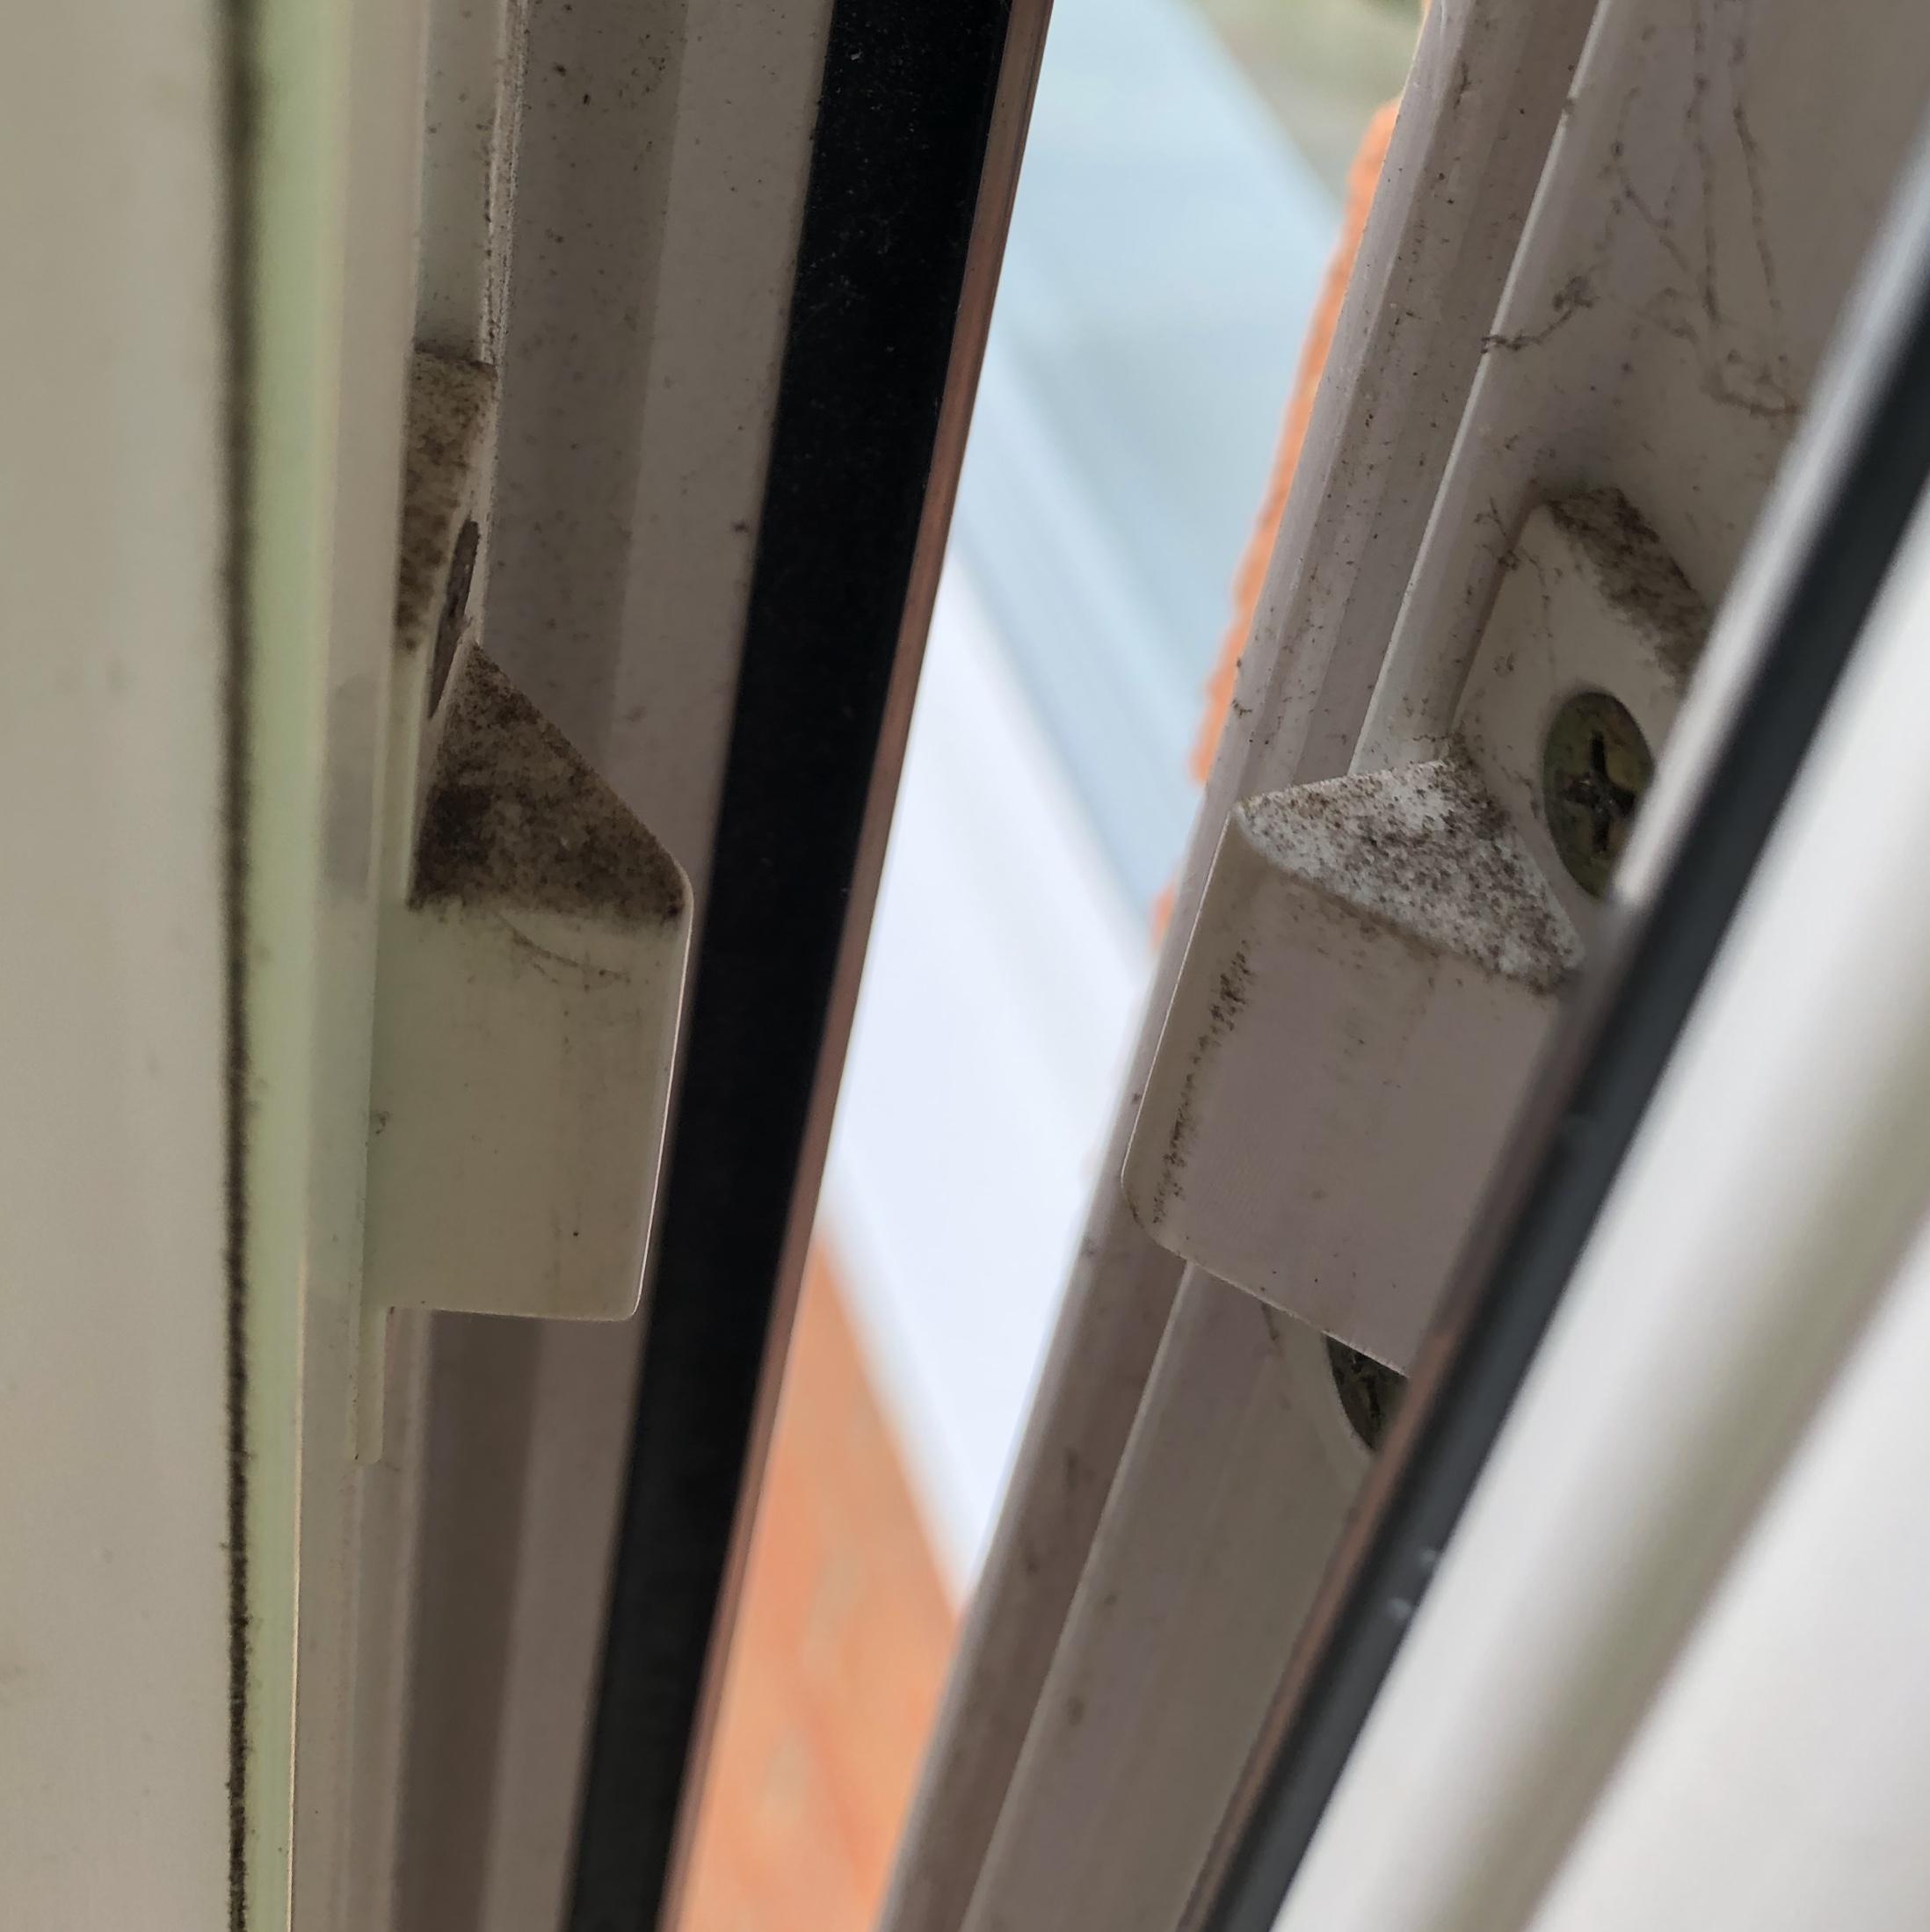
I’d fit the wedges to that - will stop the window moving in its frame.1 point
-
This: https://www.screwfix.com/p/soudal-soudafoam-expanding-foam-gun-grade-750ml/5026D? + https://www.screwfix.com/p/no-nonsense-foam-applicator-gun/28483 + https://www.screwfix.com/p/no-nonsense-foam-gun-cleaner-500ml/60133 SO much easier than the hand held cans with drinking straw tubes you'll wonder how you managed without one.1 point
-
Lots of cracked sealant around the inside too I note. Worth renewing. Again on the inside if you remove the old silicone then foam any gaps. (Low expansion Soudal from S'fix in a proper gun).1 point
-
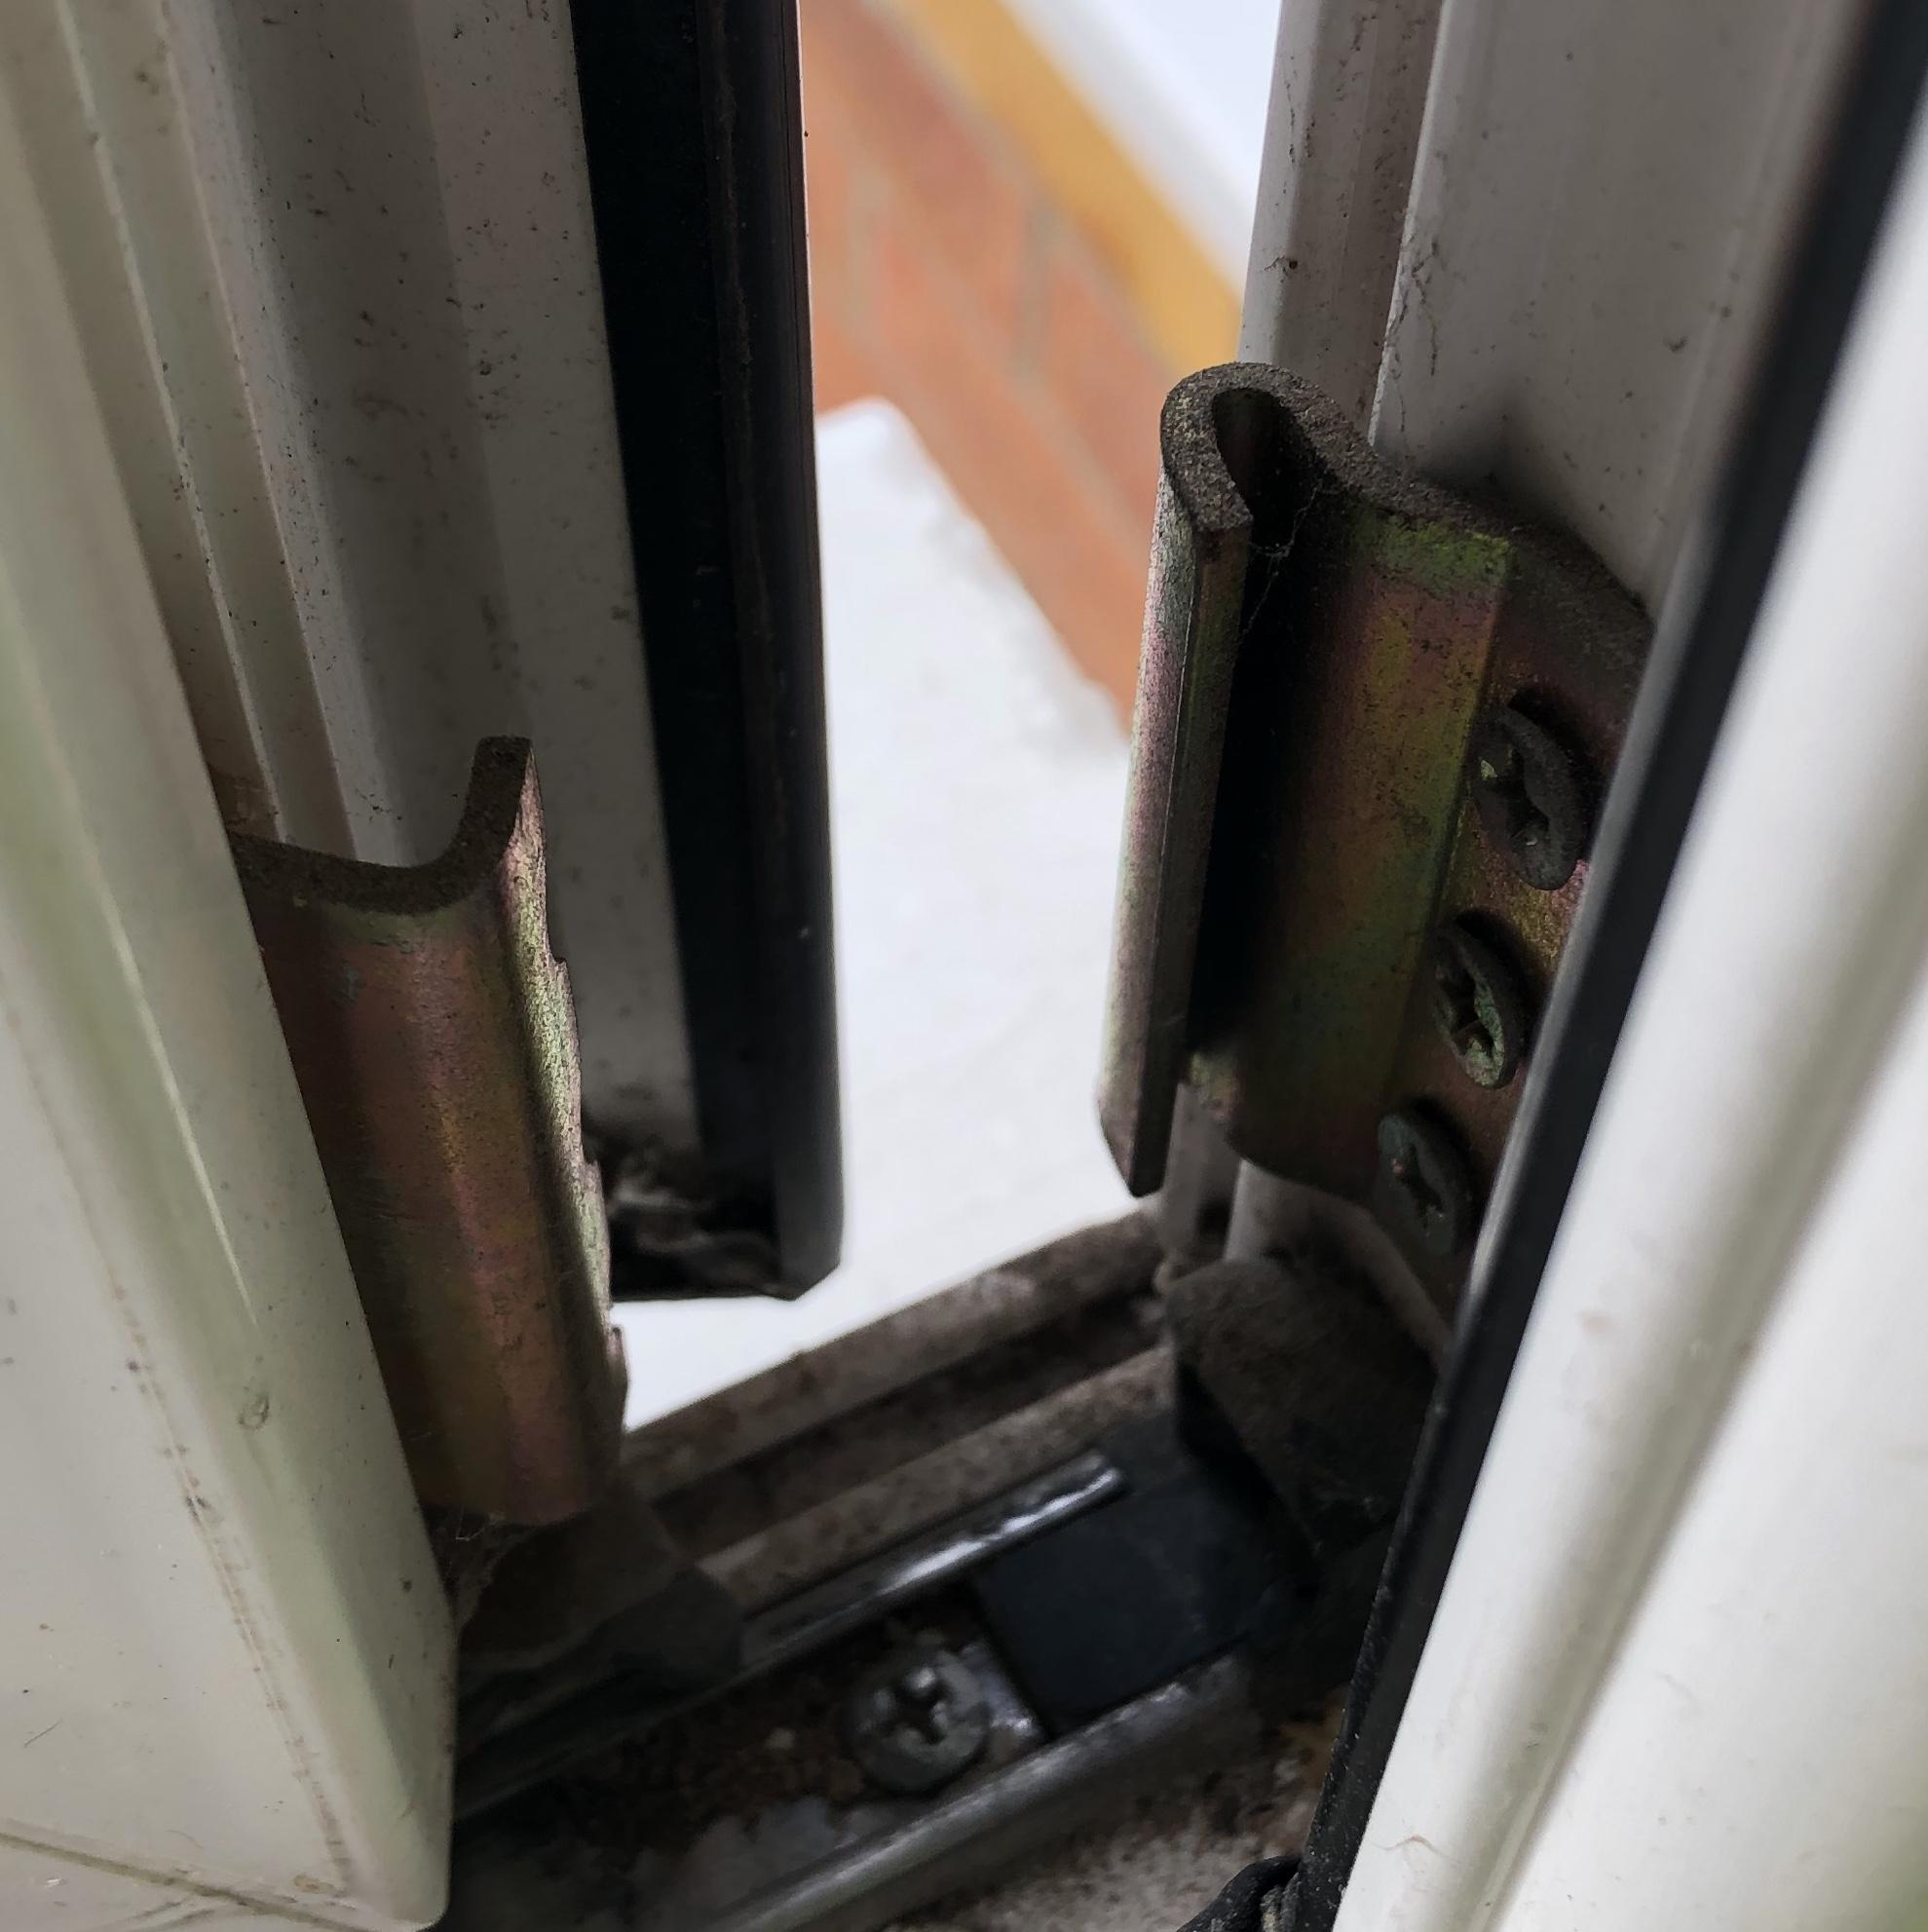
Sounds like someone has tried to pull the window open from the outside - there may be anti-jemmy hooks fitted or a set of alignment or sash seal wedges. If not, easy to do and cheap. Check the hinge side for these sort of things Anti - Jemmy hooks Alignment or sash seal wedge The bottom ones are designed to force the seals tight and stop the window from doing what you are experiencing. You can buy them cheap enough here

 1 point
 -
I treated Titan stuff as disposable at first, but have changed my mind having bought a cheap drill that seems damned near unbreakable. It's been thoroughly abused, but refuses to give up. No idea how Titan compares to Evolution, other than I suspect both are really no-name Chinese stuff that gets badged with these names by UK sellers. Might even be that both come out of the same factories in China!1 point
-
Someone on here had a good link to a place that does older DG components. ???1 point
-
Go and buy this with change from £100 Titan Sliding Mitre Saw You will use it for a lot more than you think, and when it breaks, take it back and get a new one under warranty.1 point
-
Probably didn't allow for the cill when measuring. Cavity wall? The wind will be howling in there and escaping through every gap. Foam that lower gap inside (dampen first), cut flush then silicone over. You can work silicone grease into perished rubbers that might help too. You're on a loser taso some extent as the window is set so far out beyond the cavity. Been there / done that / living it:1 point
-
I am guessing you have white trim pieces up the sides and across the top where the frame meets the wall. Will probably have been stuck on with mitre bond. These will have had a silicone bead run up them after fitting. Unfortunately the fitters have likely just whacked the windows in with frame fixings and packs and not bothered to use low expansion foam or Compriband around the frame. Most of my 2G windows are the same. I'm addressing as I go along. In your case it looks like like there was a cock up with the height so they've chucked a bit of 4"x2" in and rendered over it. At the very least they should have stapled some expanding metal on it. I'd take the rest of that render off. Use a plant sprayer over all the gaps to wet them then get a low expansion foam in there. To make pretty ideally screw some st/st expanded metal to the timber and render over. Won't help with any cold bridging but should stop draughts. Alternatively screw a strip of upvc over it and silicone round the edges. In my bathroom there was a 1" gap between top of new window and lintel all covered over by trim! You'll still have I bet huge gaps up the sides. You could take the trim off and repeat the exercise then fit new trim.1 point
-
Yup. OCD / ADHD whatever. Brain decides to start going through lists and the frame has to get up with it. My oldest is the same. I wonder where he gets it from ?? One of those is regular, and the other ( more expensive ) is flexible. If it’s UFH or porcelain tiles then it’s flexible every time. Regular only if it’s a dumb slab and ceramic tiles.1 point
-
All that good living!1 point
-
Tape the ends of the pipes with cheap electricians insulating tape to stop any crap getting into the pipes as you work them through the build. The outside diameter of the pipe is critical for getting the o-ring in the fittings to seal well, so if you drag the pipe and create a linear scratch along its length expect to get problems later on in the second fix. The o-ring squeezes onto the outside, so water would happily track along any linear imperfection. I cringe when I see plumbers yanking it through tight holes in timber joists.1 point
-
@joe90 On a dry dusty floor I always mop the whole floor first with 25/75 flexi primer/water until saturated. That'll dry more or less in front of you, and then you're good to lay. After mixing up ( standard set if its a big area and I'm on my own ) I have a bucket of 50/50 and a sponge and dampen the area I am about to lay. Haven't lost a patient yet, and have never used SBR. A lot of people, mostly plasterers, swear by SBR, ( I think they use it in their tea / coffee instead of milk TBH ) but if there is a product for one job and a product for another, then buy the one that says so on the tin AFAIC . I've used Mapei by the bucket load so no issues there, and many others such as Bal ( expensive ), Ultra ( my first choice as I've used mountains of it with fantastic results ), Kera, Granfix, and other 'knowns', but the only one I would actively steer clear from is Unibond. Had some proper shite results with that and whatever you do, don't EVER buy their ready made floor adhesive in a tub!!!! Utter dog? As always, butter the back of the tile so its completely covered, and lay your notched bed on the floor, ( if the floor is good enough for one notch ), or butter, bed the floor, and then bed the tile too ( if its a poor floor that's needing making good but SLC is overkill ). Contaminants like plaster or plasterboard dust are not your friend, so mop the life out of the floor with loads of good old H2O wherever there is evidence of that. TBH a dry floor is your biggest concern so refer to my first and you should be fine.1 point
-
I actually don't know the name of the supplier, it is just a random guy who powder coats things. Annoyingly it appears in dribs and drabs so has taken ages to put up. He turns up in an estate car with a very aggressive dog in the back. It is just aluminium powder coated aluminium sheet so a local powder coater should be able to do it. There was a lot of back and forward on who should measure it and whose responsibility it would be if it didn't fit. The straight areas were OK, but the diagonal on the gable in particular created a worry. The builders built wooden soffits and fascias as they normally would and the aluminium is either screwed or stuck to it. They and the architect spent some time detailing it so that you cannot see the screws. The soffit is fitted first and is just a flat sheet. Then the fascia is fitted, it is l-shaped with a small overhang so that the screws are in the back of the overhang and cannot be seen. This covers the screws in the soffits. The joins have strips of rubber behind them as it was felt that this provides a neater join than some kind of covering strip. Due to building the wooden version and then covering it, it was considerably more expensive than just painting the wood. It may eventually pay for itself after 40 years of not needing to be painted. I just checked the costs and the aluminium plus fitting was 140% of the cost of the underlying wood. I don't have the exact area, but it looks like it probably cost over £150 per linear metre in total. The house has very wide eaves, the soffits are 650mm wide.1 point
-
Little update, mist coats went on 2 weeks ago. All dried nicely1 point
-
I’ve used composite cladding on a couple of property’s about five years ago Really good to use Very simalar to the oak slay tiles in apperience I sometimes pass there and it looks a slick as the day it was installed if was quite new on the market back then From memory I think it was called Teko wood or simalar I can’t remember the actual cost as it was an exstra on a much larger job The client was impressed with the look1 point
-
I think “ @Nickfromwales says just get the (expletive deleted) on with grouting for (expletive deleted)’s sake “ i believe Nike are about to enter the market for grouting- so a contract is winging its way to Nick as we speak .1 point
-
JFDI ?
 1 point
 -
I think the term 'flood level' in relation to AAVs refers to the basin overflow level.1 point
-
The sun came out yesterday and at mid day with the low winter sun we were generating 1KW So everything seems to be working and both strings performing equally at mid day. A summary of costings: PV panels £813 Generation and export meters £25 Inverter £255 DC cable £44 Unistrut £192 Nuts and bolts £50 Timber £163 Total £1542 As a bonus, I get a shed, just for the cost of the timber to board in the sides.1 point
-
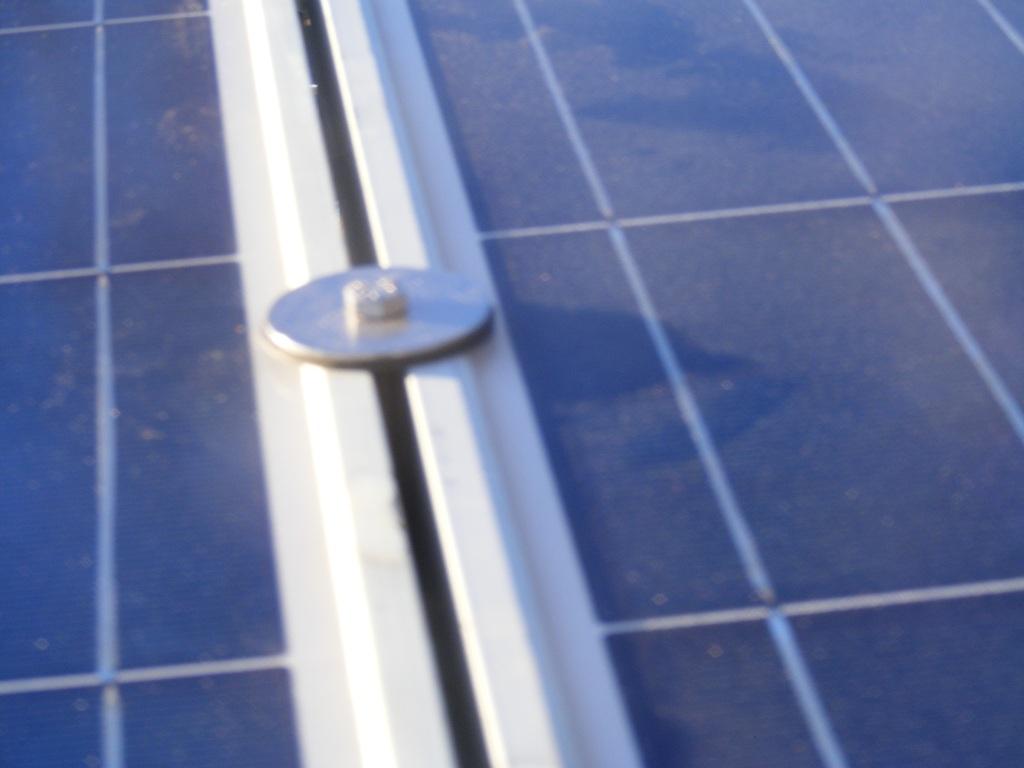
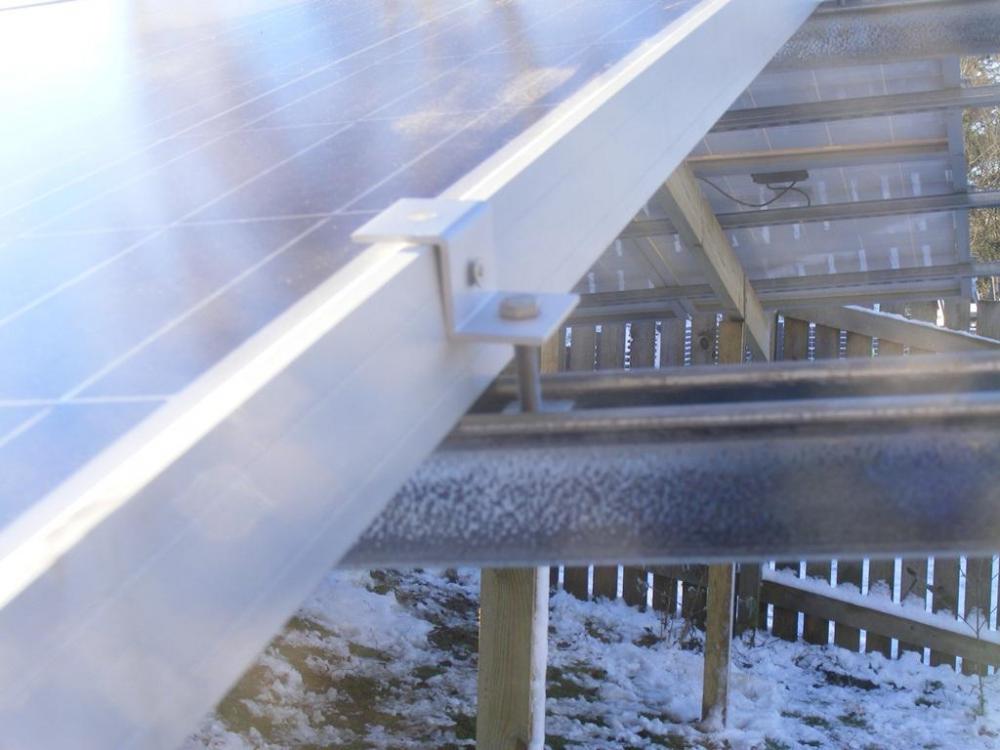
Significant progress in spite of the weather. All panels now mounted, view from the East View from the south The unistrut is still to be cut to length. Fixings worked reasonably well. Between panels a simple penny washer and matching rubber washer The end fixing was not so good. Plenty of people on ebay selling the same solar pv brackets but nobody gives any dimensions of them. As it happens they are too small for these panels, so the self tapping screw has been added to stop any inclination for the bracket to slide off. I connected one string today, just the east facing string. It was just gone mid day when I connected it, so well past it's peak and it was generating 300W in the low winter sunshine, and gradually reduced as the sun went further. Although all the cables are in place, I can't connect the other string until the rest of the MC4 connectors that I have ordered arrive here.


 1 point
 -
@laurenco I've done that detail on industrial units but not housing. The main issues are having a gutter lining that is seamless (IE similar construction to a flat roof in solvent welded plastic or rubber) and also it should be designed so that the front lip of the gutter is lower than the back by a decent margin so, if it gets blocked, the water overflow is outwards and it can't come back into the building by backing up under the roof finish.1 point
-
Doh! I've only gone and ordered a "deep" hole saw from the same place I did before in the opening thread only to find it's a standard one.....like I did before. SHISTERS!0 points
-
There are five sets of 3 in my house!0 points
-
Thank you JSHarris and PeterStarck for responses. Our BCO has approved durgos and venting the drain. However i am reading a lot of plumbing posts on other fora. Some plumbers say that if you have only durgos you will have a smelly house. Some also ridicule the competance of BCO's to recommend such a system. Have your durgos ever let you down ?0 points