Onoff
-
Posts
21125 -
Joined
-
Last visited
-
Days Won
206
Everything posted by Onoff
-

You're underground what did you expect ?
Onoff replied to Pocster's topic in General Self Build & DIY Discussion
That ladder hoist I linked to just now is dead easy. Low component count too. Decent industrial ladder bolted to the wall. Cheapo engine hoist. Some Unistrut supporting a 1m x 1m lifting deck. What's the worst that can happen? ? -
Erm...I asked what kit not what angle. Looks sh!t. No fun.
-
You're underground what did you expect ?
Onoff replied to Pocster's topic in General Self Build & DIY Discussion
This has merit: Check out Geda ladder lifts too. -
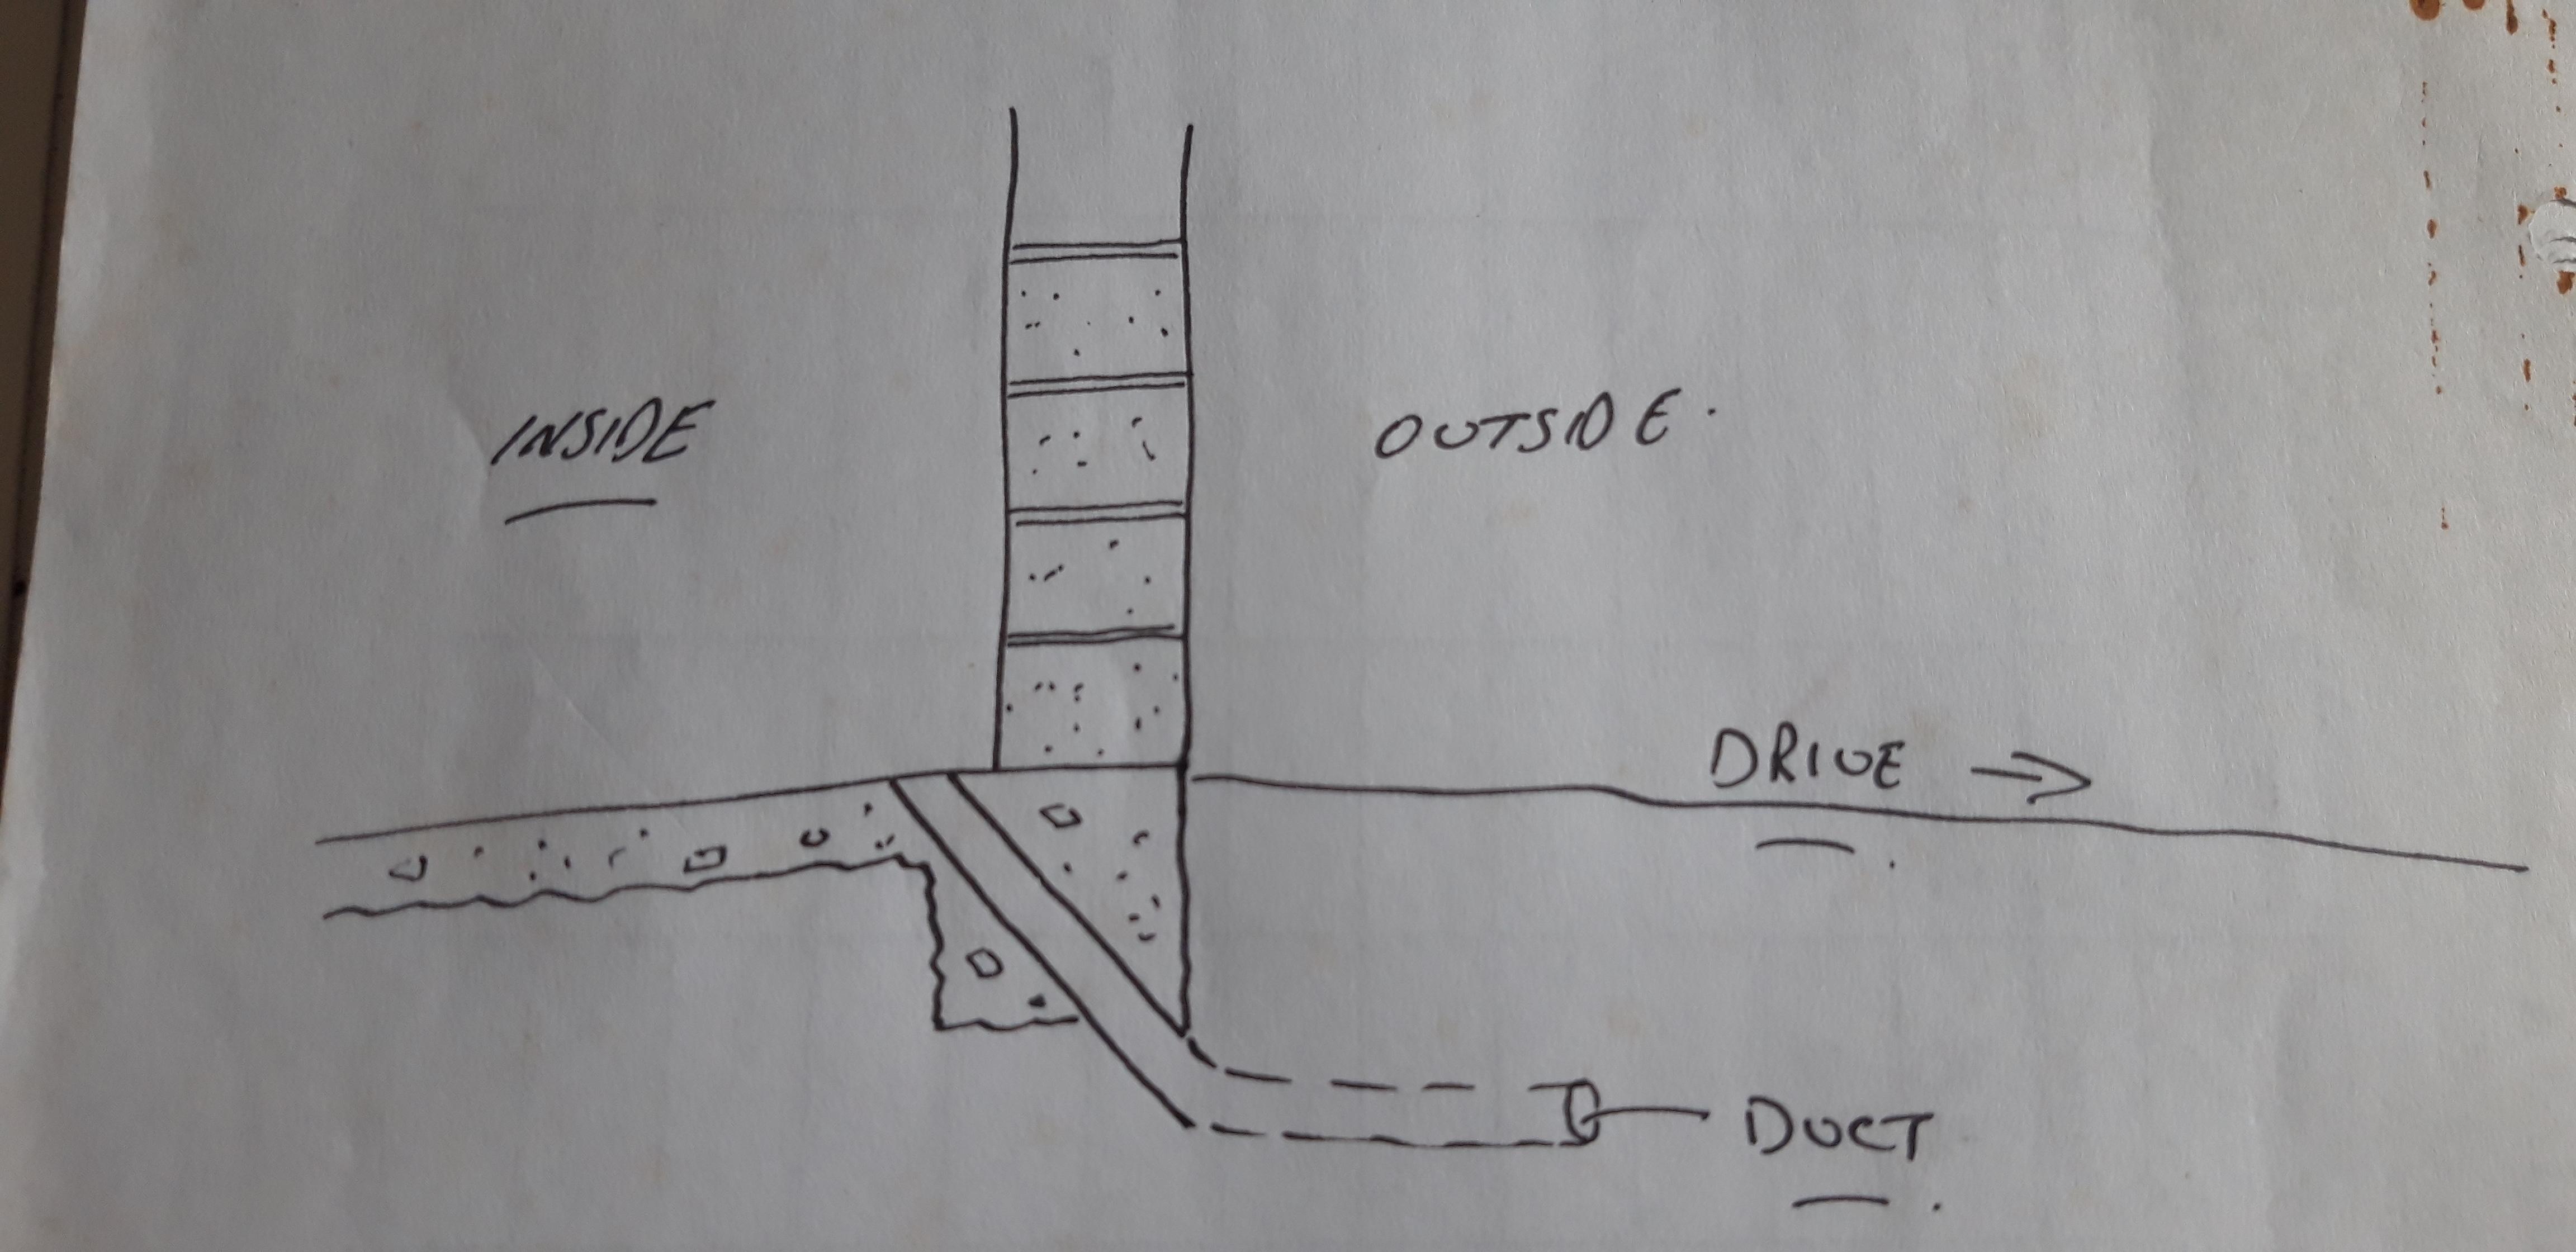
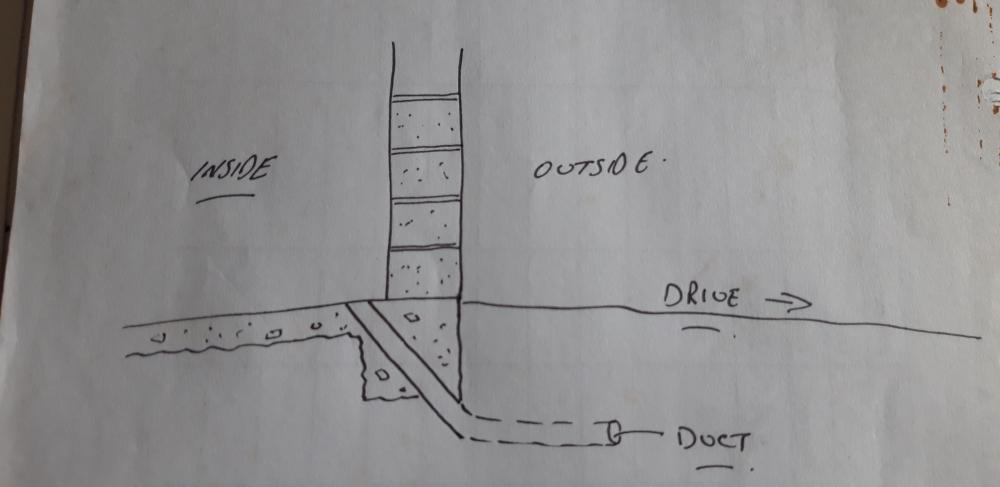
My garage when built had no provision for power so consequently I gave the swa from the house to the garage on a catenary. It's temporary, as in "my" temporary! ? Of more immediate concern is that I get "proper" power down to the gates. Plan is ducted swa but I need to drill down through the concrete floor then the footings at an angle. Trenching from the garage is no issue and I've a man with digger lined up. Pea shingle, cable tape, duct etc all ready to go. I've been putting this off for a while tba (unlike me). The swa could come straight out of the garage front pillar, down into the duct but I don't want that! Nor along the fence etc. That's just cr@p. What kit do I need to get / hire? Assuming a diamond core drill and I'd spray a hose on it? I've only ever got drillers in at work with their clamp down rigs and then only ever for vertical homes down/up through slabs. Not fussed about making a mess in the corner of the garage. Guessing the vertical depth from the garage floor to where the hole exits the footings will be about 600mm deep? All I have here is a 1m long 24mm SDS bit. If I hit any old iron etc that's been chucked in the footings that'll be no good. Last time I did similar was when I did the water main in the house through thinner footings and it was a mission. I did it but it was bloody hard work with a cheap, dry TCT toothed dry bit and ad hoc extension bars. 63mm duct btw. Cheers
-
Help on building front garden wall
Onoff replied to Matt1972's topic in Bricklaying, Blockwork & Mortar
Hollow or solid blocks? I'd invest in a Bricky maybe. A doddle to use honestly. https://bricky.com/ Stainless steel wall starters maybe instead of complicated interlocking? I'd go for complicated interlocking mind ?). If using lightweight blocks like Celcon you can cut them really accurately with a bfo block saw. Either do 4 shallow cuts round the block and the saw will follow these or knock up a wooden box/big to slide the block in. (The "proper" brickys will just use a club hammer and bolster). Can't remember the make of my saw. Well used and the World and his wife have borrowed it. Something like this: https://www.toolstation.com/irwin-concrete-hardpoint-saw/p43010? Corner beads must be stainless steel or they'll rust and show through. Render will cover all your mistakes! -
Did you pay up front or stick it on the slate?
-
any comeback on surveyor that missed something
Onoff replied to tonygg's topic in Surveyors & Architects
Can you construct a French drain? -
Where to put the electricity meter
Onoff replied to MortarThePoint's topic in Consumer Units, RCDs, MCBOs
It stems from BS7671. In the 18th edition it's regulation 433.2.2 (page 90 of the one I have in front of me). (Don't forget the regs aren't statutory but may be used as a defence in law etc). Put a switched fuse in between the meter and cu if wanting more than 3m. -
Just pick a detector with a relay output (like an Aico with optional module) and disable the inbuilt sounder. (Don't interconnect the alarm either). Use the relay to switch off the MVHR and a warning light on maybe. https://www.aico.co.uk/product/ei128r-hard-wired-relay-module/
-
Tell me about it!
-
You're underground what did you expect ?
Onoff replied to Pocster's topic in General Self Build & DIY Discussion
Give me the sizes when you do it and I'll knock you one up with brass eyelets and a drawstring. Got loads of old covers like this. -
You're underground what did you expect ?
Onoff replied to Pocster's topic in General Self Build & DIY Discussion
Mate served in Iraq told me it was de rigueur for the locals to cover mains junctions with a "carrier bags" up on roof tops. Not a good idea as though it rains infrequently the bags quickly go brittle. The mains junctions are often nothing more than bare wire ends twisted together. He said they'd take it in turns to naked sunbathe (helmet on, weapon to hand) whilst on stag. More than once he'd been awoken by an unfortunate bird or rat disturbing the crumbling plastic bag with inevitable results. -
You're underground what did you expect ?
Onoff replied to Pocster's topic in General Self Build & DIY Discussion
On a serious note if said winch is left outside it will pay to make or get made a loose vinyl cover. Been using this lot for over 30 years: http://sailmakers.co.uk/ I'm sure there'll be someone similar in your neck of the woods. (As an indicator how good they are they worked on the Cutty Sark after the fire a few years back). -
I've used a lot of Ever White...it's still white. Evo-Stik The Dog's B*ll*cks Crystal is also pretty good imo. Another one that feels totally different to ordinary silicone. More like a "gel" like CT1. I fixed a neighbours leaking heating oil tank with it too. Still good.
-
Thanks. Not sure if it can be sat straight on the Ultrabase...making enquiries now...
-
Building Control, Private vs Local Authority
Onoff replied to PipM's topic in General Self Build & DIY Discussion
Nice quilted bog roll, a Readers Digest and maybe some wet wipes to smooth things along then! -
Building Control, Private vs Local Authority
Onoff replied to PipM's topic in General Self Build & DIY Discussion
Fwend! -
Guessing an Assignment Of Rights "deal"? https://www.affordablewarmthscheme.co.uk/air-source-heat-pump-grants/#:~:text=Air Source Heat Pump Grants in England%2C Scotland and Wales,systems to electric heating systems.
-
And an open black sack folded back on itself. Wipe the bin, wipe then bin etc.
-
You're underground what did you expect ?
Onoff replied to Pocster's topic in General Self Build & DIY Discussion
Still working on his erection I heard. -
I imagine on the back of a grant via the Domestic Renewable Heat Incentive scheme but I didn't think the grant covered the installation costs? Guess the installer pockets the 7 year tariff to cover the install? Same as when PV installers were doing free installs and taking the FiT.
-
@PeterW, morning. Seem to recall you saying you've a mate or something who uses the Anycubic printers at work (for prototyping?) The recommendation being the main reason I went for it. Half thinking you might have an Anycubic as well? Printing PLA is pretty much a doddle with zero adhesion problems due to the special, dimpled, Ultrabase heated bed being so good. It sticks like the proverbial then once cool a light breeze will release the print it comes off that easy. Printing ABS though is proving an absolute pig! Don't want to use any adhesion promoter on the bed for fear of damaging it. Having it in an enclosure as we now have and at the sort of temperatures we need to print ABS (and stop warping) we risk damage to the electronics. Trying to source a 220 x 240mm glass bed to fit instead. This so I can use Kapton tape, ABS slurry etc with abandon! The FB group I've joined hasn't really helped as I hoped they would either! Wish I'd gone for an Ender 3 tbh. Do the people you know print ABS on the i3? Cheers
-
Looks excellent ? Will you stain the deck? Fit handrail? Second picture down, don't now how tall you or your friends are but there's no chance of catching your head on the pointy end of that fascia board is there? I did exactly that on my dwarf nephew's shed. On the third or so occasion I got his jigsaw and rounded it off! Fascia just above the oval wooden sign: (I am a bit taller than most mind).
-
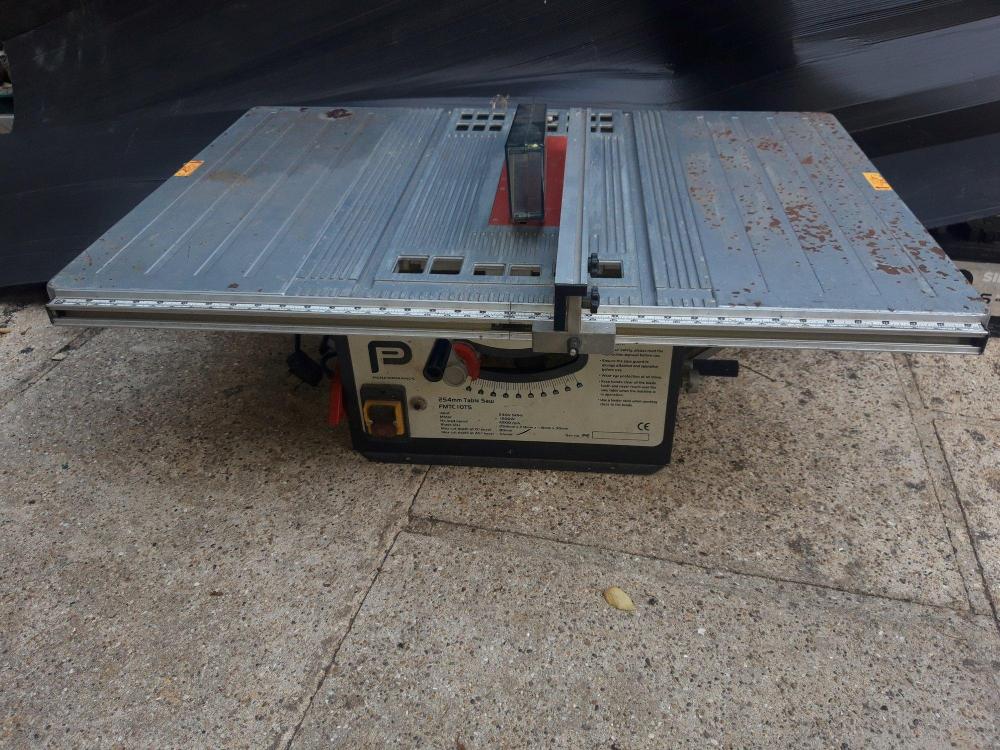
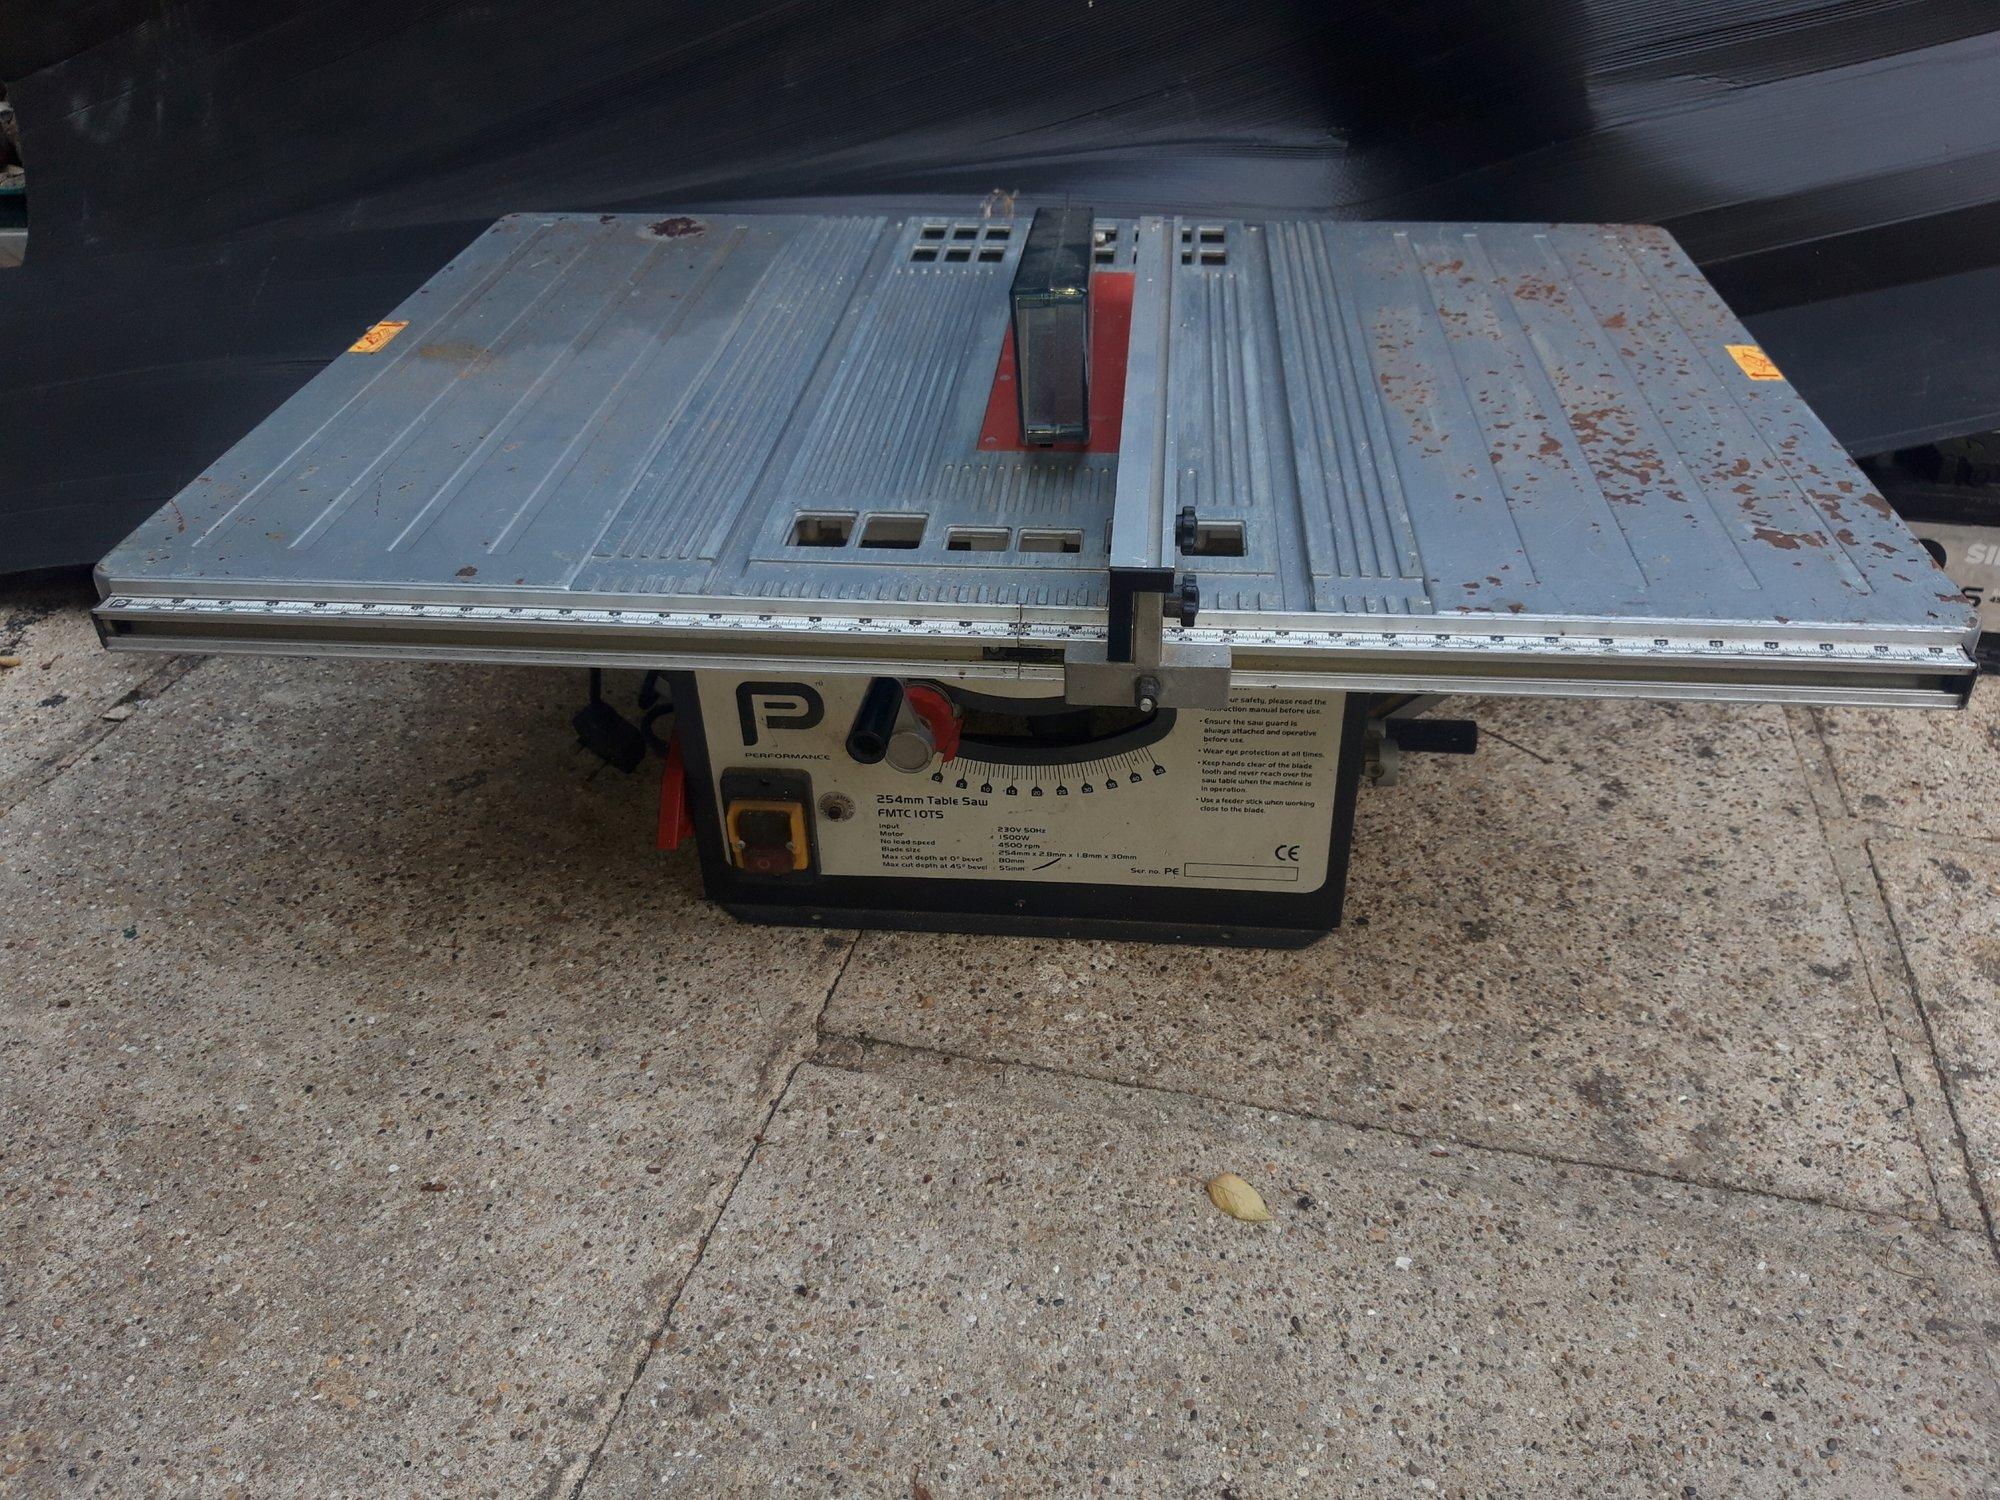
Just gave a mate £50 for this. Wish I'd said no to the saw and waited for the Lidl one! ?