


Onoff
-
Posts
21172 -
Joined
-
Last visited
-
Days Won
206
Everything posted by Onoff
-
My kinda guy, Sod's Law one of the neighbours will be on his mower when I try:
-
God no! The pipe'll be fixed / replaced shortly. The well/borehole seemed like a good idea at some time for watering/flushing at least. Just wondering how on earth you would go about it? Is it a DIY proposition? Could you dig a hole and "sink" concrete rings as you go? How was it done in the "old days"? How do you know how deep it needs to be? Safety when digging and so on..... I bought a dowsing book at Godshill a couple of years back actually. Now you say it Dave I remember you saying about it on eBuild.
-
Mine did EXACTLY what it said on the tin....or was it Nick? I pressurised it to nom. 3 bar, it rose a bit whilst curing initially then has sat at 3 bar with the "test" water in it for months now.
-
This has come up on the back of my mains water leak. Discussing it with the wife tonight and I mentioned that some on here have had success with dowsing. She's grew up locally all here life and pipes up "There used to be a well on here!" (she's not sure where of course). Now I've known her for 30 years and she never mentioned that before. She then proceeds to tell me about various other smallholdings locally who had wells and a local stable who still have one apparently. So.....it got me thinking! The single track road next to the house is relatively new, only tarmac'd in the last 50 years. We are btw pretty much the lowest house at the bottom of the valley. Before the road it was a seasonal water course and in fact still resembles a small river when it rains heavy. I'm guessing then the water table here is pretty high? The whole place is damper than a damp thing. Tentatively thinking well digging or borehole. Wouldn't know where to start. Any pointers?
-
Thanks for that. Had a quick search on the subject and it seems plumbers often use a 4' length of copper tube. Tomorrow's fun! All a quick eBay search for "listening rod" brought up was Rod Stuart!
-
Bugger! Noticed a "rushing" water sound this afternoon within the house. With every water using thing off I traipsed out to the water meter to see the digital meter whizzing round. From the stopcock and meter OUTSIDE the boundary it comes in in old STEEL, from the right of the picture, under the fence. Originally it came to this, another stopcock and meter: I've had this second meter taken out so now there's just a second stopcock inside the fence. Either side of the above stopcock in the picture is a bit of MDPE but original STEEL either side of the MDPE assembly. The steel is circa 60 years old. So, going to the left of the above picture it runs under the lawn; lilac bush, mature conifers etc all in steel. Then under the concrete path around the house, I think under the front bedroom and then comes up in the bathroom to a new stopcock: Of course this is where I've just concreted the new floor so the corner might have to come up! Mentioning to the missus that I said about replacing the water main before I did the floor I got "So it's my fault now is it?" Closing this stopcock and the rushing sound is still heard. There's nothing getting past it as I've connected a bit of drain hose to the new drain cock and with the stopcock shut and drain open there's still the rushing sound but nothing comes out of the drain cock. So something like 30m lawn to dig up and inspect / replace the old steel. Sod's Law my mate with the digger is on holiday. Again we've had the discussion about future issues with the trees..... No obvious pooling on the ground but then the pipe's about 2' deep. Any clever way of pinpointing a the major leak? Dowsing? (Seriously).
-
BDSM dunge.....
-

Bath Surround / Boxing In, and concealed pipework
Onoff replied to Onoff's topic in Bathrooms, Ensuites & Wetrooms
Ta. Something like this is the plan. The inset panel shown as "pebbles" is where she wants mosaics. I think I'd worked out the side of the bath tiles based on 5mm gaps but could drop to 3/4mm easy enough. Now I've chamfered the corner that end tile will be cut anyway. Not sure what the grout width was tbh on the mosaics but as they're contrasting then thicker grout lines on those might work? EDIT: Debating some subtle plinth lighting of some description..... -
Bath Surround / Boxing In, and concealed pipework
Onoff replied to Onoff's topic in Bathrooms, Ensuites & Wetrooms
Plan is to get the woodwork all in, screwed together and "easily" removable. A dry run if you like. Then take apart and glue, screwing back together. I'll probably treat it with something too. Then all back and mark the concrete where the BOTTOM, fixed batten will sit. Drill some counterbored holes in the bottom batten and whack in a few st/st studs. Slightly over tighten to account for shrinkage. Shim as required. Then back it off and a good slug of Sikaflex etc. 12mm marine ply sides shortly and figure where the removable tiles will be. Then batten behind, cut corresponding removable panels in the ply. Was planning 5mm grout gaps, colour tba. Would it make sense, as well as bonding the tiles on with silicon to grout ALL the tiles on the box in "silicon"? -
Bath Surround / Boxing In, and concealed pipework
Onoff replied to Onoff's topic in Bathrooms, Ensuites & Wetrooms
-
Bath Surround / Boxing In, and concealed pipework
Onoff replied to Onoff's topic in Bathrooms, Ensuites & Wetrooms
The "open" end of the bath, near the sink I'm having the join mid-way. BUT the other end where the bath goes into the corner formed by the two walls I'm debating re-making the "join" up near the bath edge - see dotted line rather than in the middle as it is now. That way I'll be easily able to get to the join in the riser cupboard next to the doorway (the multi-socket is sitting basically in what will be the riser):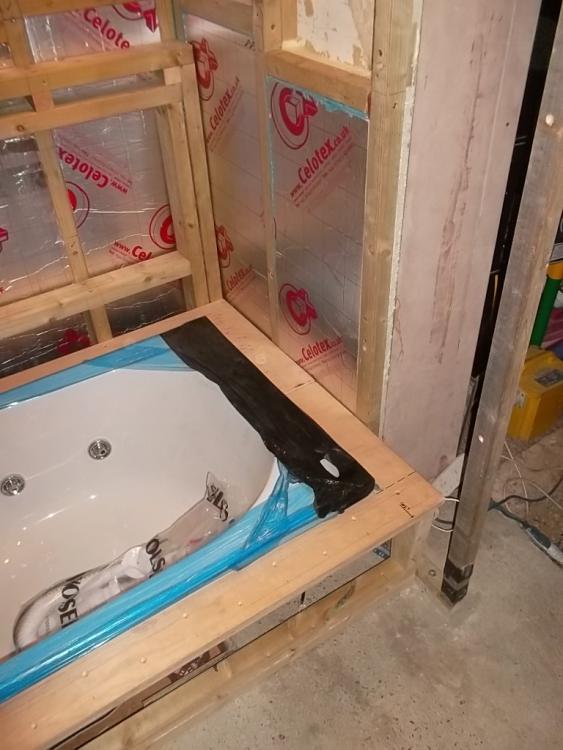
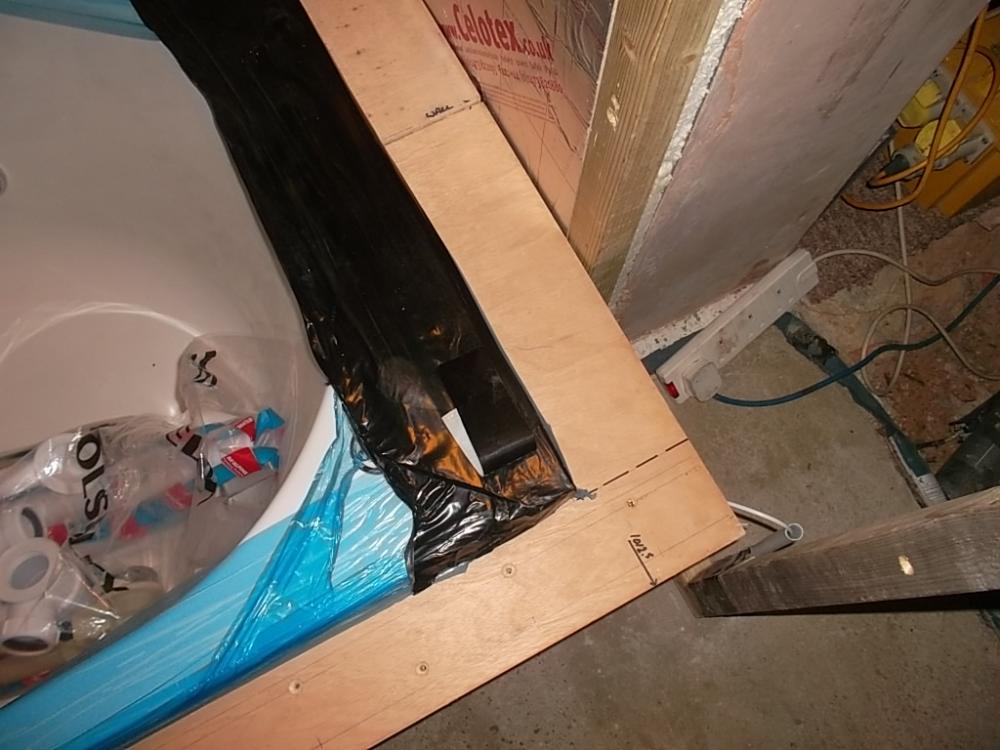
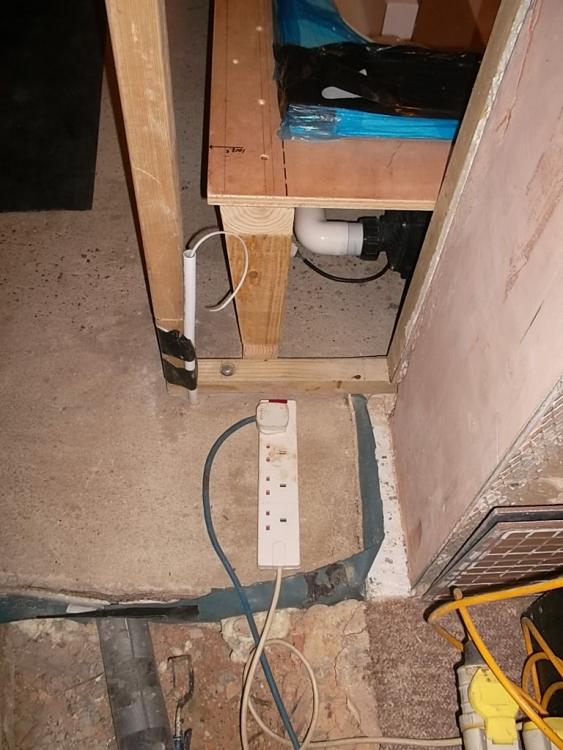
-
Get digging, it's cheaper than the gym and the beer tastes better at the end of it!
-
Advice on correcting plasterboard seams covered with Artex
Onoff replied to 8ball's topic in Plastering & Rendering
I reckon that when first done they may have used the old 2" brown tape on the joints. I bet they placed the DRY tape against the boards and then tried to PVA over the top hoping it'd soak through i.e they didn't PVA the joint first, SOAK then stick the tape on THEN PVA over the lot. I've similar but not so bad on the 4 upstairs ceilings in the dormer. Mine's circa 1988. HOT water will soften Artex up to scrape it off but it's messy. Also likely won't work if it's been gloss painted. -
Bath Surround / Boxing In, and concealed pipework
Onoff replied to Onoff's topic in Bathrooms, Ensuites & Wetrooms
Nah! I was proper careful. I know exactly where the envelope of the bath sits. It's even less now I'm tapering the sides!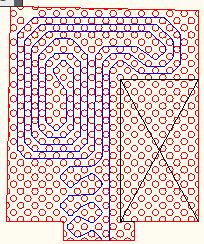
-
Bath Surround / Boxing In, and concealed pipework
Onoff replied to Onoff's topic in Bathrooms, Ensuites & Wetrooms
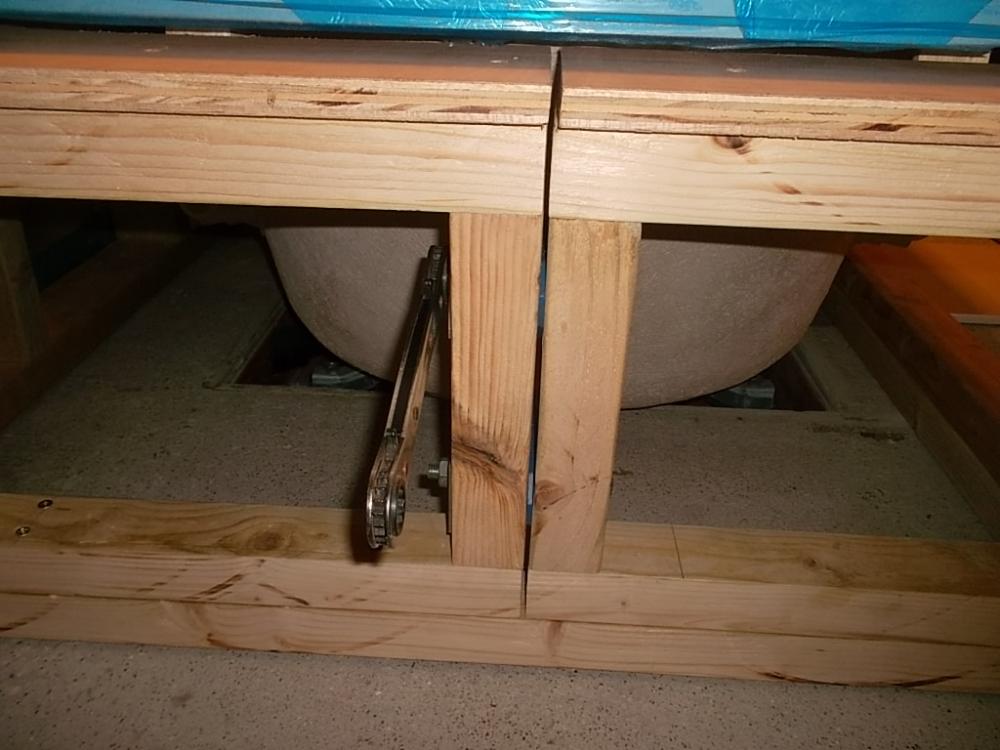
Getting there. The bottom batten with be fixed direct to the concrete floor. An access tile will allow loosening of the two coach bolts and hopefully allow that "half" of the box to be pulled away so as to remove the bath. Similar detail the other end. This batten to the floor, first thought was drill and put in studs with Fischer resin. Would CT1 or similar do as well?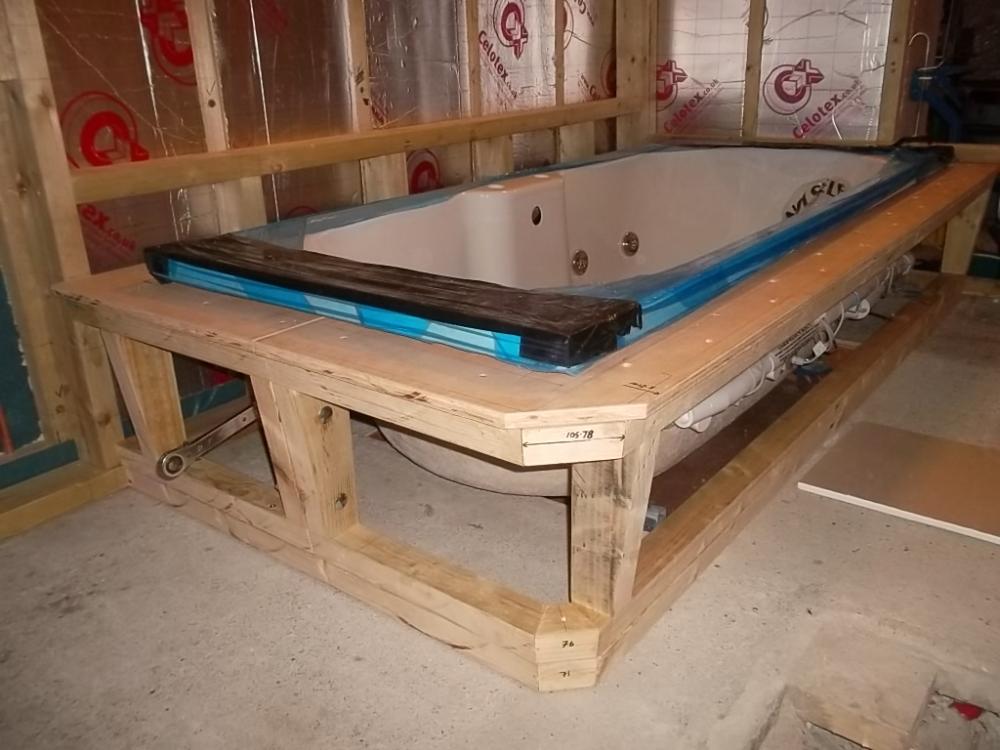
-
I used sharp sand. Felt soft sand might "filter" down through the Type 1. If it had been REALLY out of level then I'd have probably used some form of grit.
-
If you went for PIR could you shop around for seconds to offset the cost difference above EPS? If you don't re-level / whack you're still going to have to fork out for finer aggregate to achieve some sort of near level.
-
A quickly installed level drag board will give you a reference. It will also let you see your progress when the going gets tough. The danger with attacking a big area as a whole is you'll jump about with no real plan, take too much out here, not enough there and be doing unnecessary work.
-
She'd kill me if I started helping anyone else! Maybe when the divorce comes through..... Just a thought, could you roughly calc the volume that needs removal and dig a "big hole" in the middle of the area of a similar volume. Then rake in towards the hole. Just thinking having the hole might help the "mass" collapse in. EDIT: I've just reread the OP. 40-50mm down? If you remember my floor, prior to concreting I ran a couple of level rails down the opposite walls. Maybe do that. Get the pick out and loosen with the pick, rake & shovel keeping an eye on your guide board.
-
I've got a piece of timber maybe 10' long that came out of the bathroom ceiling here. It was odd to the rest so in passing I queried it. Supposedly came from Charlton football ground when they knocked the old grandstand down. Got to be worth a few quid. I did think of cutting it into sections and flogging on eBay with a "certificate of authenticity" as the previous owner of the house actually collected it himself from Charlton. I'm going to put up a "What Have You Hoarded?" thread!
-
Structural Steel Fabrication - how wide to search?
Onoff replied to Fallingditch's topic in RSJs, Lintels & Steelwork
Thinking about it if you mention my name it'll probably be £10K -
Structural Steel Fabrication - how wide to search?
Onoff replied to Fallingditch's topic in RSJs, Lintels & Steelwork
Try my fabricator, P & W Nash (Engineering) Services Ltd in Hoo near Rochester. Tel: 01634 250986 and ask for Stuart. Been using for 30 years at work and for home. They're first class. They also have an excellent relationship with Medway Galvanising so can supply in that finish depending on size etc. (It does add a fair bit to the cost). Tell Stuart Clive said to call. http://www.pwnash.co.uk/ -
Couldn't (wouldn't? ) have done it without you lot. It's not for nothing I wake up screaming "KNOCK DOWN REBUILD!" when I dream of having to do similar to every room in the house! At least I'll be able to retreat to a luxurious WARM bathroom.
-
Have a look at my epic. I excavated (personally), by HAND, down to a similar depth and basically stopped when I hit firm clay/chalk. Whatever, it was solid and I was peed off digging. I knocked in a few pegs and then compacted (5kN electric wacker) down a minimum 50mm of homemade Type 1 - basically hardcore I graded through a 40mm mesh. I then levelled it with sharp sand and it was flatter than a flat thing. Immediately over that went 25mm of EPS to protect the following DPM from and sharp bit s of the Type 1 poking through. My thin depth of hardcore was another reason for the mesh as in it's a floating "raft" almost. And just for any new fans out there: The original floor 60mm higher than the rest of the house to start with: Not too bad once I got going: The original floor level was where the white painted wall stops: Levelling pegs: Home made Type 1 going down: My purchase off of Preloved when I abandoned making my own electric wacker (watch this space 'cos it's back on the cards): Quite satisfying. The missus said "It makes it look bigger!": Like a billiard table: I think at one point I may have laid naked on this and kept putting the level on it and smiling: The moral is to do better at school so you can pay some other **** to do it for you!
-
I kid you not: this is where I get my stone from
Onoff replied to ToughButterCup's topic in Building Materials
H&S wise it reminds me of the local sawmill where we'd get free sawdust and wood shavings for our pet rabbits as a kid. The BIGGEST circular pit saw imaginable. They would barely turn off the saw on the wall and then let us get down in the pit next to the blade telling us to mind our heads! Everyone was happy, they got rid of some waste, animal welfare was maintained. Nobody got hurt (or if they did nobody knew or sued). This is why I'm voting LEAVE!




