


Onoff
-
Posts
21125 -
Joined
-
Last visited
-
Days Won
206
Everything posted by Onoff
-

How to keep a toilet roll dry in a wet room?
Onoff replied to Adsibob's topic in Bathrooms, Ensuites & Wetrooms
......come to visit! ? -
How to keep a toilet roll dry in a wet room?
Onoff replied to Adsibob's topic in Bathrooms, Ensuites & Wetrooms
I'm with you there. Often steal the kids Kandoos... -
How to keep a toilet roll dry in a wet room?
Onoff replied to Adsibob's topic in Bathrooms, Ensuites & Wetrooms
I think @ToughButterCup has a Geberit one? -
How to keep a toilet roll dry in a wet room?
Onoff replied to Adsibob's topic in Bathrooms, Ensuites & Wetrooms
That'd be like a square peg in a round hole. -
That shed's massive, got to be at least half the size of @Big Jimbo's!
- 367 replies
-
- 2
-

-
- ireland
- timber frame
- (and 1 more)
-
How to keep a toilet roll dry in a wet room?
Onoff replied to Adsibob's topic in Bathrooms, Ensuites & Wetrooms
Don't have kids for a start, the messy little feckers manage to spray water a good 3m here. -
A picture says a thousand words etc.
-
Oh Zoot wherefore art thou? ?
-
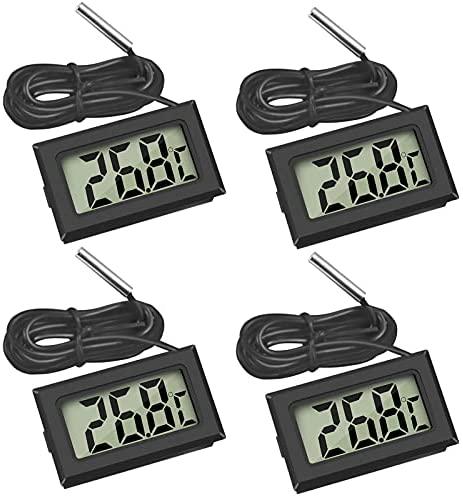
A few people on here have used this sort of cheap thermometer with a probe for testing/diagnosis (picked at random): https://www.amazon.co.uk/Thlevel-Thermometer-Temperature-External-Refrigerator/dp/B07TY6HRL4/ref=asc_df_B07TY6HRL4/?
-
Sorry, I took it as 2.6mm.
-
What does 2.6mm insulation board do then? I suspect it doesn't insulate.
-
Is English your first language out of interest? The OP WANTS airtightness.
-
I have a feeling that if not properly mixed the water in the mix either runs out the nozzle or maybe sits atop the mix if the gun is pointing down. Either way you end up pushing too stiff a mix and it's impossible! When they work they great.
-
I put tiles direct onto plywood with CT1 Grab n Bond. Also stuck some onto moisture resistant plasterboard with CT1, Sticks Like Sh!t, The Dogs B@ll@cks etc. All stuck.
-
I like to think @pocster and I plumb the same depths. The images come up if you type "funny door knockers" in Google. They're on Etsy, Pinterest etc.
-
Surely not? All the mods here have a great sense of humour and none are prudish.
-
I thought you were more familiar with back doors?
-
I imagine @pocster would like to get his hands on one of these:
.jpeg.25352141609fd7e5b4d8bc1c33e98492.jpeg)

-
I'd be well happy if I can get this mix through a mortar gun: - 3 soft - 1 sharp (figured it'd add strength and maybe some interest with the fines in it) - 1 opc - 1 lime (for plasticity/self healing)
-
Pretty sure my mortar gun instructions say not to get sharp sand anywhere near it.
-
PMSL! On the bus at the mo.

-
Turn the pump up to 11? ?
-
Spend a bit of time on here and you'll know not to wait up for me on this. I've a list of unfinished projects here, so long, I've forgotten some. Yes, the water rose by pure convection is the thinking but relatively slowly given the small area and the fact of no pump. First tried this expecting it to be heating/lifting water like a mad thing. The intake hose stuck in a bowl of water. It didn't work: This configuration didn't work either: Had to put the barrel horizontal like in the earlier photos. Hot in on the right, cold out bottom left. Had a few hot car washes out of it and a couple of al fresco showers much to the kids amusement. Tbh my south west facing hip cries out for PV panels but I want to change to a gable end. I had thought of building some neat, full height, can heater panels and fitting either side of the sliding doors. As it stands SWMBO is rather attached to the rose on the left and jasmine bush on the right so that won't be happening. This site is good: https://builditsolar.com/ It's run by an American lad called Gary. He was I think the site owner of the Simply Solar forum which was an absolute mine of info. https://ecorenovator.org/forum/showthread.php?t=7393 Tbh most on here look down on solar thermal projects like this. The thinking seems to be if you can afford PV why bother.
-
On a more serious note... Built a small, soda can water heater of my own design out of scrap. Achieved 50degC above ambient. Sort of a poor man's solar thermal. Then, given my attention span issues I got bored... Keep meaning to make a bfo 8'x4' one.
-
I have a large number of suitable components available. Pre emptied to save you the time. Bargain at £1 a can. Edit: I see you're also in Kent so I'll do free delivery within a half mile radius. ?

