HerbJ
-
Posts
602 -
Joined
-
Last visited
-
Days Won
4
Everything posted by HerbJ
-

Radio 4: solar panels aren't designed for this temperature ....
HerbJ replied to ToughButterCup's topic in Photovoltaics (PV)
Mine too - 6.5-year-old system3.99kWp (facing due just slightly west of due south) producing 16.9 kWh up to 1700hr, with a peak at 2.9kW -
Siberian larch vs sweet chestnut cladding
HerbJ replied to PeachyBeechy's topic in General Construction Issues
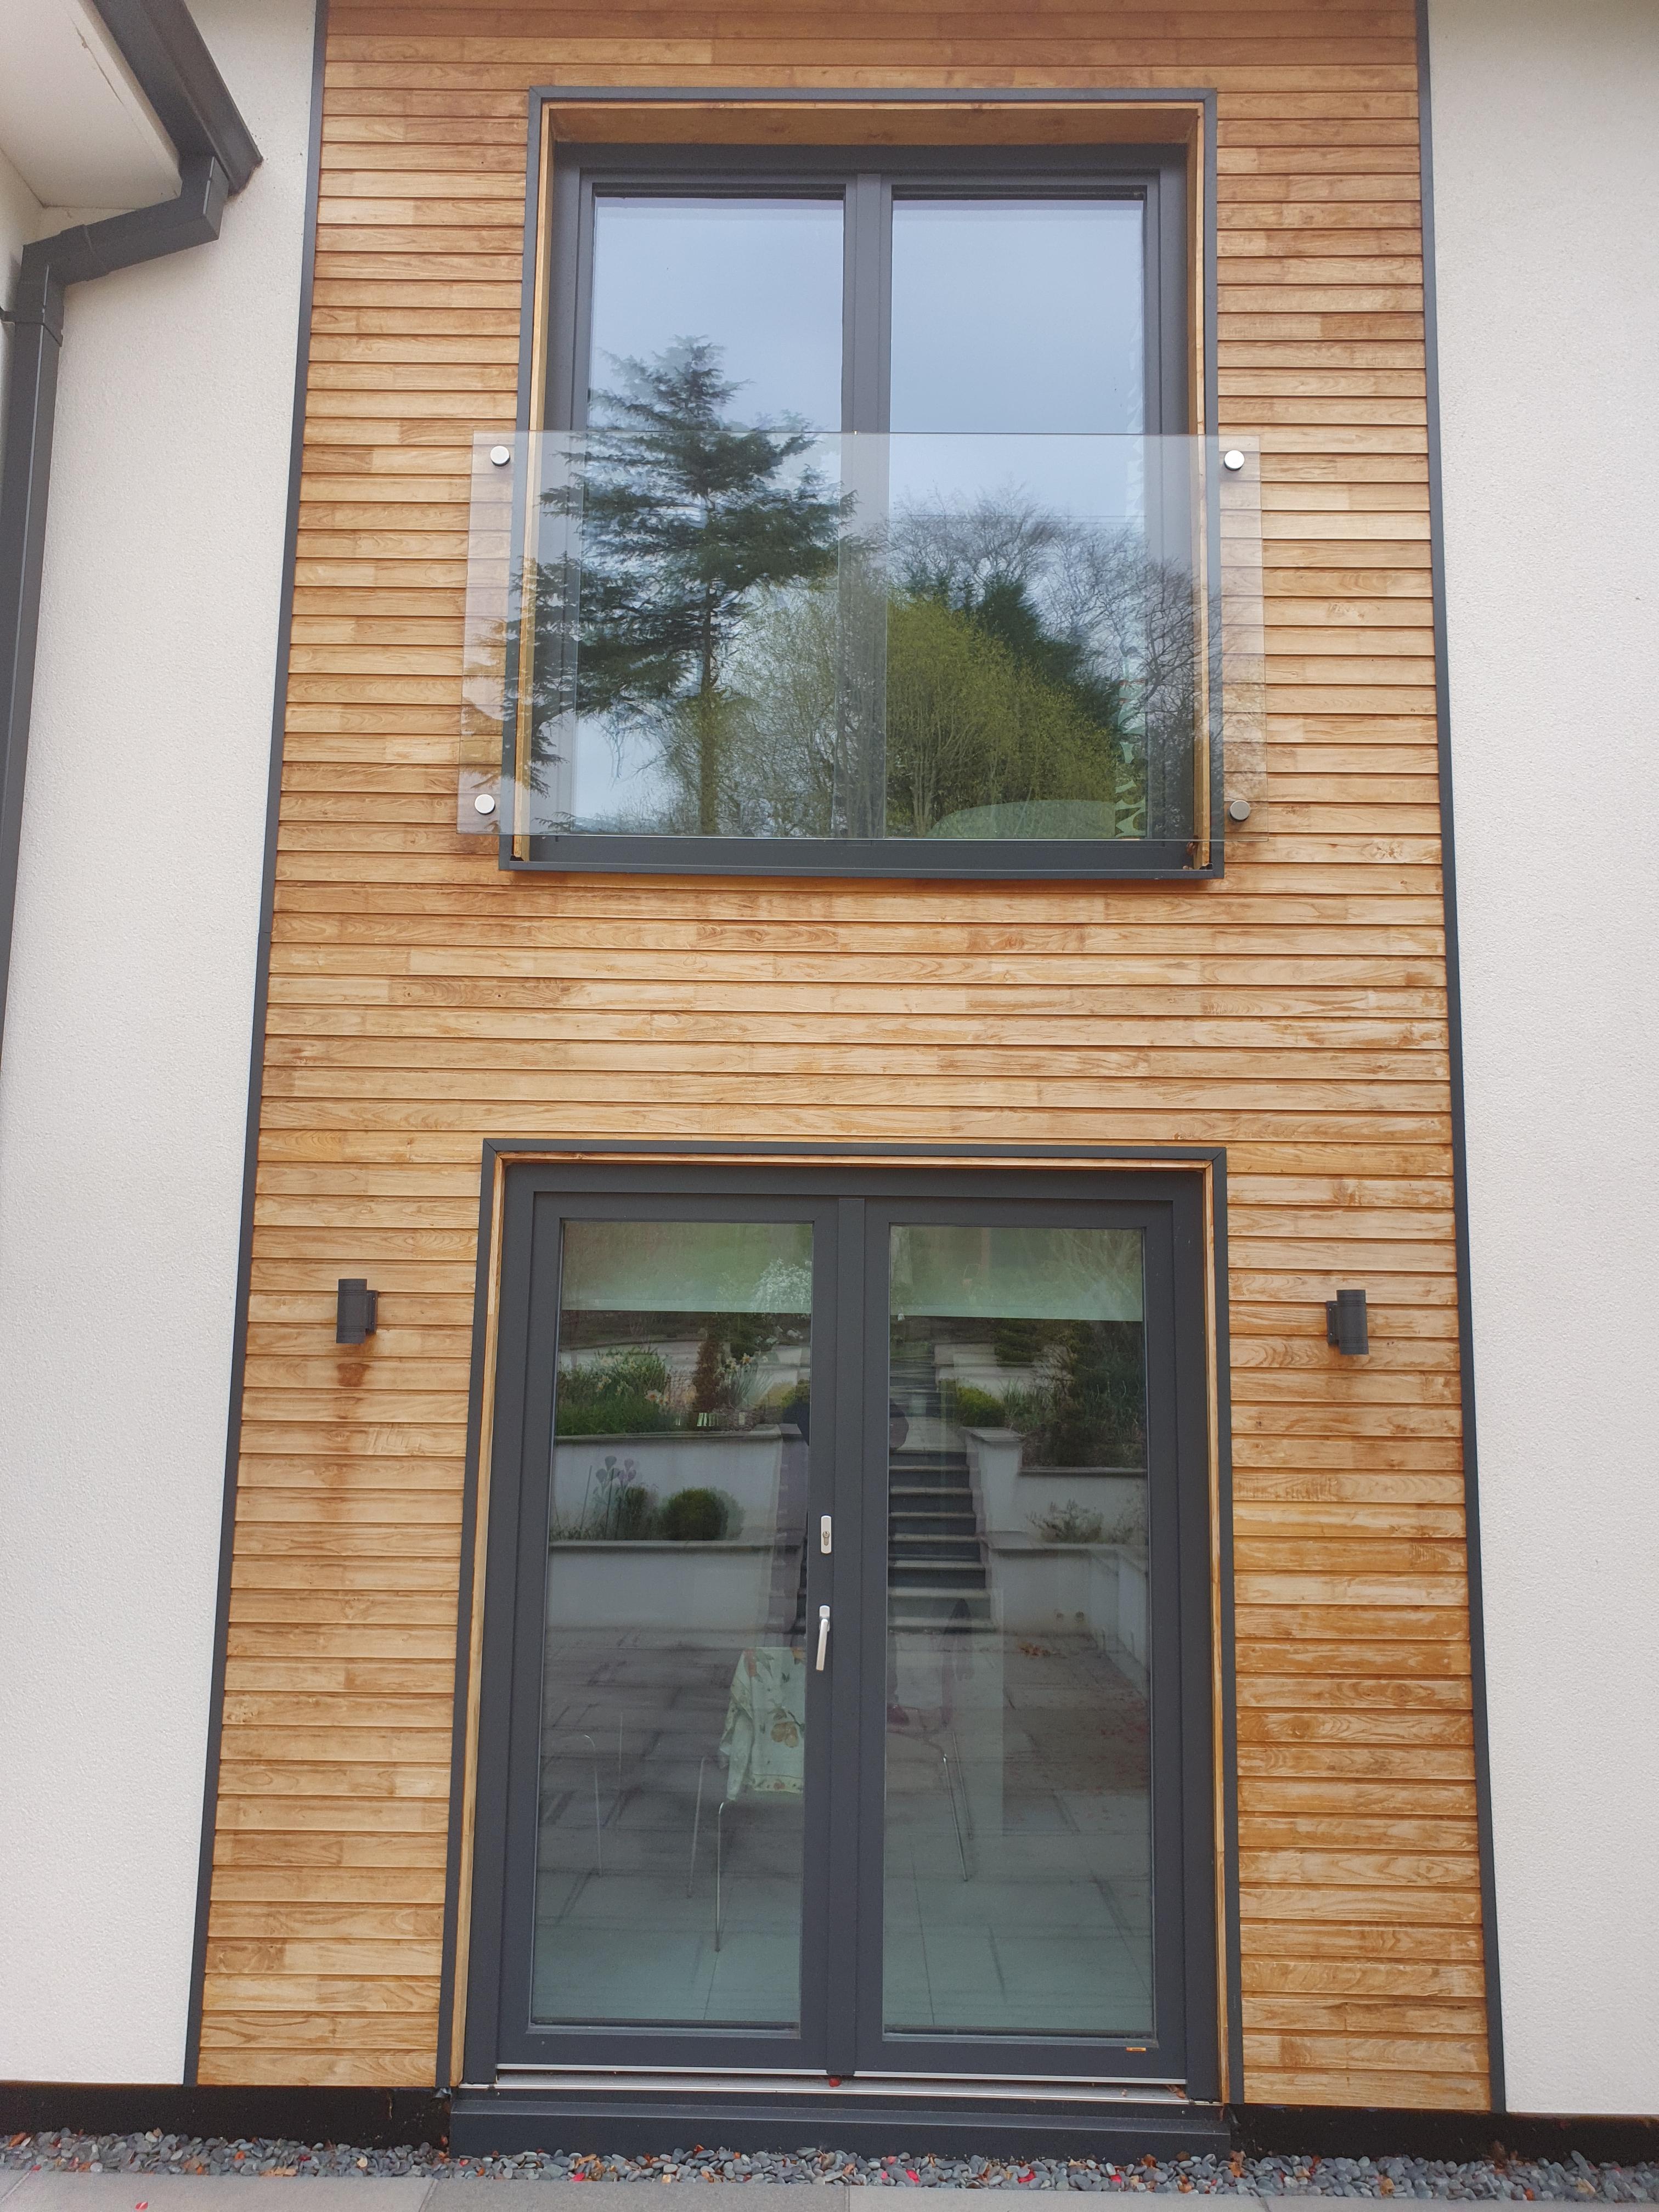
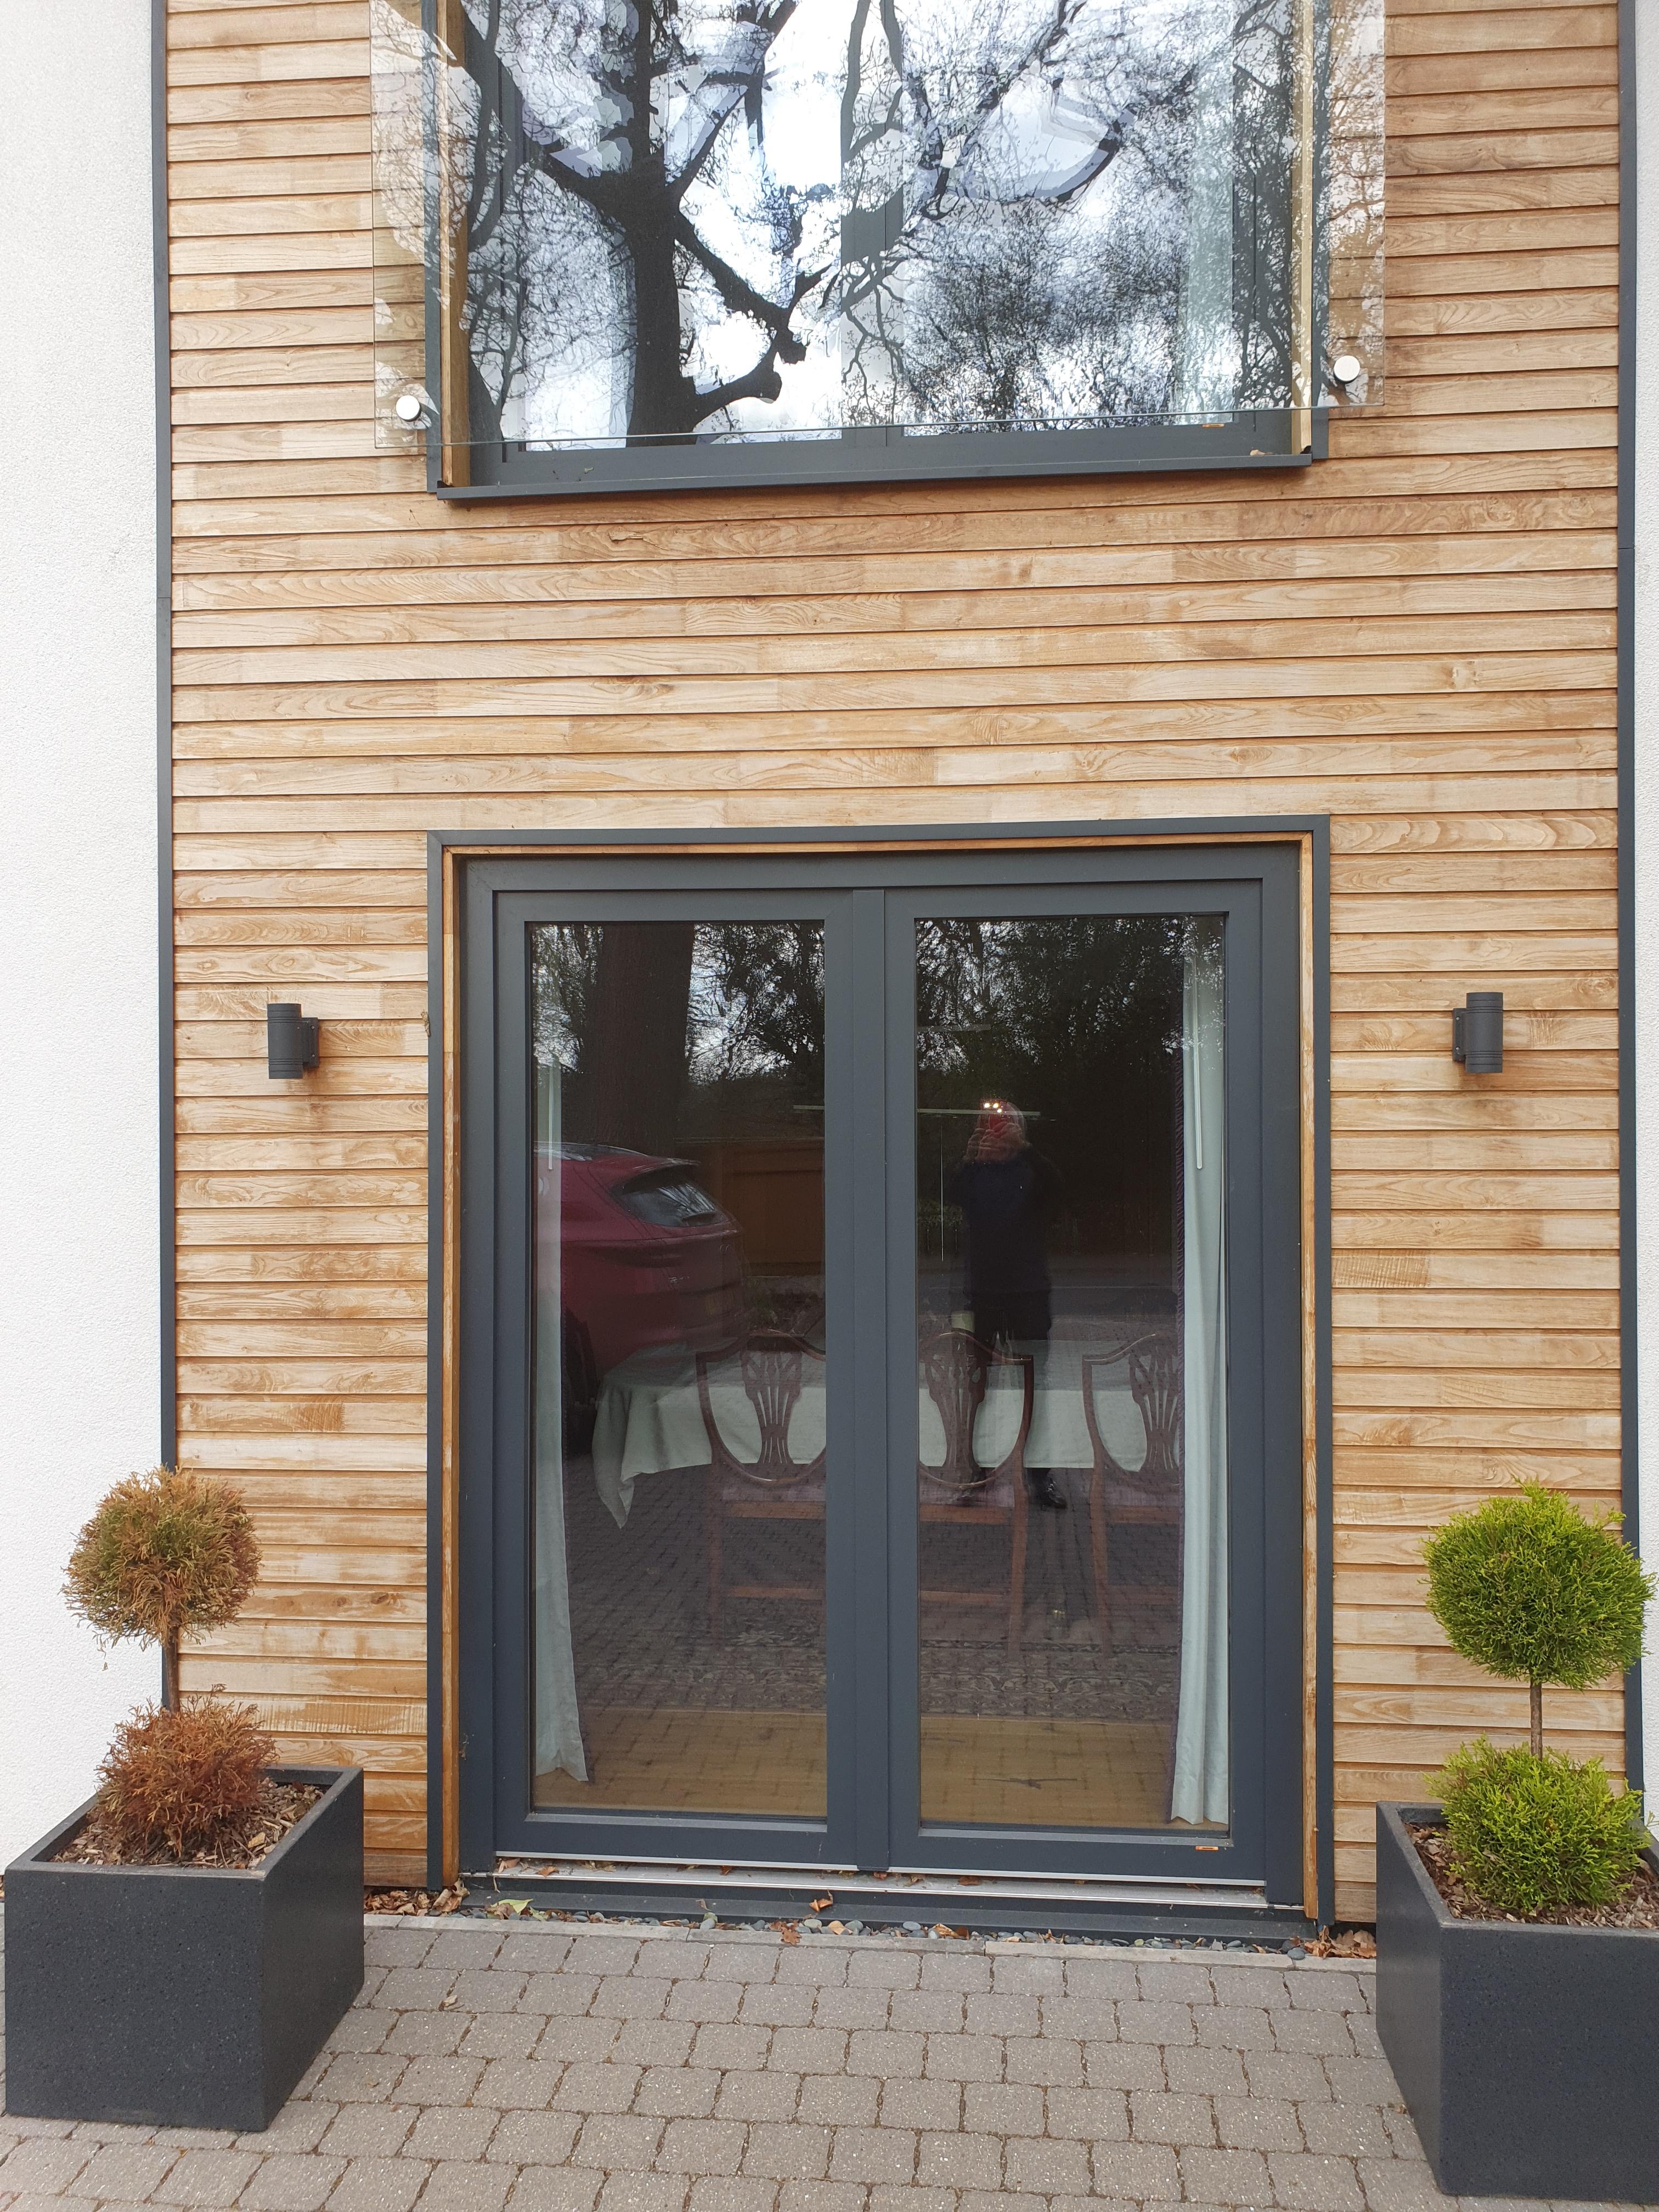
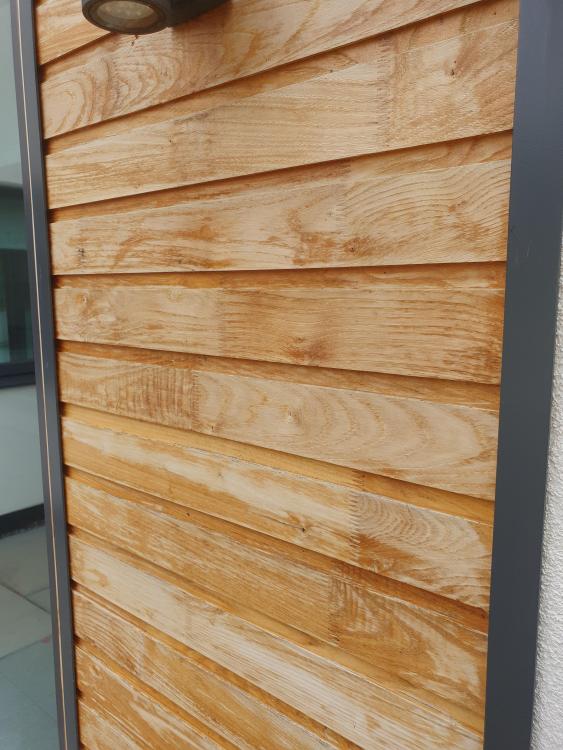
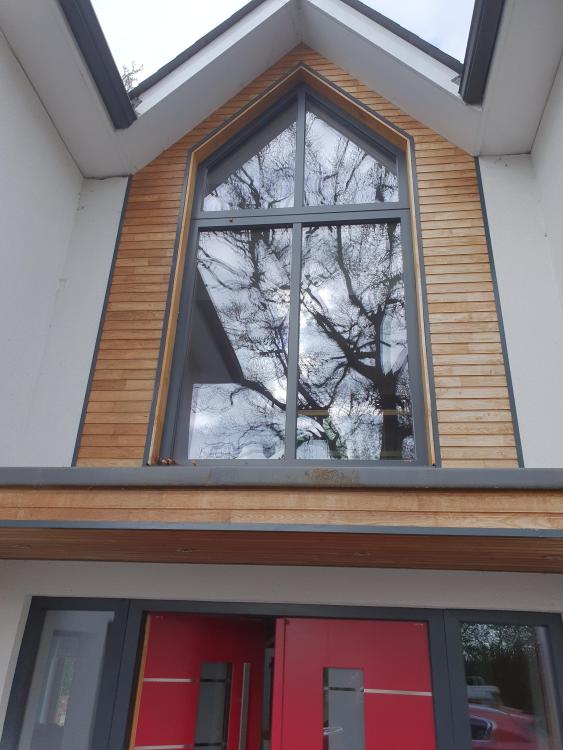
As promised, photos from this morning. All the cladding was treated with OSMO UV Protection Oil before installation.


-
Siberian larch vs sweet chestnut cladding
HerbJ replied to PeachyBeechy's topic in General Construction Issues
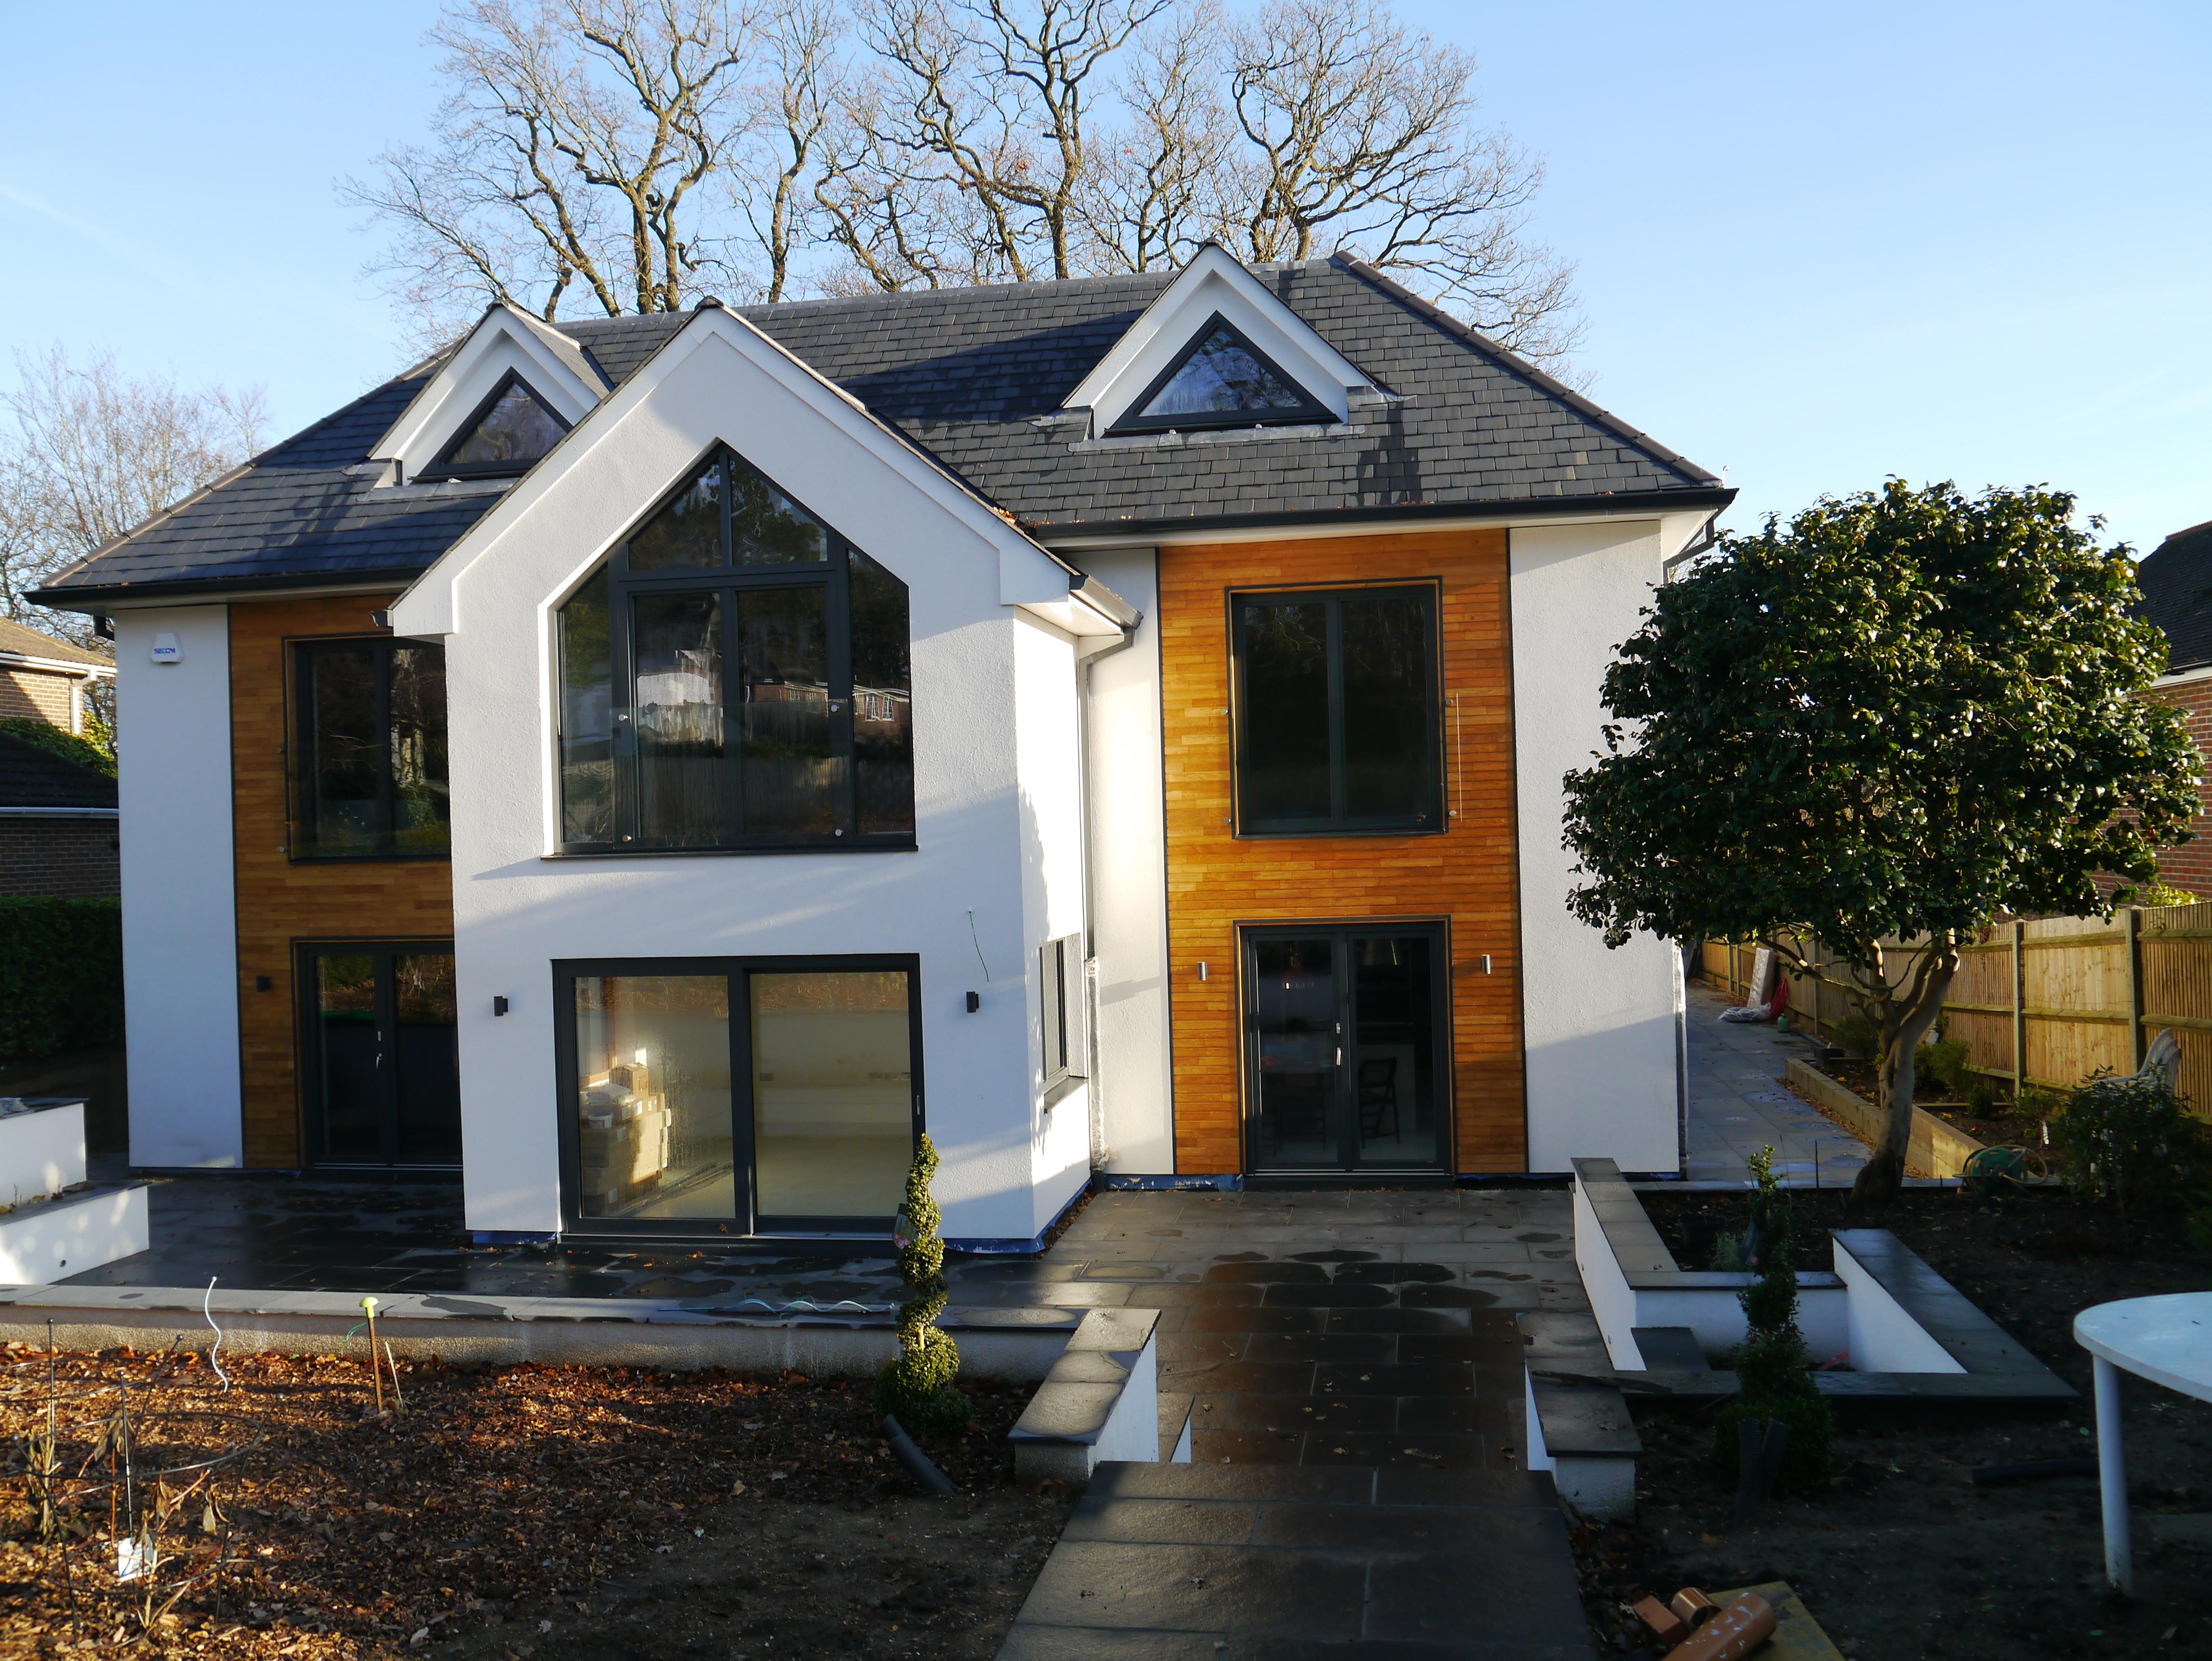
Yes, we have sweet chestnut cladding that was treated with two coats of OSMO before installation, so it has not weathered too much in 5 years. It's performed OK and we are still pleased with the choice. The attached pictures are from December 2016, when it was completed. I will take some current and close-up pictures tomorrow.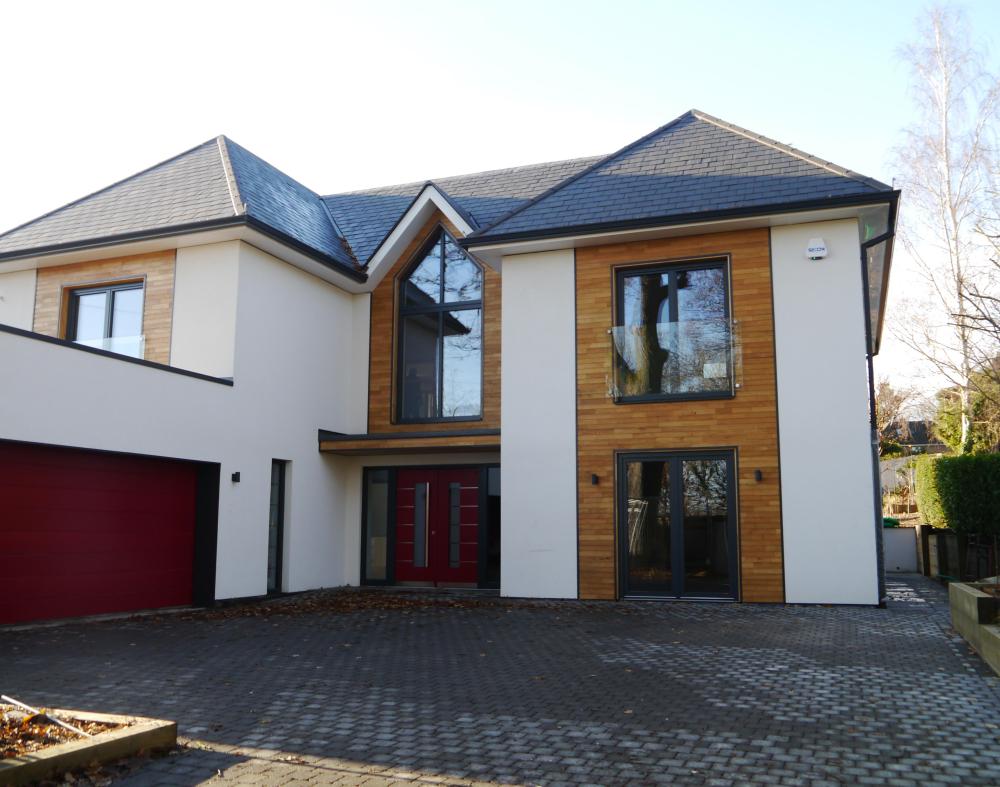

-
This contains a lot of valuable information that should help you. You need to start separating your problem areas and make some decisions to move forward and make progress. I don't think you can sensibly keep all your options open until you have installed the TF and steels, without delays and additional costs The specification of your MVHR unit may be separated from the routing/layout of the ducting, given that you seem to have decided on the unit's location and if you have decided to use flexible ducting. More design work and decisions are essential if you have decided to use rigid ducting, but also more important to start thinking about it before your install the TF and steels. Certainly is - don't do it! It may compromise the structural integrity of the steel work
-
+1 to this. You cannot afford to delay this preparatory design work work.... It must be possible for you to make a preliminary plan of the ducting lay-out and this will highlight the locations clashes where ducting clashes with your steel work. I specified 100mm penetrations for ducts and 50mm penetrations for cables and pipes - see photo In practice, there will not be that many penetrations required. Penetrations in steelwork need a SE review and may need stiffening detail, so it is important to have this work completed in the fabrication shop. It is not something that can be easily done at site!! Use this information to instruct your TF/steelwork supplier to provide penetrations at these locations. Do the same thing for cable and plumbing layouts and arrange for penetrations for these services as well.

-
Good memory - I used the Jupiter System on my 1st Floor. It was relatively expensive but has worked really well. The Jupiter Heating System is as attached. It is installed on the top of 22mm OSB flooring, with engineered wood floor finish to bedrooms and porcelain tiles to bathrooms. The Ground Floor was UFH installed in the insulated raft foundation when it was poured (an MBC installation) and not heating was installed on the 2nd Floor. ideal_eco_constructions.pdf Installation-Guide-IDEAL-ECO.pdf InstallingTimberwithJUPITERUFH.pdf System_Eco.pdf System_Ideal.pdf
-
Apologies- just realised that you have already paid the full invoice, including the VAT. I have edited my earler post to reflect this.
-
Already answered above HMRC will reject the entire invoice. Just as they did with me. Read the thread above carefully and understand. It details all the appropriate information you need, including the standard rejection language from HMRC and language you can use in your response to the contractor Your best approach might have been, if the contractor still resists 0% rating, was NOT to pay the VAT but just pay the base invoice, with a letter based on the format included in the thread, together with the appropriately completed Pro-Forma Certificate and requesting a revised 0% rated invoice. If they refuse to refund the VAT, the VAT , then your only way to recover it would be through the courts and this will be further hassle and delay! When I talked to HMRC (back in 2017) following the rejection of couple of invoice that included 20% VAT, they clearly advised that it is "illegal" to charge incorrect VAT on services. As I remember it, when I asked what I steps I could take to recover any incorrectly charged VAT, if the contractor still refused to refund the incorrectly charged VAT, I was clearly advised my only recourse was to sue the contractor on the basis that the VAT had been illegally charged (in accordance with the relevant legislation). Thankfully, I never got to this stage and my letters yielded the VAT refund and revised invoices. Best of luck
-
Also look at the excellent pinned "A guide to the VAT Reclaim Process". This post covers your issue some detail.
-
Ugh - link may be useful. Let us know if this works....
-
Look at this video. If I remember correctly, the presenter covers this exact point and shows how to ensure that your issue doesn't happen. I haven't done this but have been researching video door bells and remembered this issue.
-
Building Control Completion at last (and some statistics)
HerbJ replied to ProDave's topic in Building Regulations
Well done, only another 2 years to go.... Have a cup of tea and get back to it! -
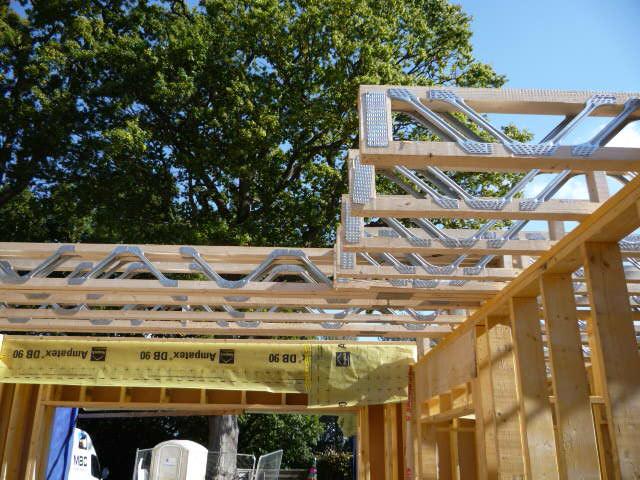
Hi MBC probably used the same membranes as for my build, which was a couple of months ahead of @bitpipe. They used some AMPATEC DB90 but mostly SIGA-Majpell -5 to wrap the joist ends and between floors and, for mine, they used SIGA-Majpell -5 for the walls and roof. ( the airtight board was introduced after my build) - see photos.


-
The PV diverter only switches power to a selected source when it detects export of electricty. In my case, I have set up the diverter to switch on the HW immersion heaters , independently top and then bottom, if the top reaches the set tempertaure. This makes sense, as we are not charging the car every day. I could set the PV diverter to switch to battery or anything else I choose.... If you are charging your car, the any spare PV power available, after other standing loads on the house, will be used by the EV charger supplemented by imported power. The Podpoint EV charger is rated at 7 kW and my PV provides 3.5 to 3.5 kW maximum on the a very good day, so we only ever get a contribution from PV, but it all helps.... The PV diverter will not power the immersion heaters during this period. just the same as on dull days when there is insufficient PV to supply the house standing loads.
-
We have a Podpoint 7kW EV charging point, which was installed by Podpoint as part of a subsidised deal. The installers were fairly efficient and professional. The EV charging point was installed in our garage and it was easy for us, only 1 metre from our Plant Room and main distribution board. The installation includes the necessary RCD, a clip on CT and other protection equipment built into the charging point. You will needs decent internet wi-fi signal at the charging point to use the Podpoint telephone app to manage charging remotely. ( something they do not tell you), I attach the Podpoint Installation Guide and Data sheet. The Installation Guide is fairly detailed. PP-D-130012-14-Instalation-Guide-Solo.pdf Solo-Smart-Charger-Domestic-Datasheet_191118_133212.pdf It has been drawn to the forums attention by the manufacturers that the above guides are now out of date and should not be used as patterns for new installs. Editors
-
thoughts on using landscape designer
HerbJ replied to MarkyP's topic in Landscaping, Decking & Patios
You may like to look at this thread, which may be of interest and covers some of your questions. -
getting initial concept ideas from architect
HerbJ replied to shetland's topic in Surveyors & Architects
Many architects participate in a "Architect in the house" charity scheme with association with RIBA. I think it is normally in Autumn every year, but someone may have better up-to-date info. For £40( ?) gift to the designated charity, participating architects give 1 hours free consultation. The participating architects get booked up fairly quickly....SWMBO and I used this scheme many years ago for getting some ideas for an extension that we could not get our heads around. The architect suggested and sketched a very good option and we engaged him to get the scheme through planning. We were very happy with the outcome It's worth following up if it fits with your timescales and there are local architects participating in your area. . -
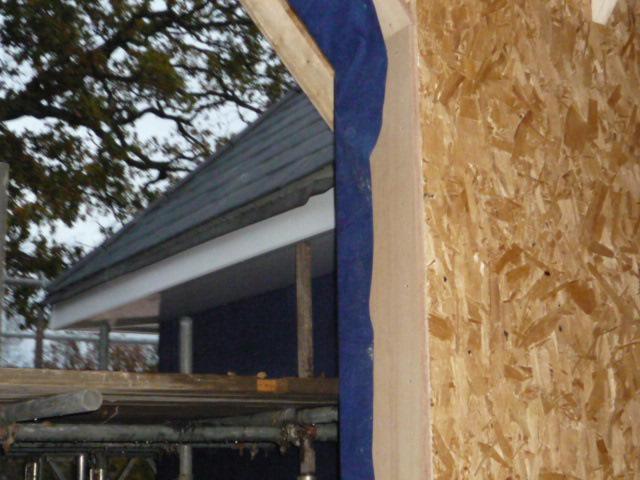
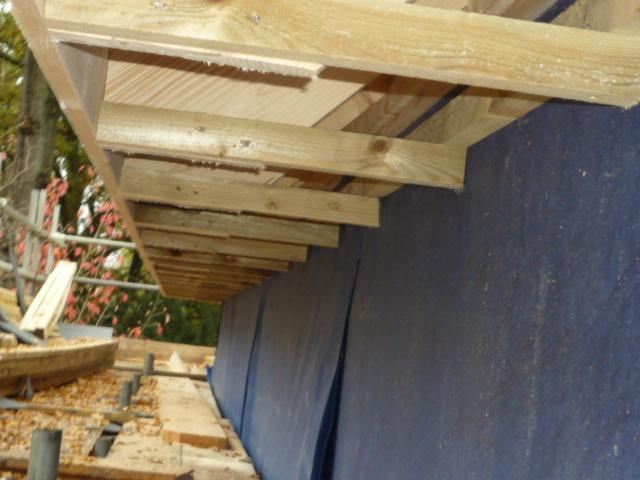
I have a render/cladding external skin - rendered aquapanel for the most part - but the same approach should work for your construction. I assume MBC's scope for the TF is the same a mine. MBC fiited fascia boards and noggins, as part of their scope. I then was able to fit my fascia and noggin board finish (UPVC) and gutters (seamless aluminium) with temporary downpipes in eary November, immediatley before my windows were fiited, and several months before the aquapanel and render was completed in March/April. Attached photos may help.. Your approach with a external brick skin should not be a lot different and you will have a gap between brick skin and installed soffit, to allow for the differential expanasion/setment of the brick skin and the timberframe holding the roff and fascias/soffits. @TerryE will probably share his experience. Trust this helps.


-
The house I demolished for my new build had an old interceptor chamber. It was originally the lodge house for a Victorian mansion, which had been gradually subvivided into 10 plots large plots, from 1950 thorugh 1970. It was the last chamber on the system at the time. When I was dealing with Thames Water on my new build, I was told that they were first introduced in Victorian times: in cities to stop smells(and rats) from the main system passing back to houses - a real problem for terrace houses and the like - see https://www.labc.co.uk/news/my-dad-told-me-about-them-drain-interceptors. Anyway, I was told it was no longer necessary and could replace it with a new inspection chamber, which was a big help as this gave me an extra 200 - 250mm or so drop in invert level and improved my foul water drainage design/layouts.
-
Manifold system versus hot return system
HerbJ replied to Russell griffiths's topic in General Plumbing
+1 to @Bitpipe my circulation pump is the same - not surprising, same plumber! -
Good news - it must feel good to get that out of the way!
-
MVHR and no trickle vents.
-
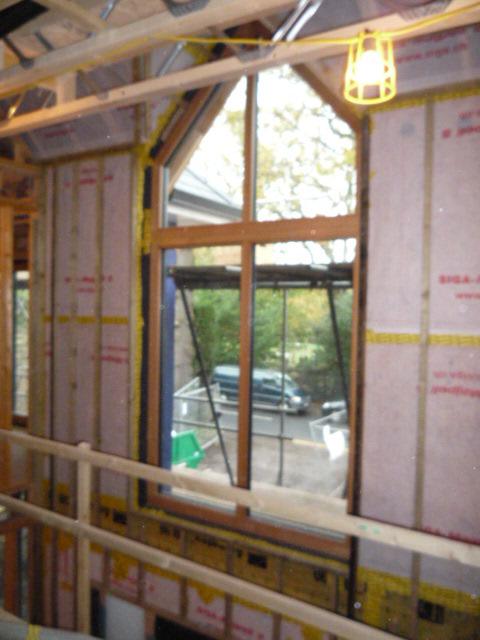
Make sure that your window opening dimensions for your windows are made with the window "boxes" installed. I actually did all of mine from the timber-frame drawings and it was check check, check again with me coordinating (and taking responsibility) with MBC AND the window supplier to ensure installation tolerances were correct and the windows could be installed.
-
shower drain position in new raft foundation
HerbJ replied to gravelrash's topic in General Plumbing
Yes, I cast slots for shower and drain into the insulaated foundation, for a furure walk-in shower in the downstairs cloakroom . It was then filled in some spare insulation and tiled over. Photos of how we handled the slot during the pour and in frame erection.


-
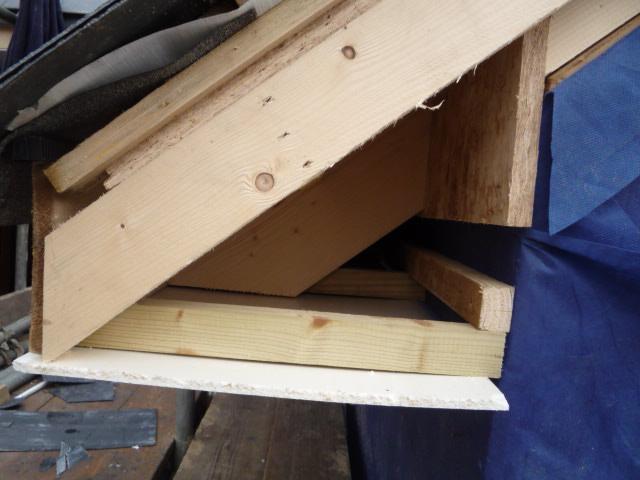
Yes, I agree with this, I specced marine grade ply boxes to be fitted in each window openings by MBC as part their scope (not a great photo but you get the idea). Also a photo to illustrate what @bitpipe is explaining aboot the differnce between the VPC layer construction on my build and also the service cavity battens. +1 to Compraband - used on all my windows